Maybe you’re new to Lion (welcome newly acquainted Mac users), or maybe you’re not much of a Mail user to begin with. Well, “Hello From Cupertino, CA”! Much of the hype around Lion has revolved around the iOS-inspired changes made to Mail, which aims to make reading messages, composing email, and navigating through conversations really easy. To do this, Mail likes to hide the Mailbox List, while getting you comfortable with the new Favorites Bar. Lion’s new vertical message list and message-preview pane better make use of wide-screen displays, especially while full-screen. If you’re not familiar with this terminology yet, don’t worry. Grab a cup of coffee, your favorite morning or afternoon pastry, and get ready to set up Lion with your account.
Adding an Account to Mail
A brief note: I’m primarily going to be working with a pair of new Gmail accounts to show you some of the new features in Lion. If you don’t have Gmail, the process is very similar.
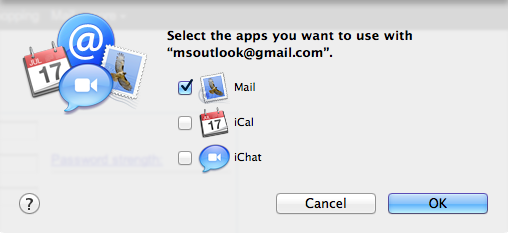
Lion is pretty smart. When logging into Gmail for the first time on the web, Safari asks you if you’d like to add that Google account to Mail. If you accept, Safari will also ask you if you’d like to bring over your Google Calendars to iCal and your Google Talk contacts to iChat. Today, I just only want to setup Mail.
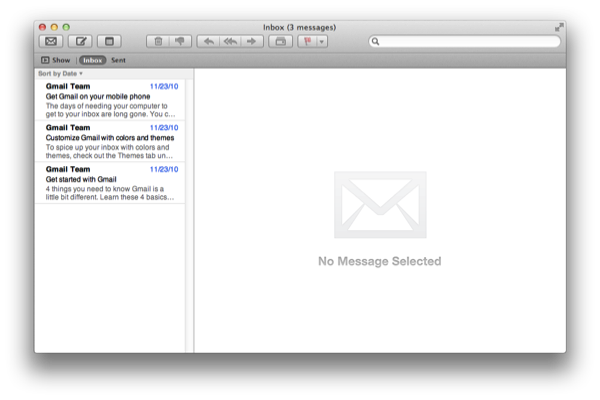
After you click Add Account and OK (I deselected iCal and iChat integration which can be added later), all of your messages in Gmail will show up in Mail. Voilá — it’s that easy.
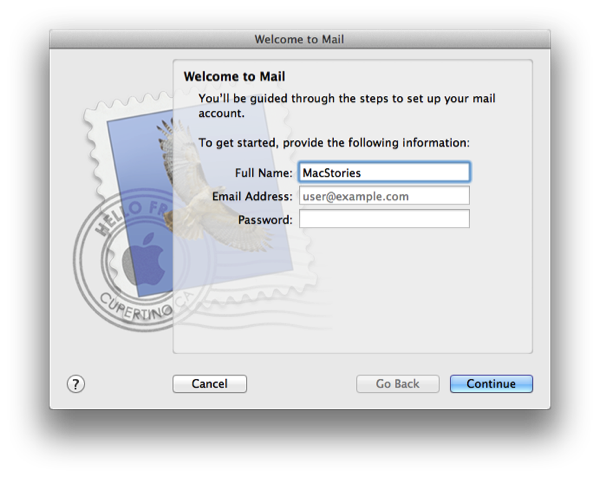
There are three other ways you can add accounts in Mail. If you don’t want to use Safari, launching Mail for the first time prompts you to add an account. Simply enter your real name, your gmail address, and your password. Mail takes care of the rest. In adding another Gmail account, simply click on File > Add Account…
Similar to how iOS handles adding new accounts, there’s now a pane in the System Preferences called Mail, Contacts, and Calendars. Here, you’re given the option to add everything from a Microsoft Exchange to an Aol. account in a generic interface that allows you to import information for contacts, calendars, and iChat. All of the accounts you’re connected to will show up here.
Assigning Gmail Labels to Mailboxes
Gmail has always had poor compatibility with generic email clients, although Mail does a pretty good job of being able to let you assign different labels (which show up as folders in Mail) to proper mailboxes. This has always been the case as well for folders from other email services.
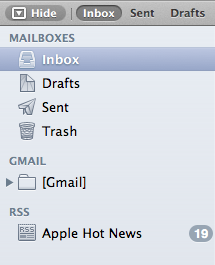
The first thing we want to do is reveal the Mailbox List. Simply click the show button in the Favorites Bar (that strip of text underneath all of your buttons in the Toolbar) to reveal the Mailbox List. This area of Mail often stays hidden, but essentially makes up the backbone of your account. It’s occasionally important to visit this area when adding new favorites or when managing folders and smart folders.
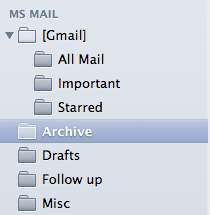
You’d expect there to be a Sent, Drafts, Trash, and Spam mailbox under your Inbox in the Mailbox List. Instead, these items show up underneath the [Gmail] folder as a sub-folder. Well that’s pretty annoying right? After all — we want to have quick access to these folders so we can preview drafts and sent messages, and navigate with our Favorites Bar later on.
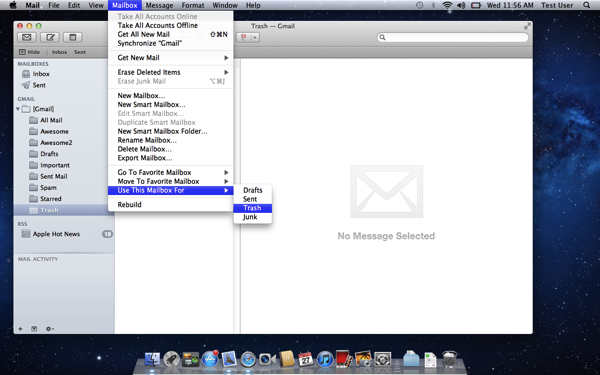
Unlike Outlook, which is a pain in the butt to set up, Mail allows you to simply right click folders and assign them to proper Mailboxes. Highlight the folder you want to assign, then simply select Mailbox > Use This Mailbox For from the menu to make your designation. So you’d set:
- Drafts to Drafts
- Sent Mail to Sent
- Trash to Trash
- Spam to Junk
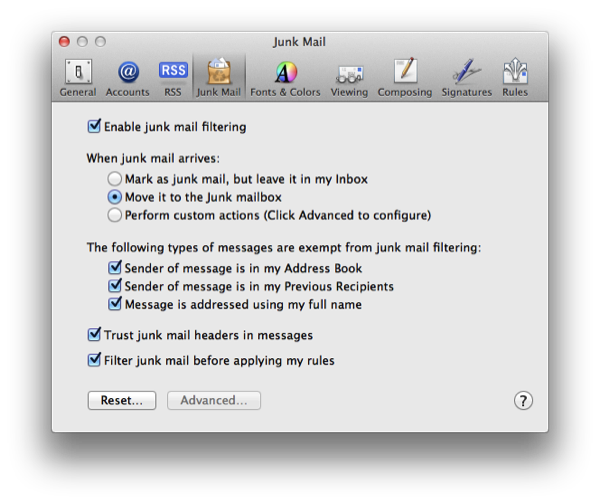
The Junk mailbox, however, doesn’t want to show up as a Mailbox. That’s because in Mail, junk email still shows up in the Inbox, and instead receives a simple junk mail flag that indicates a message could be problematic. This doesn’t make a big difference since Gmail’s spam filter will catch these messages before it hits Lion, but we can still make sure junk mail never reaches the Inbox with a quick trip to the preferences.
You can get to the preferences by visiting Mail > Preferences… in the menubar. If you click on the Junk Mail tab at the top, you’ll see options for filtering junk mail and determining what happens as junk mail arrives. If you select the second radio button, junk mail will be sent to the Junk mailbox instead hanging out in your Inbox. This will group your spam folder with your Sent and Draft mailboxes in the Mailbox List.
Favorite Bar, Message List, Conversations, and Search
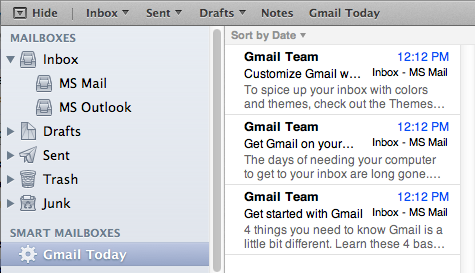
The Favorites Bar in Mail allows you to quickly jump to important mailboxes without having to reveal and hide the Mailbox List. Favorites can be added by simply dragging your favorite Mailboxes or folders from the Mailbox List to the Favorites Bar (just like dragging links to the Bookmarks Bar in Safari).
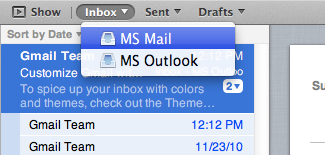
If you have multiple email accounts added to Mail, you may notice that clicking on Inbox or Sent will show messages from every account, unified in the Message List. If you want to jump to a specific mailbox, clicking and holding on these buttons will let you narrow your results to that account.
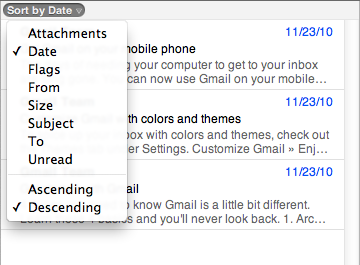
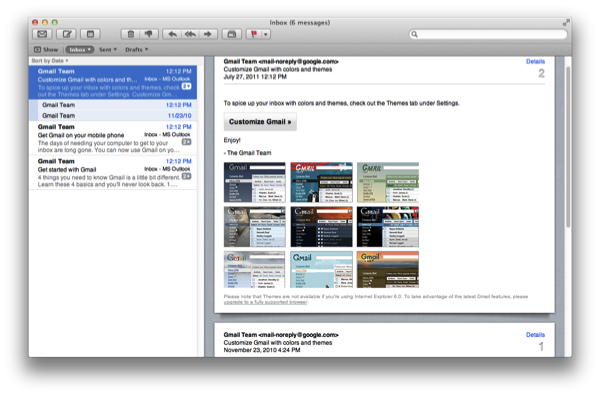
The Message List isn’t dissimilar to Microsoft Outlook’s style, and even allows you to sort messages in familiar ways. By default, messages are sorted by date, but by clicking on that button in the top right corner, you can sort messages by its flagged status, subject, or by unread status.
As you click on messages (or arrow through them), you’ll notice that the preview pane to the right comes alive with the message’s contents. Back and forth conversations (and sometimes consecutive messages) will be broken into their own windows with number labels that signify the order the messages were received in.
By default this conversation view will only show you replies from the sender. You can either click Show More From… at the bottom of the message to see the response in context, or select View > Show Related Messages to reveal a conversation view that is closer to Gmail’s threads.
Messages also have inline controls for deleting, responding to, or forwarding that message to another person, and a details button can reveal more information about the original sender. If you ever need to view a message header, you can find that option in View > Message > All Headers.
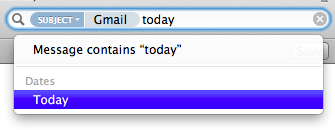
Search tokens make their appearance in Mail to help you find exactly what you’re looking for across your mailboxes. You build search tokens by typing a name, date, email address, or part of a subject line, and use suggestions to narrow your search terms from the drop-down menu. Multiple tokens can be combined to find exactly what you’re looking for.
Completed search tokens can be translated into Smart Folders that give you repeated access to results for that query. You can drag a Smart Folder to the Favorites Bar if you want instant results for a particular query.
Signatures, Composing Messages, and Notes
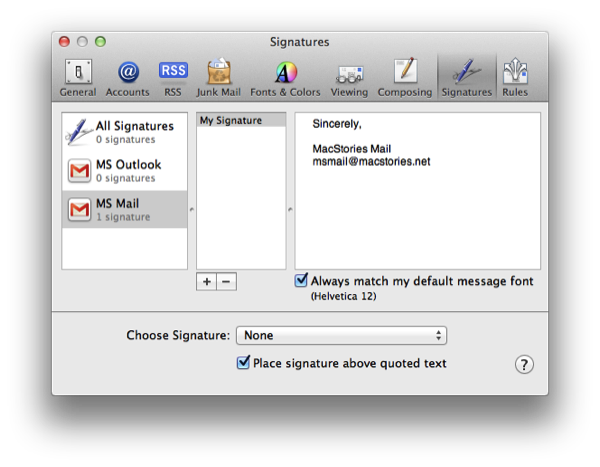
Before we compose a message, we should set up the signatures we’d like to use with our accounts. Back in the preferences, the Signatures tab allows us to select accounts, add a new signature, then type the text we want to automatically include with messages. As a tip, I’d leave a space or two before the signature body so it doesn’t run together with the message body when you begin to type.
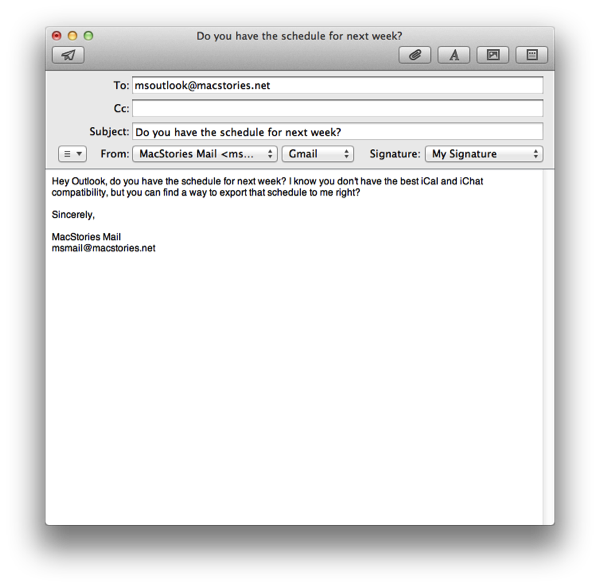
Composing a message is as easy as clicking the compose new message button in Lion (you can hover the pointer over the toolbar buttons to see their names). The compose window has a lot of options available, and will automatically insert your signature if you have one. Depending on what inbox you’re currently viewing, that account will be selected when you decide to compose an email. You can simply click on the From field to change what account you’d like to send the email from.
A button the left of From appears to be an alignment tool, but it’s actually a field editor that allows you to show or hide CC and BCC fields. Along the top of the compose window you’ll find buttons to add attachments, adjust font and alignment, a photo browser so you can email photos from iPhoto, and templates so you can make your email really fancy. If Lion’s autocorrect is getting in the way of typing, you can disable the option via Edit > Spelling and Grammar > Correct Spelling Automatically from the menubar.
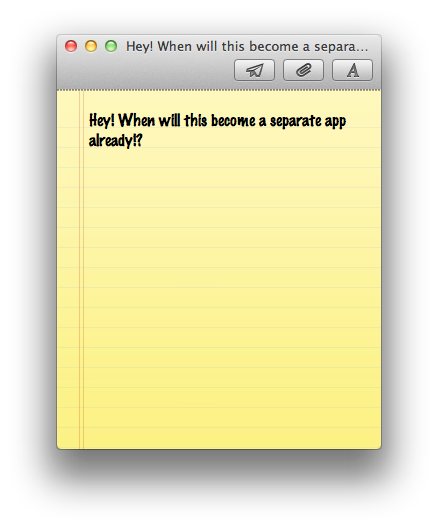
MobileMe (soon iCloud) users might be interested in sharing notes between Mail and their iOS devices. By clicking on the Notes button in the toolbar, you can compose a note in an interface that’s not terribly different from the iPhone or iPad style (even that Marker Felt font is still in effect). Notes will appear inline with email messages in the Message List when synced or created.
Customizing the Toolbar and Archiving Messages
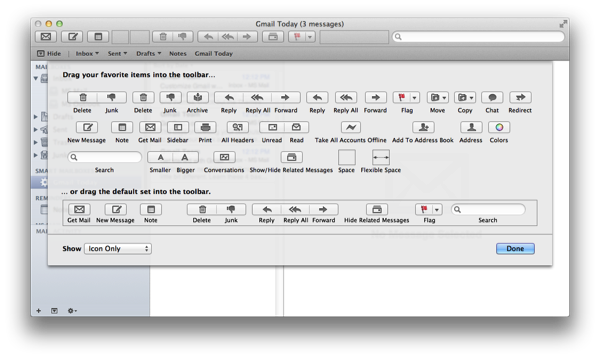
If you right click on the toolbar, you can adjust what tools you want available by dragging and dropping various buttons and spaces to and from the toolbar. Of importance, there’s buttons for redirecting messages, moving messages, and going offline (say for when you’re on a public network).
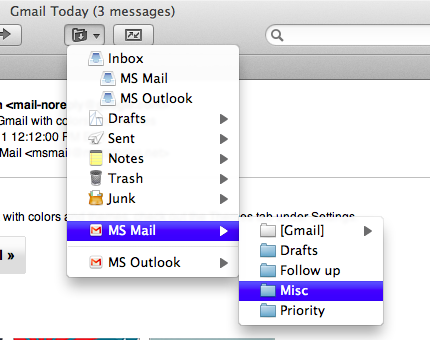
One button in particular is pretty interesting. If you want quickly move a message to a folder from your Inbox, you can tap the button and a get a drop-down menu that mimics the Mailbox List. Clicking on a folder will let you move a message to a new location (these show up as labels in Gmail).
In order to be compatible with all email accounts, the Archive button happily available to Mail isn’t 100% compatible with Gmail. While it’s great that an Archive folder is created, you still have an extra copy of your message since Gmail keeps all of its messages in All Mail. Well, at least it’s not in your inbox!
Mail in a Nutshell
Mail is beautiful and the conversation view is great. While the preferences are still a mess, you really only need to visit it for signatures and mail rules. The archive button in Mail needs to have better Gmail compatibility, but otherwise it’s a solid first upgrade from its classic companion on Snow Leopard and Leopard. Mail is easy to set up, and with five minutes of tweaking is ready to use alongside other native apps on your machine.


