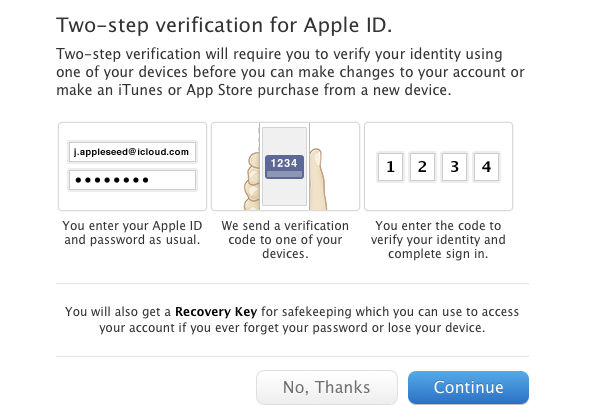
Today, as originally reported by 9to5Mac, Apple has rolled out two-step verification for Apple IDs. Two-step verification makes it more difficult for someone to compromise your Apple ID by adding an additional layer of security. In this case, it’s an iOS device you own such as your iPhone (iPads and iPod touches also apply). As you make a purchase from iTunes on a new device or after you log into your account with your username and password, you’ll be asked to authenticate with a short code four-digit code. Currently, two-step verification is available for Apple customers living in the United States, the United Kingdom, Australia, Ireland, and New Zealand.
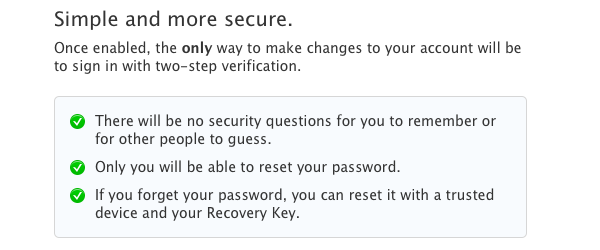
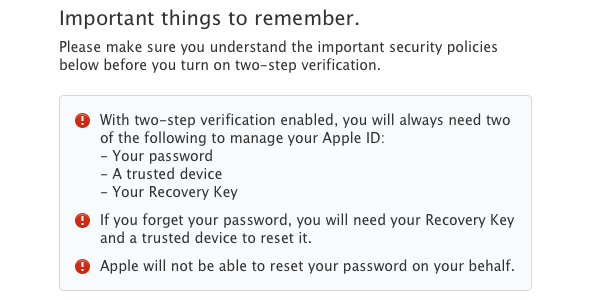
Using two-step verification is completely optional — you’re not required to use the extra security measure if you don’t want to. For those who opt-in, Apple gives fair warning that you’ll need your trusted device with you to access your account information. Apple does provide a printable Recovery Key in case you lose your iOS device or forget your password, but they won’t be able to help you if you lose it. I recommend storing the Recovery Key in 1Password for safe keeping. If you do lose the Recovery Key, you can generate and print a new key if you can log into your account.
If you won’t be enabling two-step verification, it might be a good idea to revisit your security questions. Instead of using likely answers, generate less guessable, complex words with 1Password instead for added security. Here’s a quick guide.
Setting up two-step verification starts by visiting appleid.apple.com. Upon logging in, click on the Password and Security tab. After entering a couple of answers to your security questions, you can find the option to turn two-step verification on at the top of the page. Simply click Get started… to begin setup.
Apple will walk you through the process, eventually asking you to choose a device. If you choose your iPhone, you’ll be sent a temporary passcode to enter into your device for verification if you have Find my iPhone (iTunes link) installed. Additionally, you’ll have to do it again for your phone number. Feel free to then add other iOS devices and any additional SMS-capable phone numbers (Apple notes that you won’t be able to use a web-based or VOIP phone number). When it comes time to log into your account, you can choose which of these devices or phone numbers is most convenient to request a verification code from.
As a side note, if you see devices that you no longer own or are using in the list, you can visit supportprofile.apple.com at a later time to unregister them. It’s always a good idea to do this when you sell your devices or give them to family.
Once through you’ve chosen your trusted devices, Apple will give you the option to print out the Recovery Key. I would do so at this time (the paper you print out has no personally identifiable information if you want to fold it into a wallet or keep it in a folder). You can’t copy and paste the Recovery Key, and you’ll need to enter it by hand to continue.
Lastly, Apple makes you agree to the terms and conditions of using two-step verification. It’s a rehash of what you’ve read before, but still important. Now that you’re finished, Apple will present you with a notification and the options available to you in your Password and Security tab will have changed.
Remember, only new devices require two-step verification. Making purchases on your verified iPhone, iPad, or iPod touch shouldn’t require the additional step. Two-step verification prevents other people from logging in with your account and making purchases without your consent. To protect your iPhone from theft, I highly recommend visiting this guide on The Next Web.
For more information on two-step verification, visit this Apple provided FAQ.
Update 5/22/2013: About the three day wait
A few readers have reached out to me and noted a potential three day wait. Apple will send an email to your iCloud address, your primary email address you use with your Apple ID, and any alternate email addresses informing you if this is the case. According to reader feedback and the FAQ linked above, you may have to way three days if you’ve recently made changes to your password or security questions. Apple will also enforce the wait if your password doesn’t meet the minimum requirements of 8 characters, at least one uppercase letter, and at least one number. Again, 1Password is great for generating a stronger password. Apple does this to double-check that you’re the person actually making the changes. Once the three day wait is up you can continue setting up two-step verification.


