This week saw the release of Saver 2, a big update to the personal finance and expense tracking iPhone app from Alex Solonsky and Vadim Shpakovski. I reviewed the original Saver nearly four years ago, and whilst the core of the app is very similar, the new features and completely refreshed and modernised design make Saver 2 a lot better.
There are quite a few personal finance apps available these days and it’s important to know that Saver, an iPhone-only app, is one that won’t be for everyone. For example, you won’t be reconciling multiple bank accounts – that’s just not how Saver works. But at the same time, don’t think of Saver as just a barebones tool: it is far more than that and will work terrifically for many people. This is particularly true if you purchase one of Saver’s subscriptions which add a bunch of advanced features (more on that later).
Entering Transactions
As with any finance or budgeting app, the bulk of your time will be dedicated to entering the details of all your transactions. It’s therefore important that the process is as simple and streamlined as possible, or else you’ll quickly become frustrated and potentially get lazy and stop keeping track of your finances.
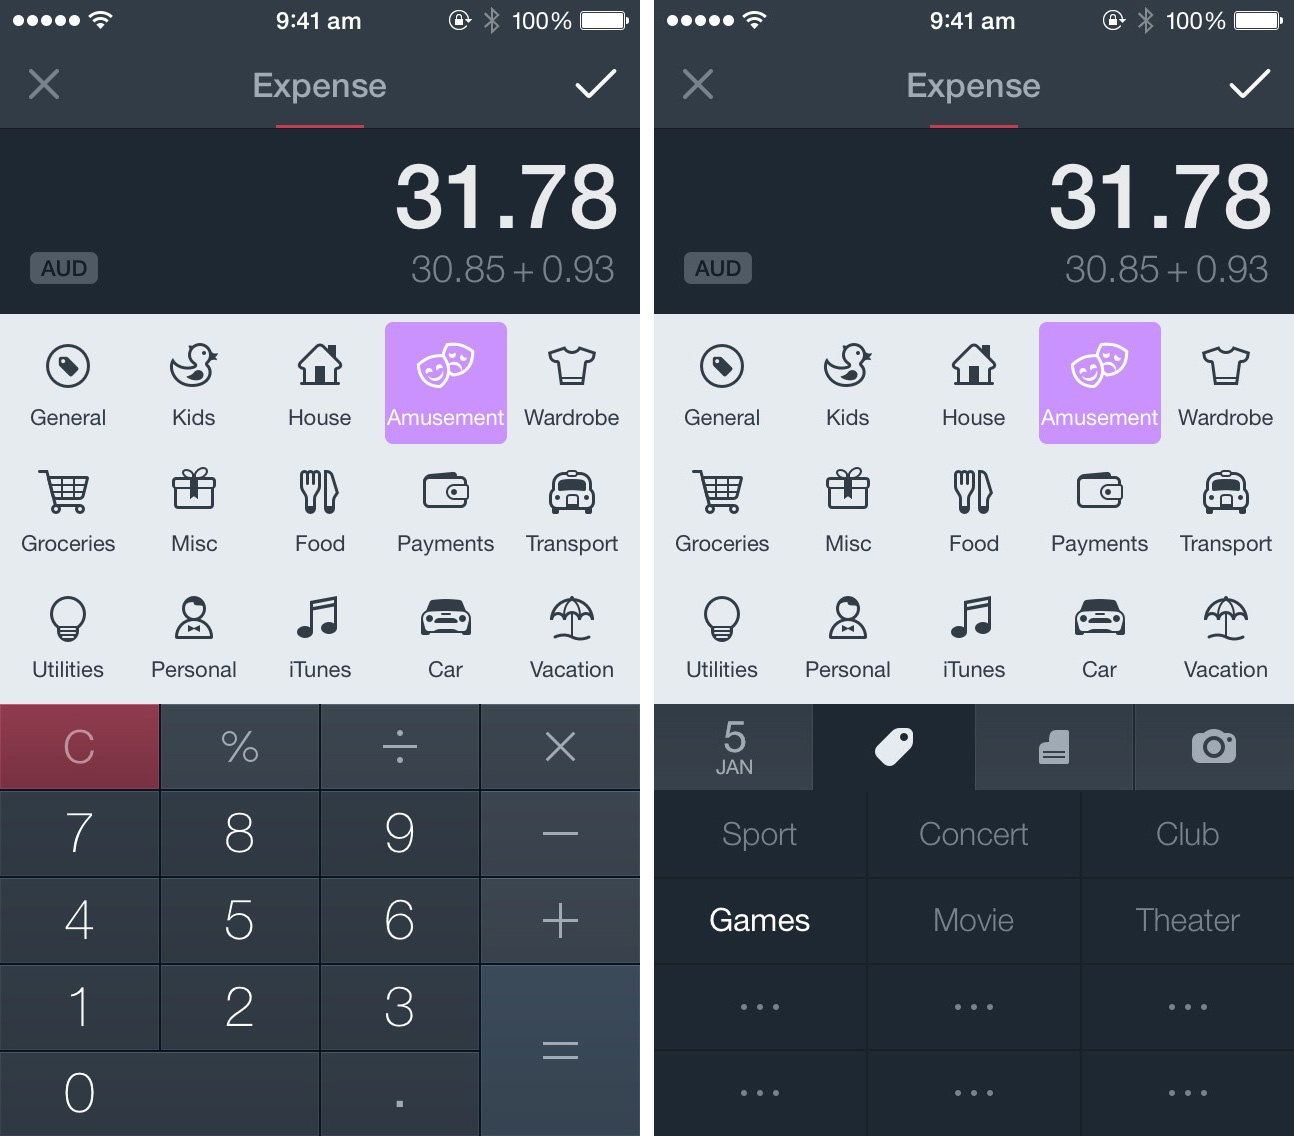
Fortunately, Saver 2 has a straightforward and efficient interface for adding transactions. Tapping the dedicated add transaction button in the tab bar will take you to a screen that displays a list of transaction categories, as well as a number-entry keyboard. Tapping on the category selected will lower the keyboard and display further options, allowing you to change the date of the transaction or add a tag, note, and image.
One of the nicest touches of Saver 2 is that the number-entry keyboard is actually a calculator. For me this comes in handy when dealing with international transactions because my bank statement will show not just the actual transaction, but a second transaction that is the bank’s international transaction fee. With Saver 2 I don’t need to use my rusty mental maths skills and can just add the two transactions with the keyboard.
The focus of entering transactions is by default on expenses, which is for good reason because you’ll likely be making a lot more expense transactions than income transactions (quantity-wise). But when you do have to enter an income transaction, it is as simple as scrolling down on the categories list until you reach the income categories. Alternatively, just tap the word ‘Expense’ on the Navigation bar and it’ll take you directly to the Income categories.
Reviewing your Transactions
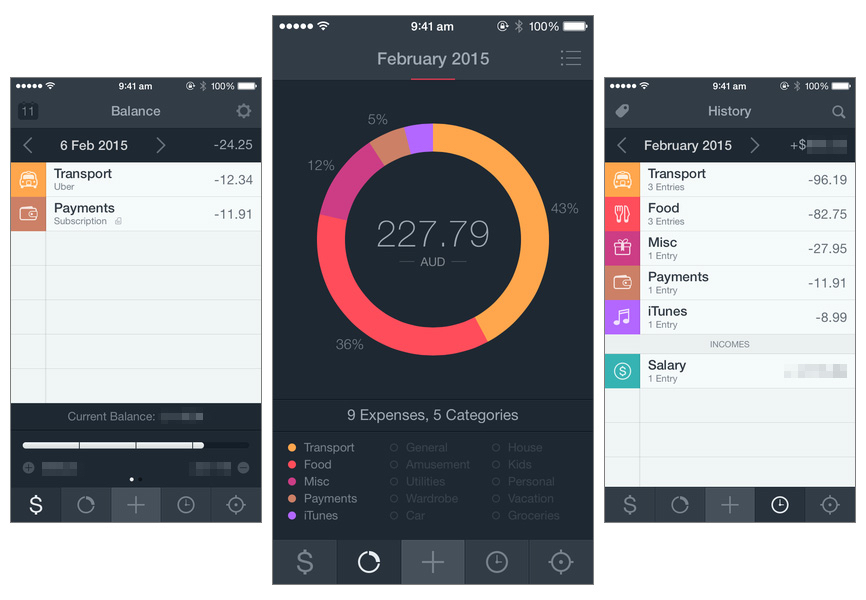
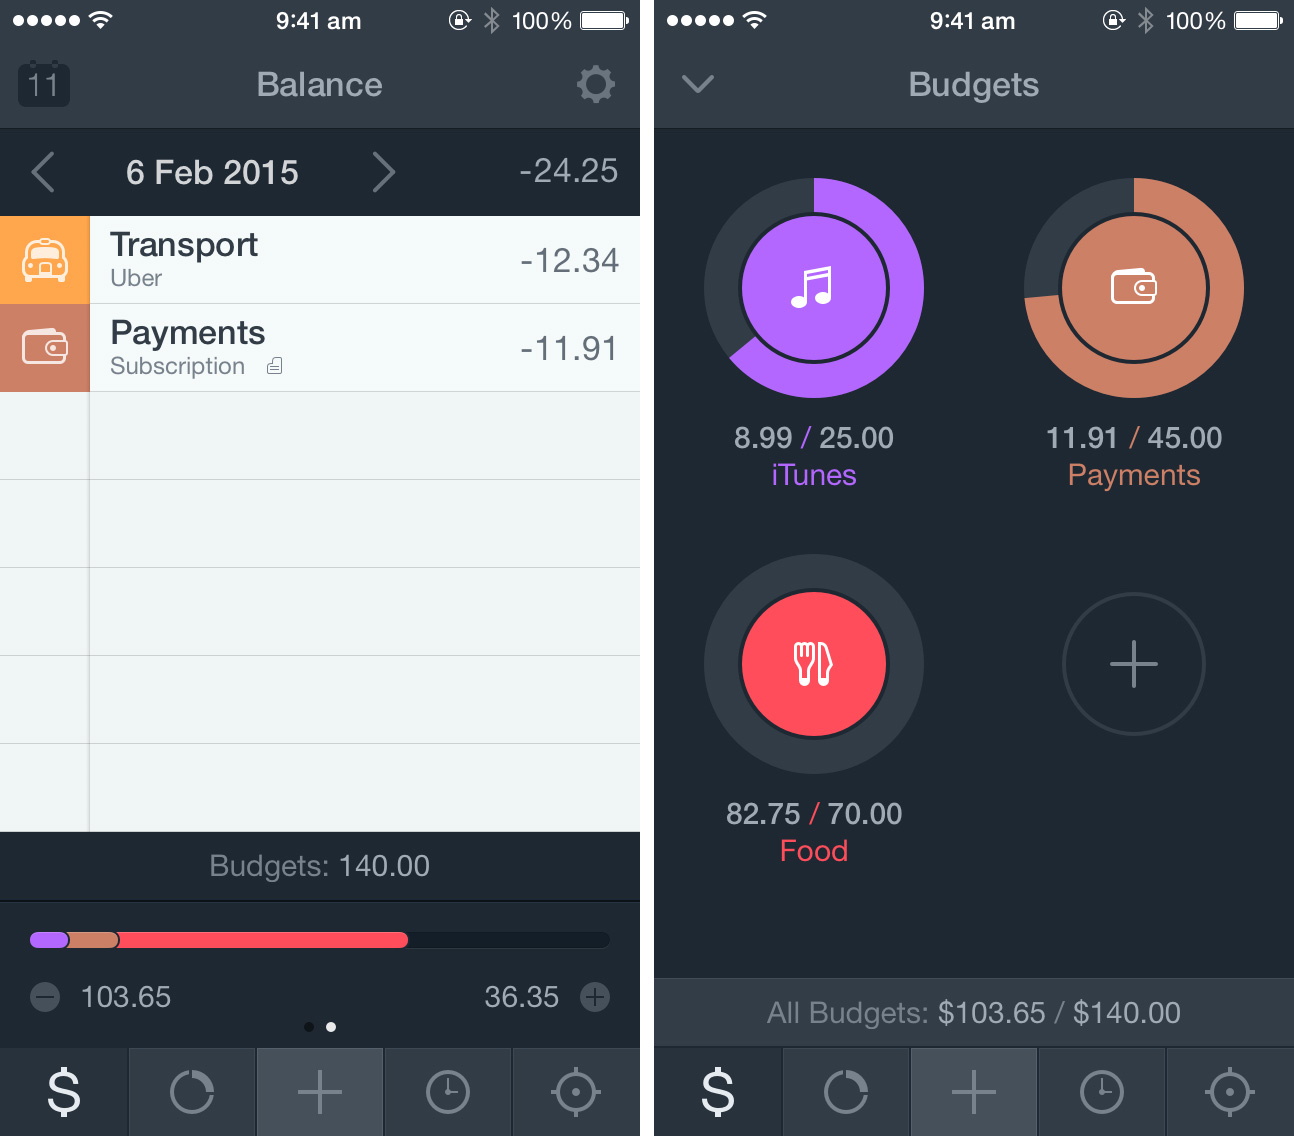
Saver 2 has 3 dedicated screens, accessible from the tab bar, that enable you to review and analyse your transactions – each doing so in different ways. The first, Balance, shows all your transactions that have been made today (or any other day), including the balance. Tapping on the balance figure will rotate you through the total balance, total expenditure and total income for that day. Down the bottom of the Balance screen is a graph that shows you the balance for the current month, including how much you have spent and earned this month.
The second screen, Graphs, illustrates your transactions with a donut graph, with your transactions divided by category. If you tap in the middle of the navigation bar, you can swap between Expenses and Incomes, scroll up and you have the option of viewing transactions by week, month or year, and swipe left or right to go to the next or previous time period. Tapping on a segment of the donut graph will also reveal the total amount spent on that category and show the tags that were used in that category (tapping on the tags will show you the amount spent per tag).
Credit needs to go to the Saver 2 team because they’ve done a terrific job in designing and implementing the graph. Not only does it look great, but it is interactive and super snappy to use.
Finally, there is the History tab. This screen lists all of your transactions for a specified time period (week, month, year) but grouped into the various categories. But you can also view by tags, rather than categories, by tapping the button on the far left of the navigation bar. Tapping on a category/tag will show you all the transactions from that category/tag.
Goals
Now that you’re using Saver to keep track of your income and expenses, you’re hopefully saving some money.
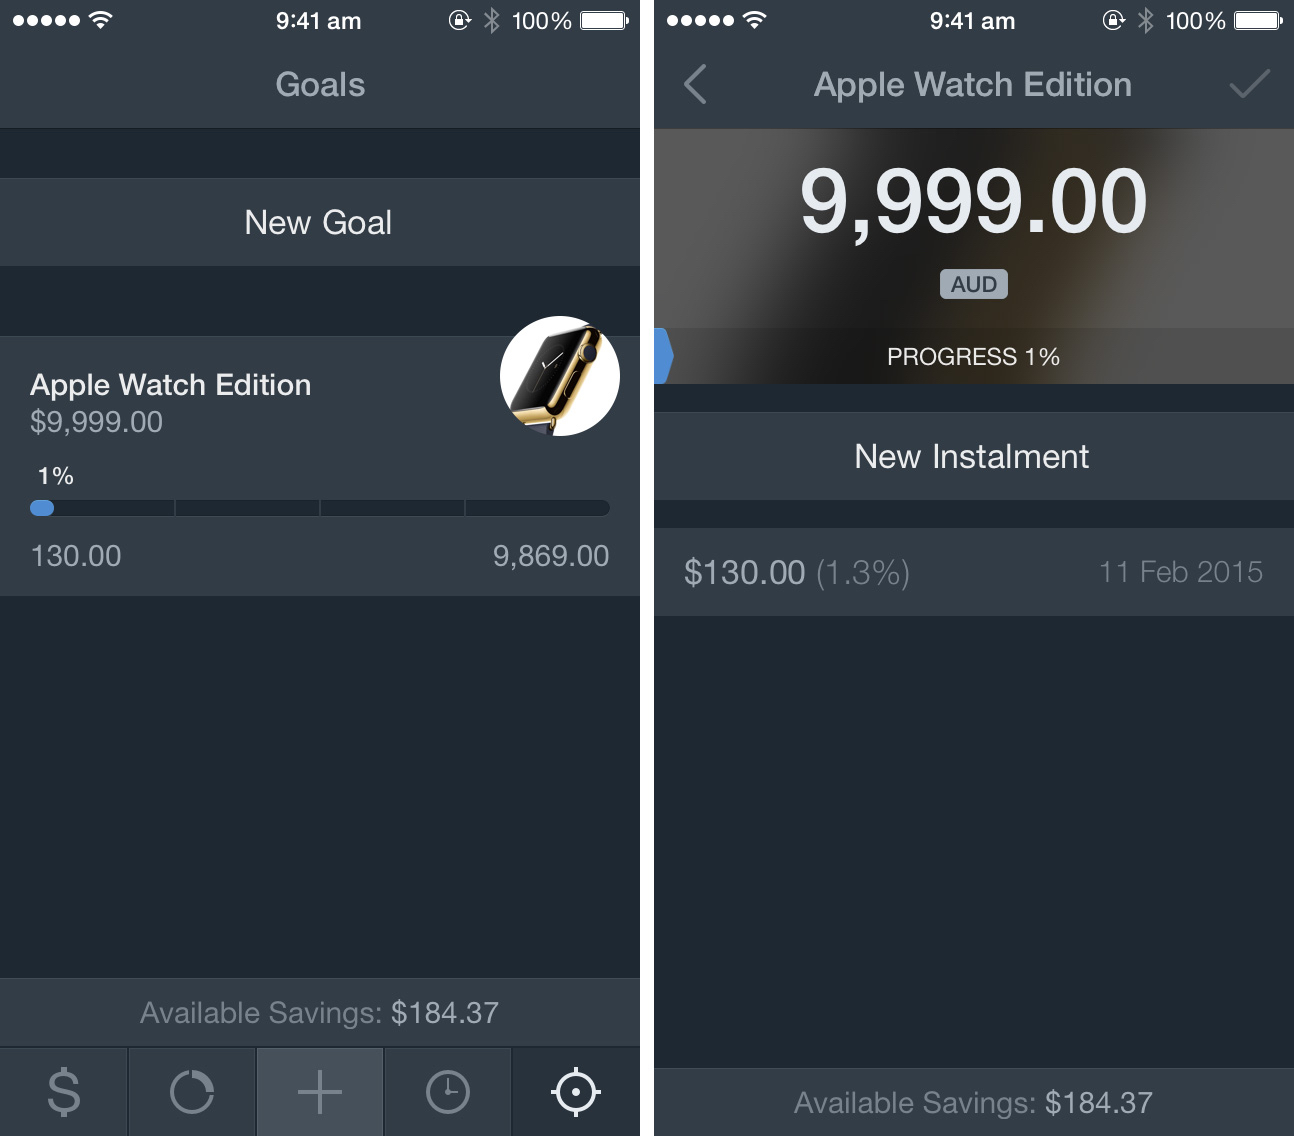
The last button on the tab bar, Goals, is where you can put those savings towards a financial goal. It’s as simple as specifying the dollar value of the goal, adding a name and (optionally) adding an image to represent your goal. Whenever you want to contribute funds to the goal, just tap the goal and add an instalment.
Budgets
It’s a bit of a hidden feature (I’m not sure why), but you can also create budgets based on the various categories of transactions.
To find the feature, go to the Balance screen, swipe over the bottom bar that shows your current balance and then tap on that budgets bar. Then you can add a budget, with the choice of category, value of the budget and whether it should repeat and rolover month to month (those last two features can be accessed by swiping left on the list of categories).
Saver 2’s In-App Purchase Subscriptions
If you’re going to commit to using Saver 2 for tracking your finances, you might be interested in the Saver Plus and Saver Pro subscriptions which add a bunch of more advanced features. These are pretty self-explanatory, so I’ve pasted the description of those features below.
I don’t have any gripes with the cost of them, but I do think that the Multiple Incomes feature from Saver Plus should be included in the core functionality of the paid app. Because as it stands, if you don’t purchase a subscription, you can only have one income entry per month which just seems too limited. Perhaps a compromise would be only enabling one income category unless you purchase a subscription.
Saver Plus - $9.99 per year
- Multiple Incomes: Add as many incomes as you want to get the full picture of your financial health.
- Editable Categories: Manage categories like a boss: add, rename, rearrange things, change icons and colors.
- Recurring Entries: Let Saver handle frequent transactions - like rent or coffee - automatically.
- Custom Budget Cycles: Set a starting day of your budget cycle and choose its duration: week, two weeks or month.
- Locations: Attach geo-data to your entries to discover that you’re visiting that donut shop too often.
- Reminders: Do not miss important payments. Set Reminders and Saver will notify you in advance.
Saver Pro - $19.99 per year
- Everything from Saver Plus
- Multi-currency: Traveling a lot or shopping online? Track your purchases in any currency and get automatic conversions.
- Advanced Analytics: Turn your phone sideways to see more data - totals, averages, savings, trends - all the essential statistics at your fingertips.
- Sync and Backup: iCloud sync keeps everything up-to-date, iCloud Drive stores your backups.
- Data Export: Generate beautiful PDF or CSV reports ready for print or spreadsheet import.
- Early Access: Pro subscribers get early access to new and major features as we build them.
Concluding Thoughts
Saver 2 looks great and fits right in with iOS 8, but it’s also incredibly polished and I encountered no lag or slowness at all in testing. However at the same time, it should be noted that it has taken the developers quite some time to deliver an updated app for the iOS 7 and 8 design style. I wouldn’t normally mention this, but a budgeting app needs to be used frequently, for a long time, and is also quite hard to switch between apps (given all the data you’ve entered may not be importable into your new app). But in fairness to Saver, it is hardly the only finance app to have taken a while to get a design refresh on iOS and I remain optimistic that the developers will be able to turn this app into a sustainable business, particularly with their new IAP subscriptions.
Personally, I’m considering switching to Saver myself. I’ve been using MoneyWiz and although I quite like the way MoneyWiz works (and how it has a few more advanced features), Saver’s simplicity and sleek design are appealing. One of the other issues that is holding me back from switching to Saver is the lack of Mac or iPad apps, but this omission is less of an issue thanks to the efficient transaction entry screen in Saver.
Ultimately, if you haven’t been tracking your expenses or you’re using an app that is too complex for your needs, I’d strongly recommend giving Saver 2 a try. Saver 2 is an efficient, polished, and nimble iPhone app to track all of your transactions and work towards attaining your financial goals. Plus, it’s a steal at $2.99, and if you find yourself wanting more features, you’ve always got the Plus and Pro subscriptions that give you a bunch more features and help support the developers.
Saver 2 is available on the iPhone App Store for $2.99 (currently discounted by 40%), with the subscriptions also 30% off for the launch period.


