A few weeks ago, while I was preparing my coverage of Apple’s Q2 2013 earnings call, I grew tired of my system to resize and rename images on OS X, so I rebuilt it from scratch using Automator, Name Mangler 3, and TextExpander.
When I create images for MacStories, I either keep them at a single size between 600 and 650 pixels, or use two separate versions: the original larger size, and a smaller one that links to the full version. In either case, images are uploaded to our CDN with Cyberduck, which I have been using for years and that has never failed me. Until last month, the process of duplicating the larger image and saving it to a smaller size was entirely manual – something that, I later realized, was surprising considering I try to automate as many aspects of my daily workflow as possible. I decided to fix this before the Apple earnings call because I knew Excel was going to export our charts as large PNGs – but, mostly, because it really didn’t make sense to keep on manually clicking menus and selecting sizes after all these years of writing for MacStories.
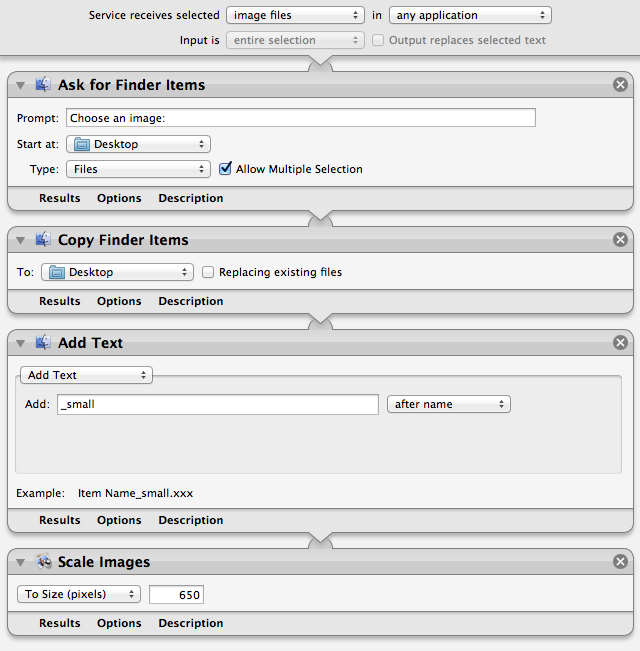
The first step was to create an Automator workflow to duplicate all my images at once, reisizing them to 650 pixels, and appending “_small” to their filename. I feel like Automator is vastly underrated these days, and it actually comes with several options to interact with selected Finder items.
Here’s the workflow:
I ended up choosing the “Ask for Finder Items” action to make sure I could double-check the files I’m passing to Automator; while I could have just told the workflow to automatically fetch the items that I had selected beforehand, I wanted a quick way to confirm the images that needed resizing. The Finder dialog box that Automator pops up is fast, can come up with a pre-defined location (in my case, the Desktop), and it allows for multiple selection (through a checkbox). The last three steps are rather self-explanatory: images are copied, “_small” is appended at the end of their name, and they’re scaled down to 650 pixels. With my Apple charts and graphs, this means I get images named “iPhone” and “iPhone_small”.
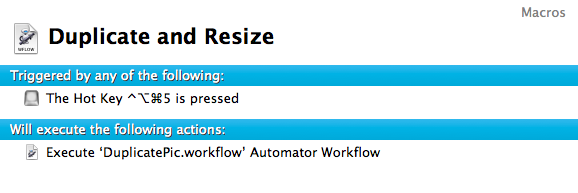
Obviously, I wanted to launch the Automator workflow as fast as possible without having to deal with any additional menus. There are plenty of ways to assign keyboard shortcuts to workflows, and I picked Keyboard Maestro because it’s always running on my Mac and I knew it was easy to set up an action to execute an Automator workflow:
If you don’t want to use Keyboard Maestro, you can use apps like Alfred or LaunchBar to assign a shortcut to an Automator workflow file.
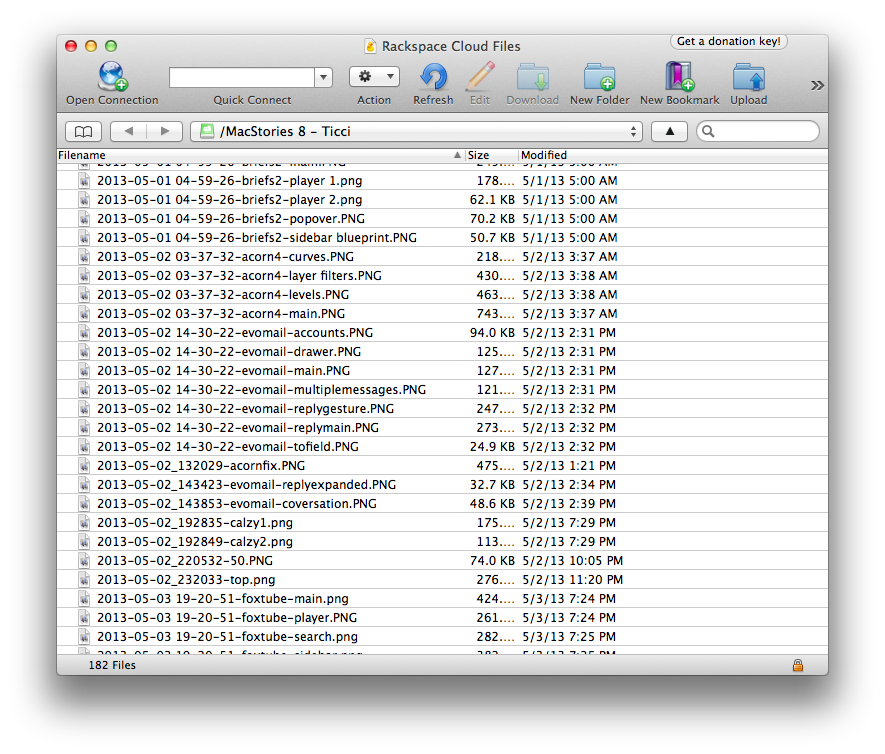
Once I have two images on the Desktop, the next step is to properly rename them. As I previously detailed, my preferred way of naming images[1] is to use a strftime timestamp as a prefix to the image’s name. In this way, images that are uploaded to Cyberduck are sorted alphabetically[2], but because Cyberduck’s Filename column can be resized, I get to see the complete filename in the main list as well:
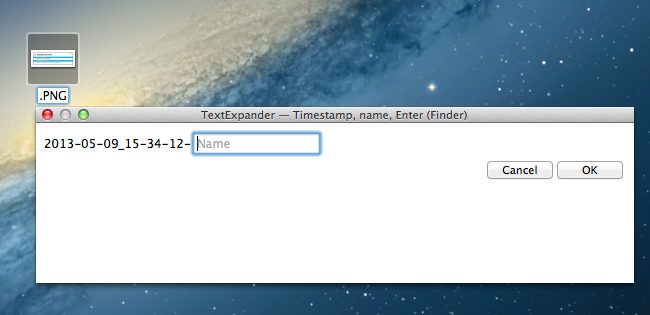
When I have a single image I need to resize, I use a TextExpander fill-in snippet to change the filename to timestamp plus a name that I type in TextExpander’s popup. I know that I could use another workflow to rename the selected image without having to erase its name and typing the TextExpander shortcut[3]; however, when I have single images that need to be resized, it’s because they are screenshots taken with the Mac’s built-in screenshot function, which creates filenames that I don’t want to use, and therefore I need to type a new name anyway.
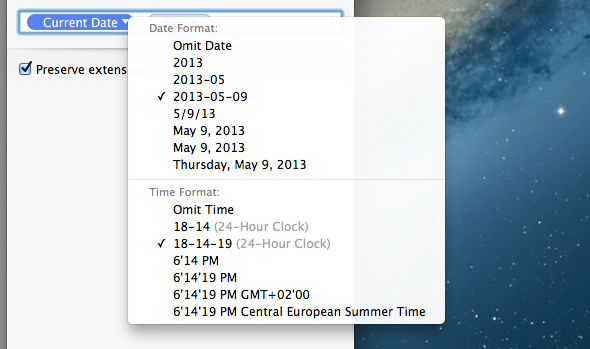
You can see how TextExpander supports strftime timestamps, and how I also told TextExpander to hit the Enter key for me so that Finder will exit the renaming mode automatically.
When I need to rename multiple files at once, I use Name Mangler 3 by Many Tricks. Released a few weeks ago, I bought a Name Mangler 3 license 10 minutes after playing with the trial version because the feature set is fantastic.
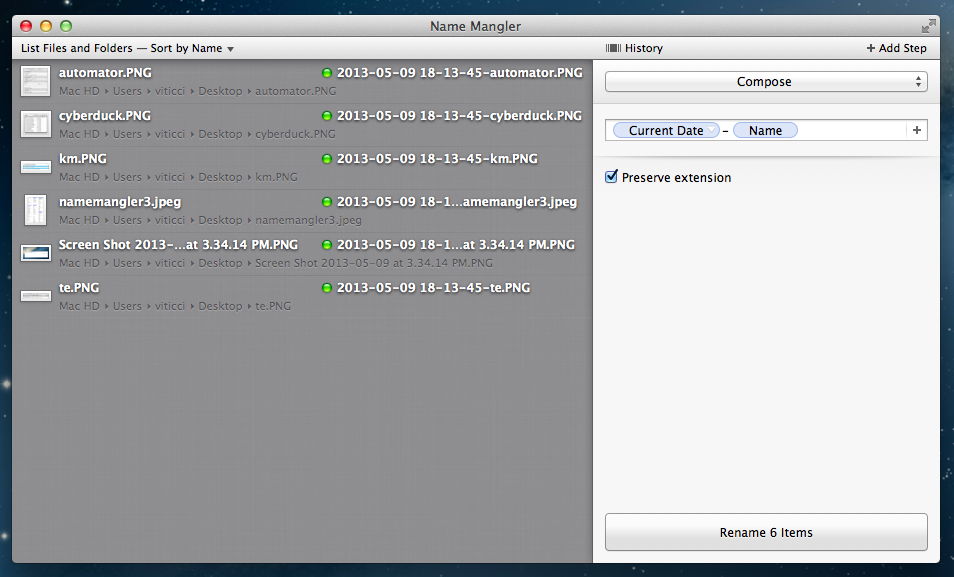
Name Mangler’s interface is divided in two main panels: the file list and the renaming steps. The file list on the left is where you drop files from the Finder, and where you’ll find sorting options (typical stuff such as Ascending/Descending, Creation/Modification Date, but also more advanced options such as “sort by Path”) and a preview of your files with their current name and the one they’ll get after the batch renaming process. My favorite small detail of the file list is that you can pre-populate it with files upon startup: in the Preferences, there’s a “Populate with Finder Selection” option that works exactly as advertised – select some files in the Finder, launch Name Mangler, and the files will already be listed without having to drop them inside the main UI. If you want to keep the option disabled but still populate the list quickly, you can choose File > Populate with Finder Selection or hit CMD+P.
The renaming steps screen is what sells Name Mangler 3. While I have very simple needs, Name Mangler 3 comes with a plethora of features to create multi-step renaming workflows based on variables, metadata, and more – with an interface that’s always clean and “visual” in the way it deals with something that could easily become complex and cluttered. You can choose between 10 renaming types, which include the standard Compose mode (a file will be renamed) but also Suffix/Prefix, Find and Replace, and Sequence. Because Name Mangler works by breaking each renaming option into its own step, you can combine multiple steps together to batch rename files with advanced criteria in just one click. For instance, you could create a set of steps to rename photos with a timestamp, arbitrary text, location name, and then sequence them using arabic or roman numbers.
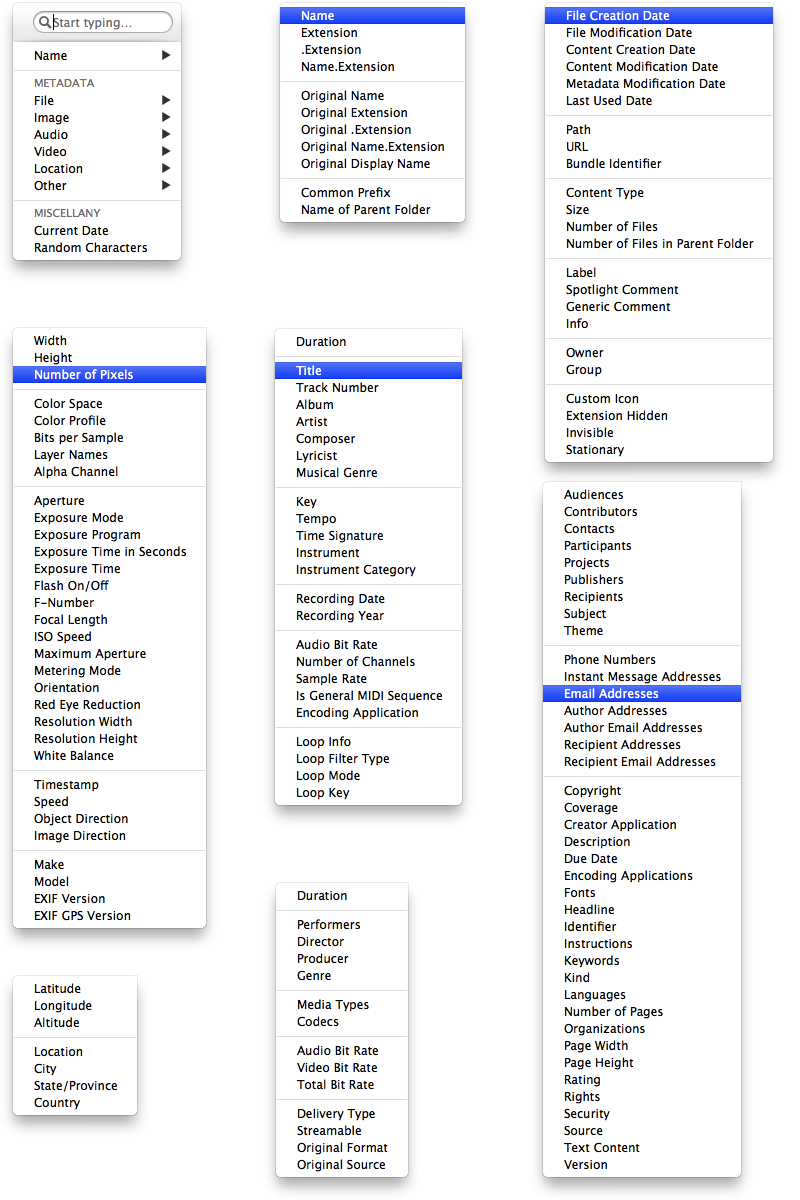
If you’re coming from Hazel – which I use to rename images remotely – you’ll instantly be familiar with Name Mangler’s variables and dropdown menus. When you add a new step, you can click a “+” button to add a new variable from a contextual menu that also has a search field if you feel like filtering variables by name (useful if you don’t remember in which categories they’re in). There’s an incredible amount of variables to fiddle with – if you don’t believe me, see for yourself:[4]
For my images, I have set up an action (and saved it as preset) that takes images and renames them by adding a date & time prefix before the name and extension. If the name hasn’t already been added, Name Mangler lets you enter text in between variables, and if you want to go back to an action you ran in the past, you can use the History panel.
Once I have my images ready to be renamed (again, I can double-check everything thanks to the preview on the left), I can click rename and, in less than a second, Name Mangler will give me freshly renamed images in the Finder without creating duplicates.
I’m quite happy with my new file renaming setup: it takes around 20 seconds from start to finish if I have to type the filename myself, and even less if the filename is already there. In rebuilding my workflow, the most important lesson I’ve learned is that Name Mangler 3 is worth more than the $19 it costs if you do a lot of batch renaming on a daily basis. I highly recommend checking out the trial and buying a license from Many Tricks’ website.[5]
- Or anything, really. Any file that goes into a folder that includes other files and needs sorting will likely get the timestamp treatment from me. ↩︎
- I always use month numbers, not literal names, and 24-hour time to ensure timestamps are sorted automatically. ↩︎
- Which, by the way, takes three clicks: select image, hit Enter to select filename, Backspace to delete the entire name before the extension. ↩︎
- But seriously, you should believe me. ↩︎
- I always feel uncomfortable recommending the Mac App Store version of an app like Name Mangler. I fear that, with its access to the filesystem, Name Mangler may run into issues with Apple limitations in the future. Still, if you really want it, here’s the Mac App Store link for Name Mangler 3. ↩︎


