The quest for the perfect text application – for some of us it has been a lifelong goal, or at least it feels like it. I realised very early on in my computing life that I did not enjoy playing with formatting in Word or Pages, and when I discovered that Markdown provides the ability to make items **bold** or _italic_ with just a few simple characters, I felt like I had finally found my text formatting holy grail.
Many years ago I discovered Drafts for iOS, and the idea appealed: you open the application and type. No creating a new file, or trying to decide what to do with the text before the thought is fully formed, just open, type, then decide. I frequently need to jot down notes, save links, and have found being able to write without thinking too much about where the words need to go, and how they’re going to get there, is extremely helpful in today’s world of constant interruptions.
Last year saw Drafts 5 released for iOS with even more capability than before, allowing you to truly customise it to be the text editor you’ve always dreamed of having. There was only one small but important snag – no Mac version.
Today there is a Mac app. It is what many of us have been waiting for, albeit with a few missing features at the moment. Drafts for Mac has landed.
Let’s get one thing out of the way: you’ve probably heard of Marzipan, the Apple project to enable iOS developers to bring their applications to the Mac. This is not one of those apps. It is an app written from the ground up for macOS, which works as expected with the system features.
Onboarding
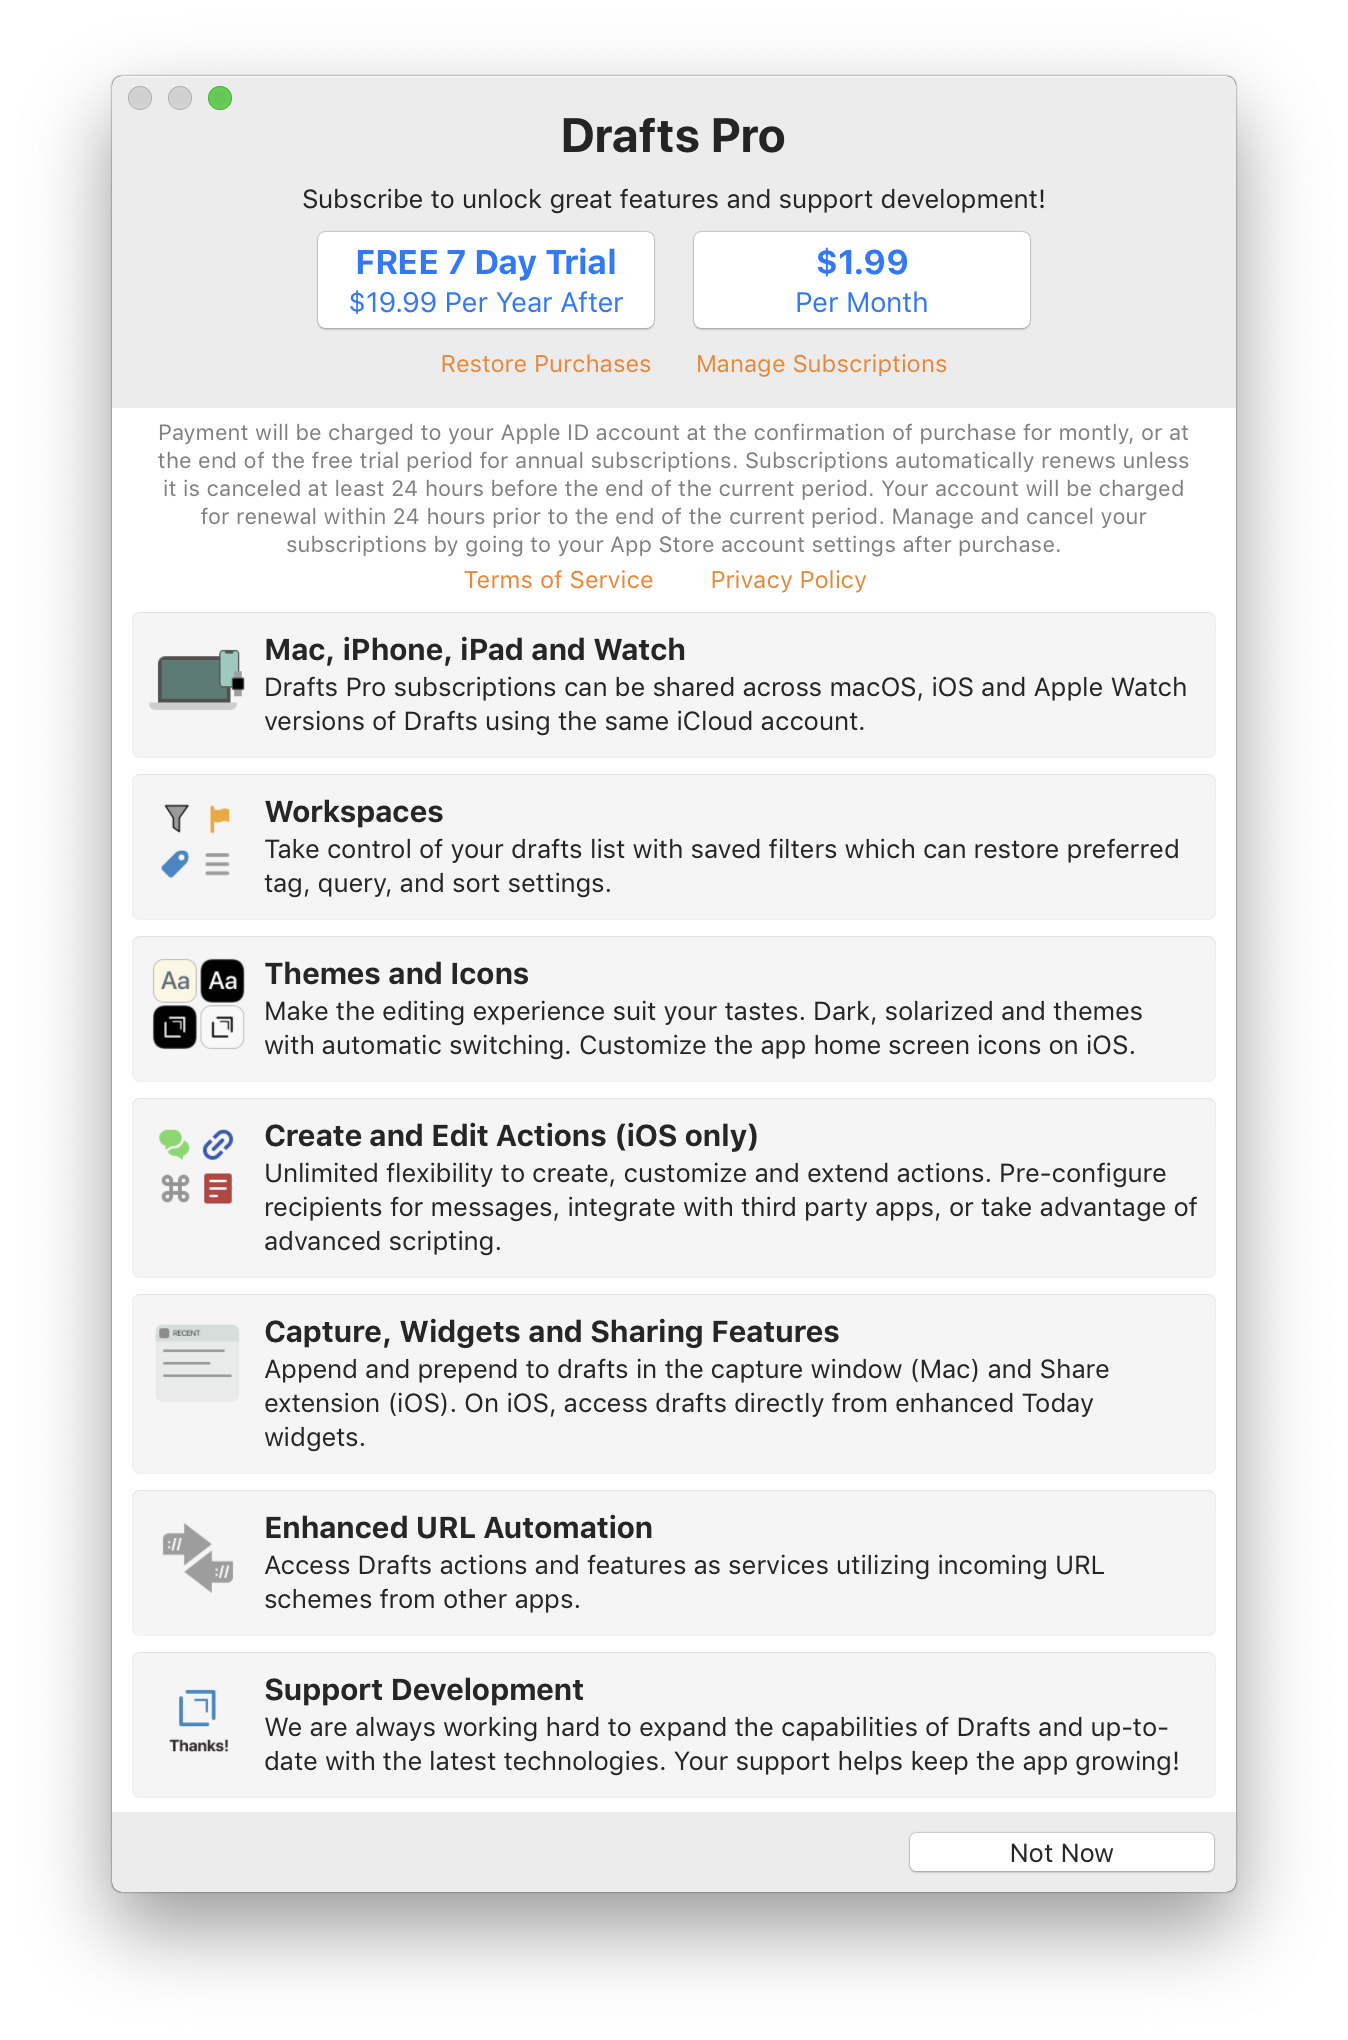
After installing Drafts for Mac, if you do not already have a Drafts Pro subscription from the iOS app, the benefits of it are outlined for you, allowing you to sign up for a yearly subscription for $19.99 or monthly subscription at $1.99, or to proceed with no subscription.
If you already have a subscription from the iOS app, that is recognised automatically, as the subscription is valid for both platforms.
So how do you actually use Drafts? As it’s a text editor and storage application, there are many ways you can set it up to work for you – from being a temporary place to write text, to a program that can help you organise, find, and maintain notes. It uses iCloud to sync notes between devices, and also supports storing some script and template files in the Drafts folder in iCloud Drive.
Organizing Your Drafts
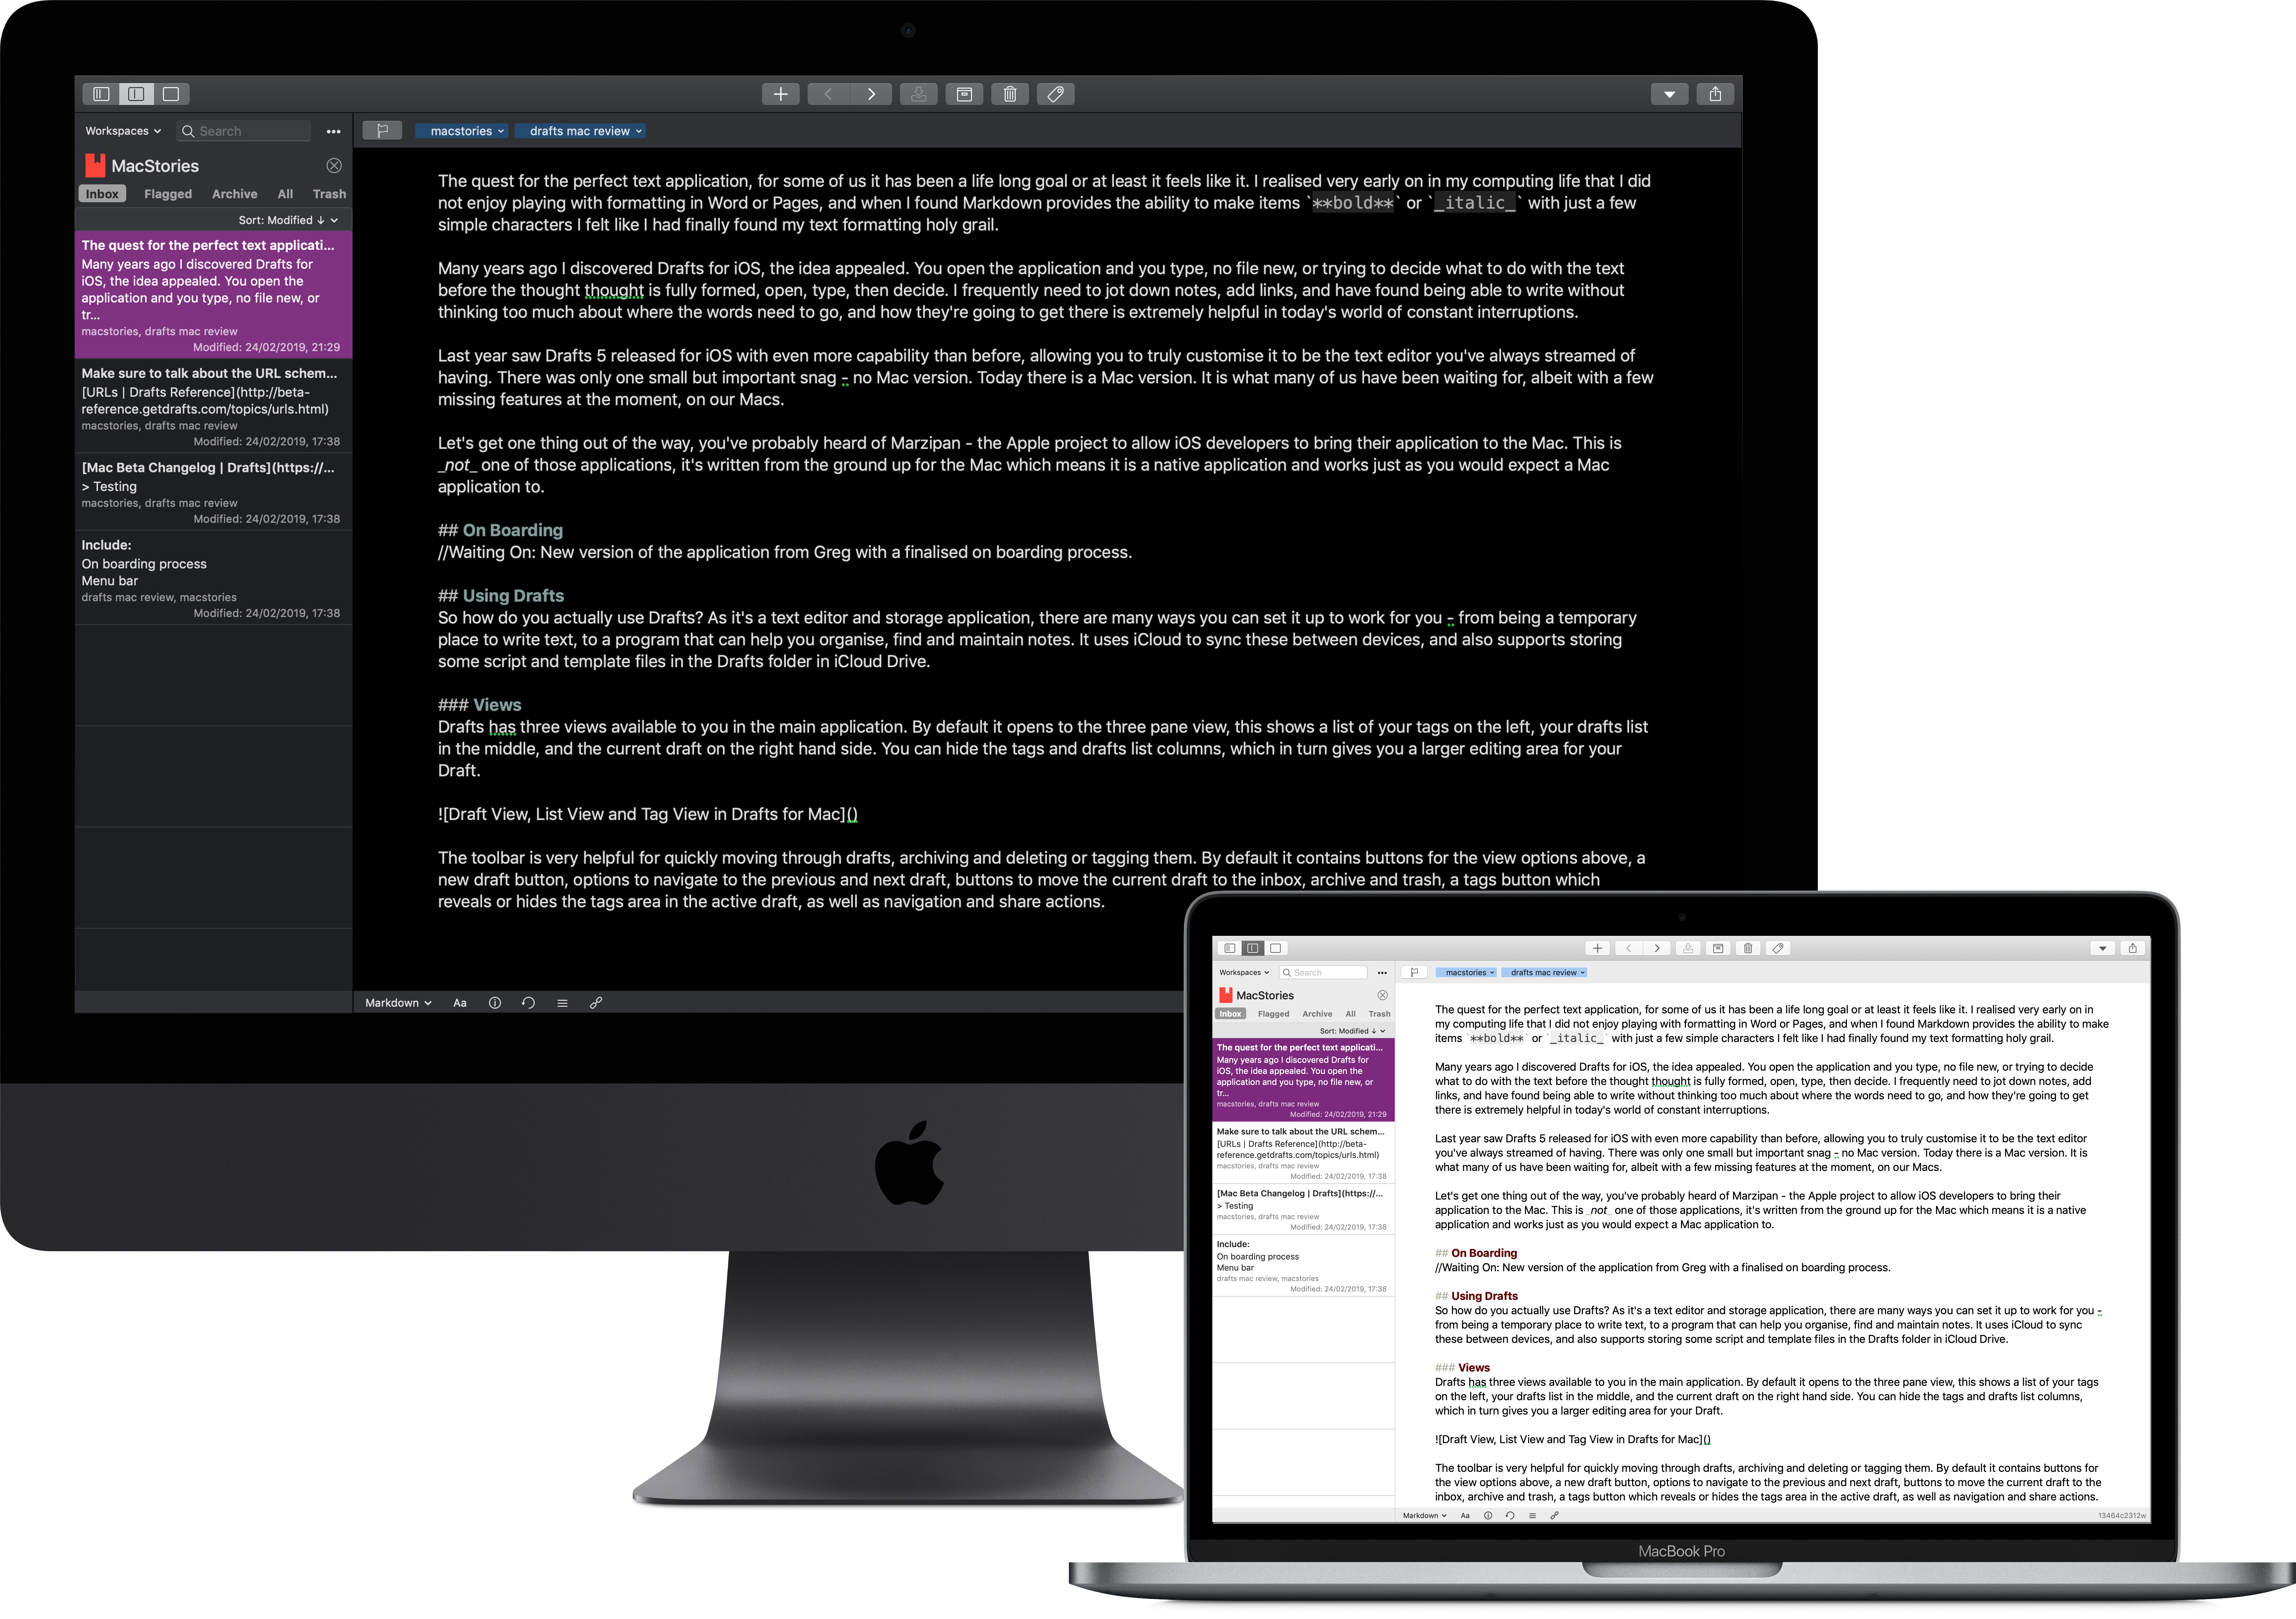
Drafts has three views available to you in the main application. By default it opens to the three-pane view, which shows a list of your tags on the left, your drafts list in the middle, and the current draft on the right-hand side. You can optionally hide the tag and list columns, which in turn gives you a larger editing area for your draft.
The app’s toolbar is very helpful for quickly moving through drafts, archiving and deleting or tagging them. By default it contains buttons for the view options above, a new draft button, options to navigate to the previous and next draft, buttons to move the current draft to the inbox, archive, and trash, a tags button which reveals or hides the tags area in the active draft, as well as navigation and share actions.
Tags versus folders seems to be a permanent hot debate when it comes to file management, and for what it’s worth, I’m on the side of “both” – but I prefer having tags available to me in Drafts. You can assign tags to a draft quickly, and leave the tag area of the editor open should you choose to do. In addition to this tag area, one of the sidebars is dedicated to tags, and Drafts offers powerful filtering that allows you to search for drafts that include every tag in a list of tags, any of those tags, and even to exclude drafts with specific tags.
In addition to tags, you can quickly flag drafts too – this is something that in combination with Workspaces can help you keep on top of the more important items that land in Drafts.
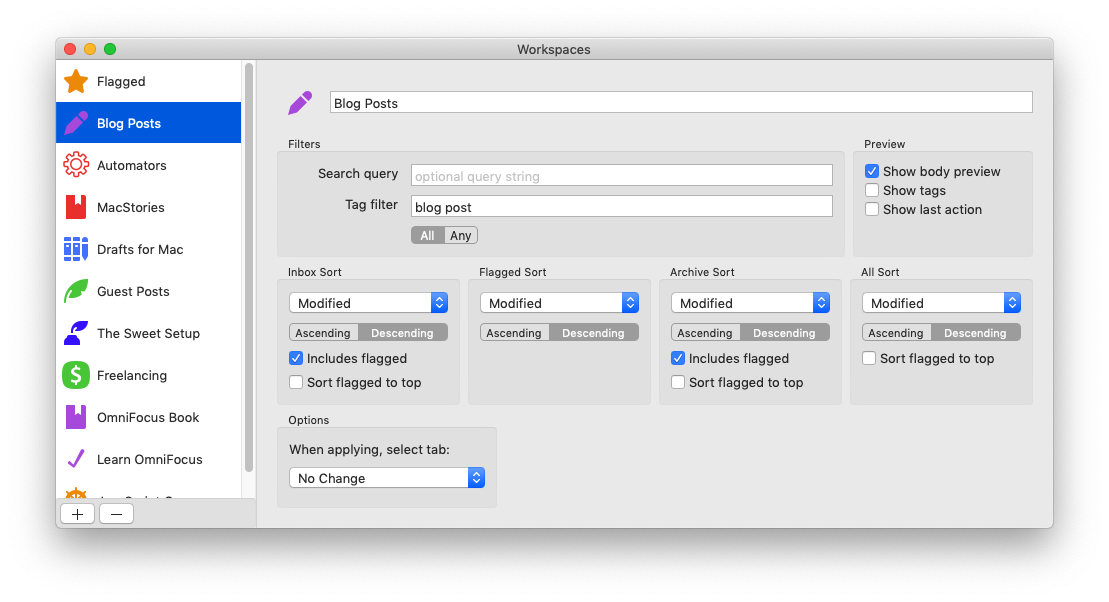
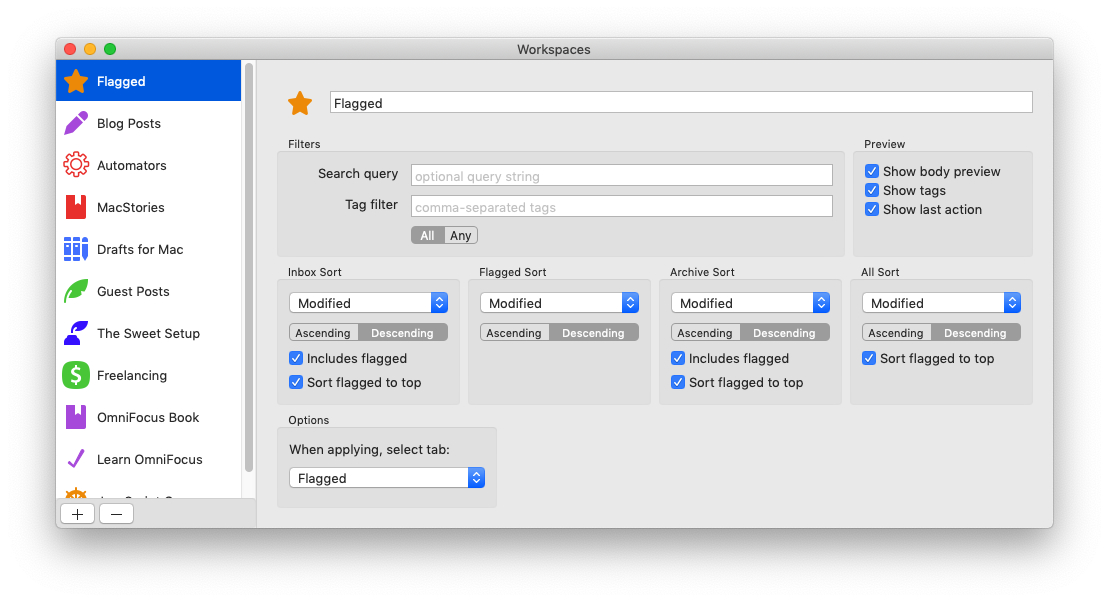
Workspaces are Drafts’ version of folders – but they’re dynamic. Based on tags and flags, and combinations of these, your Drafts workspaces are saved filters allowing you to see just the subset of Drafts you want or need to work on at the current moment in time.
Workspaces has a menu option, as well as a drop down next to the search option – from these you can select existing workspaces, open the editor, or clear the filters, the latter of which is quite handy when you want to edit a draft you created via the menu bar capture.
Workspaces are easy to create – you can specify which tag(s) or search strings to filter for, with tags if it should be an “any” or “all” filter, and then which sort should be applied to each of the inbox, flagged, archive, and all groups of items in the drafts list. You can also specify which of these you want to switch to when opening a workspace, allowing you to create a very simple workspace for flagged items.
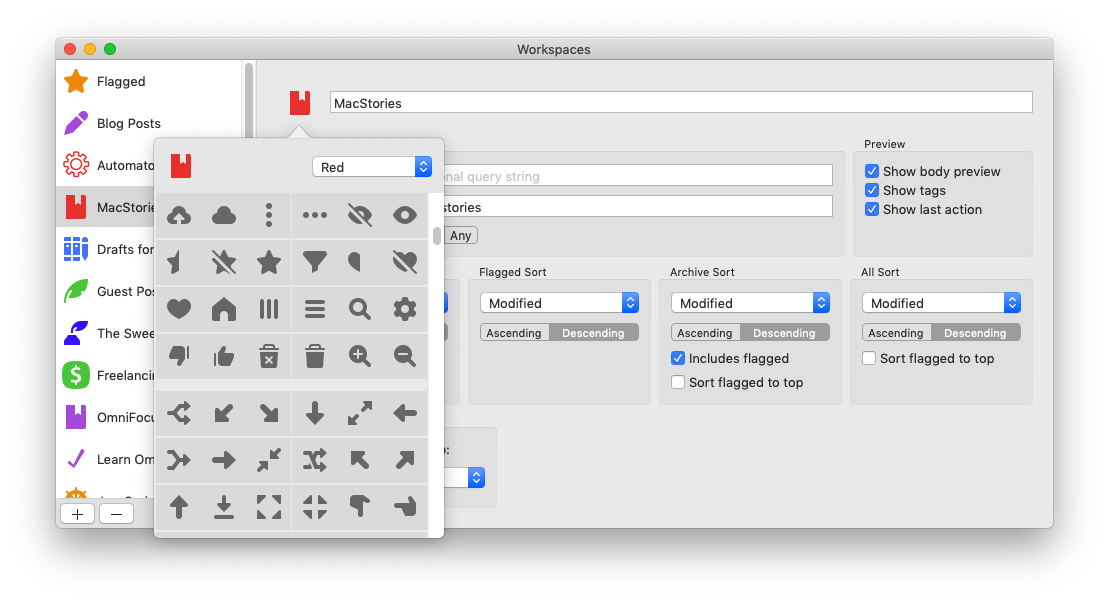
Each Workspace can have an icon and colour associated with it, which helps you to identify it when switching between them. The icons and colours available are the same as on iOS, and these Workspaces sync across all devices connected to an iCloud account.
Writing Your Drafts
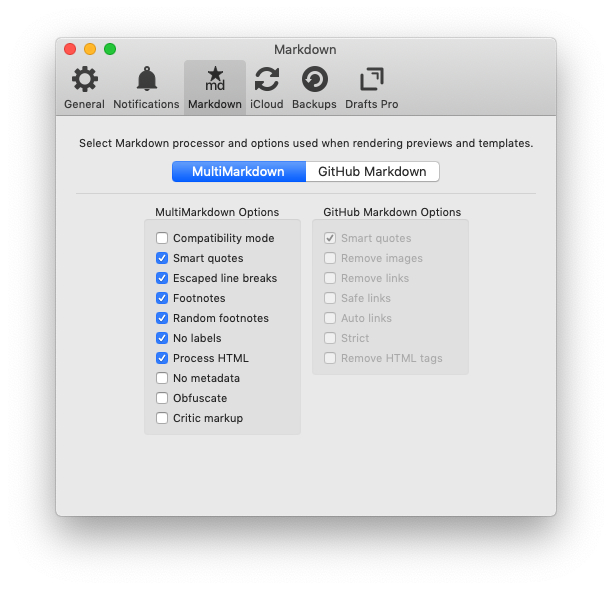
Drafts is one of many applications on the market which uses Markdown to allow you to format your text, meaning your document is plain text with extra notation for bold or italic. Drafts for Mac supports MultiMarkdown – and you can choose to enable options such as processing HTML and random footnotes. You can also switch your Drafts install to use GitHub Markdown, which offers support for tables, strikethrough, and allows you to disable support for images and links.
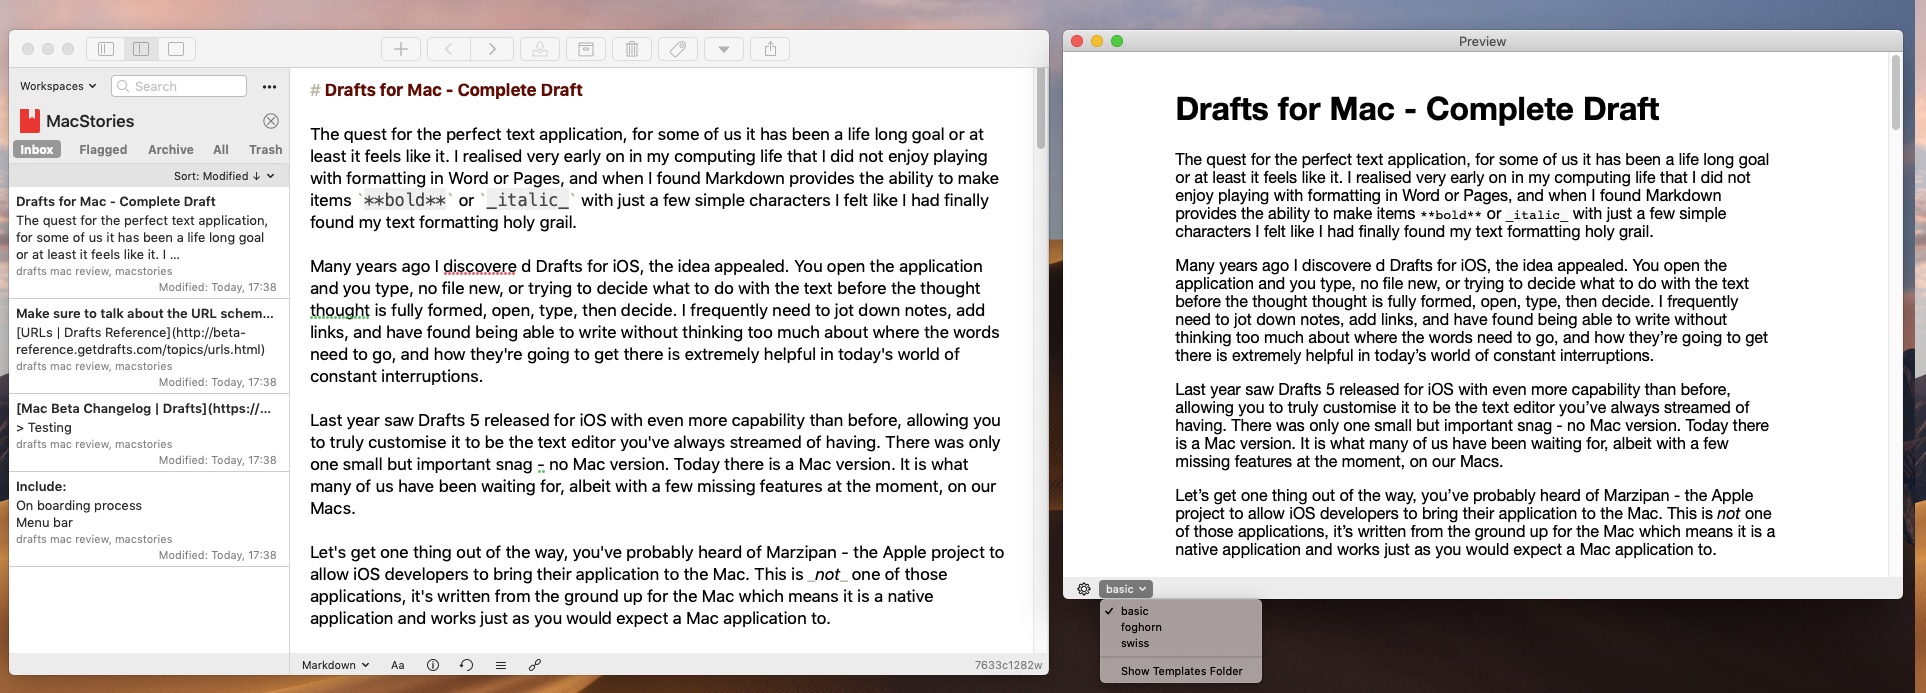
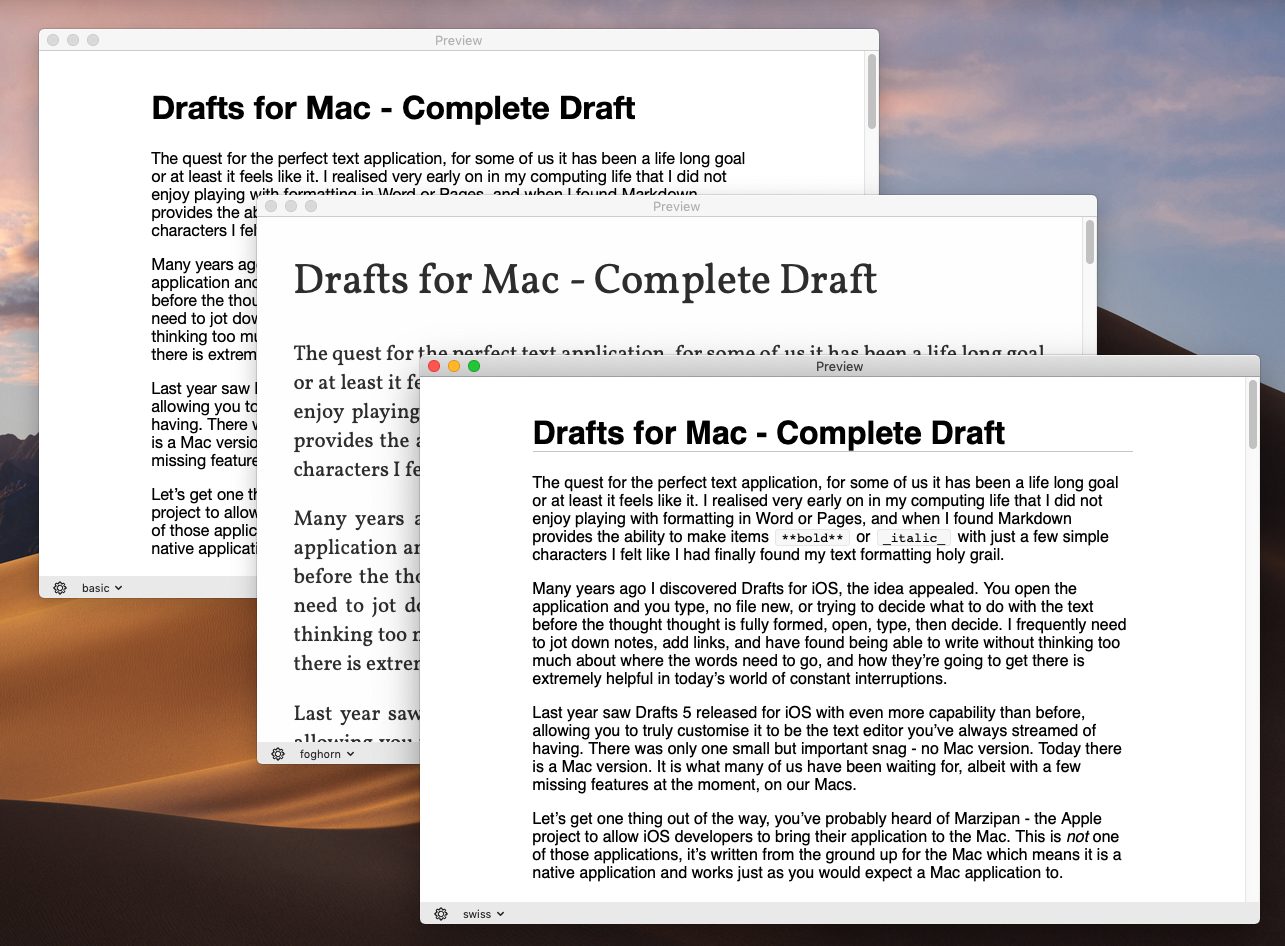
All of these options come into full force in the preview window – this can be accessed through the file menu, or with ⌥⌘P – which allows you to see a preview of what your document will look like once the formatting has been rendered. The preview doesn’t update in real time with edits to your draft, but instead includes a small delay – this seems like it might be distracting at first, but it actually allows you to formulate your words and make some progress instead of seeing your nicely formatted typos show up on the other half of the screen! The preview window is just that, a separate window, which means you can put it on a second display. I’ve even used it in conjunction with Luna Display in meetings to show people the notes I’ve been taking.
The preview feature comes with three built-in themes, as well as the option to create your own and store them in a folder in iCloud Drive.
Creating Drafts
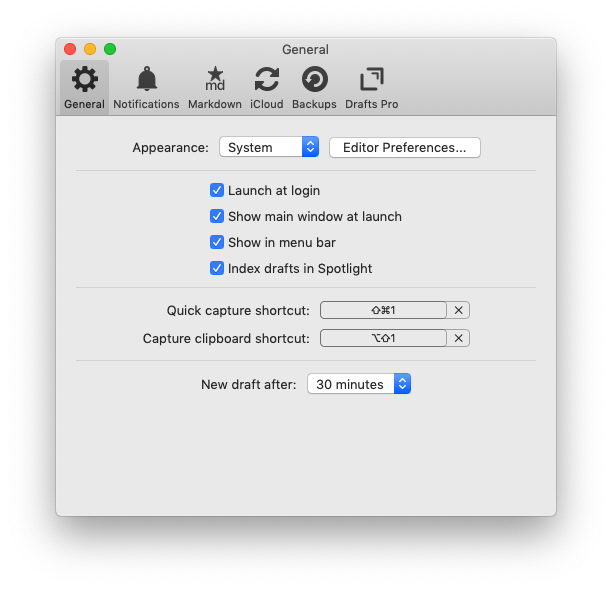
There are several ways you can create drafts, the first of which is just opening the application and typing into the editor area. Drafts will automatically create a new draft at launch after 5 minutes away from the app, and this can be changed in the preferences to suit your needs.
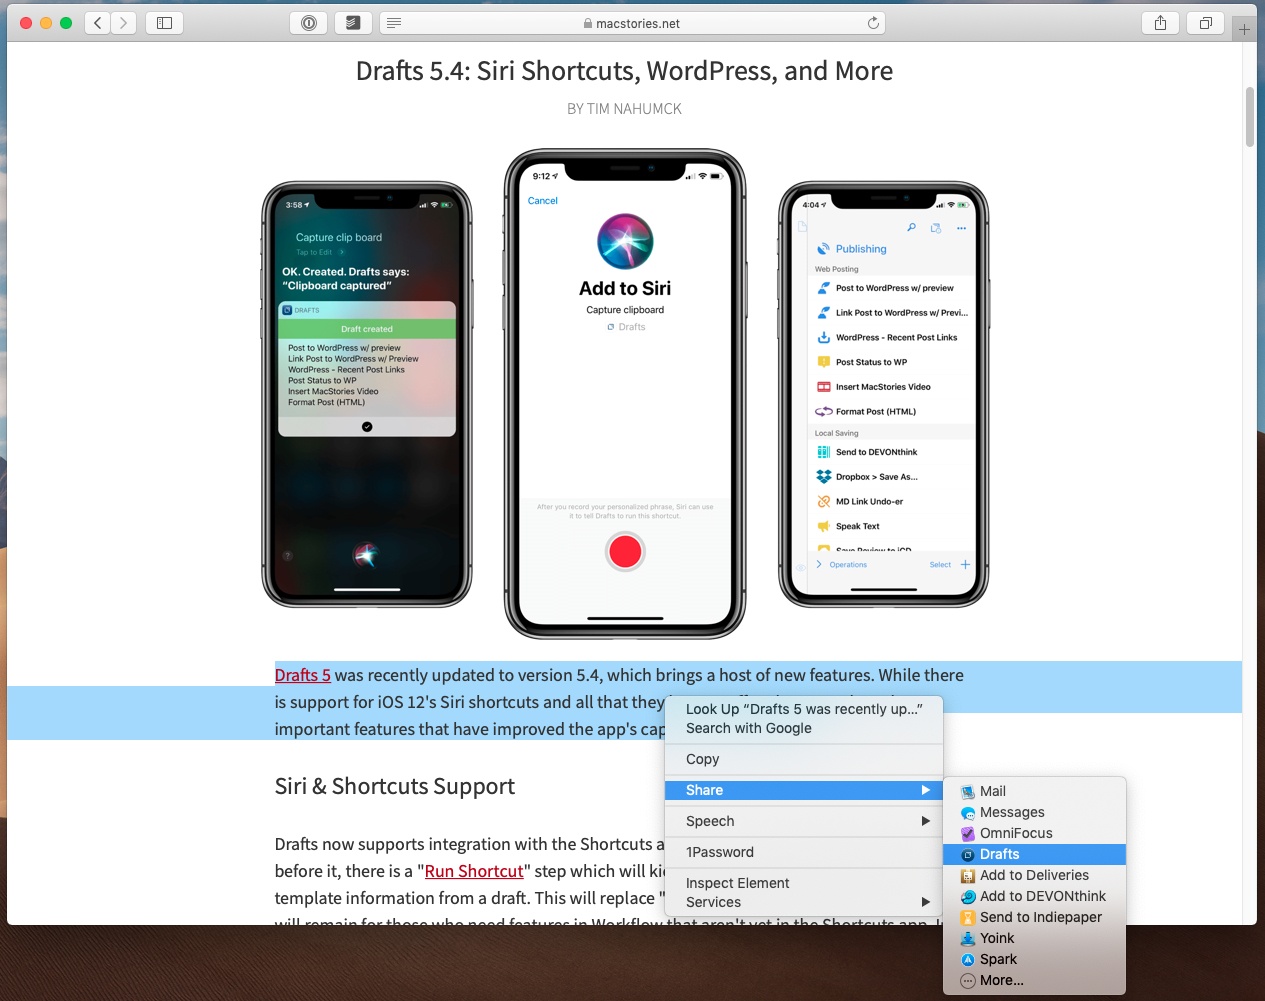
You can also create new drafts from the share sheet built into macOS simply by selecting text and sharing it to Drafts. This creates a new draft in the background with the selected text.
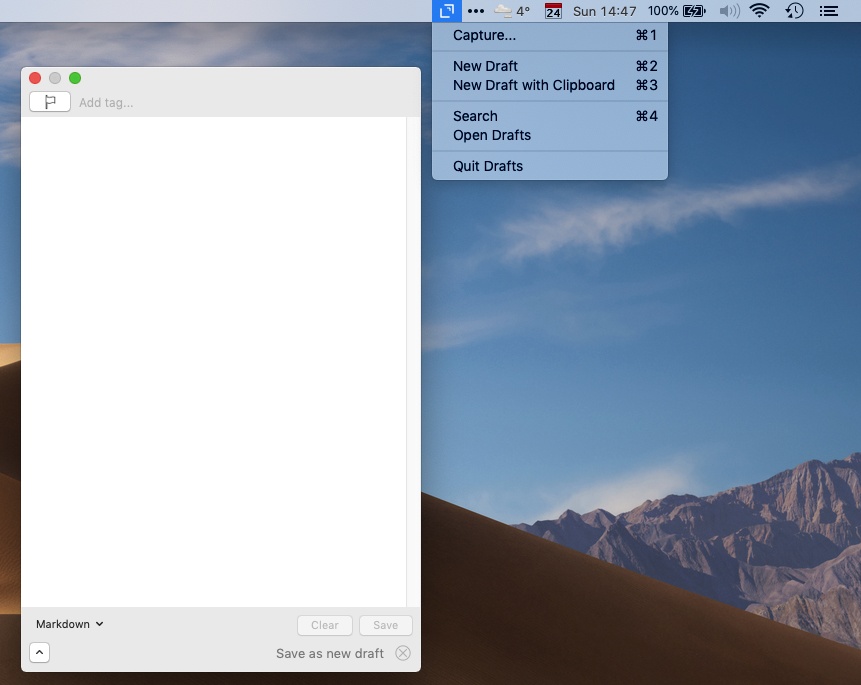
Another draft creation method is via the app’s menu bar component, which serves as a way to open a quick capture window: here you can type or paste text, assign tags, change the syntax, and then save it. If you have a Drafts Pro subscription you can append or prepend this to an existing draft if you need to.
As well as being able to open a quick capture window, the menu bar also enables opening the full Drafts interface with a new draft loaded – either an empty one, or one populated with the contents of your clipboard. There’s also an option to jump straight to the search field in Drafts, allowing you to quickly find whichever draft you’re looking for.
New drafts can also be created using nothing but the keyboard: in Drafts’ preferences you can set keyboard shortcuts that launch a quick capture window, or which capture the clipboard to Drafts. These work the same way the options from the menu bar icon do, just from the keyboard – and in the case of capturing the clipboard, it happens without ever seeing the Drafts interface.
Finally, one last method of draft creation is dragging and dropping text or Markdown files onto the dock icon – including multiple files at a time, which makes importing from other applications or systems easy.
Key Features
One of the reasons why Drafts has become such a popular application is because of the automation possibilities built into it. Drafts for Mac is not yet as capable as its iOS counterpart in this area – but it is no slouch either.
Drafts simply wouldn’t be Drafts without URL schemes – and I’m very pleased to see that the Mac version doesn’t disappoint in this area. What’s more, these URL schemes are the same as the ones present on iOS, allowing users to control Drafts with simple commands that can be used in many applications, including bookmarklets in a web browser.
create: The create URL scheme allows you to create a new draft with the text you pass to it.open: You can use this to open a draft with a specific UUID.get: Use this to retrieve the contents of a URL with the UUID passed to the call.prepend: Add text to the beginning of a draft.append: Add text to the end of a draft.replaceRange: Replace X characters from position Y – this can also be used to insert text inside a draft by passing length 0.search: You can use this to either focus on the search field in Drafts, or pass a search string or a tag to filter for.workspace: Open Drafts to a specific workspace.
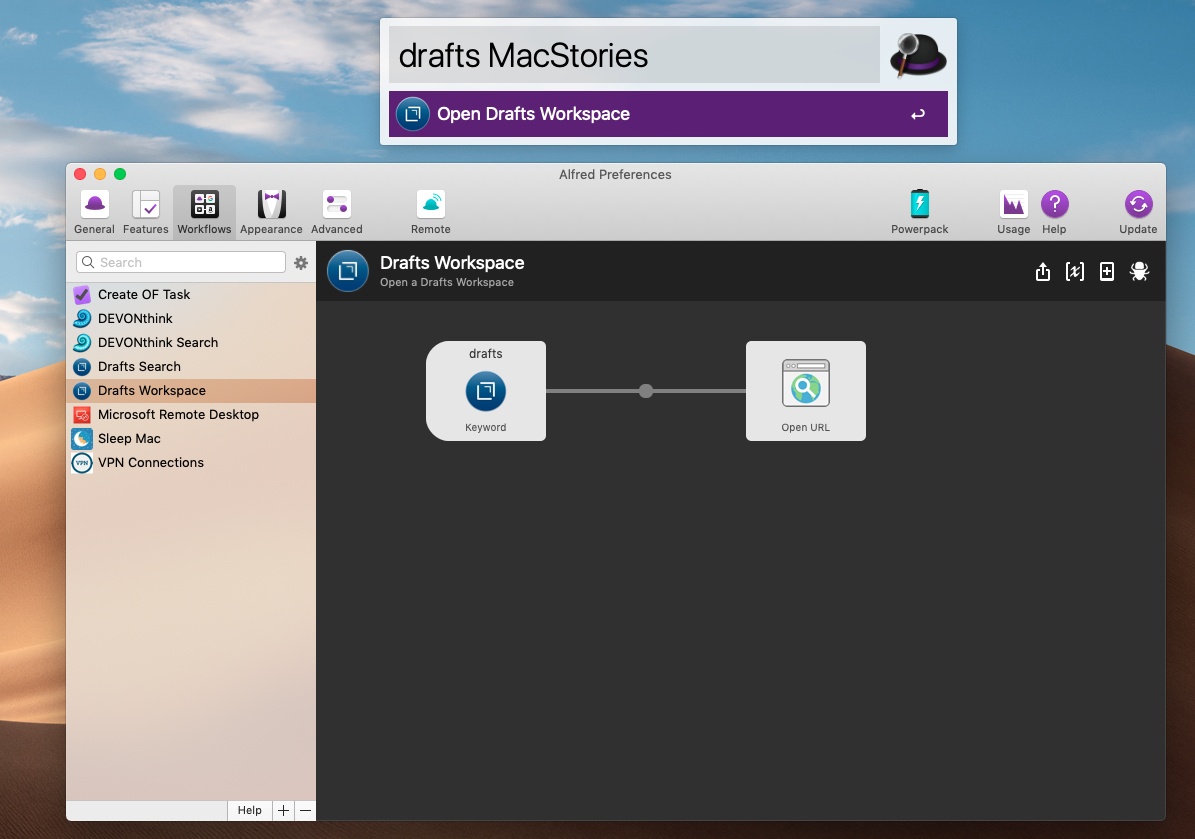
Whilst URL schemes are very popular on iOS, you can also use them on macOS in conjunction with applications such as Alfred or PopClip to enable searching Drafts or opening a workspace of your choice from the keyboard.
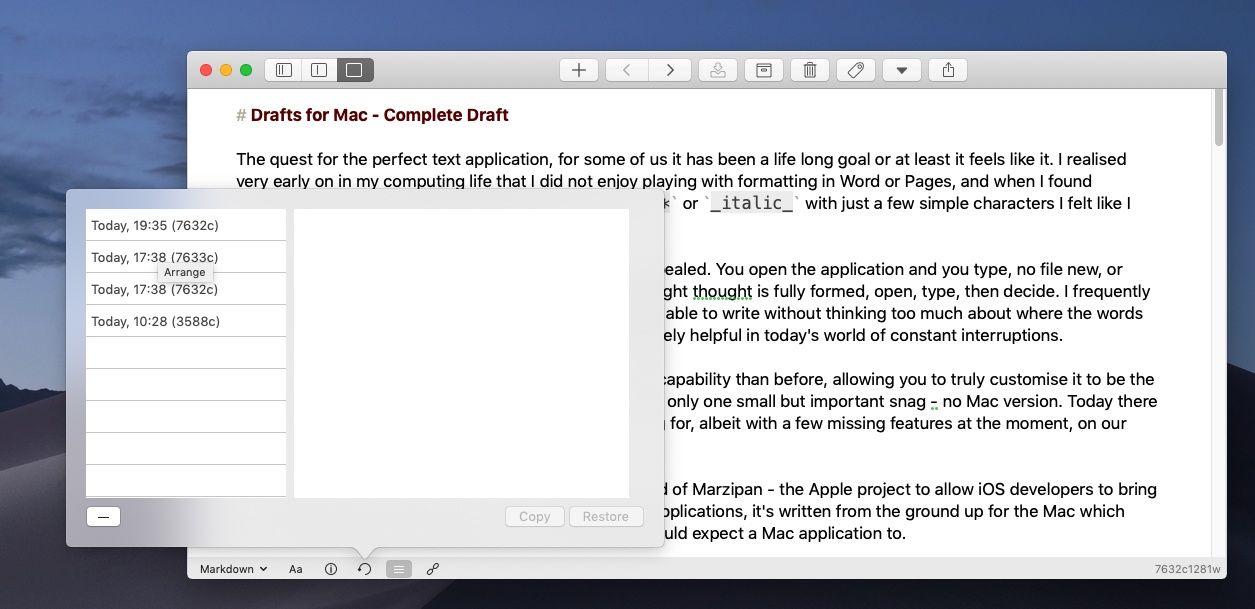
One feature that helps Drafts stand out in the world of text editors is completely built-in versioning, enabling you to check what your draft looked like five minutes ago, or five hours ago. These versions are saved automatically as modifications are made, but you can also create them by pressing ⌘S. The beauty of these versions is being able to roll back in time and see where that fantastic sentence you accidentally deleted is. From the version history you can copy the whole draft, restore it, or even select sections to copy.
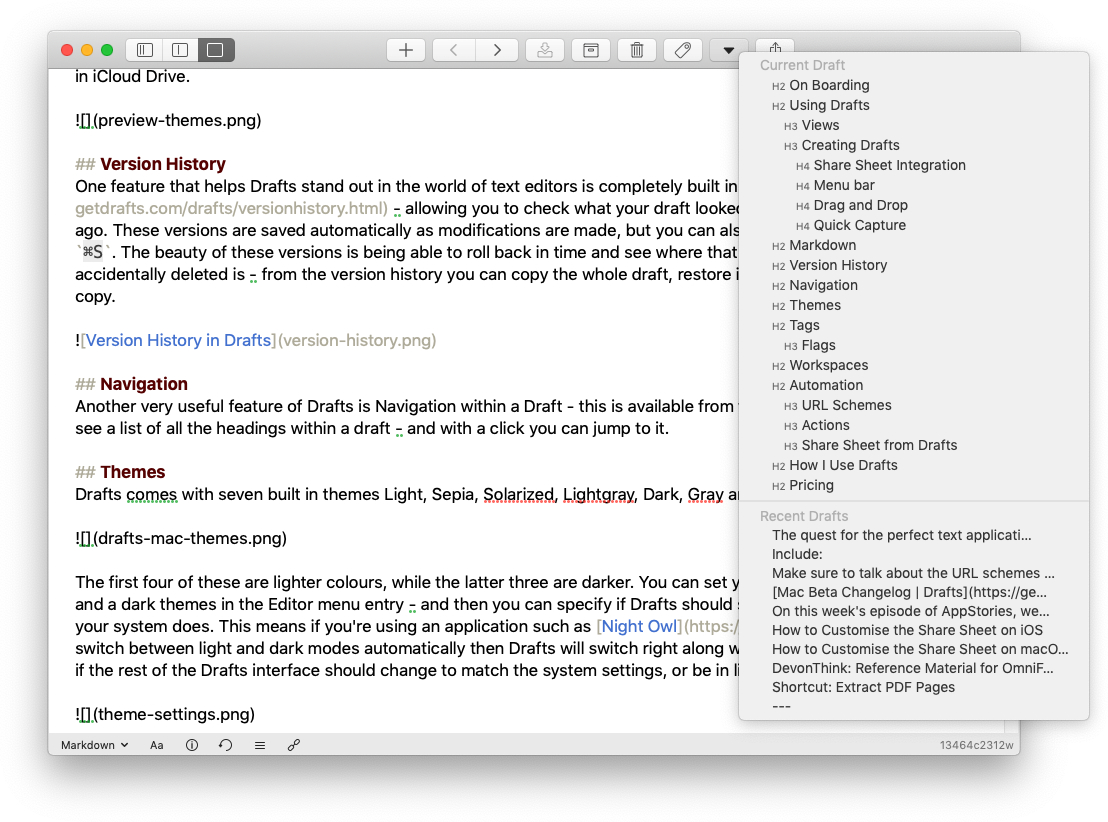
Another very useful feature of Drafts is Navigation within a draft – this is available from the toolbar and allows you to see a list of all the headings within a draft, and with a click you can jump to a specific one. Especially nice when working with longer drafts such as this review, Navigation allows you to jump straight to the area you’re looking for instead of scrolling up and down, or using the find feature which may find many instances of the words you’re searching for within your document. The navigation menu also lists recent drafts, which is a bonus if you’re using Drafts in the editor-only view.
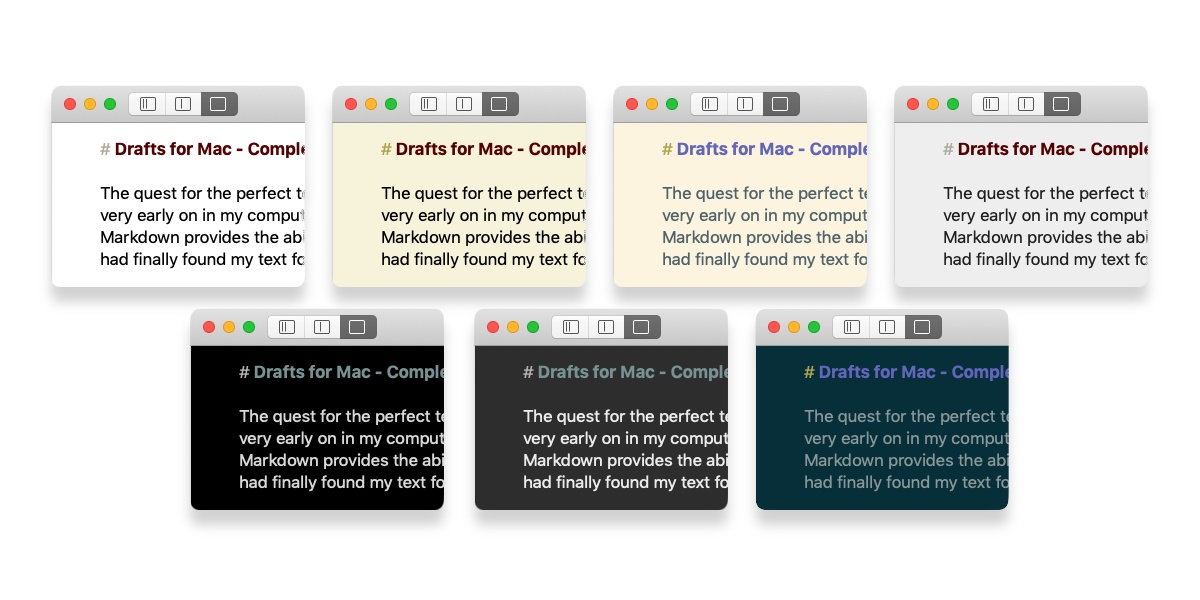
Drafts comes with seven built-in themes for the editor: Light, Sepia, Solarized, Lightgray, Dark, Gray, and Solarized Dark.
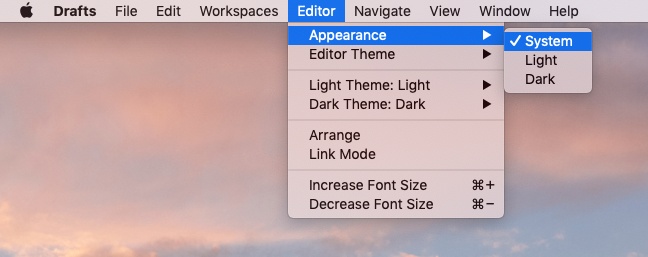
The first four of these are lighter colours, while the latter three are darker. You can set your preferences for both light and dark themes in the Editor menu entry, and then you can specify if Drafts should switch between these when your system does. This means if you’re using an application such as Night Owl to switch between light and dark modes automatically, then Drafts will switch right along with it for you. You can also choose whether the rest of the Drafts interface should change to match the system settings, or be in light or dark mode all the time.
Drafts has built in the share sheet, which does allow you to send your text elsewhere – though of course it’s not as flexible as custom actions. The share sheet takes advantage of other applications on your Mac, allowing you to send your draft to OmniFocus, Spark, or even to Yoink which converts it to a document.
As well as all of the options already covered, Drafts has a whole host of settings available in its preferences pane. You can set it to be launched at login, and to show the main window whenever the application is launched. You can also let your drafts be indexed by Spotlight, which is helpful when searching your whole Mac. You can choose not to sync Drafts through iCloud here too, but this means everything is only on your local device. Finally, you can choose to enable periodic backups on a daily, weekly, or monthly basis – and run a backup on demand as well as view these in Finder.
What’s Missing?
Actions have not yet been added to Drafts for Mac – though full support is on the roadmap for the future. This means Mac users will lack many of the automation capabilities Drafts has become so well known for – even the simplest automations, such as keyboard shortcuts for formatting text in Markdown, are missing here. As actions are one of the main attractions for many Drafts users, it’s unfortunate that the first release does not include them. However, Drafts is still a powerful text application without them. What’s more, you’re able to substitute many of the actions you might like to perform with applications such as Keyboard Maestro and Automator, or Alfred and PopClip.
As Drafts uses Apple’s CloudKit to sync rather than iCloud Drive, that means it doesn’t have a point of reference for images – so when previewing Markdown files, the app can’t display images, only text.
Related to this, Drafts doesn’t store documents where you can access them externally, such as in an app like Files. This means you’re unable to automatically add new drafts by dropping a file into a folder, nor can you share files through iCloud’s file sharing feature unless you manually export the draft as a file.
How I Use Drafts
Drafts has been ingrained in my life on iOS for so long that I’m not sure I would know what to do without it – but I tend to use my iPad instead of my Mac unless there’s a good reason not to, such as podcast recording, so I was curious to see how Drafts for Mac would work its way into my life.
The first thing I noticed is that having quick capture and clipboard capture available means I am storing a lot more information in Drafts – sometimes just for 20 minutes or so. That has been extremely helpful as it means I only have one application to reference for the URLs, notes, and reminders to myself I create throughout the day. I frequently do this through Alfred using URL schemes.
As well as using Drafts to store text temporarily, I have come to find my workflow works well employing it for long-term storage and organisation. I have several workspaces which help me to find and organise my drafts based on tags associated with them – this helps me achieve a nice level of focus whilst still letting me capture anything that occurs to me quickly and easily. I store ideas for blog posts, drafts of emails, and personal show notes for podcasts here – the sync is rock solid so I can be editing something on my iPhone on my way through the door into my office and then pick up right where I left off on Drafts for Mac.
In the absence of actions support, presently I use Handoff with my iPhone or iPad to run custom actions on the drafts that need it. Though we can still use Alfred and even Keyboard Maestro with its “click at image” feature to get started with automation on our own. Overall, just having access to my drafts on the Mac has made my day to day work much quicker and easier.
Drafts for Mac is a free download available from the Mac App Store. This download grants access to basic features including creating drafts, tagging, and syncing to iOS or other Macs. In order to use Drafts for Mac’s full capabilities, a Drafts Pro subscription is required. This unlocks workspaces, editor themes, and appending or prepending from the capture window. The Drafts Pro subscription is $19.99/year, and unlocks Pro features on iOS as well as macOS.
I am absolutely thrilled with this release of Drafts for Mac. For an application that is brand new to the platform, it feels solid and very Mac-like. Whether you’re looking for a notes application for quick notes and text, or something more complex that allows organisation, Drafts can serve your needs. For those who have never tried using the iOS version there’s no need for that, unless you want actions, in which case for the time being, picking up your iPhone or reaching for your iPad is a small price to pay for the functionality that will soon come natively to macOS.


