This summer, my all-time favorite window management utility Moom received a major 4.0 upgrade more than 12 years after the initial release of Moom 3. Ever since I went back to the Mac as my main computer, Moom has allowed me to create automations to arrange my windows and easily save and restore specific window layouts. From a fully customizable palette to new keyboard shortcut options to the ability to chain custom commands, Moom 4 offers a wide range of new features that make it an even more advanced utility that will appeal to anyone looking for more flexibility than Apple’s new window tiling feature, which is coming in macOS Sequoia.
Let’s check out the main new features in Moom 4.
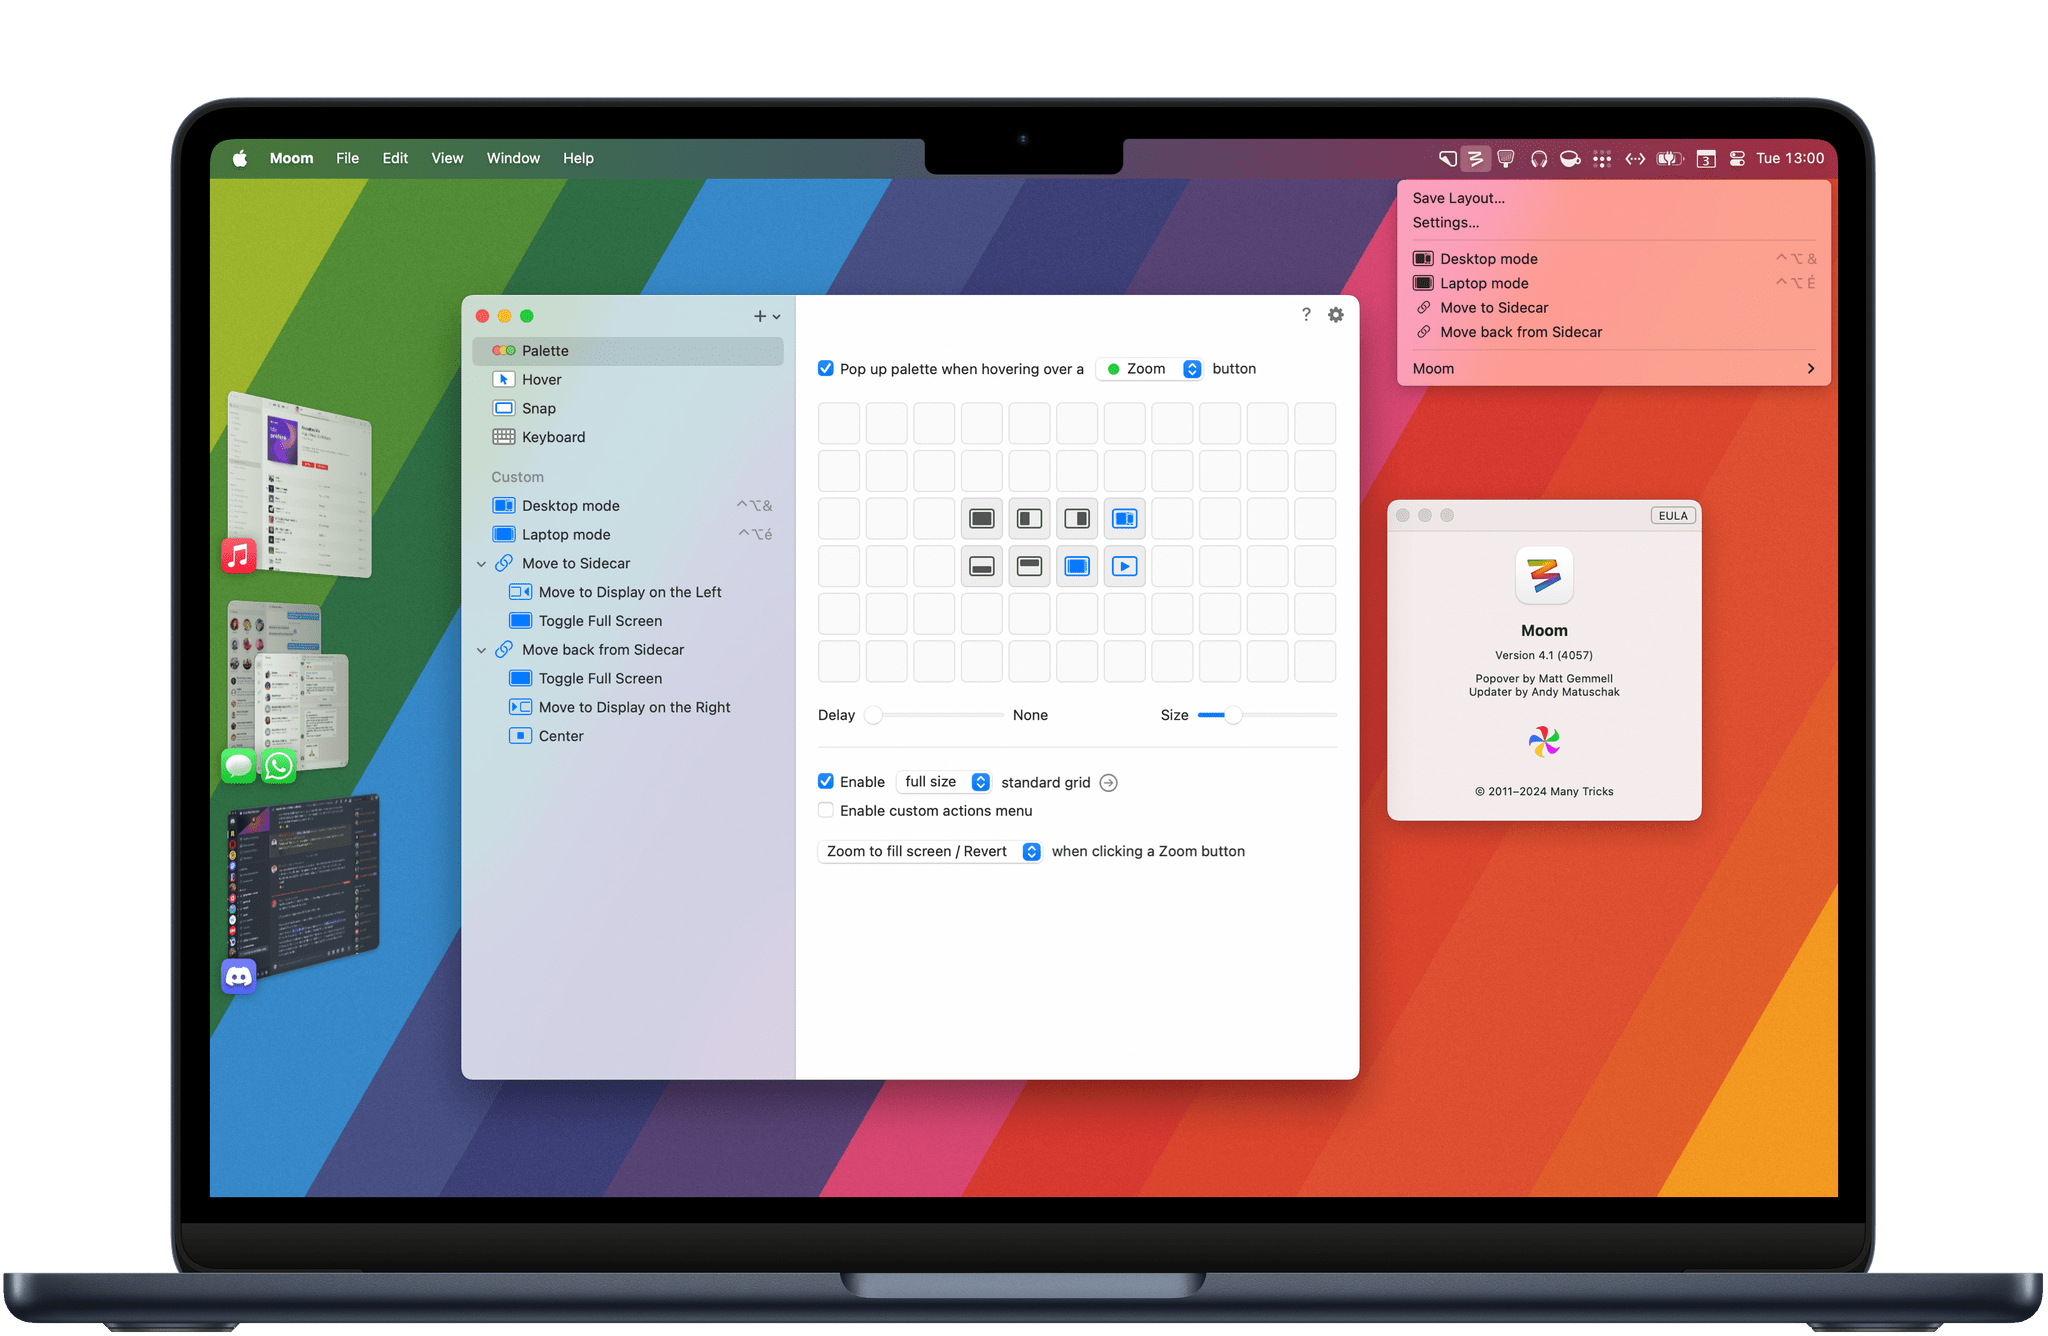
The new version of the app still includes an optional palette that appears when hovering over the green button in a windows’s title bar. This palette is meant to supplant macOS’ default tooltip and lets you quickly tile your windows to either side of the screen, maximize them to fill the entire desktop, or create a vertical layout with your windows.
But this update takes the palette even further: it’s is now entirely customizable. In addition to repositioning every button inside the palette, you can now also enrich it with your own custom shortcuts and layouts created with Moom. While I used to turn off the palette in Moom 3 and solely rely on keyboard shortcuts and predefined layouts, the ability to customize the palette has completely changed that for me. I am now a big fan of the feature.
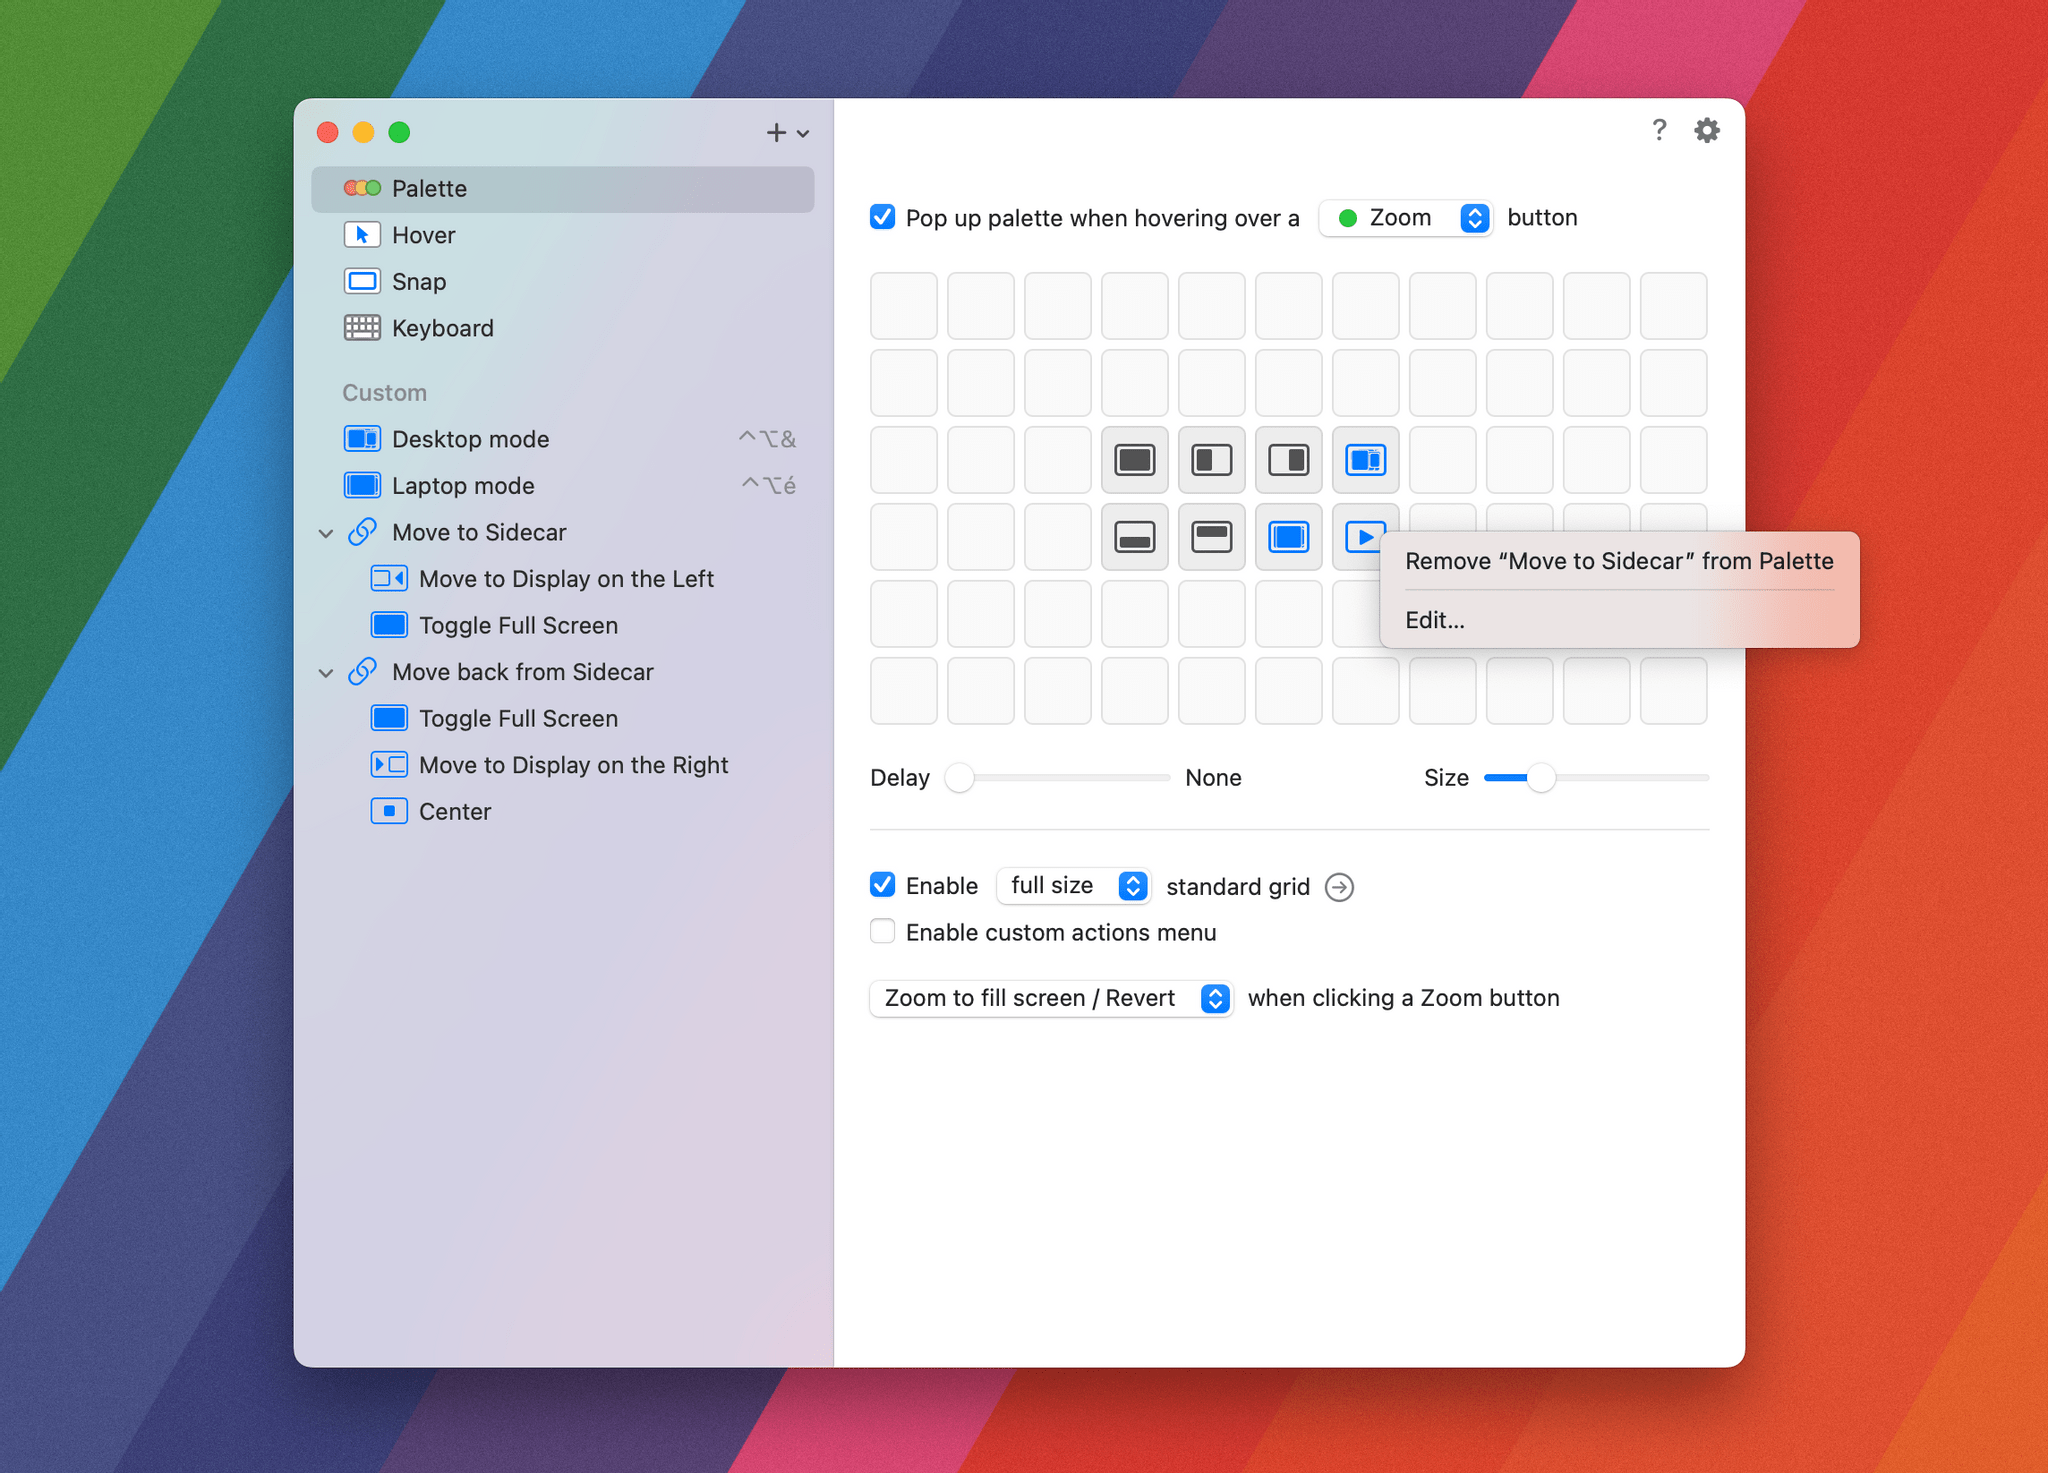
Moom’s palette is now customizable. To add one of your custom layouts, drag it from the sidebar to the palette editor.
One of Moom’s main features is its window resizing grid, which carries over from previous versions. When enabled, you can use it to quickly draw a rectangle onscreen to immediately move and resize a specific window. The grid’s cell sizes can be customized in the app’s settings, and there’s also an option to add gaps between and around tiled windows. The smaller the cells, the more flexibility you have when tiling windows on the fly.
Moom’s window resizing grid is still here.Replay
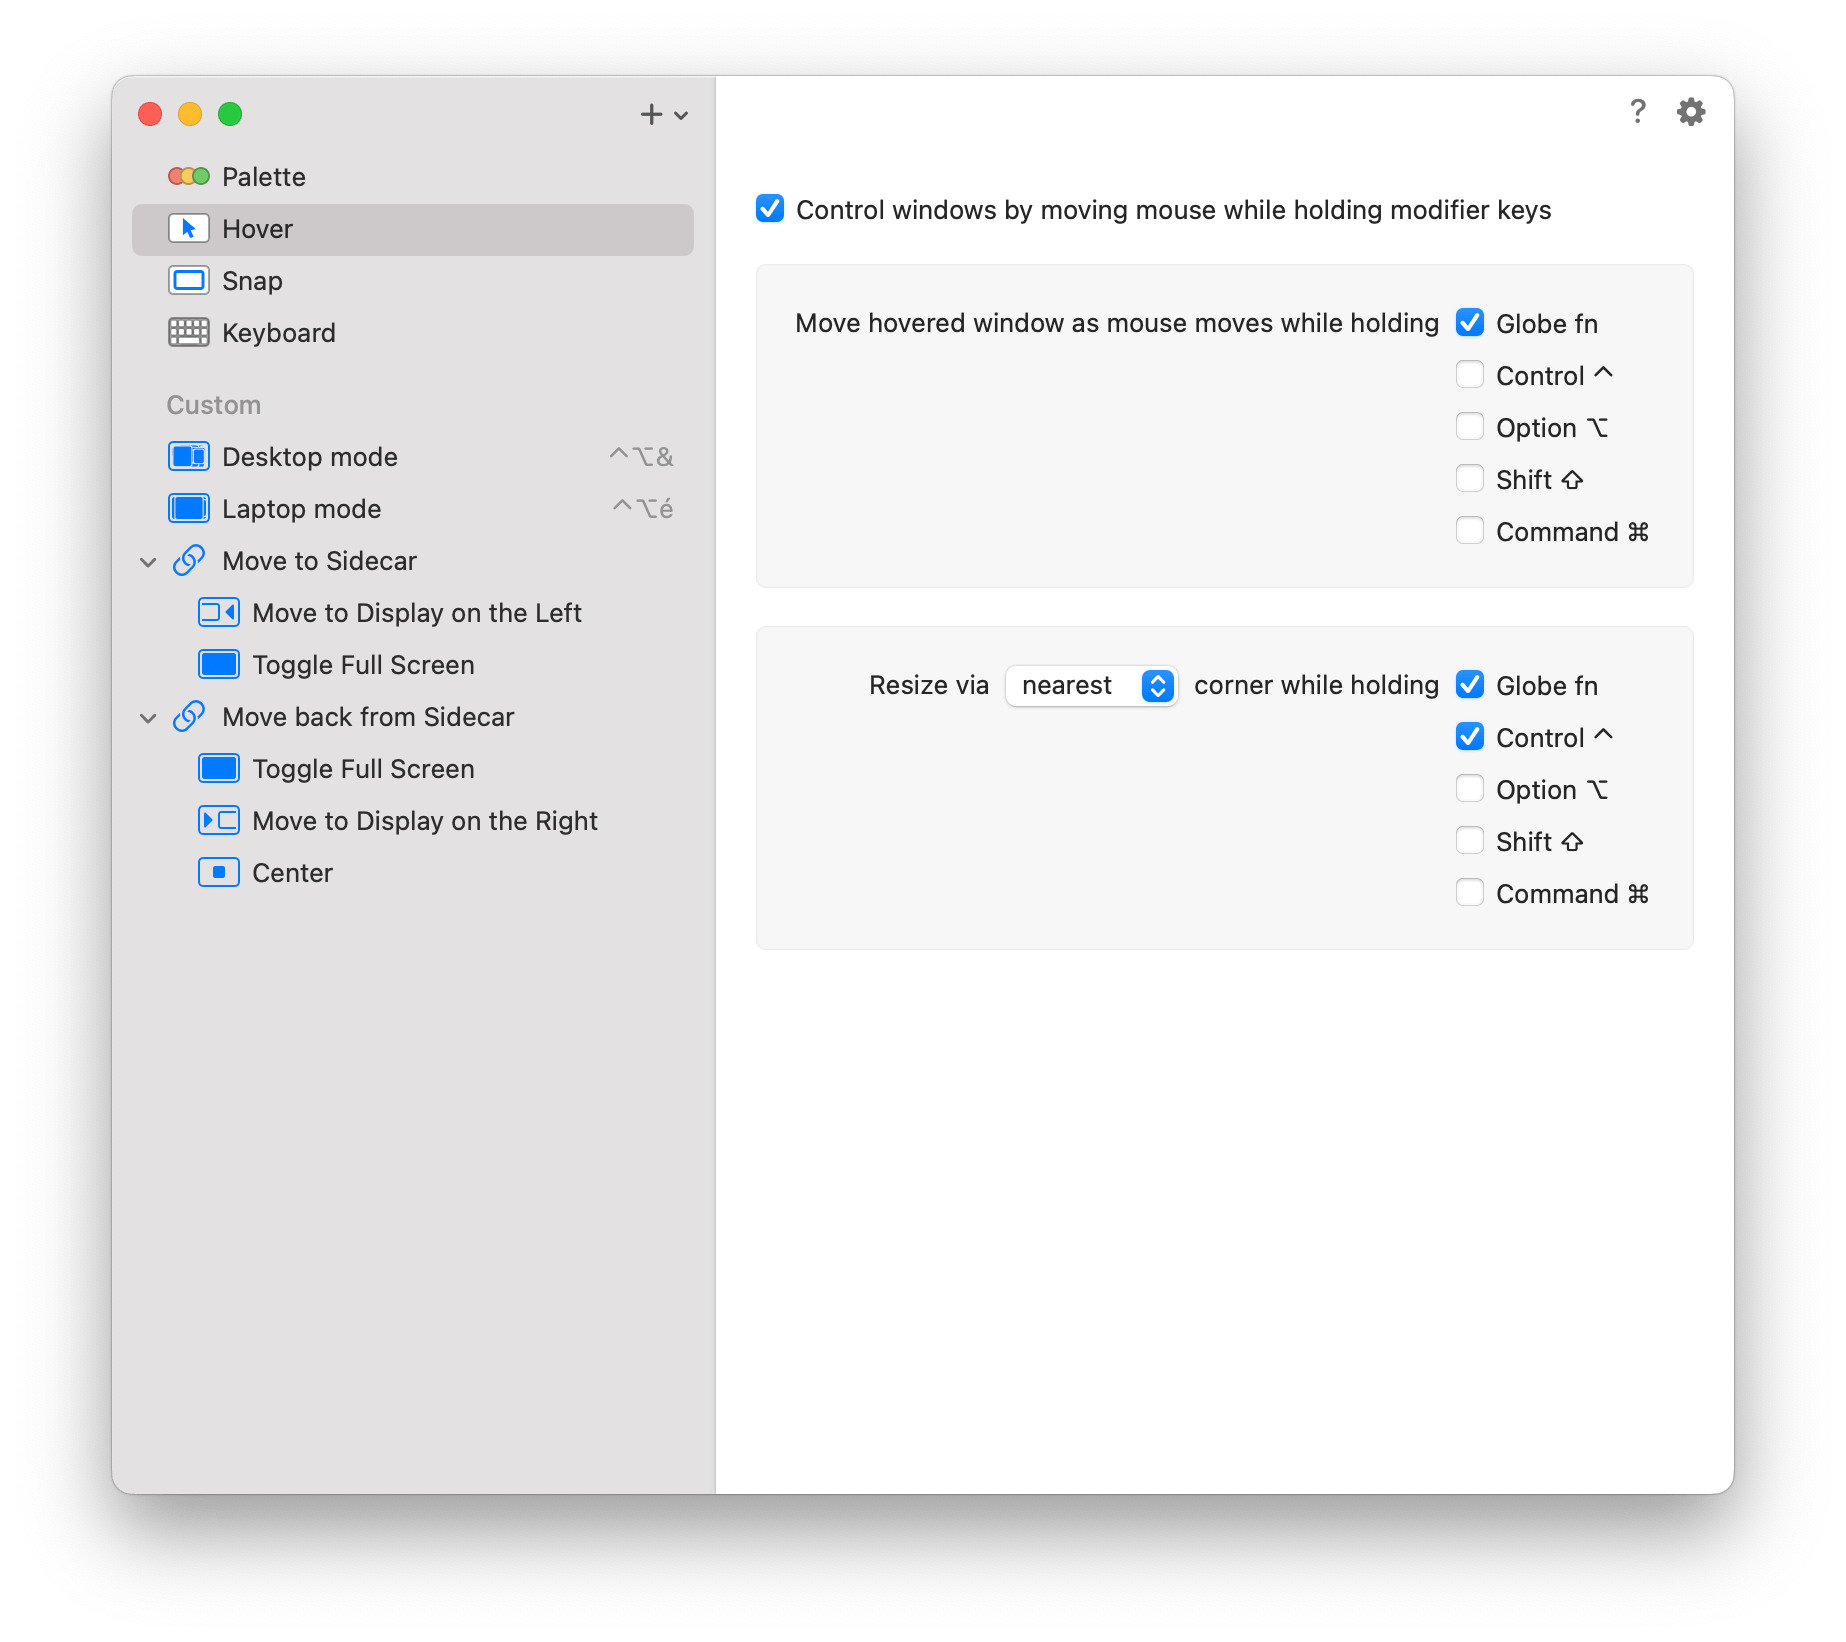
But if like me, you’re not a fan of arranging your windows in a grid and prefer to let them float above each other, Moom 4 has you covered with a great new feature called ‘Hover.’ This lets you move and resize windows on the fly with your cursor while holding down specific modifier keys, without the need to click and hold on a window’s title bar or reach for one of its four corners.
In my setup, I’ve chosen to use the Globe (fn) key as the move window modifier and Globe + Control (^) as the resize window modifier. In practice, this means that I can place my cursor over any window onscreen and hold down the Globe key to reposition that window simply by moving the mouse. To resize that window, all I have to do is place my cursor near a corner and add the Control (^) key into the mix. You may think that I’m exaggerating, but in usage, this combination makes rearranging windows with the mouse extremely satisfying.
Rearranging and resizing two Safari windows using Moom 4’s Hover feature.Replay
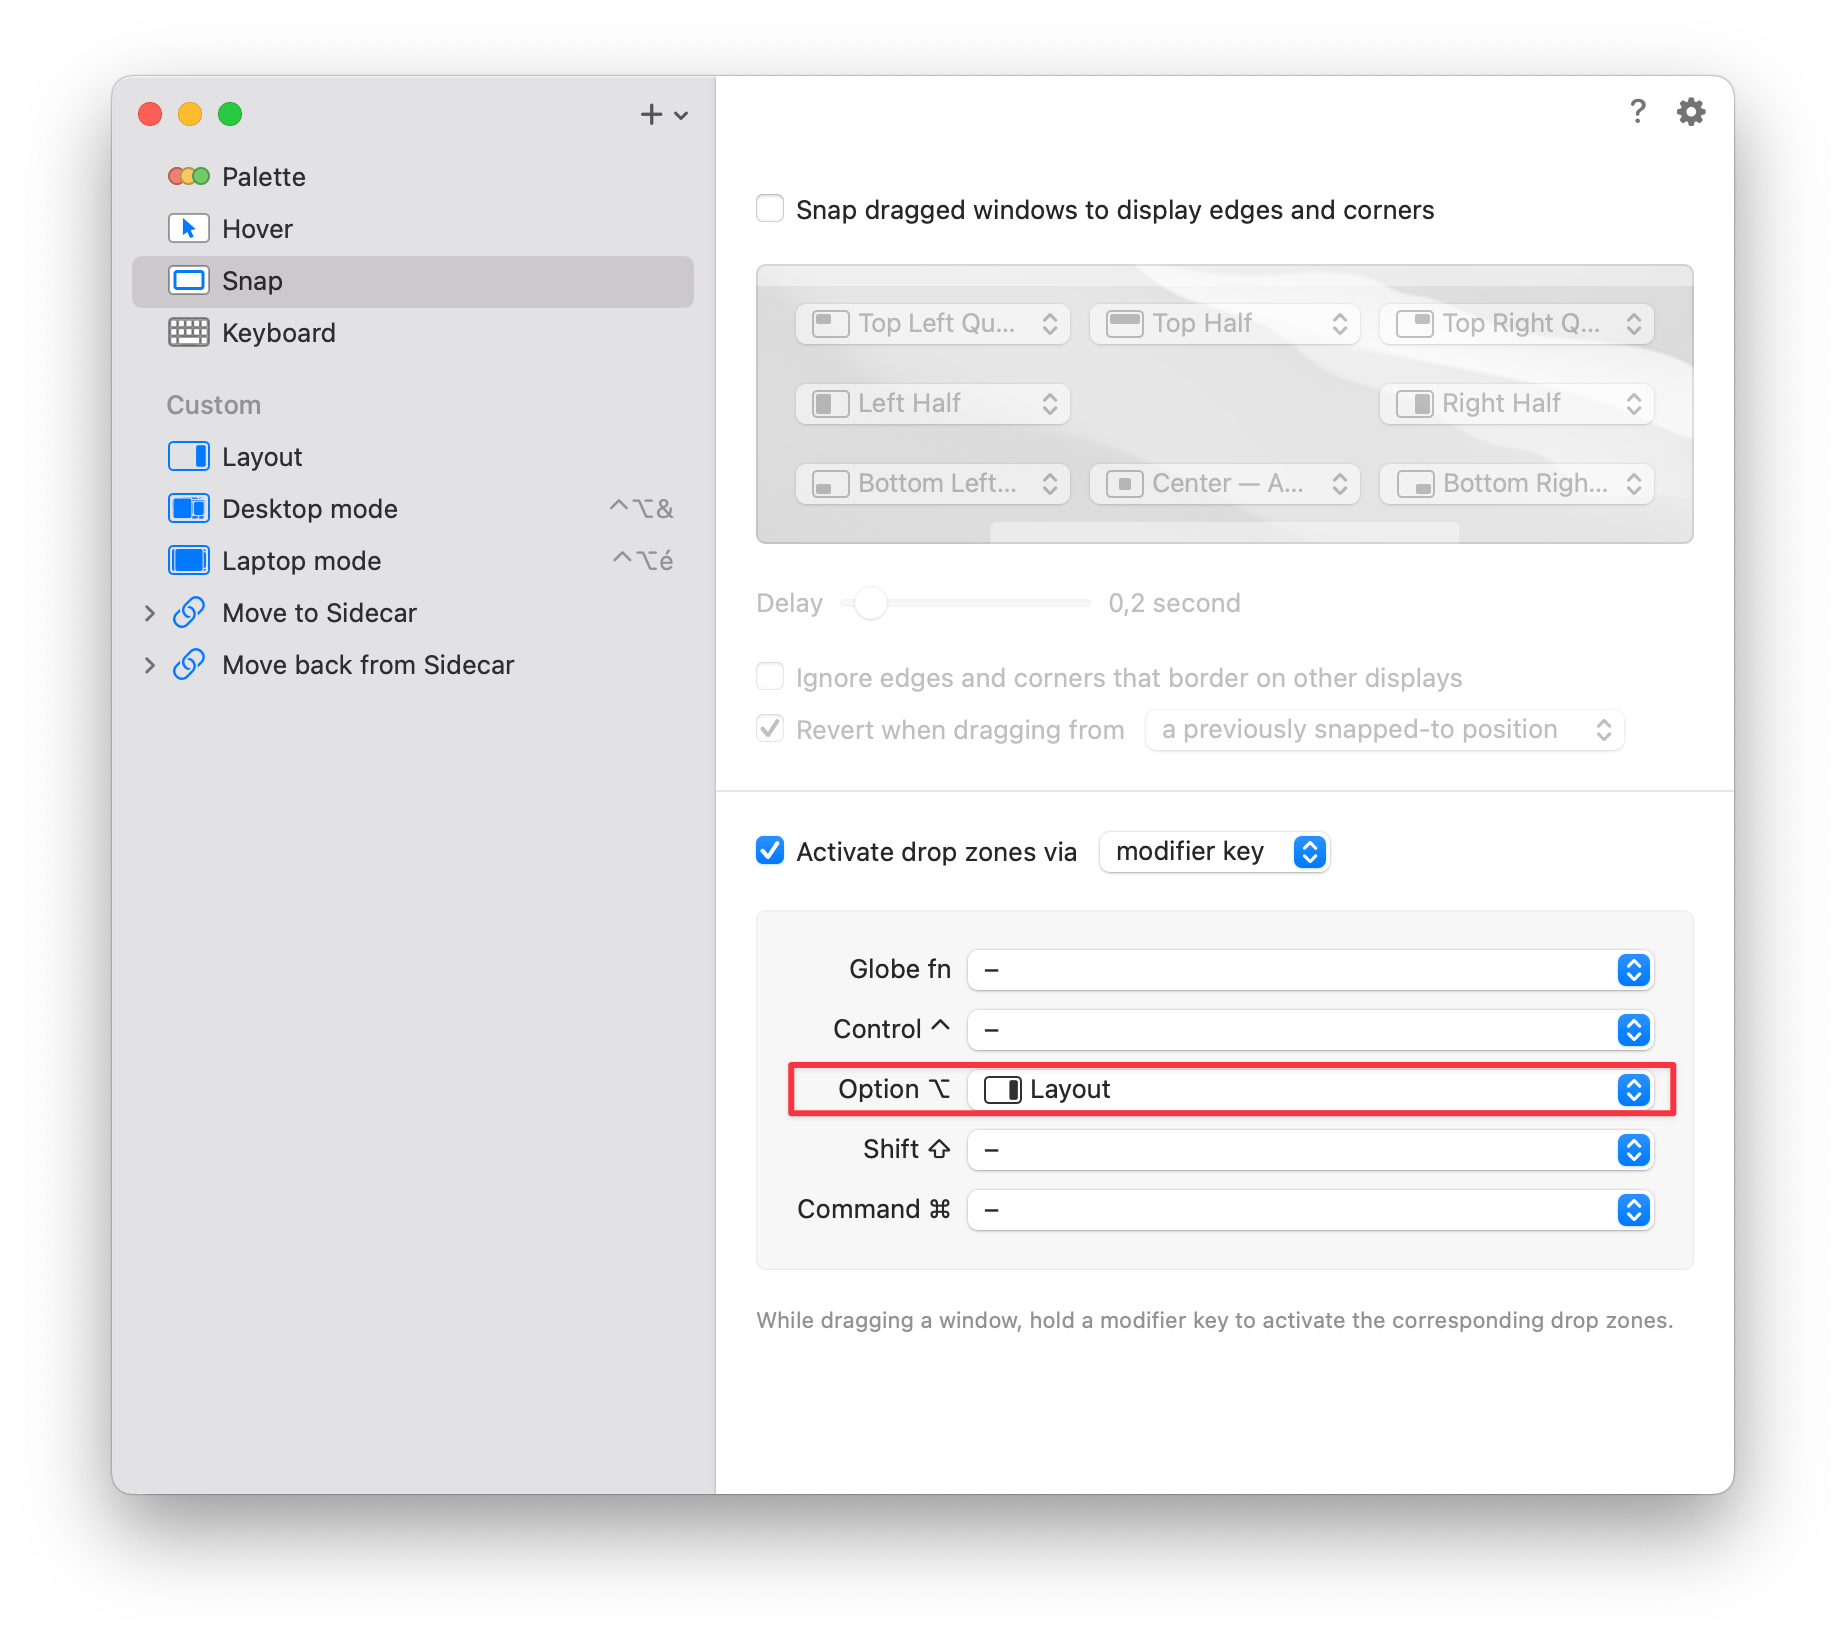
This modifier key logic has also enriched Moom’s ‘Snap’ feature. In addition to replicating the experience from Windows 11 and macOS Sequoia by letting you drag windows to the edges of the display to tile them, Moom 4 also allows you to hold down the modifier key of your choice when moving a window to quickly place it in a custom ‘drop zone’. This is especially useful if there is an area on your screen where you always like to keep a specific application.
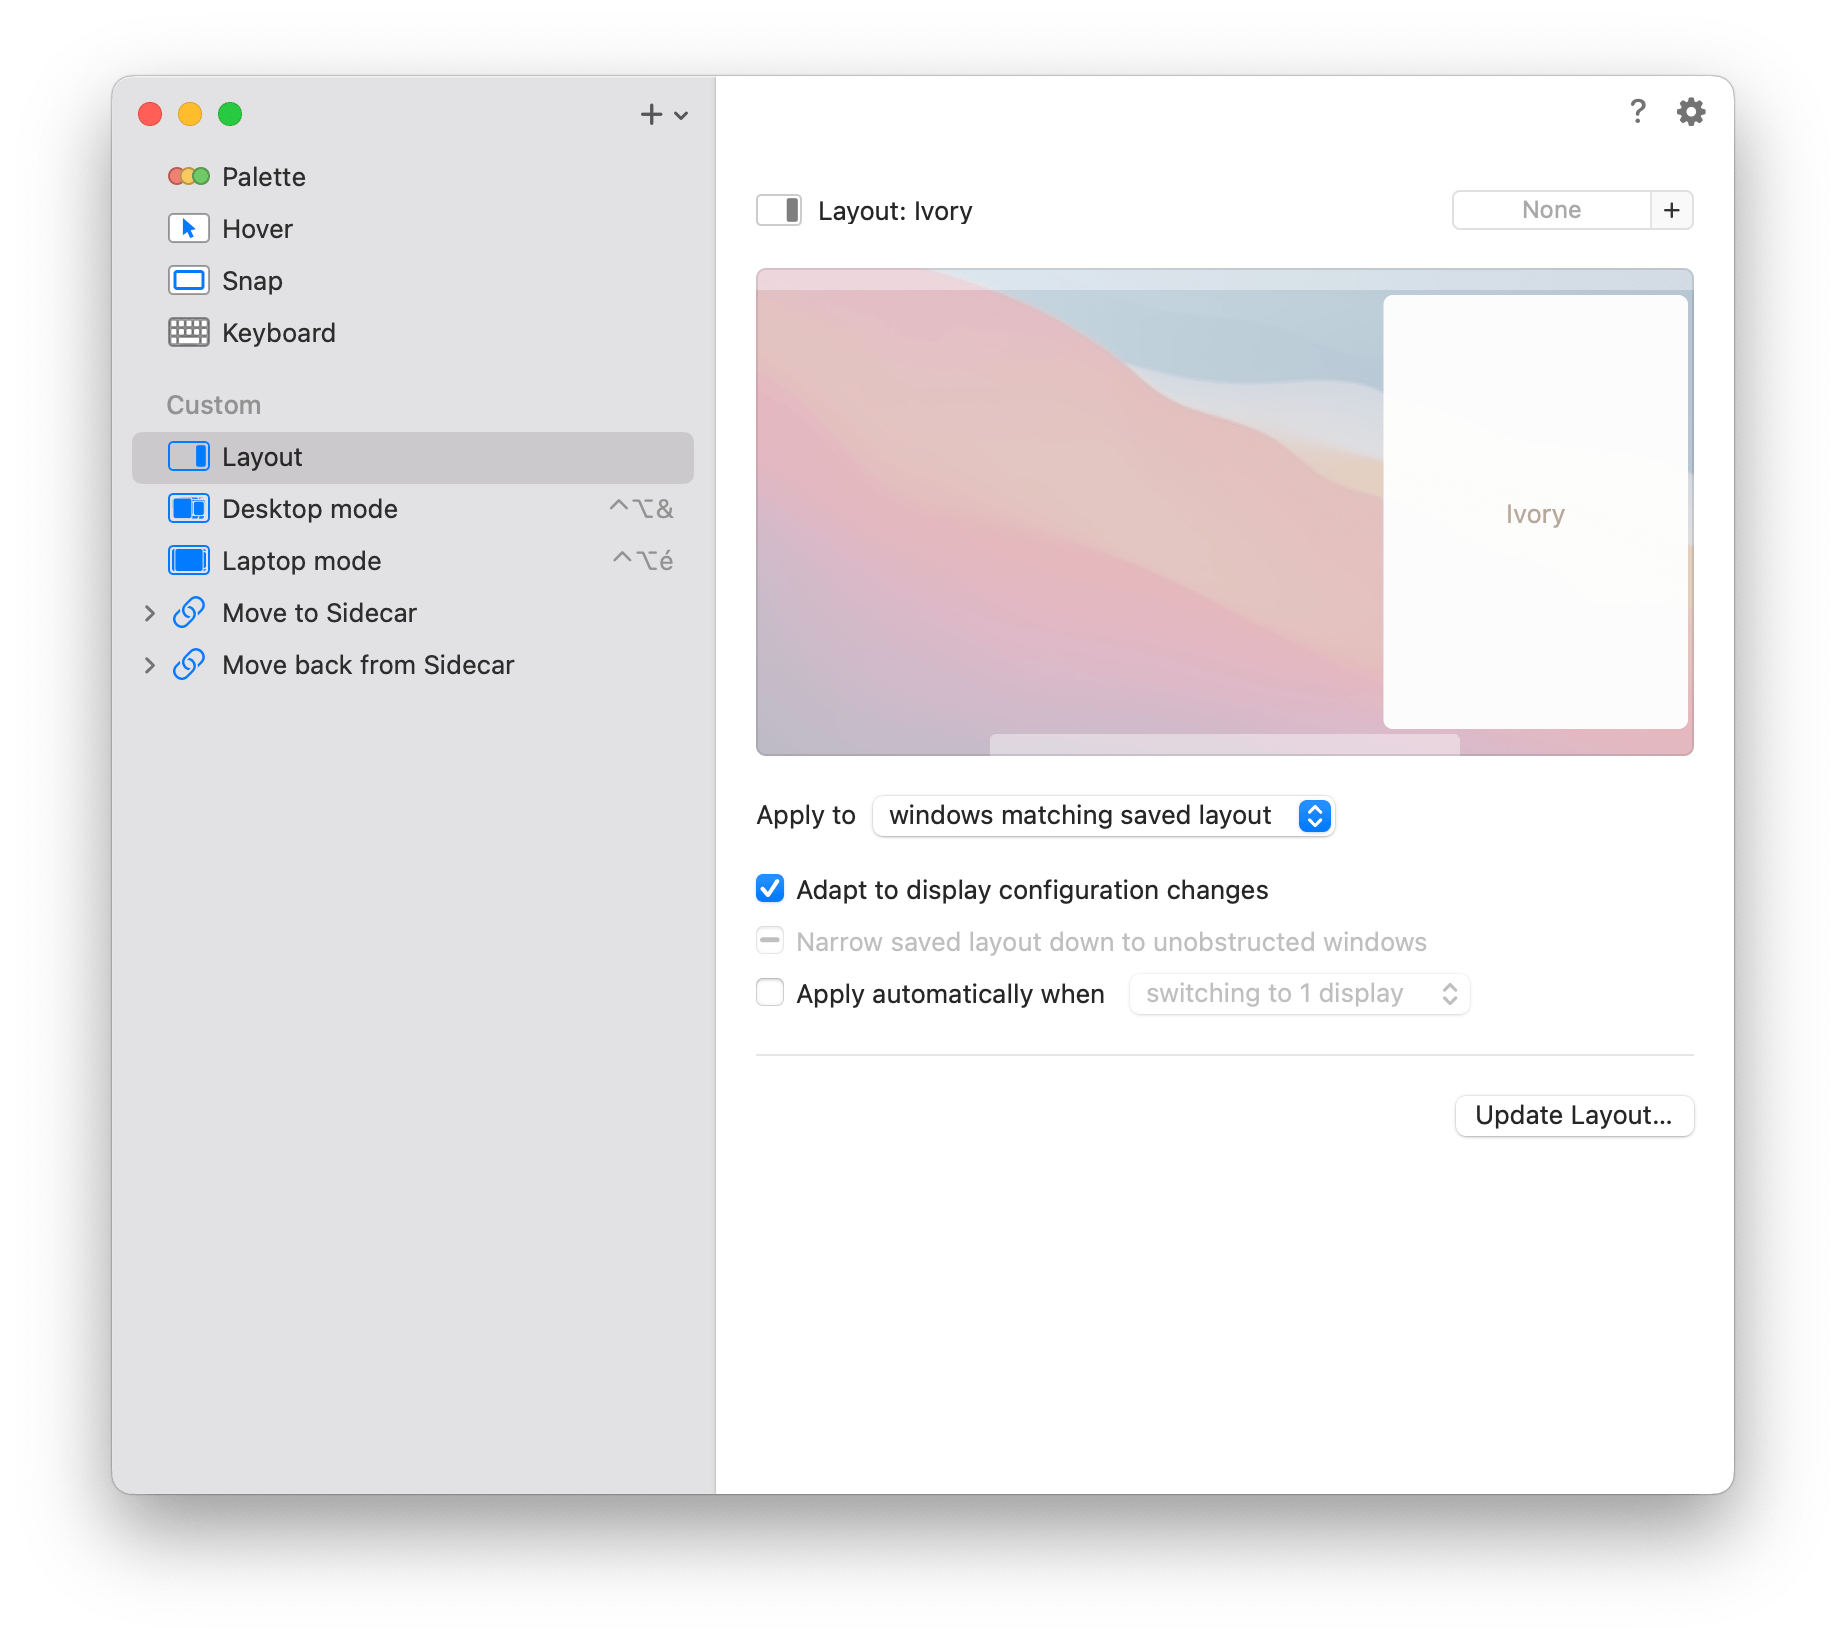
For instance, I have set up this feature to set up a custom layout that allows me to quickly snap the Ivory window back into a predefined position on the screen:
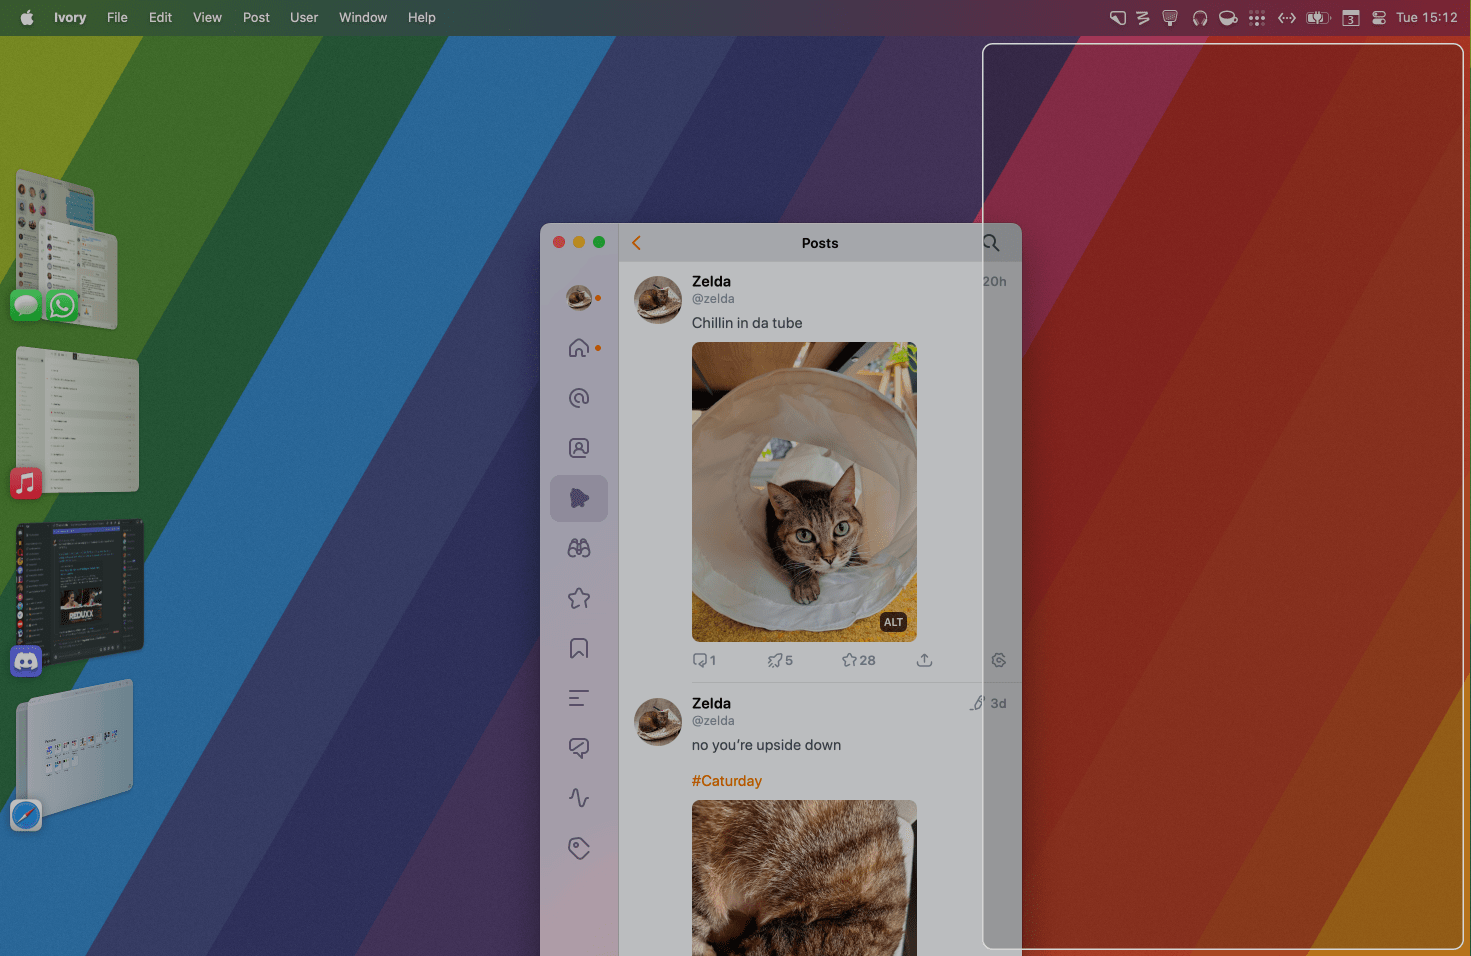
…all I need to do is hold the modifier key while moving the Ivory window to snap it back into position.
In addition to the ability to save and restore custom window layouts, Moom 4 can now chain any of the app’s built-in commands together. For example, you can create a chain that will successively resize a window and center it on the screen.
The possibilities with chained commands are endless, and it’s hard to imagine every conceivable use case, but I was able to leverage the feature to create two useful chains for my workflow. At my desk, I often use my iPad Pro as a secondary display with Sidecar while I’m working. When that happens, I almost always like to put windows in full screen on the iPad’s display. However, this process is often tedious and requires that I spend ten seconds every time moving a window and putting it in full screen.
To solve this, I used Moom 4 to create a chain called ‘Move to Sidecar.’ When triggered, this chain moves the currently active window to the iPad’s display and immediately puts it in full screen. I created a second chain called ‘Move back from Sidecar,’ which exits full screen and immediately moves the window back to my main display. Now, I can easily send a window to the iPad’s display with a single click, directly from Moom’s palette, without having to manually drag the window over and toggle full screen.
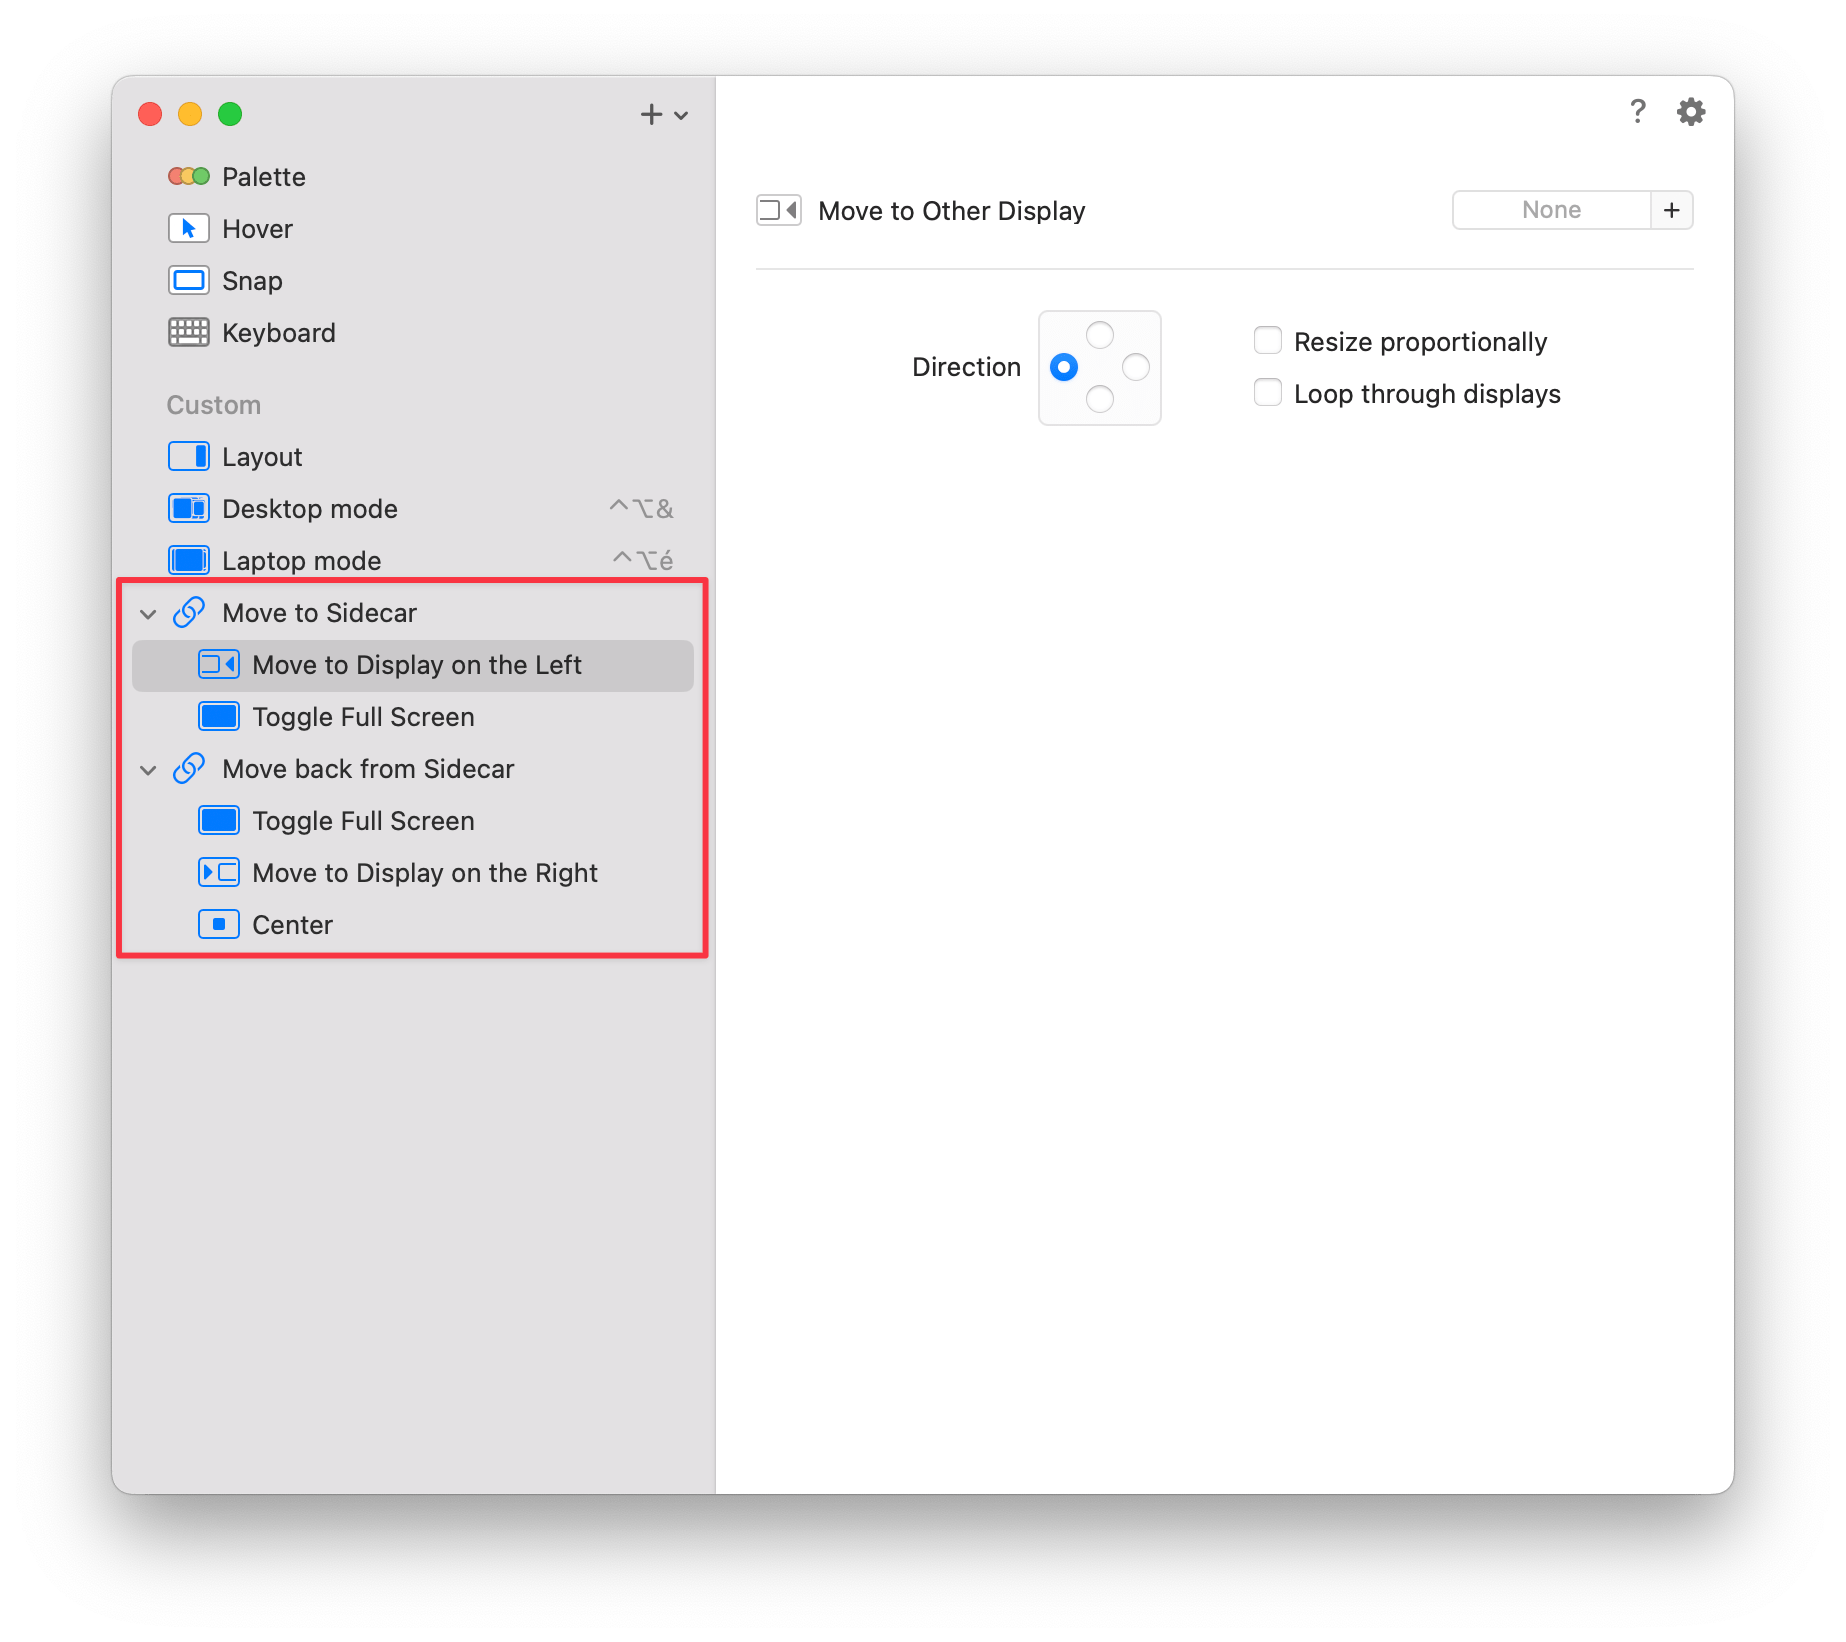
I’ve set up a chain in Moom 4 to easily move a window to the iPad’s screen in Sidecar and immediately put it in full screen, plus a second chain to quickly move a window back to the main display.
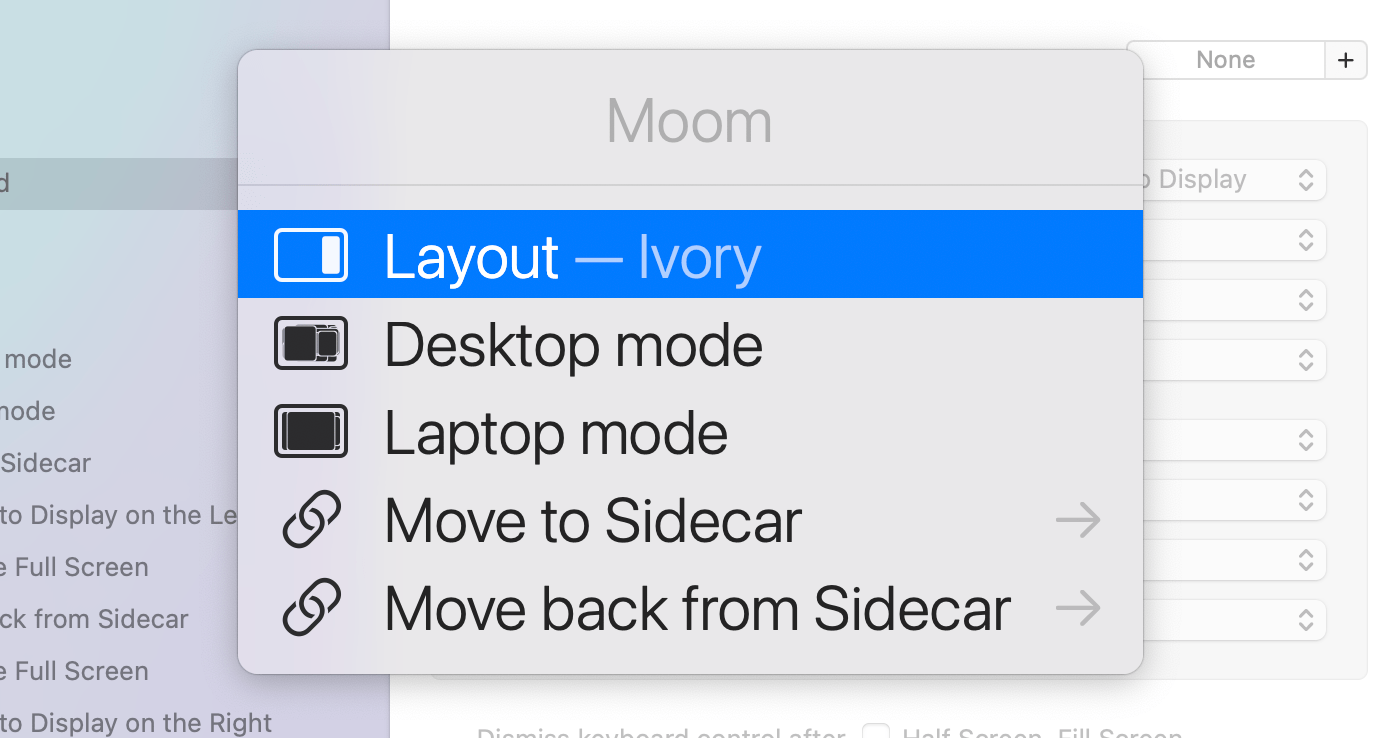
Since almost everything in Moom 4 can be tied to a keyboard shortcut, all of these features are available without the need to ever use the mouse. But even if you haven’t assigned a keyboard shortcut to one of your custom commands, you can still trigger it using only the keyboard via Moom’s new onscreen controller. The controller can be launched via a dedicated keyboard shortcut (I’m using Option ⌥ + Shift ⇧ + H) and looks a lot like Spotlight on the Mac. When the controller is displayed, you can immediately start typing to select and run a specific Moom command, or navigate between options using the arrow keys.
Moom 4 is an incredible update to a long-standing Mac utility that had already found its place on my list of apps I always recommend to Mac newcomers. The app is more flexible than ever and will prove itself useful to a wide range of Mac users, including both those who are looking for ways to manage their windows entirely from the keyboard and those who would rather use the mouse.
This is especially true when you consider that every single feature in Moom is optional and can be disabled entirely. Think of Moom as a window management Swiss Army knife: it is always nice to have, even if you’re not going to use more than half of its built-in tools.
While macOS Sequoia is finally getting the ability to tile windows side by side this fall, it is clear that Moom has nothing to worry about. Its flexibility and enhanced potential for automation place it miles ahead of anything macOS has to offer natively.
Through September 4th, Moom 4 is on sale for $10 for new users and $6 for users upgrading from Moom 3. After that date, Moom 4 will be available to purchase for $15, or $8 for Moom 3 users. The app can be purchased and downloaded directly from ManyTricks’ website.


