This Week's Sponsor:

PowerPhotos

The Ultimate Toolbox for Photos on the Mac


Posts in tutorials

Screen Sharing For Alfred Brings VNC To Your Fingertips

Screen Sharing is a feature built into Mac OS X for remotely controlling another computer through the use of virtual network computing (VNC). Apple’s native screen sharing client is buried in the operating system making it nearly impossible to find the app when you actually need it. On top of that, it really lacks basic features like being able to store a connection for future use. Due to these shortcomings, most people turn to third party applications for managing their VNC connections. A quick search in the Mac App Store will turn up some pretty great options including Edovia’s Screens. Although apps like these work extremely well, not everyone wants to spend that much to easily connect to a remote computer. This is why I created the Screen Sharing for Alfred extension. I wanted Alfred to be able to function as my VNC client and really extend the functionality of the Apple’s native Screen Sharing app.

Screen Sharing for Alfred adds the ability to store information about VNC connections and quickly access them with a simple keyboard command. It is written in a beautiful fusion of shell scripting and AppleScript so it is fast, efficient, and capable of interacting with the user through AppleScript’s GUI prompts. It also incorporates David Ferguson’s genius Extension Updater system in case any new features are added in the future. For those unfamiliar with Updater, it is an extension for Alfred that allows developers to make bug fixes and add new features to released extensions – then when users run Updater, it will download the latest version of any extensions that have updates available. Read more


Logging with Day One and Alfred

Yesterday, Brett Terpstra posted a fantastic little script to leverage Day One’s built-in CLI (command line interface, more information available here) to create new journal entries from the Terminal or an app launcher. Brett has posted instructions on how to use Launchbar with the script, or skip the app launcher part altogether and go with the Mac’s Terminal instead:

Day One already has a quick entry palette in the menubar. It also has a command line interface (/usr/local/bin/dayone)1 which provides some geeky options (try dayone in Terminal) and the flexibility needed to replace my current logging system. You can create entries quickly with either method, but I wanted just a little bit more out of it. I built a quick script which allows a basic syntax for starring entries and defining dates (using natural language) inline in the entry itself. It can be used from the command line, from LaunchBar (or similar) and can be incorporated into just about any scriptable workflow.

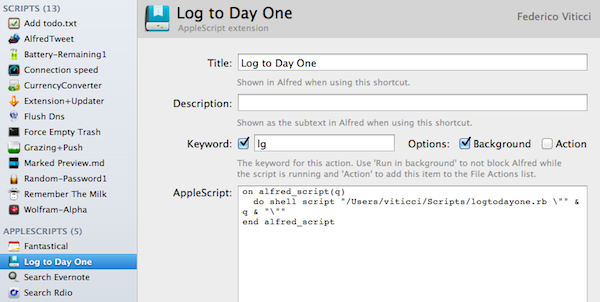
I wanted to make the script work with Alfred, my app launcher and navigation tool of choice, and it turns out the effort to modify Brett’s script is equal to zero. I simply replaced “on handle_string(message)” with “on alfred_script(q)” and “end handle_string” with “end alfred_script” to make it work in Alfred. Obviously, you’ll need to fill in the path to your script after you’ve followed Brett’s instructions.

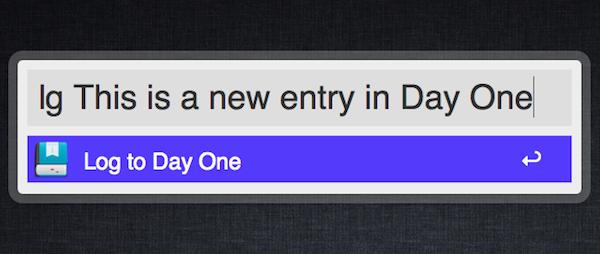
The three Day One entries above were created (and starred) using Alfred.

Before you create a new Applescript extension in Alfred, don’t forget to download Brett’s script and make it executable in your desired location, and create a symlink for Day One’s CLI (Show Package Contents on Day One, then navigate to Contents/MacOS/dayone - that’s the CLI you have to symlink) in your usr/local/bin/ directory.

You can check out Brett’s post here, and catch up on our coverage for the latest version of the app, Day One 1.5 (Mac and iOS).


A Hack to Get Back “Save As”

A Hack to Get Back “Save As”

And to add insult to injury, as a keyboard junkie it’s not just the removing of “Save As” that saddens me. It is also the removal of a very handy keyboard shortcut that I used many times a day: Command+Shift+S. And so, by harnessing the power of Keyboard Maestro, I set up Command+Shift+S as a “Save As Hack”.

Shawn Blanc laments about how Lion’s Duplicate and Revert functions — replacements for the apparently outdated yet super useful Save As function — just don’t cut it when you want to save multiple versions of a document or quickly save a copy with an alternate name (I do this a lot when self-editing lab work in college). Apps like OmniOutliner work around this by offering templates (which were available before Lion mind you), but even then the Save As function offers a direct path to quickly renaming the file and shoving it in Dropbox if you have to.

Duplicate performs this function in that you physically get a new document copy presented on the desktop. The problem with Duplicate is that while it’s intended to be user friendly, it ends up making more work than is necessary. Instead of simply renaming and saving a document, you have to sit through an animation, close the original document, then rename and save the new document. I think its safe to say most Mac bloggers are inherently power-users, and have come to rely on quick keyboard shortcuts and tools that were standard up until now. While Duplicate isn’t as friendly for us, Shawn’s right: the worst part really is the lack of that shortcut key.

Shawn has a Keyboard Maestro macro available on his site for download. Alternatively, John Gruber and Ben Brooks offer a similar solution that doesn’t go as far, but brings back the shortcut irregardless through System Preferences.

Permalink

Jailbreakers: Hide the Store Button in the Music App

NoStoreButton on Cydia

NoStoreButton on Cydia

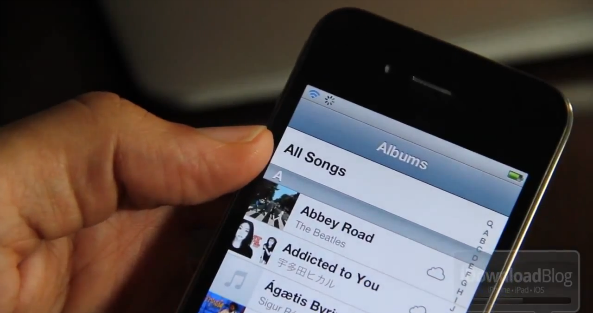
Apple’s Music app is pretty fair when it comes to finding and playing back your favorite tunes, but occasionally I’ll accidentally press the integrated Store button as I try to back out of the Albums view. In getting a Store button where I expect a back button (of course I’m probably doing it wrong), why not just remove it altogether?

If you’re jailbroken, Cydia has a self explanatory tweak that’ll do just that. Download NoStoreButton, respring, and relaunch the Music app to find the Store button hidden for good. The tweak is free to download, and iDownloadBlog walks you through the process with a video tutorial on their website.

[via iDownloadBlog]


You can Totally Snap iPhone Photos with your Headphones

I still take photographs the old fashioned way, but photographers with a tripod and mount will love this tip. From the Why Didn’t I Try This department, OS X Hints shares that you can use the volume up button on the included Apple headphones to snap a picture. Photographers who don’t want to be hands on with their iPhones when taking photographs will appreciate having free remote bundled in with their iPhones — those headphones don’t need to be in your ear after all.

Perhaps the best part is that this can be paired with Bluetooth devices! I’m not sure if every headset with volume controls will work (as the buttons need to map correctly to the iPhone), but if a Bluetooth headset can increase the iPhone’s volume it should work.

You can turn your bluetooth headset into an instant wireless remote.

A steady photograph is ultimately a cleaner photograph. You can reduce a lot of camera noise, improve the quality of the picture, and take better night photographs by simply steadying your iPhone. If you have the kit available to prop your iPhone for photographs, then getting even more hands off will really help make the different between a good photograph and a great one. The iPhone 4S camera is among the best in class for smartphones, and what better way to utilize as a semi-professional device than to use what we already have available as a remote shutter release? It’s an excellent tip, and if you hadn’t already tried this, consider it a worthy addition to your knowledge noggin.

Quick note: Camera+ recently got its volume-snap back, and it works here too. Don’t forget about the GLIF (shown above) for easy iPhone mounting to your favorite tripod.

[OS X Tips via Macgasm]

Note: We published this tip in our initial iOS 5 tips roundup, but none-the-less it’s a great reminder for new iPhone 4 and iPhone 4S owners.


Use “Mobile Documents” Folder To Sync Files with iCloud Across Macs


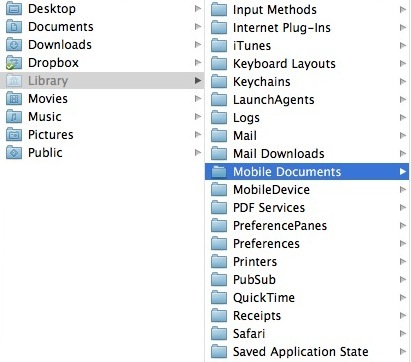
Hidden into Lion’s ~/Library (which can be displayed in a variety of ways as we detailed in our Lion review) there’s a Mobile Documents folder that’s capable of syncing files across Macs configured with iCloud, Mac OS X Hints reports. Sure enough, the Mobile Documents folder is the directory iCloud uses for Documents & Data, a feature available both on iOS 5 and Lion. Mobile Documents is the same folder that contains data for apps that already work with iCloud, such as Instacast, iWork, or Galaxy on Fire 2.

What’s interesting about this folder when used with two Macs under the same iCloud account is that it provides a basic “drop box” functionality for files that don’t necessarily belong to an iCloud-enabled app. As you can see in my screenshot, the Mobile Documents folder contains data and sub-folders for App Store apps that work with iCloud. In order to follow Mac OS X Hints’ suggestion, I tried to drop a few images directly in the folder – as I’d normally do with Dropbox – using my iMac. In a few seconds, those files were synced back to my MacBook Air. Both my iMac and MacBook Air use the same iCloud account, and have Documents & Data on. Clearly, those images didn’t belong to an officially-registered iCloud app (such as Instacast), but the files were synced back and forth between the two machines.

So what we have here is a cool hack to use the Mobile Documents folder as a temporary Dropbox-like solution based on iCloud. This is interesting because Apple could technically prevent files that don’t belong to a signed iCloud app from syncing across Macs, but decided not to, at least on 10.7.2. If you think about it, this could imply the company will offer some sort of iDisk replacement sometime in the future, or build a GUI for syncing documents back and forth between Macs manually. Or, it could be the foundation for an upcoming iWork for OS X update. Or then again, it could simply be a cool trick that won’t receive any official support from Apple.

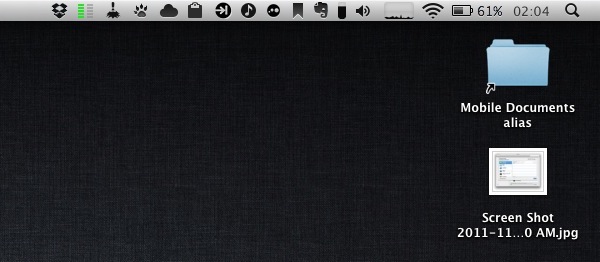
If you want to try the Mobile Documents sync (Mac OS X Hints claims the system even supports conflict resolution, which was suggested by John Gruber months ago), I’d recommend you make an alias of the folder, drop it onto your Desktop, and start dropping files into it. Make sure all your Macs are configured with a single iCloud account, and do not delete the documents & data that are already in there, or you’ll lose precious app libraries, preferences, or saved states.

Finally, please note that even if files you’ll sync won’t show up in “official” iCloud apps, they’ll still count against your iCloud storage.

Update: here’s how you can use Mobile Documents with GoodReader for iOS.


You Have Your iPhone 4S: Now Put a Ringtone on It

The iTunes Tone Store. Rings. Alerts. Tones.

The iTunes Tone Store. Rings. Alerts. Tones.

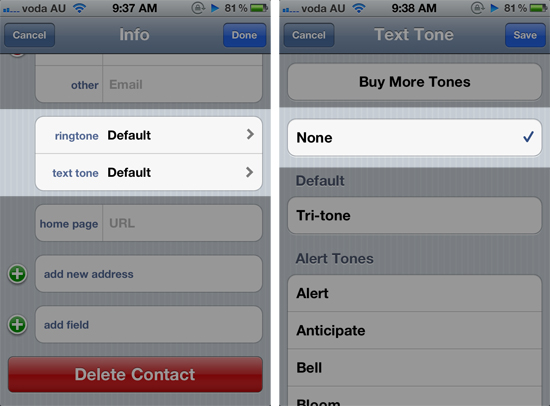
While you might not be able to replace Siri’s voice with GLaDOS (yet), you do have control over how your iPhone notifies you of incoming calls and messages. New to iOS 5, the iTunes Store includes a special tones store where you can purchase new tones starting at $0.99 for alerts, and $1.29 for popular ringtones. The tones available feature everything from Star Wars sound effects to your favorite music from the 90s.

Read more


iOS 5: Tips, Tricks & Hidden Features

As exciting as every new major iOS release is, there’s just as much if not more excitement in finding the little things that no one knows about. Apple spends a lot of time creating major additions and changes for their releases, and then lets the users try to figure out all the small stuff. Well, not everyone has time to figure them out or doesn’t want to go through the effort to do so. This is where MacStories comes in. We know our readers are all about the details, so we went on to scan, search and pry our way through iOS 5 to find many of the hidden treasures that will make your iOS experience even better.

More iOS 5 coverage here.

Read more


Scripting BBEdit - Part I

I was recently listening to an episode of the popular podcast Build and Analyze where Marco Arment was discussing his experience of leaving the comfort of TextMate to test drive BBEdit for a week. The results of his experiment were similar to many others who have attempted the same feat and after that week, according to Marco, he had returned to TextMate. I once did the same experiment. A dedicated TextMate user who switched to BBEdit for no other reason than the lack of updates and BBEdit happened to be in the Mac App Store at a greatly reduced price. I jumped on the opportunity to try the legendary text editor with its newly added fullscreen, auto-save, and resume features.

The humorous part of listening to Marco describe his time with BBEdit was knowing that we shared identical opinions on all of the quirks that differentiate TextMate and BBEdit. I don’t think one is any better than the other, I just think they solve the same problem with two different methods. What features BBEdit lacks, it generally makes up for in scripting ability. It has one of the most detailed and feature-rich AppleScript dictionary I have ever seen. So as I came across quirks that I could change with AppleScript, I wrote a script for them and that is what I would like to share in this mini-series of posts. Please note these articles are intended for people that are familiar enough with BBEdit to be able to add a new script and assign a keyboard shortcut in the preferences.

Wrapping Text

The first thing that drove me absolutely crazy with BBEdit is when hitting the quotes or parentheses key while text is selected, BBEdit doesn’t wrap the text in that punctuation but instead writes over the selection.

To alleviate this issue I wrote six AppleScripts (one for each commonly wrapped punctuation) and I assigned each one a keyboard shortcut. In this situation I think the keyboard shortcut is just as important as the script itself. It has to be easy to remember and close to the position your hand is already in when typing the punctuation key. So in five of the six shortcuts I simply added the command key and it felt as natural as typing the punctuation normally. For the single quotes script I settled with the Option + Command combo because it is on the same key as the double quotes.

  • Wrap in Asterisks: ⇧ + ⌘ + *
  • Wrap in Backticks: ⇧ + ⌘ + `
  • Wrap in Brackets: ⇧ + ⌘ + ]
  • Wrap in Parentheses: ⇧ + ⌘ + )
  • Wrap in Quotes: ⇧ + ⌘ + “
  • Wrap in Single Quotes: ⌥ + ⌘ + ’

All six scripts are variations of the same code shown below:

Download these scripts here: Wrap Text scripts

Save these scripts to the directory: ~/Library/Application Support/BBEdit/Scripts

Commenting Entire Line

The second feature of BBEdit that bugged me was the way commenting was implemented. Most of the time when I hit the “Comment” keyboard shortcut I actually wanted to comment out the entire line; instead, BBEdit starts the comment wherever the cursor is located. I wrote a script that reads the documents source language and comments out the entire current line using the correct syntax for that language.

For the keyboard shortcut I actually changed BBEdit’s default Un/Comment Selection to ⌥ + ⌘ + / so that I could configure my script with the default combination I was already used to: ⌘ + /

The script is configured to work with but is not limited to these languages:

  • Unix Shell Script
  • Python
  • Perl
  • Ruby
  • Java
  • Javascript
  • PHP
  • Objective-C
  • ANSI C
  • C++
  • HTML

If you don’t see the language you want it is very easy to add your own – just open the script and take a look at the code.

Download the script here: Comment Entire Line

Save these scripts to the directory: ~/Library/Application Support/BBEdit/Scripts

*Stay tuned for more posts on ways to really get the most out of BBEdit!