Among the actions that didn’t make the transition from Workflow to the new Shortcuts app for iOS 12, built-in support for triggering IFTTT applets (formerly known as “recipes”) is perhaps the most annoying one. With just a few taps, Workflow’s old ‘Trigger IFTTT Applet’ action allowed you to assemble workflows that combined the power of iOS integrations with IFTTT’s hundreds of supported services. The IFTTT action acted as a bridge between Workflow and services that didn’t offer native support for the app, such as Google Sheets, Spotify, and several smart home devices.
Fortunately, there’s still a way to integrate the just-released Shortcuts app with IFTTT. The method I’m going to describe below involves a bit more manual setup because it’s not as nicely integrated with Shortcuts as the old action might have been. In return however, you’ll unlock the ability to enable IFTTT triggers using Siri on your iOS devices, Apple Watch, and HomePod – something that was never possible with Workflow’s original IFTTT support. Let’s take a look.
Configure an IFTTT Webhook as a Trigger
The basic idea behind this is to use IFTTT’s Webhooks as triggers for an applet. IFTTT describes webhooks as best suited for DIY projects or companies that want to get started integrating their platform with IFTTT. In practice, a webhook is a unique URL that accepts a request. Once the URL is “pinged”, IFTTT recognizes it as a trigger and runs the applet. In the slightly more advanced version, the webhook can also receive request data, and therefore identify variables (IFTTT calls them “ingredients”) in your request.
As you can imagine at this point, a webhook can be triggered from Shortcuts using the ‘Get Contents of URL’ action without having to configure any other parameters. Allow me to demonstrate how easy it is to set up IFTTT applets that can be triggered from Shortcuts.
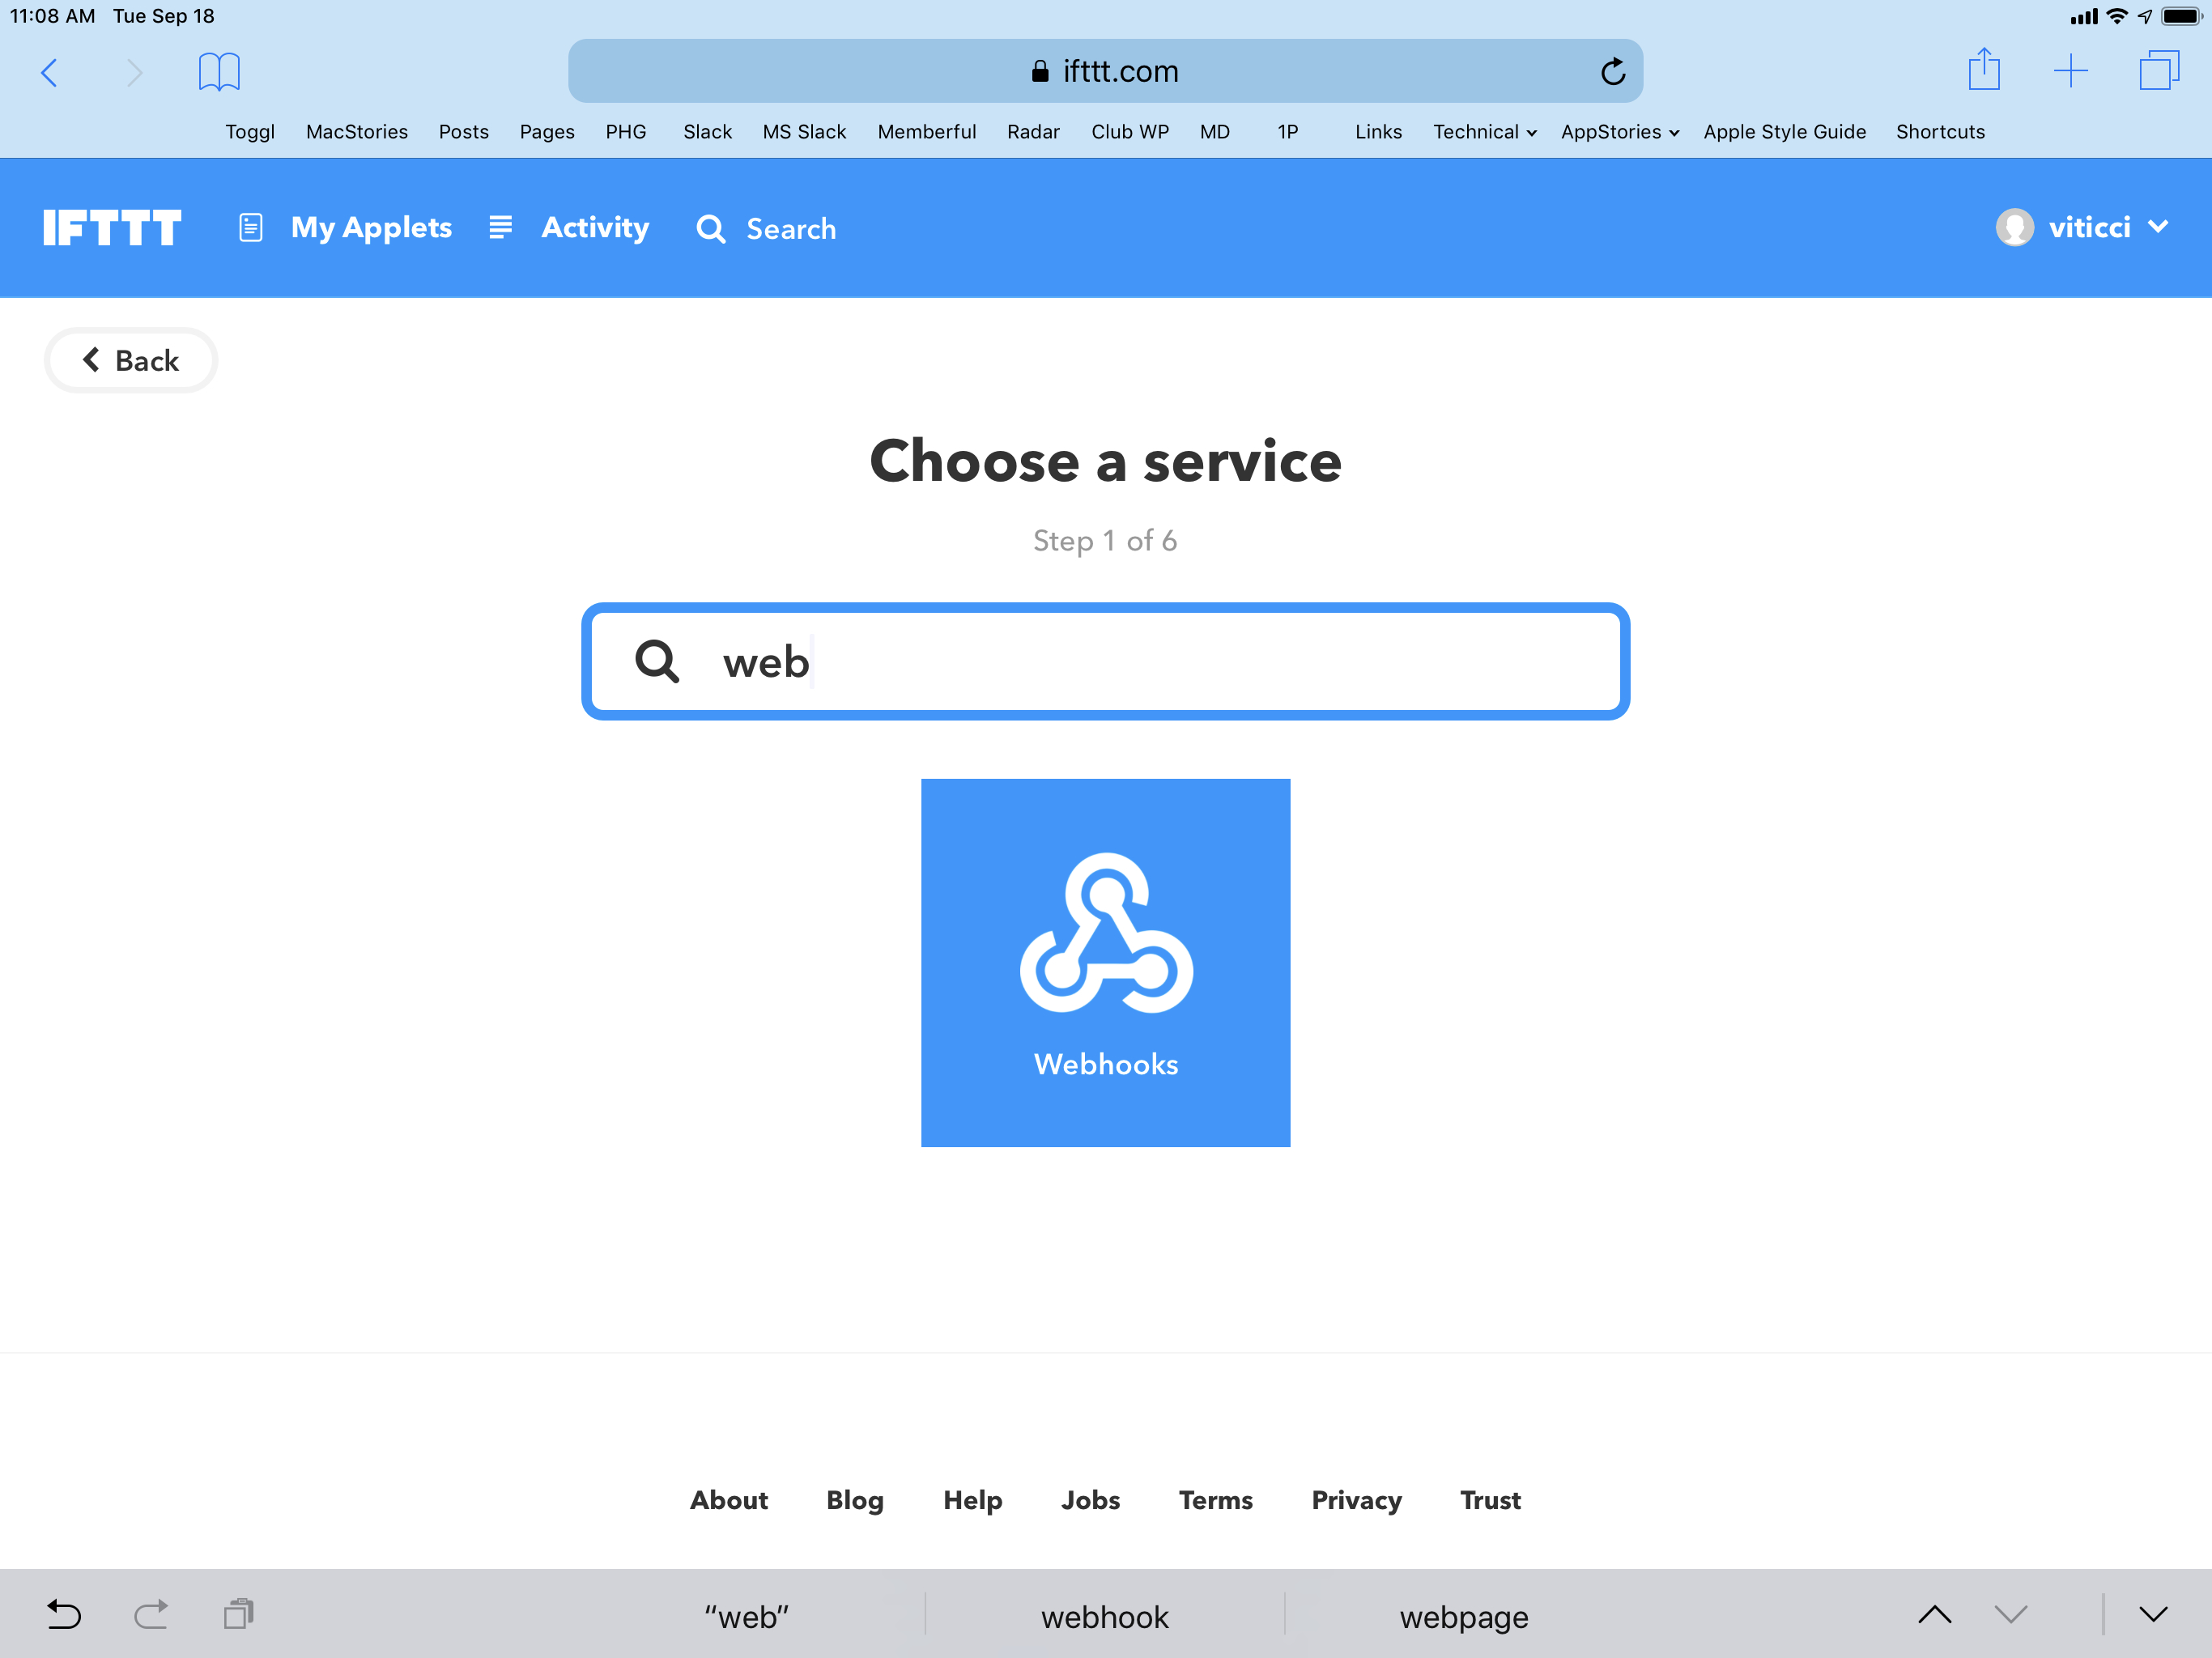
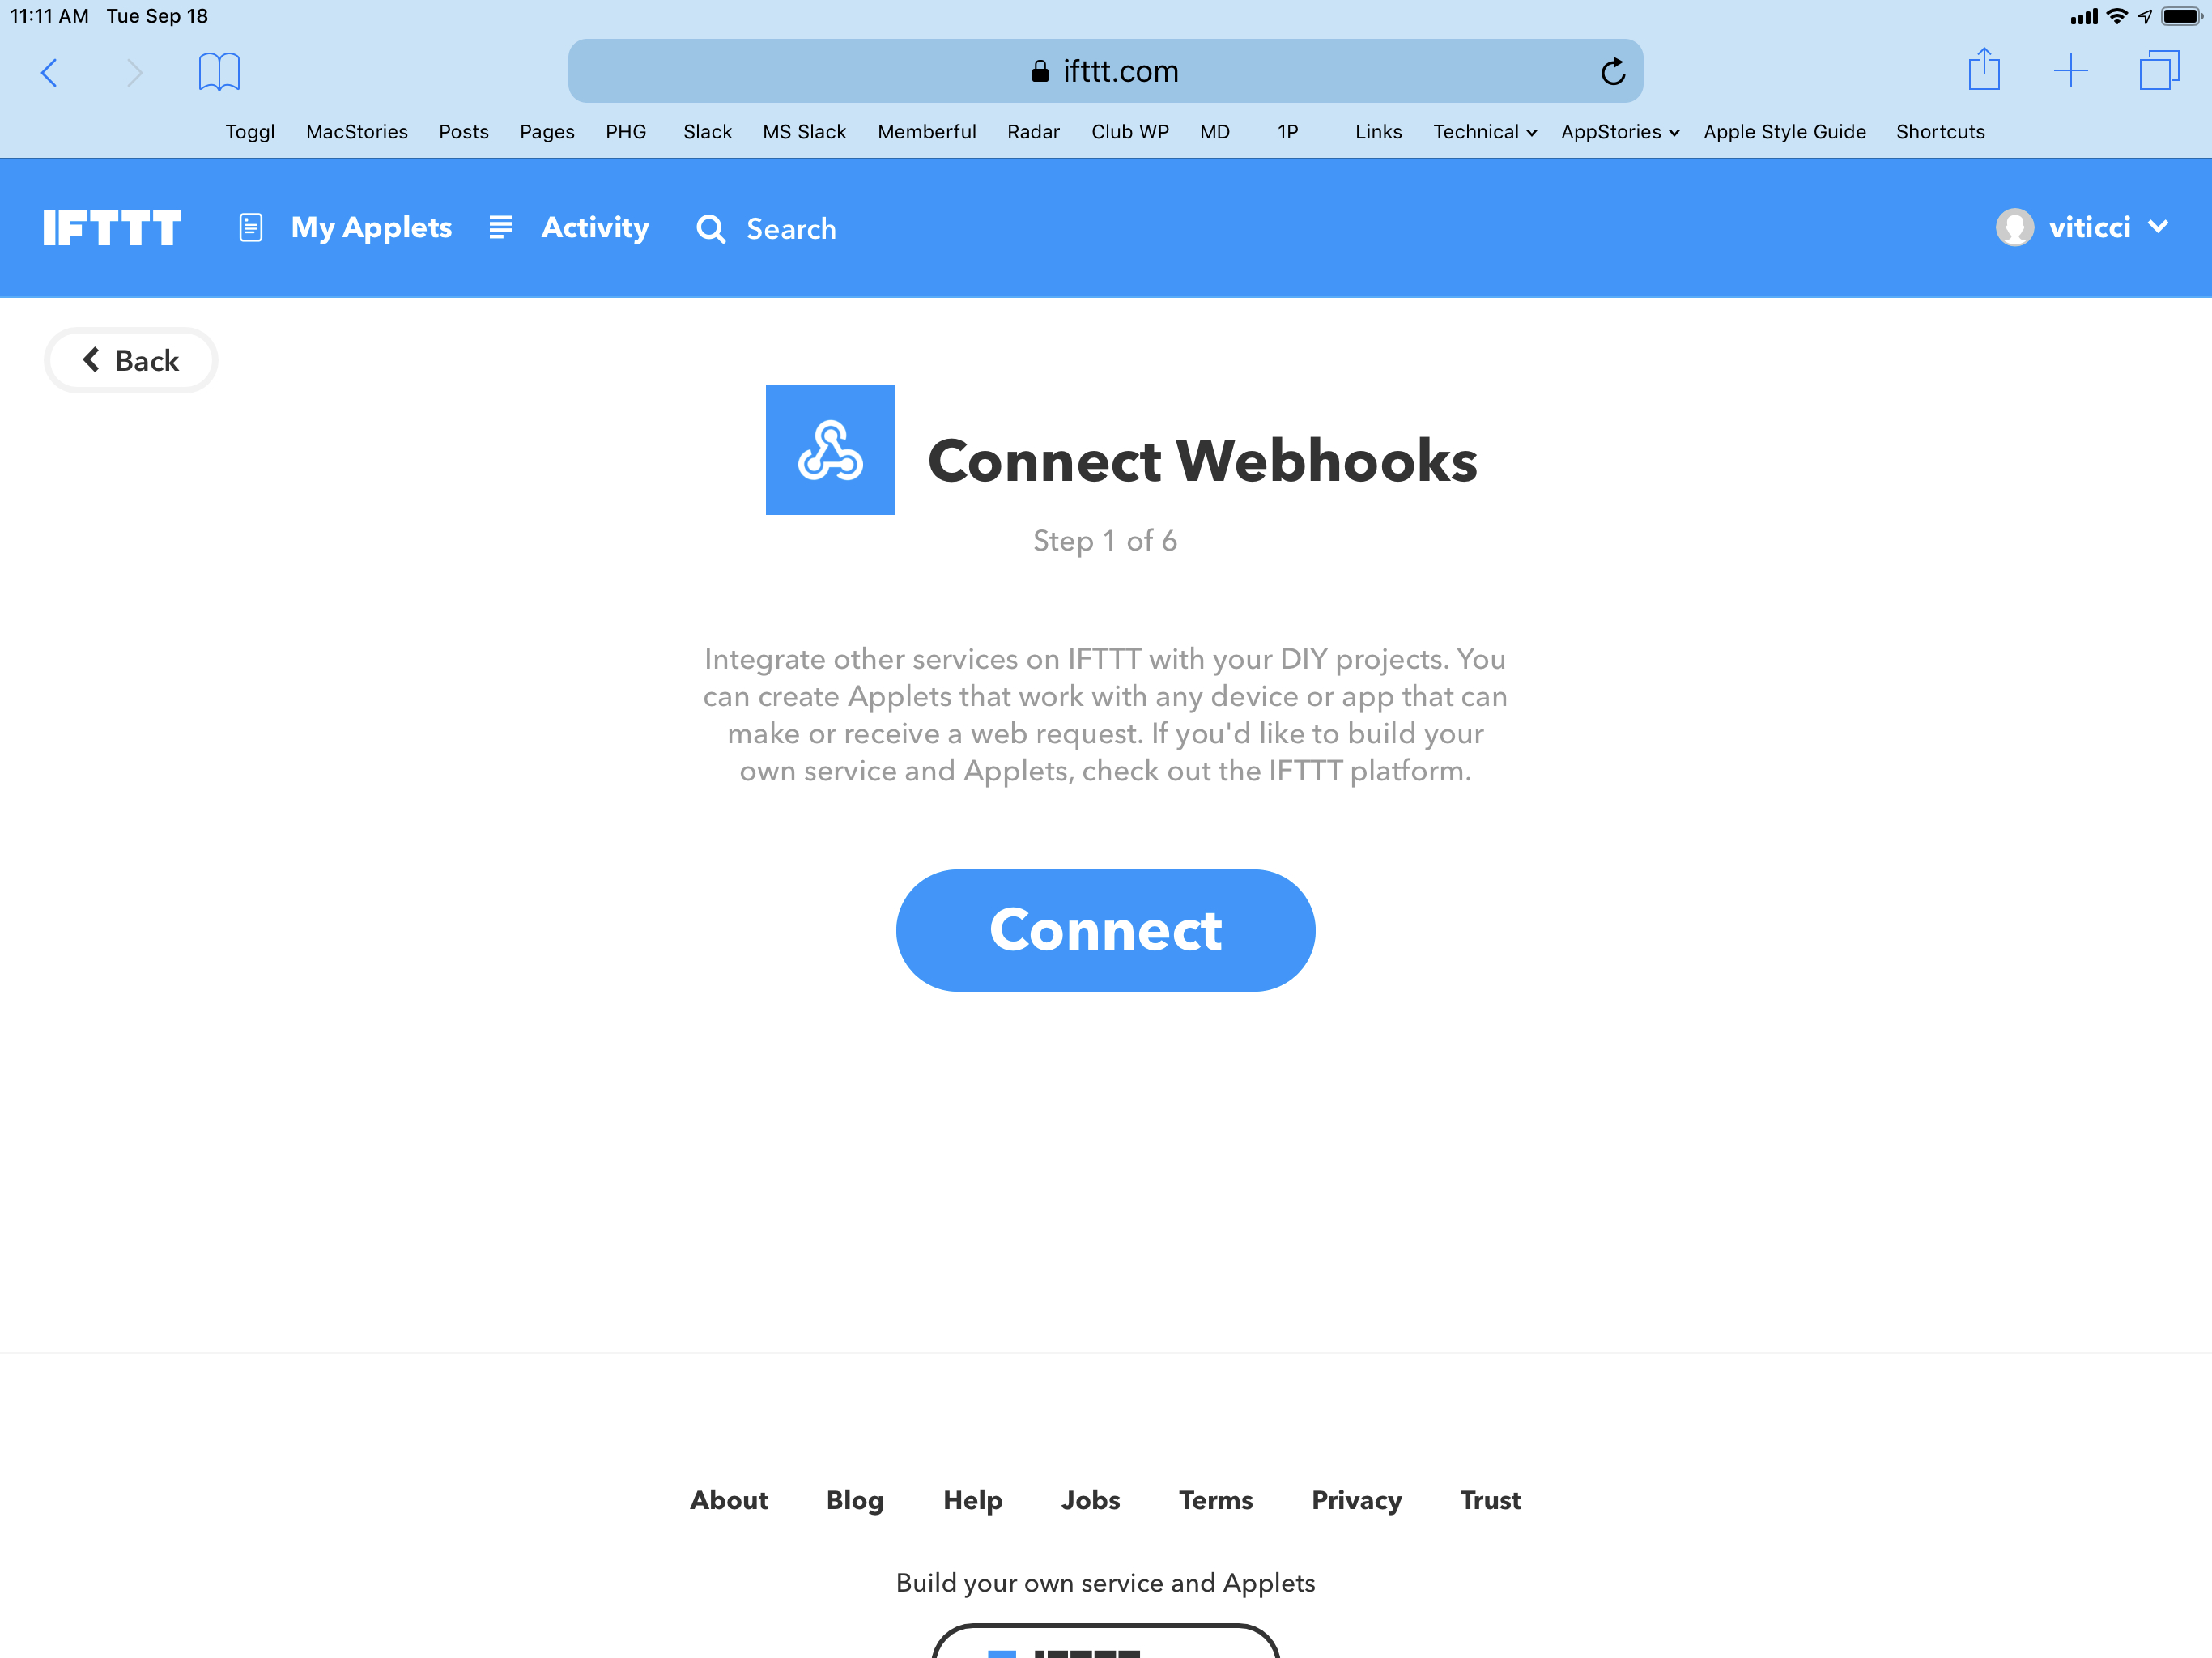
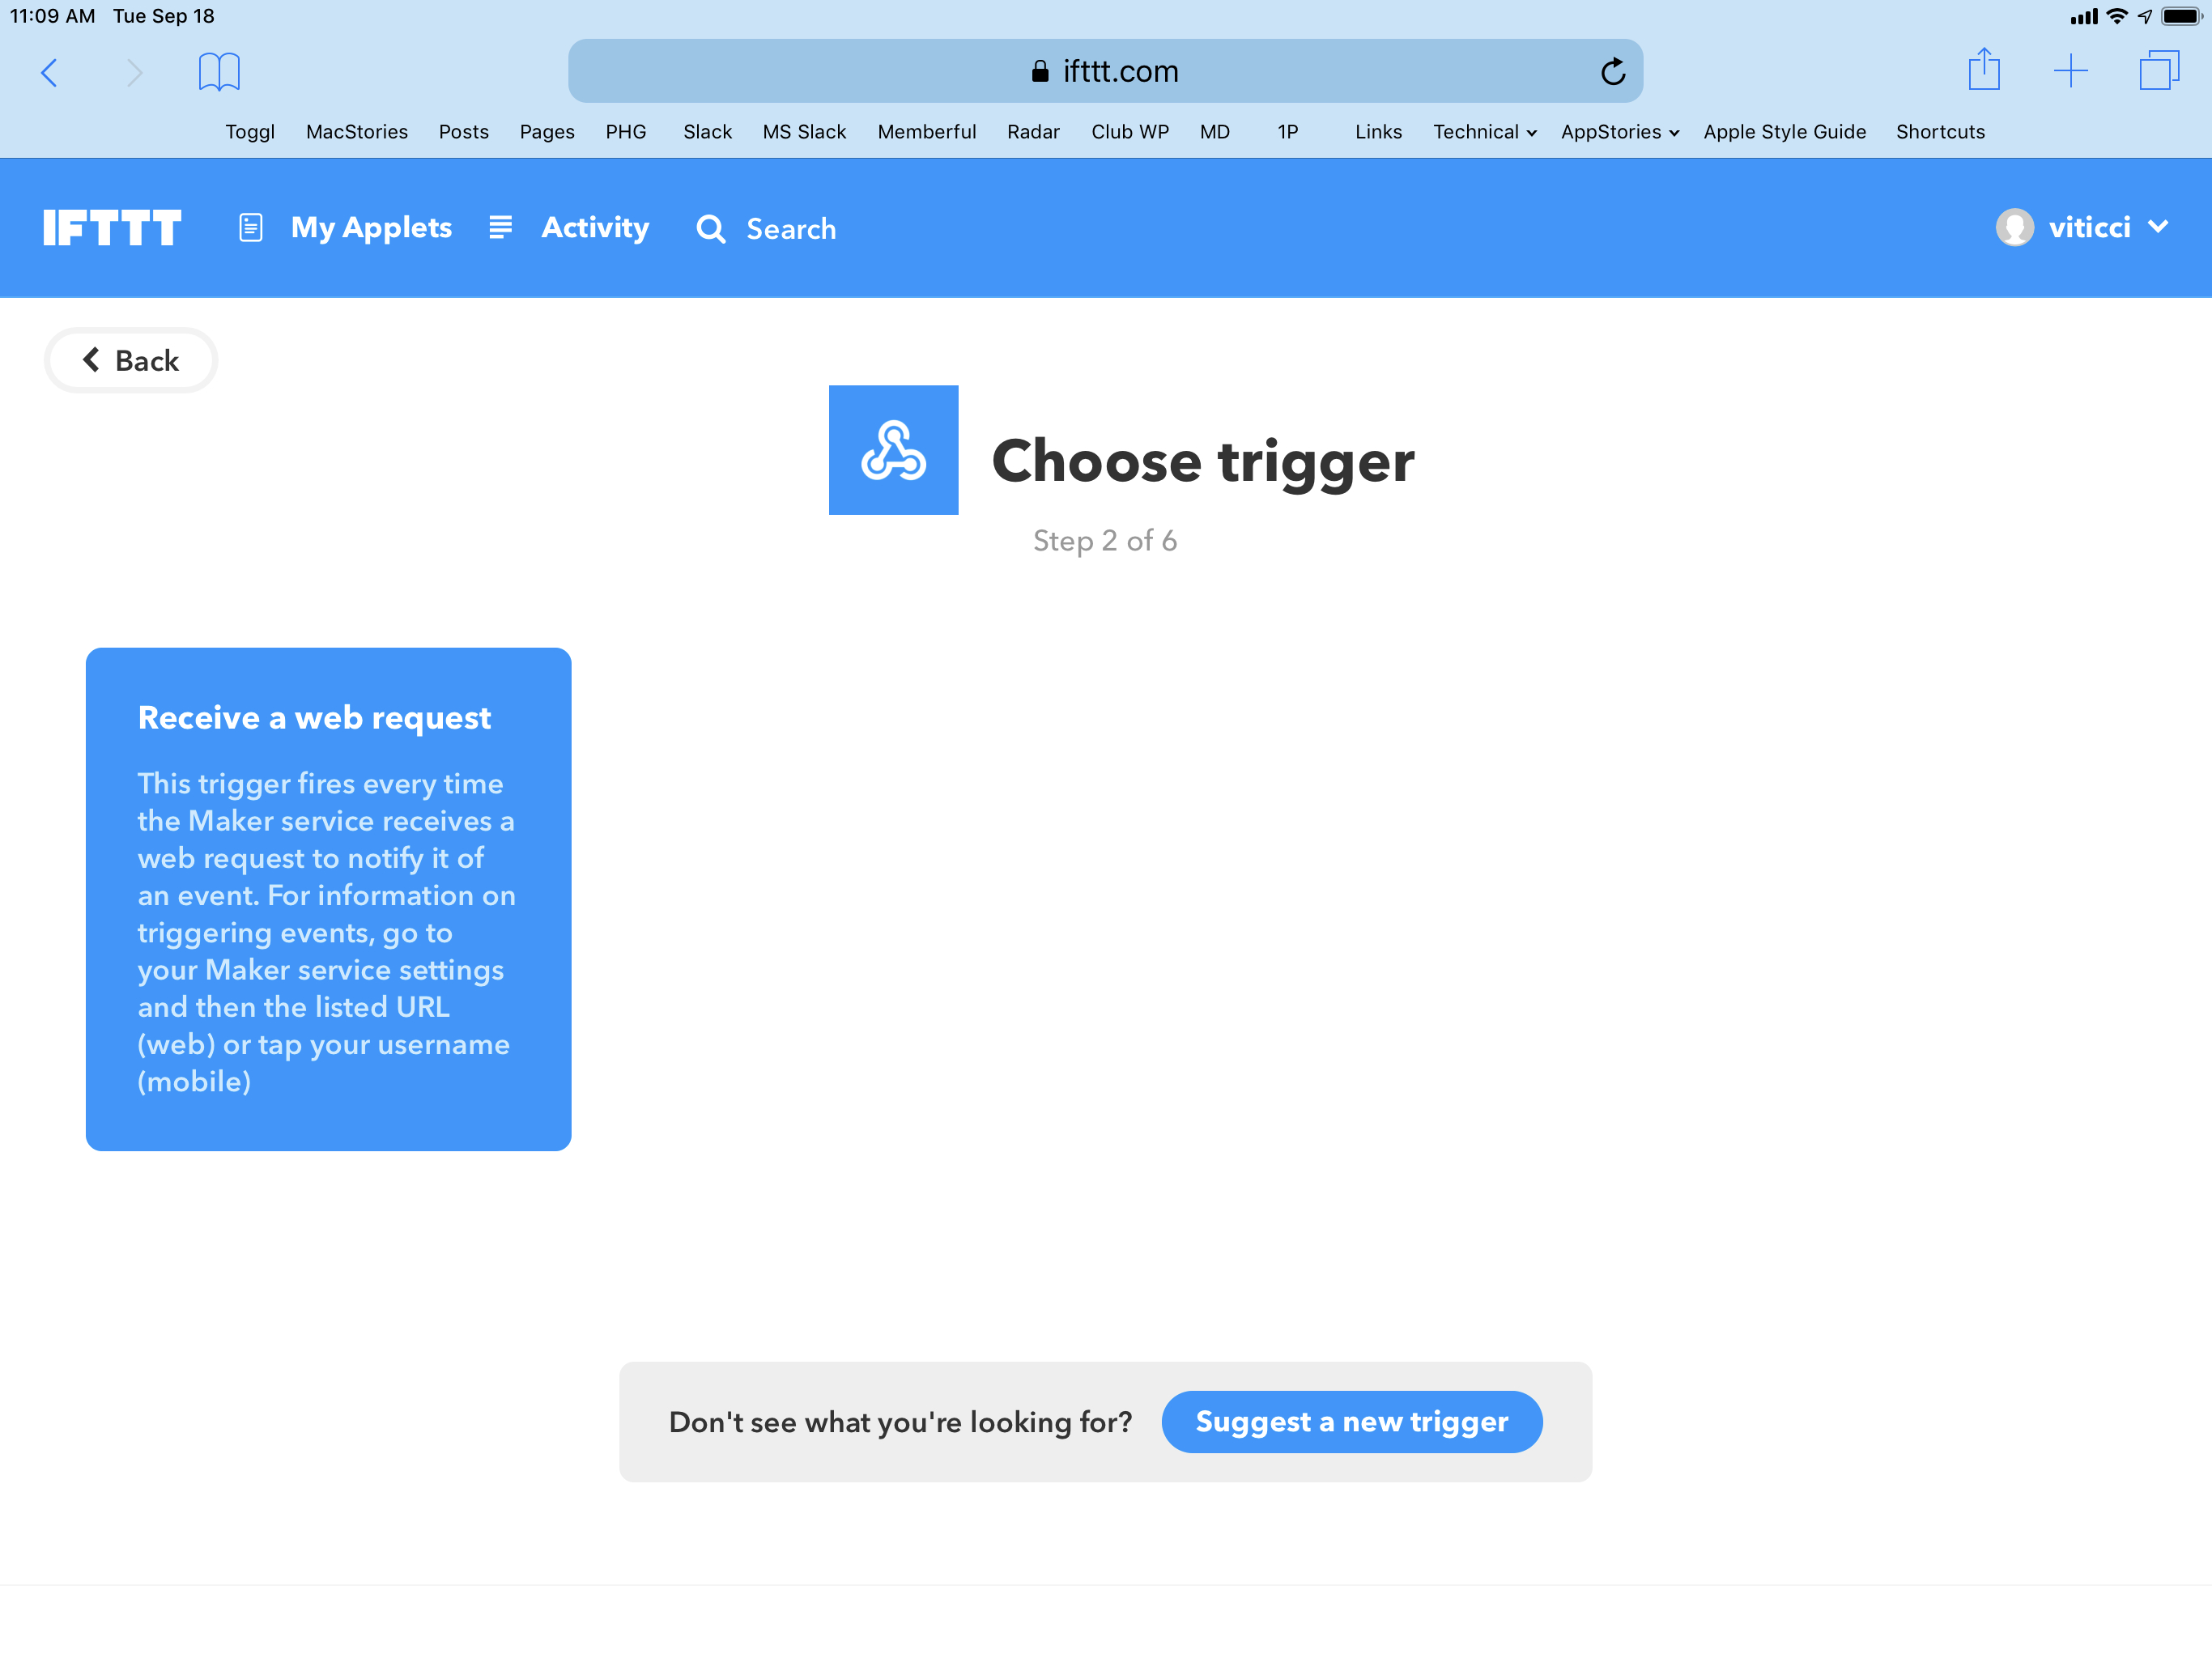
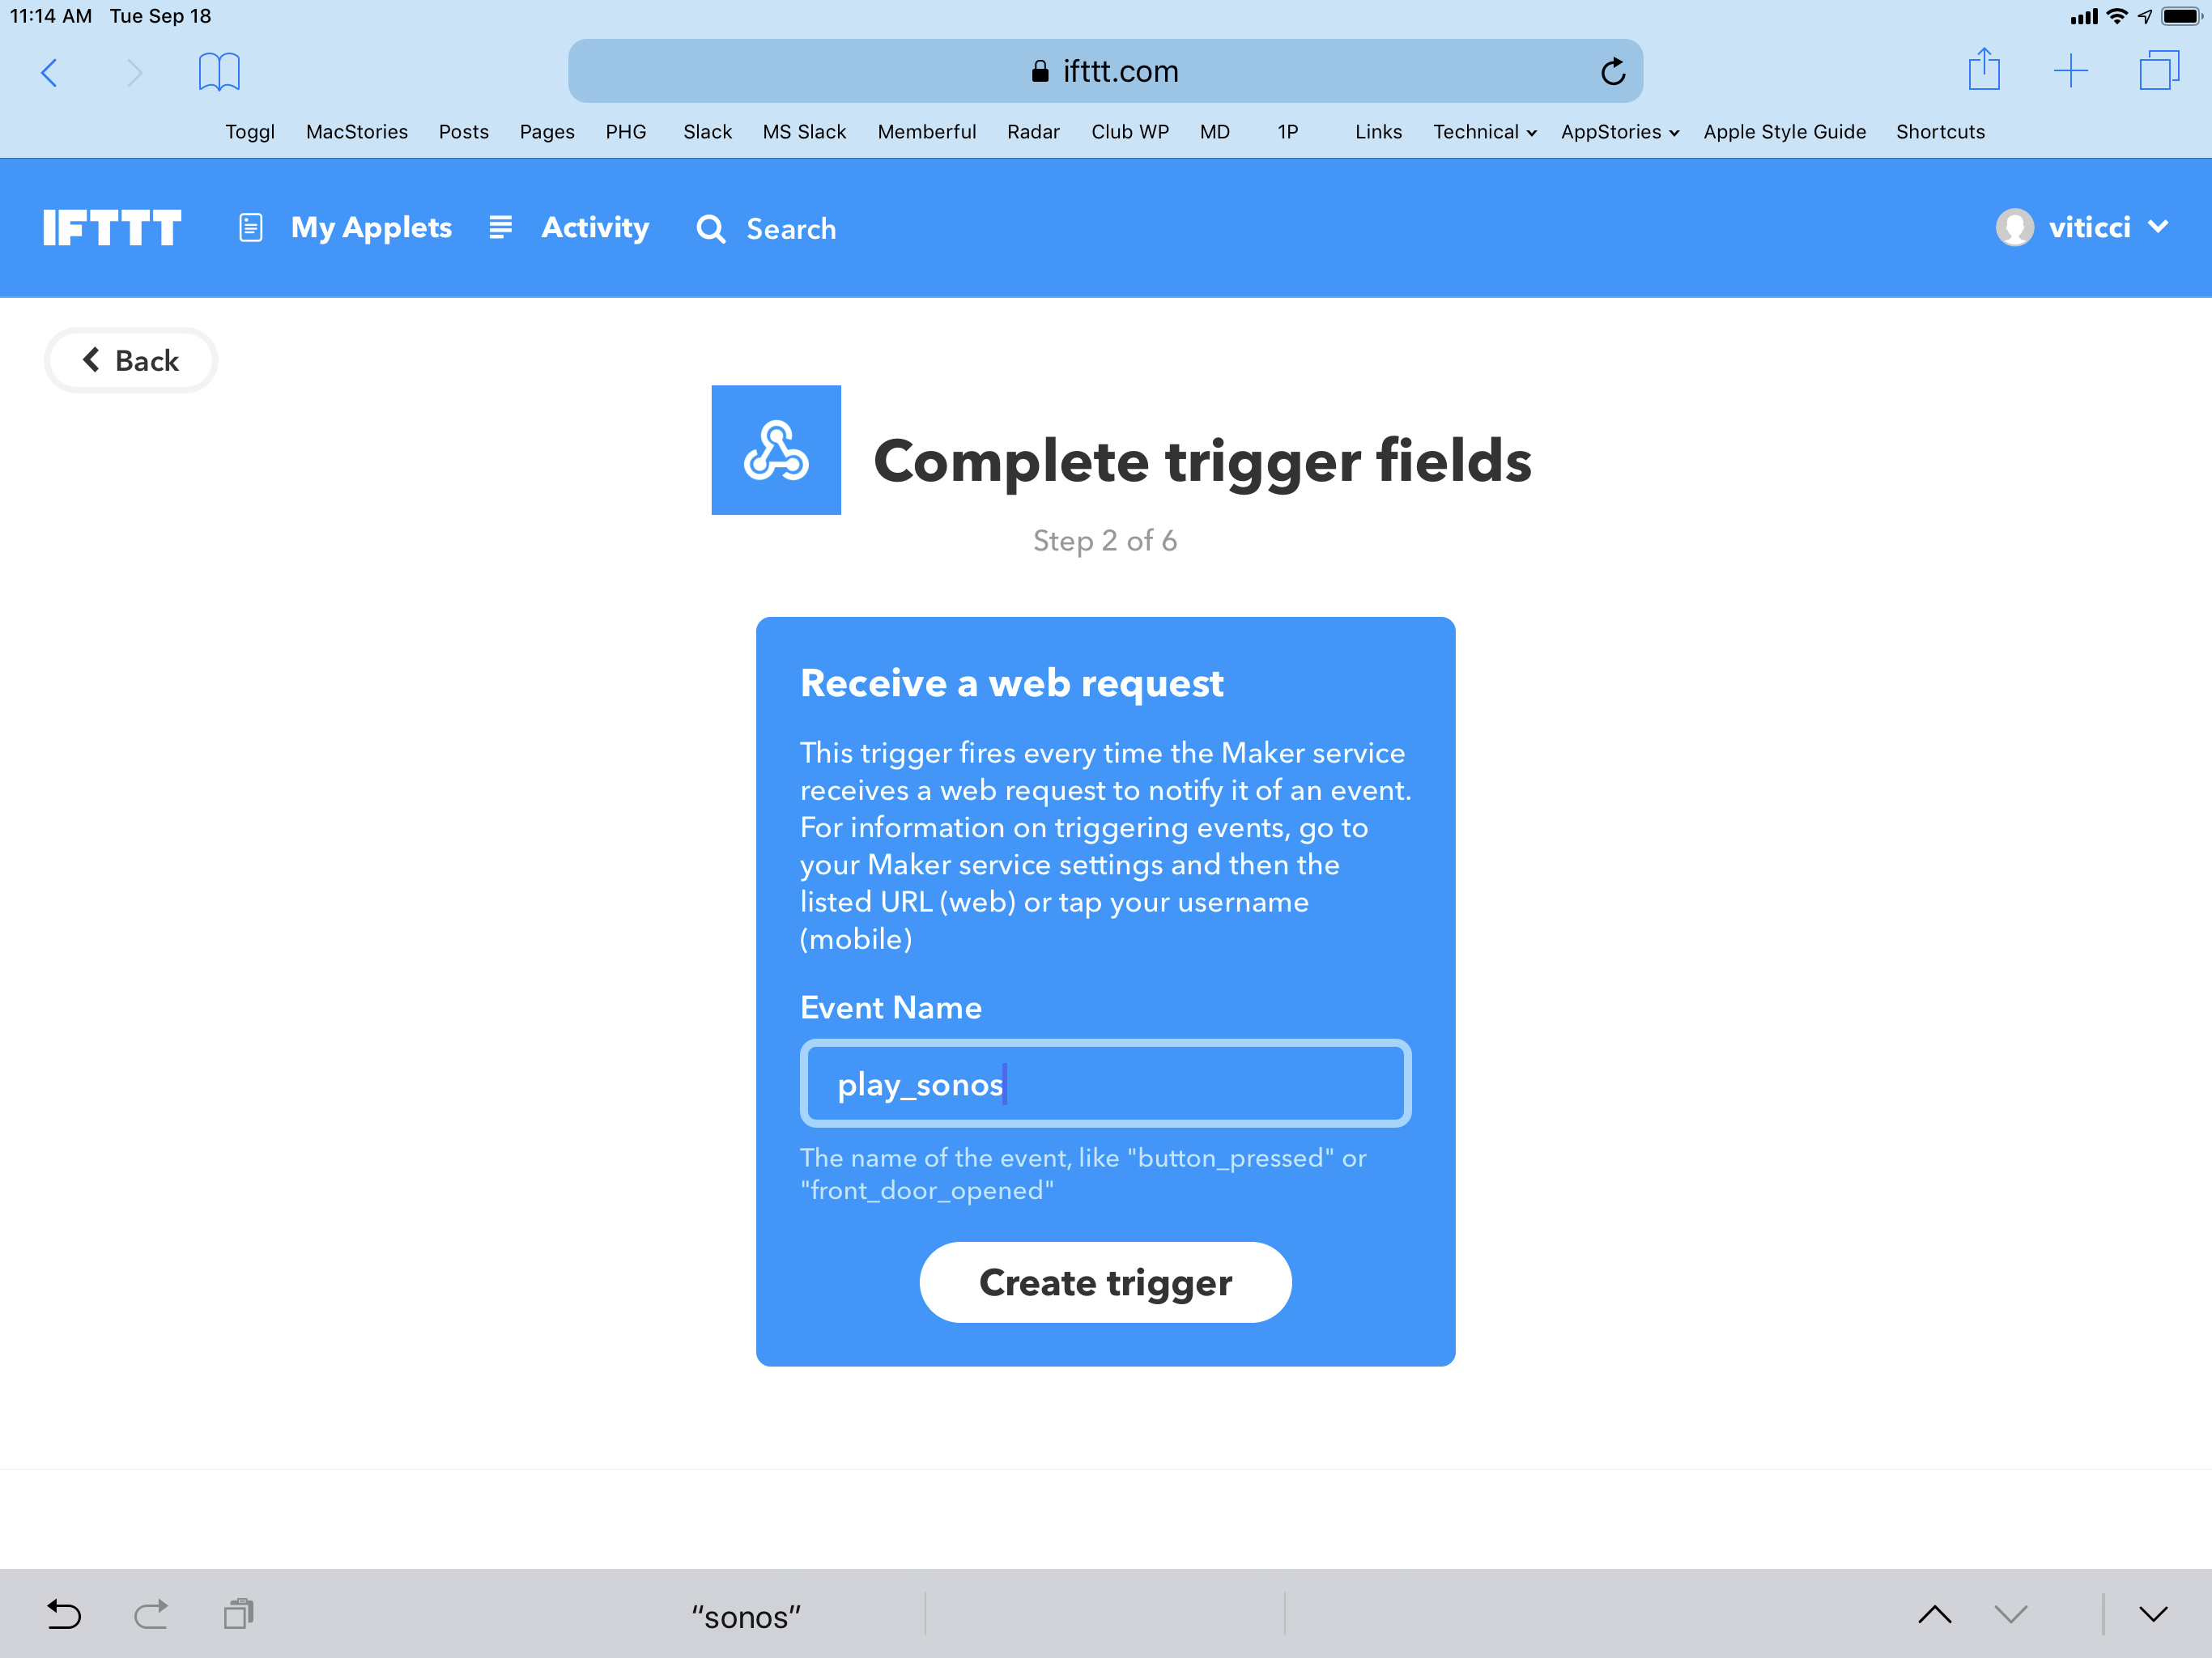
For this example, I’m going to create an applet that runs a Sonos action because I want to use Siri to play one of my favorite playlists on my Sonos One. To configure this action, you first need to create a new IFTTT applet and choose Webhooks as a trigger; if it’s the first time you’re dealing with the Webhooks channel in IFTTT, you’ll be asked to connect your account. Once you’ve done that, you’ll see there’s only one type of trigger you can choose in the following screen – “Receive a web request”.
At this point, you have to create an event name. This is a short label that tells IFTTT which webhook to trigger in your account. You can enter any name you want; for the purposes of this example, I’m going to be using play_sonos. After entering an event name, tap ‘Create Trigger’ to continue.
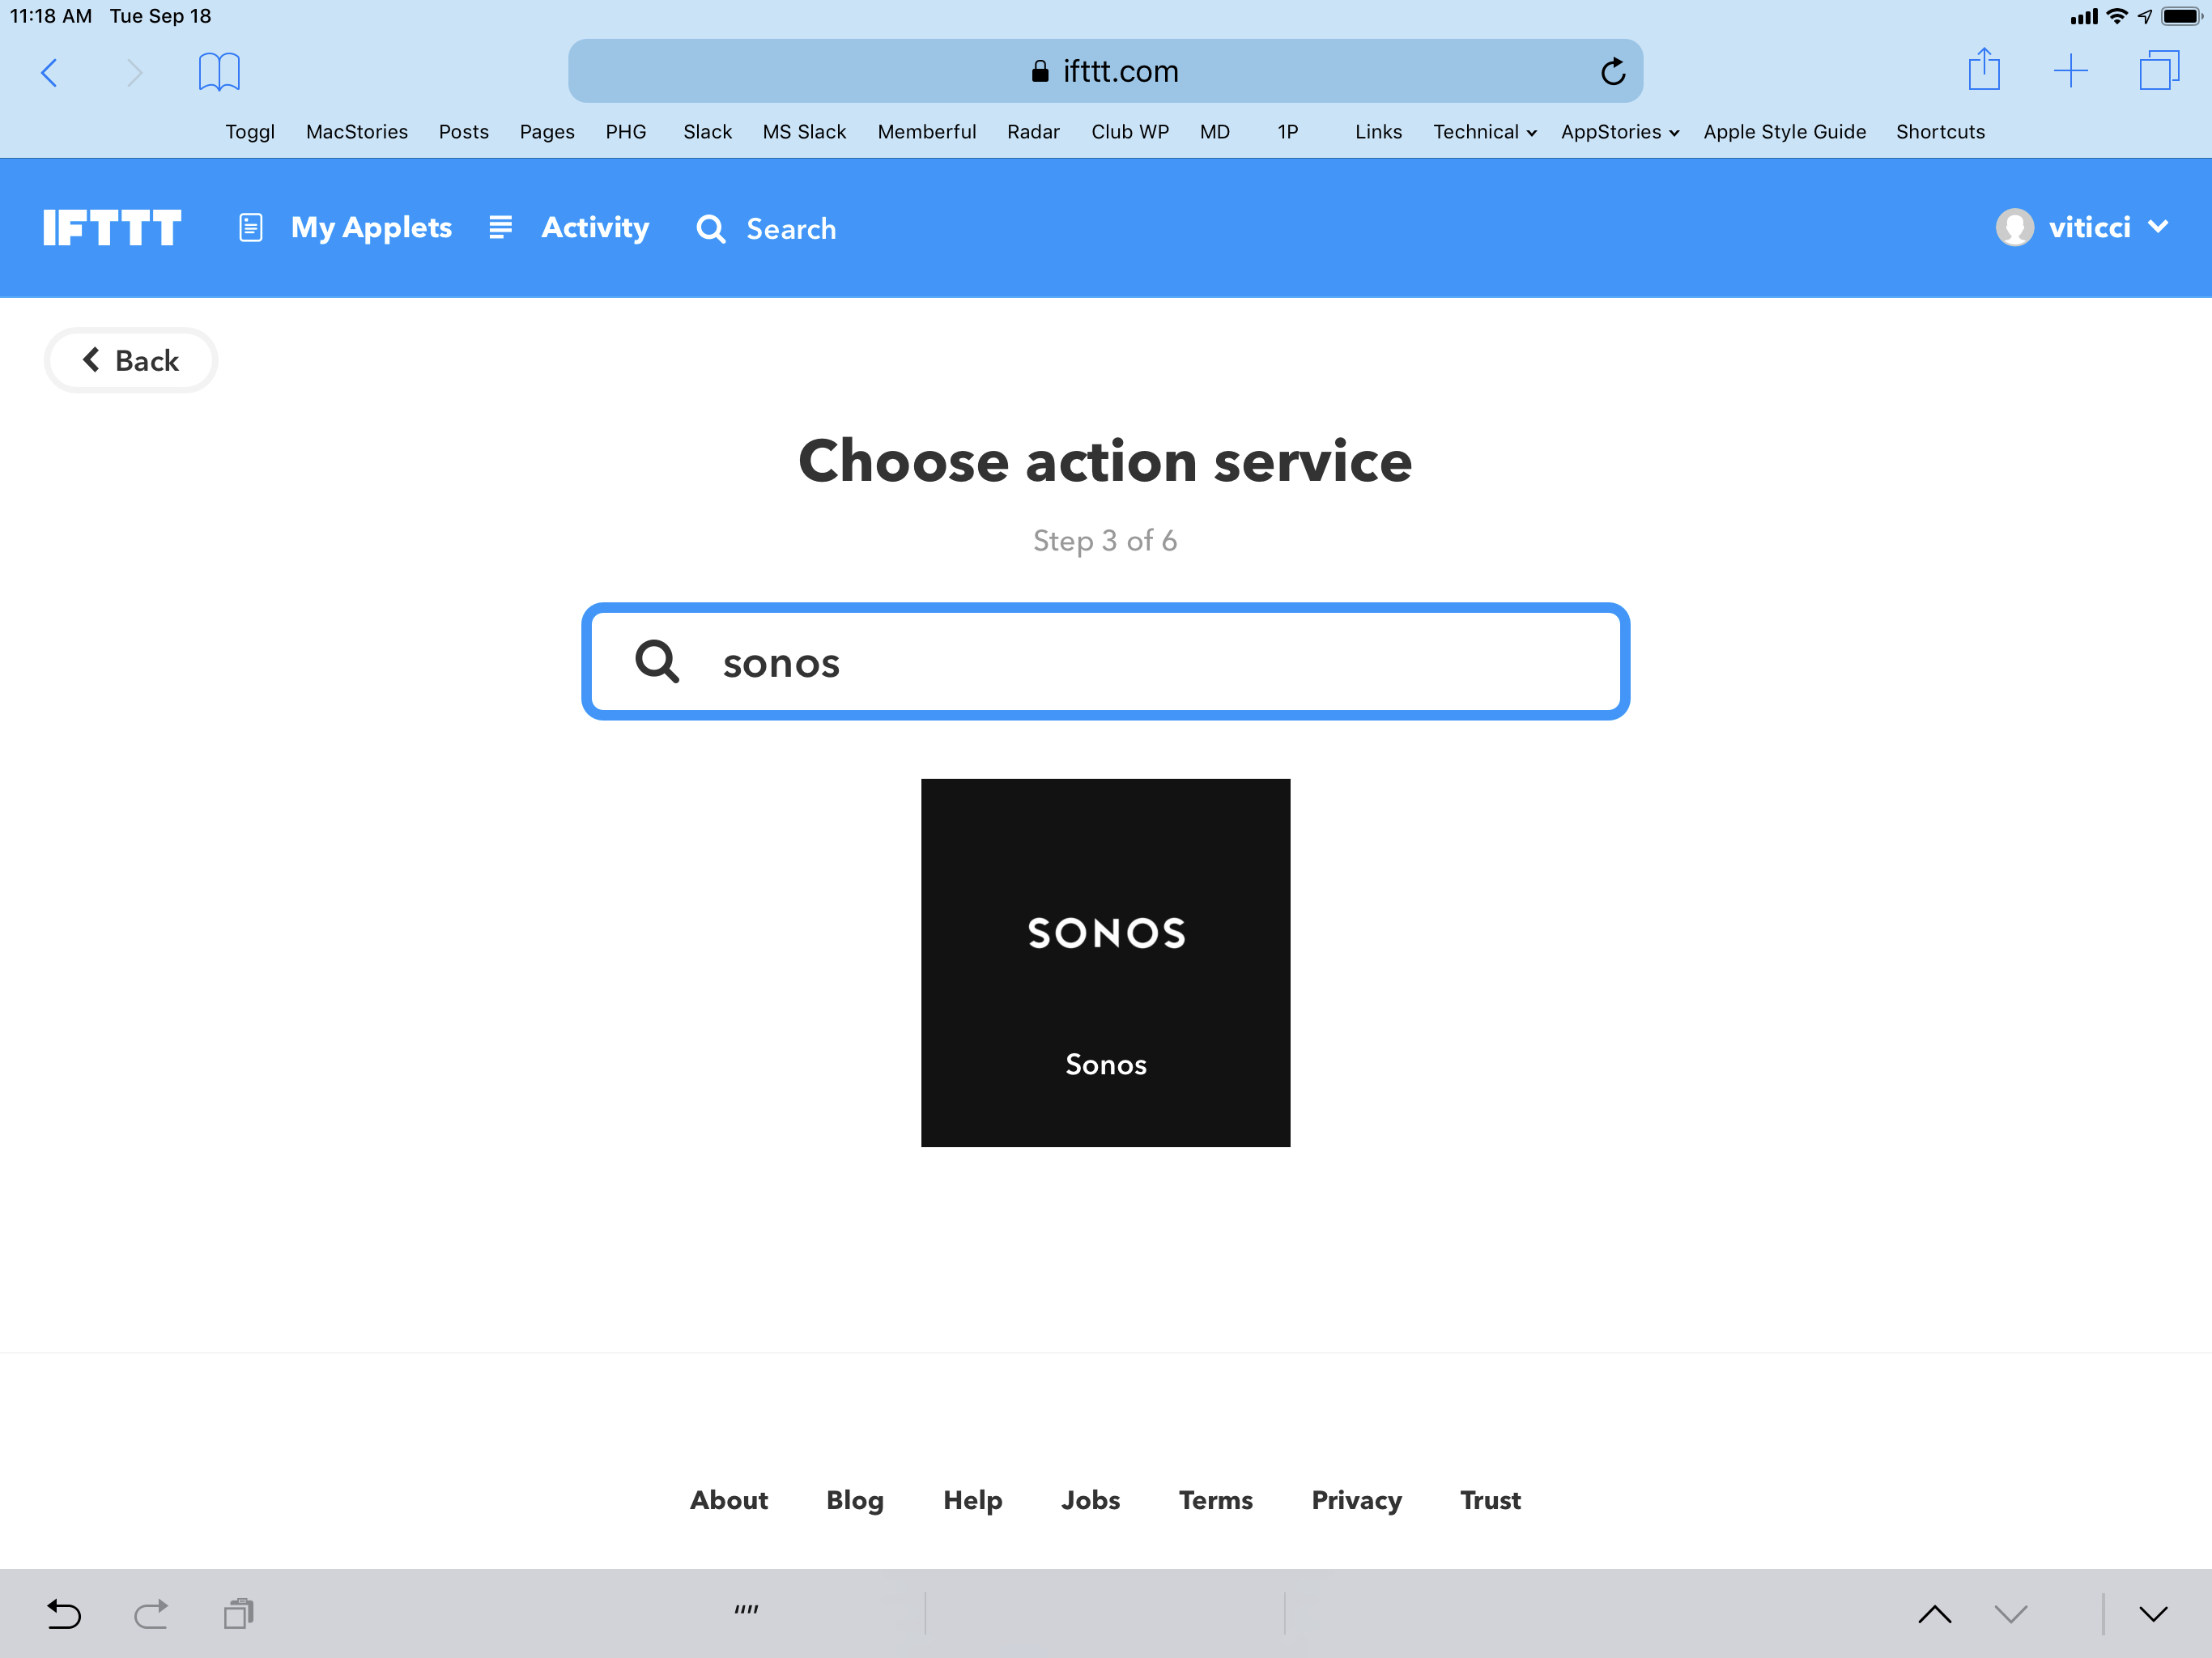
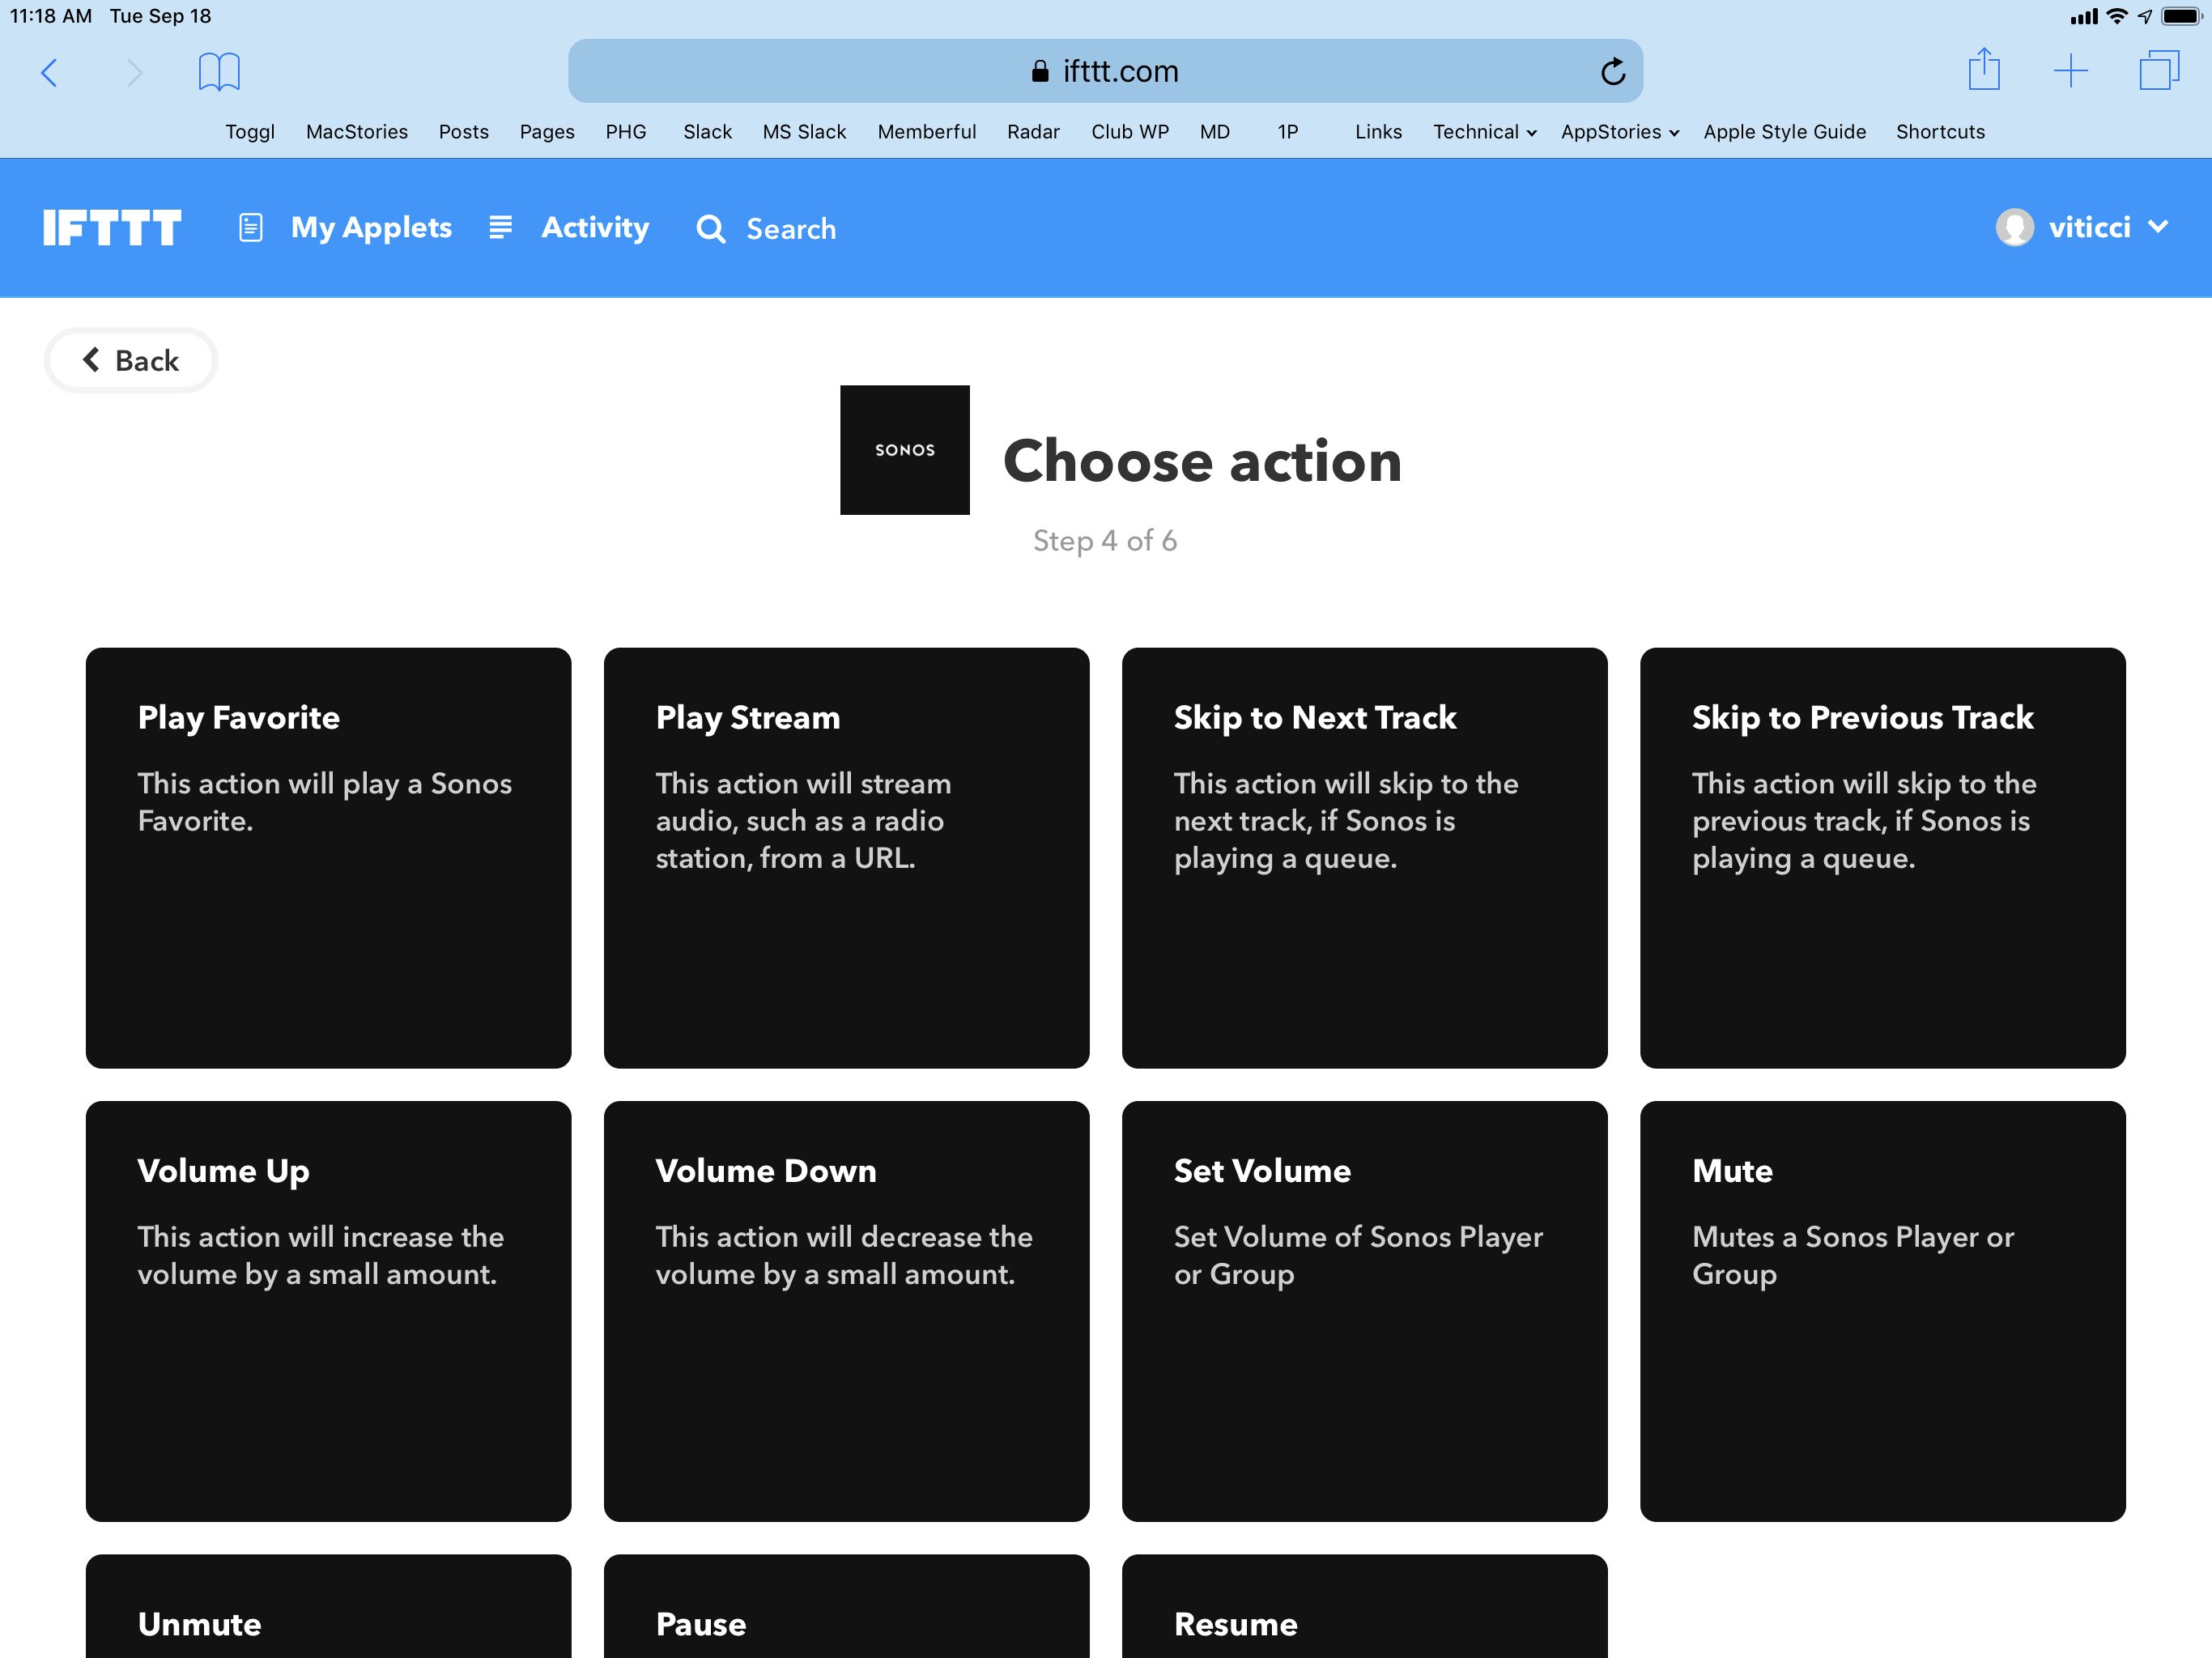
At this point, choose an action that IFTTT should run after receiving the trigger. You can choose from hundreds of apps and services in this screen; as I mentioned above, the core strength of IFTTT is its excellent support for dozens of popular smart home devices and platforms that don’t integrate natively with Shortcuts on iOS. In my case, I’m going to choose Sonos and the ‘Play Favorite’ action; of course, if it’s the first time you’re using Sonos with IFTTT, you’ll also have to connect your Sonos account to the service.
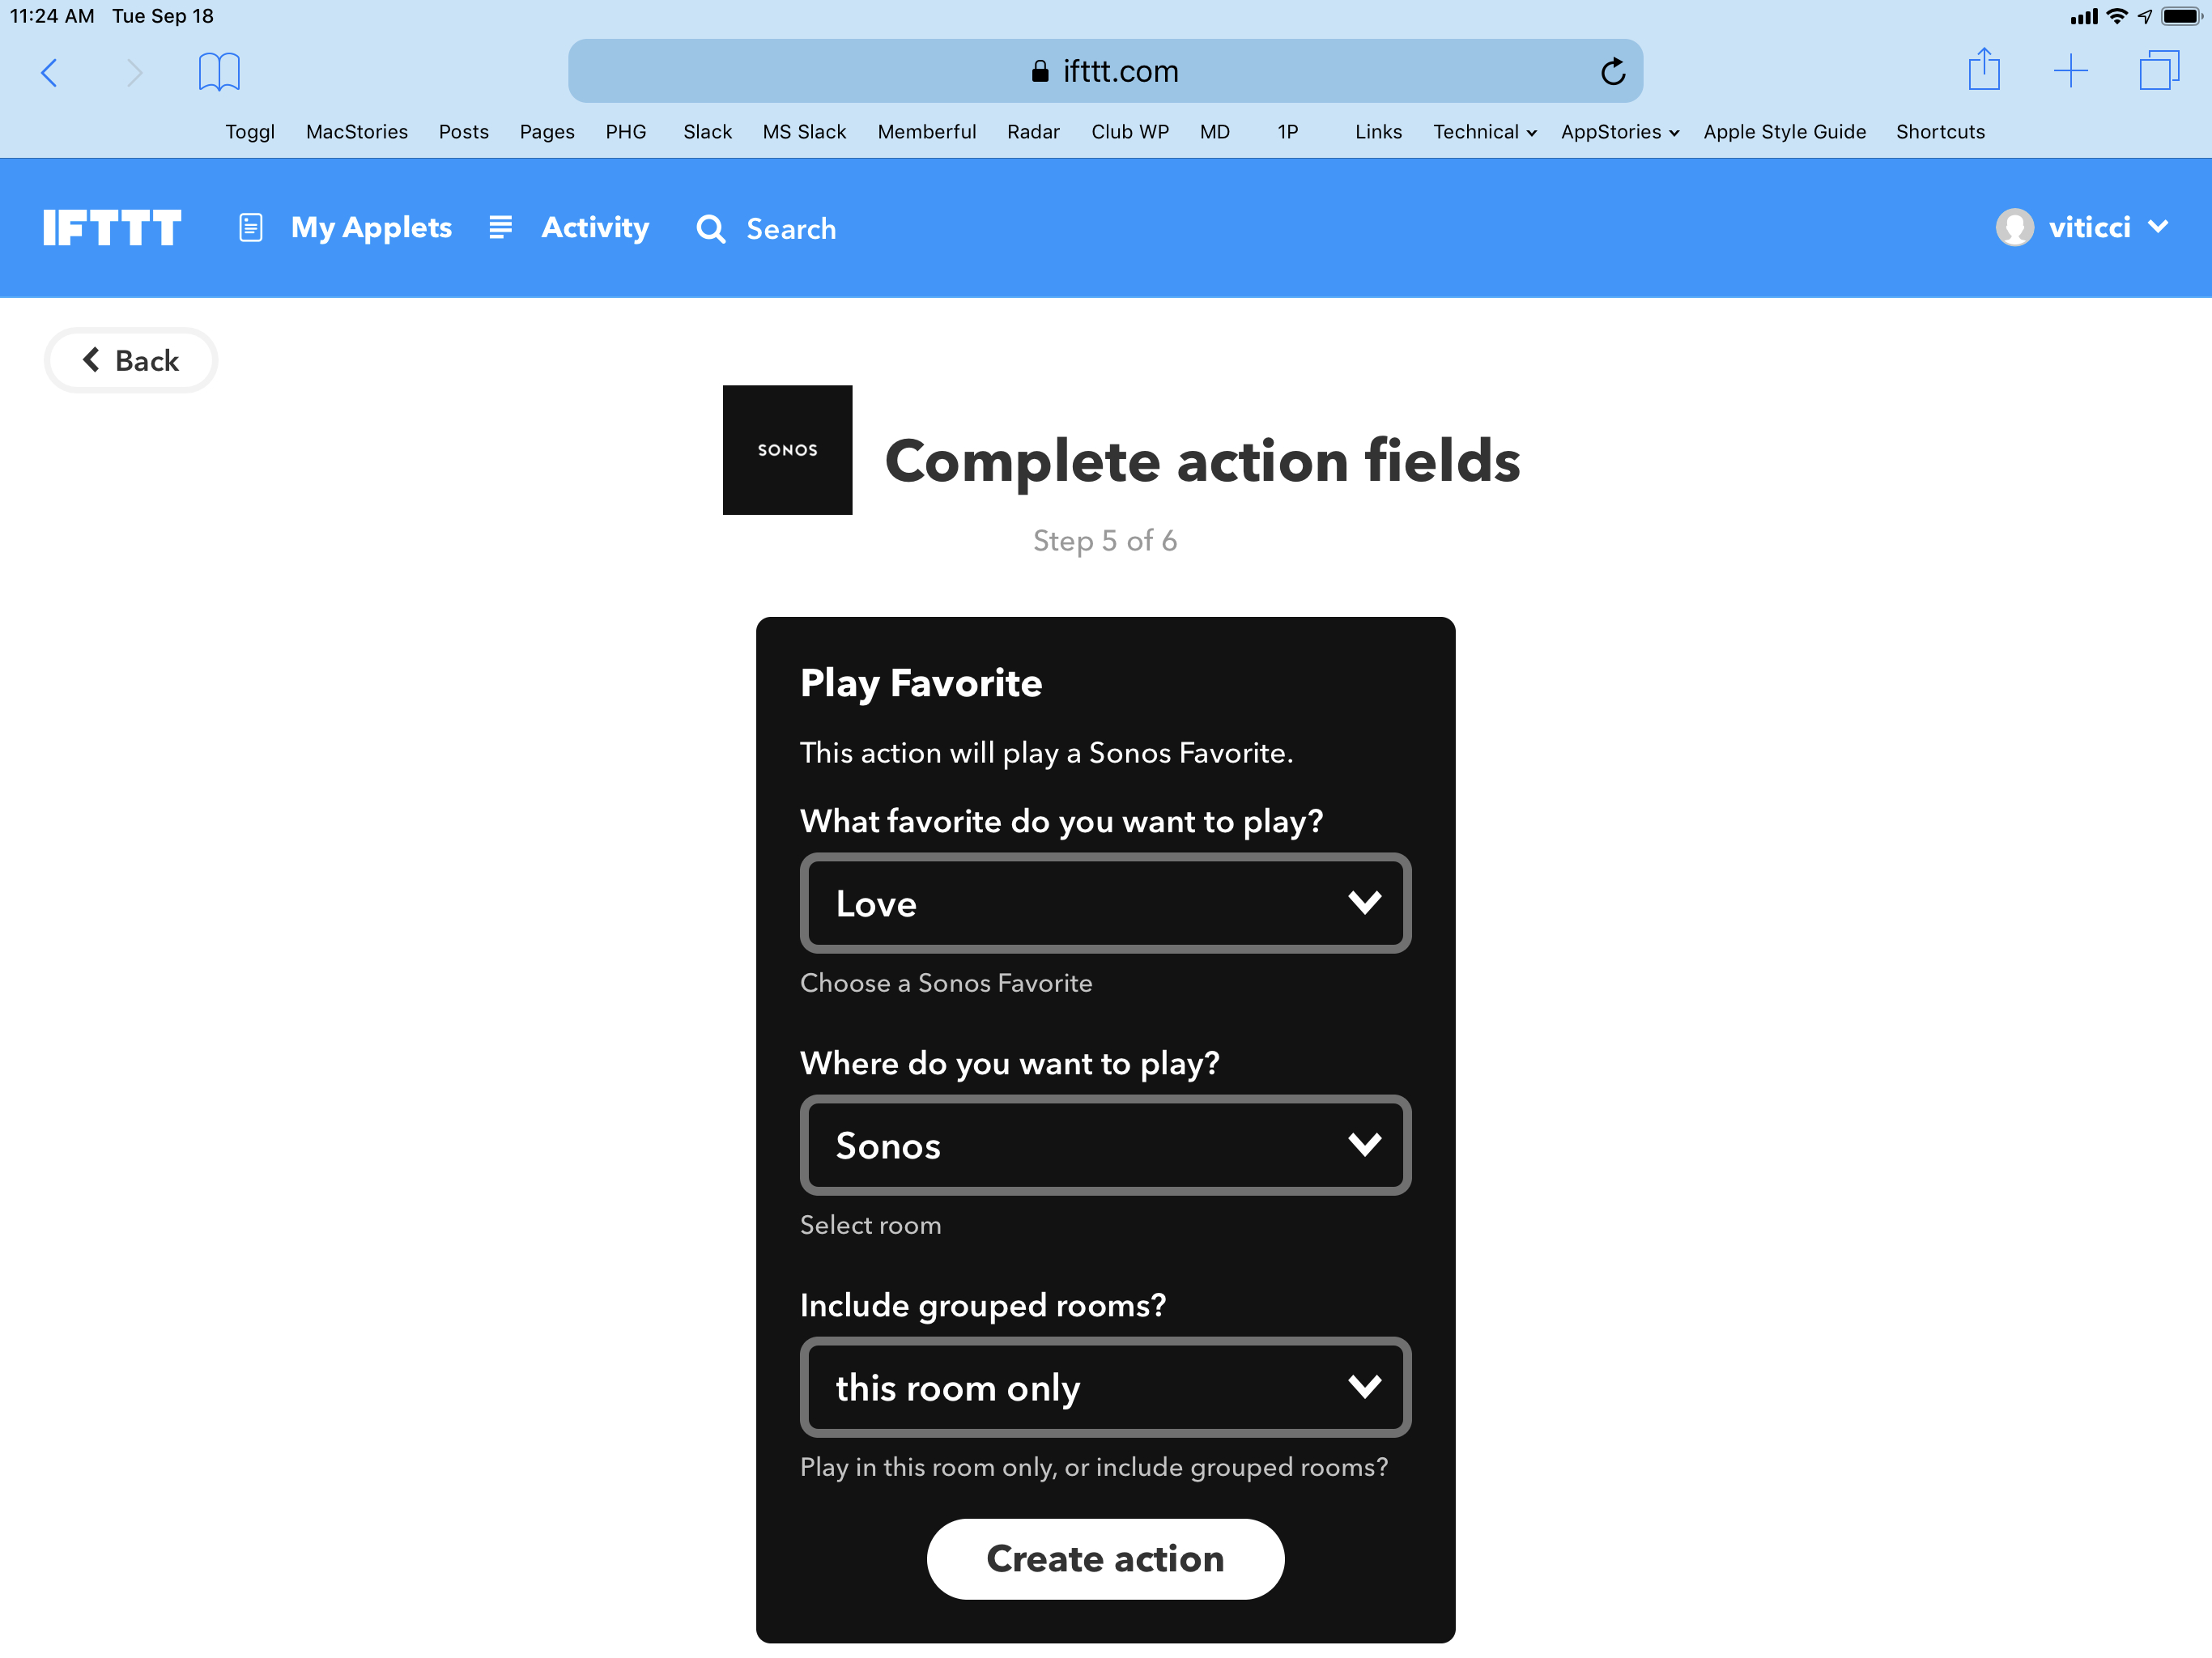
In the final step of the applet creation process, IFTTT asks you to pick a favorite playlist (which has to be added via the Sonos app beforehand), a room where you want to play the item and, optionally, a grouped room. Review and finish creating the applet, and it’ll be saved in your account, waiting for a trigger to activate it.
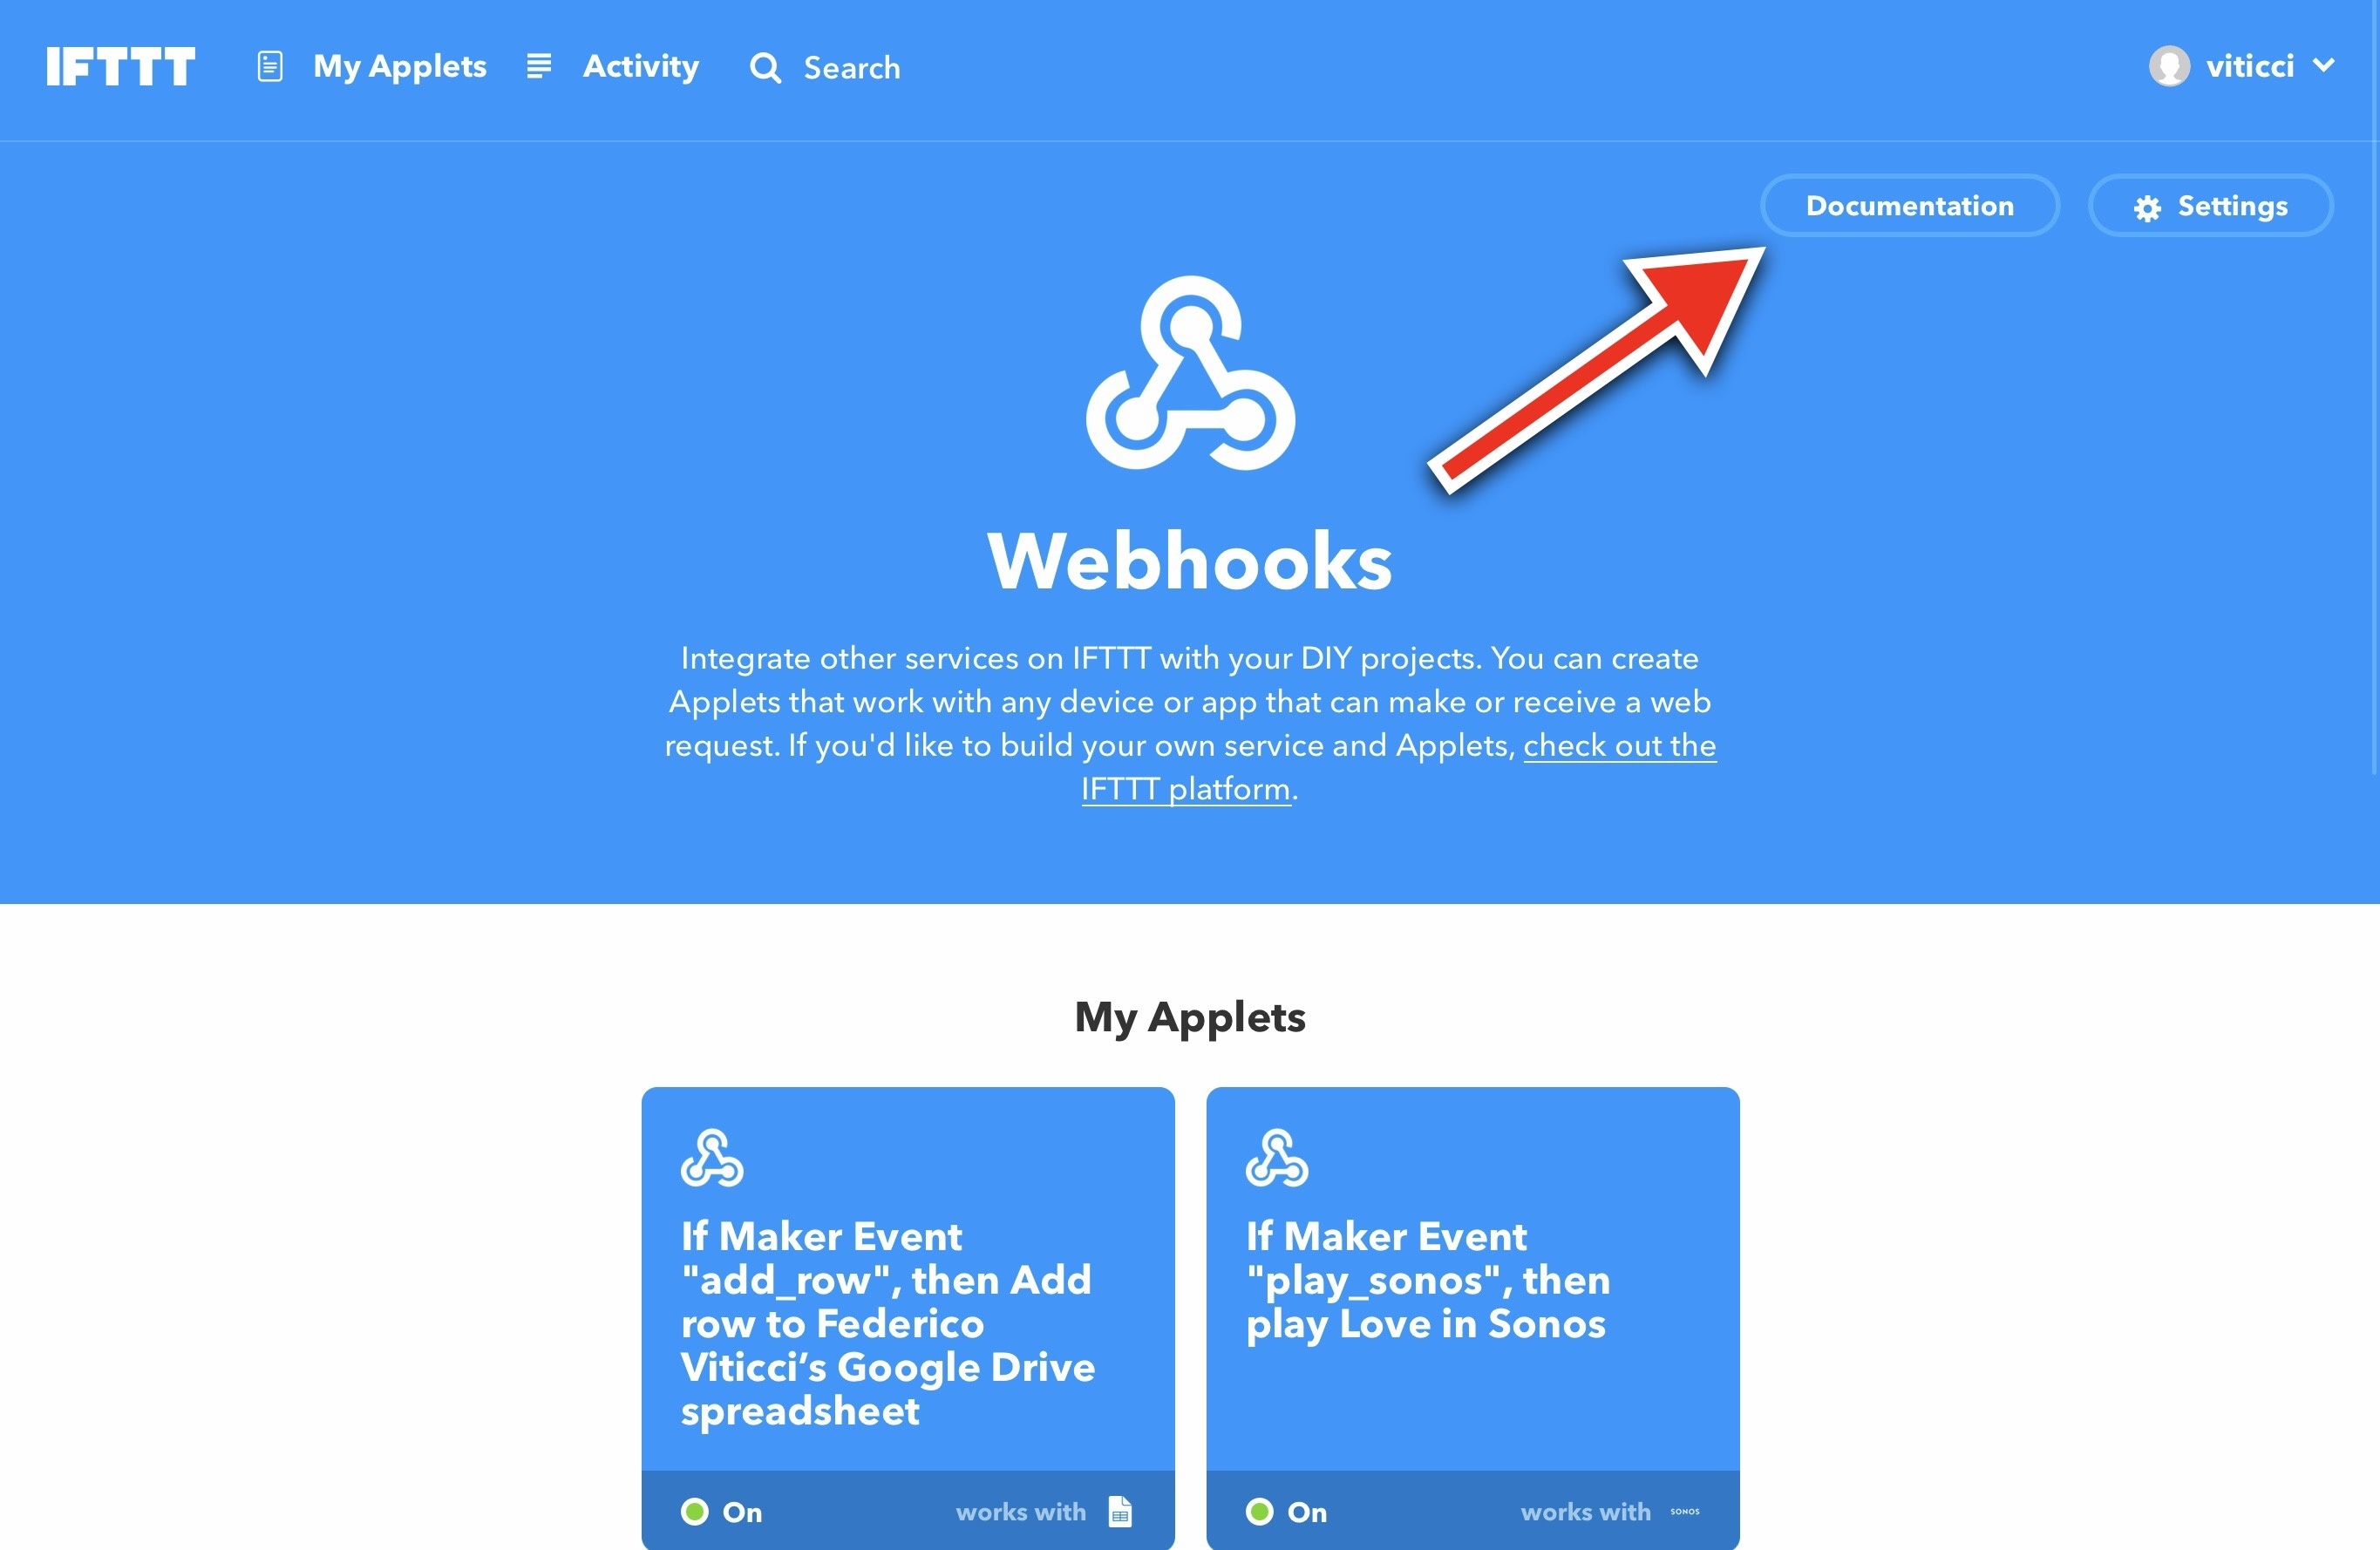
This is where Shortcuts comes in. To run an IFTTT webhook, you need to know which URL to ping as well as your unique account key. To find these bits of information, you have to visit the IFTTT Webhooks page and tap the ‘Documentation’ button in the top right corner, as pictured below.
The documentation page will present you with two essential items: your webhook key, which you need to save somewhere on your device, and an example URL to trigger a webhook. The URL looks something like this:
https://maker.ifttt.com/trigger/EVENT_NAME/with/key/1234
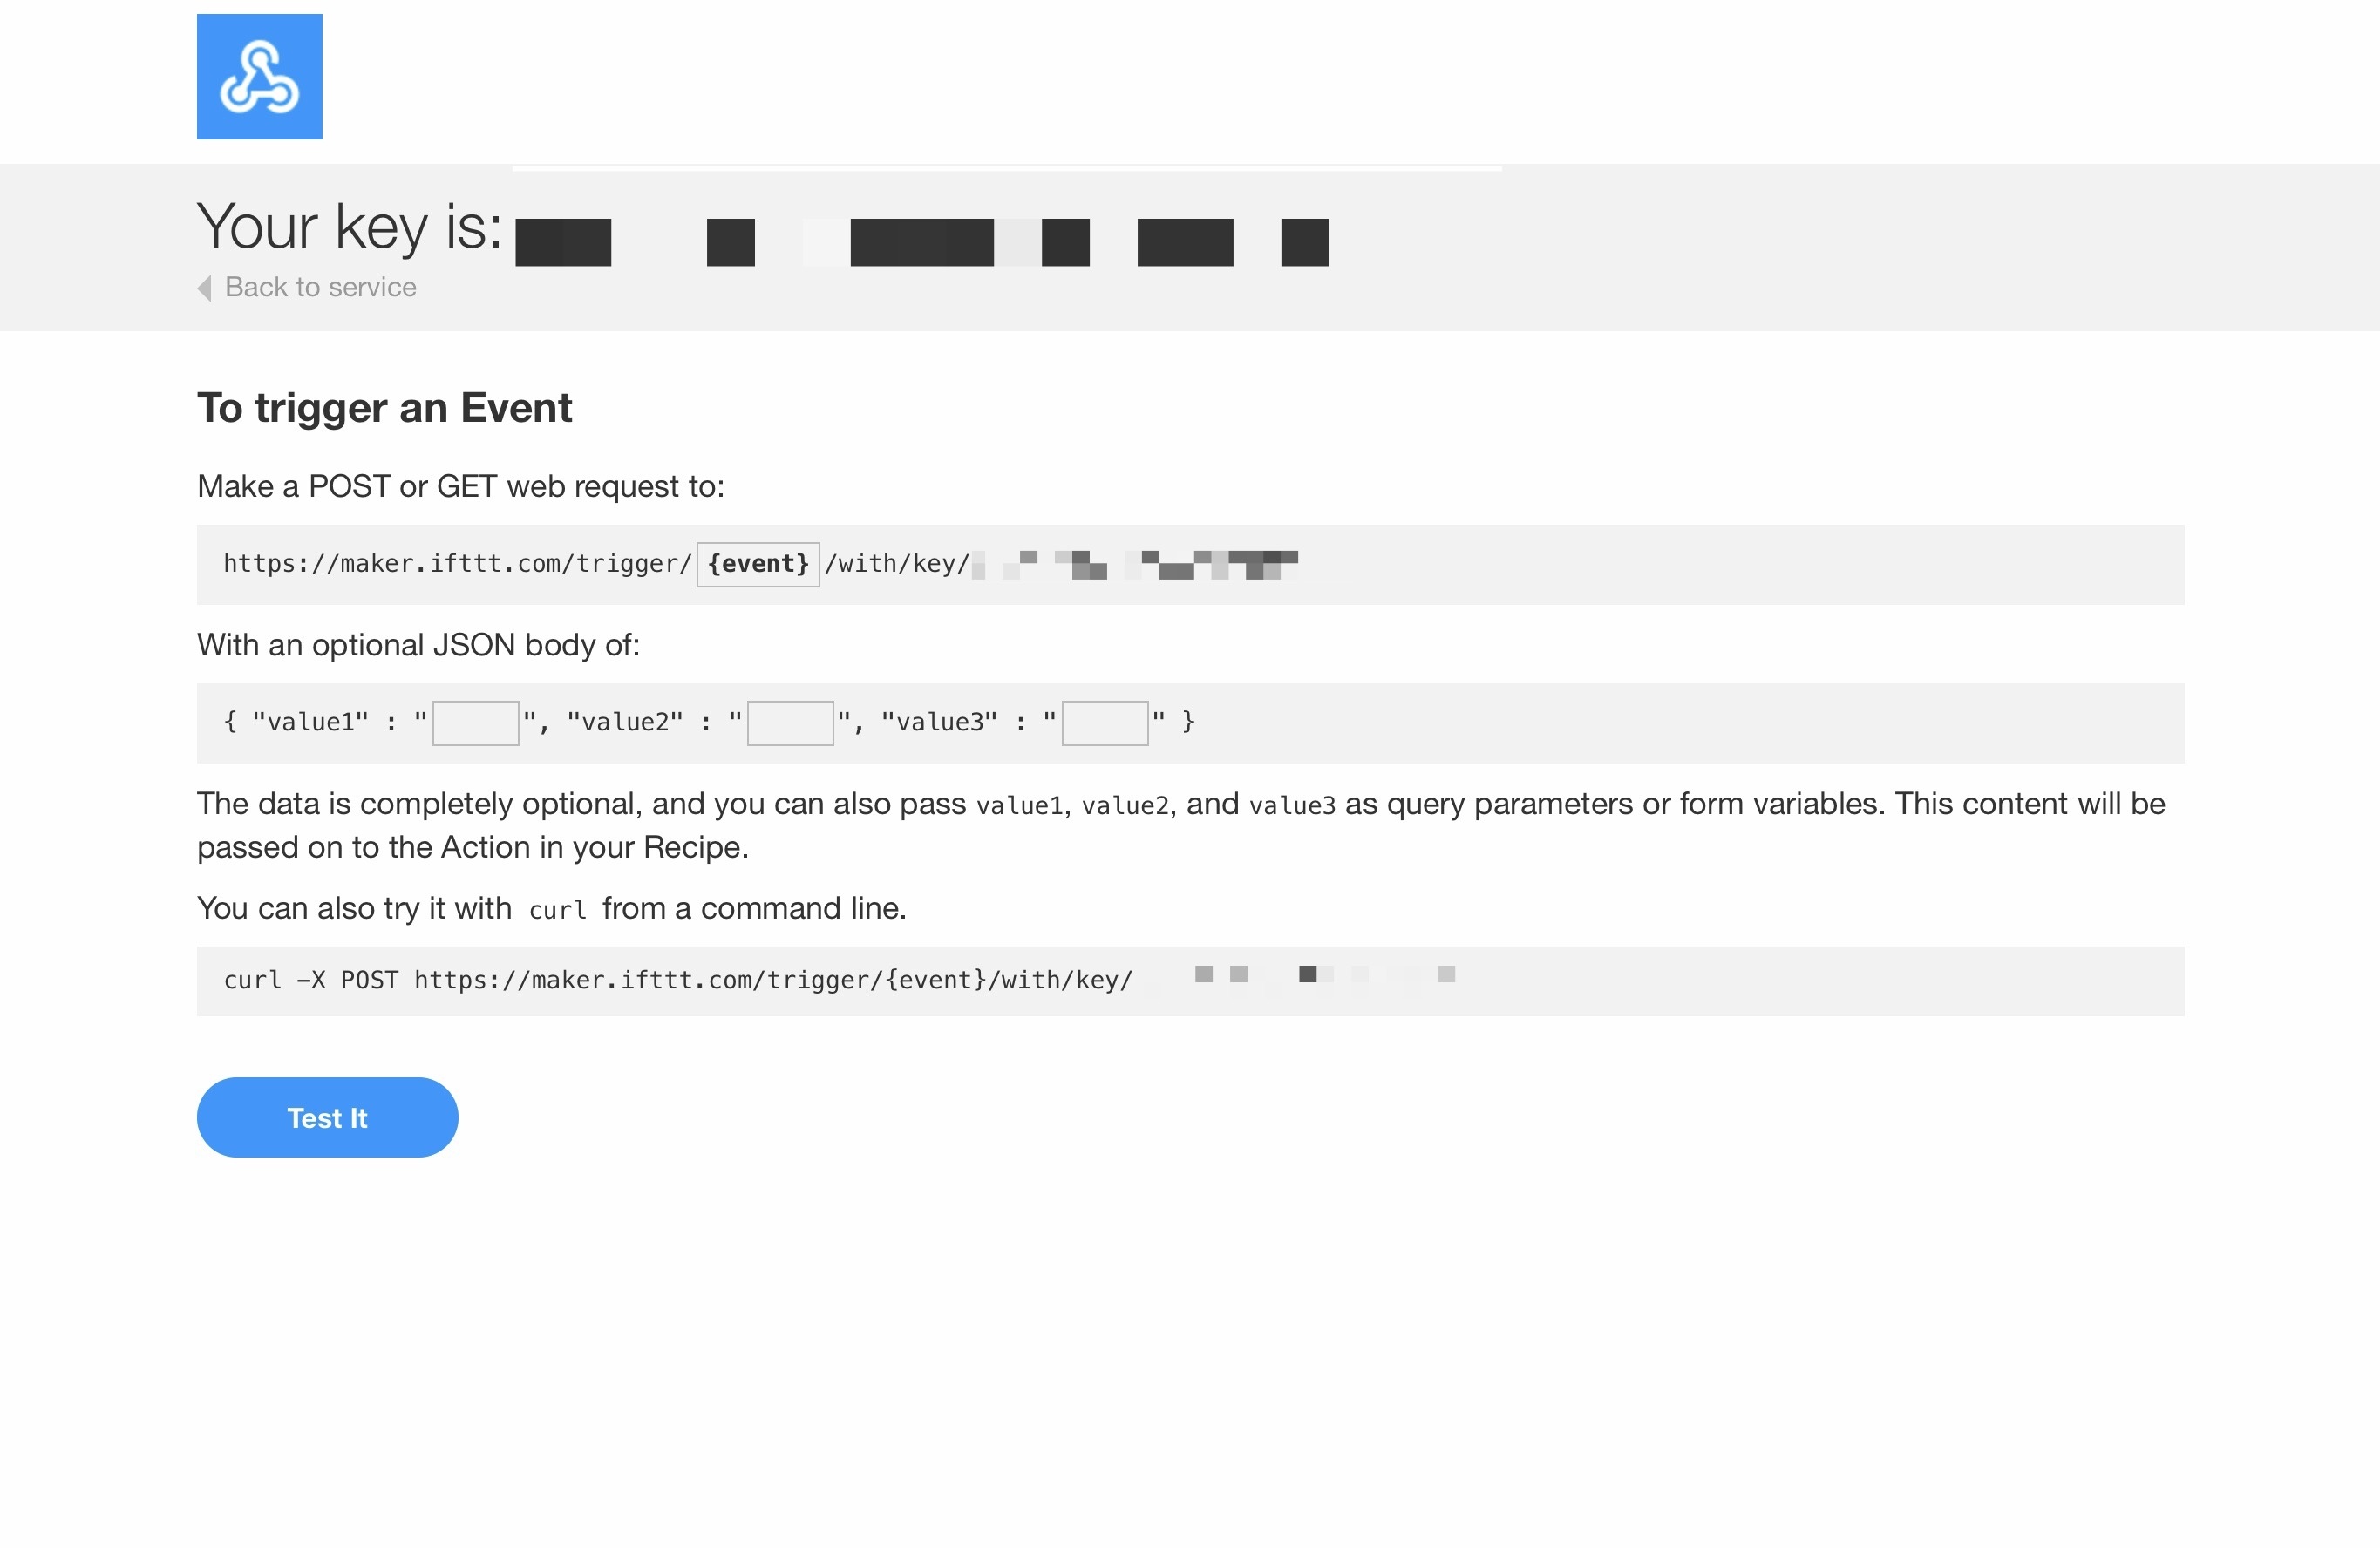
As you can probably guess, the event name is the label we created on IFTTT for the webhook, while 1234 stands for your unique, private key – which you have to keep safe and not share with anyone.
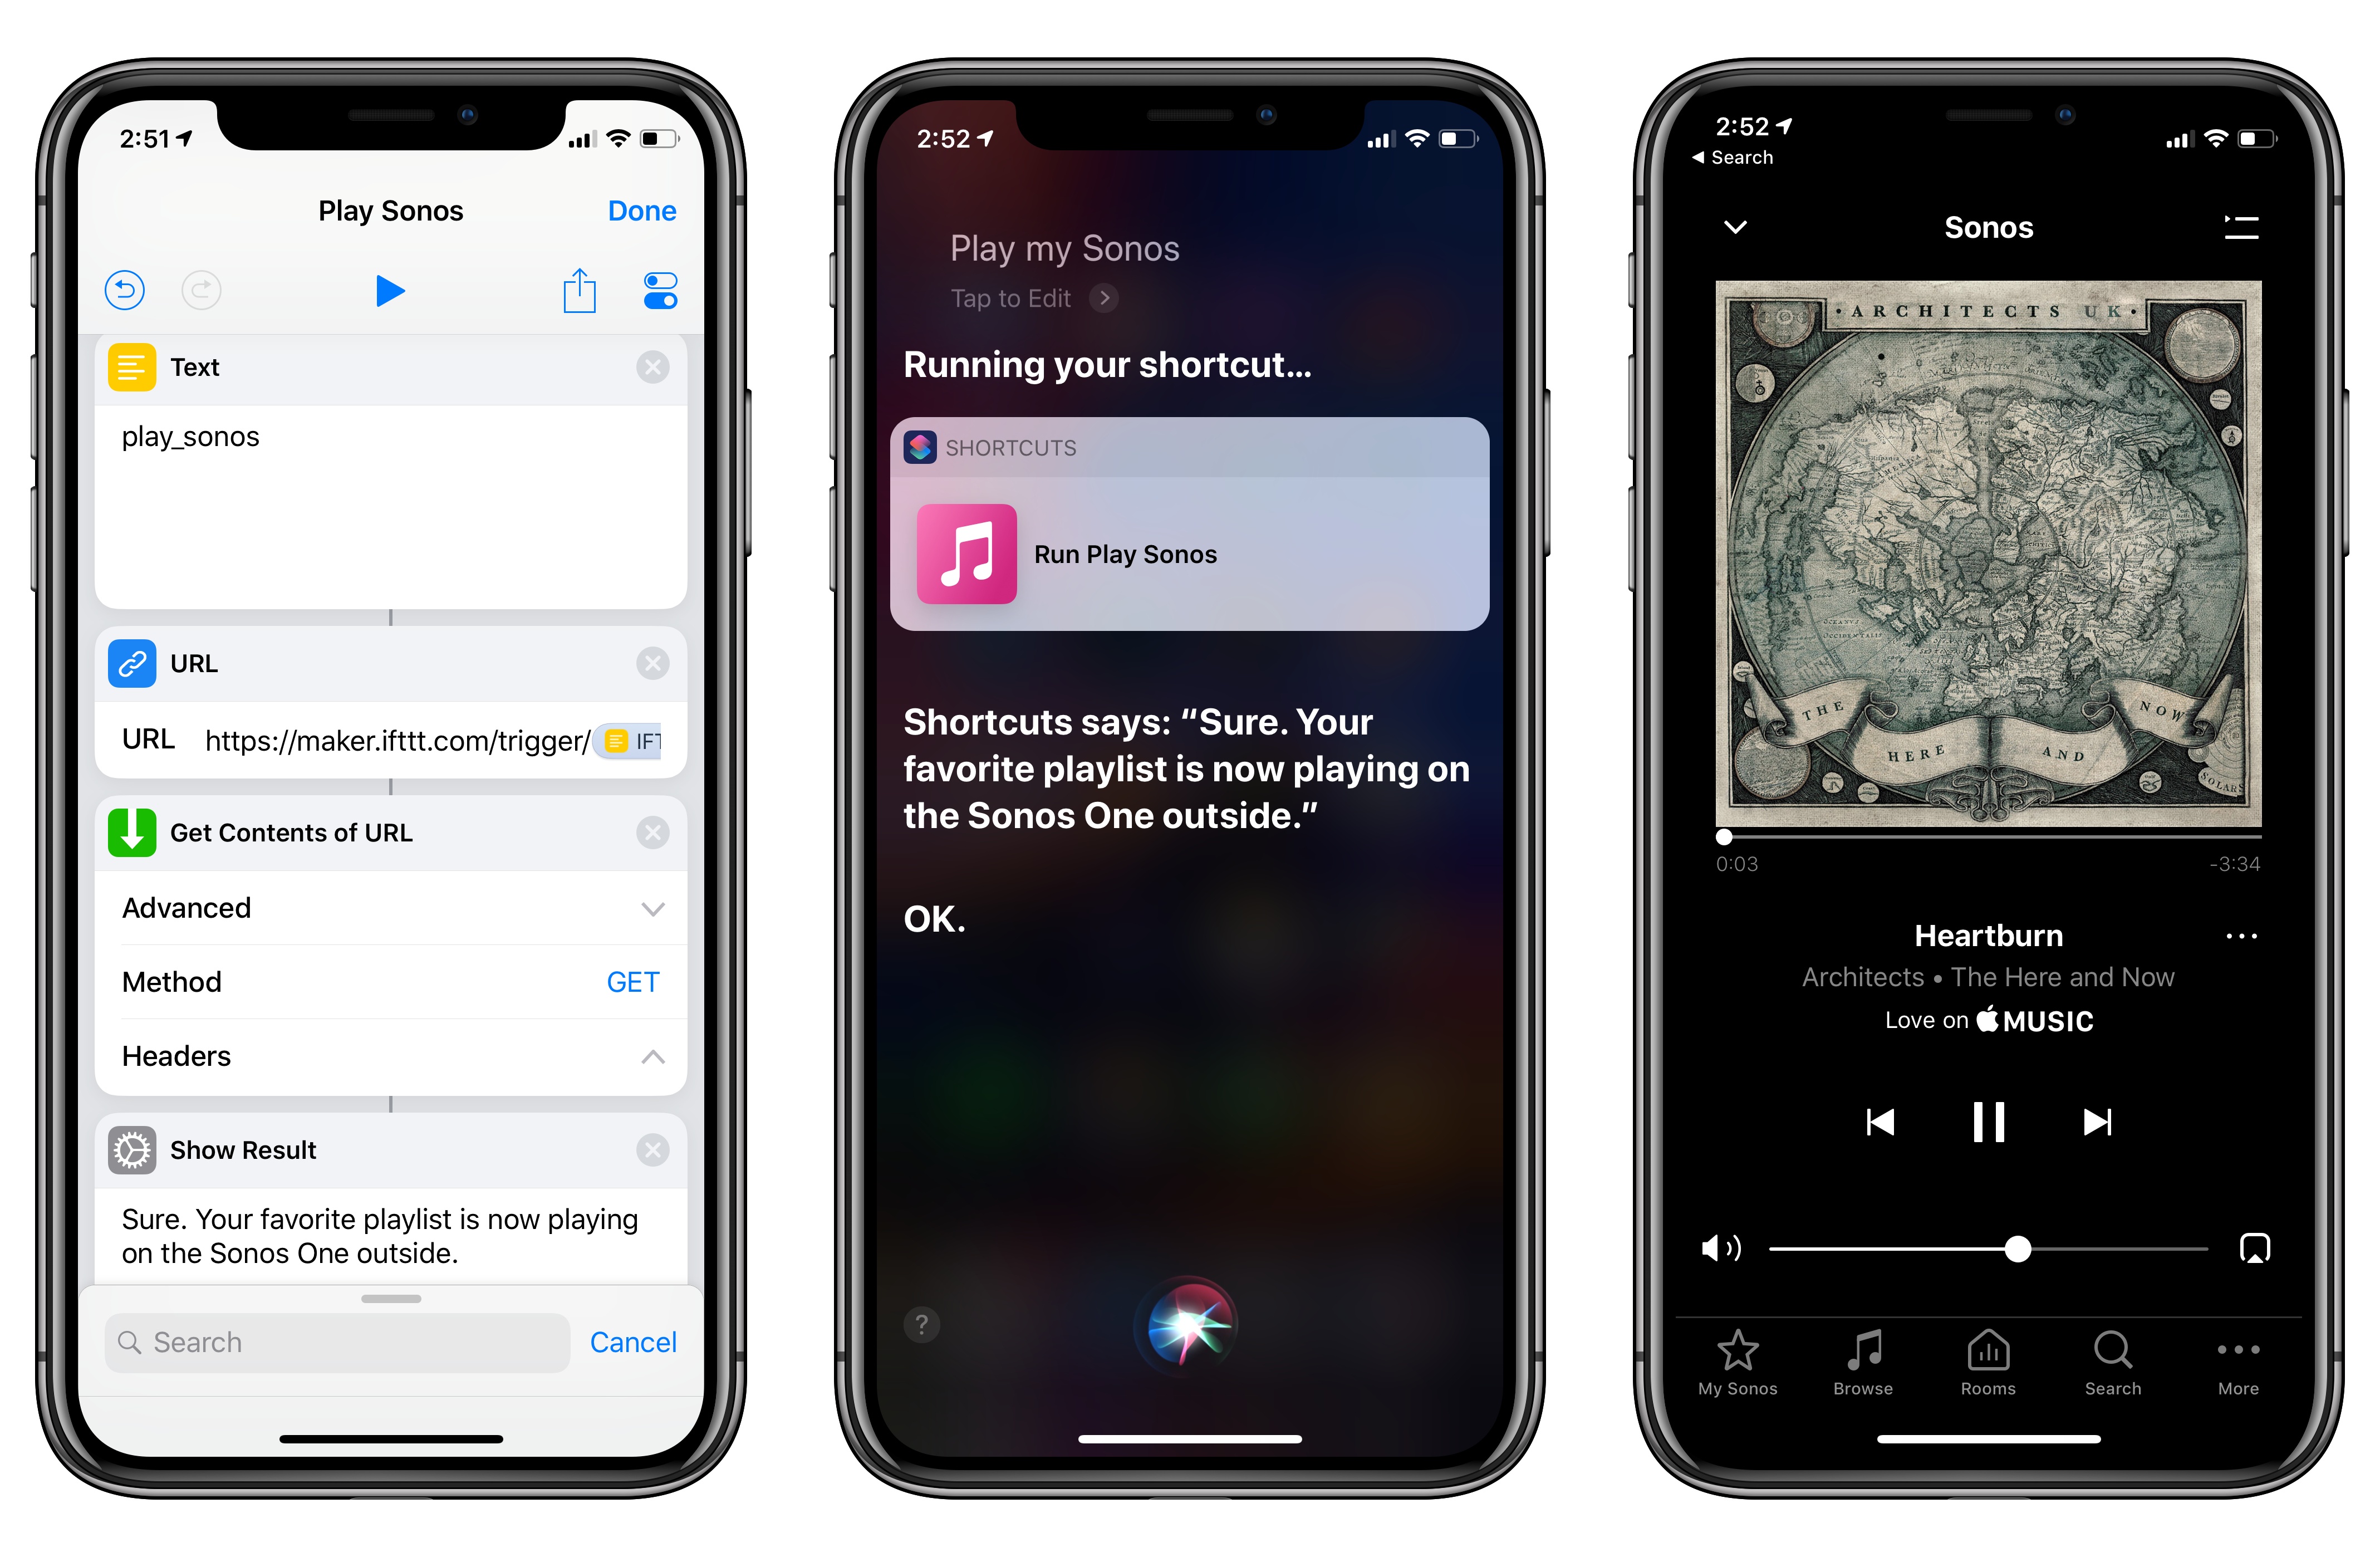
At this point, it’s time to create a new shortcut in the Shortcuts app. To trigger an applet like my Sonos example, we just need four actions: two ‘Text’ actions for the event name and Webhook key, plus a ‘URL’ action and, finally, the ‘Get Contents of URL’ action. The final product should look something like this:
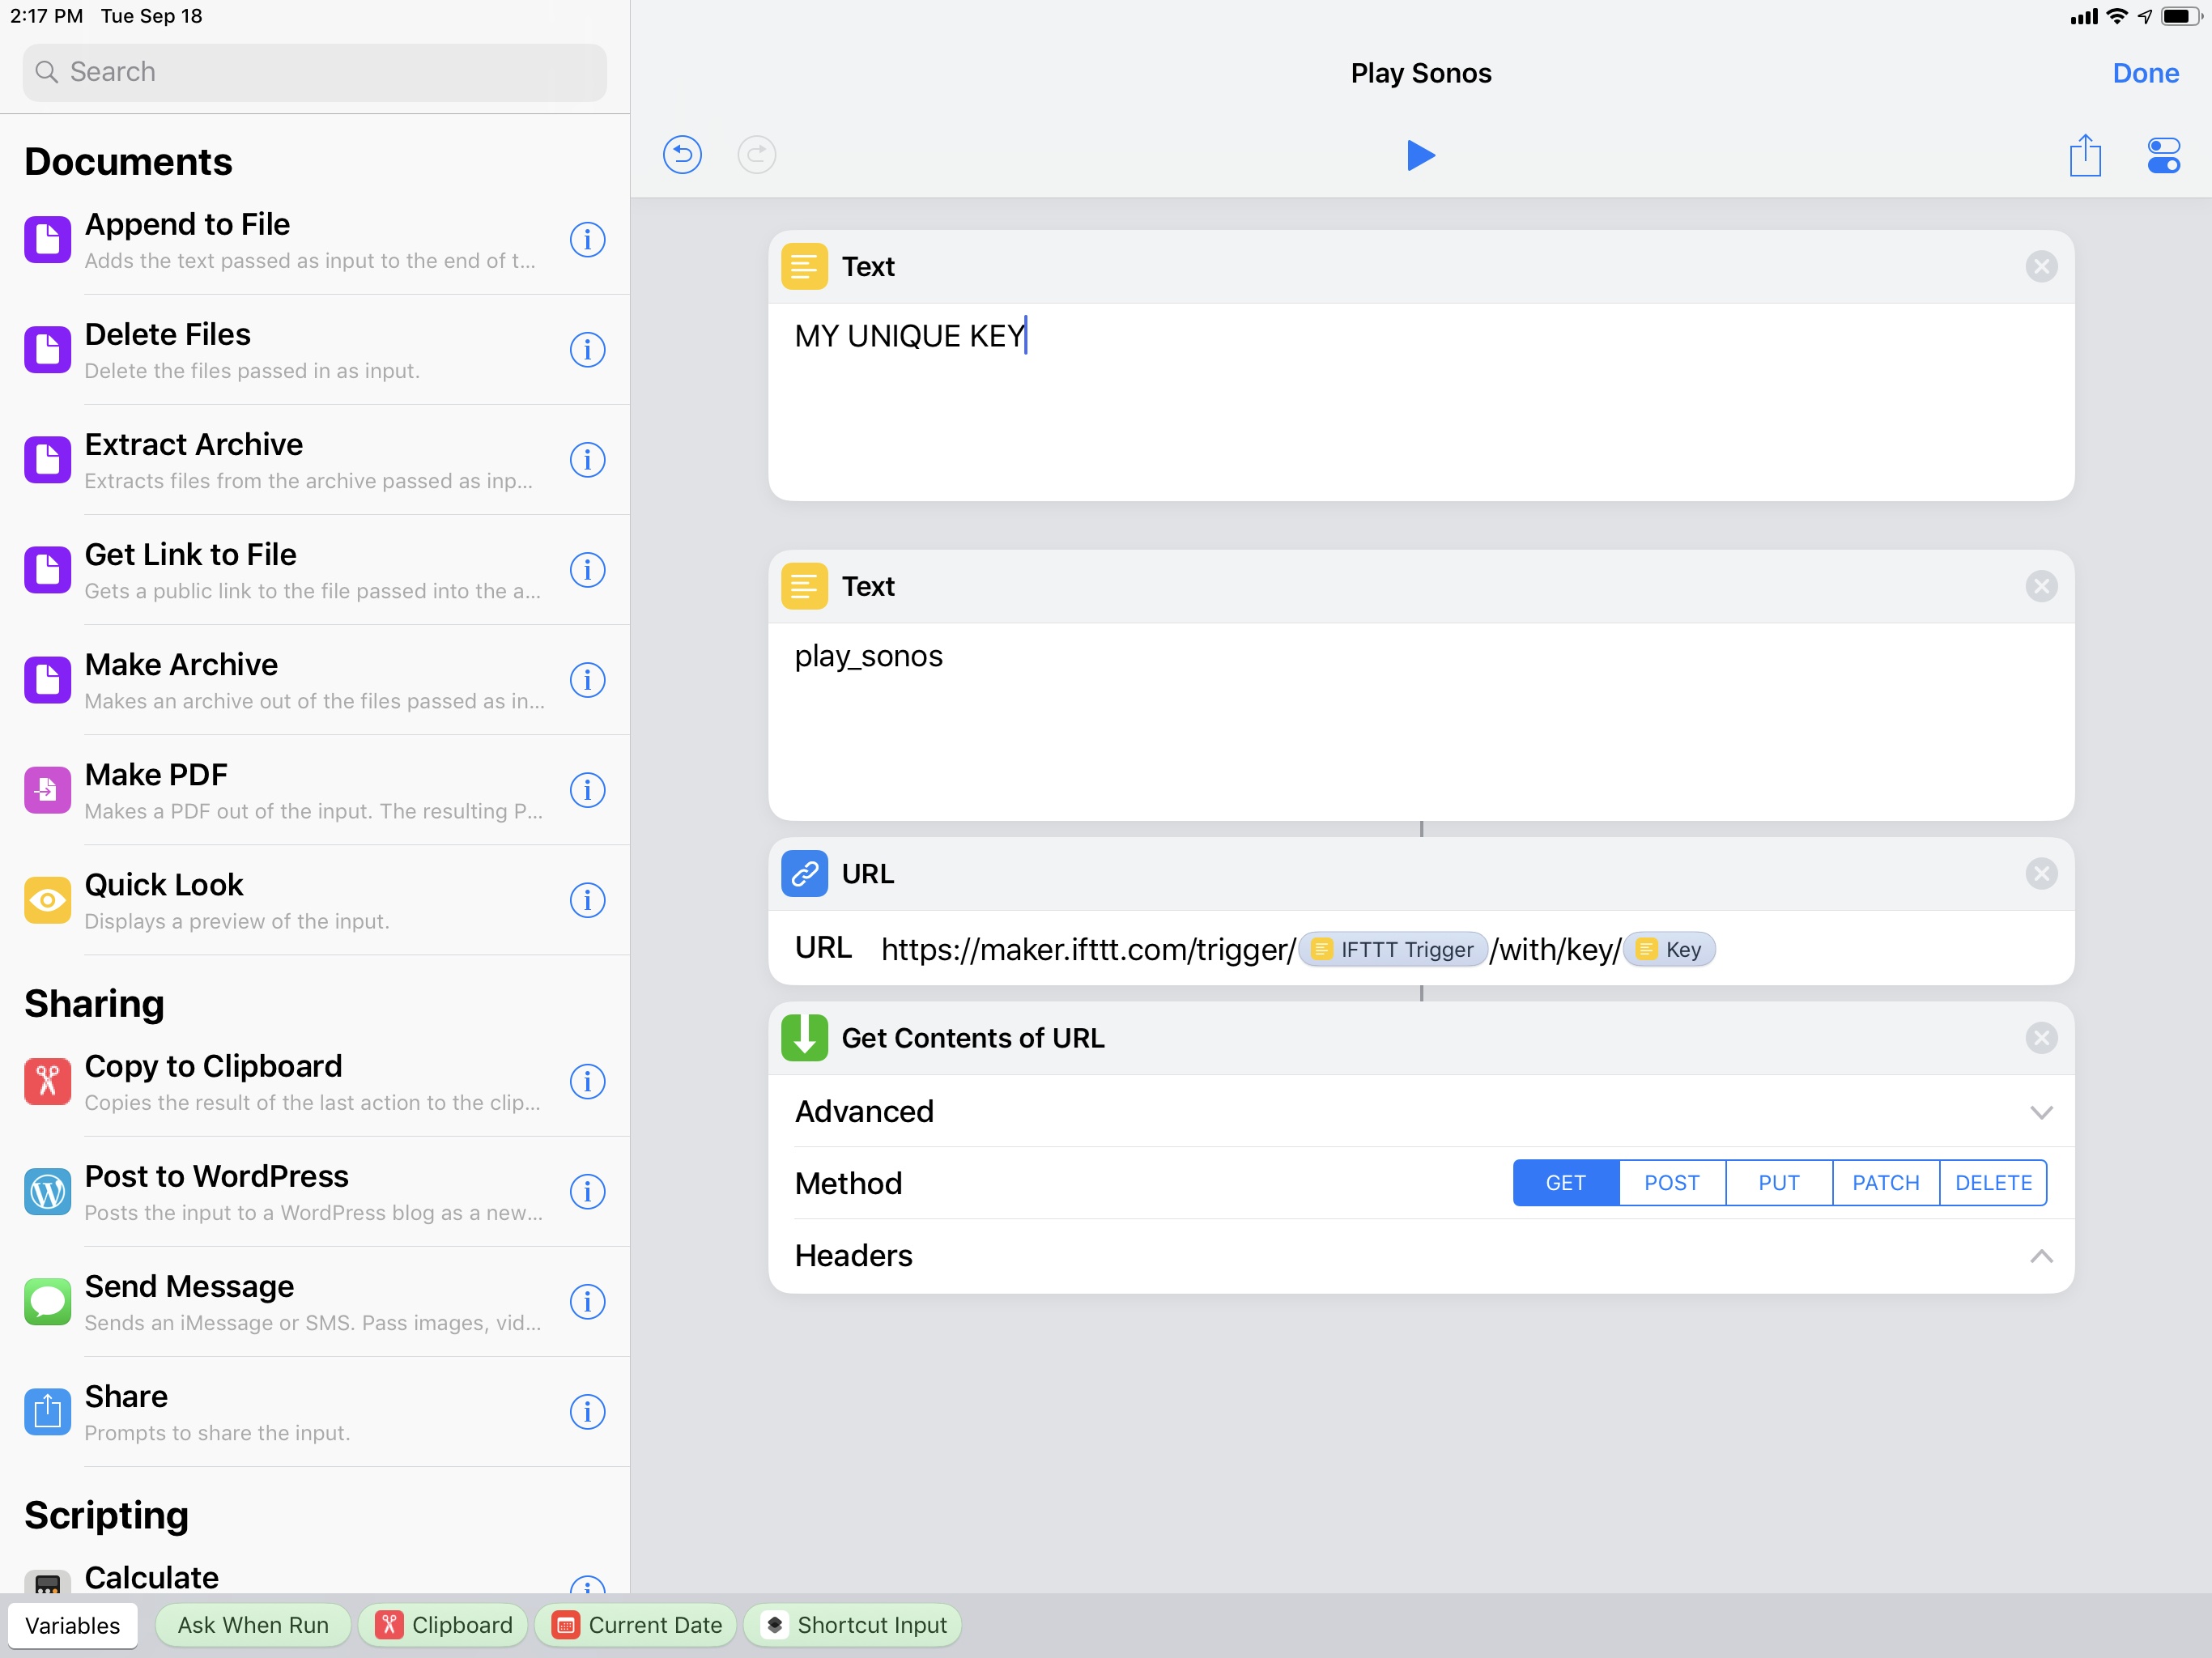
Once you’ve filled in the ‘Text’ actions with your event name and IFTTT key, run the shortcut, and, after a couple of seconds, the associated IFTTT action will run. In my case, this means I can run the shortcut and after a few seconds a specific playlist starts playing on my Sonos one.
This is all fun and useful, but it gets even better if you pair your custom shortcut with Siri and start invoking it with a personalized phrase. As I detailed in my review of iOS 12, you can do this by opening a shortcut’s settings and tapping the ‘Add to Siri’ button.
Once you have a custom phrase, you’ll be able to associate any webhook-based IFTTT applet with a Siri command. If you want to create multiple IFTTT shortcuts, you just need to replicate the shortcut template I described above but change the event name for each applet; your IFTTT key will always be the same. For example, here’s how my friend (and review narrator) Myke Hurley can control his Roomba with the Shortcuts app and a simple Siri phrase:
Myke can now activate his Roomba with a Siri shortcut through IFTTT. Myke says he likes this. (Tap volume button for audio.)Replay
IFTTT webhooks open up the Shortcuts app – and therefore Siri and iOS 12 as a whole – to hundreds of third-party integrations that aren’t supporting native shortcuts yet. This is a powerful idea – imagine using Siri on the HomePod to control your Logitech Harmony remote or asking Siri on the Watch to set your Nest thermostat to a specific temperature. However, there’s even more we can do with IFTTT and webhooks combined with Shortcuts.
Advanced Version: Pass Variables to IFTTT Actions
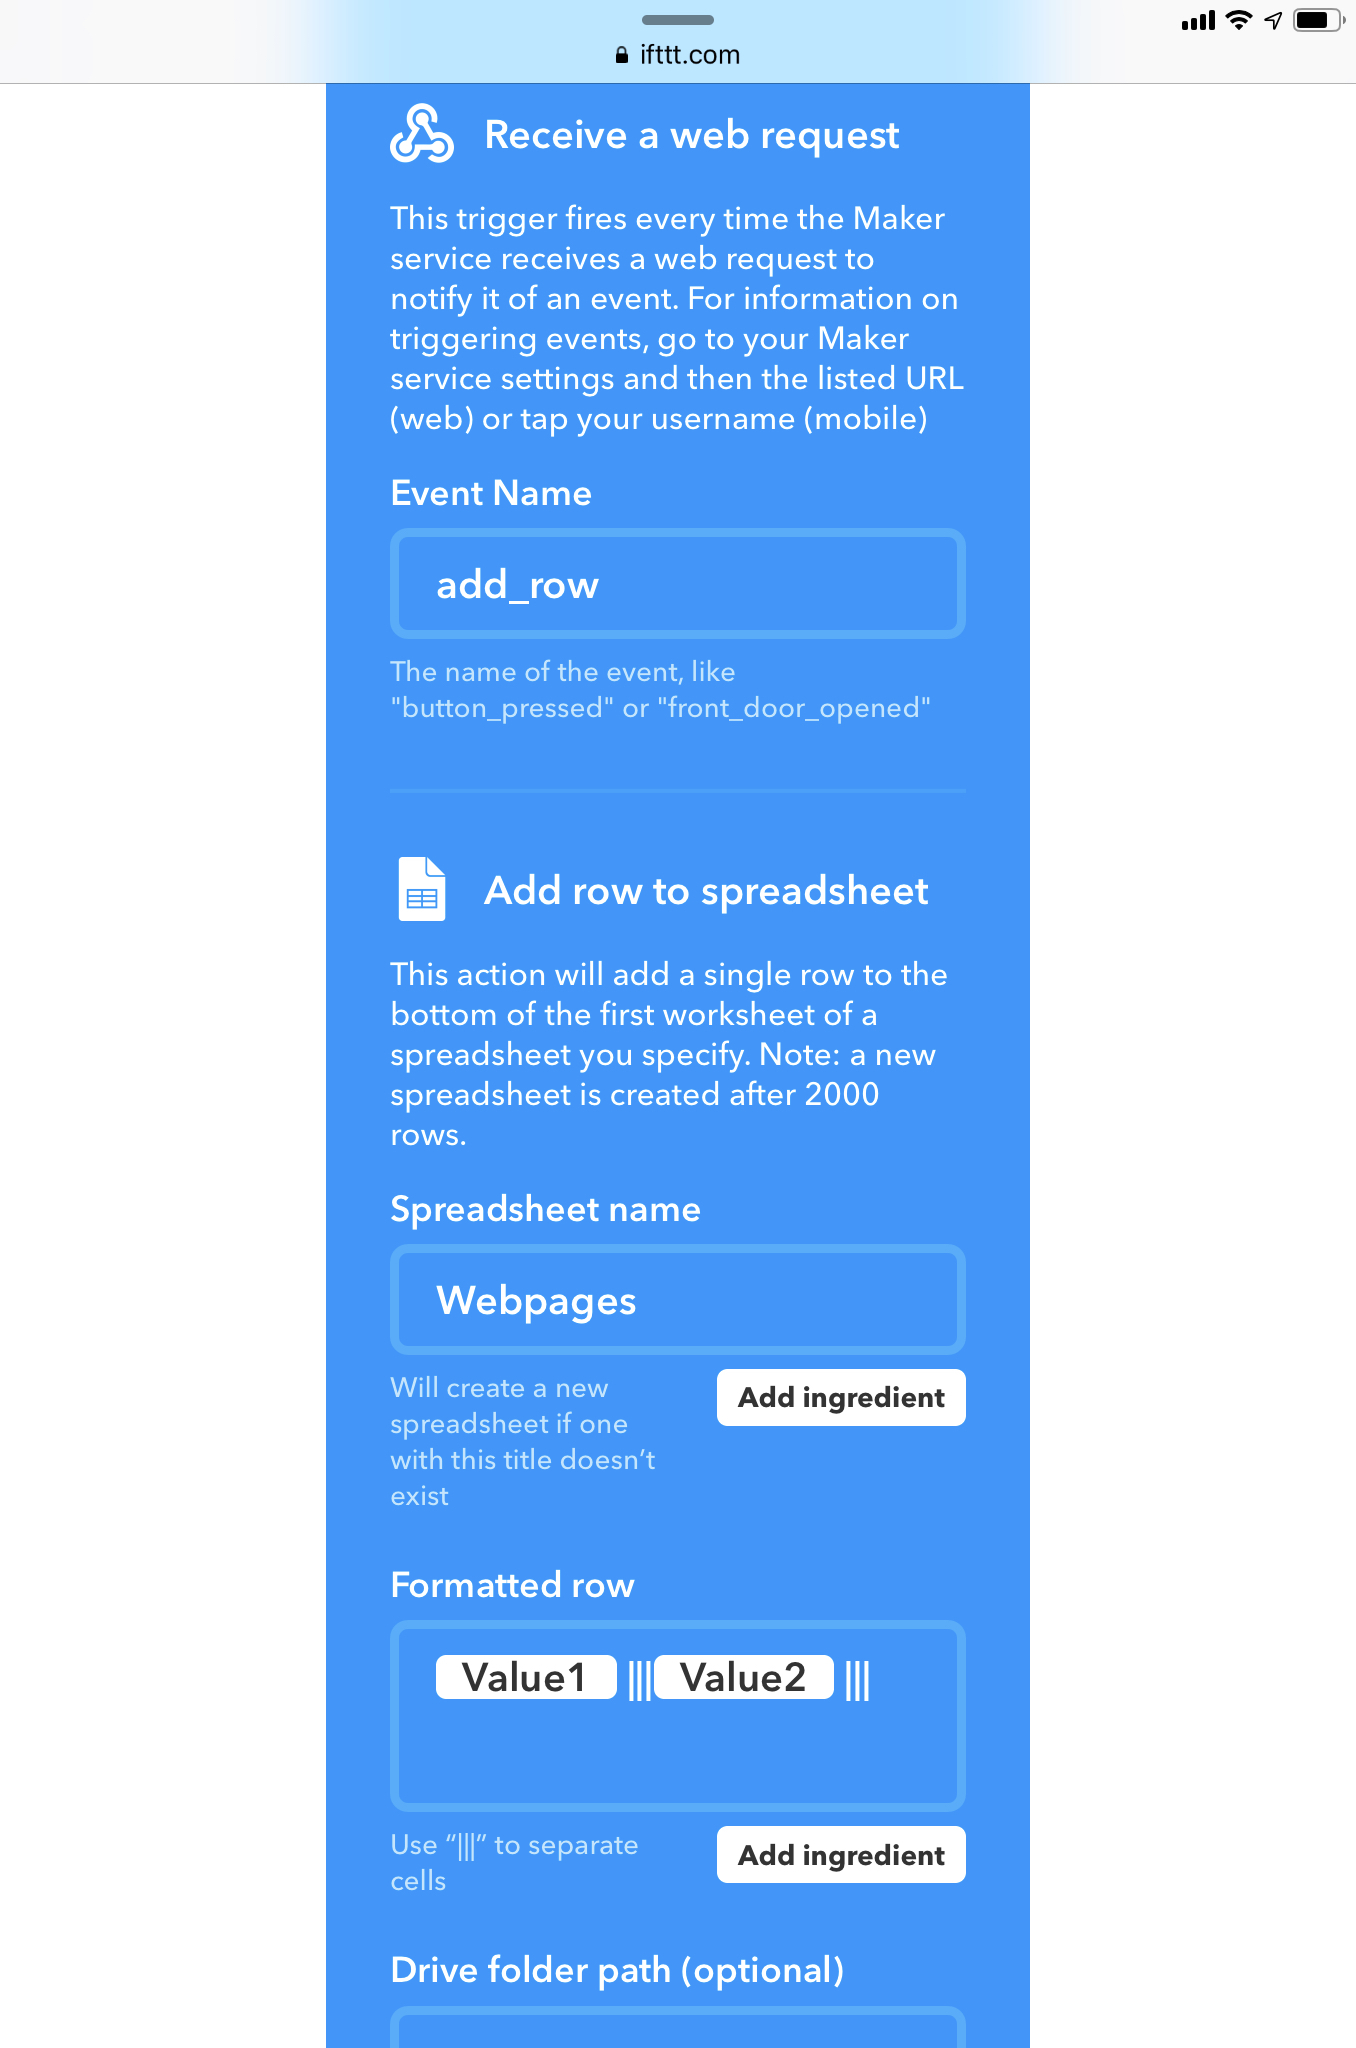
Certain IFTTT actions allow you to configure fields by using plain text and ingredients. An example of this may be the ‘Add row to spreadsheet’ action, which, as the name suggests, can add a new row to the bottom of a spreadsheet in your Google Sheets account. To configure this action, you type the document’s name and path in the necessary fields, then select which ingredients to use based on what the trigger sent. With Shortcuts, in addition to triggering basic applets, we can also pass along variables to trigger actions that support customizable data fields.
As detailed by IFTTT, webhooks support receiving up to three values for ingredients that have to be sent along as part of a JSON body. We don’t have to care about any JSON formatting because Shortcuts has a visual action that lets us assemble what IFTTT requires in just a few taps. Essentially, we just need to include values in our webhook request as pictured below:
Once again, let me explain a practical use case for this with an example. Let’s say that I have a spreadsheet where I like to save interesting links I come across on the web. The spreadsheet has two columns – one for the webpage title, one for the actual URL. I want to have an easy way to copy a link from my iPhone and instantly send it to IFTTT so that it’ll add it as a new row to the spreadsheet. With Shortcuts and iOS 12, we can create a custom shortcut that takes the contents of the system clipboard, formats it for IFTTT, and triggers the action from Siri, without having to open the Shortcuts app at all.
On IFTTT, create a webhook trigger and give it a unique event name. Then, choose the ‘Add row to spreadsheet’ action for Google Sheets and enter the document’s name and path in your Google Drive account. The key part in this action is the ‘Formatted row’ field, where you’ll have to enter ingredients for value1 and value2, which are the variables the Shortcuts app will pass to IFTTT.
Make sure to enter cell separators as pictured below:
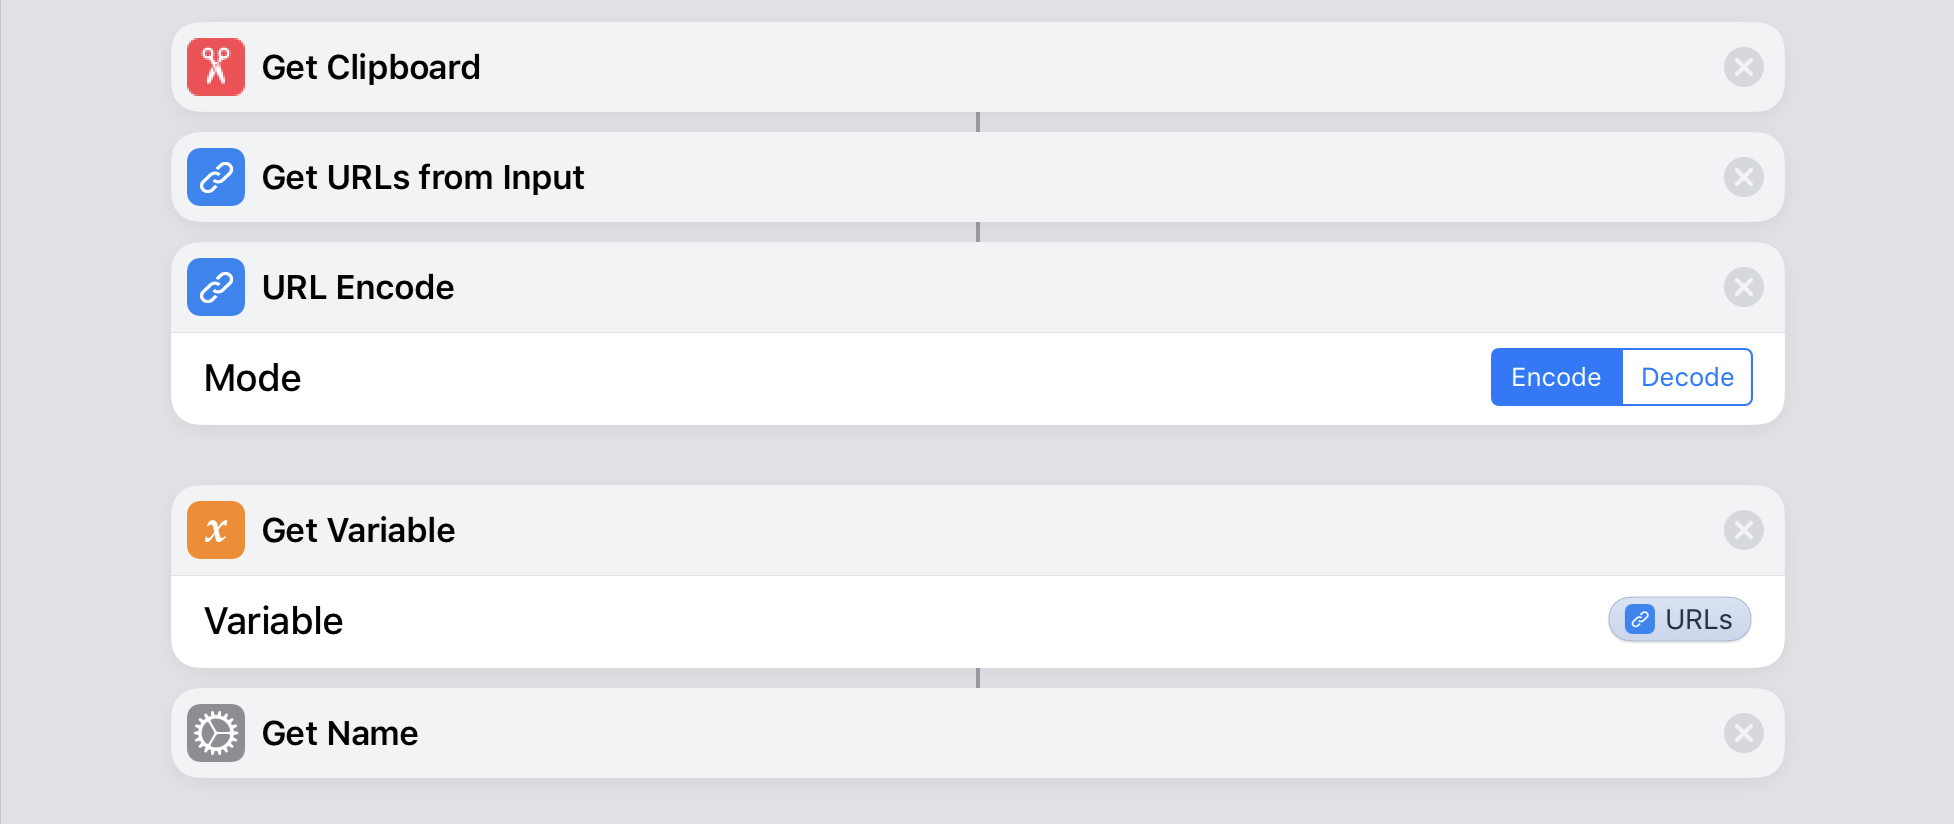
Back in the Shortcuts app, create an IFTTT trigger (with the usual key, event name, and URL actions) but this time add actions for sending the contents of the clipboard as well. In my case, I had to use a handful of actions to get a URL from the clipboard, read its title, and encode it for IFTTT:
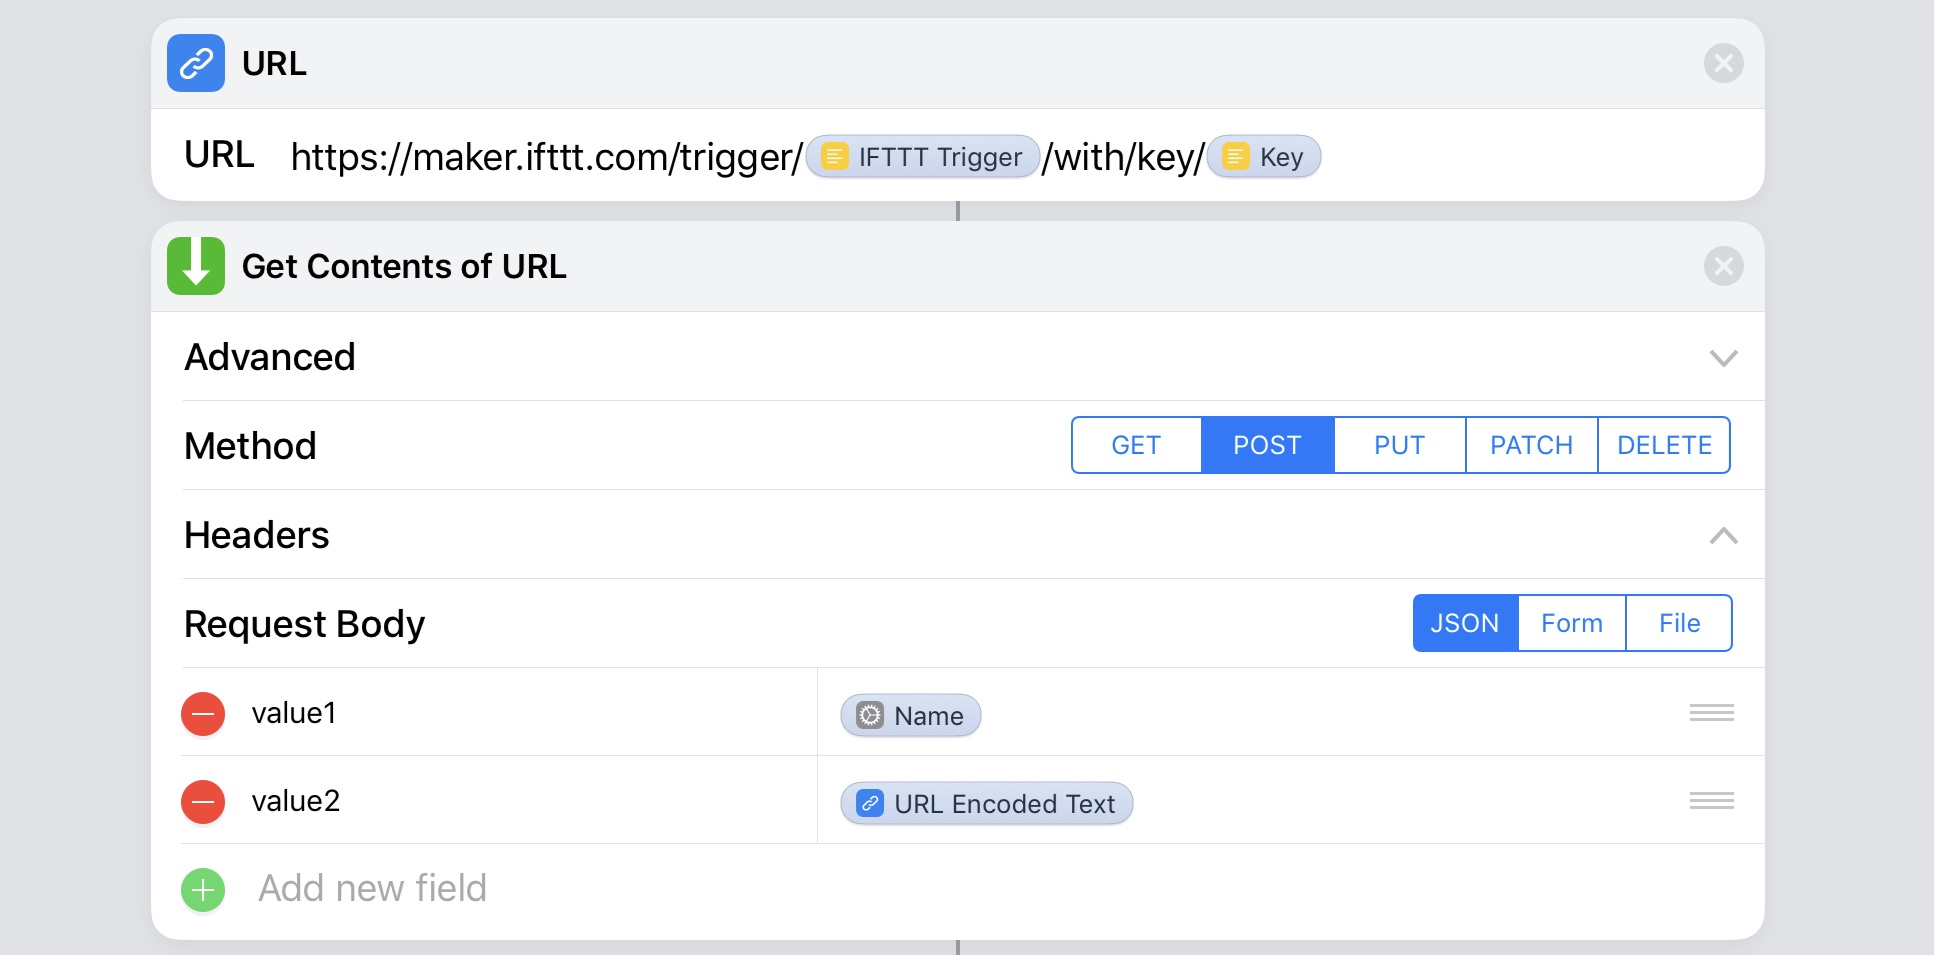
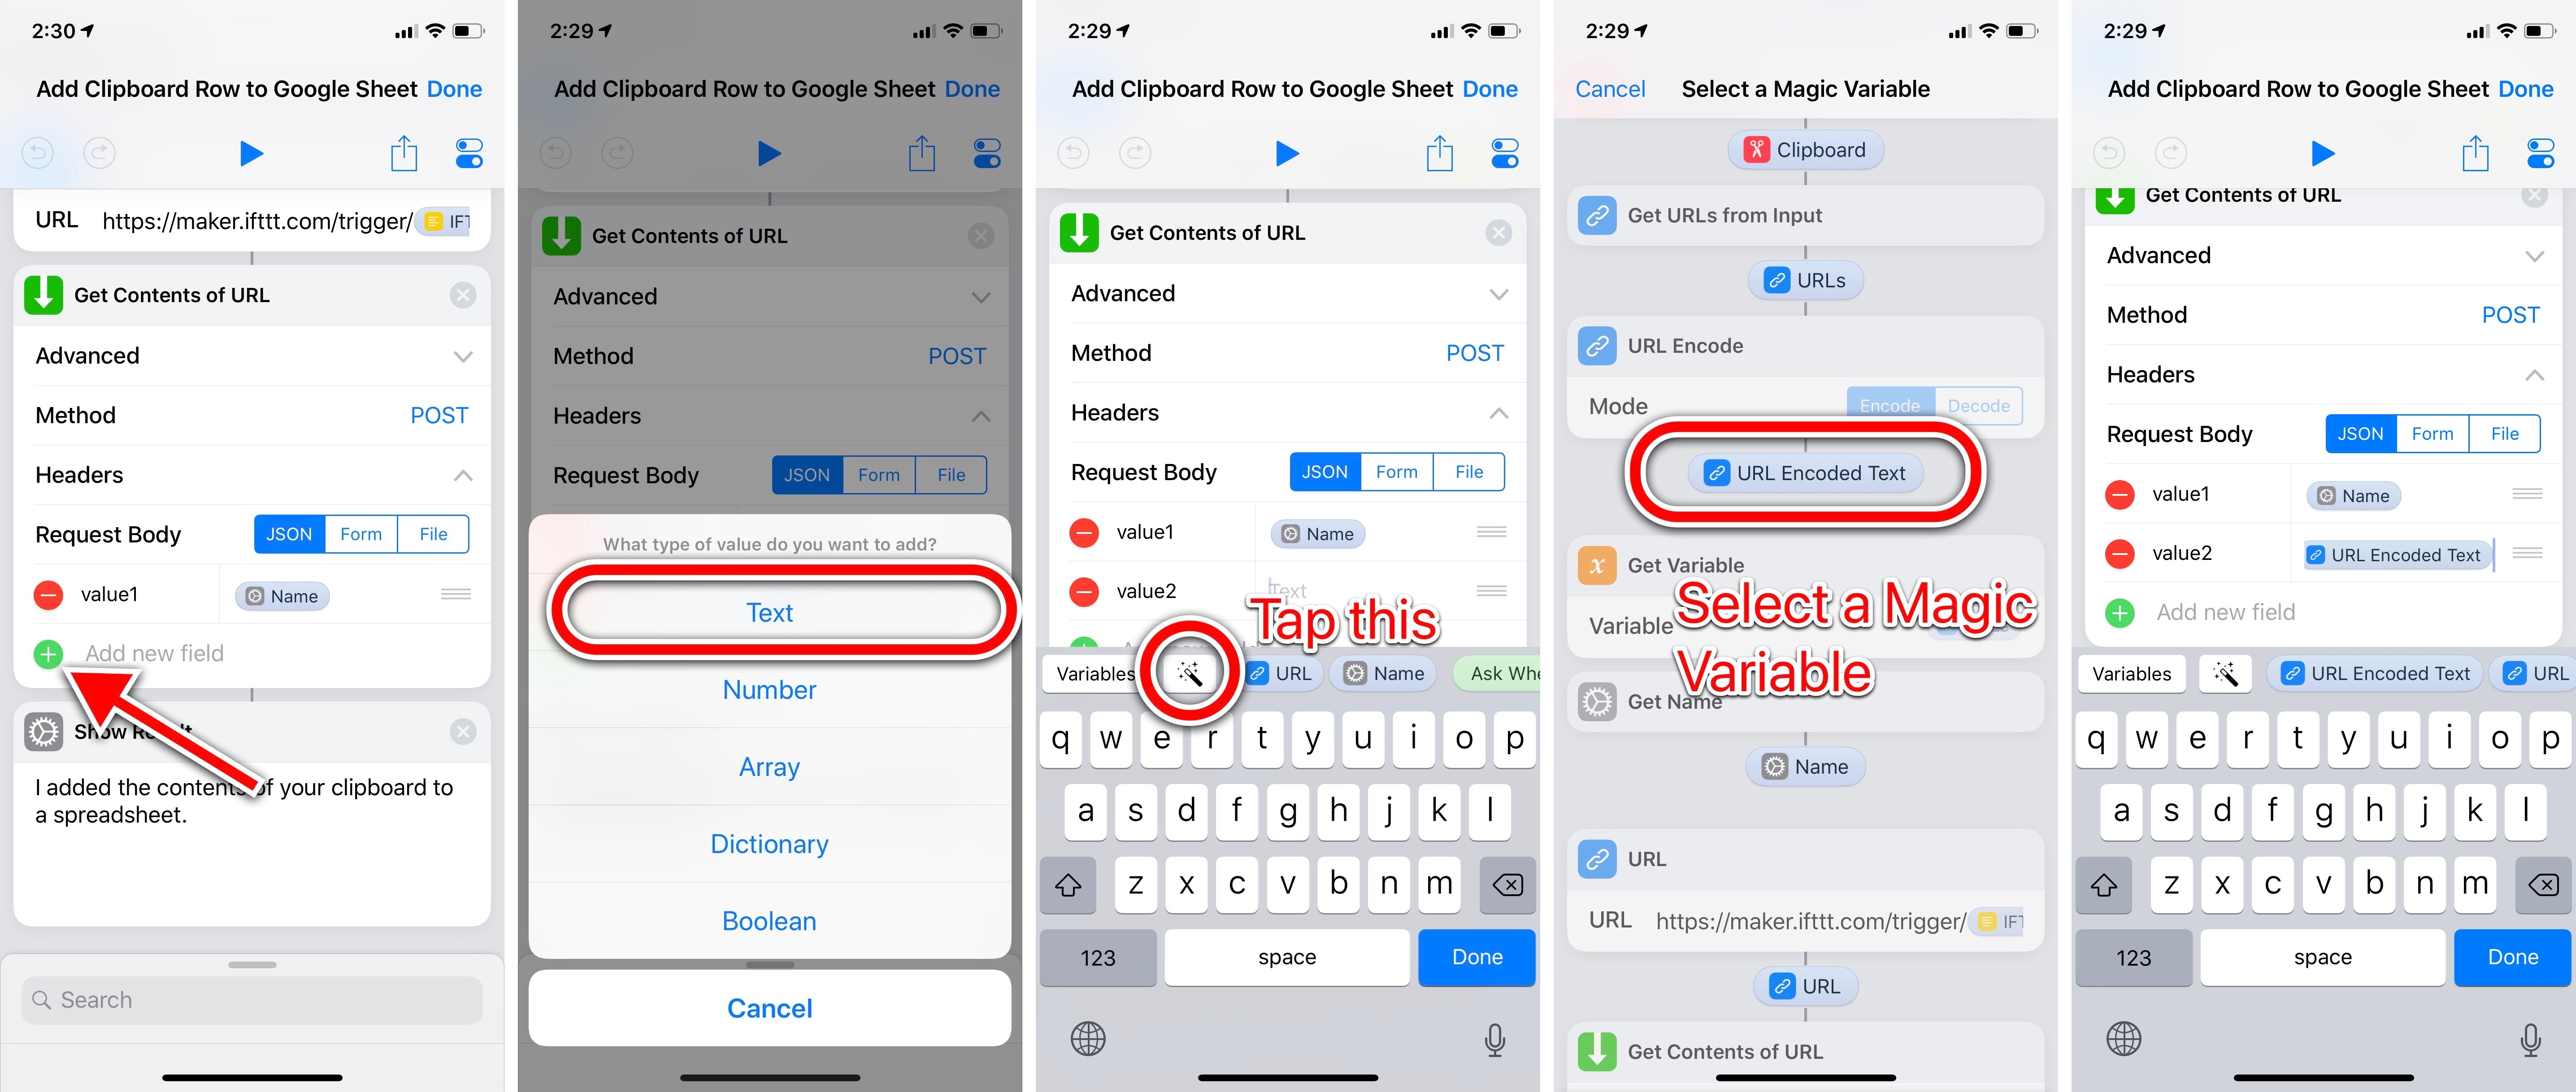
Finally, we need to modify the ‘Get Contents of URL’ action so that is becomes a POST request with a Request Body that contains value1 and value2, as required by IFTTT. Again, this is easy to do in Shortcuts because you just need to select a few UI elements without doing any “coding” yourself. To add values, add a new text field to the Request Body section and use Magic Variables as their actual value. In my Google Sheet example, the two values are the name of the webpage and the encoded URL.
At this point, with the IFTTT applet ready and waiting for a request, create a custom Siri phrase for the shortcut, then copy any link to the clipboard. After invoking the assistant with your phrase, wait a few seconds for the shortcut to run, then open the spreadsheet in Google Sheets. The new row consisting of a webpage title and URL will be there, waiting for you at the bottom of the document.
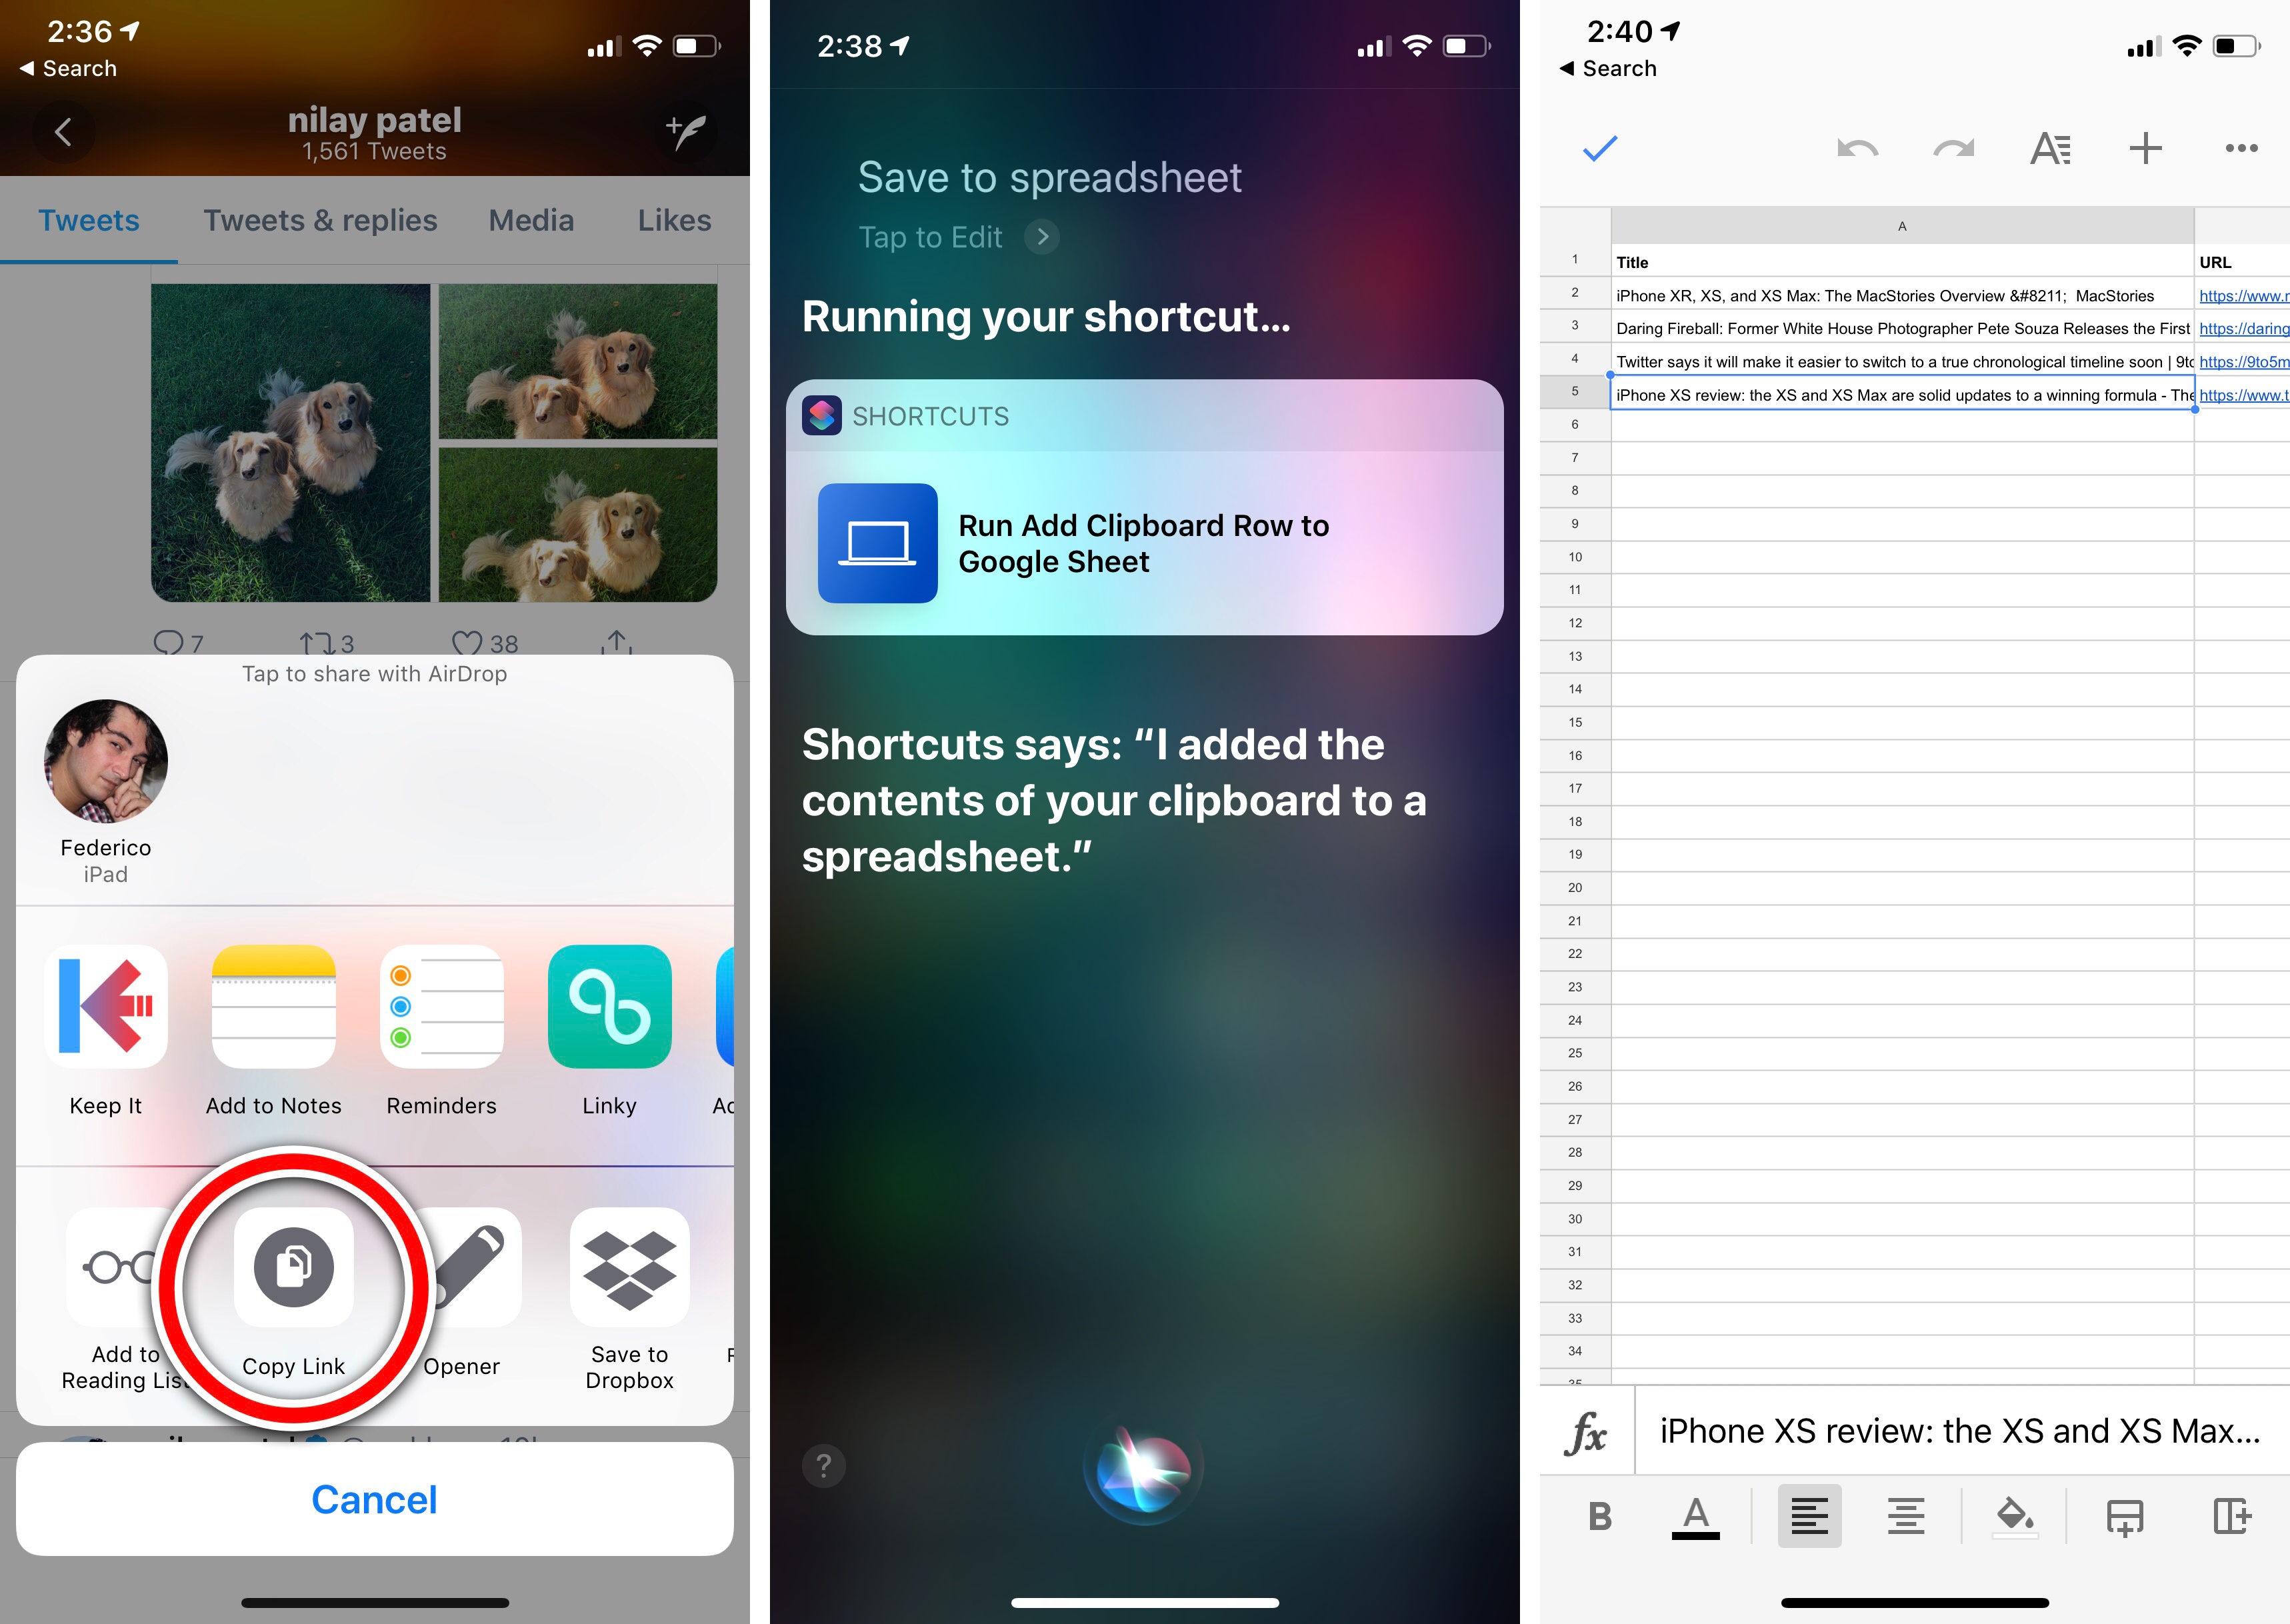
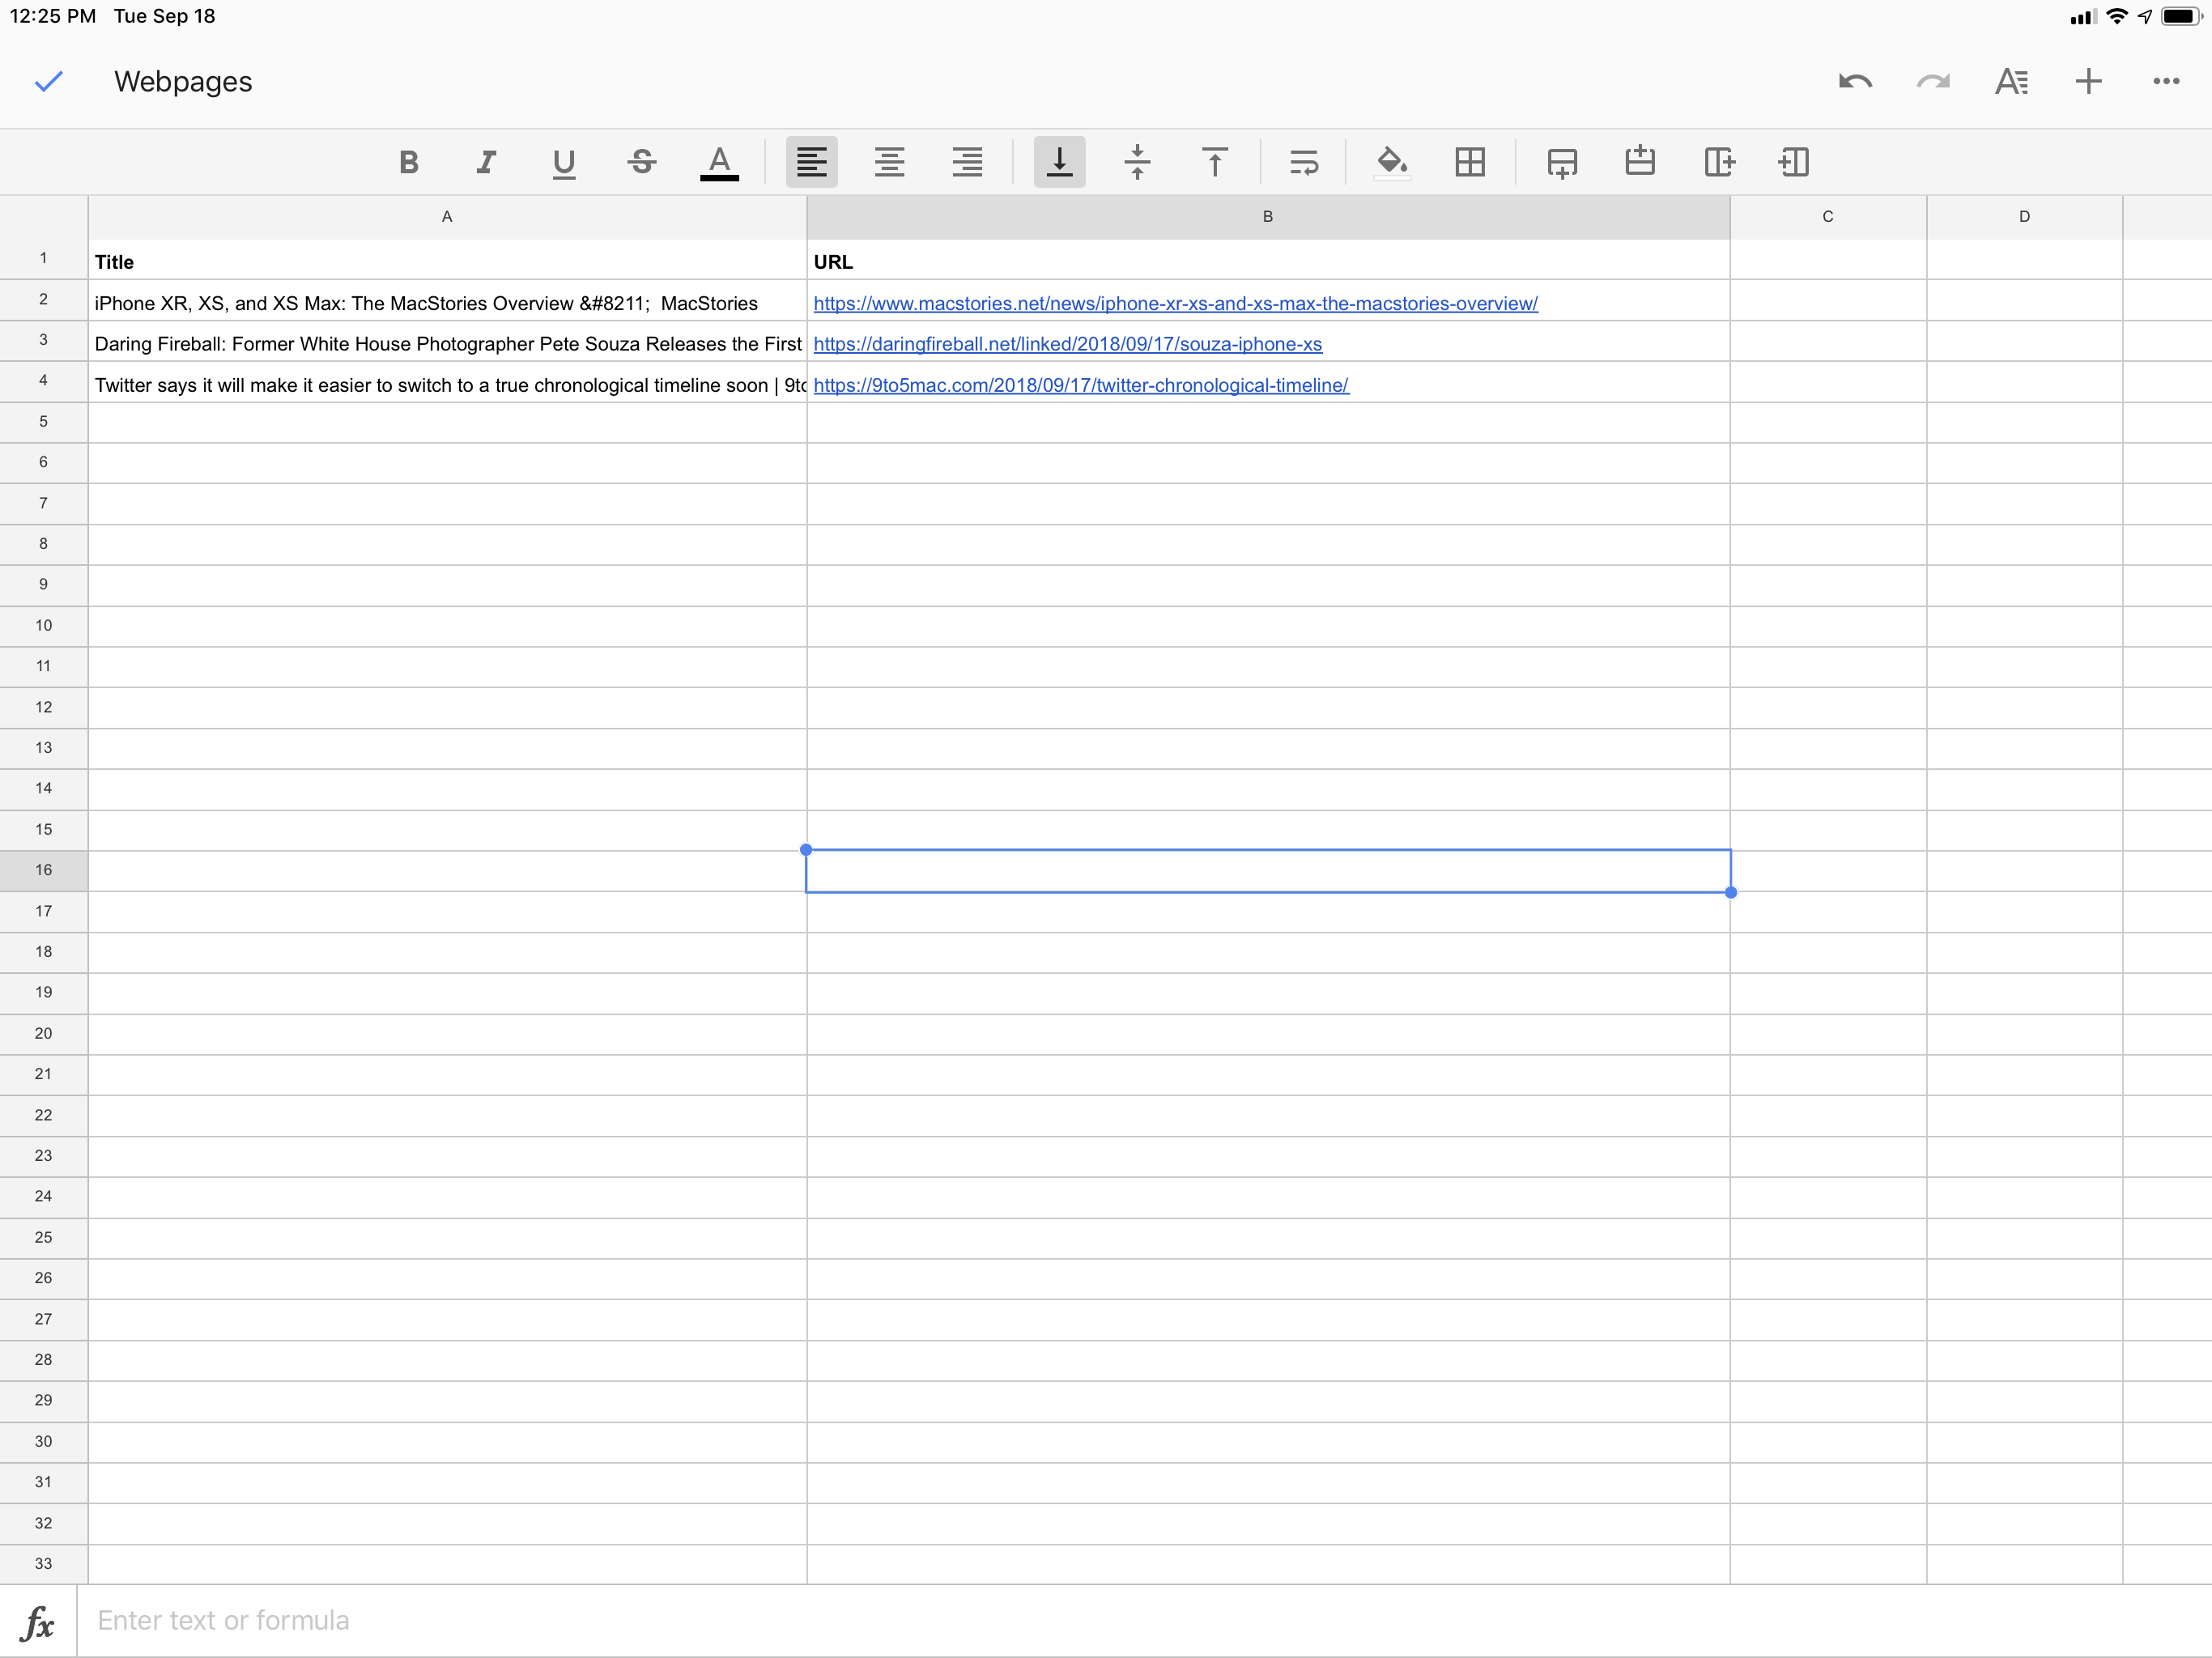
You just used Siri on your iPhone to format data from the device’s clipboard and send it to a web service that appended it to a spreadsheet in your Google account – in less than four seconds. Now that’s pretty cool.
Even though I would have preferred Apple to keep the original IFTTT action in Shortcuts, it’s still possible to integrate the popular service with Apple’s new app, using Siri as a bridge between your iOS device and hundreds of web services supported by IFTTT.
After experimenting with this concept for the past couple of weeks, I keep thinking of new possibilities created by the fact that shortcut phrases can be invoked on any Apple device and that the Shortcuts app can send any kind of variable to IFTTT. Whether you simply want to turn on a smart home device or send a list of ingredients to a web service, combining Shortcuts, Siri, and IFTTT into a single command is a fun, powerful idea that I’m going to apply to a bunch of services and accessories that do not support shortcuts in iOS 12 yet.
Add Clipboard Row to Google Sheet
Send a link from the iOS clipboard to IFTTT, which will add it as a new row in a Google spreadsheet.