Following a tip by one of our members in the Club MacStories+ Discord server last night (if you haven’t joined yet, now’s a great time to do so), I came across the settings page on the beta.icloud.com website to configure a custom domain and email address with iCloud Mail. This is the direct link to the settings page; it was working last night, but it seems to be having some issues today.
Custom domains in iCloud Mail is a feature Apple announced for the “rebranded” iCloud+ service at WWDC, which I’ve been curious to try for two reasons: I have a personal domain laying around I can use to test this, and iCloud Mail – unlike Gmail – supports proper push notifications on iOS. Given the beta nature of this feature, I am not recommending you try this with your primary email address right now; I set it up with a secondary email address I barely used before.
I would advise against switching your primary custom email address to iCloud at the moment – especially if your custom domain is used as the primary login for your Apple ID. But because I did it…for science, I wanted to share a few details on how it went.
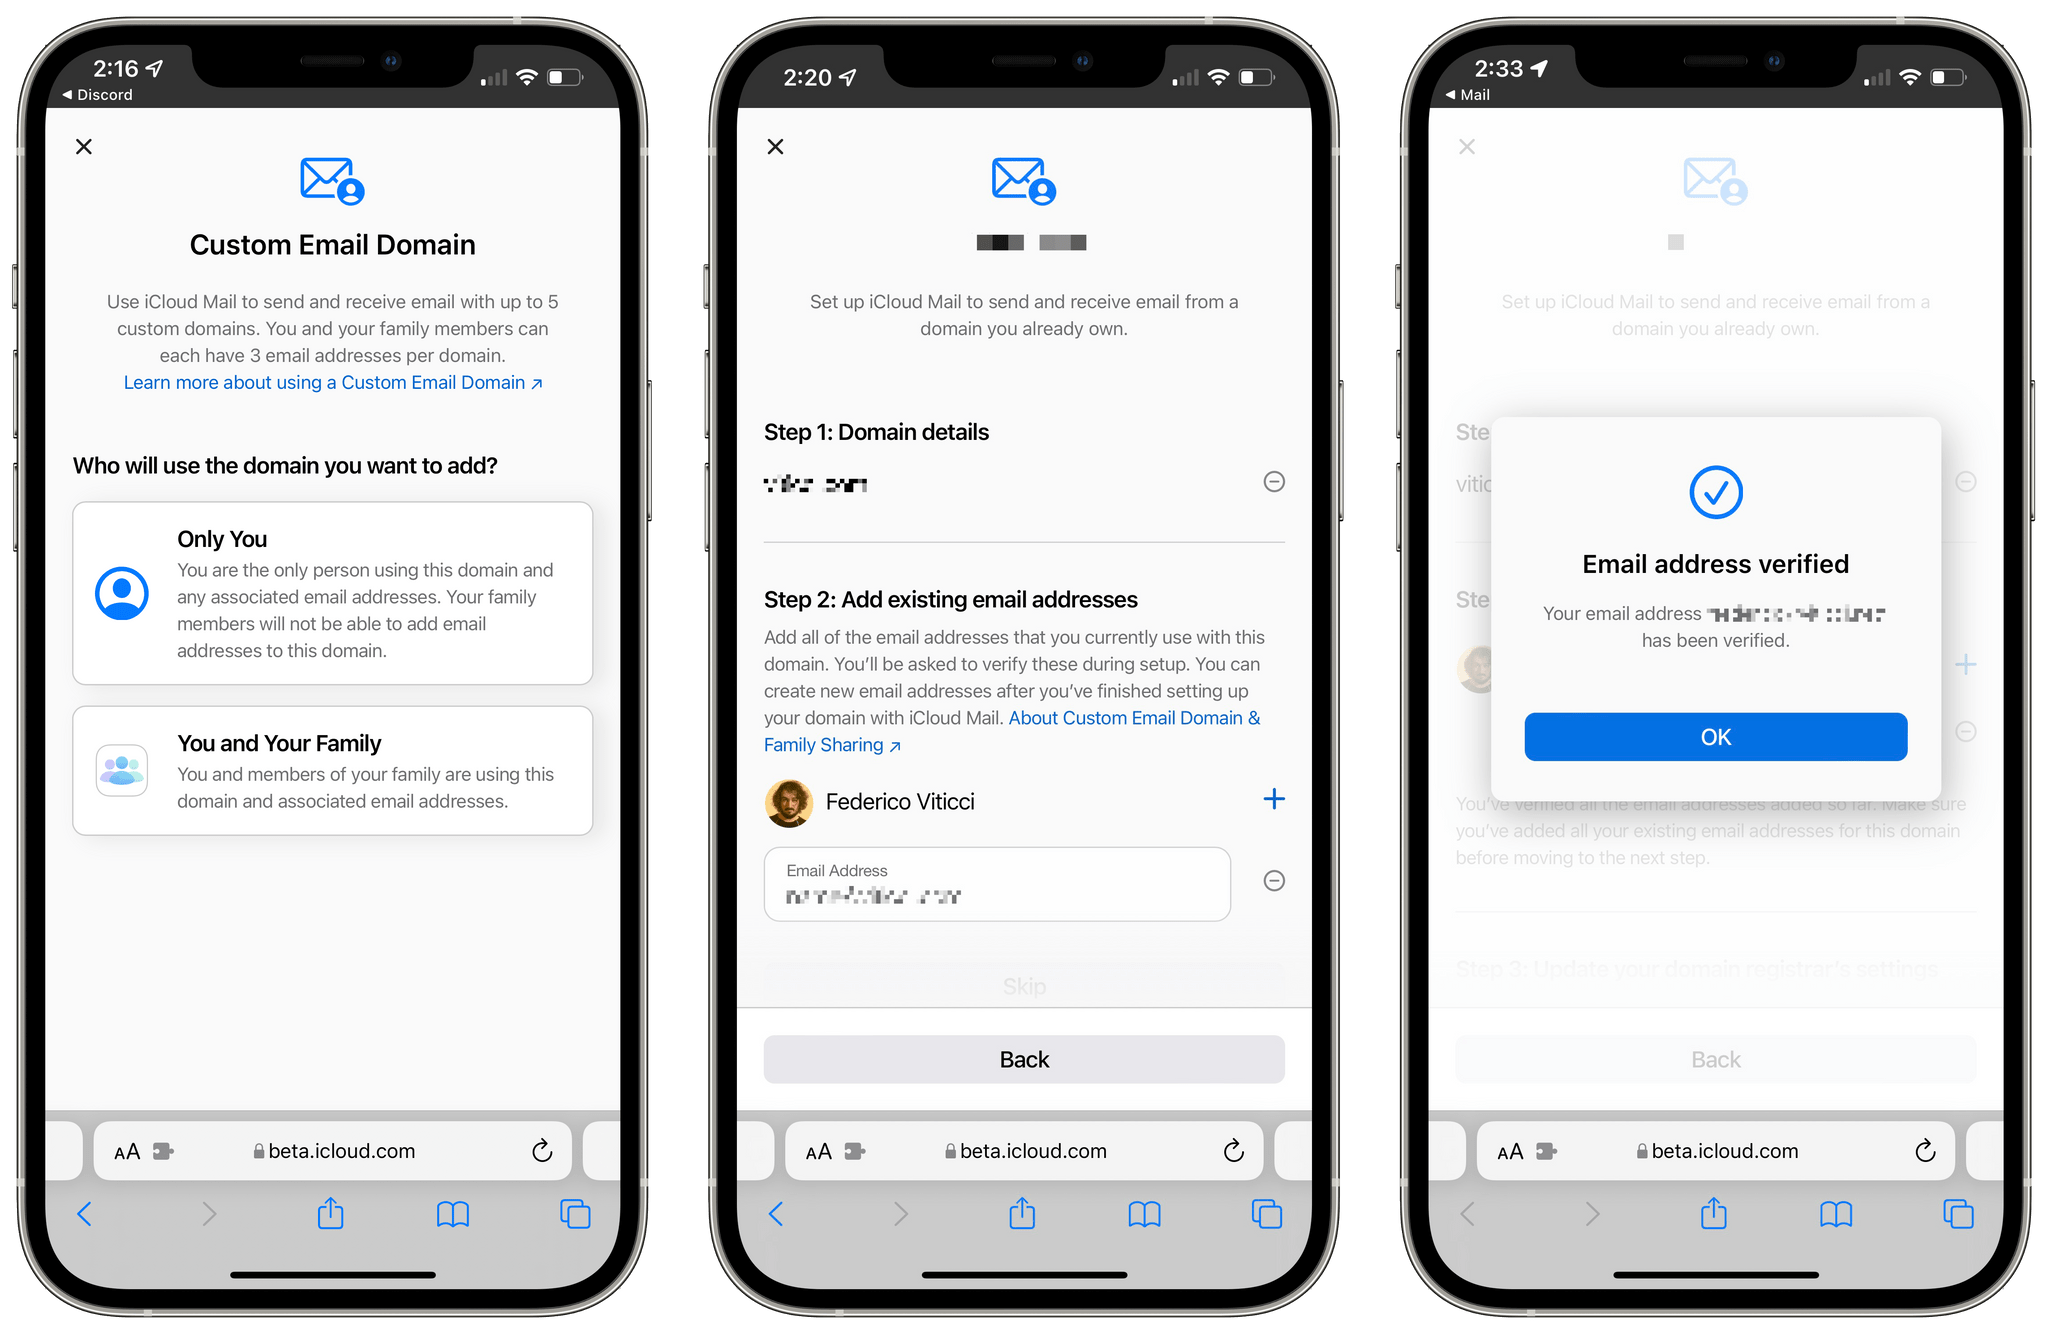
After I clicked the link above, I was presented with a screen that allowed me to choose whether I wanted to set up a custom email domain just for me or for me and my family. I don’t hate my family and wouldn’t force them to test this functionality right now, so I picked the first option. The iCloud website then took me to a page where I had to enter my domain name and an existing email address I was already using with that domain. This step is necessary because you’ll have to verify that you, in fact, own the domain and its associated email address.
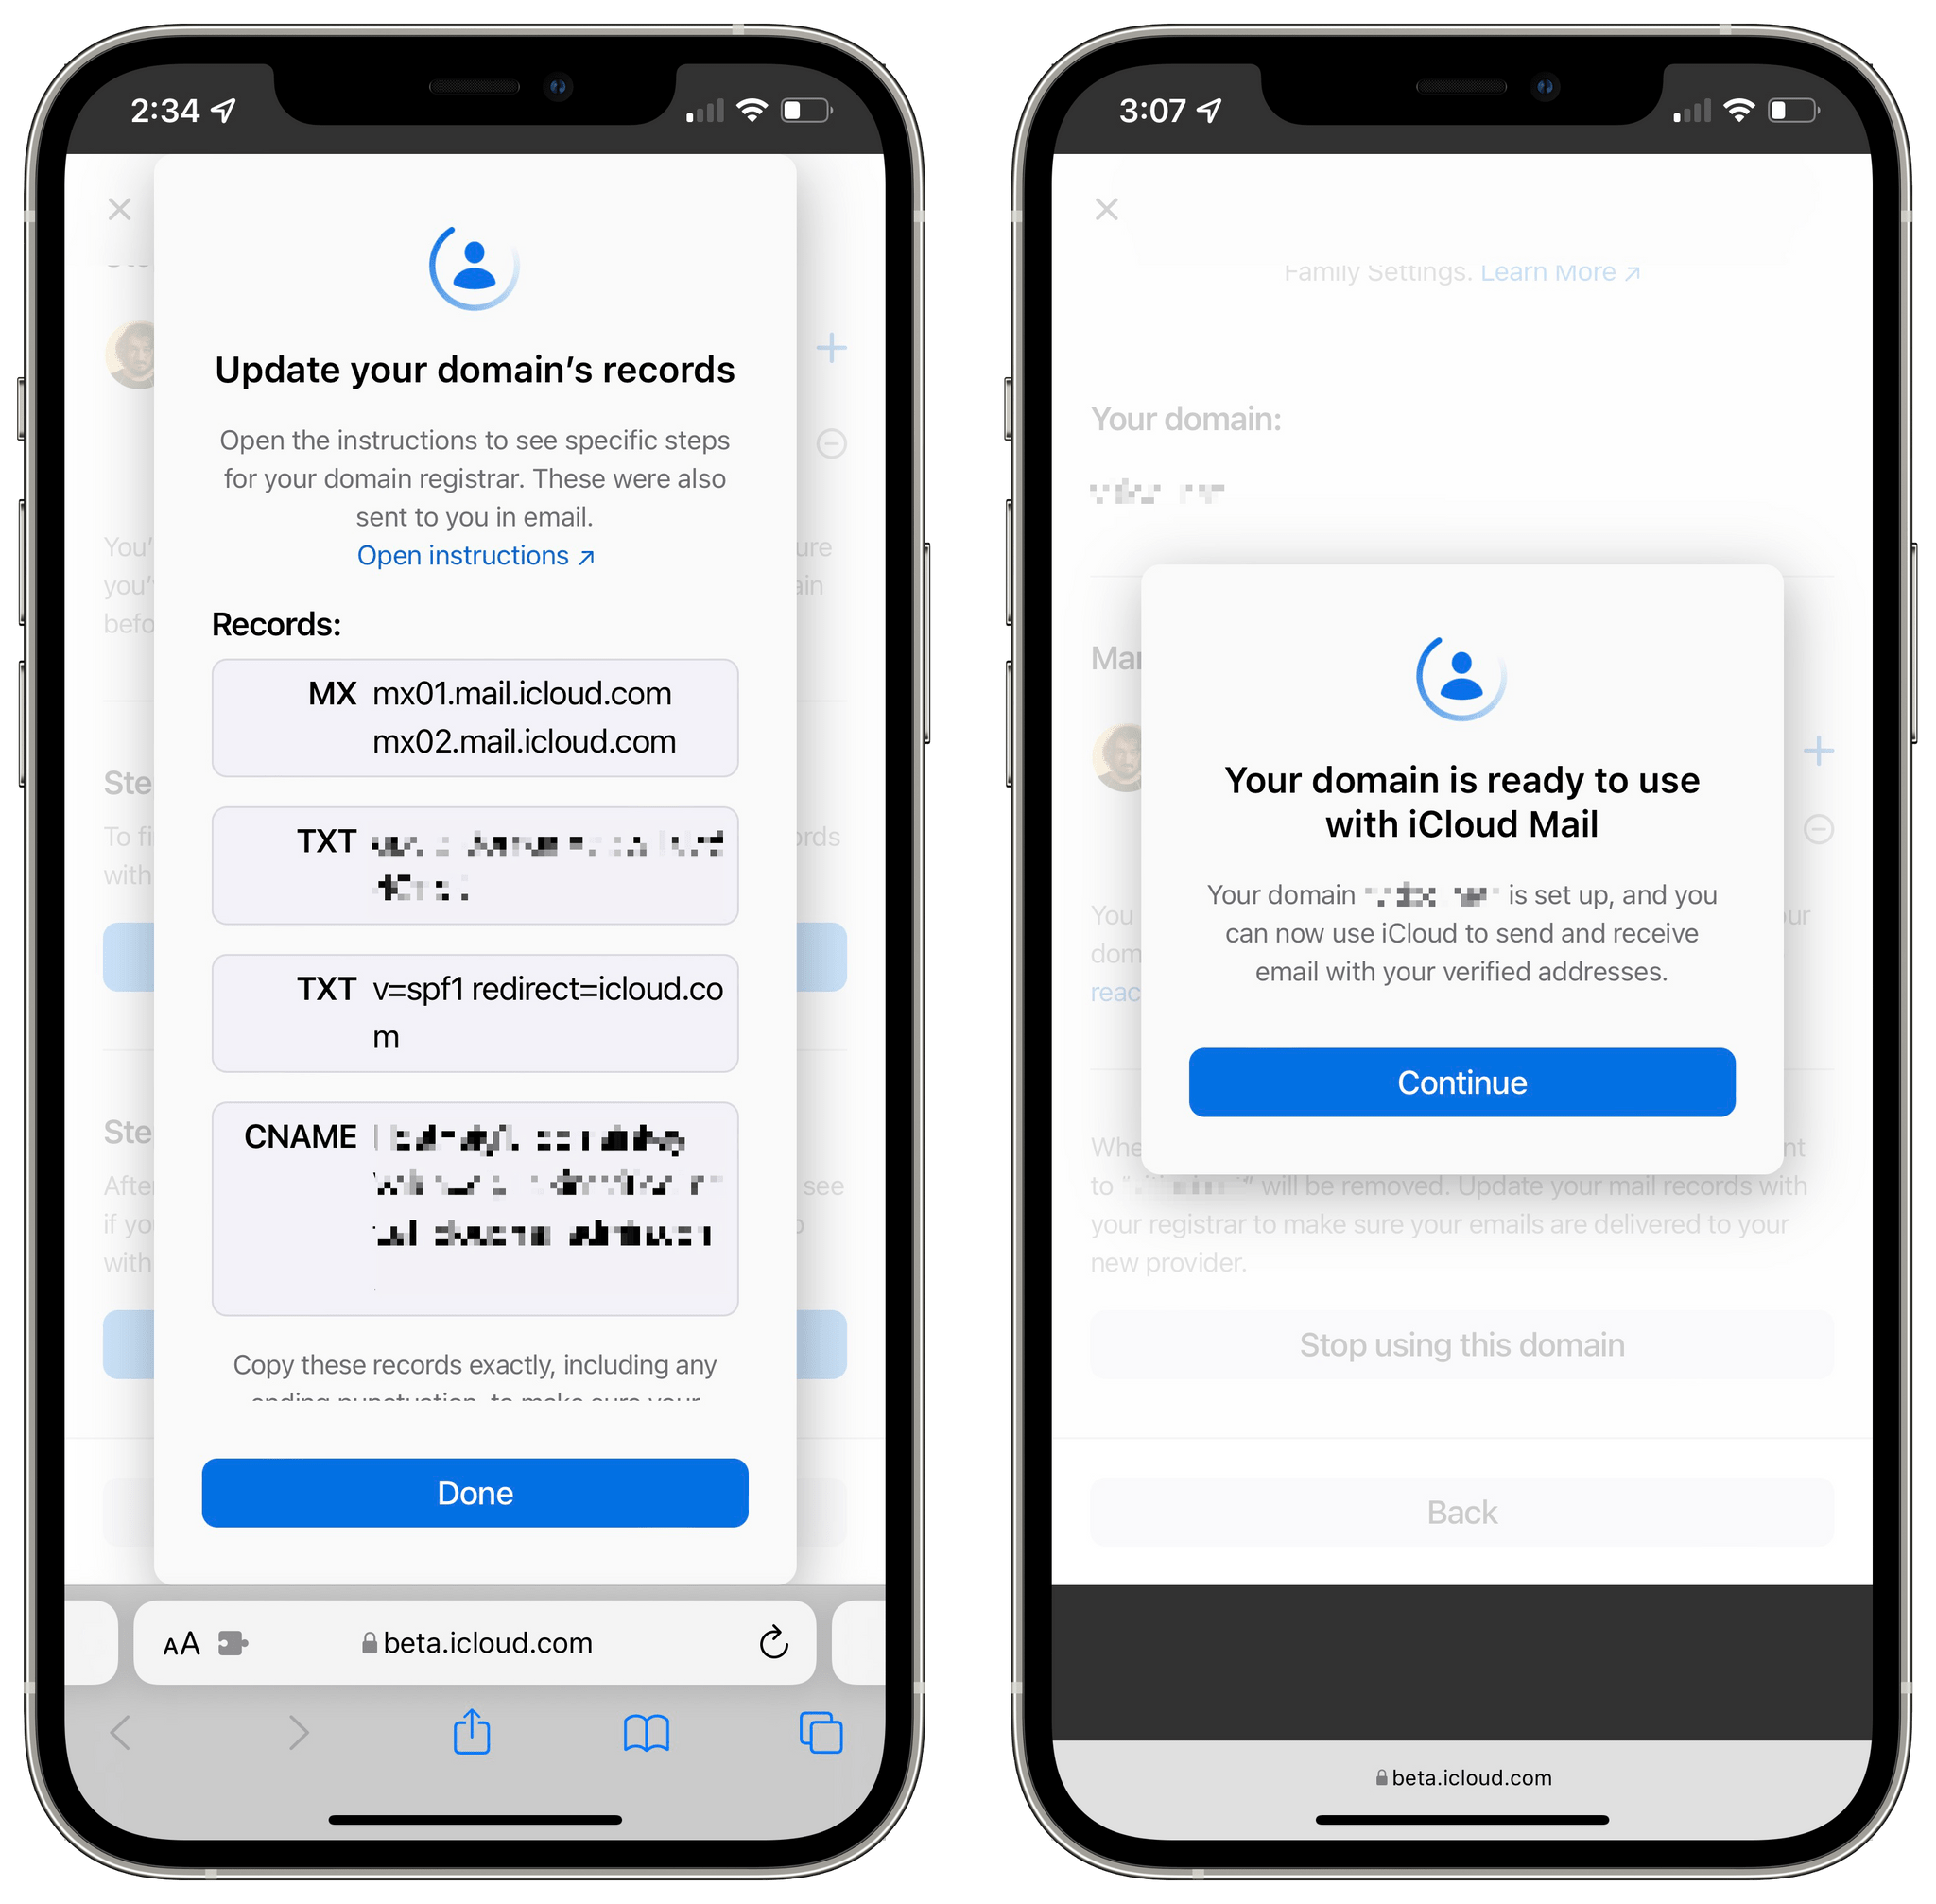
After I verified the email address by clicking a link in a message I received, iCloud was ready with instructions on how to update DNS records on my domain registrar’s website. This is the tricky part: registrar websites have different ways to tweak DNS records and different propagation times, so you’ll have to be patient and careful. As you can see in the screenshots below, you’ll have to modify MX, TXT, and CNAME records for iCloud Mail. If you’ve ever added a custom domain to services like Gmail before, you should pretty familiar with this process. Once you’ve modified the records, wait a bit (I had to wait a few minutes with mine), click the ‘Done’ button, and, if iCloud can find your updated DNS records, you’ll be good to go.
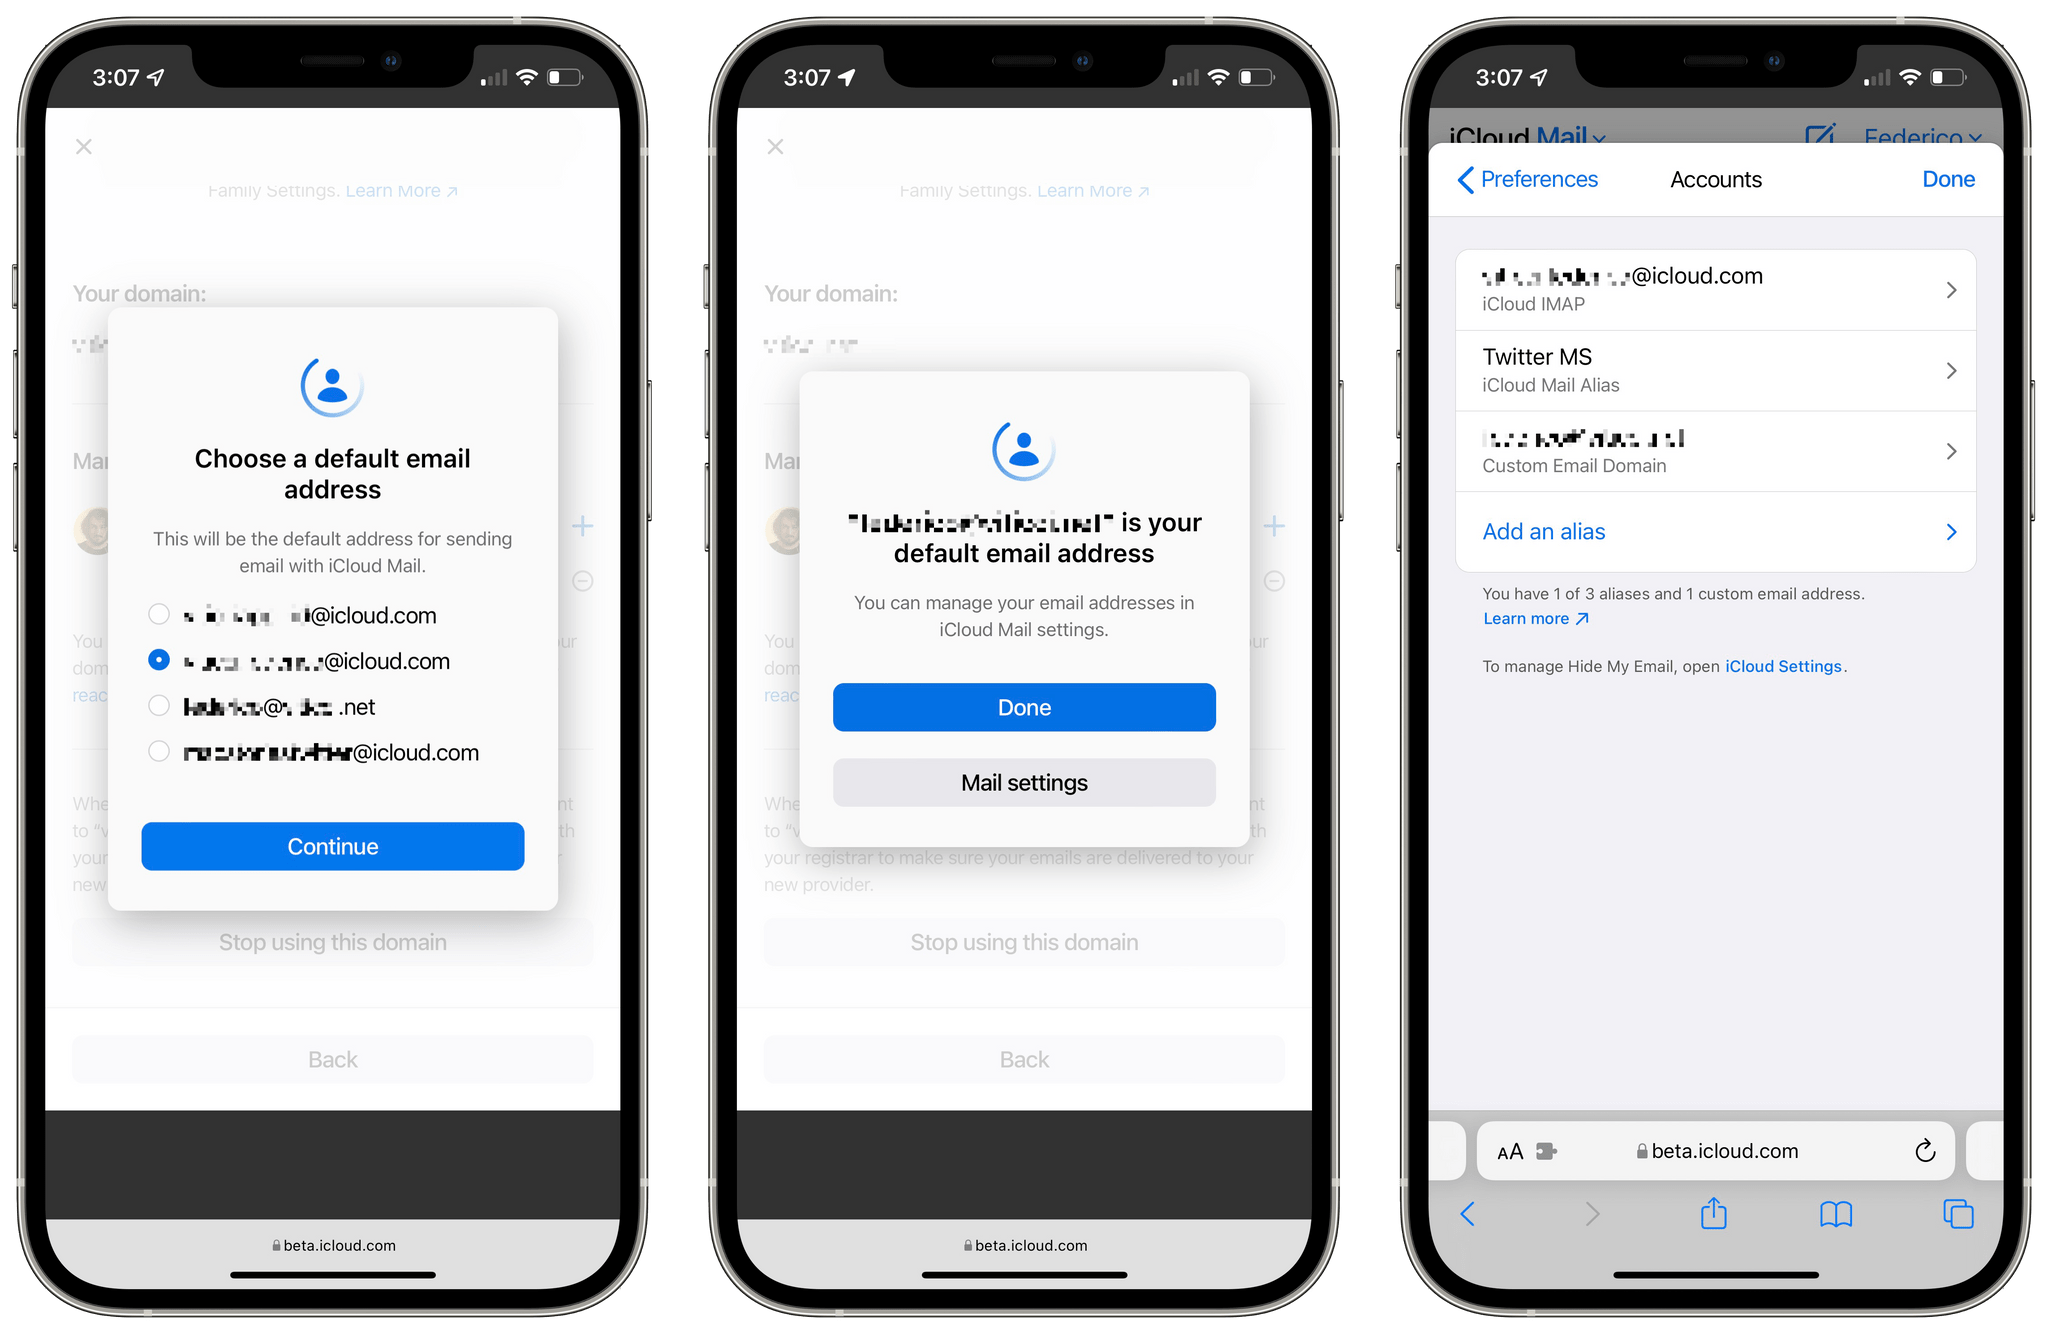
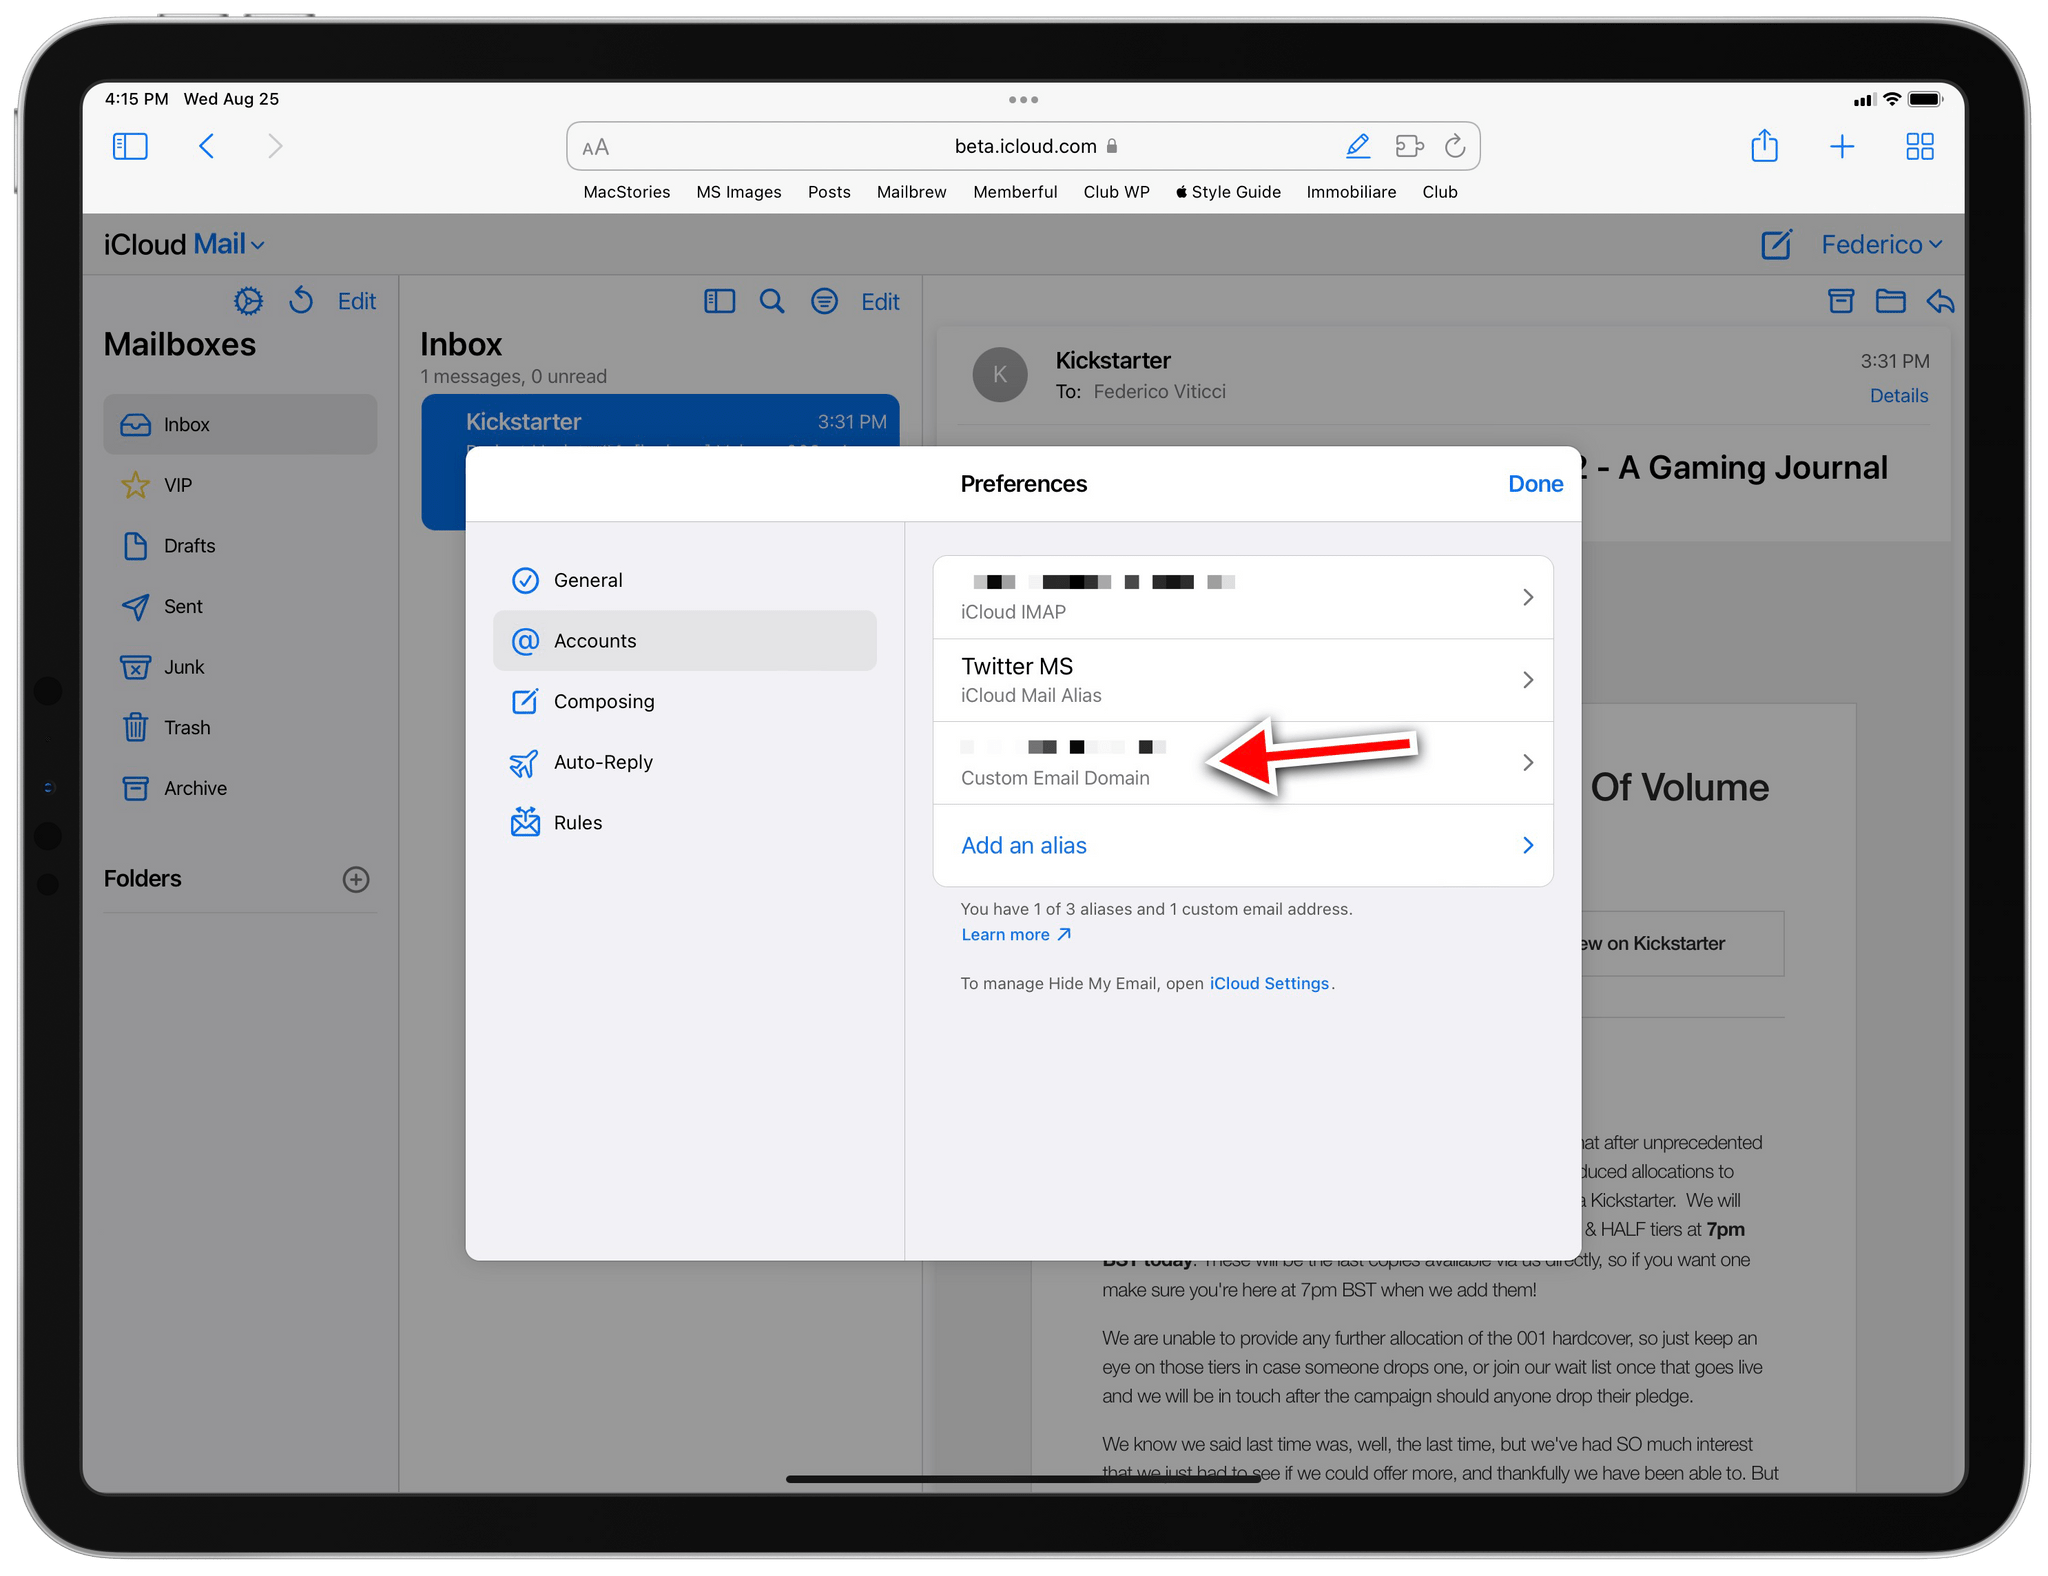
Here’s the slightly confusing aspect of this process: as of iOS 15 beta 6, there’s no section of the Settings app for iPhone and iPad that shows you the custom email addresses you’ve set up for iCloud Mail. Instead, they just show up after a while as, effectively, aliases in the Mail app. I set up my custom email address last night, and it finally showed up as an option in the Mail app (when clicking the ‘From’ field in the message composer to send a message) this morning alongside my other iCloud Mail aliases. You can, however, see custom email addresses and set one as default on the beta iCloud website, as shown below.

You can set your custom email address as the default for iCloud on the web. Hopefully this option will come to iOS too.
Rough edges are to be expected during a beta process, so I assume the public release of this feature will have a proper presence in iCloud settings on all Apple devices. But for now, if you don’t know how to start using a custom email address for iCloud, just wait until it shows up in Mail alongside your aliases.
So that’s how you can set up a custom domain and email address with iCloud Mail right now. Apple has a support document you can read here if you want to learn more about DNS records and domain registrars. Now I just need to figure out what to do with this new personal email address.


