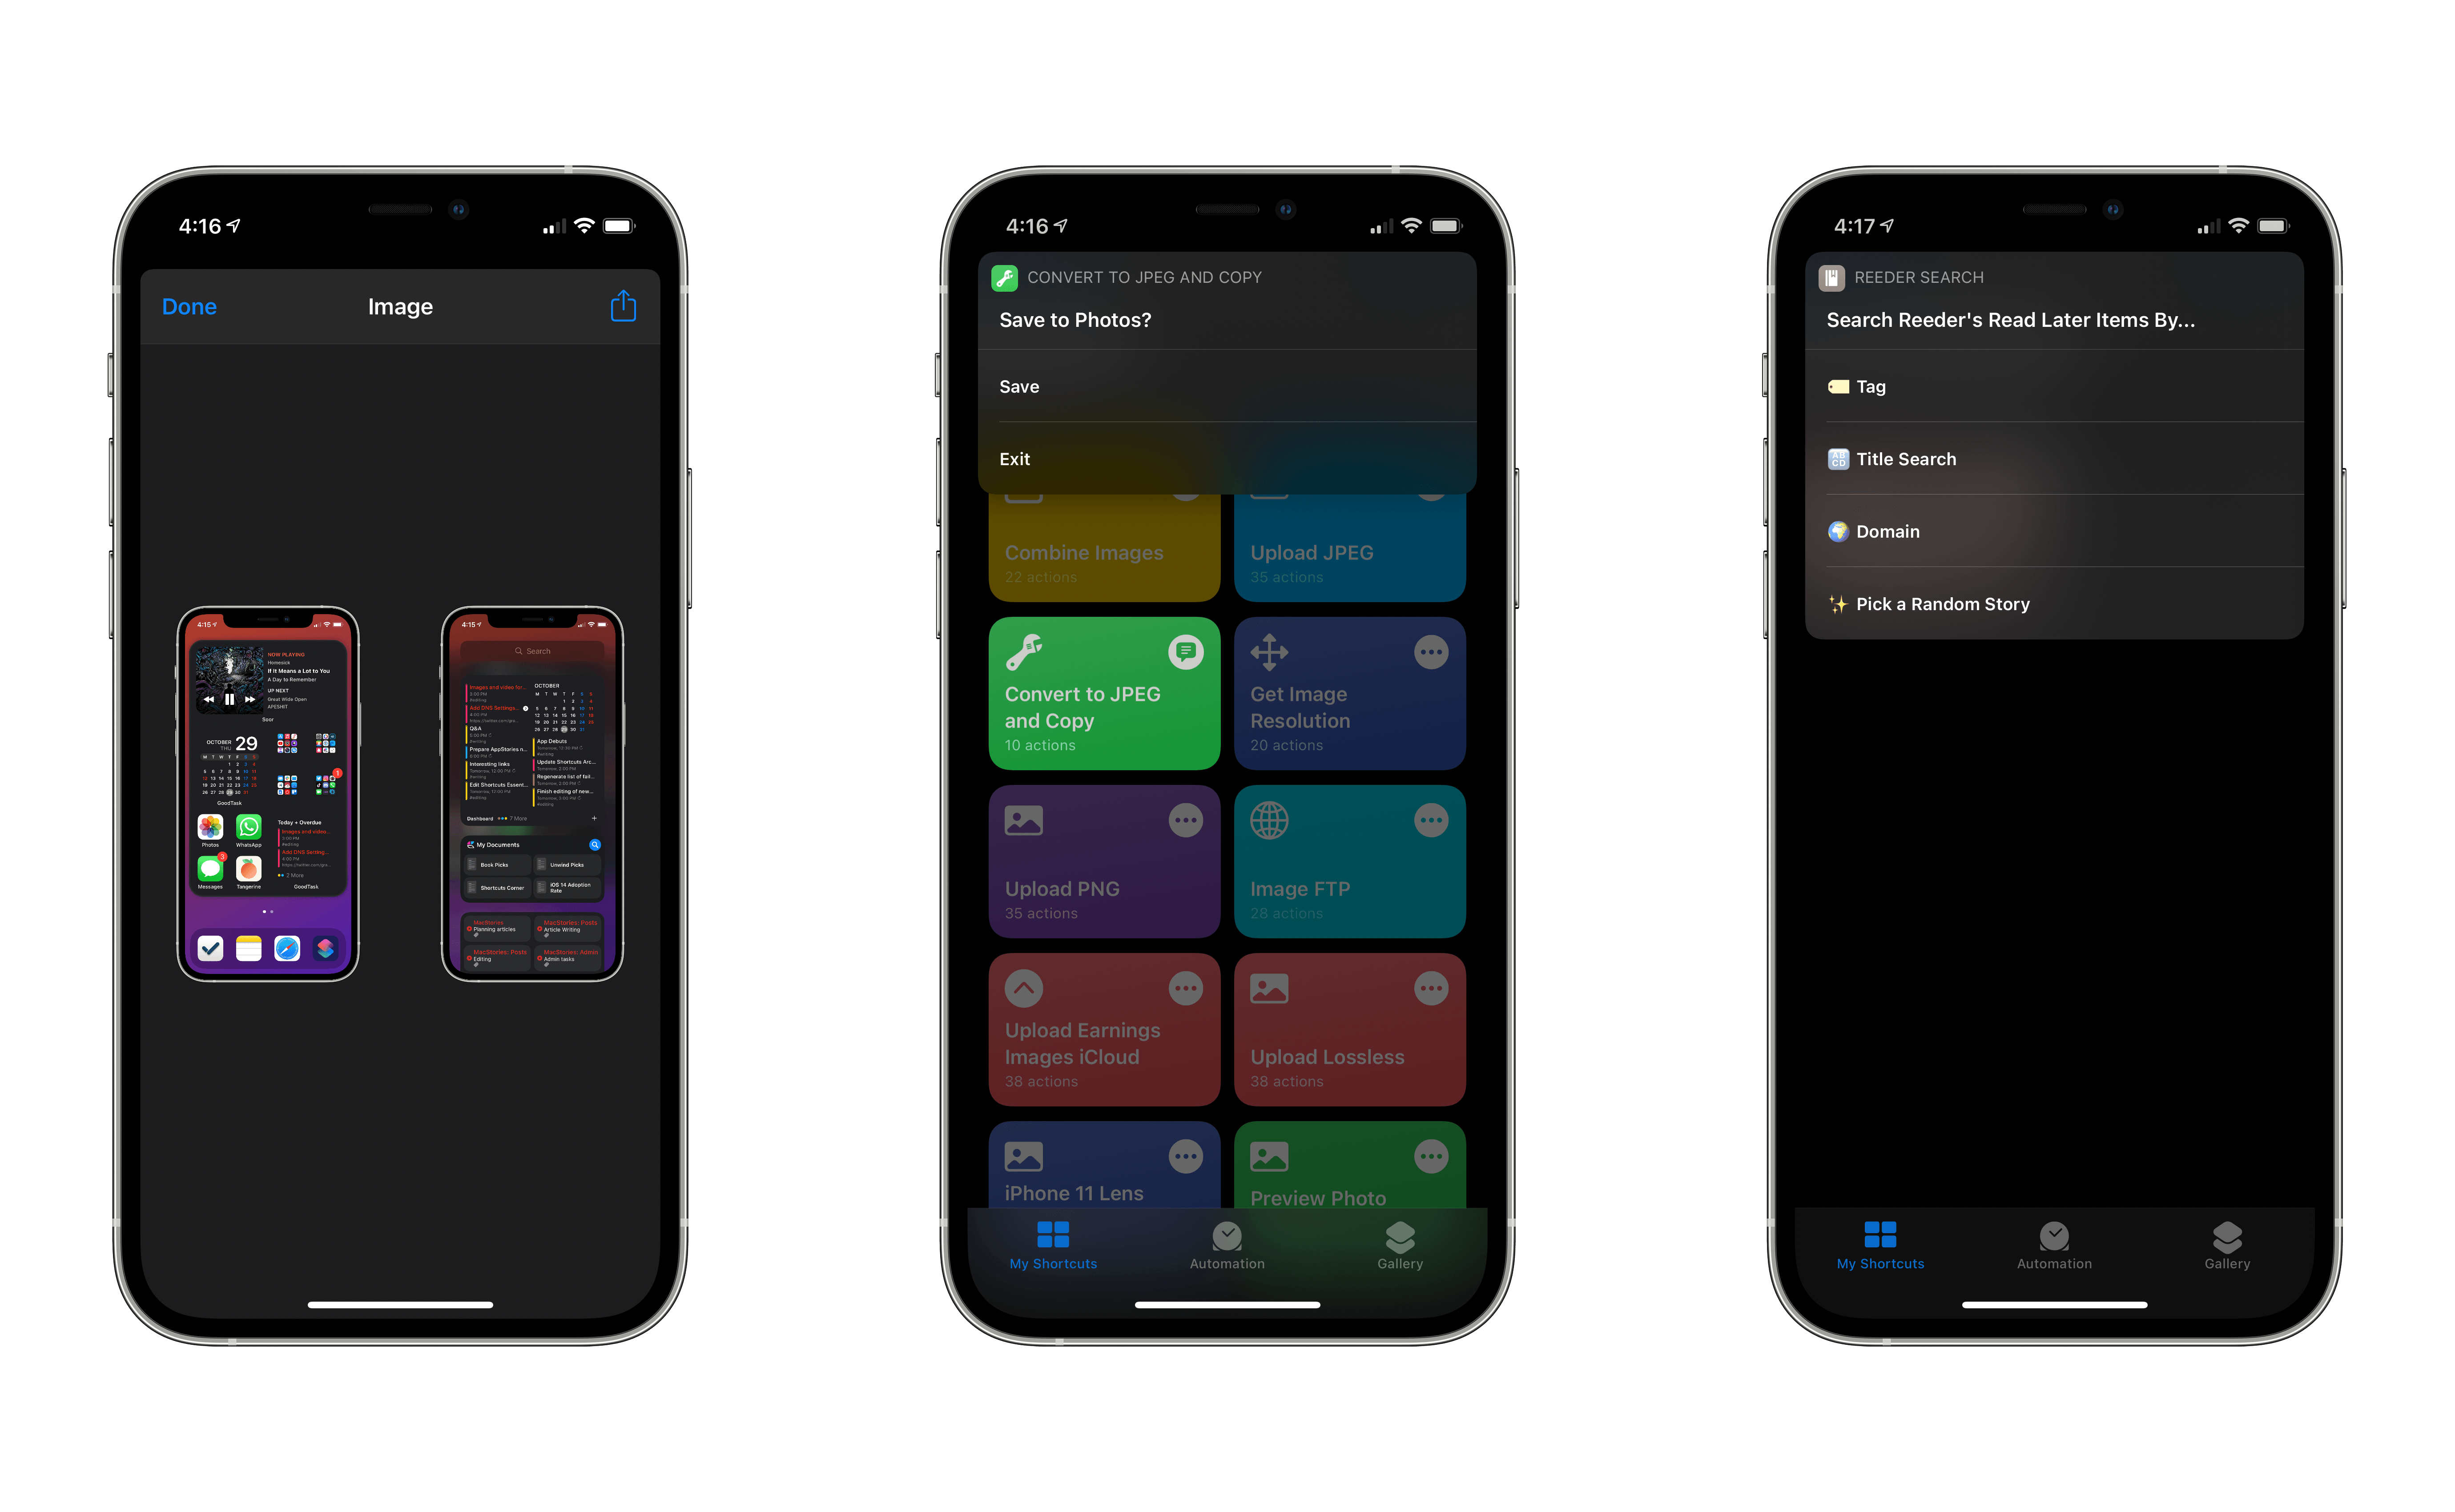
In this comeback installment of the Shortcuts Corner (I took a break last spring to focus on my Modular Computer story, then WWDC happened, then…you get the idea), I’ve prepared an assortment of image-related shortcuts available for free on the MacStories Shortcuts Archive. Ever since I installed the first betas of iOS and iPadOS 14 on my iPhone and iPad months ago, I’ve been reorganizing my shortcut library with folders. Thanks to this feature, I’ve assembled a collection of simple “utility” shortcuts that I use on a daily basis, but which I never shared on MacStories. This week, I’m sharing three of these shortcuts: one to quickly get the resolution of any image; one to convert any image to JPEG while stripping metadata from it; and the last one to encode any image previously copied to the clipboard in Base64. Following the requests of several readers over the past week, I’ve also updated our popular Apple Frames shortcut with support for the iPhone SE, iPhone 12, and iPhone 12 Pro.
In the Club MacStories edition of the Shortcuts Corner this week, I’ve also created an advanced Reeder shortcut that lets you browse articles in your Read Later account by tag, title, and more. Let’s dig in.
Apple Frames for iPhone SE, iPhone 12, and iPhone 12 Pro
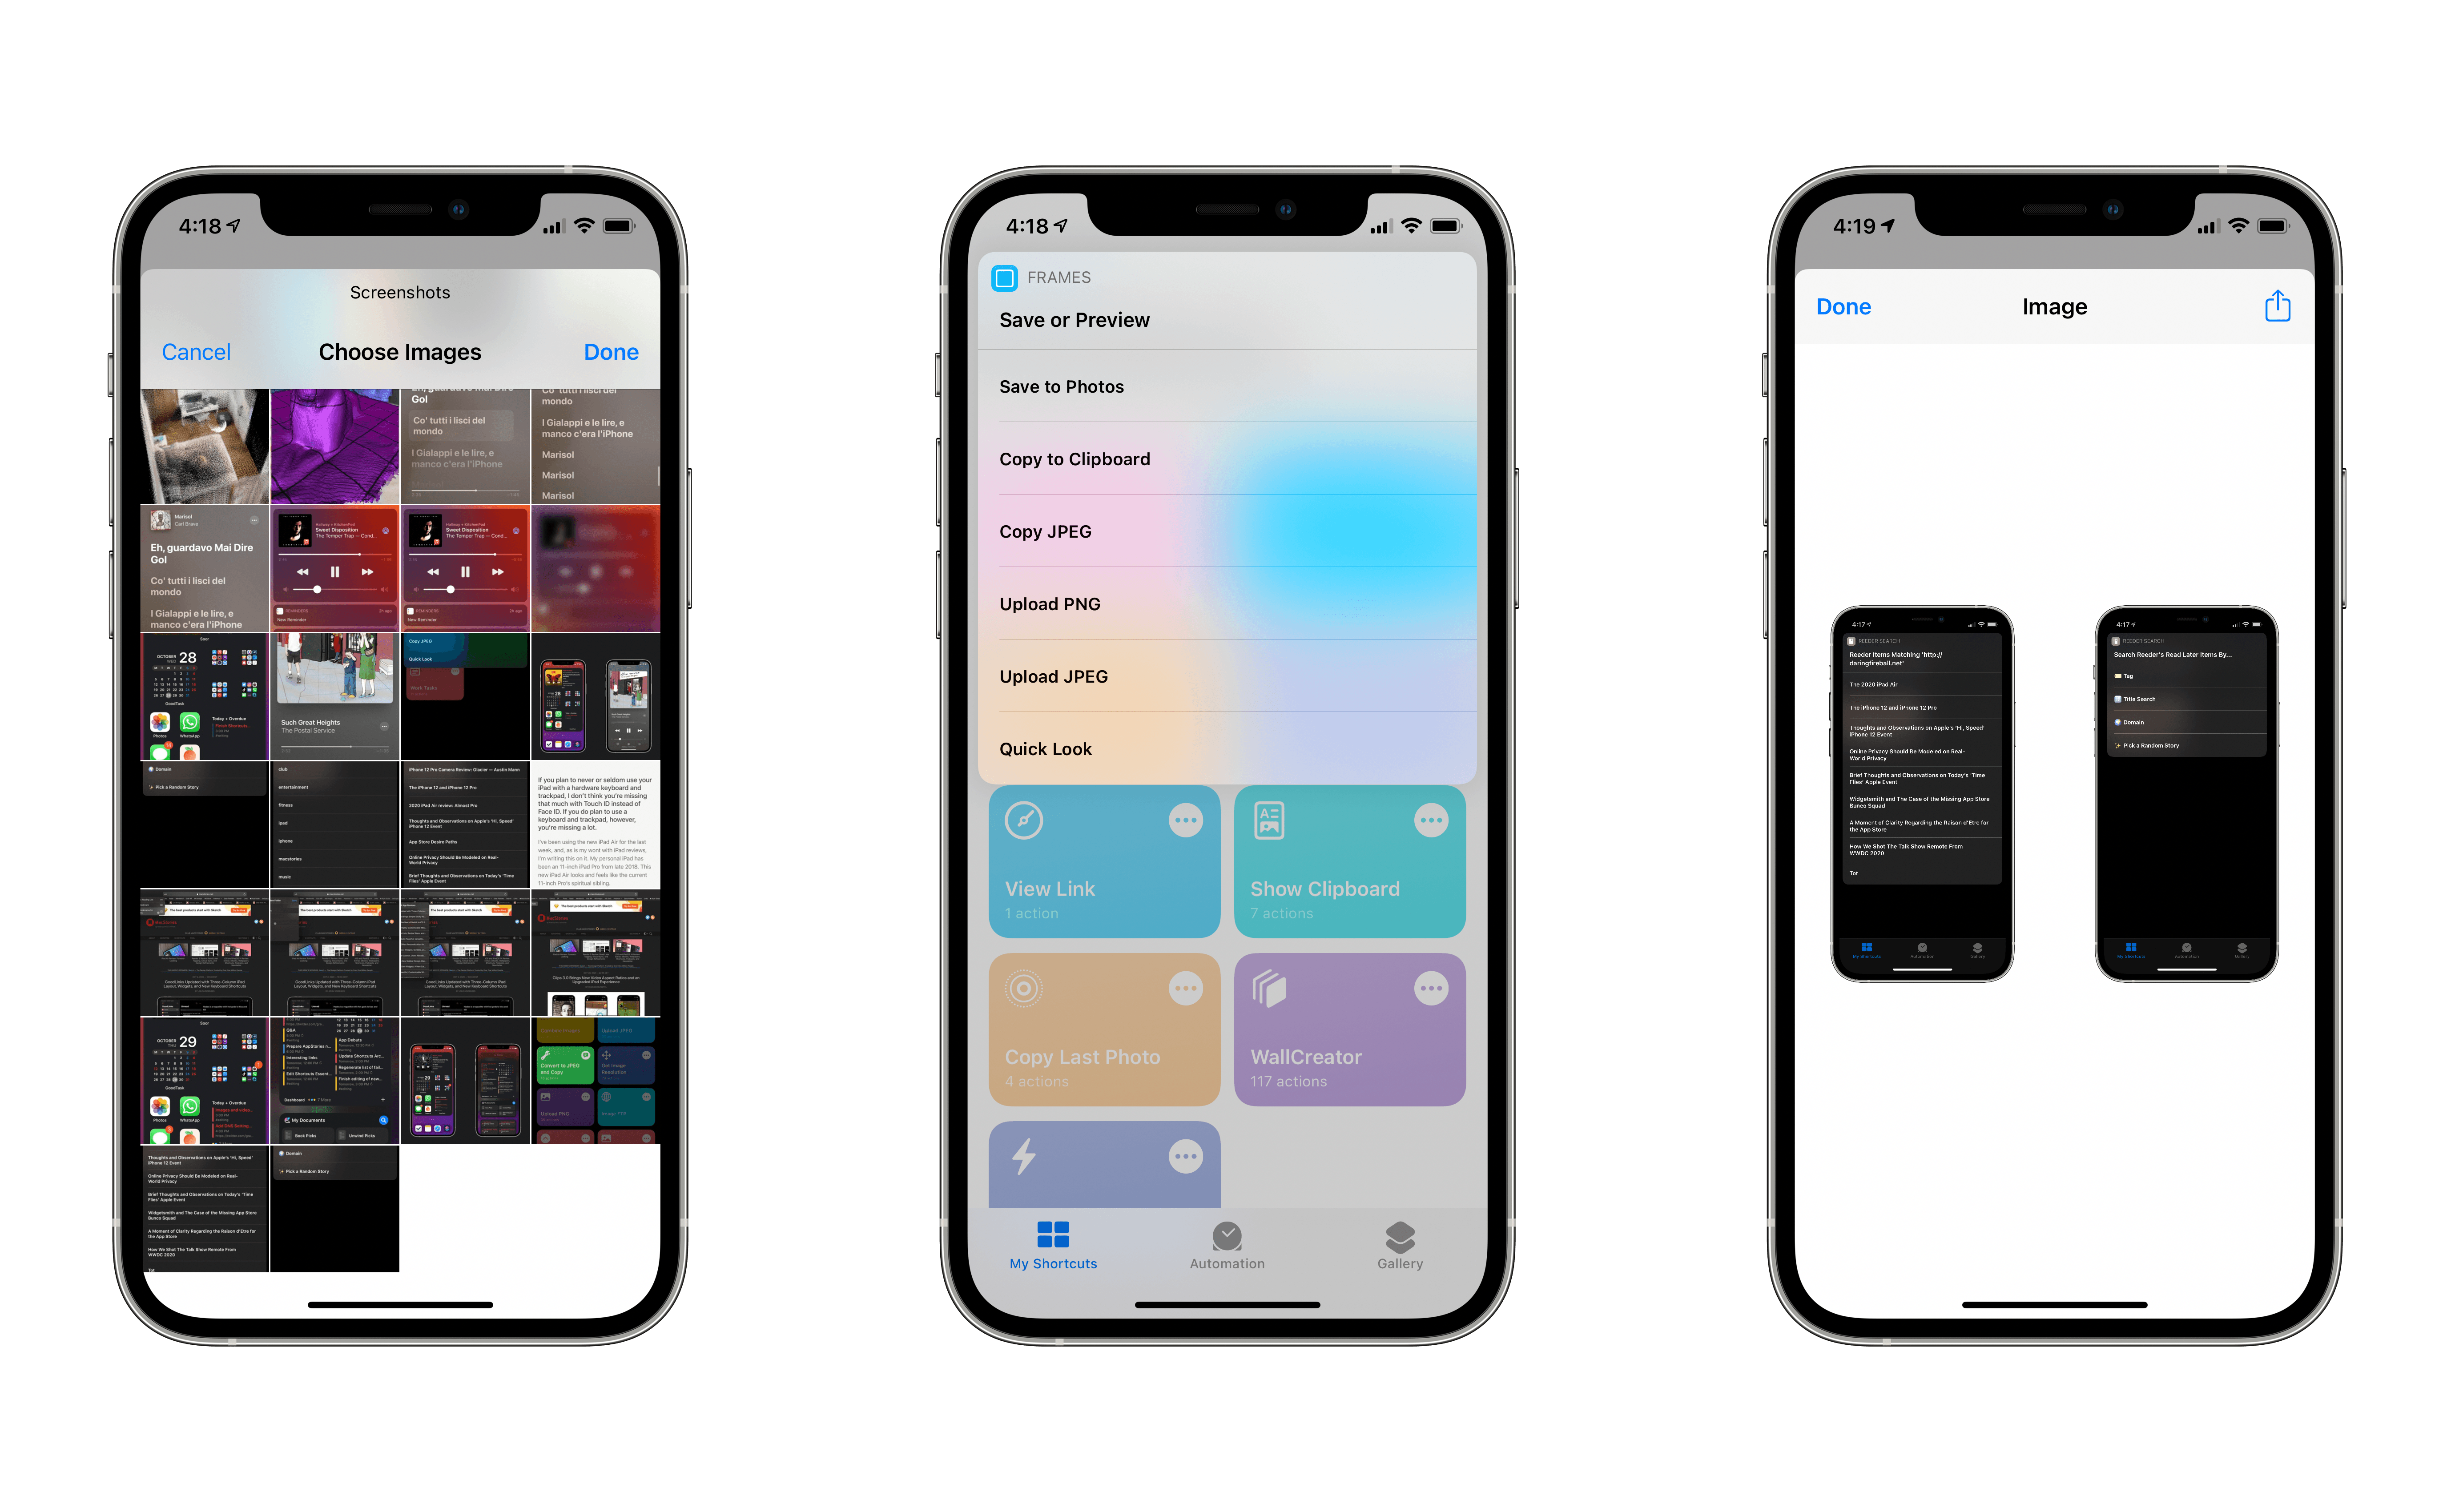
Apple Frames, the shortcut that lets you put physical device frames around screenshots taken on iPhone, iPad, Apple Watch, and other Apple devices, has consistently been the most downloaded shortcut from the Archive, as well as one of my most used shortcuts on a daily basis. All the “framed” screenshots you see on MacStories are generated with Apple Frames, which has also helped designers and developers prepare good-looking product images for their apps’ websites and App Store pages. Apple Frames is made possible by Shortcuts’ support for Base64 image encoding and the ‘Overlay Image’ action, as well as Silvia’s excellent work in adapting Apple’s official frames to work with screenshots taken on iOS and iPadOS.
As is tradition every year, I’ve updated Apple Frames to support the latest iPhone models released by Apple in 2020. With the latest version of Apple Frames, which you can download below, you’ll be able to frame screenshots for the iPhone SE (in portrait), iPhone 12 (portrait and landscape), and iPhone 12 Pro (portrait and landscape); as always, you can select multiple images at once to create a composite image of multiple devices; at the end of the shortcut, you’ll be presented with various actions to preview the framed image, copy it, or save it.
There are some technical considerations worth sharing about the new iPhone models supported by Apple Frames. When I created Apple Frames years ago, I made the decision of never showing any menus or interruptions after the user has selected screenshots they want to frame. My goal was to make Apple Frames easy to use for everyone with as little friction as possible. For this reason, Apple Frames doesn’t let you choose which version of an iPhone you want to use if more devices share the same resolution; I have to decide which iPhone frame to use if the shortcut detects a screenshot that could belong to multiple iPhone models. In this case, the iPhone 12 and 12 Pro share the same resolution (because they have the same display), but Apple Frames defaults to using the iPhone 12 Pro model, which made more sense to me given the typical MacStories audience. For a similar reason, in adding support for the 2020 iPhone SE, I chose to drop support for the iPhone 8 (which shared the same resolution) since I’m assuming more Apple Frames users are now using the iPhone SE.
Unfortunately, at the moment of writing this, Apple hasn’t released official product images for the 10.9” iPad Air, so I couldn’t add support for that device to the shortcut. As soon as the company releases images for the iPad Air, iPhone 12 mini, and iPhone 12 Pro Max, I will update Apple Frames again and write about it here. In the meantime, you can download the latest version of Apple Frames below.

Apple Frames
Add device frames to screenshots for iPhones (6, 7, 8, X, XS, 11, SE, and 12 generations in standard/Plus/Max sizes), iPad Pro (11” and 12.9”, 2018/2020 models), and Apple Watch S4/5 (40 and 44mm). The shortcut supports portrait and landscape orientations, but does not support Display Zoom. If multiple screenshots are passed as input, they will be combined in a single image.
Convert Image to JPEG and Copy
A few months ago, I noticed something I didn’t like: when copying an image from a MacStories article and pasting it in a new tweet in the official Twitter client, the app would initially display it with alpha transparency (without a background); when viewed in the timeline, however, the image gained a garish maroon background color, which I wasn’t a fan of. The easiest solution to the problem was to convert any PNG to JPEG before pasting it in Twitter’s composer; to make the process easier, I built a shortcut for it.
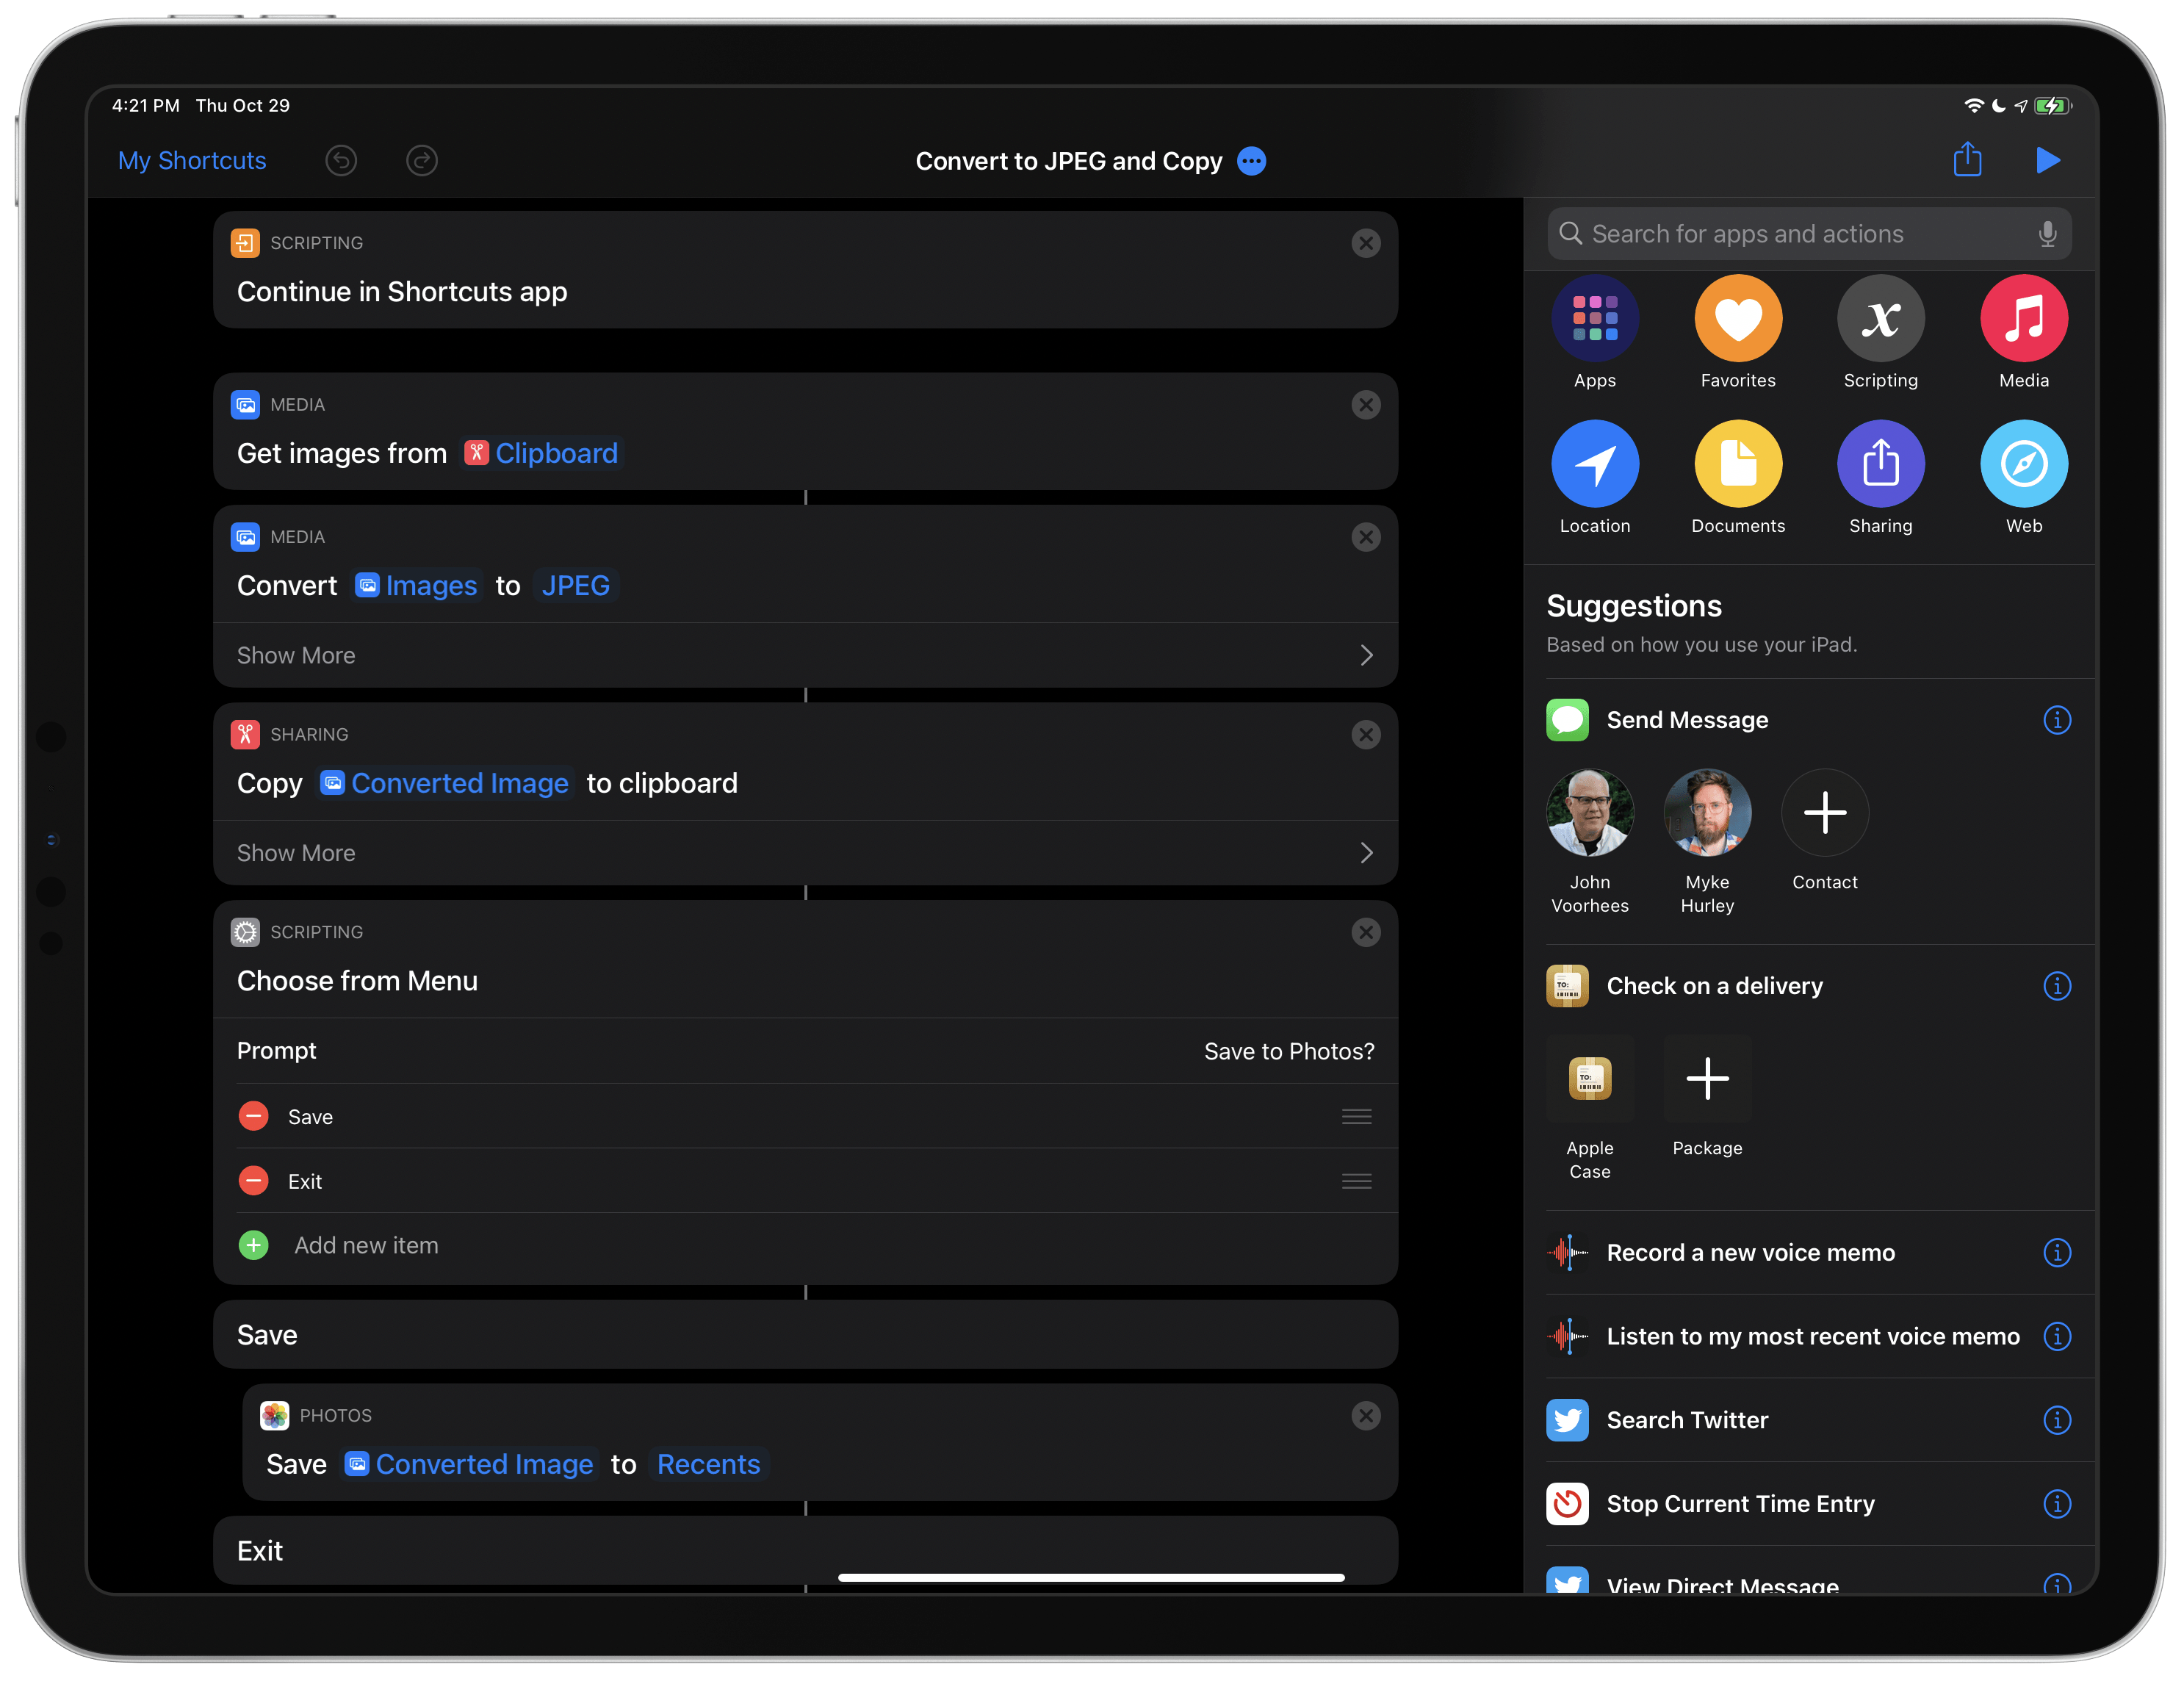
There’s nothing groundbreaking about the ‘Convert Image to JPEG and Copy’ shortcut: it reads any image previously copied to the clipboard, converts it to JPEG1, and copies it back to the clipboard, so you can paste it somewhere else. As you can see, the shortcut features a ‘Continue in Shortcuts App’ action at the beginning; I did this because in my tests with this shortcut as a widget, reading images from the clipboard would often fail when run from the Home Screen.
At the end of the shortcut, you’ll also be asked if you want to save the converted JPEG to the Photos app. The converted JPEG is copied to the clipboard by default, so if you just need to paste it in another app, you can ignore this step.

Convert to JPEG and Copy
Convert any image previously copied to the clipboard to JPEG, stripping metadata from it. The converted image is copied to the clipboard, and you can optionally save it in the Photos app.
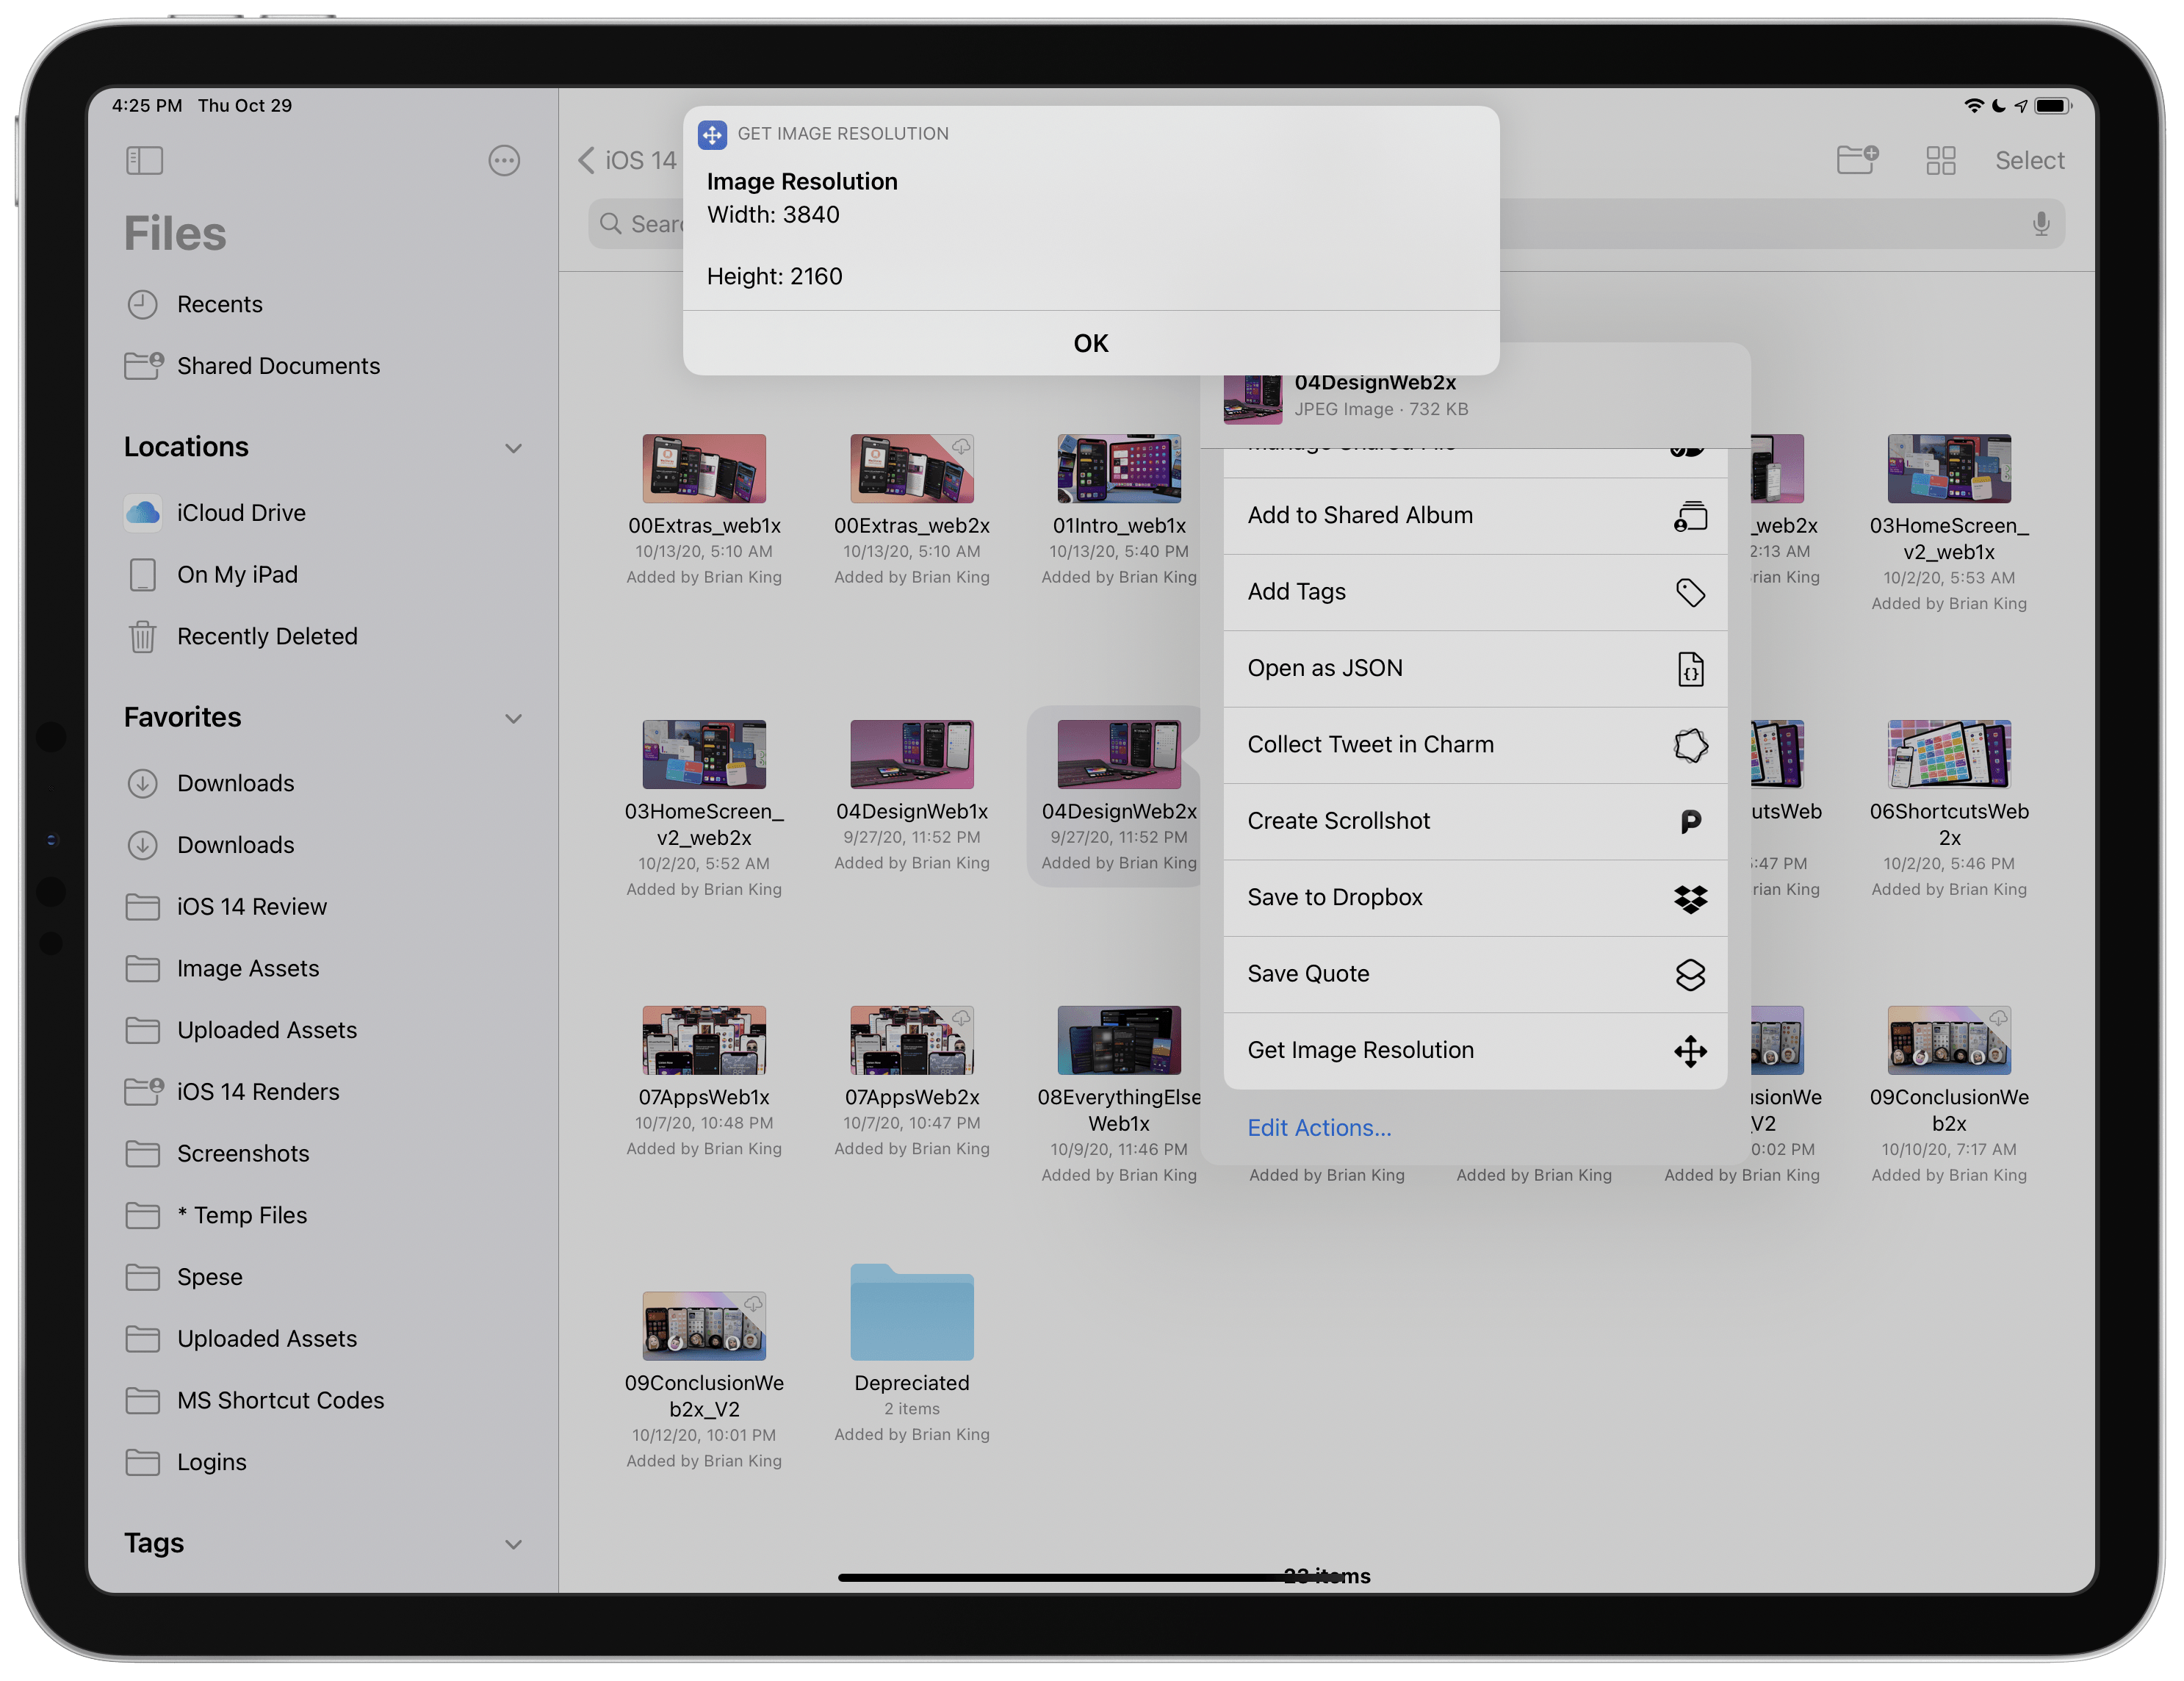
Get Image Resolution
This is another simple, but effective shortcut: if you’ve ever found yourself wanting to quickly check the resolution (in pixels) of an image on your iPhone and iPad, this shortcut lets you do it with just a few taps.
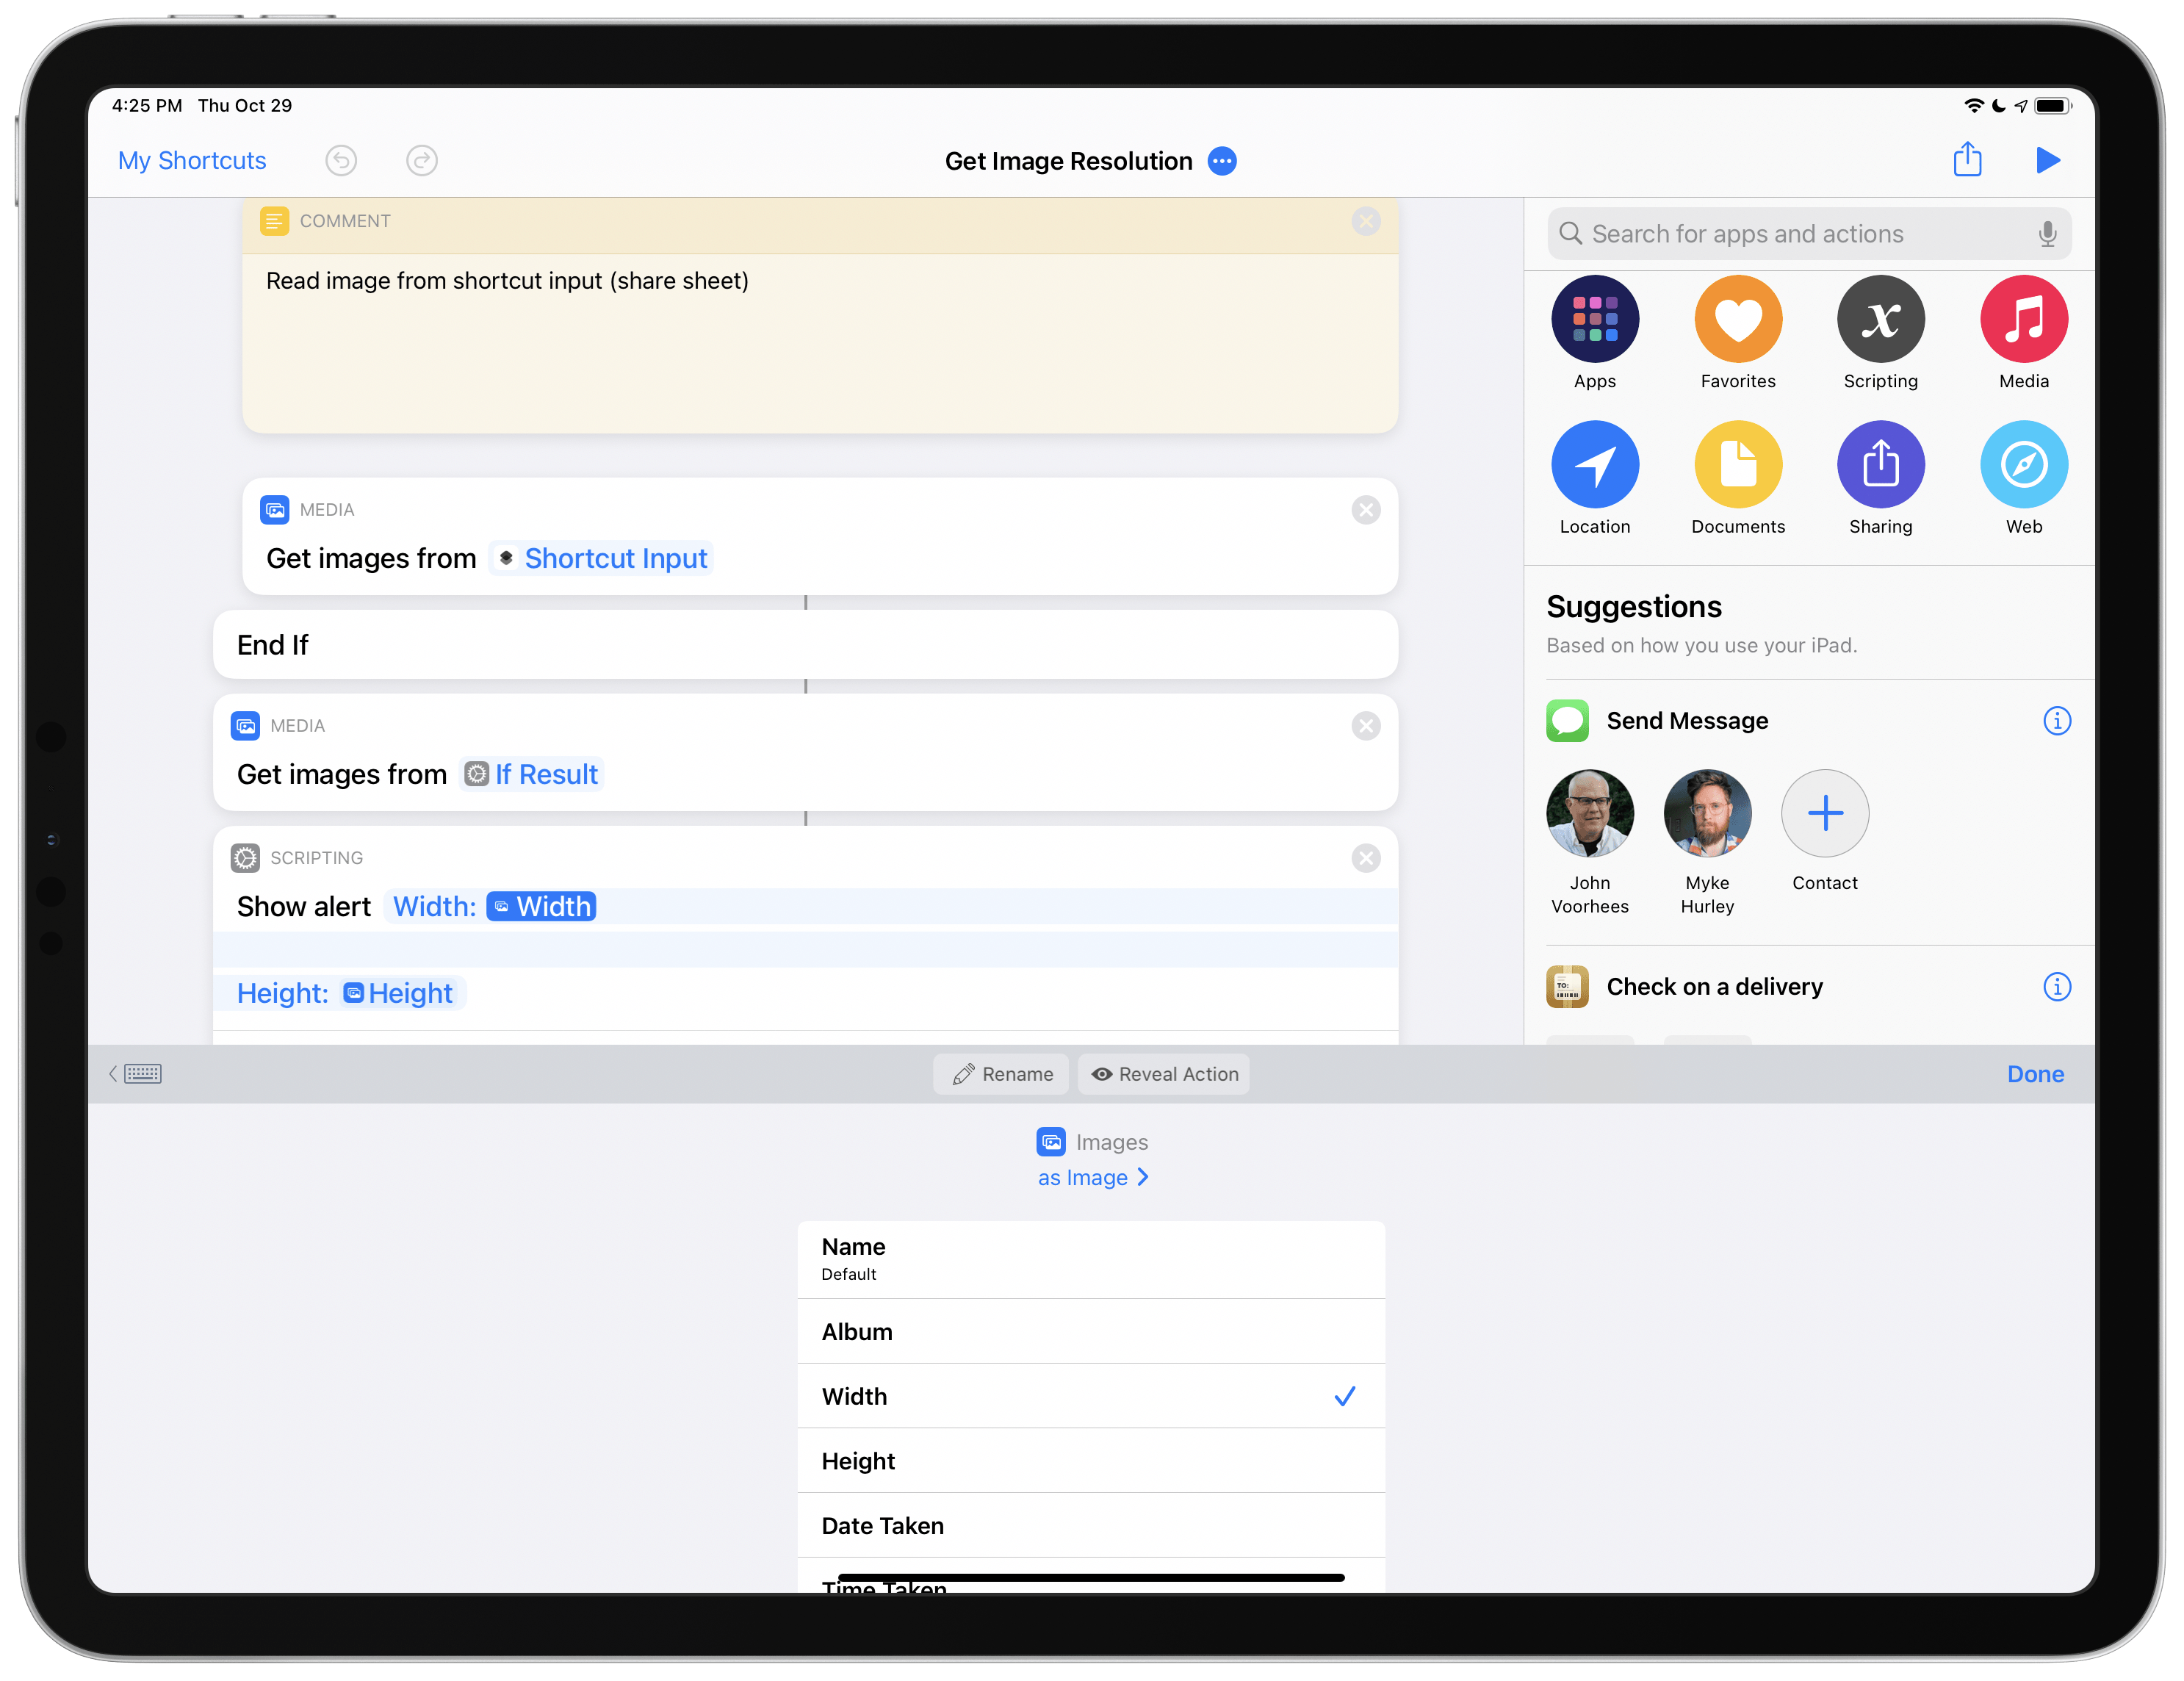
You can use this shortcut either from the share sheet or from the Shortcuts app and widget. When running in the share sheet, the shortcut accepts images as input, which means you can share images from Photos, Files, or any other app and check the resolution of the passed item. Alternatively, you can run the shortcut manually and either pick an image from the Photos app or use an image you’ve already copied to the clipboard.
In any case, at the end of the shortcut, you’ll be presented with an alert displaying the width and height of the selected image. In a nice touch, reading these bits of metadata from an image doesn’t require using a standalone action in Shortcuts: the magic variable that is automatically created for image objects in Shortcuts can be inspected to access various properties, including image size. Keep this in mind to avoid using unnecessary ‘Get Details of Images’ actions in your shortcuts when you can just read properties from magic variables.

Get Image Resolution
Get the resolution of any image passed from the share sheet, picked from Photos, or previously copied to the clipboard.
Encode Image to Base64
This is another shortcut I’ve been using for over a year now, and which I somehow never shared on MacStories. Every once in a while, I find myself having to encode an image copied to the clipboard in Base64 – a text representation of an image file that allows me to “embed” images in shortcuts via regular ‘Text’ actions. This technique – which is often derided by my co-hosts on Connected – is how the Apple Frames shortcut can put device frames around screenshots without accessing any external resources on the Internet, for instance.
Every time I need to turn an image into a Base64 string of text, I use the Encode Image shortcut, which takes an image from the clipboard, previews it in Quick Look, and converts it to Base64 using Shortcuts’ native ‘Base64 Encode’ action. To make the final text string as compact as possible (images encoded in Base64 can span hundreds of thousands of characters depending on the size of the original file), I disabled the ‘Line Breaks’ toggle in the ‘Encode Image’ action; furthermore, to prevent any potential sync lockups with Universal Clipboard across Apple devices, I turned on the ‘Local Only’ setting in the ‘Copy to Clipboard’ action at the end. This way, your device will not attempt to sync a super-long string of text over local WiFi across iPhone, iPad, and Mac, which caused me issues several times in the past.

Encode Image
Encode any image previously copied to the clipboard in Base64. The resulting string of plain text is copied to the clipboard.
Club MacStories Exclusive: Search Read Later
Exclusively for Club MacStories members this week, I’ve built a shortcut that lets you search articles saved in Reeder’s Read Later account – one of my favorite features of the app – with a variety of options. The shortcut, available in today’s issue of the MacStories Weekly newsletter for Club members, is called Reeder Search, and it lets you search saved articles by tag, title, or domain name; it also lets you open a random article previously saved in Reeder’s Read Later account, which can be a fun way to catch up on your read-later queue.
Here’s a video of the shortcut in action:
Using the Reeder Search shortcut.Replay
The shortcut takes advantage of Reeder 5’s support for tagging (which we covered here) and its deep integration with Shortcuts: thanks to native (parameter-based) actions, we can retrieve a list of tags from Reeder’s Read Later account, search the contents of the app, and even reopen specific articles directly in Reeder. I wish more RSS and read-later apps offered this kind of support for Shortcuts, which is part of the reason I’m using Reeder again as my go-to app for RSS feeds and saved articles.
To download this shortcut and read my explanation, subscribe to Club MacStories and check out Issue 246 of MacStories Weekly, either in your email inbox or the Newsletter Archive.
- While also stripping metadata from it, so if you’re converting photos, rest assured EXIF metadata will not be included in the final version. ↩︎


