Tao Effect’s Espionage has always taken a novel approach to encrypting data on OS X. In contrast to applications like TrueCrypt or Knox that protect data in individually encrypted virtual disks or vaults, Espionage does its best to mask encrypted disks from the end user. Rather than interfacing with virtual disks that are individually encrypted, Espionage uses the folders you want to protect as a reference point and applies a 1Password approach to the protected folders on your system. Espionage solves two problems: it centralizes all of your protected data and makes that data easy to access through a single master password. Espionage’s approach to securing your data means that you can interface with folders on OS X as if they were regular folders — tasks like mounting and unmounting encrypted volumes are taken care of for you in the background through a streamlined interface. Protecting your data shouldn’t have to come at the cost of convenience.
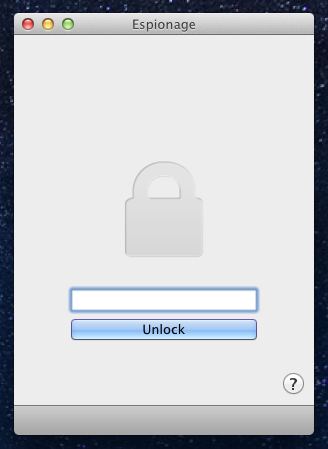
Departing from the original interface, Espionage 3 finds itself tucked away in the menubar, using Fantastical as its source of inspiration. Again drawing on similarities to 1Password, Espionage feels like the 1Password’s browser extension, with files safely stored behind lock and key rather than web logins. By simply clicking on the lock in the menubar, Espionage 3 presents itself and asks for your master password — the password being created when you run the application for the first time. Your master password is used as the foundation for your secured folders (disk image passwords are derived from SCRYPT and encrypted with AES-256).
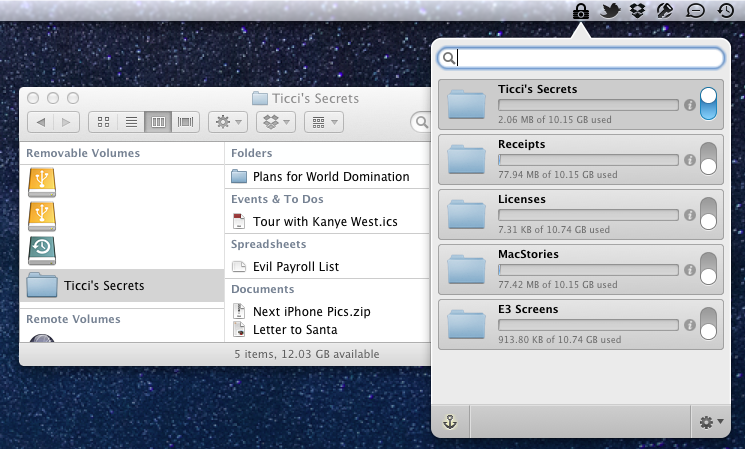
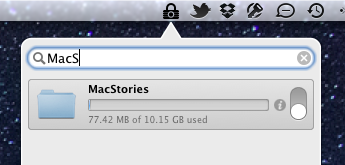
Once Espionage 3 is unlocked, you can drag folders into Espionage’s drop-down list to encrypt that folder’s contents. The process really is that simple. Adding a folder will encrypt it and lock it in Espionage, securely protecting your contents in a protected volume that’s out of sight and out of mind. (It’s similar to how 1Password encrypts your passwords and keeps them in a secure set of files either in Dropbox or with its application data.) If you try to access documents in the folder you’ve encrypted with Espionage 3, you’ll see that the folder’s contents are gone. By flipping a folder’s switch to the on position (blue), the encrypted volume containing that folder’s contents will be mounted at that folder’s location, giving you access to your files as you’ve had before. You need not know how the encryption process itself works — you simply unlock Espionage 3 to open the list of your encrypted folders, then click the switch when you want access to a folder’s contents. As a bonus, you can simply double click on the folder itself in Espionage 3 to jump to that location rather than having to navigate through the Finder. If you find yourself encrypting a lot of folders, a search function allows you to quickly narrow the list down to your matched keywords. Pro tip: clicking the anchor keeps Espionage 3 the top most window so you can navigate the Finder and drag in folders without hassle.
Each list of Folders in Espionage 3 is considered a “Folder Set.” You can have more than one Folder Set, each with their own master passwords. Additional Folder Sets are created in the global preferences. And if you so desire, Espionage 3 can be broken away from the menubar and into its own app window. The downside to doing so is that you’ll lose the handy anchor and settings shortcut buttons.
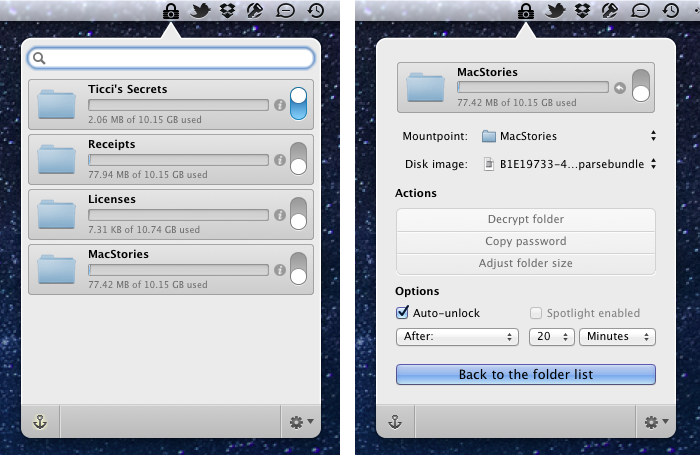
Let’s say you want even less friction. Folders added to Espionage 3 can be individually customized with a couple of options for granular control. The two options of concern are auto-unlock and auto-lock. Auto-unlock will “flip the switch” when you enter your password, granting you immediate access to those files as Espionage 3 is launched. Auto-lock works independently from Espionage 3’s global lock feature. After a period of time, Espionage 3 will lock itself to keep your contents and settings safe — unlocked folders can remain unlocked independently and lock themselves after a longer or shorter period of time if desired. This way, you can still have access to the one or two folders you need to read and write from, while protecting the remainder of your encrypted contents. Auto-lock features work on a timer which counts down in the background after a period of inactivity.
So can you encrypt Dropbox folders or sync your encrypted disks to the big blue box in the cloud? Sure — but you’ll need to have your encrypted disk images in Dropbox for it to work. Using the folder options, change the disk location to a directory in your Dropbox folder, copy the password and save it somewhere (like a text file), wait for the disk to sync, then enter the password you copied to unlock the folder in Espionage 3 on your other Mac.
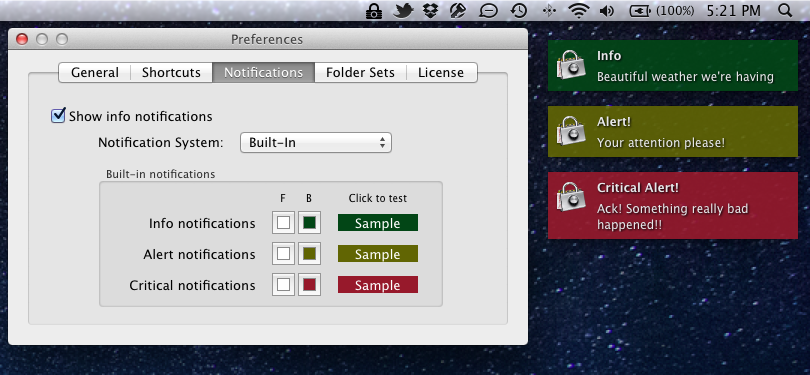
Espionage 3 supports Growl for notifications, but it also has its own built in notification system for users who don’t want to install or use Growl on their systems (and it’s pretty customizable!). Growl functionality does work, and I imagine the built-in notifications are a holdover until Mountain Lion is publicly released later this summer.
With Apple tightening down Lion, Mountain Lion, and what applications can do and how they interact with the system, Espionage 3 forgoes the ability to associate itself with an application to secure app data. You can still secure app data if you manually encrypt the application’s respective support folder in the Library, but the ability to simply drag and drop an app icon into the Espionage window is no longer available.
People choose Macs because the functions they provide make people’s lives easier. Espionage is a perfect example of an application that fits well in Apple’s ecosystem — it has taken something complicated and made it simple. While nearly a thousand words have been spent describing how Espionage works, simply using the application will tell you much about how easy Espionage is to use. It’s dead simple, practically effortless encryption software that makes privacy and security accessible and available to anyone who can navigate the Finder and drag a folder into an app window. If you have trouble using Espionage, the no-nonsense help documentation is short, succinct, and very helpful in learning what a particular function does or doesn’t do. Given its ease of use and much improved interface, I’d have to say Espionage 3 is a no brainer if you’re considering basic encryption software for your Mac. Espionage 3 is $9.99 on the App Store this week, subsequently settling at $19.99 afterwards.


