The Iconfactory, makers of apps such as Twitterrific, CandyBar, xScope, IconBuilder, iPulse, and Frenzic, are the “World leaders in icon design, custom design services, software, royalty-free stock icons and much more.”
So what app niche could they fill next? How about photo editing. Unless you’re a pixel pro who uses Photoshop, Lightroom or Aperture, there are few options for the semi-pro and amateur out there to dabble in image effects. That’s where Iconfactory’s new app, Flare, comes into play. The Iconfactory worked together with ARTIS Software to bring Flare to the Mac.
User Experience
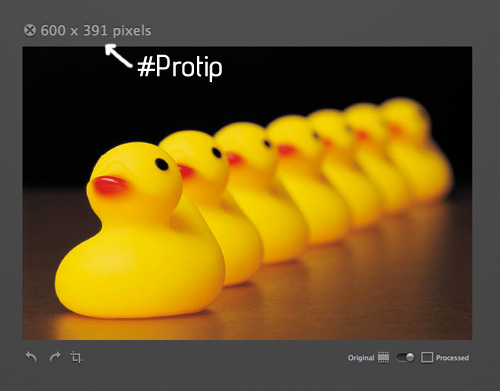
First of all, this is Iconfactory so you know every pixel is in the right place, the app is beautiful and clean with lots of subtle colors, not too distracting when working on your next masterpiece. The application’s icon is beautiful and every little detail is thought out. To get started, launch the app then simply drag and drop on the logo in the center of the screen or simply Command+O like most other OS X apps. Once you open your file, you can preview the original image with the options to crop, rotate, zoom the original or “processed” image. #Protip - click the file name above the image to switch between file name, image name and pixel dimensions. Okay, let’s move ahead.
#Protip - It would be beneficial to check out Flare’s Guides on the site, they have quick start guides, very nice video tutorials and descriptions of all the effects. This will help you quickly learn how to be a more advanced user of Flare.
Presets, Presets, Presets
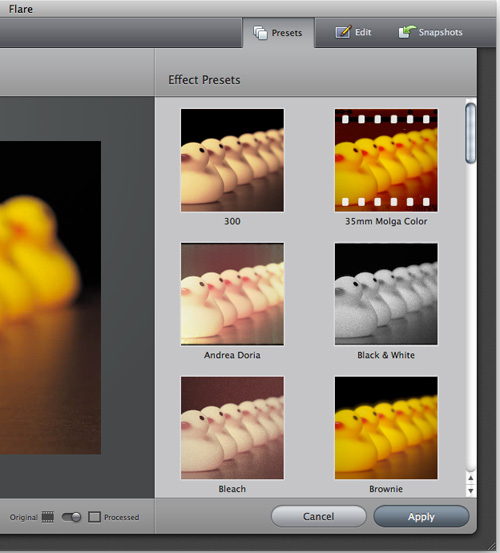
This is where the app gets exciting - click the “Presets” tab to see all the options with automatic thumbnail previews. Once you have an effect selected you can click the small gear icon on the thumbnail and rename, save as or delete the preset. Flare has over 30 preset styles (even more for download here) that you can instantly see as thumbnails or click and apply to the larger version. You have to use your pointing device to select different presets, I would like to see the ability to use arrow keys to navigate as well.
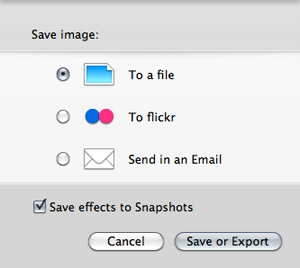
If you’re happy with the result simply click “Apply” then you can click “Save or Export” to send the image to your computer, Flickr or Mail.app. There is even a Flickr pool with public submissions if you want to get your masterpiece out there.
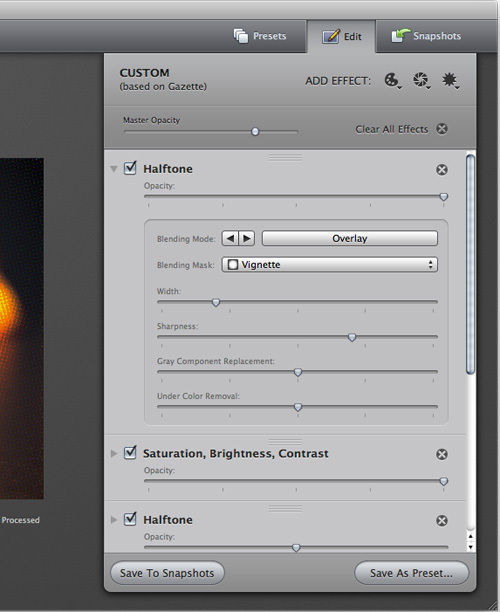
Now for the more advanced user, or if you want to experiment a little, click the ‘Edit’ tab and it expands the preset effect so you can see what options were used to get the effect. Change opacity, turn off and on some of the individual effects or use the drop down arrow on any effect and the image can be altered any way you want too. You can also add extra effects as well, just select one of the the 3 glyphs (Color, Lens or Creative effects) at the top of the Edit tab. People familiar with Photoshop and Pixelmator will recognize the advanced settings so the learning curve is quick and painless. Once you get something you like, you can save it as a new preset and/or save the effect to Snapshots.
Snapshots
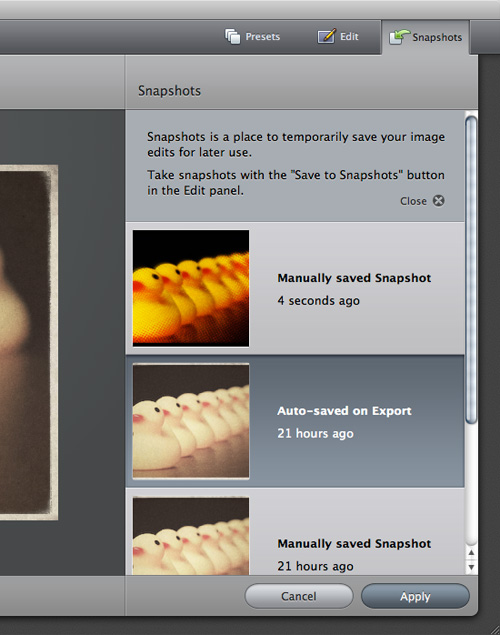
Snapshots are temporary collections of effects. They’re useful for saving a set of effects while you’re working on a preset, but they also come in handy if there is a set of effects you want to apply to several photos but may not want to keep. Flare only saves the most recent last 24 snapshots; if you add more, you will lose your oldest snapshot.
Conclusion
Flare makes it very easy to go from regular joe to photo pro in only a few clicks. The app has a fast learning curve, looks great and makes adding effects as simple or complicated as you want. In the age of social photo networks such as Instagram and Camera+, this app feels familiar but much more advanced. Recommended.
Flare is on sale for $9.99 (reg. $19.99) on the Mac App Store or $9.95 via the Flare website, you can also download a free demo there too. The only limitations to the demo version is that it limits the size of the photo you can work with to something quite small. The registered version and the MAS version have no such limitation.


