I’ve been intrigued by the BANG!CASE ever since it was introduced by Bitmo Lab as a Kickstarter campaign about a year ago. The case includes a programmable button that can be used to automate actions using your iPhone’s accessibility features. However, because I don’t normally use a case with my iPhone, I never followed through on buying the BANG!CASE.
Fast forward to early January at CES when I visited the booth for JSAUX, an affiliate of Bitmo Lab. In addition to JSAUX’s portable displays and gaming accessories, the company was showing off the BANG!CASE and GAMEBABY. (More on that on NPC soon.)
It just so happens that since the holidays, I’ve continued my quest to refine how I collect and process information throughout my day. That’s led me to test a dozen or so apps, build new shortcuts, and explore other new setups. As a result, I was primed to give the BANG!CASE a try when Bitmo offered me a review unit at their booth, and I’ve been using it for a couple of weeks.
The case has a couple of minor drawbacks that I’ll get to, but by and large, it’s the most unique and useful case I’ve ever put on an iPhone. After enjoying my iPhone without a case for nearly two years, I’ve found that the utility of the BANG!CASE is significant enough that I’ve decided to keep using it, which I didn’t expect. So today, I thought I’d lay out why I like the BANG!CASE so much and how I’m using it.
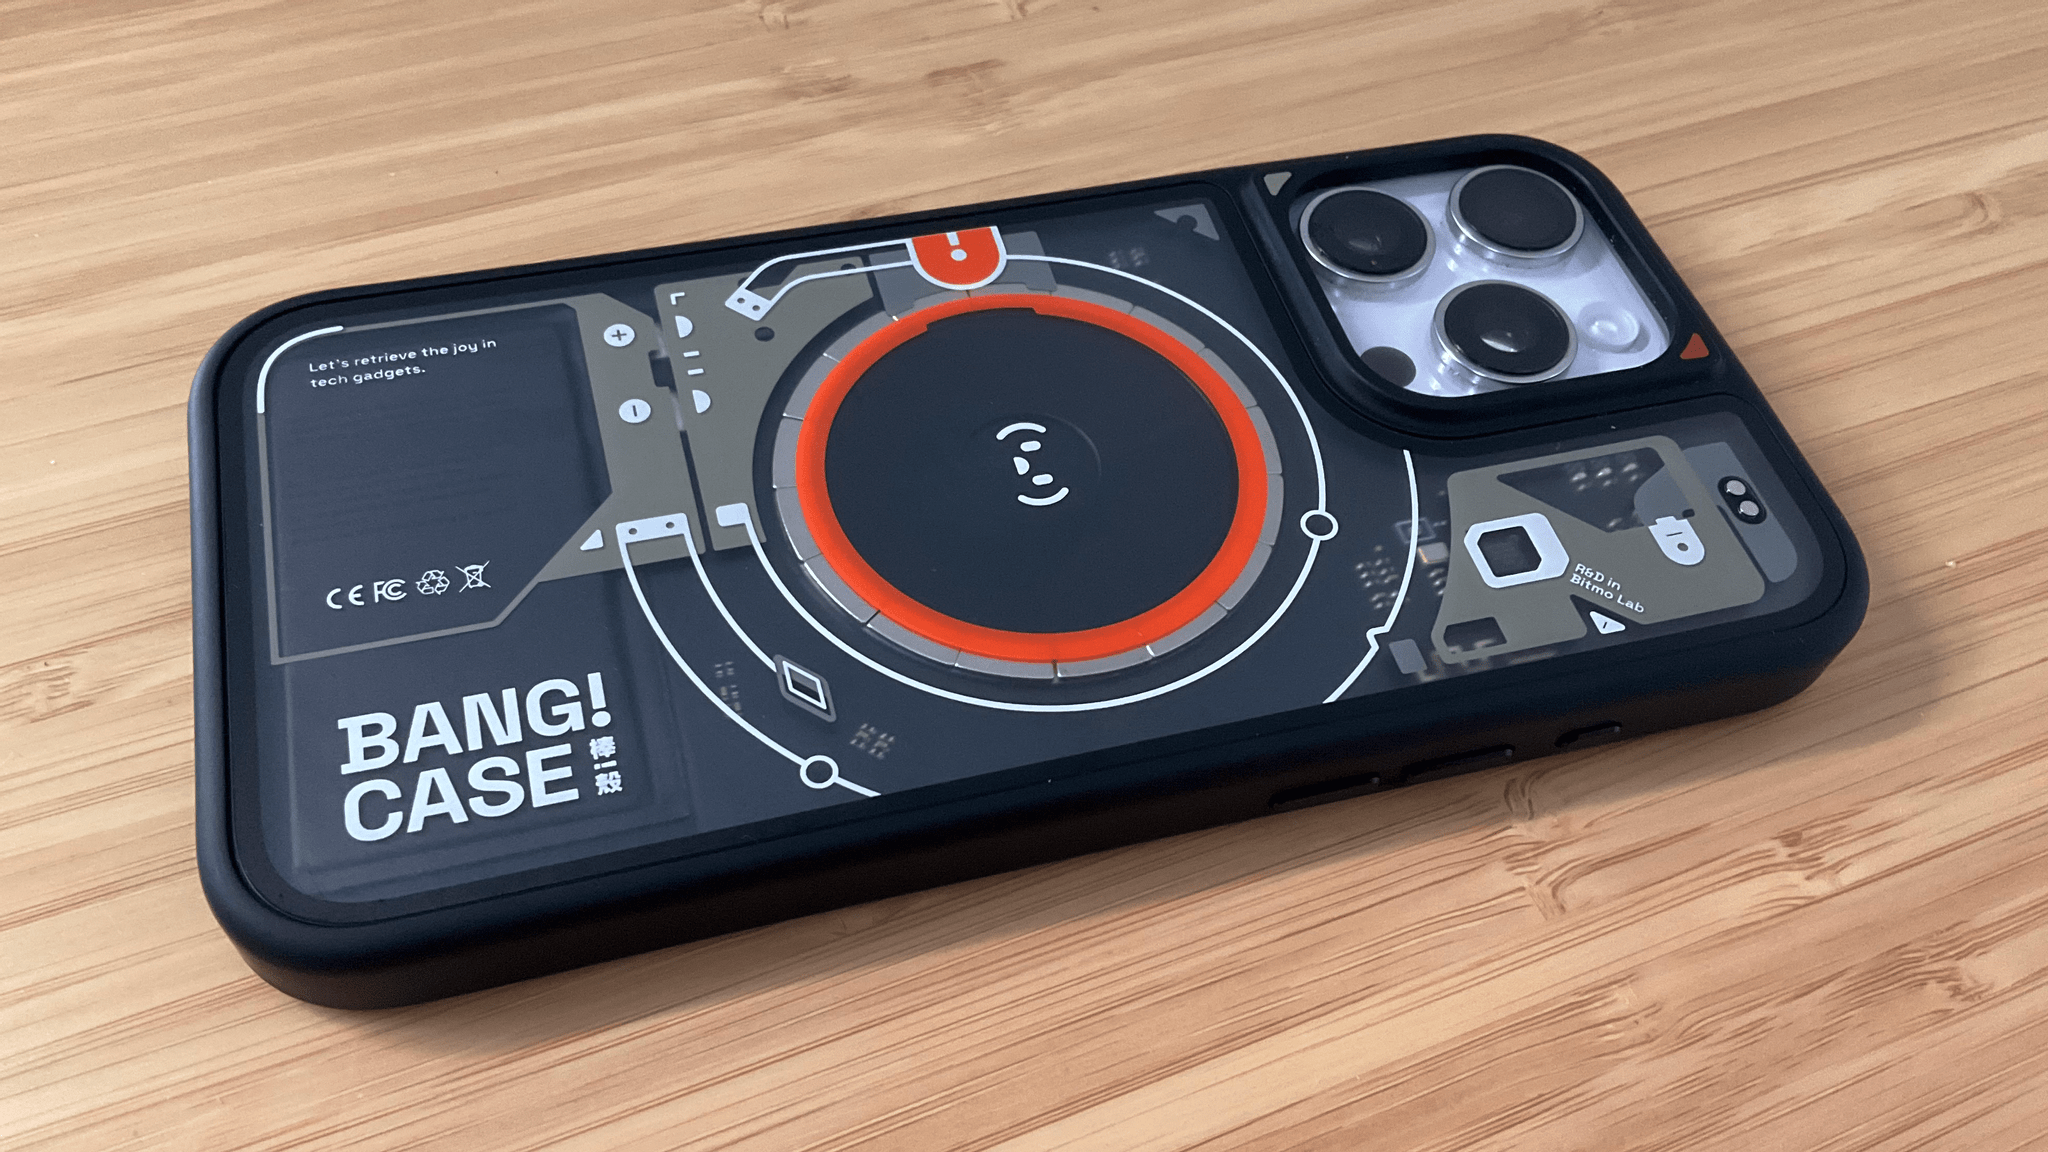
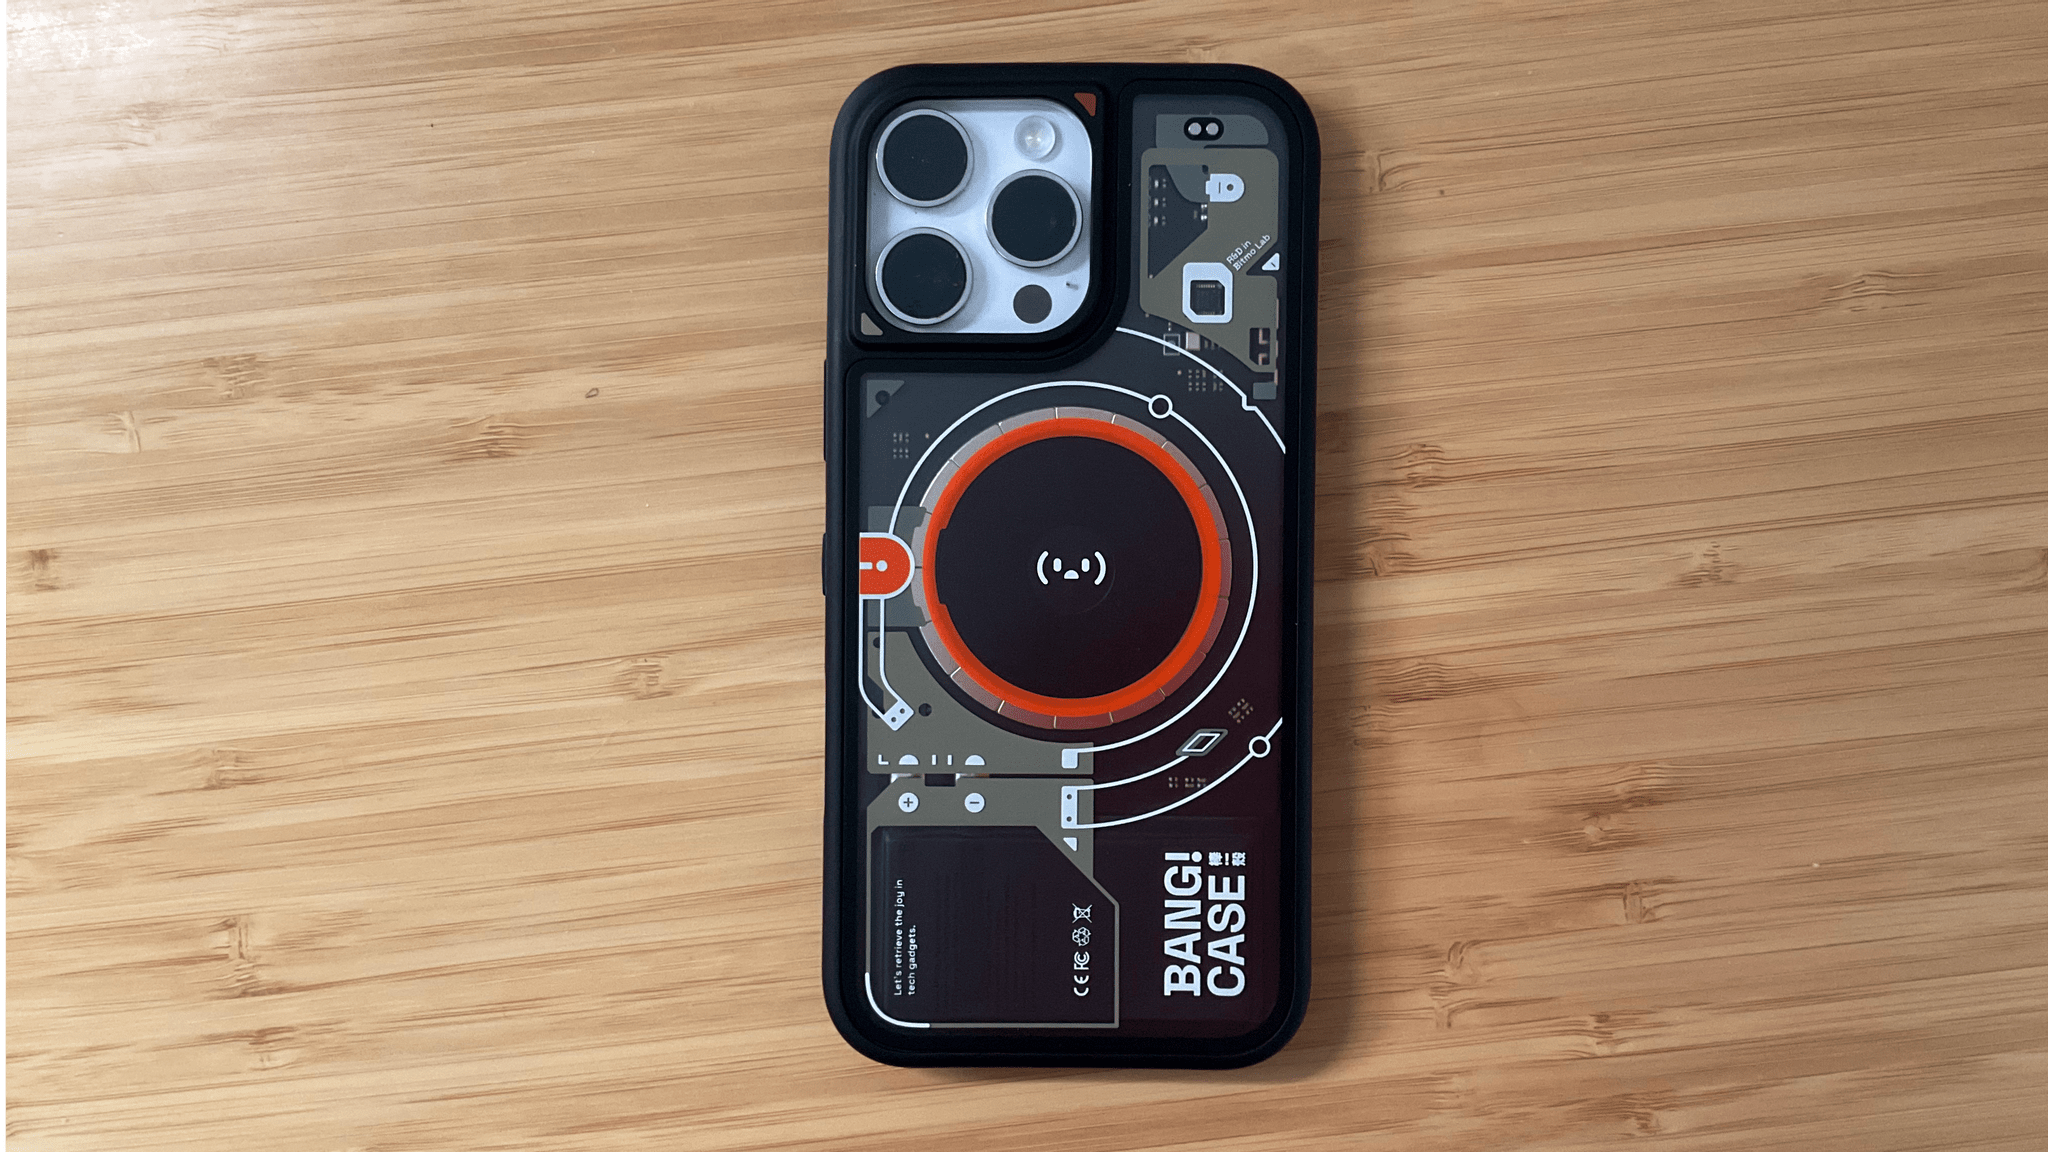
At first blush, the BANG!CASE is an ordinary case made of a soft-touch plastic. It feels good to hold, includes a cutout for the Camera Control, and has hard clicky buttons that make pressing the iPhone’s standard buttons easy. However, aside from the case’s programmable button, the part of the BANG!CASE I like the most is the design of the back, which shows off its electronics and adds some character to my iPhone.
Aesthetics aside, what really sets the BANG!CASE apart is an extra button that sits midway between the side button and the Camera Control. Bitmo calls it the BANG!BUTTON, and it can be programmed to perform three different actions with a single-press, double-press, or long-press.
The BANG!BUTTON works via Bluetooth as an accessibility device, a very clever solution that has a couple of important implications worth keeping in mind. The first is that the BANG!CASE’s Bluetooth radio is powered by a rechargeable battery, not your iPhone. That means you’ll need to charge your case periodically. The case comes with a charging cable that has a USB-A plug on one end and a special connector on the other end that uses magnets and two pogo pin connectors. In my experience, the BANG!CASE doesn’t need to be charged often, but relying on a proprietary cable to do so isn’t ideal.
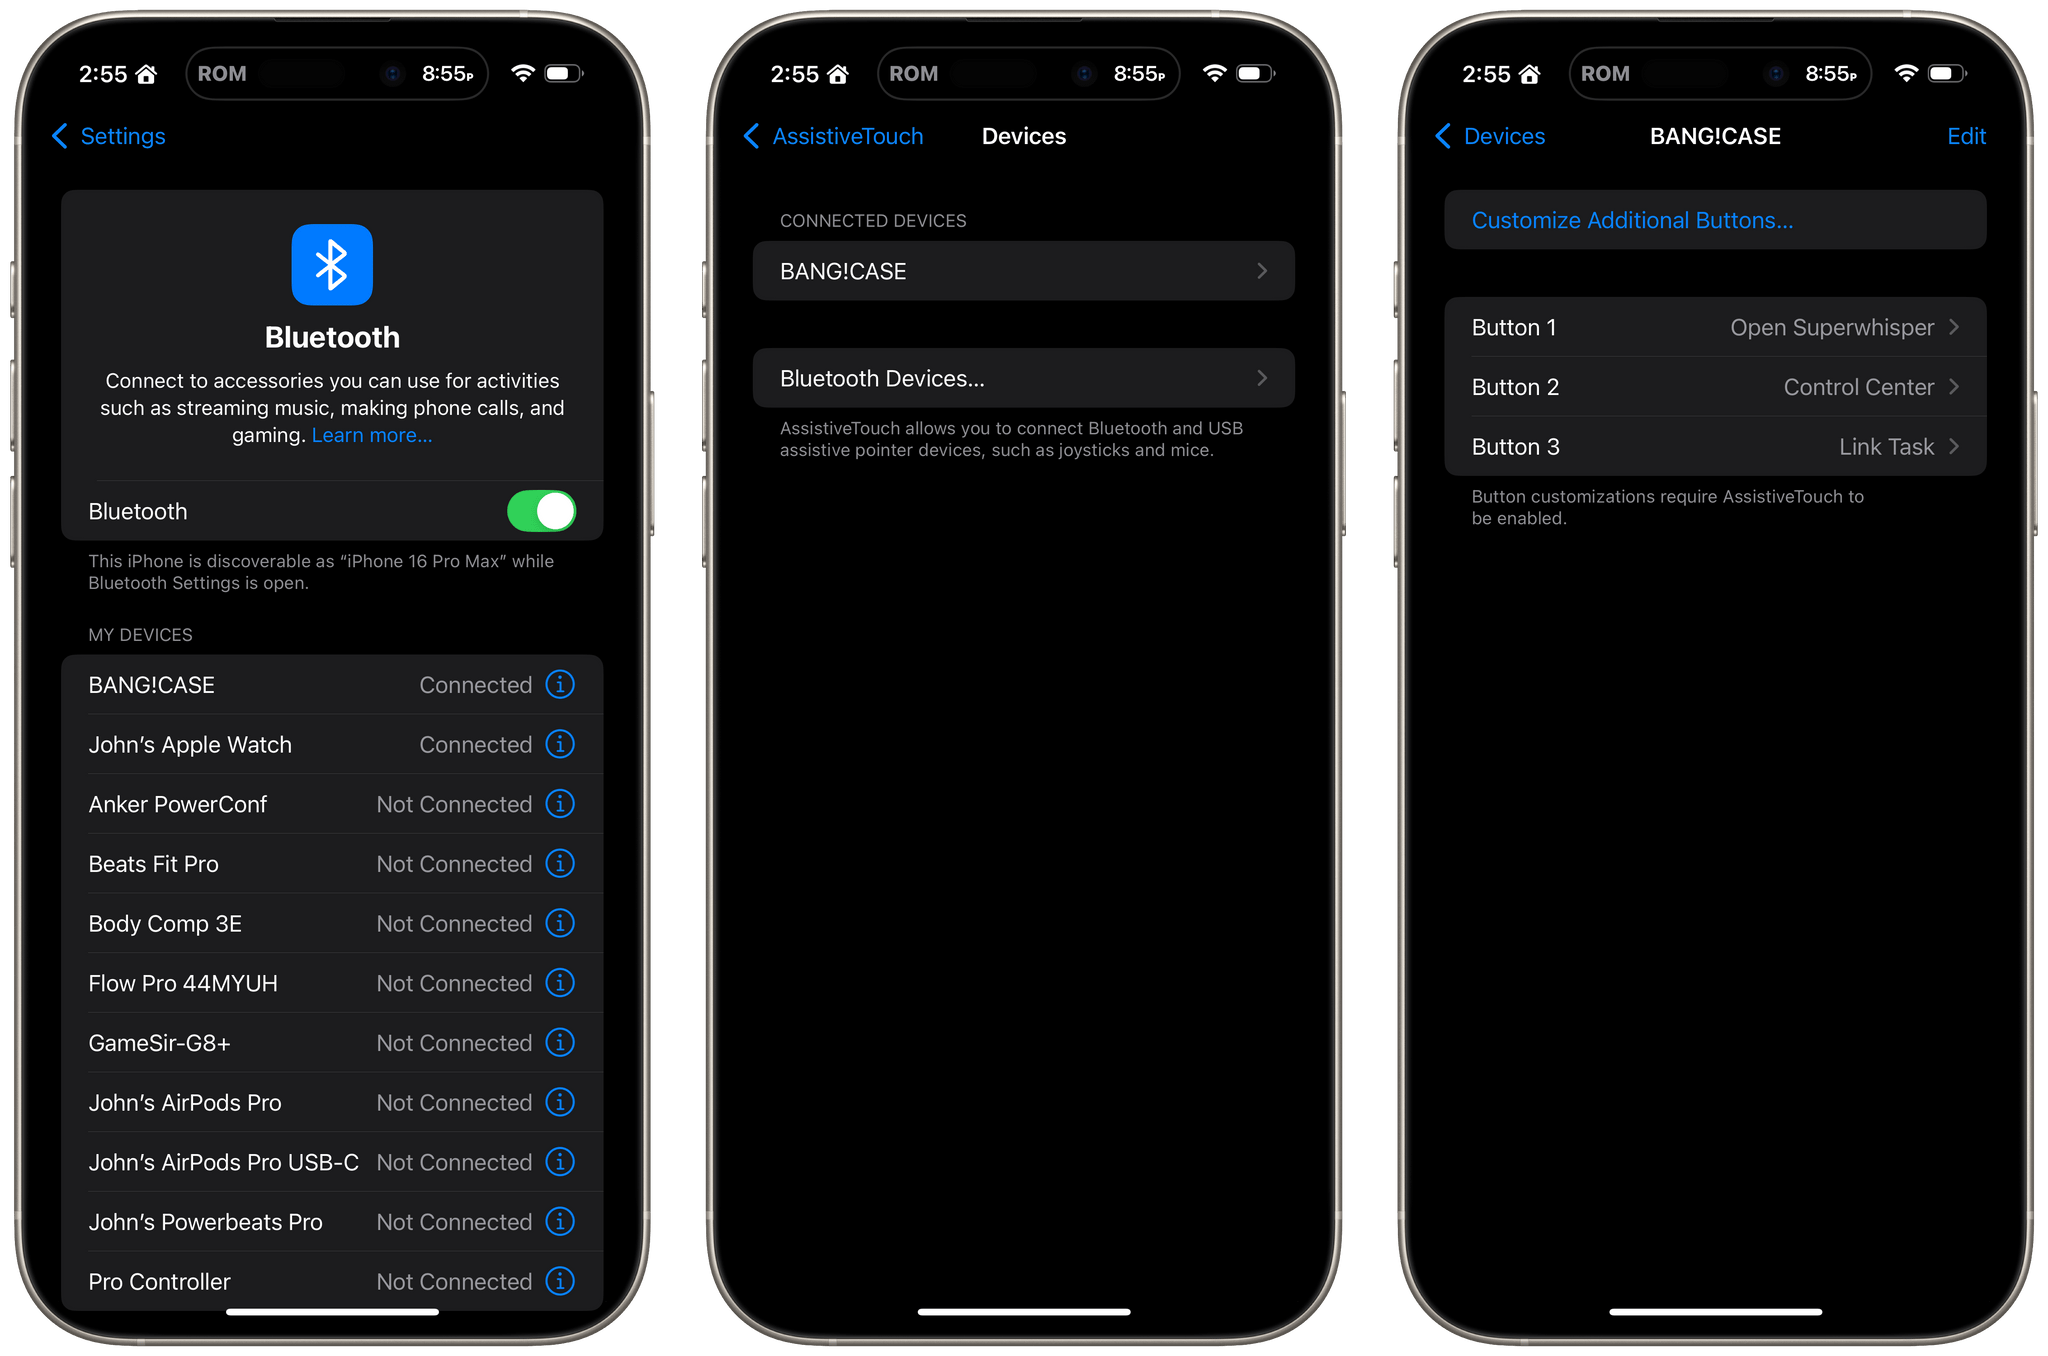
The other somewhat fiddly implication of the BANG!CASE’s design is that you’ll need to dig fairly deep into iOS’s accessibility settings to set up the BANG!BUTTON’s actions. The first step is to hold the BANG!BUTTON until the light on the case is blinking to pair the case with your iPhone under Settings → Bluetooth. Once it’s paired, you can go to Settings → Accessibility → Touch → AssistiveTouch → Devices, where you’ll see your case listed. There, you can assign up to three actions, including a long list of system and accessibility actions, along with any shortcuts you’ve created in the Shortcuts app.
None of that is as bad as it may sound since it’s a one-time setup unless you decide to change the assigned actions. Also, I’ve been using the BANG!CASE for a couple of weeks and have yet to run out of battery, although I have topped it off a couple of times. That said, running out of juice would be a bummer because you’d lose the use of the BANG!BUTTON; having yet another thing to charge in my life isn’t great, either.
Still, I’ve enjoyed the BANG!CASE a lot – so much so that I’ve been using it daily since I got home from CES. You can get more out of Apple’s Action button using Shortcuts, as Federico has shared with his ActionMode shortcut for Club MacStories members, but it’s always nice to have more automation options, which is exactly what the BANG!CASE provides. Moreover, I find the Action button a little hard to reach on the iPhone 16 Pro Max, whereas the BANG!BUTTON is near the middle of the iPhone’s vertical side, making it easier to press.
For the time being, I’ve settled on the following for my Action and BANG!BUTTON setup:
- Action Button: I use Quick Capture for Obsidian to quickly save thoughts to a scratchpad note in my Obsidian vault.
- BANG!BUTTON Single Press: A single press of the BANG!BUTTON triggers a shortcut that starts a new recording in superwhisper, an app that uses OpenAI’s Whisper LLM to transcribe spoken audio.
- BANG!BUTTON Double Press: When I hit the BANG!BUTTON twice, it opens Control Center, giving me quick access to a variety of media playback, HomeKit, and other controls.
- BANG!BUTTON Long Press: I have several shortcuts for saving URLs from specific apps, but for those contexts I haven’t created an automation for, I copy the link and then long-press the BANG!BUTTON to save it as a task in Godspeed using its API.
So far, I’ve enjoyed this setup a lot. Having both text and voice capture just a single button press away has been perfect for saving tasks, ideas, and snippets of text. Thanks to superwhisper’s share sheet integration, it’s simple to send its transcriptions to a to-do, email, note-taking, or other app too.
The winter season is my time to try new things. I’ve burned through task managers, email services, automation and AI services, new audio and video hardware, Macs, and more. It’s an eclectic mix, but the apps and services that are sticking all have one thing in common: easy access no matter what the context is. The BANG!CASE offers that, giving me access to a larger set of button actions at my fingertips, which I’m loving so far. The iPhone is a great capture device, and it’s even better with the BANG!CASE.
The BANG!CASE is available from Bitmo Lab for $49.99.