It’s not a secret that many web designers and developers out there are on a Mac platform. Especially in 2009, it seems like many professionals and freelancers have switched from Windows to Mac OS X in order to have better performances, security and, most of all, more time to do stuff. They wanted to save time, they wanted to avoid those virus and malware crappy things Windows has - for this reason many people did the “big” switch and bought a Mac. You can’t blame them: with tools such as Coda, Textmate, Textexpander and the famous Pixelmator, they had every good reason to switch to a Mac computer. Now, besides web development and graphic applications, what about the software that can help managing the financial and invoicing aspect of a freelancing job?
Today I’d like to talk about Billings from Marketcircle, an award winning app for Mac and iPhone which is gonna be your one step solution for anything freelancing related.
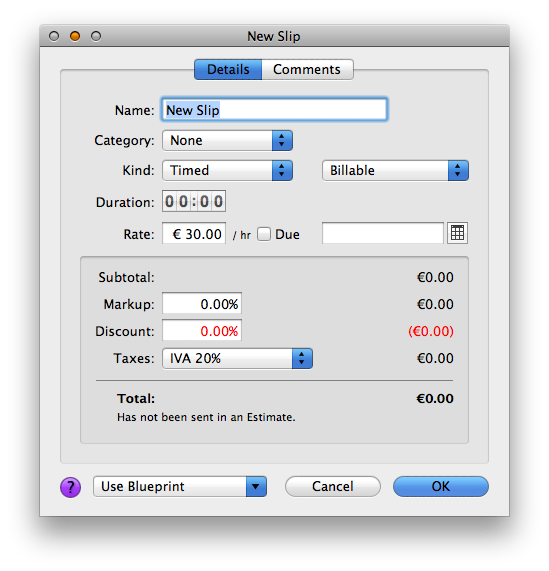
First, Billings isn’t meant for people who don’t get paid by clients. Being an application built with freelancers in mind, Billings requires you to insert some clients, companies and so on. It works like this: you have Clients, each client can have some Projects, each project can be divided into “slips”. Slips are basically all the works you have to do to complete a project. Say you have a client who asks you to redesign their company’s website: you’ll surely need to do some researches and see what the competitors are offering, collect some resources, start mocking up the whole thing in Photoshop and so on. Each part of the project is called slip and you have to tell the application which is the rate you usually apply per hour. At first launch, indeed, you’ll be asked to put some information about you (name, address, billing info) which include taxes (for people who need to apply VAT, or “IVA” in Italy) and the rate you want. You can save a custom taxes setup or even import it from a .bitax file. Never heard about that before. As for the rate, it’s calculated per hours and came set up at 75 Euros by default to me.
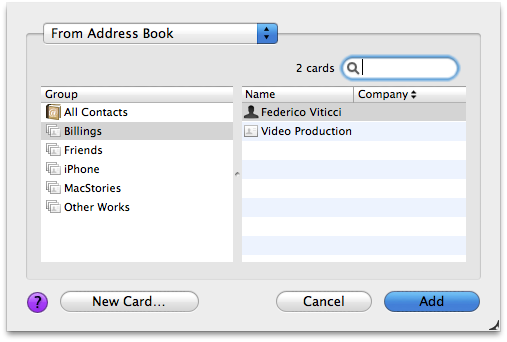
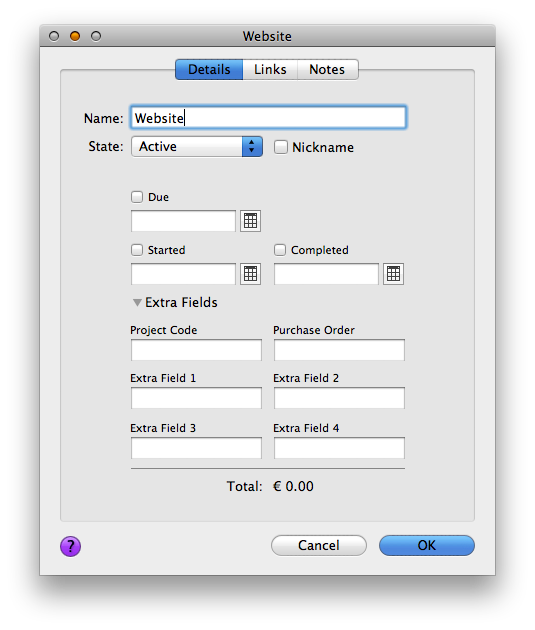
So, I’ve filled my personal info, told the app how much I charge per hour and what’s my tax region. Now what? Oh yeah, clients. One of the coolest things about Billings is that the client management is based on Address Book, so you can easily import, create and edit contacts from Billings. As you add a new client another window will appear, asking you to fill some additional info about the client like the logo, client group (very useful for clients who share similar projects. I’ve created a Websites group for instance), client number and hourly & mileage rate. Yeah, Billings even cares about your car and how much gas you use to get to the client. Considering the gas’ costs nowadays, the Marketcircle guys had a great idea. Ok, so now we have a client, a client group..better start working, right? I mentioned that each client needs to be assigned a project: to do so, either right click on the client’s icon or use the gear icon in the bottom menu and hit “New Project”. Again, time to fill a lot of other details that - trust me - will really come in handy in the future. You can enter a name, a state (Active, Estimate, Completed, Cancelled), a nickname, a due / start / completed date and some extra fields like Project Code and Purchase Order (there are many other blank fields, anyway). From the same “project info” panel you can switch to the links tab and attach a link, either to a file or a website. Last, you can enter some random notes.
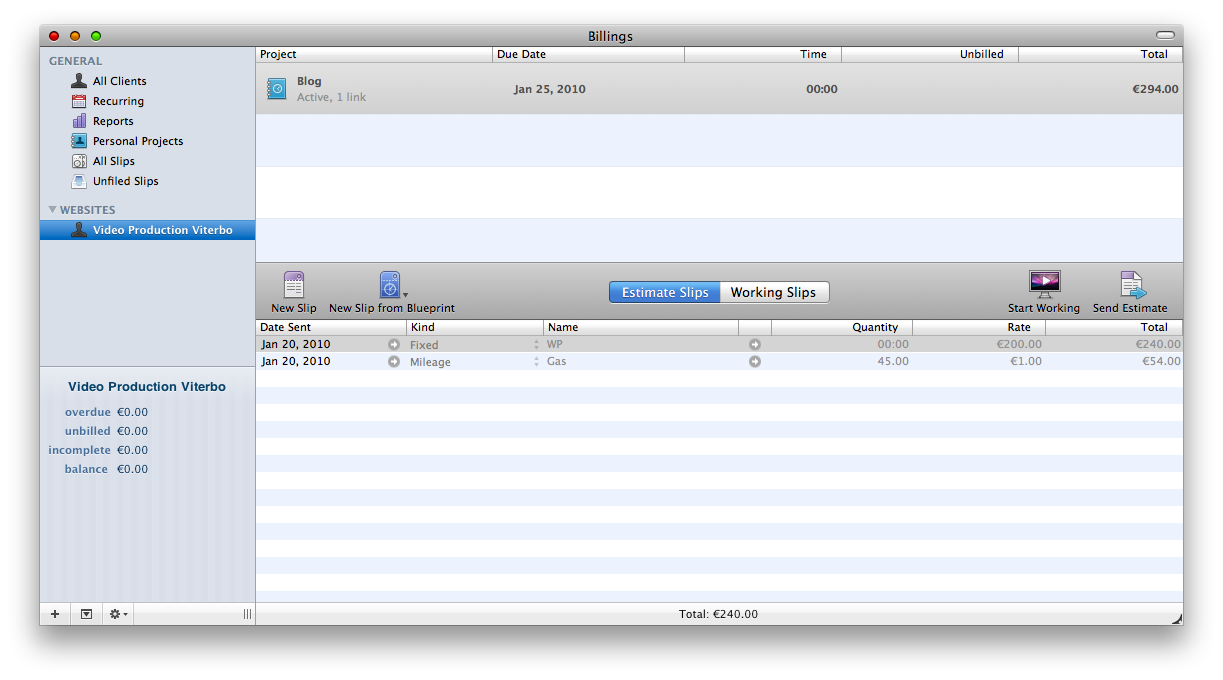
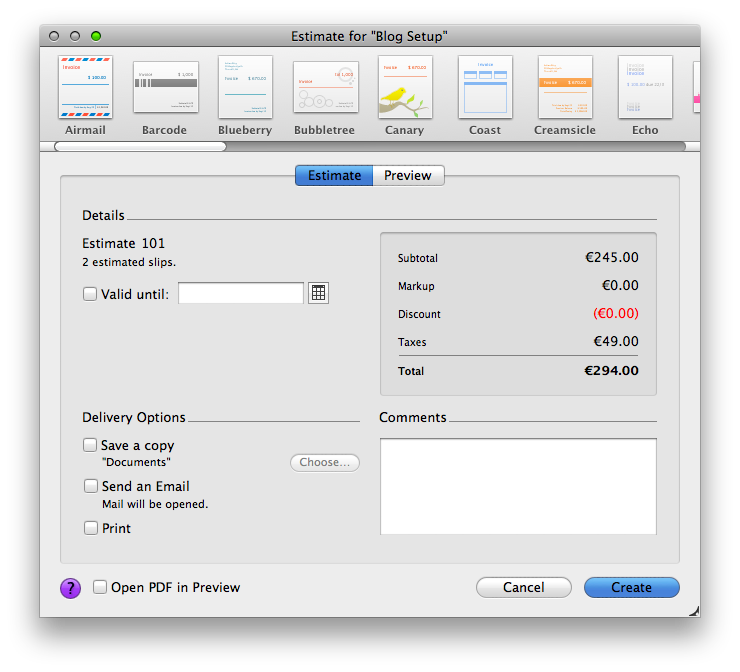
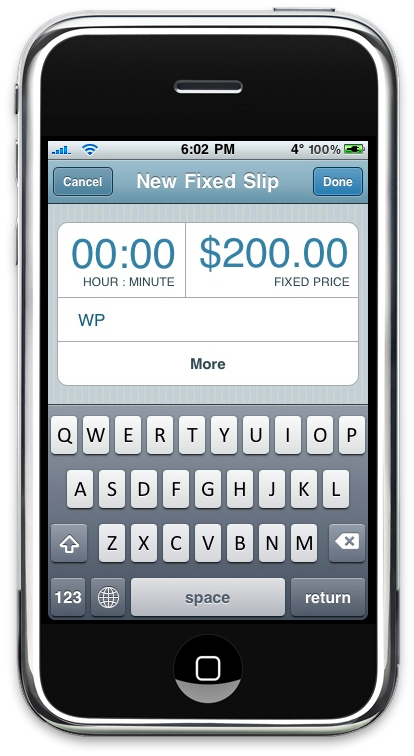
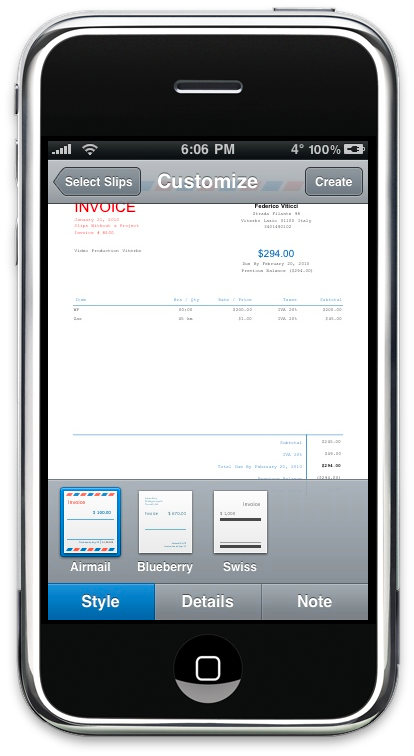
Now, here comes the most important part of Billings, so pay attention. You have to realize how many parts go into the entire project, those parts are the slips. Let me guide you through the process with my total fictional example I created for this review. I have this client, “Video Production Viterbo”, who wants me to set up a WordPress blog for their company’s website. Sounds good, I accept the project and I tell them I don’t charge per hour but I have a flat rate of 200 Euros just to set up a WordPress blog. They have a designer, I just need to set up a blog. Sounds absurd, but remember - it’s fictional. So, I create the Blog project and set a due date for Jan 25th. Now, I should add some slips based on what I have to actually do to get the job done. Let’s say…install WordPress, test it, search and install plugins and give the last touches to the final results. 4 slips, awesome. In Billings (just like in the real life) you can choose to send Estimates Slips or Working Slips. Estimates, for how much you plan to charge at the end of your work and Working, for how much you’re actually charging (assuming you’re really working). I never charge on hourly rate, but Billings allows me to choose between various kinds: time, flat (the one I use), expense, quantity and mileage. So I create two estimates slips, one for the actual blog setup and one for the 45kms trip I had to visit the company. I select both the slips, click “Send Estimate” and one of the most beautiful screens of Billings pops up, the invoicing screen. Actually, it’s not the screen that’s beautiful, the built-in templates are. You can choose between almost 30 templates, all of them editable in another section of the application, and you can obviously adjust the options of the estimate / invoice on the go, right before sending it. You can send an invoice via mail, save it in your Documents folder and open it with Preview. If somebody asks me what are the best features of Billings for Mac, the integration with the Apple branded apps surely tops the list.
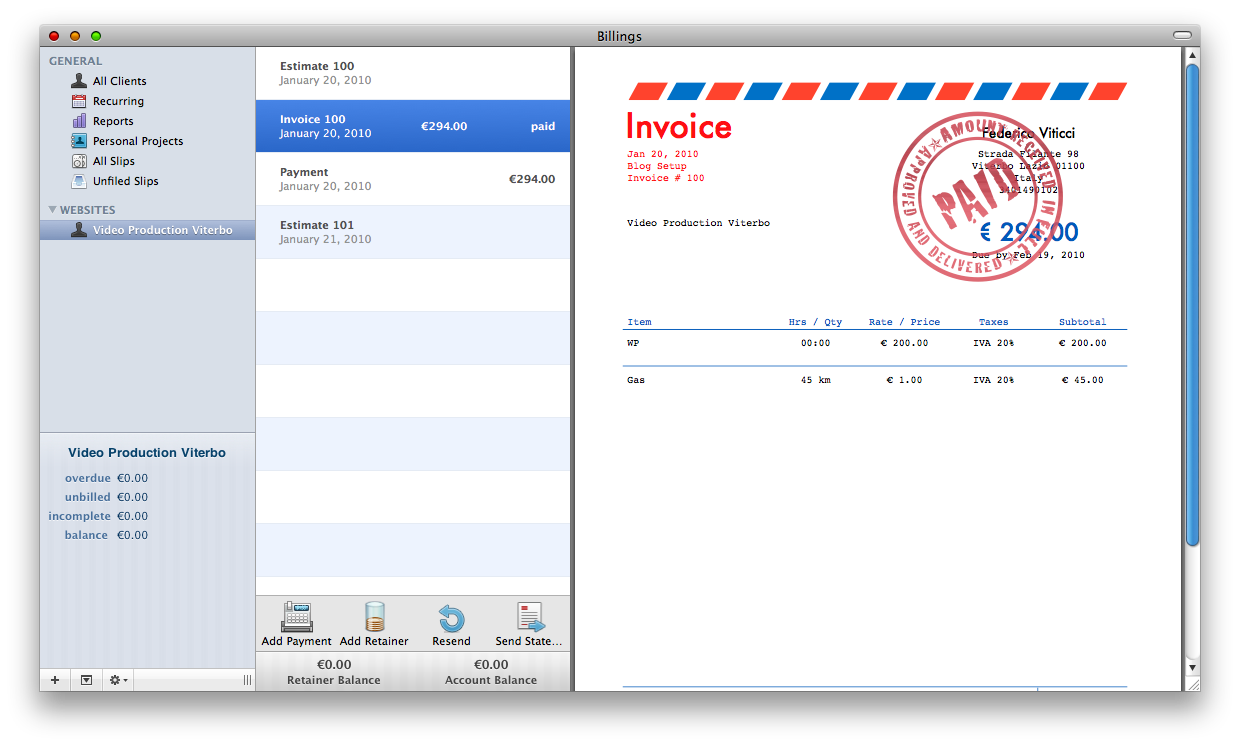
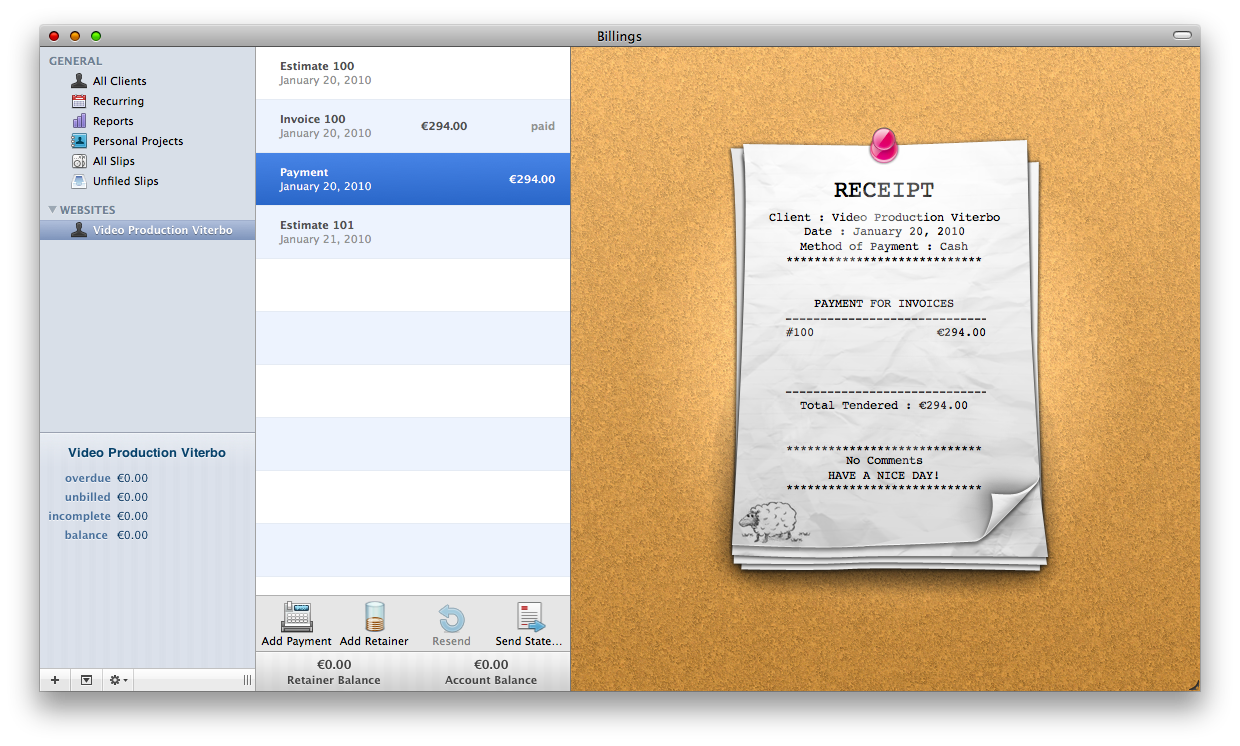
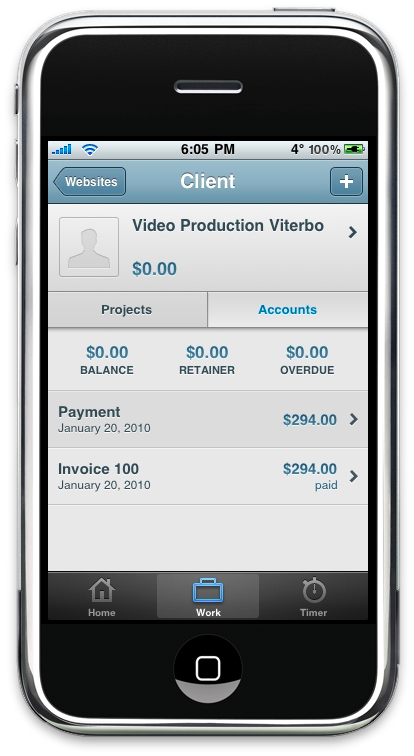
Last, let’s see how Billings handles the payments and how communicates to the user which client paid, and which didn’t. First, unpaid invoices have a nice “Unpaid” mark right next to them so it’s really easy to spot them. If you really can’t see it, every client has a cool “summary box” in the sidebar which simplifies the job of going through all the invoices when you have many clients and projects. When you receive a payment, just tell it to Billings and be sure to specify how the client paid: cheque, cash, Visa, etc. Once an invoice gets paid a huge Paid stamp appears above it, the client has no more incomplete payments and a receipt file is generated for your visual pleasure.
I can’t say more about Billings for Mac. I’m not really a heavy and pro user of this kind of apps, so I still have to fully understand many things and functions. Besides, I’m not exactly a freelancer (like a freelance designer or developer) and for this reason I think many features of Billings aren’t for me. I can say it’s a great app nevertheless: it’s clear that Billings receives a huge support from its developers, it shows an amazing attention to the smallest details. That said, if you consider that Billings features many other stuff like an in-app templates design tool, reports and timer and that there’s an iPhone version out in the App Store, you realize why this is the ultimate app for freelancers.
Anyway, before a more detailed conclusion, let me talk about this iPhone app.
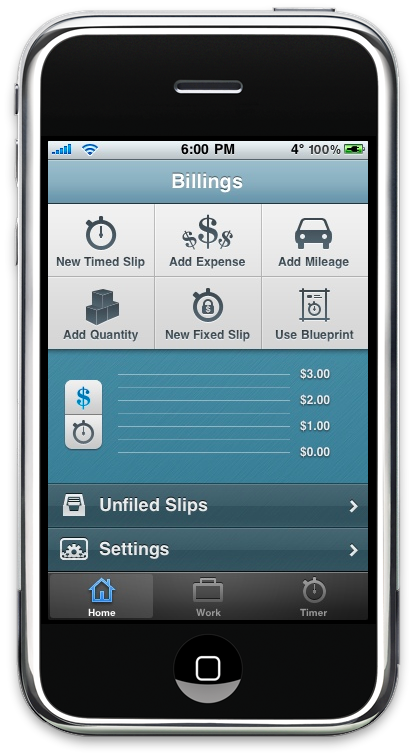
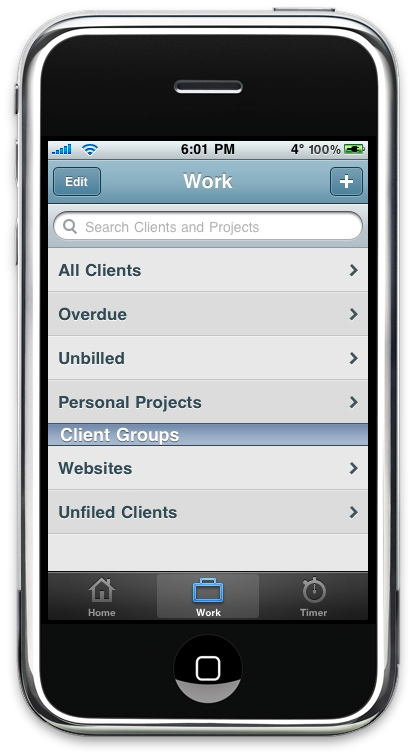
The iPhone app is very similar to the Mac app, as it basically lets you do almost everything Billings for Mac does, in a completely different, beautiful UI designed by Brandon Walkin. Billings Touch is divided into 3 tabs: Home, Work and Timer. While Work and Timer let you search clients and projects and start a new timed slip, the Home tab is the real heart of Billings Touch. From the home screen you can create a new Timed or Fixed slip, open an existing blueprint and add Mileage or Quantity. And that’s only for the top toolbar. In the middle part of the screen there’s a nice graph which shows your working time and expenses, while on the bottom there are two additional tabs that help you managing unfilled slips and the application’s Settings.
Whether you decide to start a new slip (timed or not) or to create a new expense, you can link them to everyone and everything: clients, projects, slips. Just like in the desktop version. You can manage clients, create projects, send invoices, pair with Billings for Mac. It’s one of the most complete iPhone apps I’ve ever seen. Indeed, to unlock the full version (the one with pairing and in-app invoicing enabled) you need to pay $14.99 via in-app purchase.
Is it worth it? Absolutely. If you already have Billings for Mac and you have an iPhone, Billings Touch is a must. It’s what makes Billings not a standalone app but a real suite, perfect for freelancers and designers who are looking for a serious management tool. Billings for Mac is available at 20 Euros ($40) at Marketcircle’s official store. Trust me, if you plan to manage your business like every good freelancer should, let Billings do the work. It will be your only boss.
[Disclaimer: MacStories is currently sponsoring Billings Touch. This review does not.]


