Controller for HomeKit is an alternative way of controlling and setting up your HomeKit accessories, scenes, and automations from your iPhone. While the app has been around for some time, this month it received a major upgrade with a new feature that turns the app into a fun and powerful control center for your home.
Now, in Controller for HomeKit, you can leverage the iPhone’s LiDAR sensor to scan your entire home and create a 3D floor plan, on top of which you can overlay your lights, scenes, and other HomeKit accessories. The result is a fun, customizable, and interactive UI that works so well and is so intuitive that it almost feels like it belongs in Apple’s own Home app for the iPhone.
Let’s check it out.
The first thing to note about Controller for HomeKit is that the app’s entire interface has been refreshed. The main screen now features a fairly simple layout, from which you can easily jump into a room or a list of your HomeKit categories filtered by type. This is also where you can get into the app’s more advanced sections, where you can create workflows, build scenes, or even set up automations around custom NFC tags. Since a home full of smart devices can quickly become overwhelming, the simplicity of Controller’s main screen is a welcome departure in this app category, so it gets a big thumbs up from me.
Among the app’s more advanced sections, my favorite one is probably ‘Maintenance’. This is where Controller for HomeKit lists all of your potential setup issues, such as devices that are low on battery, have duplicate names, or are currently unreachable. This section may finally give me the motivation necessary to work through all of my HomeKit issues over the next few weeks.
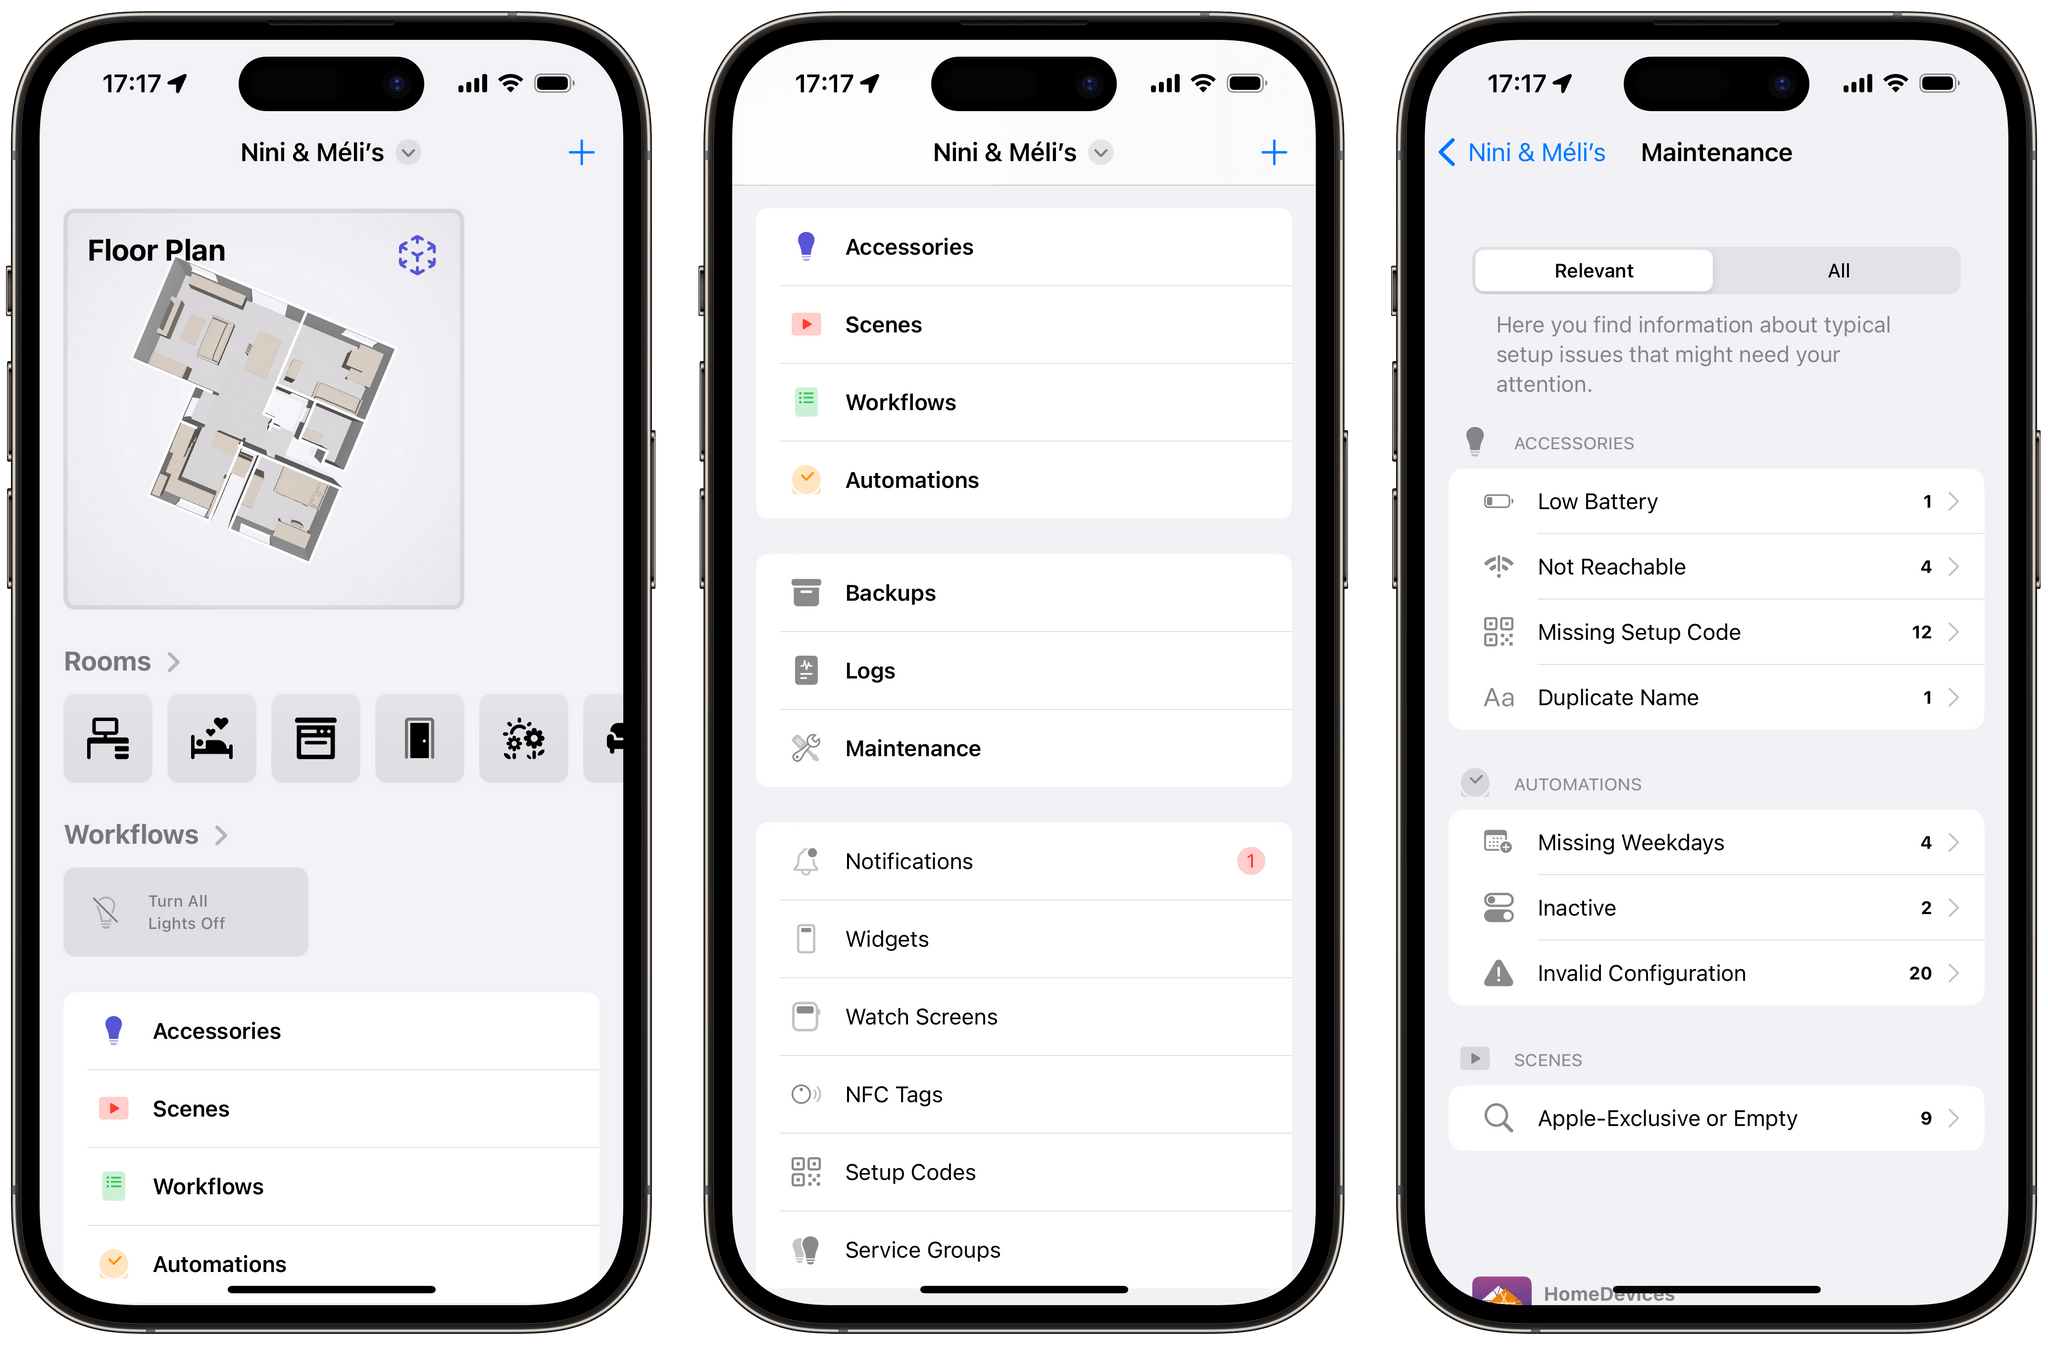
Controller’s main screen lets you easily jump into your rooms, automations, and the app’s advanced sections, including a ‘Maintenance’ overview.
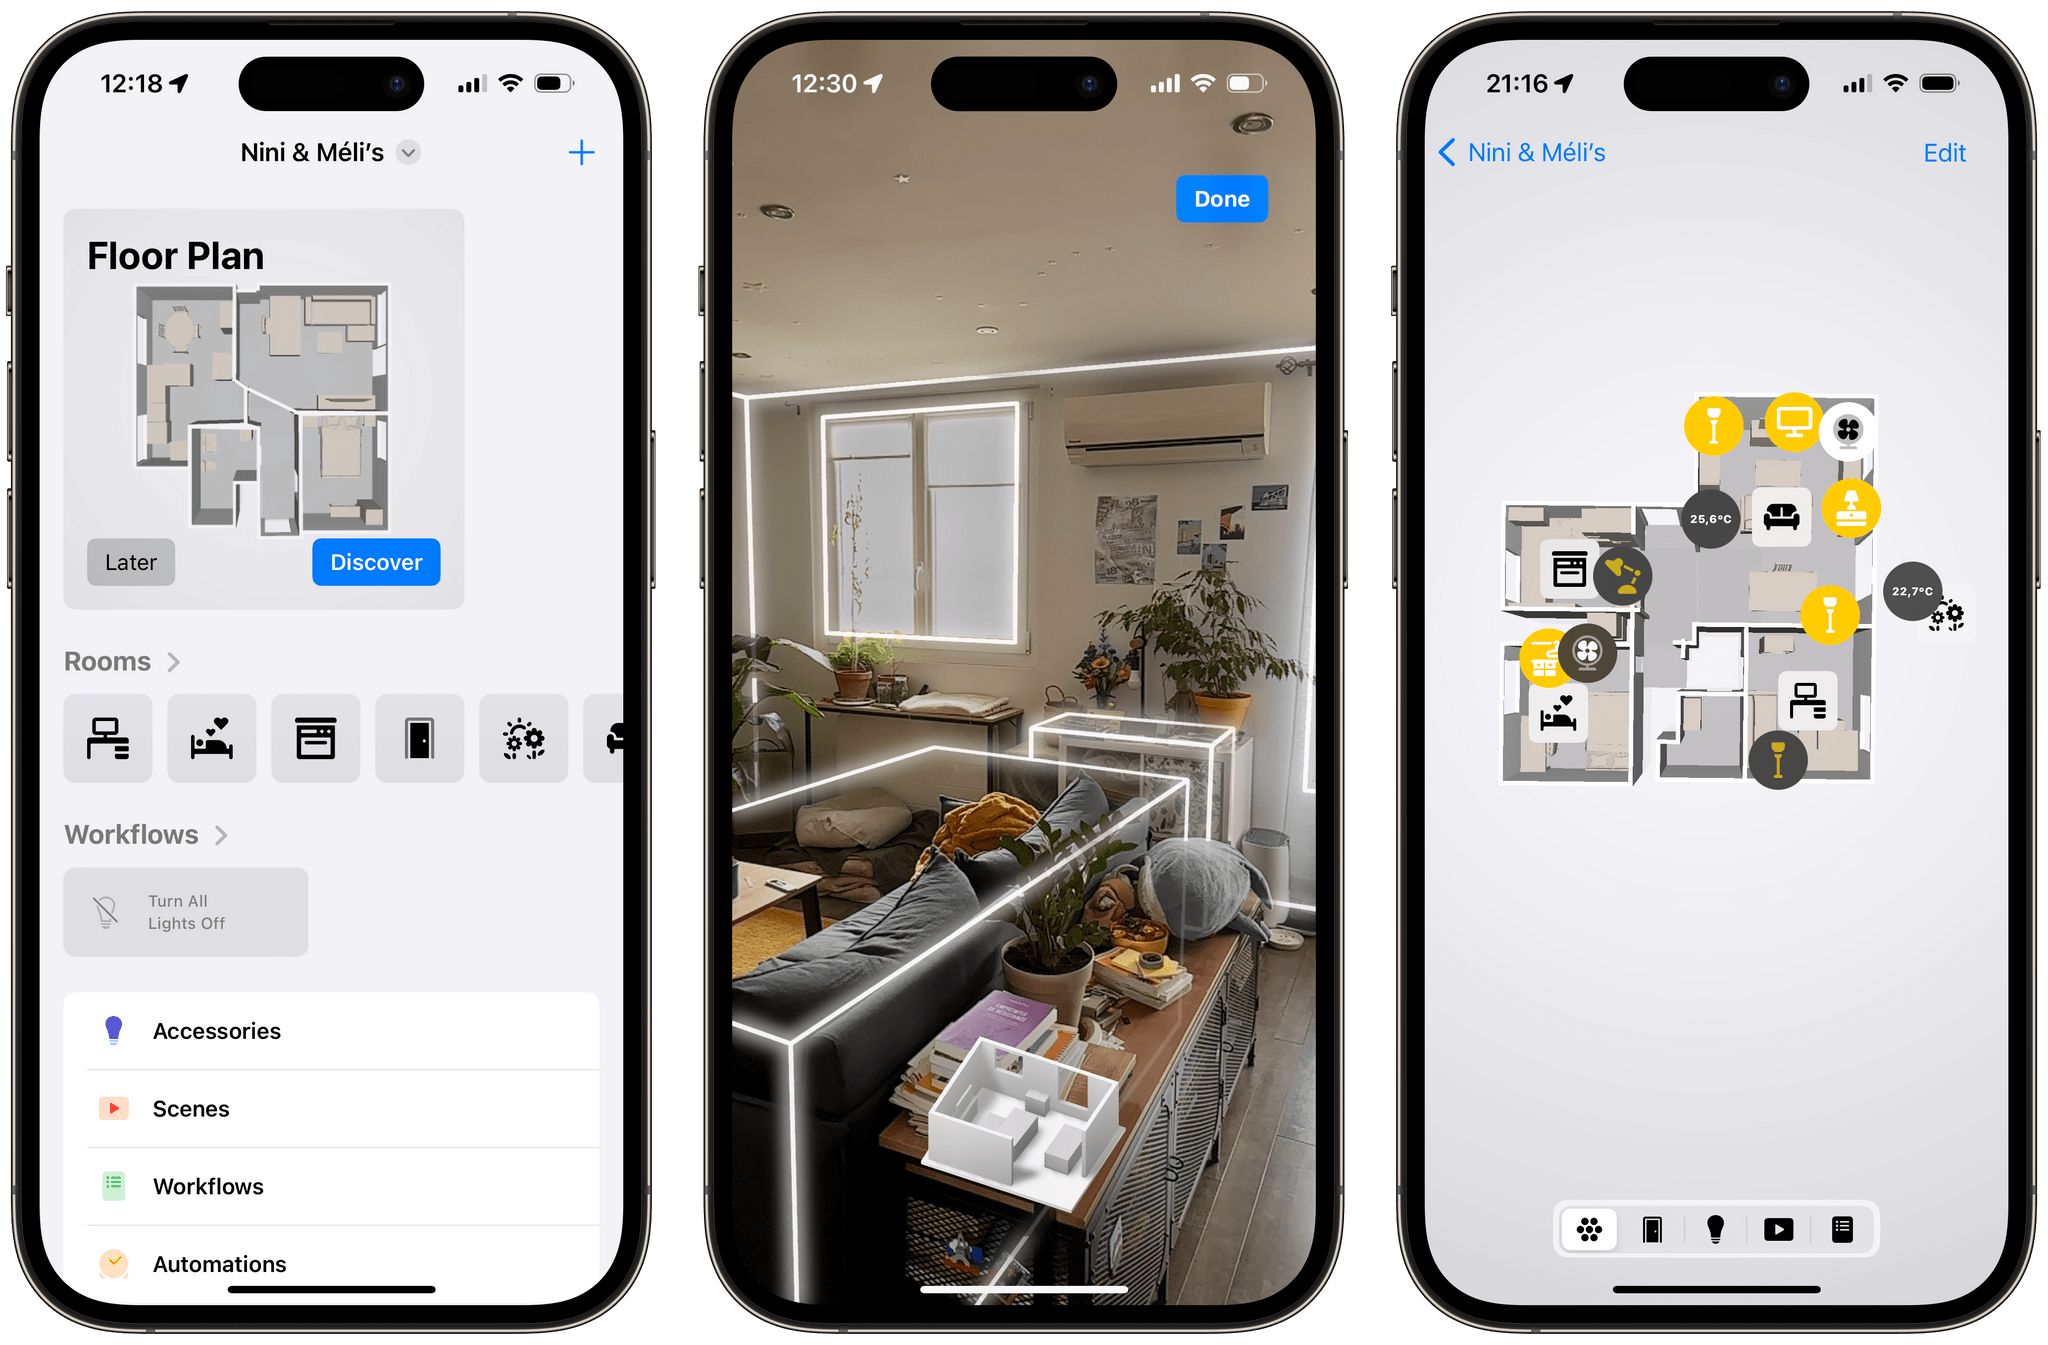
But the star of this update by a long mile is Controller’s new ‘Floor Plan’ feature. Right from the main screen of the app, you can start the process of scanning your home with the iPhone’s camera and LiDAR sensors. Although the process can take some time depending on the size of your home, it is fairly easy and intuitive. All I had to do was follow the app’s instructions and hold the phone in front of me as I started walking through every room in our apartment.
Honestly, this was a lot of fun. The quality of the scan underlines how powerful the iPhone’s LiDAR sensor and AR capabilities can be. All of our main pieces of furniture showed up exactly where they were meant to be, and some specific types of furniture (couches, chairs, beds, kitchen appliances, and tables) even had their own 3D models.
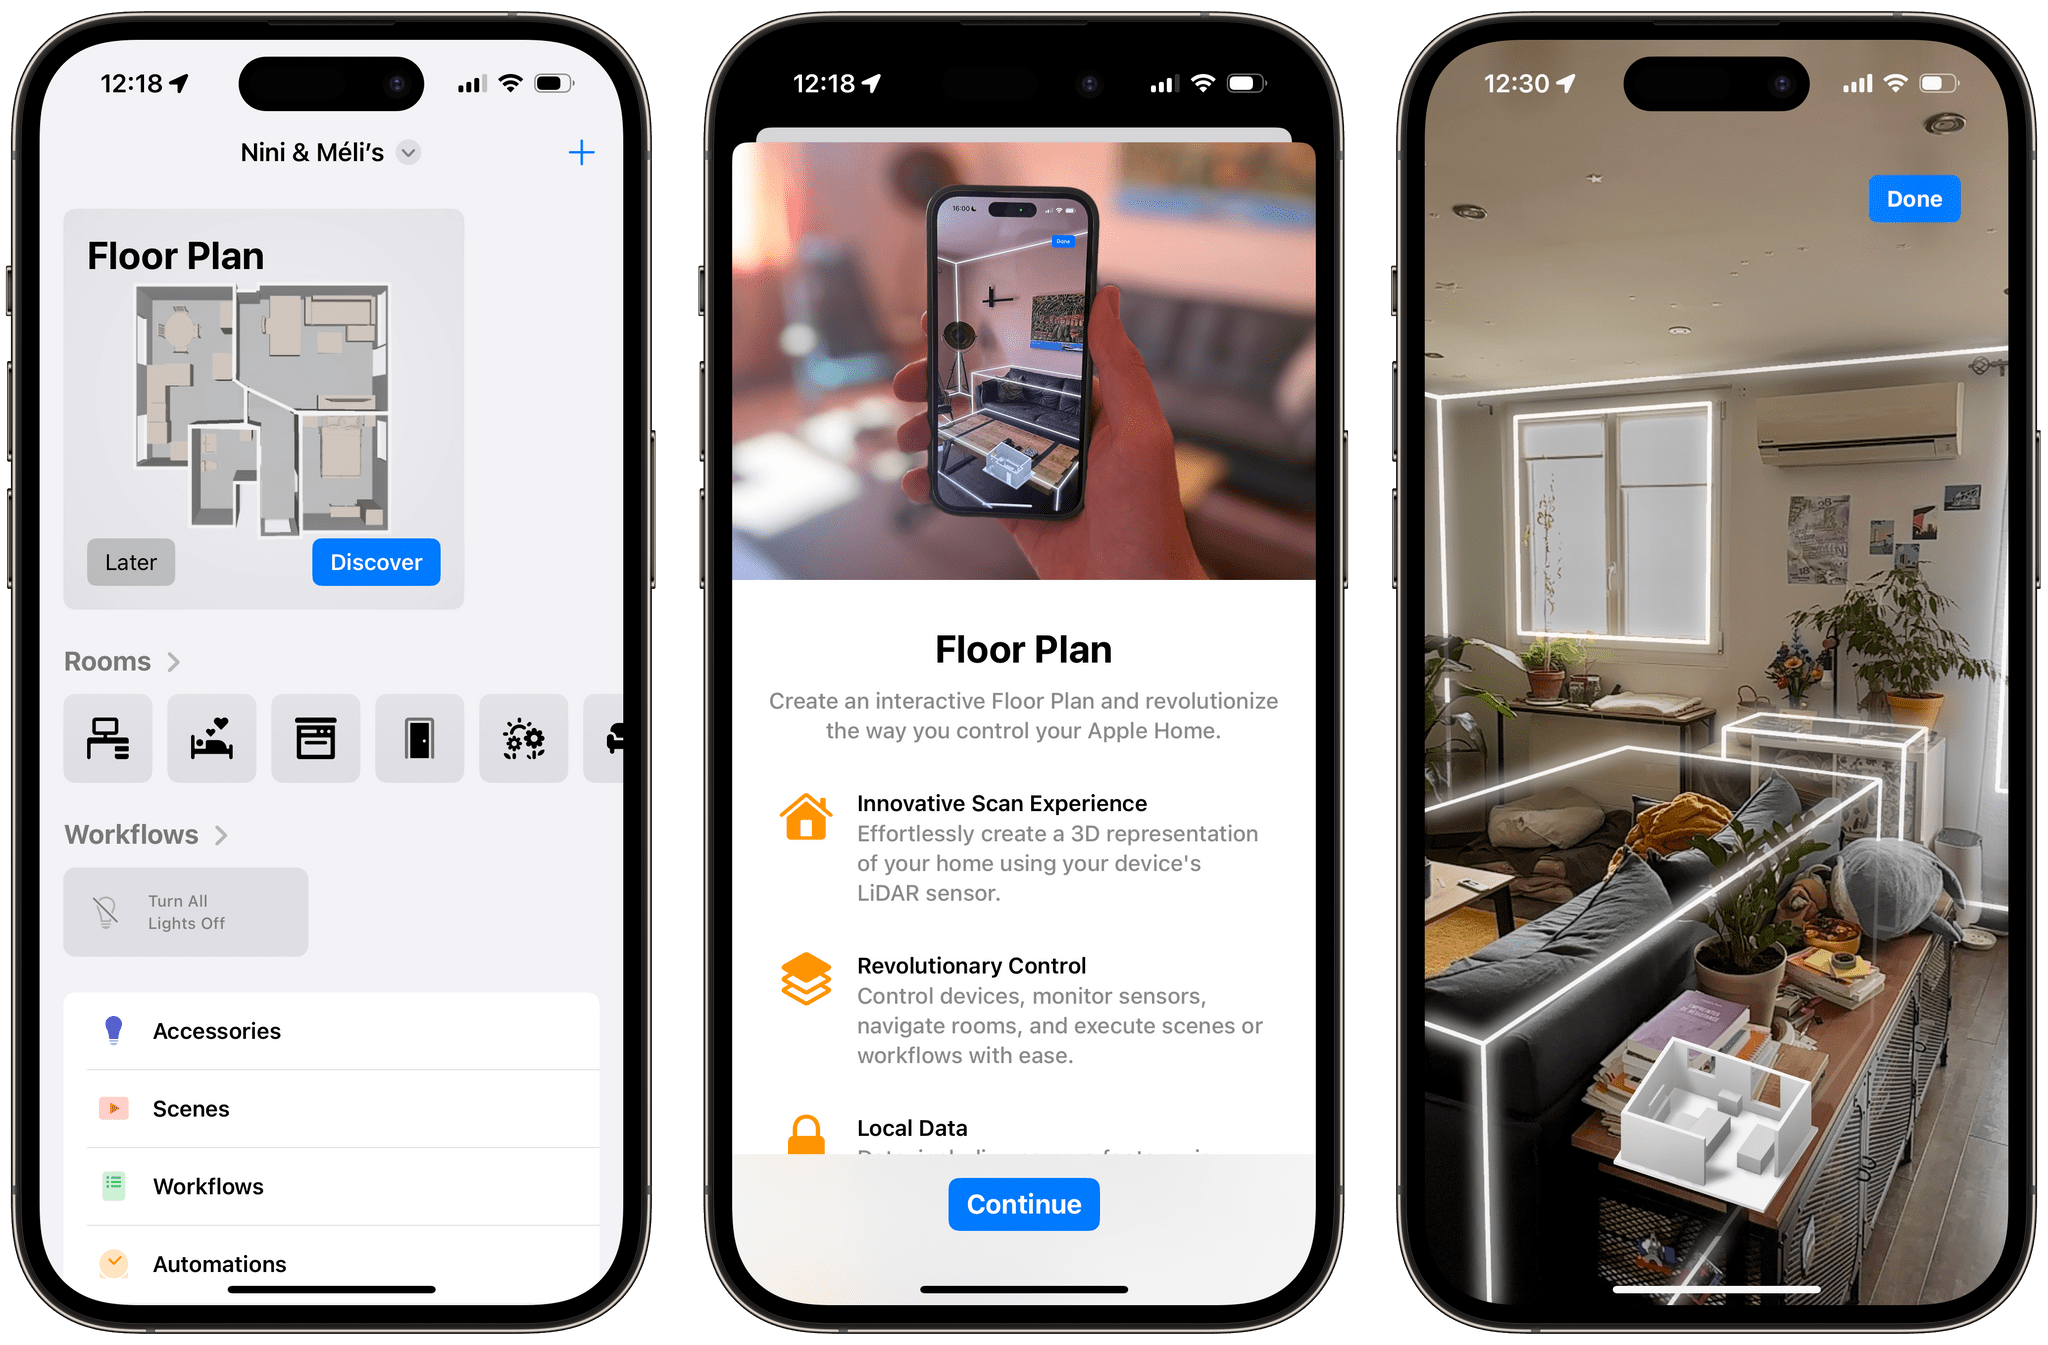
To start creating a floor plan, tap ‘Discover’ on the app’s main screen, follow the instructions, then walk around your home to scan it room by room.
Once you’re done scanning, the app brings you to an edit screen where you can start dropping your HomeKit accessories and scenes directly on top of the floor plan. This is where your floor plan becomes interactive. You can place room labels that you can tap to quickly jump into a room view, lights that can be turned on and off, and even sensors that can display their readings right on the map.
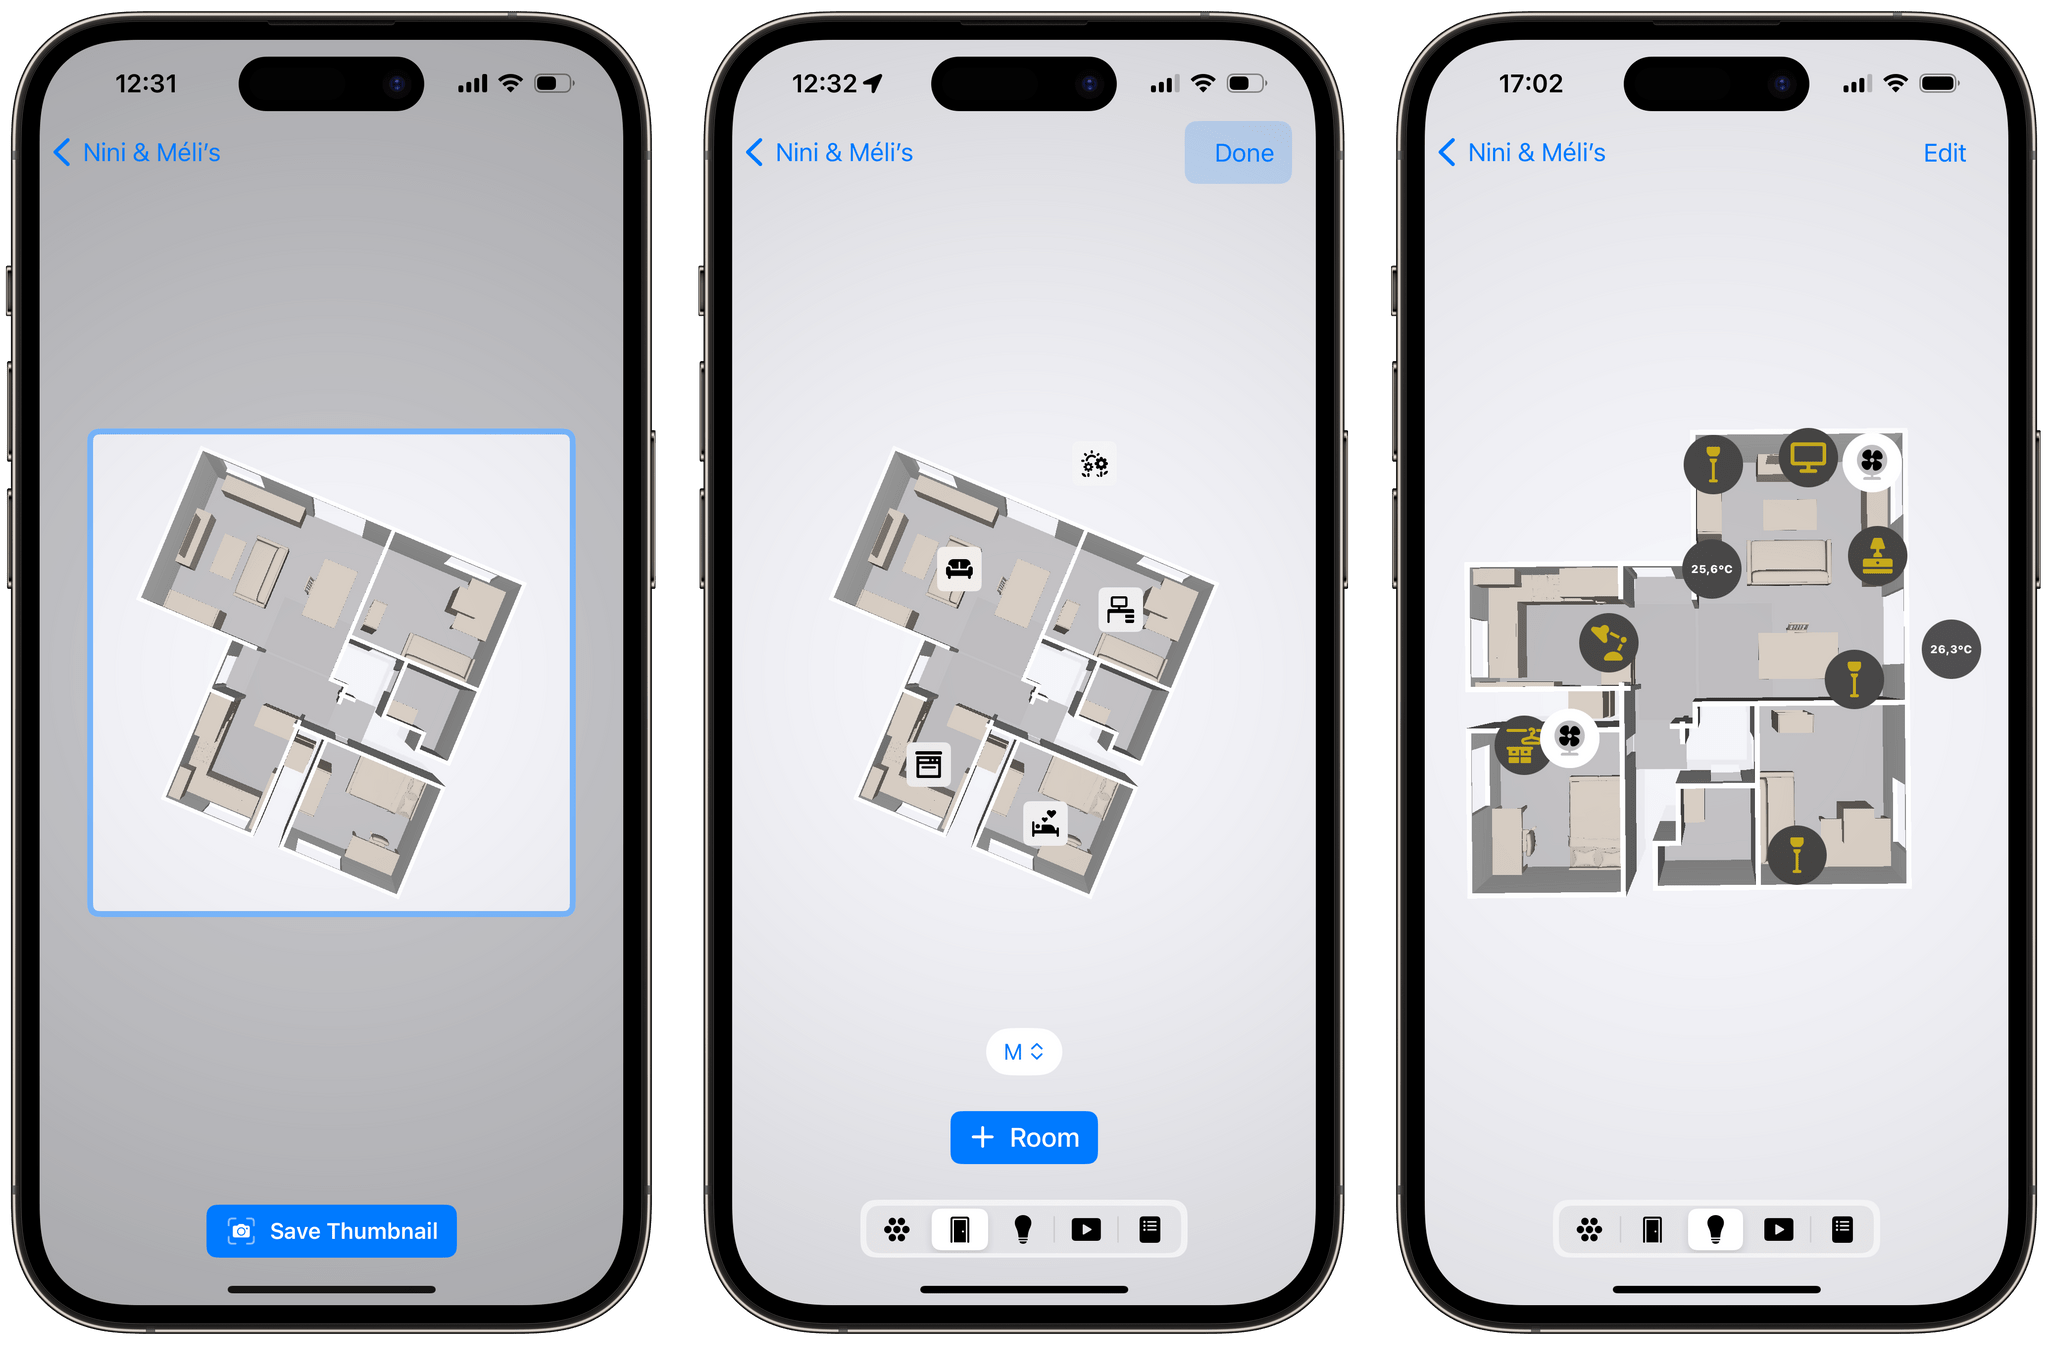
When you’re done scanning your home in Controller, you can start manually placing your HomeKit accessories and room labels on the floor map. All of the icons are customizable.
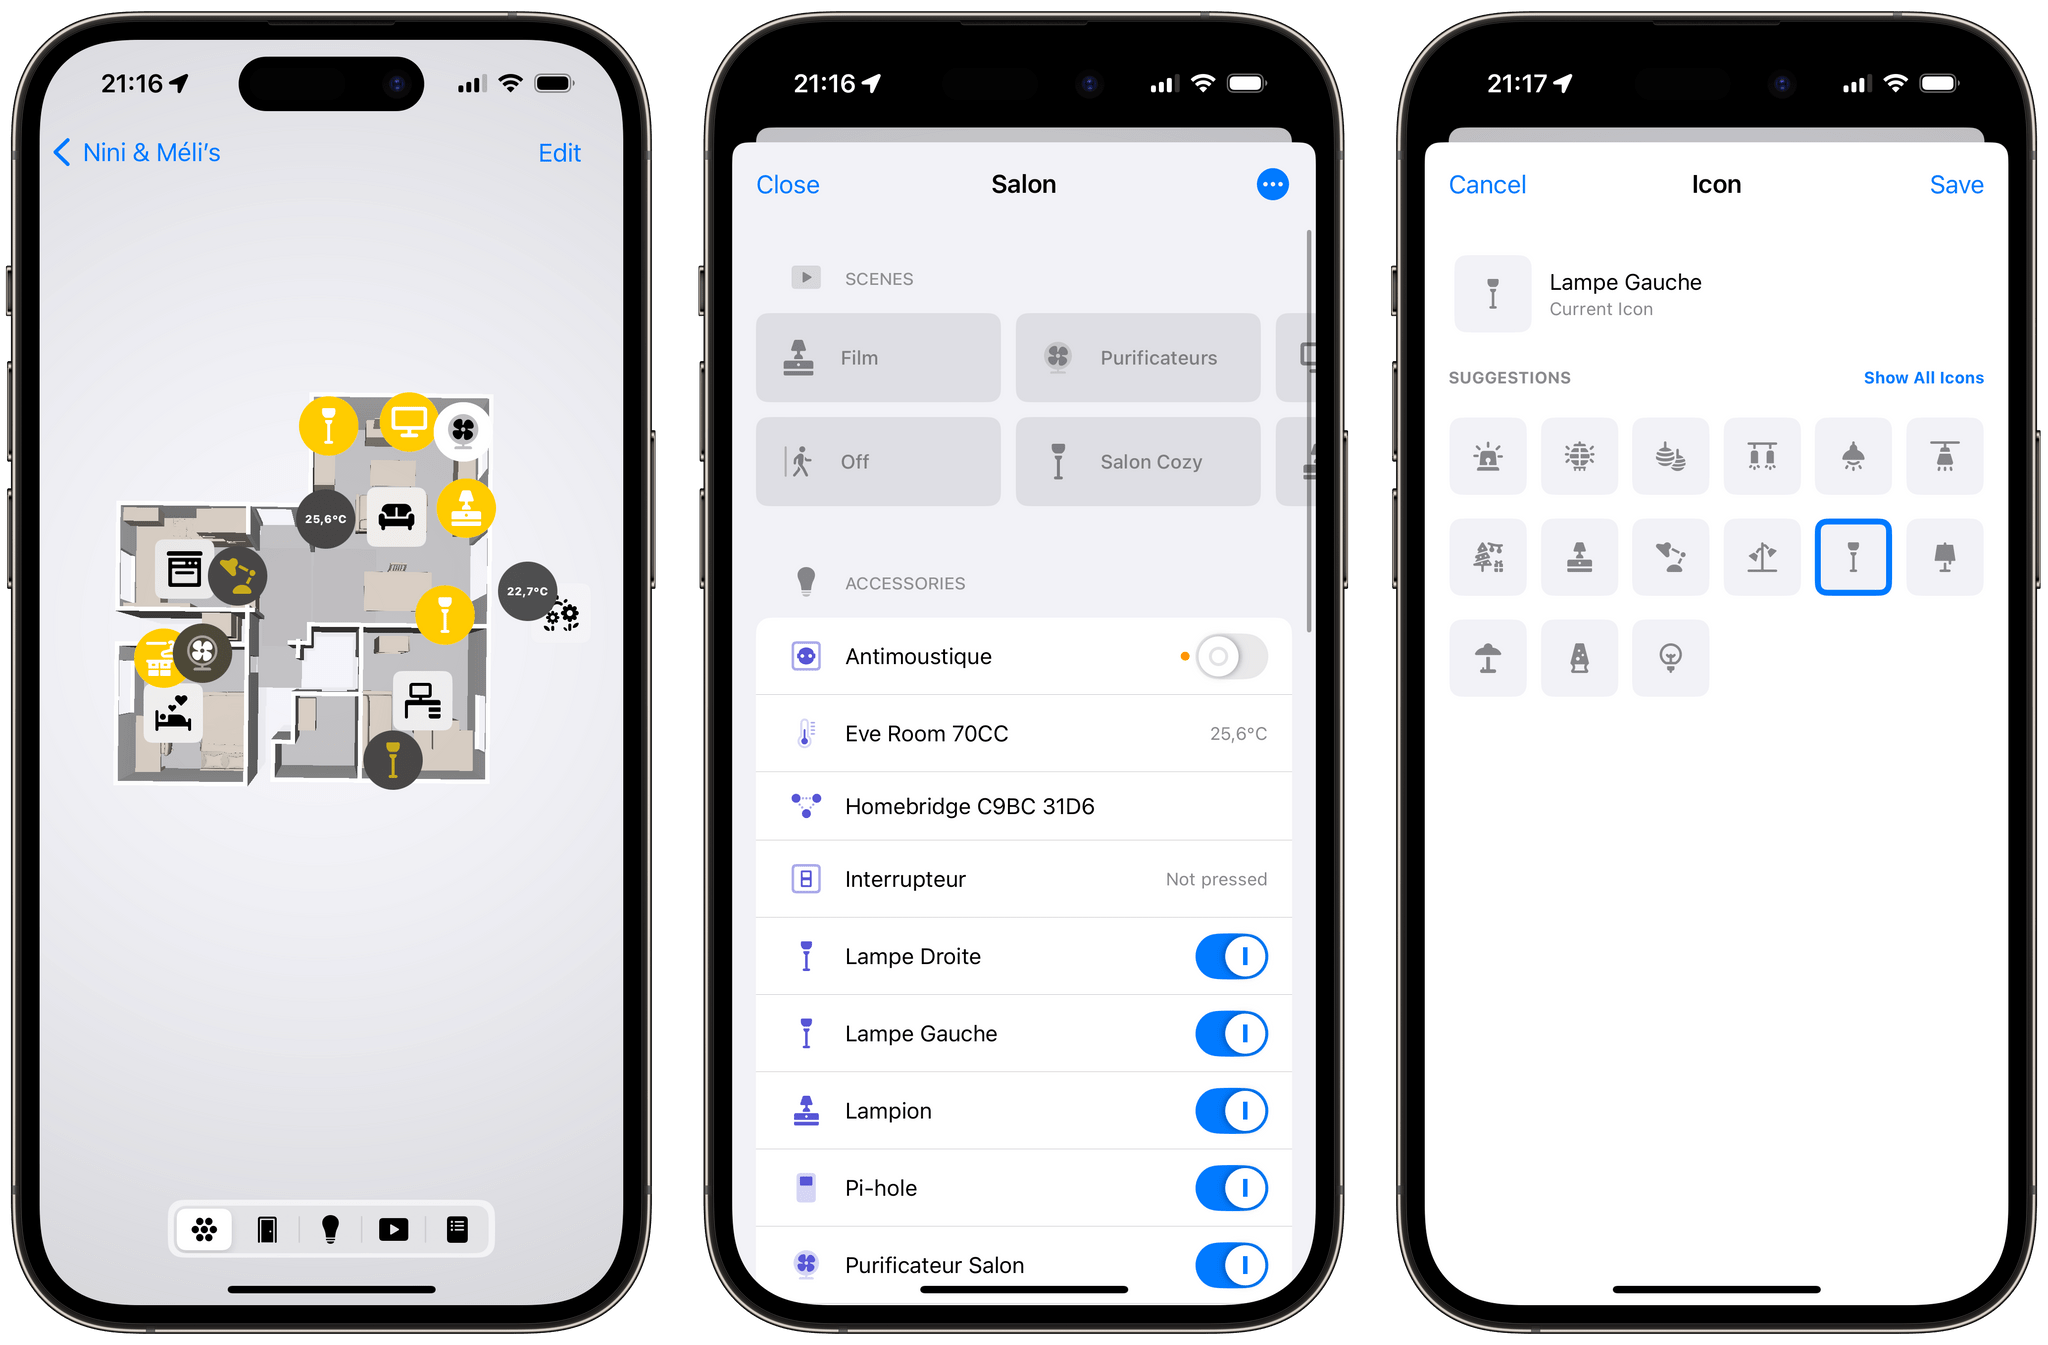
Controller for HomeKit’s floor plan is interactive. Tapping an accessory icon on the map lets you toggle its state, and tapping a room label lets you jump into a room overview where you can control and edit accessories.
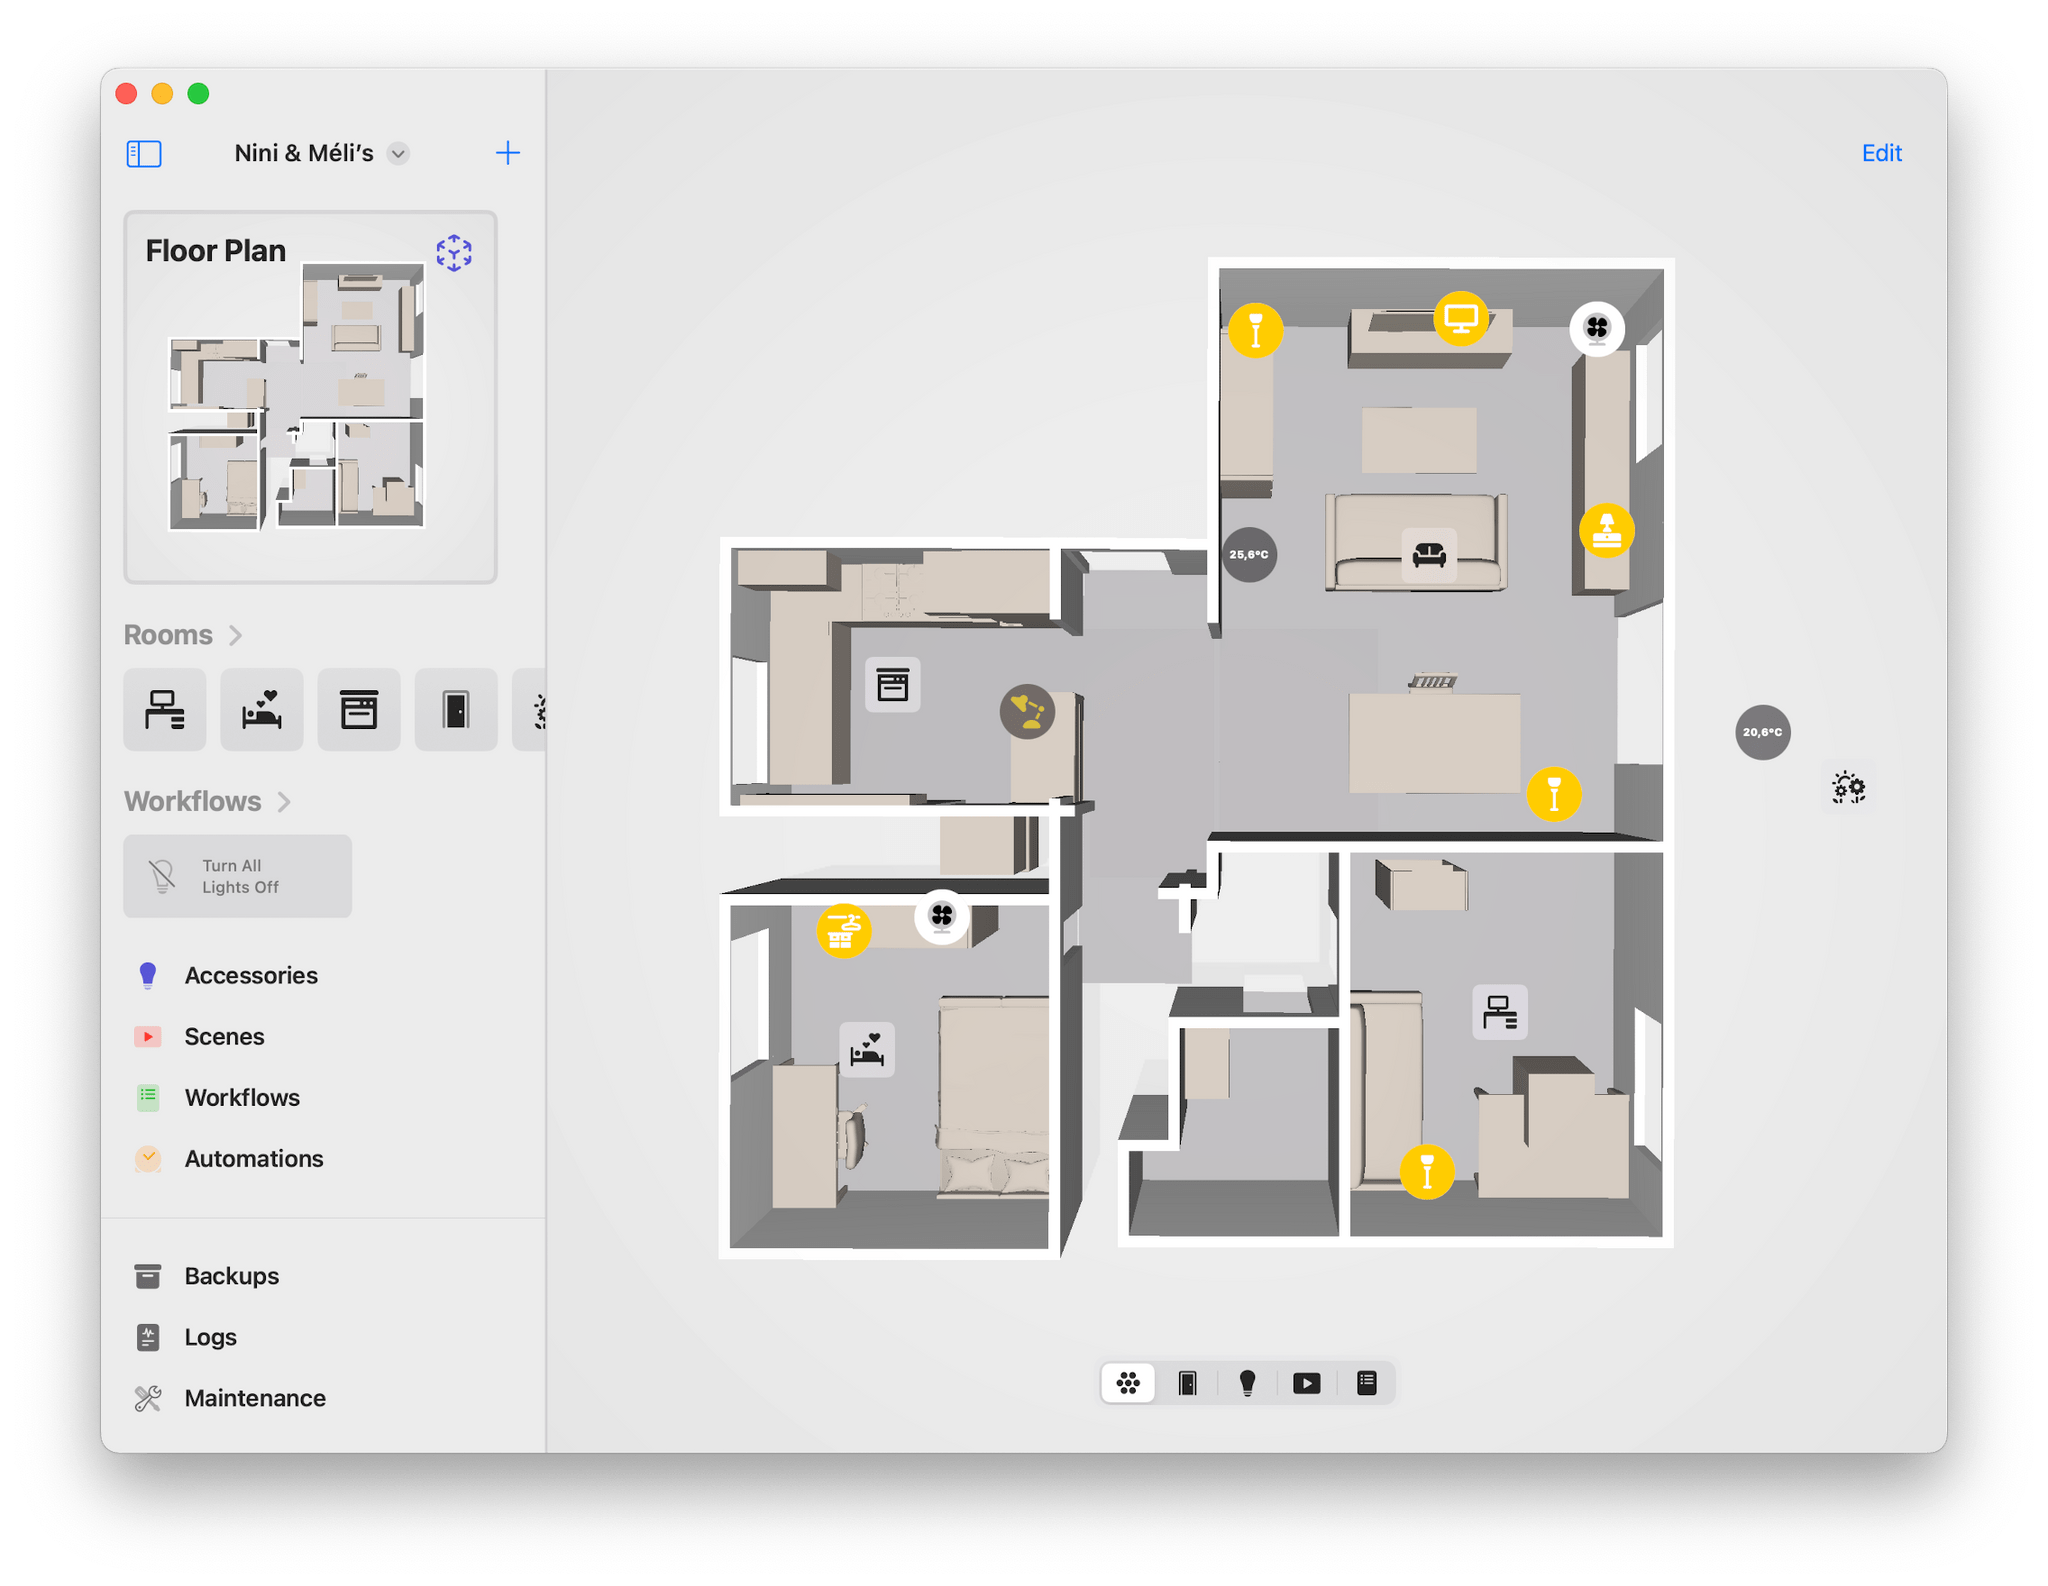
Again, this may take a while depending on the number of accessories you want to add, but the result of this whole process is incredibly satisfying. And on the iPad and the Mac, the experience is even more glorious. The app takes full advantage of the devices’ widescreen layout.
In addition to being able to view your floor plan from inside the app, Controller for HomeKit comes with two new widgets that display your floor plan on the Home Screen. Sadly, these widgets essentially act as simple buttons to open the app. Your accessories and room labels are not displayed in the widget, and you can’t interact with them without having to open the app. This means that Controller’s Home Screen widgets are merely decorative for now. This is too bad; there’s great potential for a fully interactive widget here, and I really hope this is coming.
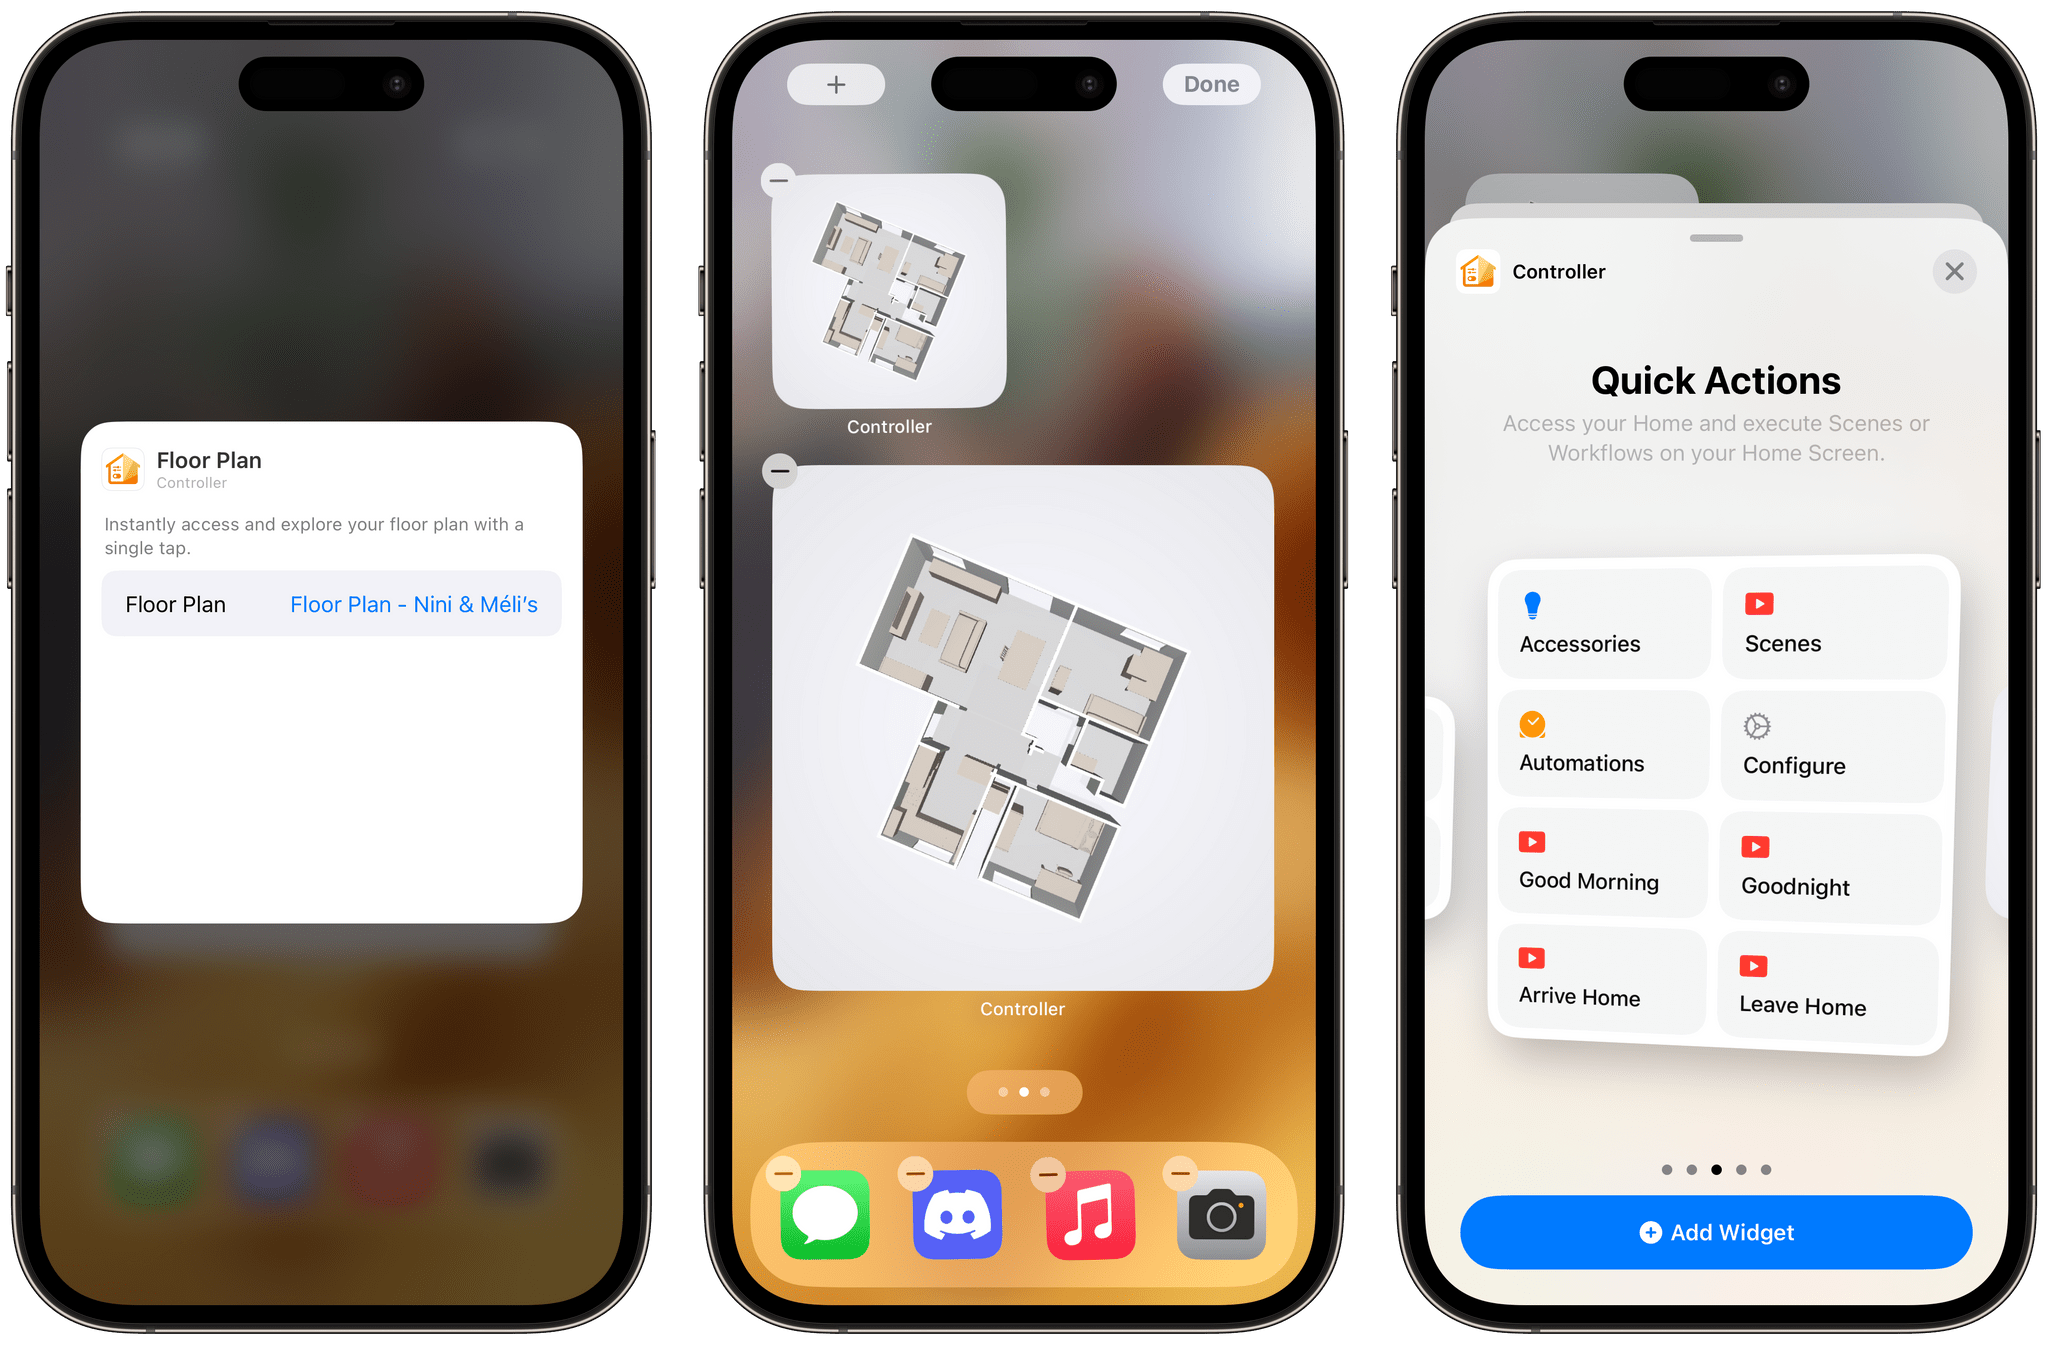
Currently, Controller’s Floor Plan Home Screen widgets are not interactive and only serve as a shortcut to open the app.
Still, Controller’s interactive floor plan is now a must-have on my iPhone. Even if, at its core, the feature is not revolutionary by any means, the UI paradigm that it creates for controlling your HomeKit devices is one of the most intuitive that I’ve ever seen on iOS. I find it hard to think of a more natural interaction to turn on a specific light in the apartment than to glance at the room on the map and simply tap the light exactly where it is in the room’s physical space. If Apple ever decides to go this route, it could be the best upgrade to the UI of the native Home app in years. As a result, I have now officially added an interactive floor plan to my wishlist for iOS 18.
If you would like to give it a try, Controller for HomeKit is available for free on the App Store for iOS, iPadOS, macOS, and watchOS. Its floor plan feature can be unlocked with a $29.99 yearly subscription or a $99.99 lifetime one-time purchase.


