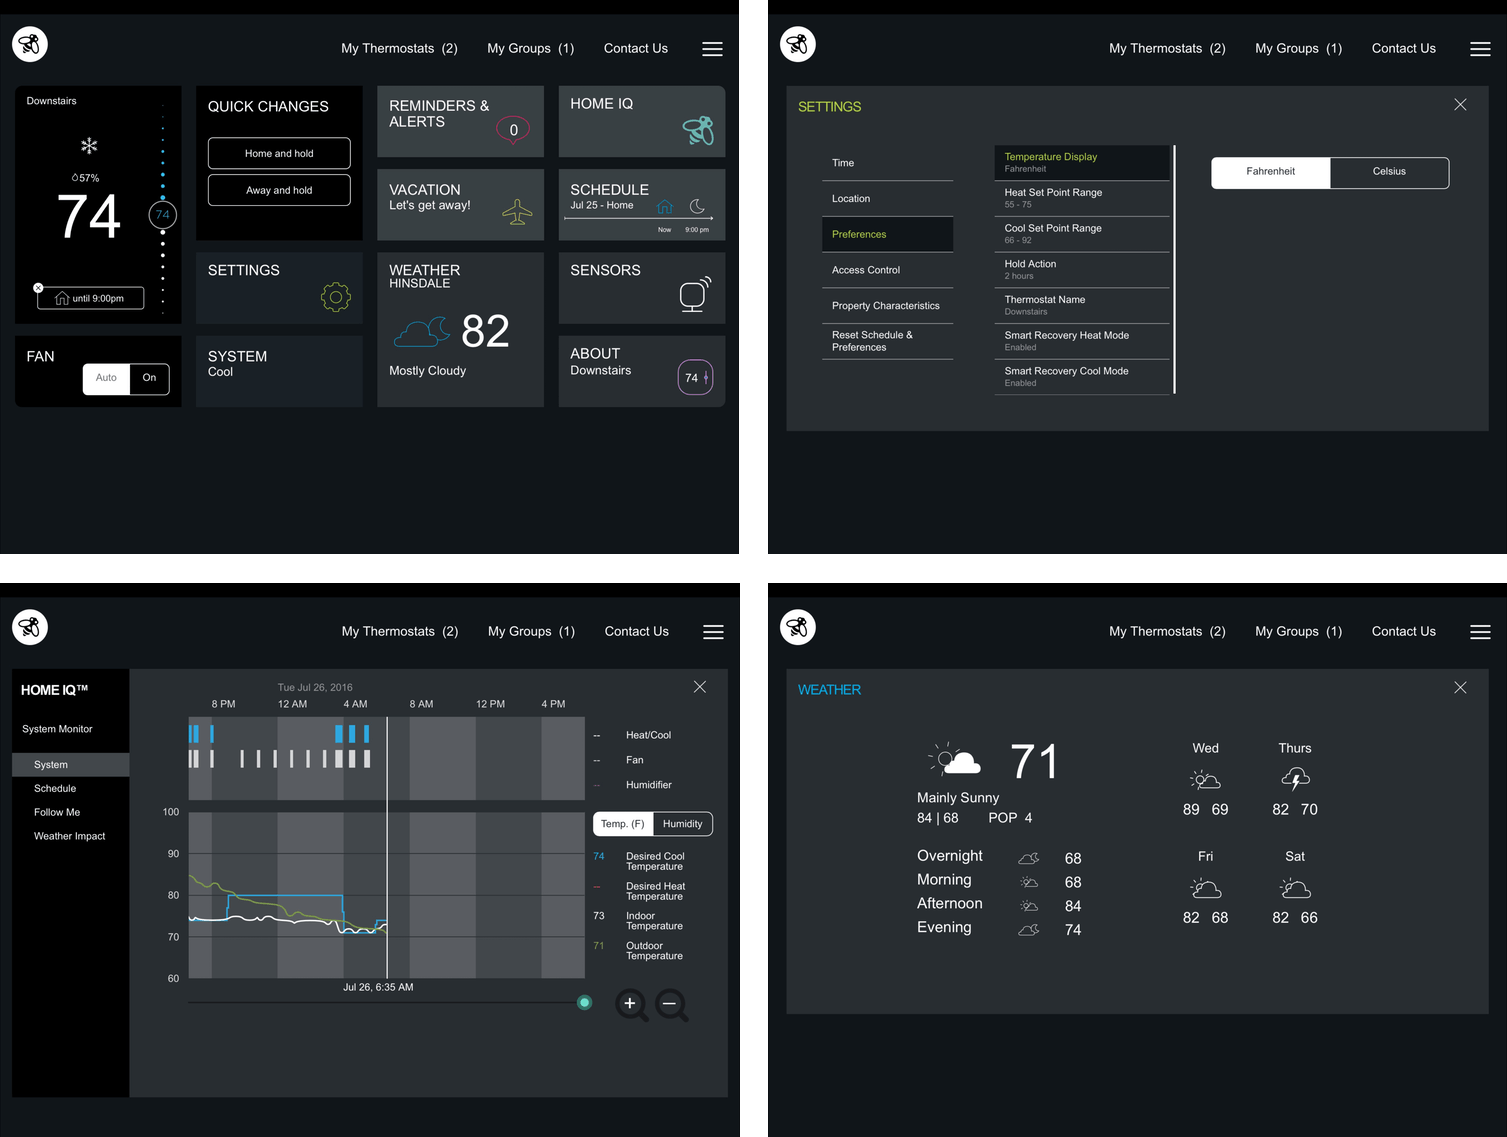
I have had my eye on smart thermostats ever since the Nest was released in 2011. I came very close to purchasing one over the years, but something always held me back. Between the price, concerns that installation could be a hassle or require someone else to install it, the lack of simple integrated control systems, and not wanting to complicate something that was already simple, I never bought one. That changed about a month ago when I purchased two ecobee3 smart thermostats for my home. I couldn’t be happier with the simplicity, level of control, and automation that the ecobee3 delivers.
Setup
I live in a two-story brick home in the suburbs of Chicago where it gets very cold in the winter and hot and muggy in the summer. Our house was built in 1940, but we added on to it about fifteen years ago, both on the first and second floors. The newer part of the house is much better insulated than the older part, which can be drafty and cold in the winter and hotter than the rest of the house in the summer.
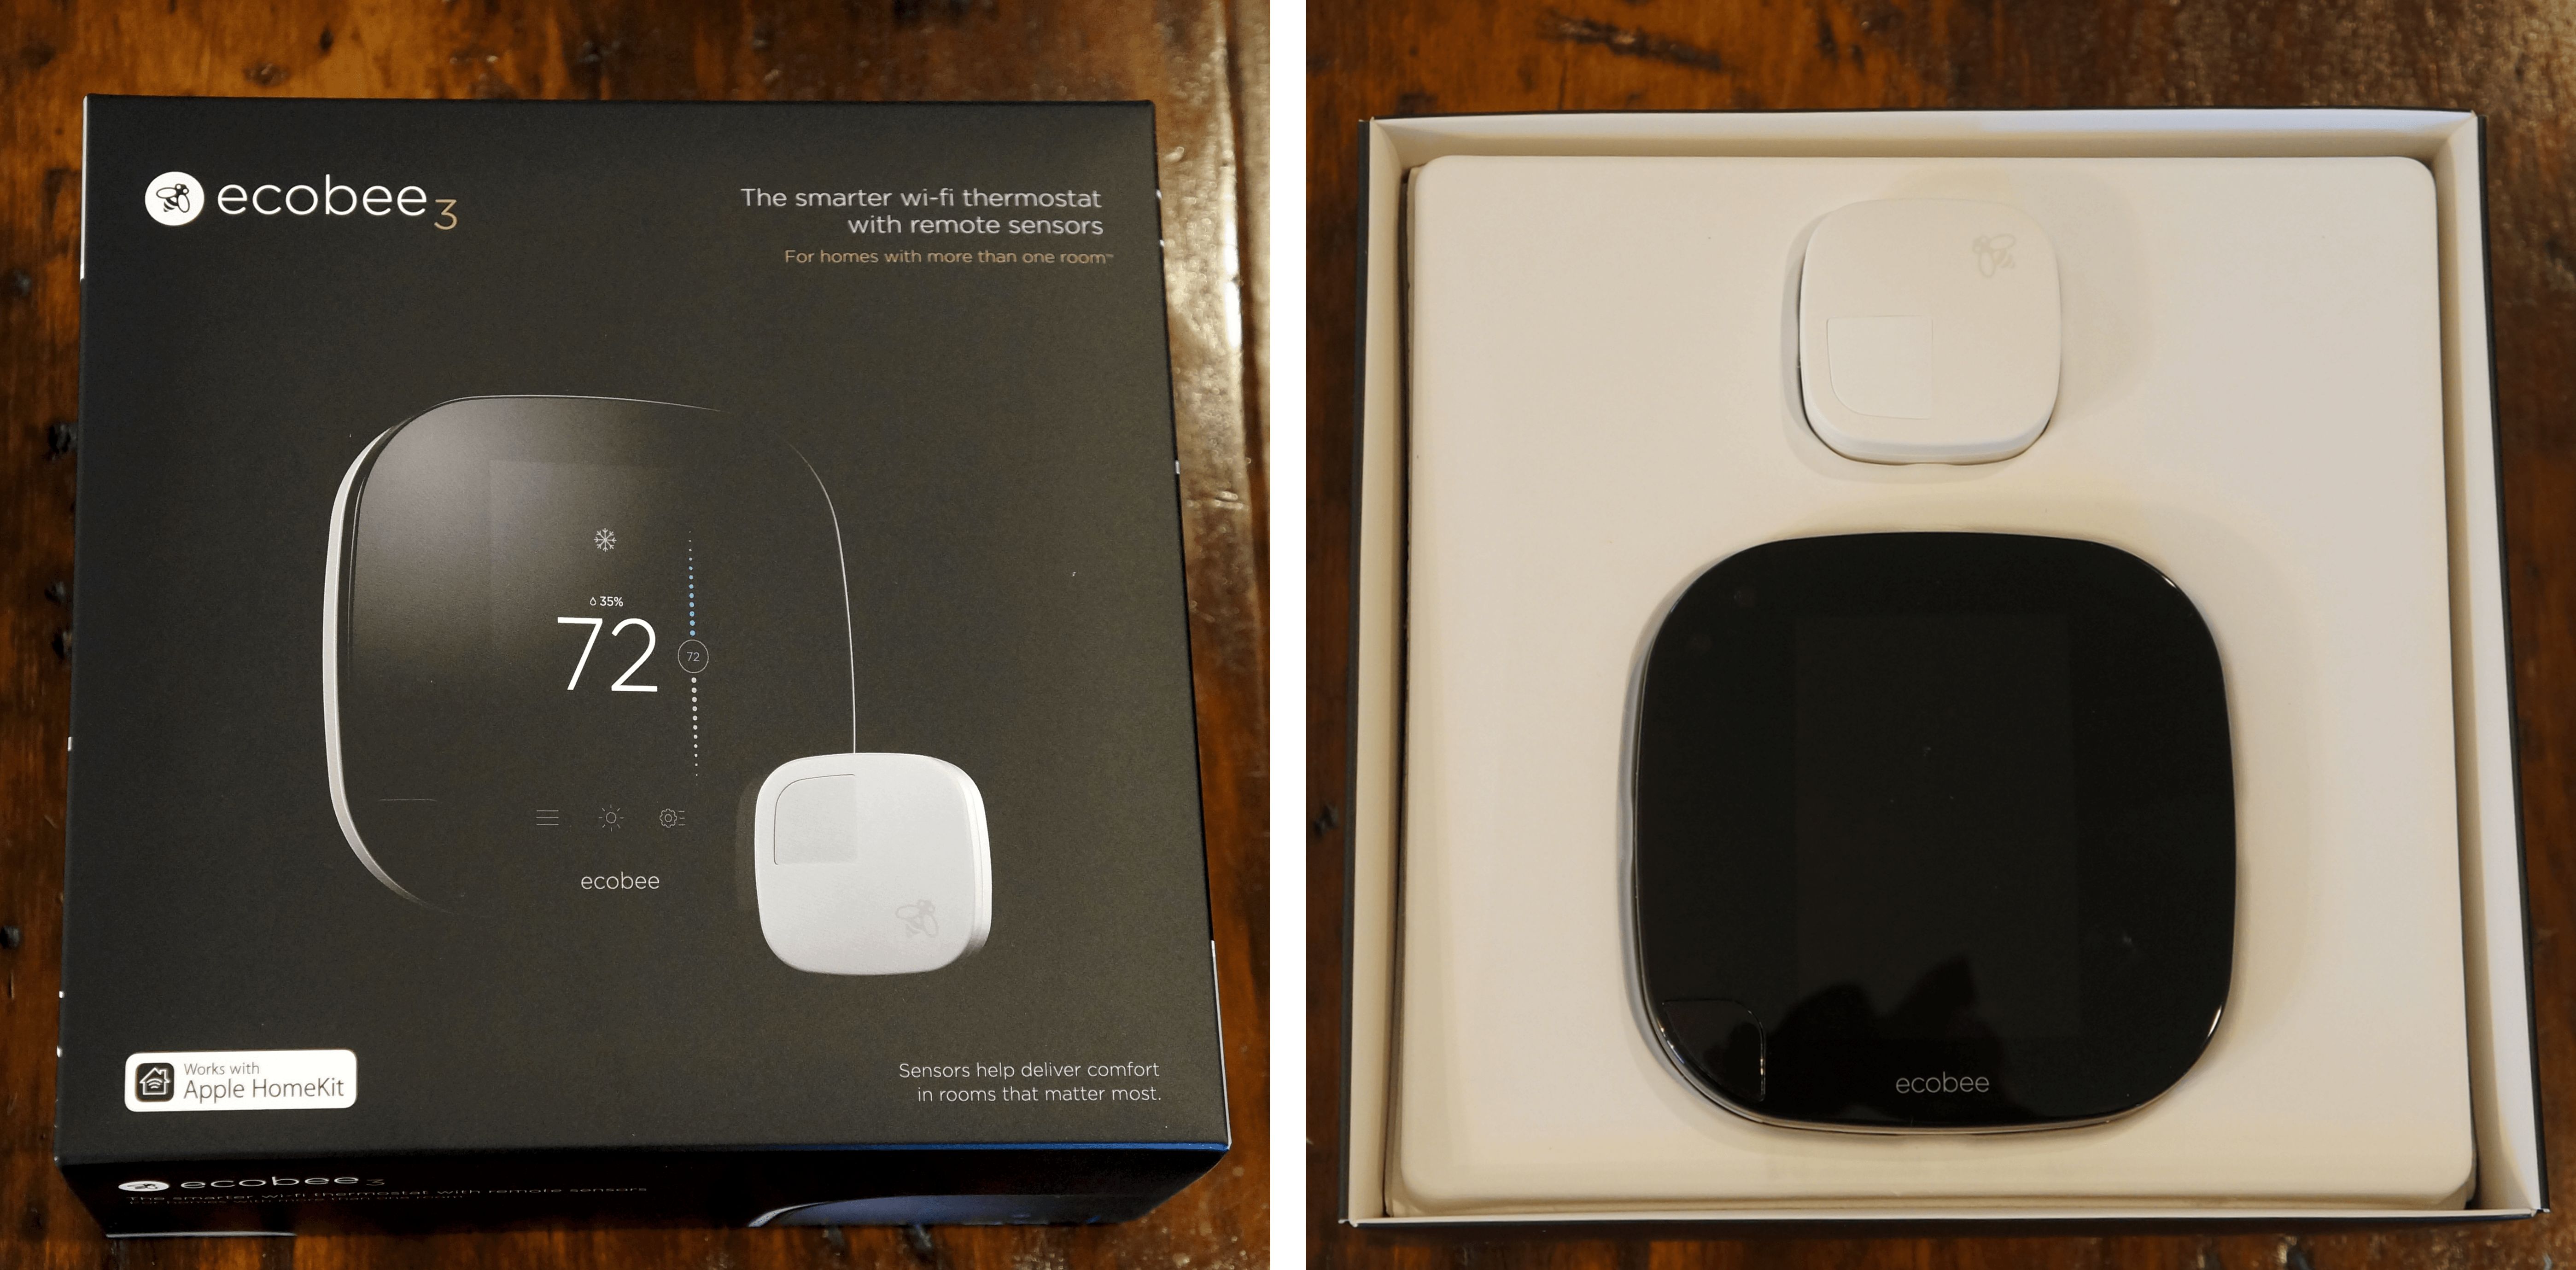
The air conditioning and heating in our house is divided into two zones: the first floor living space and the second floor where there are three bedrooms. As a result I needed two thermostats. The ecobee3 lists for $250, but is currently available for $244 on Amazon.1 Check with your local electric and gas companies though, because many (at least in the US) provide rebates if you purchase a smart thermostat.2 My electric company gave me a $100 back on each of my thermostats reducing the overall cost to under $150 per thermostat – a much easier price to swallow, especially when I was buying two.
Probably the most stressful part of setting up my thermostats was doing it on a hot Sunday afternoon knowing that if I screwed something up, we were going be very hot when we went to bed that evening. As it turned out, setup was more involved than simply plugging something into the wall, but I’m no handyman, and was still able to pull it off without too many bumps in the road. That said, I strongly recommend that if you decide to install an ecobee3 yourself, read the instructions carefully and watch the videos on ecobee’s website.
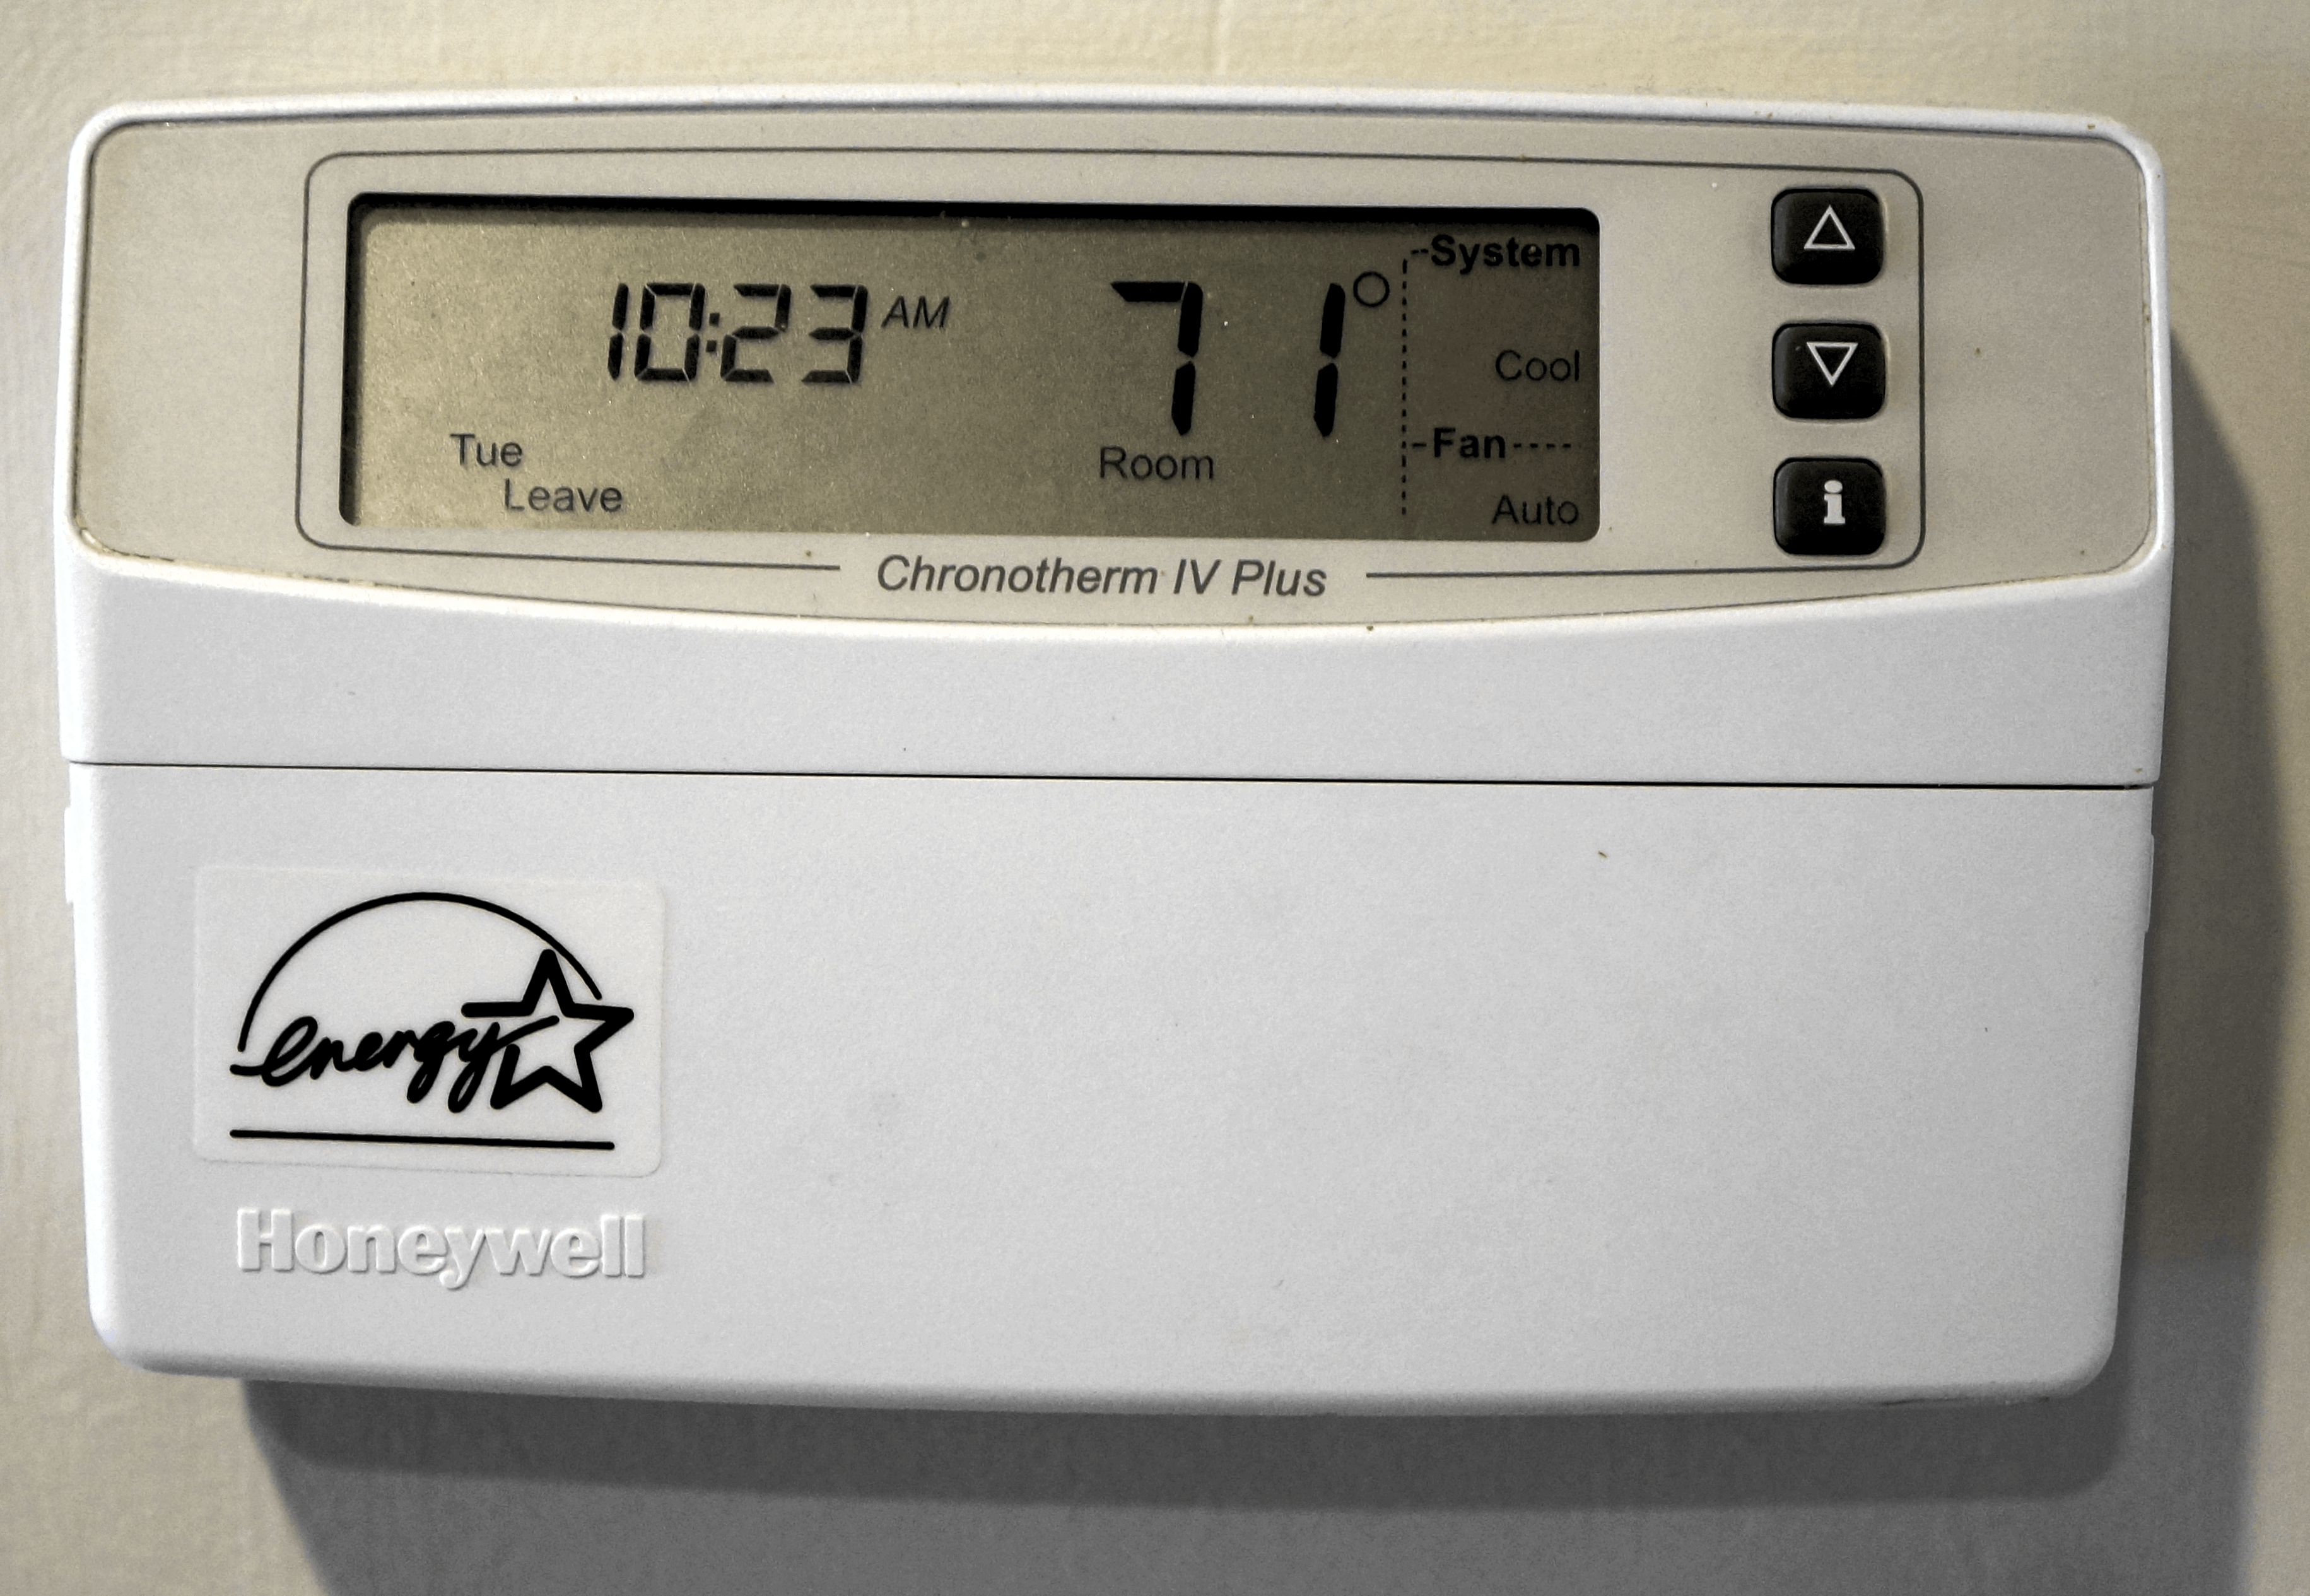
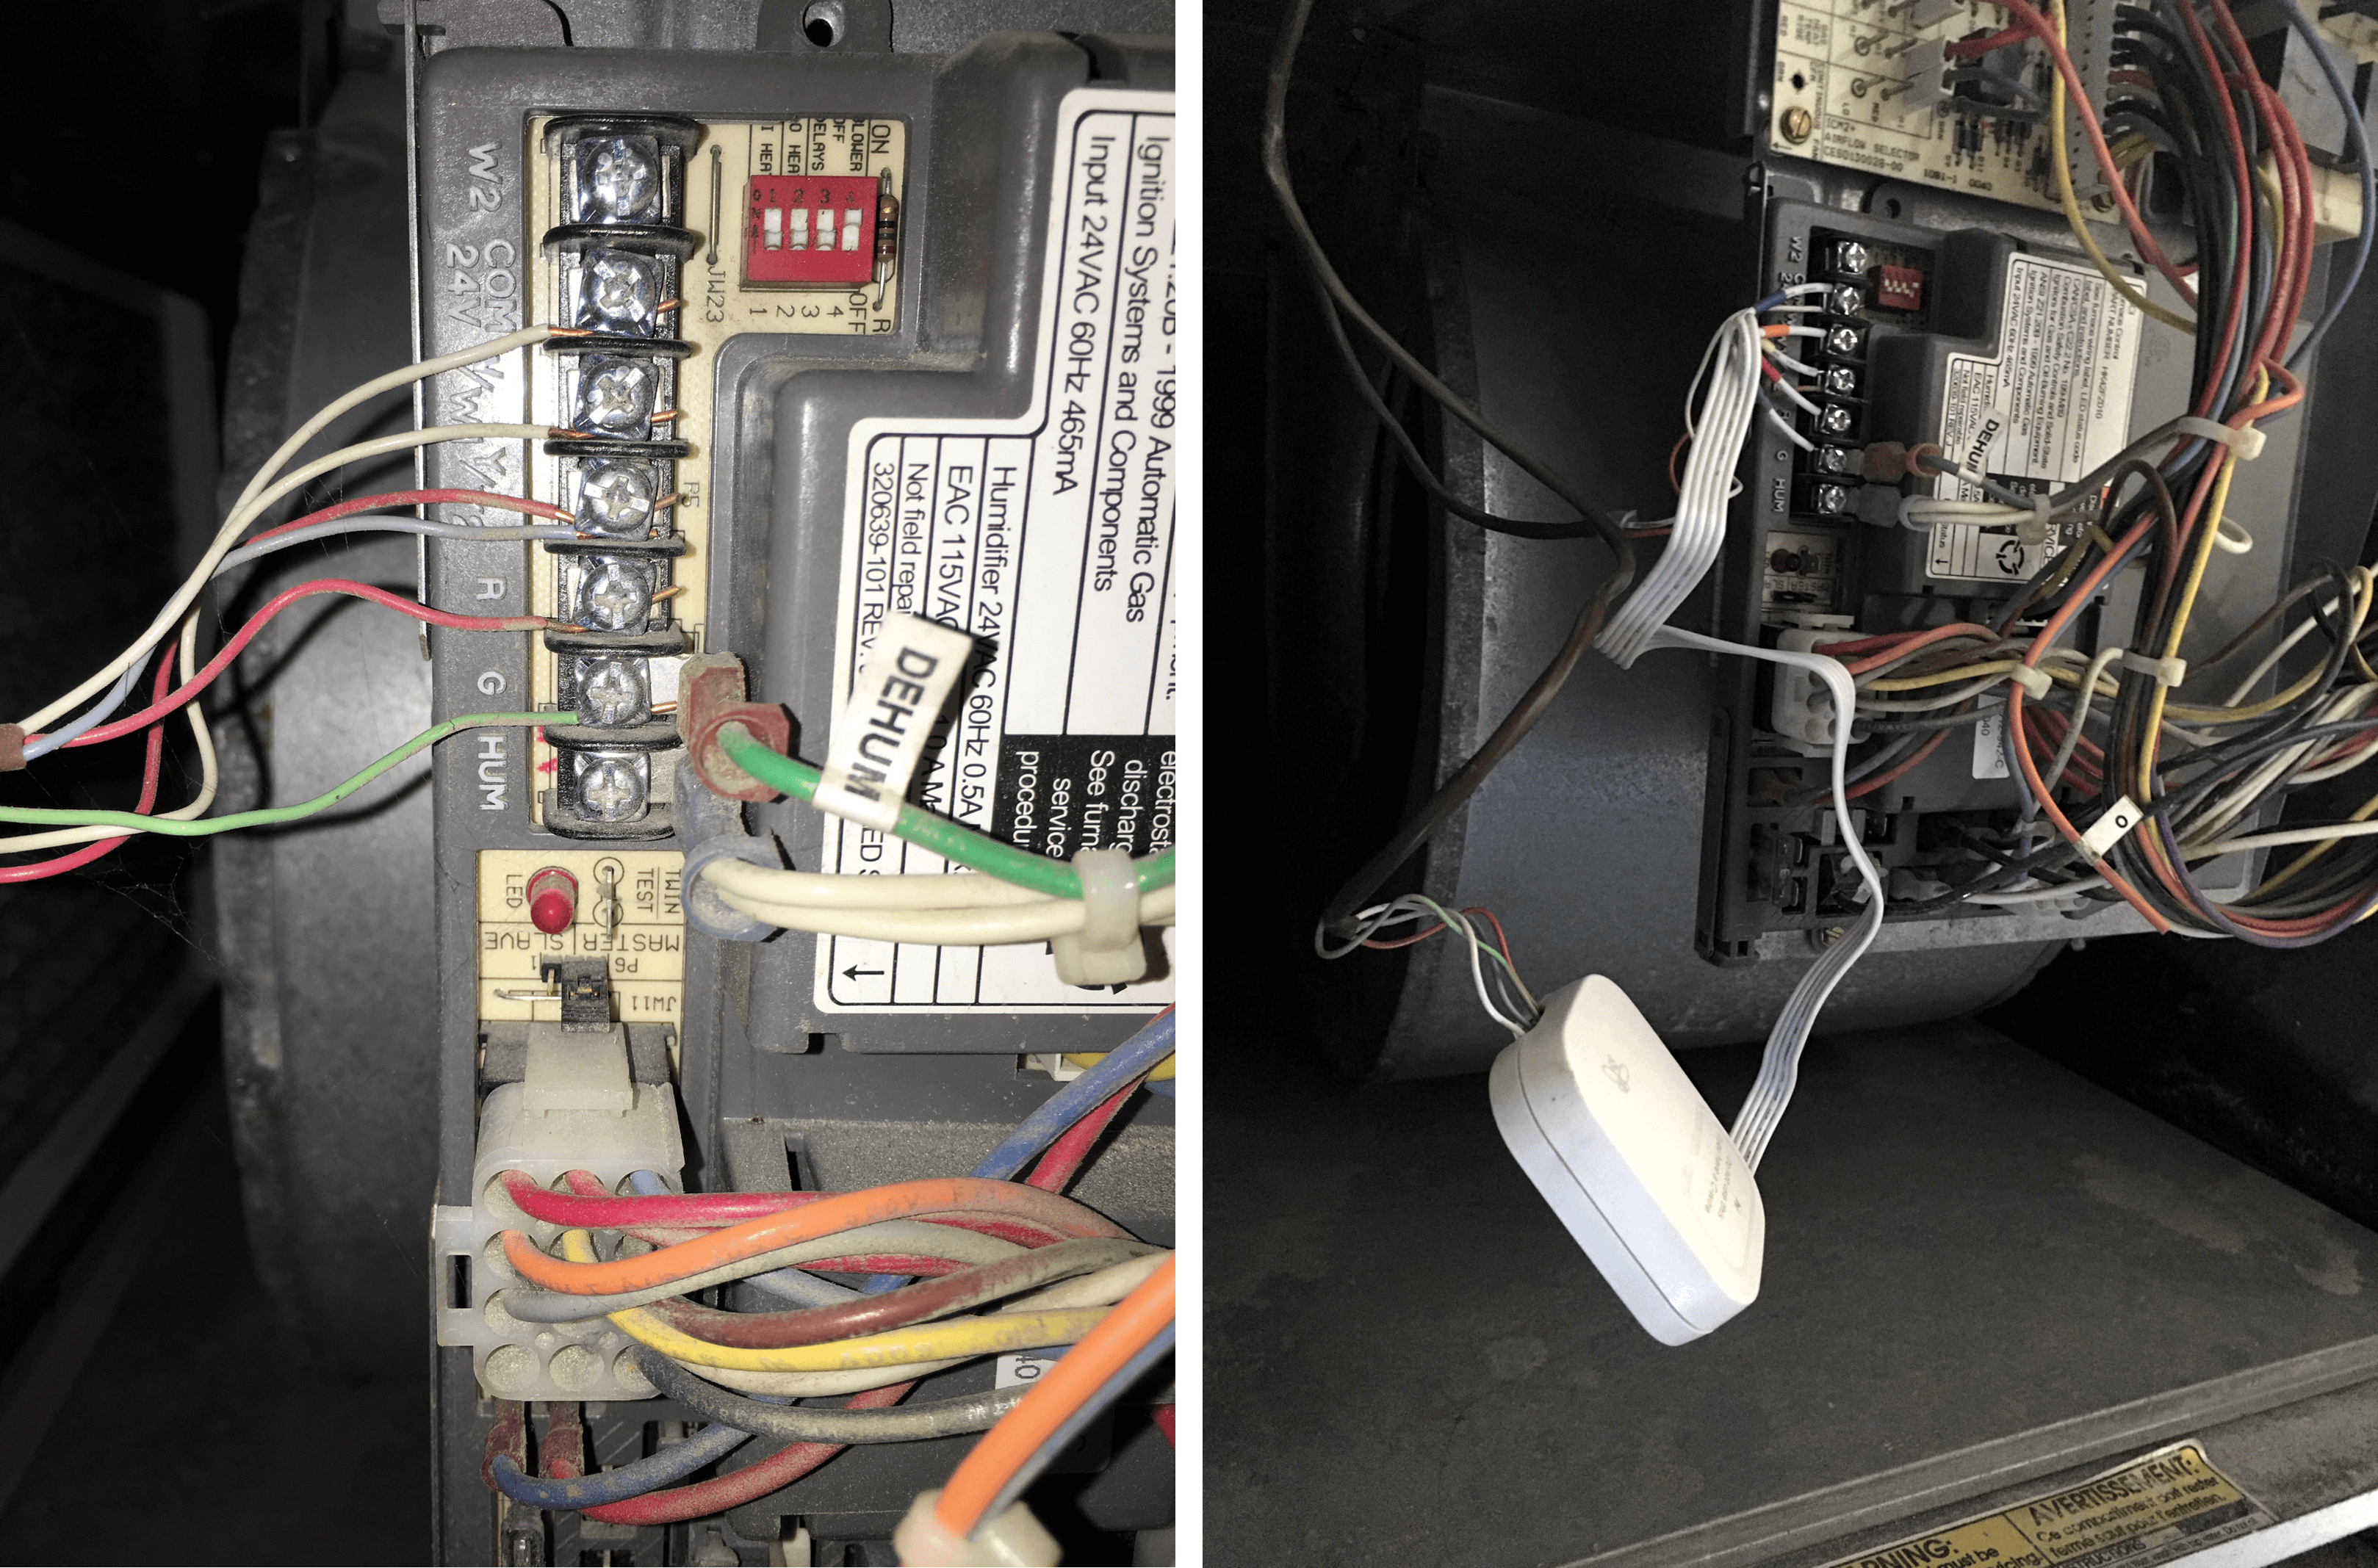
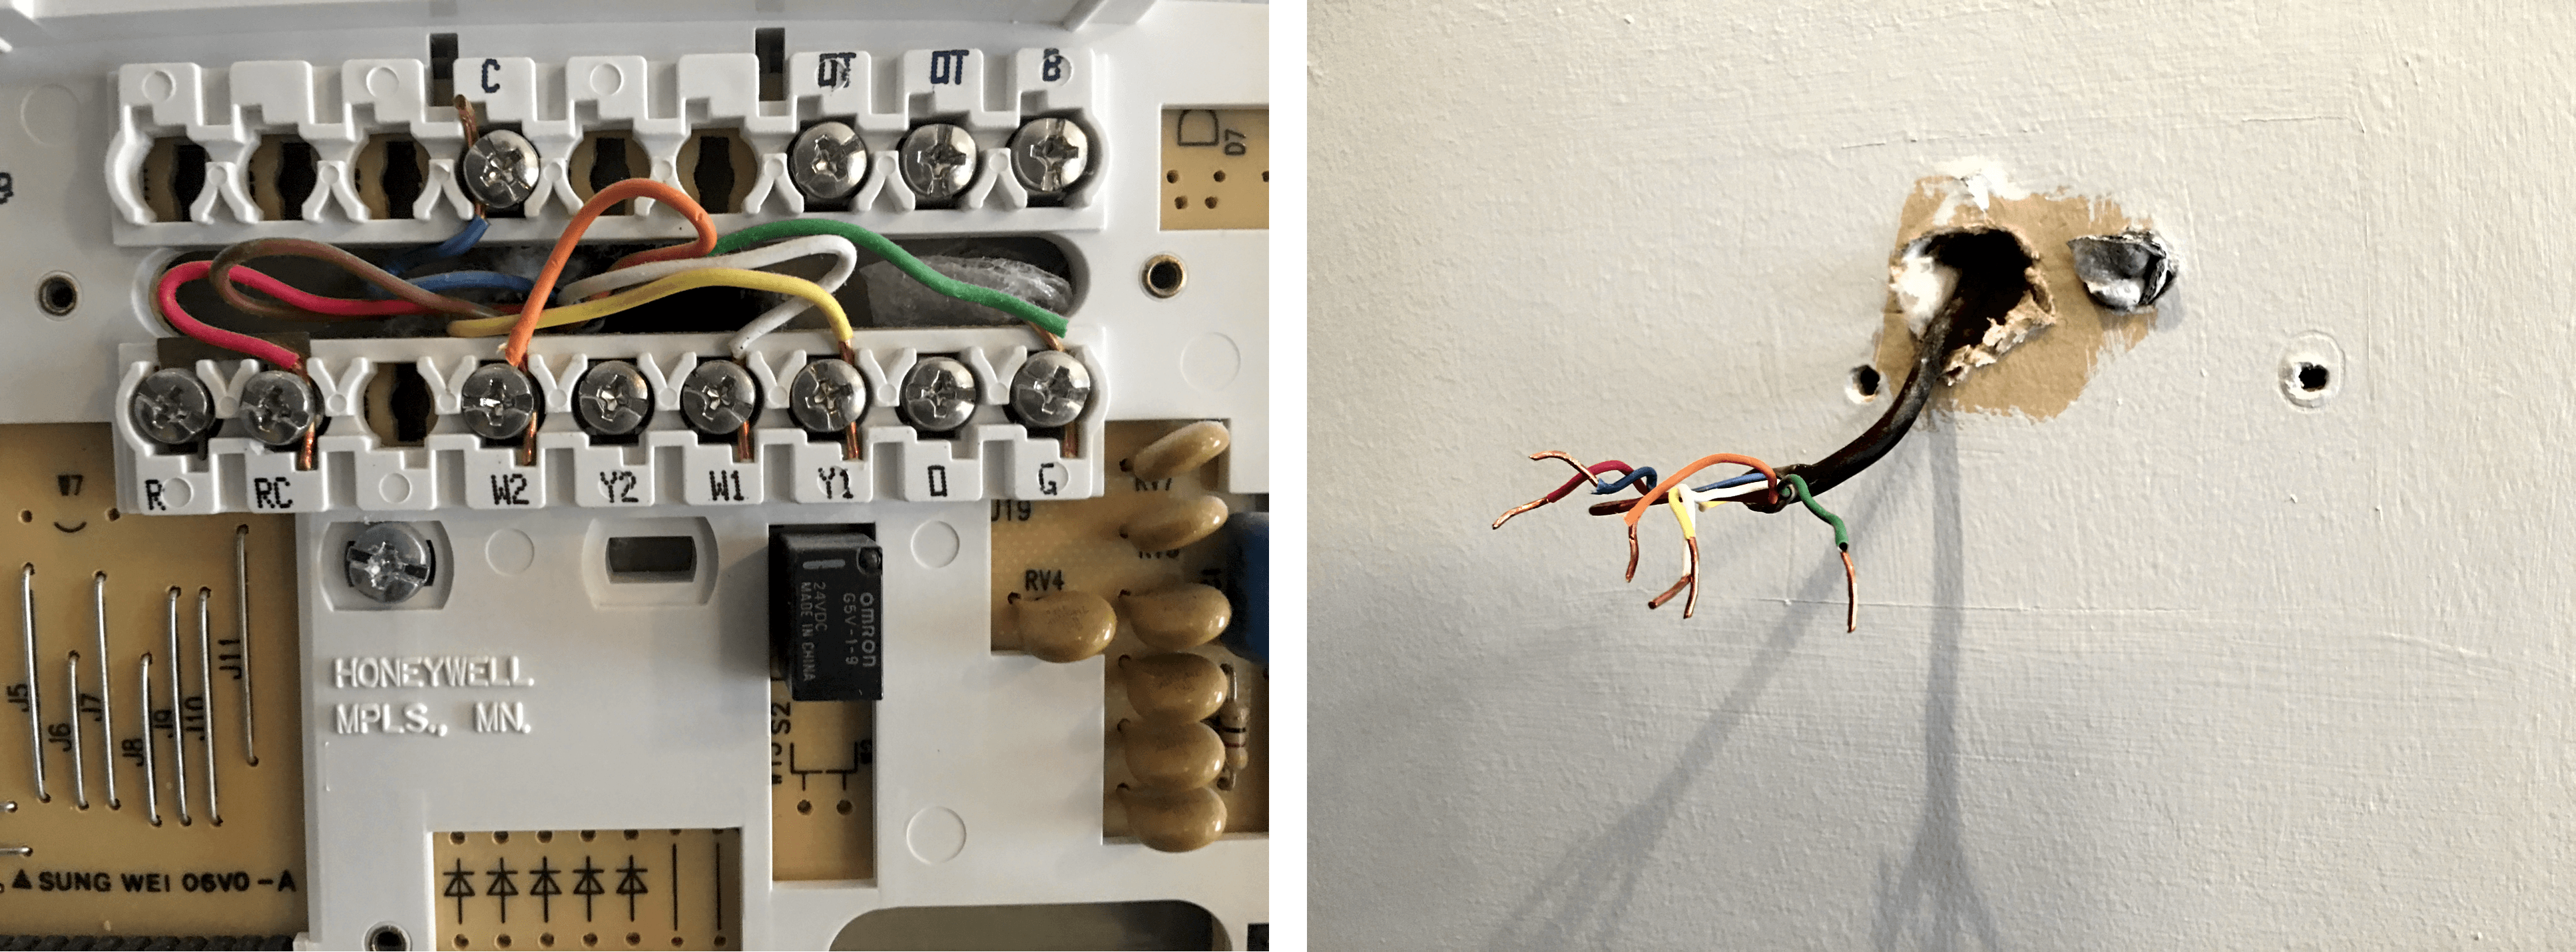
The heating and air conditioning unit that controls the first floor of my home is the older of the two units. After turning off the electricity to everything, I removed the existing programmable, but dumb, thermostat from the wall and noted the wiring configuration. Unfortunately, my first floor thermostat did not have a ‘C’ wire, also known as a common wire, which you need to power a smart thermostat. The good news is that the ecobee3 ships with a solution in the box. The bad news is that it requires a little more work.
The ecobee3 includes a Power Extender Kit that makes it compatible with heating and cooling systems that don’t have a common wire. The Power Extender Kit needs to be installed on the control panel inside the heating and cooling unit, which is more involved than simply installing the thermostat itself. While I found it a little intimidating to tackle at first, after I figured out which wires were which by searching for my model of heating and cooling system online, it only took a few minutes to install and worked right away.
Upstairs was easier. That heating and cooling unit was installed when we added onto our house and all I had to do was remove the old thermostat, attach the mounting plate to the wall, and hook the wires coming out of the wall to the corresponding inputs on the thermostat. I ran into a little trouble upstairs because I didn’t get a good contact between a couple of the wires and the terminals they plug into, but after testing each, I found the loose ones and fixed the issue without too much of a hassle. Each thermostat also came with a remote temperature and motion sensor that doesn’t require any installation other than pulling out a tab between its battery and contacts and picking a place to put it in my house, which I discuss further below.
The final step for installing both thermostats was to snap the screen portion onto the mounting base and walk through the the on-screen setup. There are several steps, including connecting the ecobee3 to a WiFi network, setting up HomeKit support, and picking various settings that I later tweaked in the accompanying iOS app, but each step was clearly explained on the ecobee3’s screen and only took a few minutes to complete.
Hardware
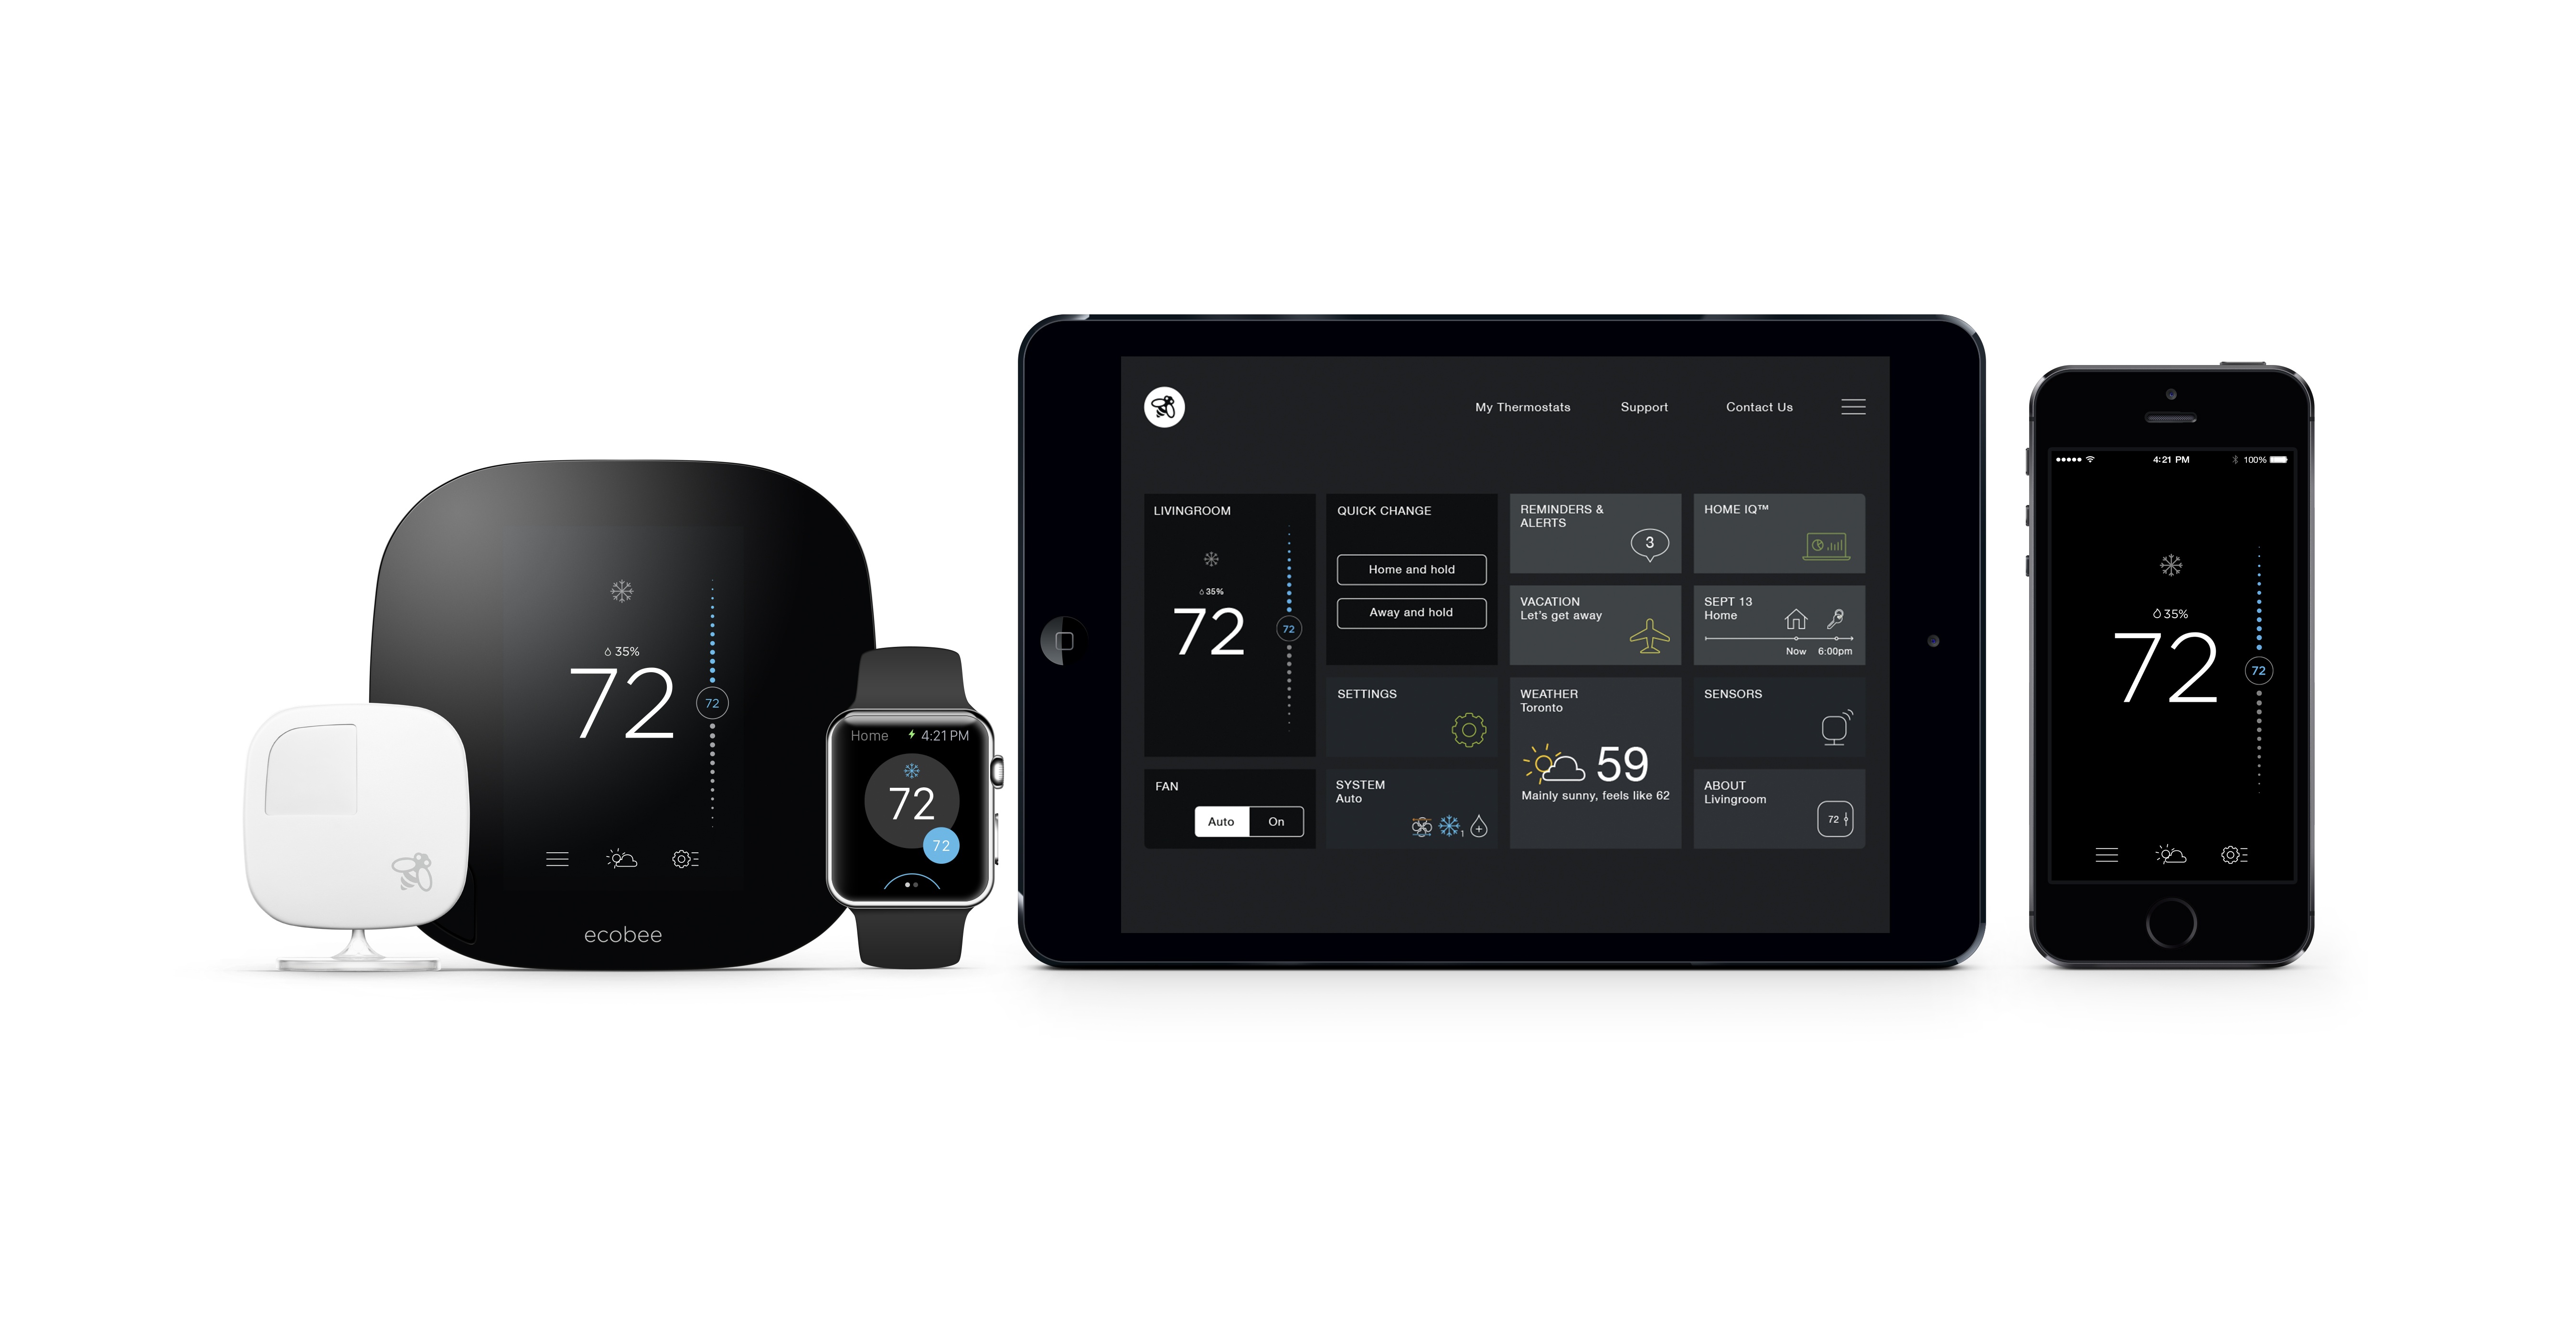
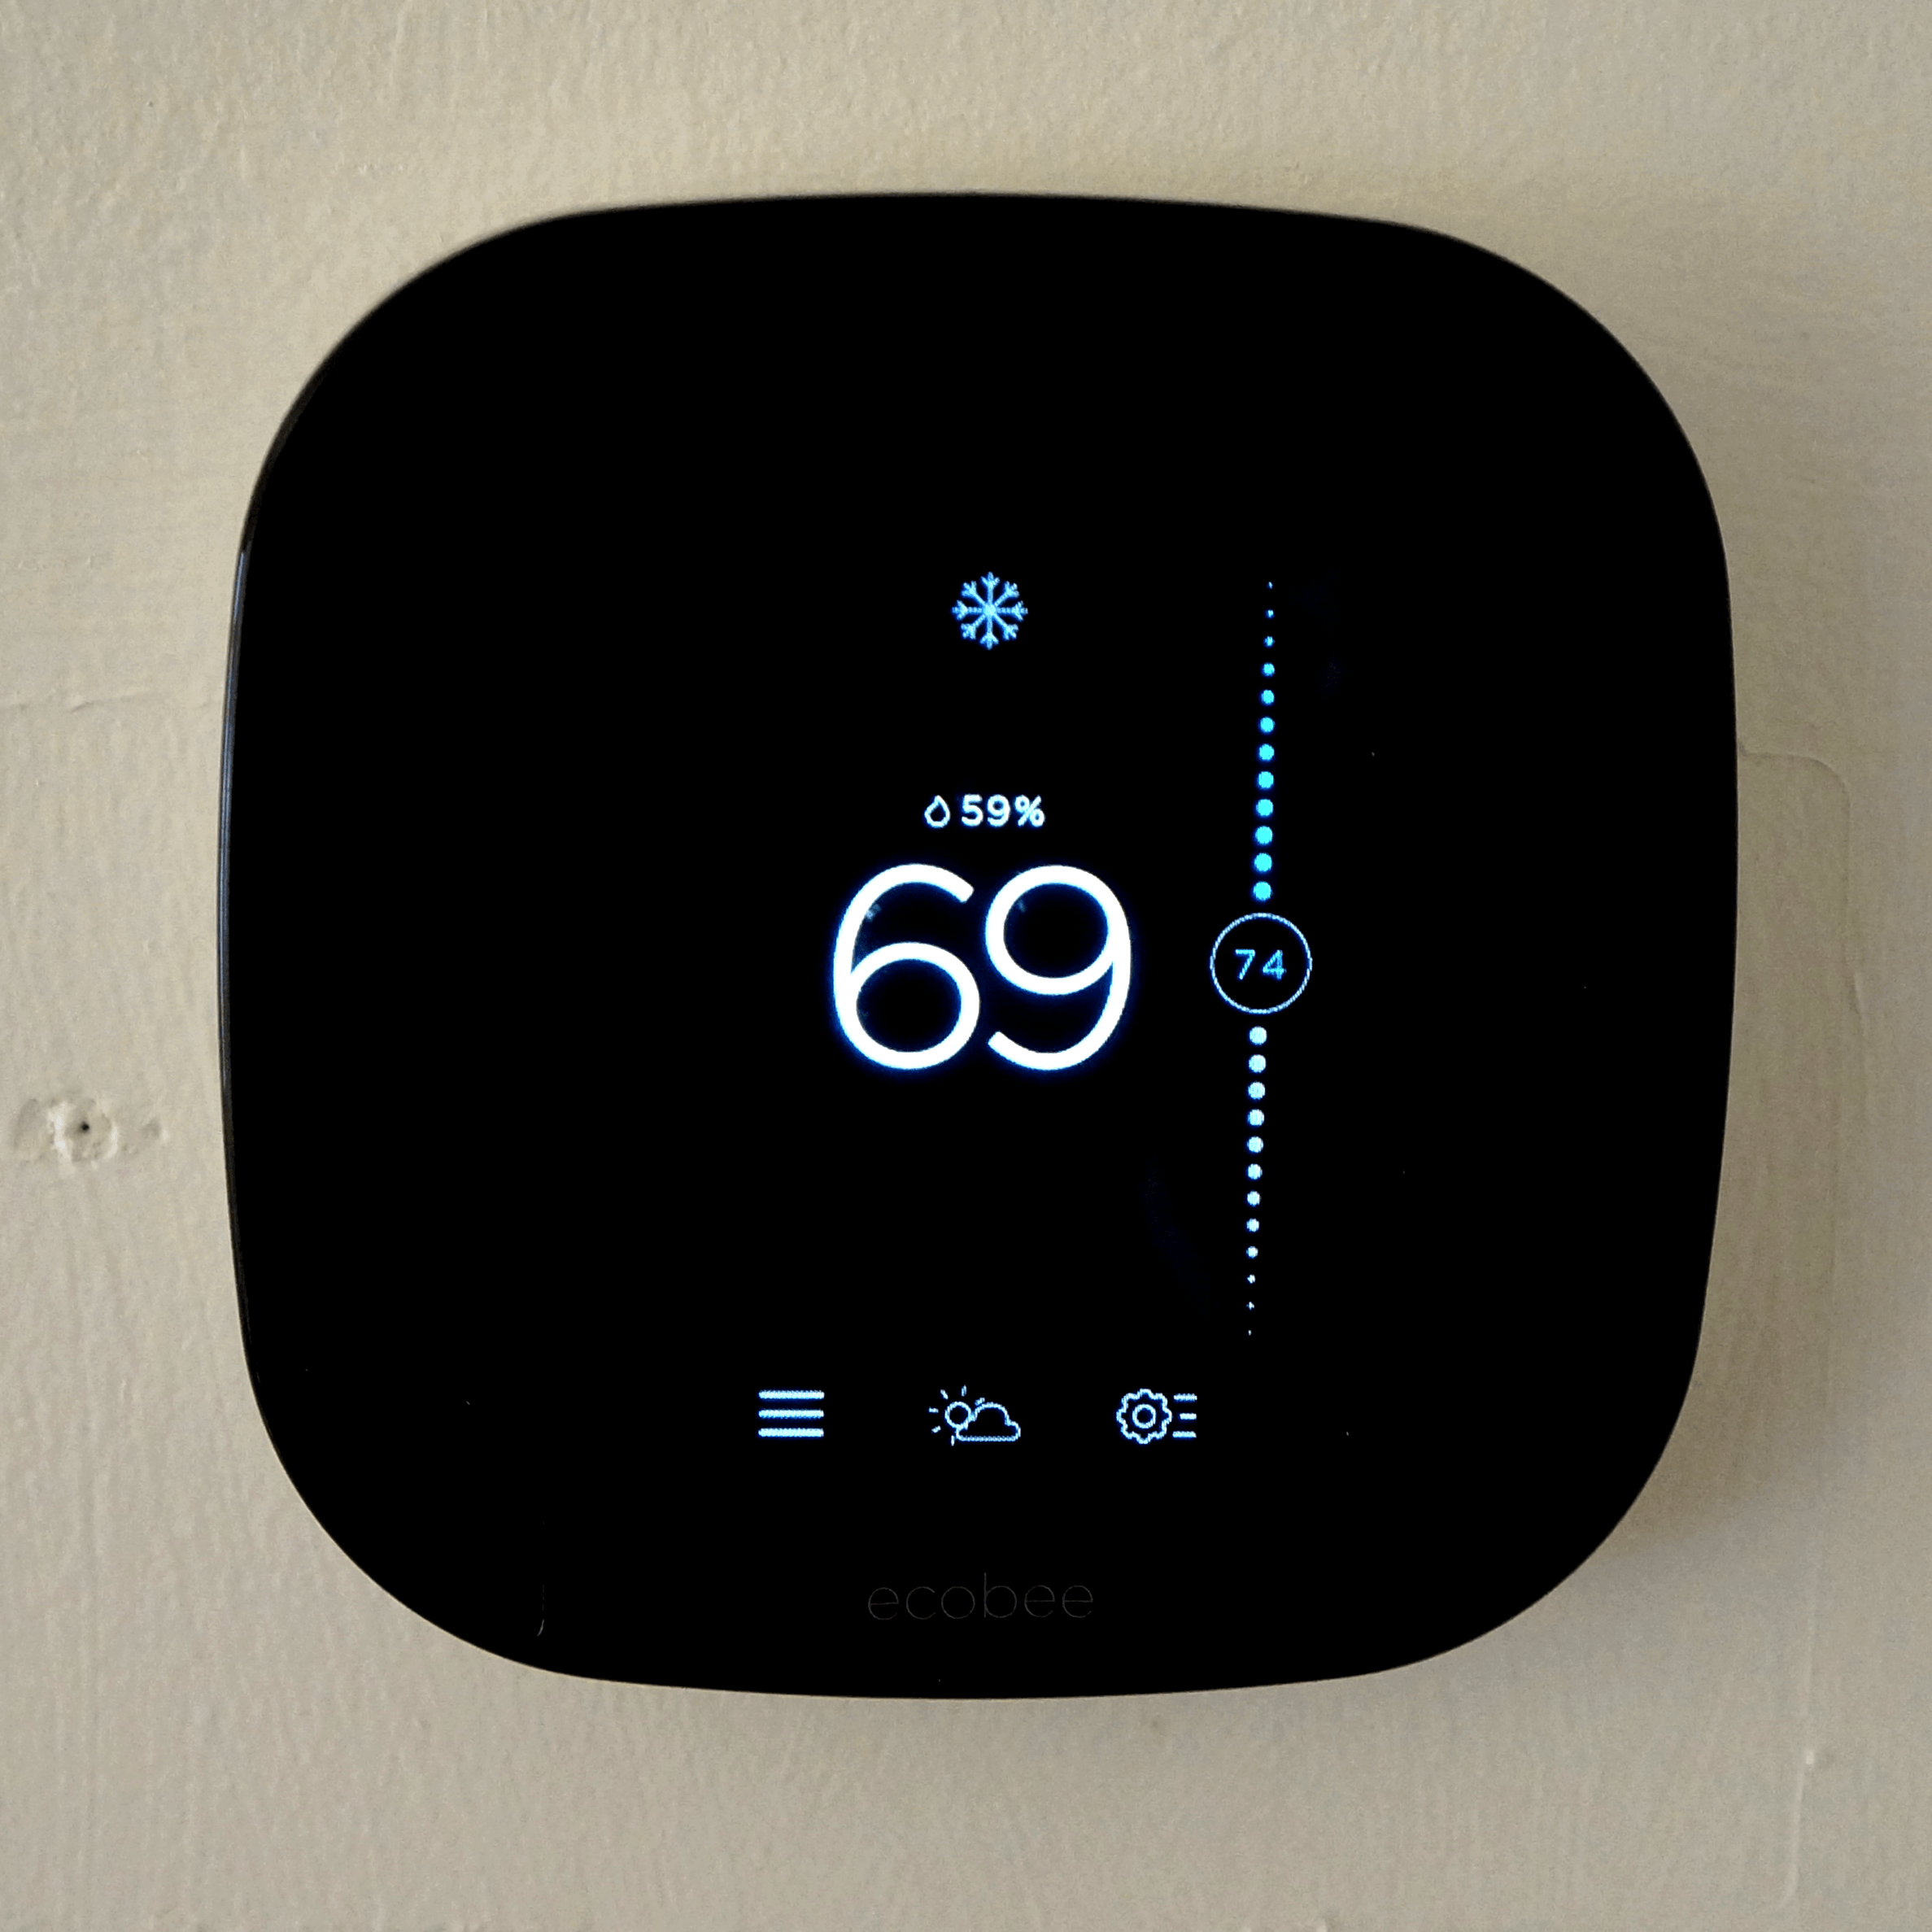
The ecobee3 hardware is square with the corners rounded off, making it looks a little like an iOS app icon. The screen is touch capacitive and responsive. When it’s not being used, the ecobee3’s screen displays the current temperature in nice big numbers that are easy to see from across the room against the ecobee3’s black background without feeling like a light is being shone in your eyes. Below the temperature are icons depicting the current weather conditions and the outdoor temperature, both of which are set in a much smaller typeface than the indoor temperature.
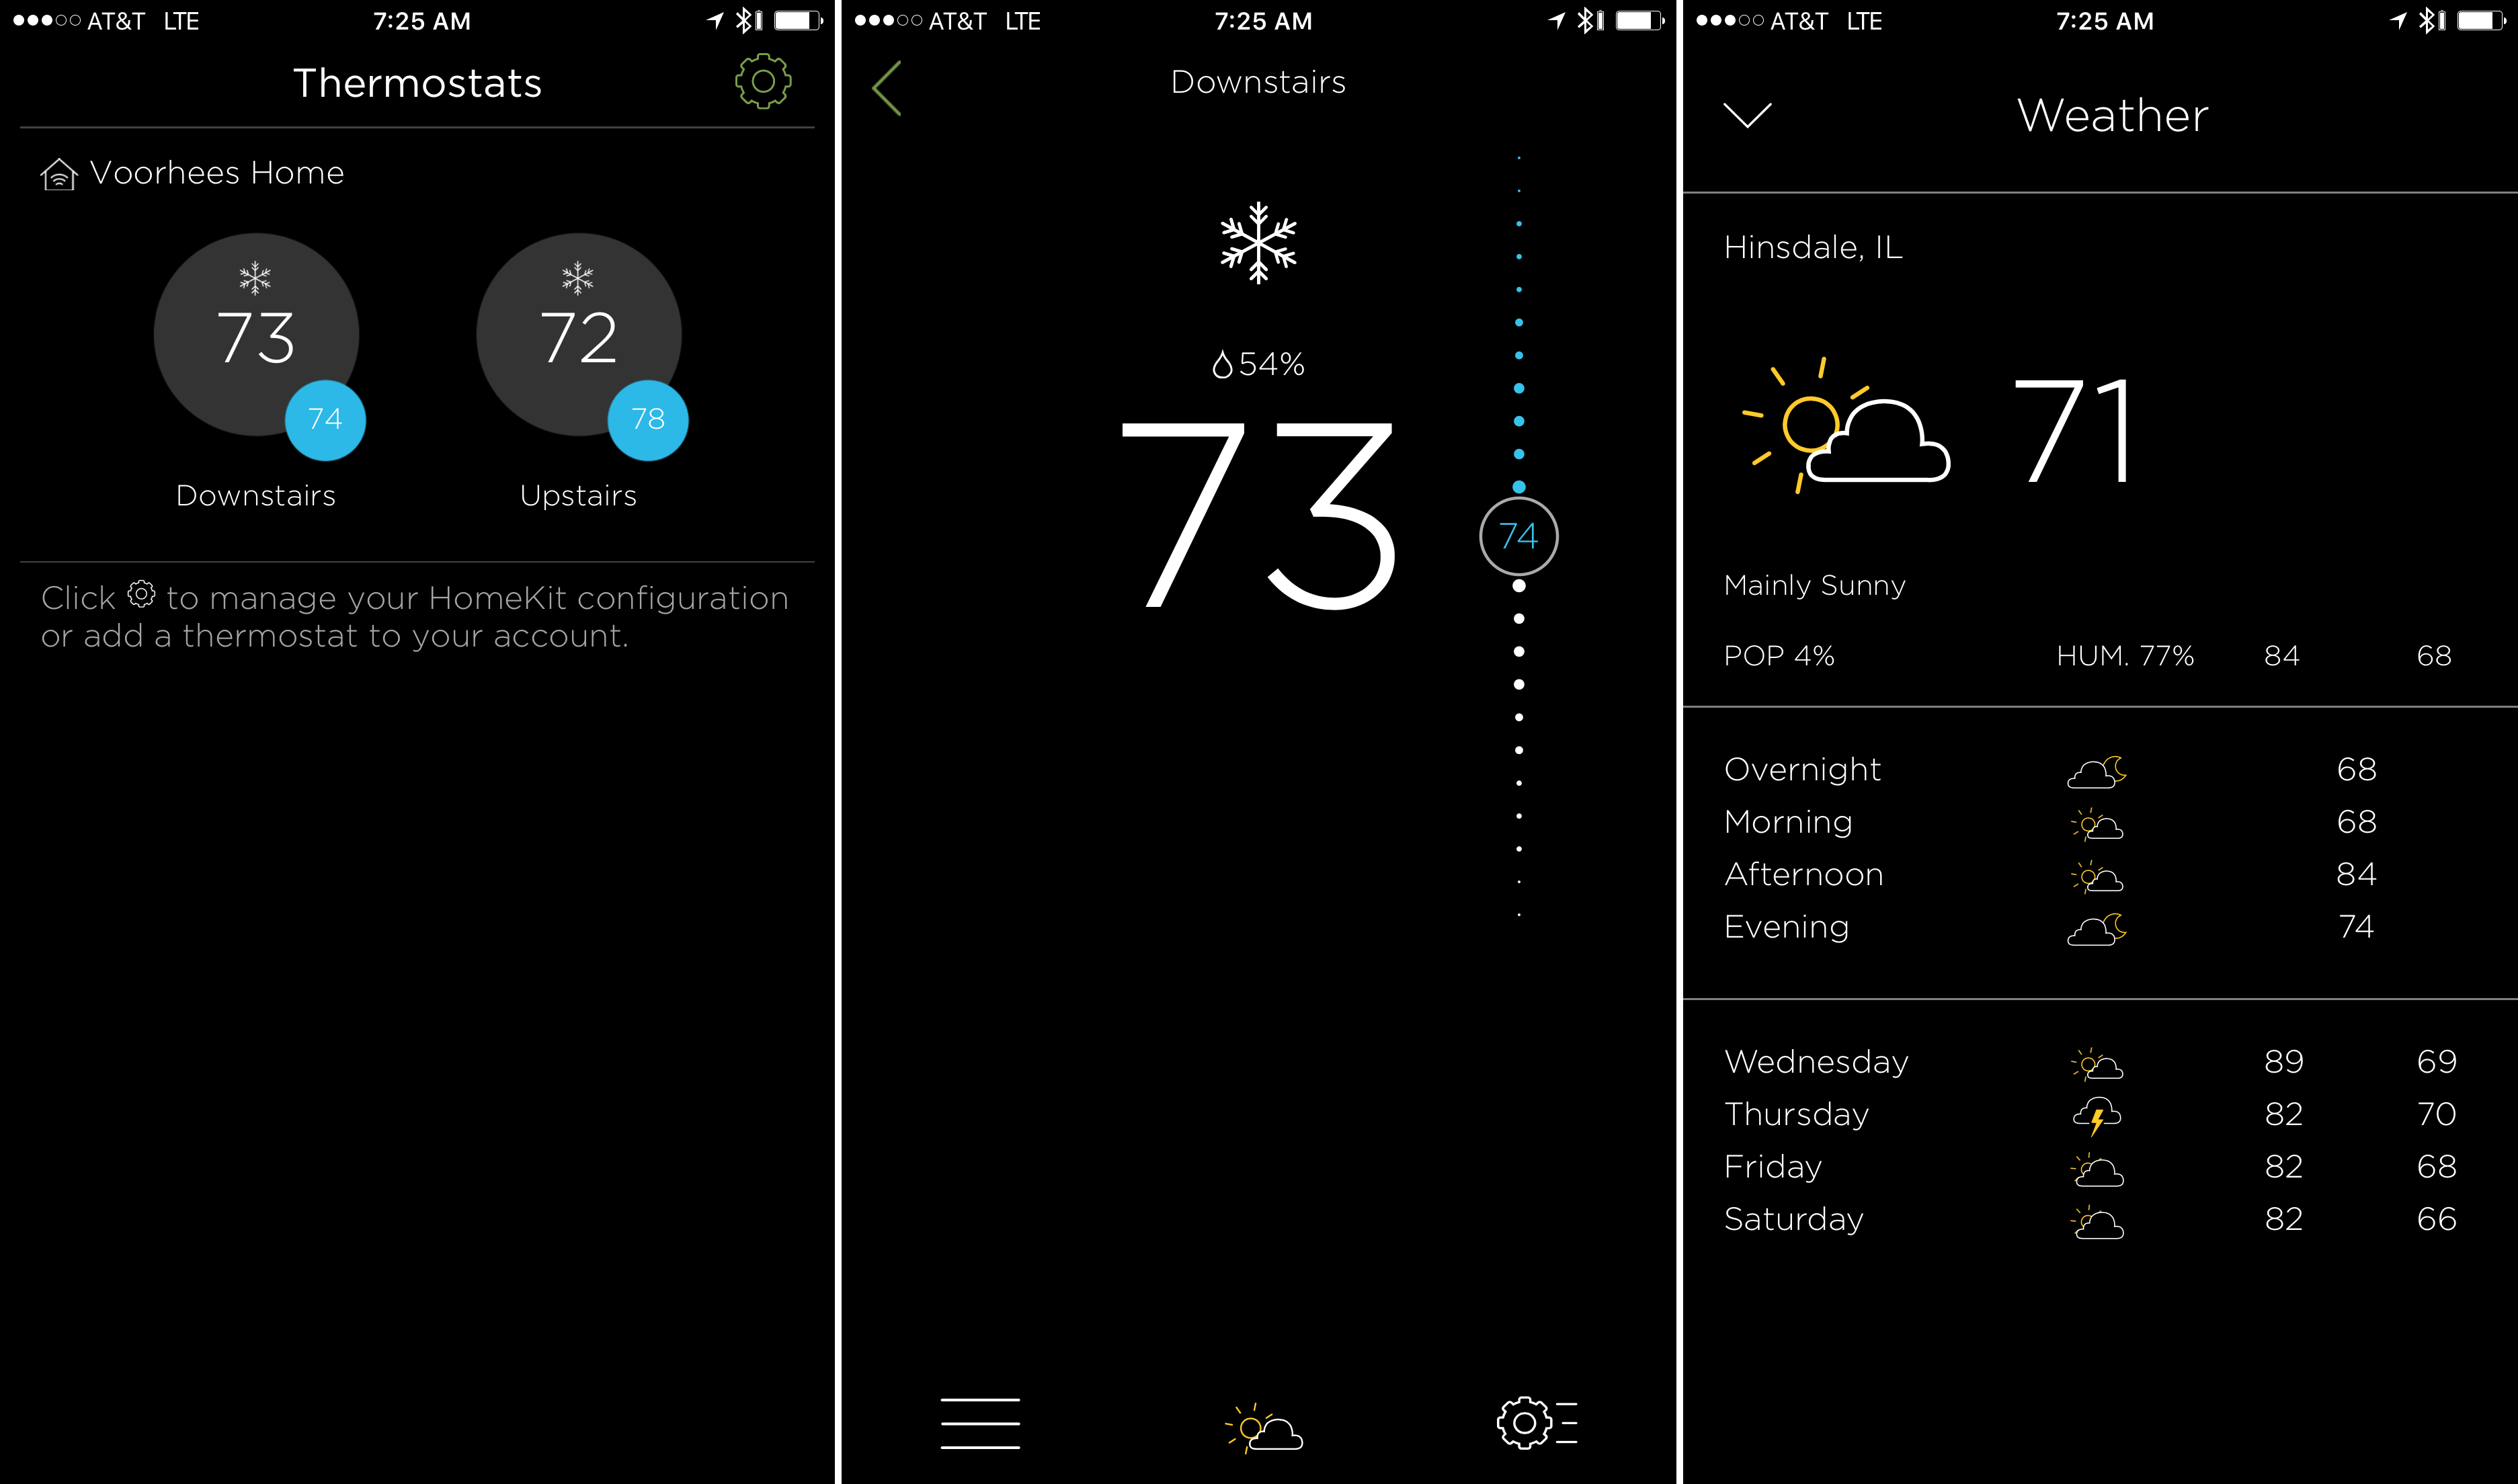
When you approach the ecobee3, the motion sensor in it brightens the screen and displays additional information. Along the right edge of the screen is a scale showing a sort of dial of temperatures that you can use to set a temporary temperature by dragging with your finger to the temperature you want. The weather information at the bottom of the screen animates away and is replaced by three icons – Settings, Weather, and Quick Changes. Settings is self-explanatory. Tapping weather displays the current outdoor conditions along with the predicted conditions for the morning, afternoon, evening, and overnight and a forecast for the next four days. Quick Actions let you quickly set your status to home or away. Finally, above the indoor temperature the ecobee3 displays the humidity and system (heating or cooling) currently in use.
The final piece of hardware that comes with each ecobee3 is a small remote sensor that measures temperature and movement. The sensors help the ecobee3 know when to run your heating and cooling system and are especially nice if you have rooms in your house that tend to be particularly hot or cold. This (and HomeKit) are ultimately what sold me on the ecobee3 over something like the Nest.
As I mentioned at the outset, part of my house is old and poorly insulated compared to the newer addition. On the second floor, the thermostat is in my bedroom, which is better insulated than my kids’ bedrooms, which means my wife and I can be perfectly comfortable at night while the boys are too hot or cold. With a remote sensor in one of their bedrooms, we have already noticed a difference in the overall comfort on the second floor. Enough of a difference that I plan to get two more sensors – one for the third bedroom and another for downstairs.3 The motion detectors in the sensors work together with the ecobee3’s iOS app to manage some of the thermostat’s more sophisticated features, like ‘Follow Me’ and ‘Smart Home/Away,’ which I cover below.
Software
According to ecobee, its thermostat saves customers 23% on their heating and cooling bills on average. One of the main reasons I bought a smart thermostat is because I participate in a special program that my local electric company runs, under which I am changed the hourly price for electricity instead of a flat rate. The benefit is that if I shift some electricity use to periods when electricity is cheaper, by doing things like running the dishwasher on a timer that goes off in the middle of the night, I can save on my electric bill. Air conditioning is probably the biggest electricity hog of them all, so it makes sense to fine tune my usage, which is where the ecobee3 really excels.
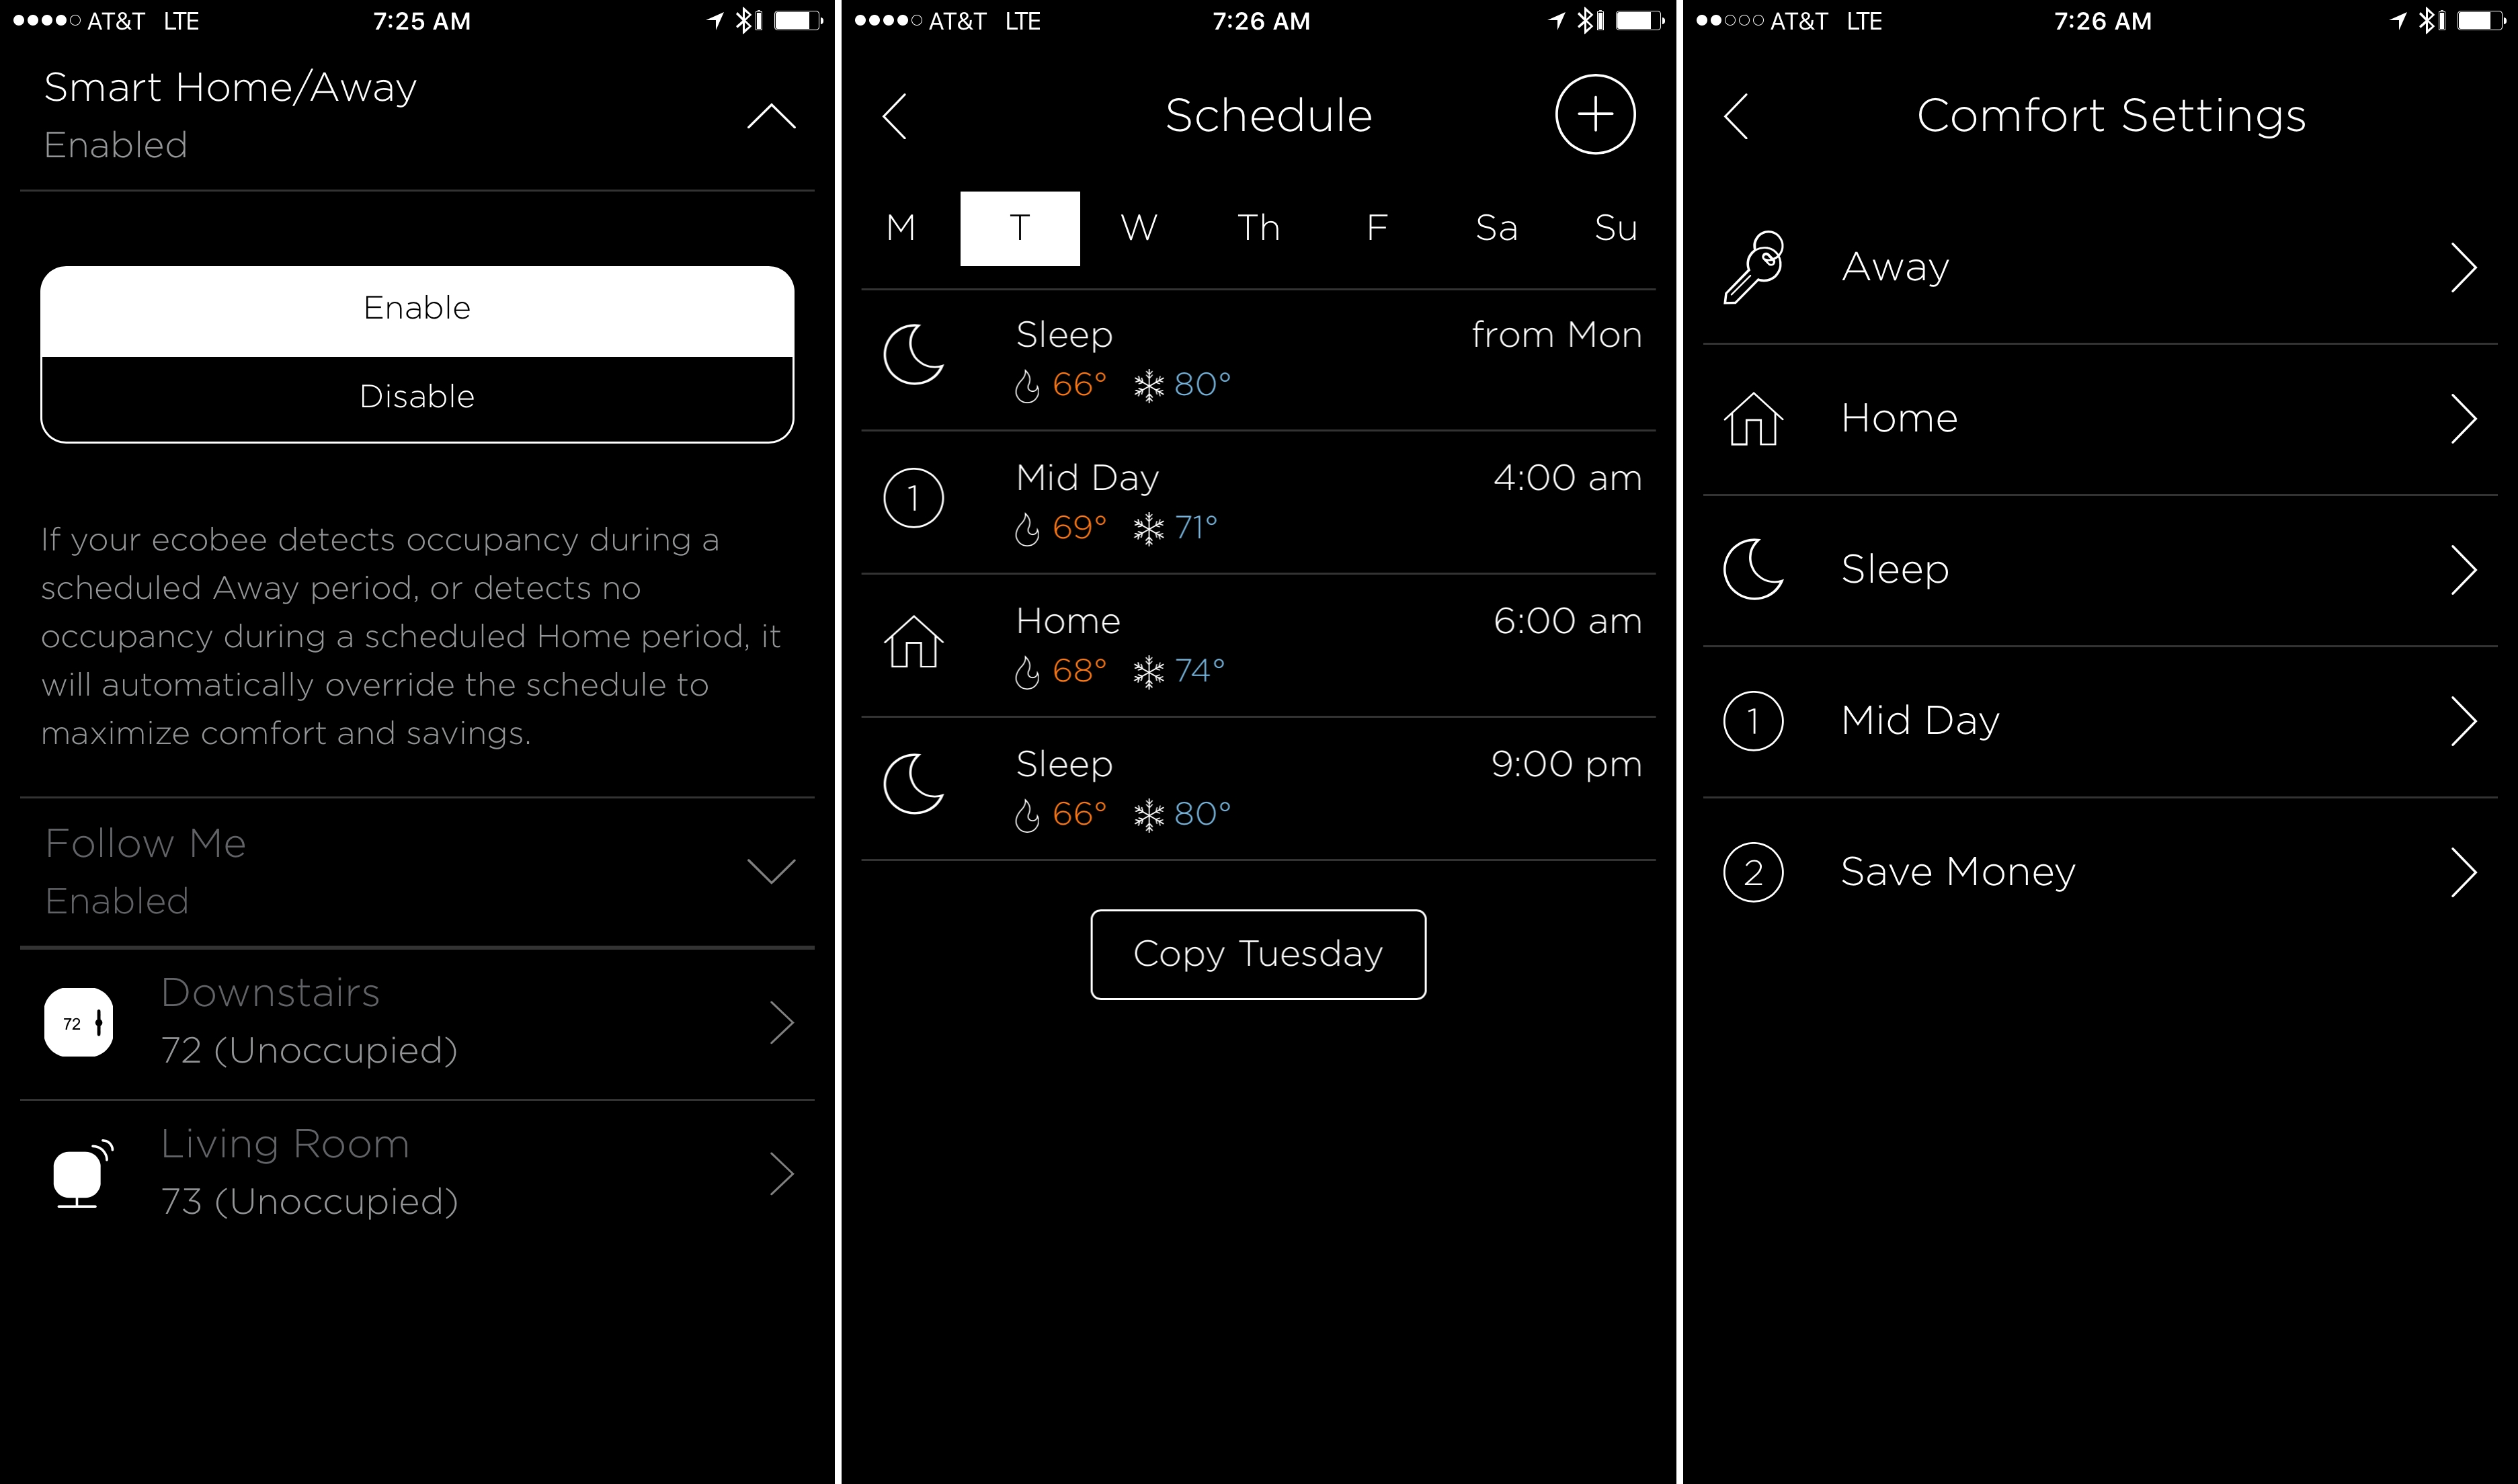
The first thing to set up is a heating and cooling schedule, which acts as a sort of baseline. Using ‘Comfort Profiles’ like Home, Away, Sleep, and custom ones that you can define yourself, you set the schedule for the day and time each Comfort Profile will run. I don’t use the Away setting because there is almost always someone home, but in the summer months, the upstairs is generally set to be cool at night and warmer during the day, while the downstairs is the opposite. That alone is handy, but not really different than what existing dumb programmable thermostats can do.
The iOS Apps
What sets the ecobee3 apart are its remote sensors, iOS app, and integrations that make automation possible. On an iPhone, the app’s screen for each thermostat looks just like the ecobee3’s own screen when you approach it, which makes sense since both are touch screen capacitive devices, but also adds a level of familiarity that makes the app just as easy to use as the device itself.
If you open Settings and then Sensors, there are two settings that add a little magic to the ecobee3. The first is ‘Smart Home/Away.’ When enabled, if the ecobee3 detects that you are home when the thermostat is set to away or that you are away when you are scheduled to be home, the ecobee3 will adjust the temperature to, as ecobee says, ‘maximize comfort and savings.’ To determine if you are home or not, the ecobee3 relies on the motion sensors in the thermostat and the remote sensors. This is another reason that I chose the ecobee3 over the Nest. With remote sensors in my kids’ bedroom and in my living room, the ecobee3 can detect if someone is home whether or not they walk in front of one of the thermostats, which are not in high-traffic areas of my house.
The second Sensor setting that I like a lot is ‘Follow Me,’ which takes the average temperature of the sensors that have recently detected motion to determine whether the heating or cooling needs to run. As I write this, my living room sensor knows that I am in this room, but the front room of my house where the ecobee3 is mounted is showing that it is unoccupied because no one has walked by it in a while. As a result, the thermostat is only using the temperature from the sensor where I am sitting to decide whether to run the air conditioning, while upstairs, both sensors are detecting motion so the average temperature is being used.
The other benefit of the ecobee3 app is the ability to adjust the temperature while you are away from home. You may remember to put your ecobee3 into vacation mode, which lets you set a hold temperature while you are away and set an exact start and end date and time for vacation mode, but if you forget, you can set up vacation mode after you leave from an iOS device. I also have set my thermostats so that if someone adjusts the temperature manually, it returns to the schedule after two hours so that the temperature doesn’t get adjusted by someone and then forgotten.
Overall, the ecobee iOS apps are solid. The iPad uses the extra space available to provide additional detail about your system, preferences, and settings, some of which is not available in the iPhone version of the app. There is even a rather nice Apple Watch app that lets you see temperature data for your thermostats and sensors from your Watch, adjust the temperature, and do things like change the Home and Away status.
I don’t like that the iPad app has not been designed for the iPad Pro so you get the oversized onscreen keyboard when you need to type. Fortunately though, there are few spots in the app where typing is necessary. Also, the iPad app does not support Split View, which is disappointing.
HomeKit and Other Integrations
Another advantage that the ecobee3 has over a device like the Nest is HomeKit support. Right now, because it’s my only HomeKit device, I’m limited to things like asking Siri to ‘Change the Downstairs temperature to 72,’ which worked perfectly in my tests. With tvOS 10 and iOS 10, you will be able to control HomeKit devices like the ecobee3 with the Siri Remote and the upcoming iOS Home app. I am in the early stages of testing both with the betas of tvOS and iOS and will have more to say about them when they launch in the Fall.
The ecobee3 also supports several other integrations including IFTTT, Amazon Echo, Wink, SmartThings, and more. That’s an impressive list of some of the most popular frameworks and tools available to let you manage the ecobee3 with other devices you might already own and automate how your ecobee3 behaves. At the moment I am using a few IFTTT workflows to control my thermostats, which I describe in further detail in the Club MacStories Monthly Log for July.
I have been very happy with my ecobee3. The level of customization to scheduling, plus the smarts of Follow Me and Smart Home/Away combined with automation, have put a sophisticated heating and cooling regimen in place that keeps my family comfortable and helps me save money without continuously fiddling with the setup. Of course I fiddled with the setup endlessly when I first got the ecobee3s, but now that I have them working in a way that everyone in my family likes, they’re on autopilot. The remote sensors, which are unique to the ecobee3, have played a large role in that by helping even out the temperature among multiple rooms and detecting whether someone is home or not better than the thermostat could on its own. In many respects, the best compliment I can pay to the ecobee3 is that after investing some time up front setting mine up the way I wanted, they just faded into the fabric of our everyday lives without adding any mental overhead, while still providing benefits well beyond what even the smartest programmable thermostat can.
The ecobee3 is available from Amazon and other retailers for around $250.
- In the US, you can also find the ecobee3 at Apple Stores, Home Depot, Best Buy, and Lowe’s. ↩︎
- Ecobee has a ‘Rebate Finder’ webpage where you can check if a rebate is available where you live. ↩︎
- Each ecobee3 can support up to 32 remote sensors. ↩︎


