For a long time, the go-to method for quickly framing a screenshot taken on an Apple device was Federico’s excellent Apple Frames shortcut. Iterating on it each year, he even added an API for expanded customization. It’s still a terrific way to create a device-framed screenshot in a pinch, but due to the limitations of Shortcuts, you can’t manually adjust the layout of multiple screenshots or their output sizes.
Within the last year, not just one, but two well-made screenshot-framing apps have come on the scene. The first was Shareshot for iPhone, iPad, Vision Pro, and, more recently, Mac. John reviewed Shareshot in August of last year and came away impressed, but with a few reservations. In February, Dark Noise developer Charlie Chapman released his take on this new kind of app with Framous for macOS. At launch, the app showed promise but lacked a lot of features that I and many others desired. Version 1.2, available now, is a stacked release that adds a vast number of requested capabilities and customizations. Let’s take a look.
Device Settings
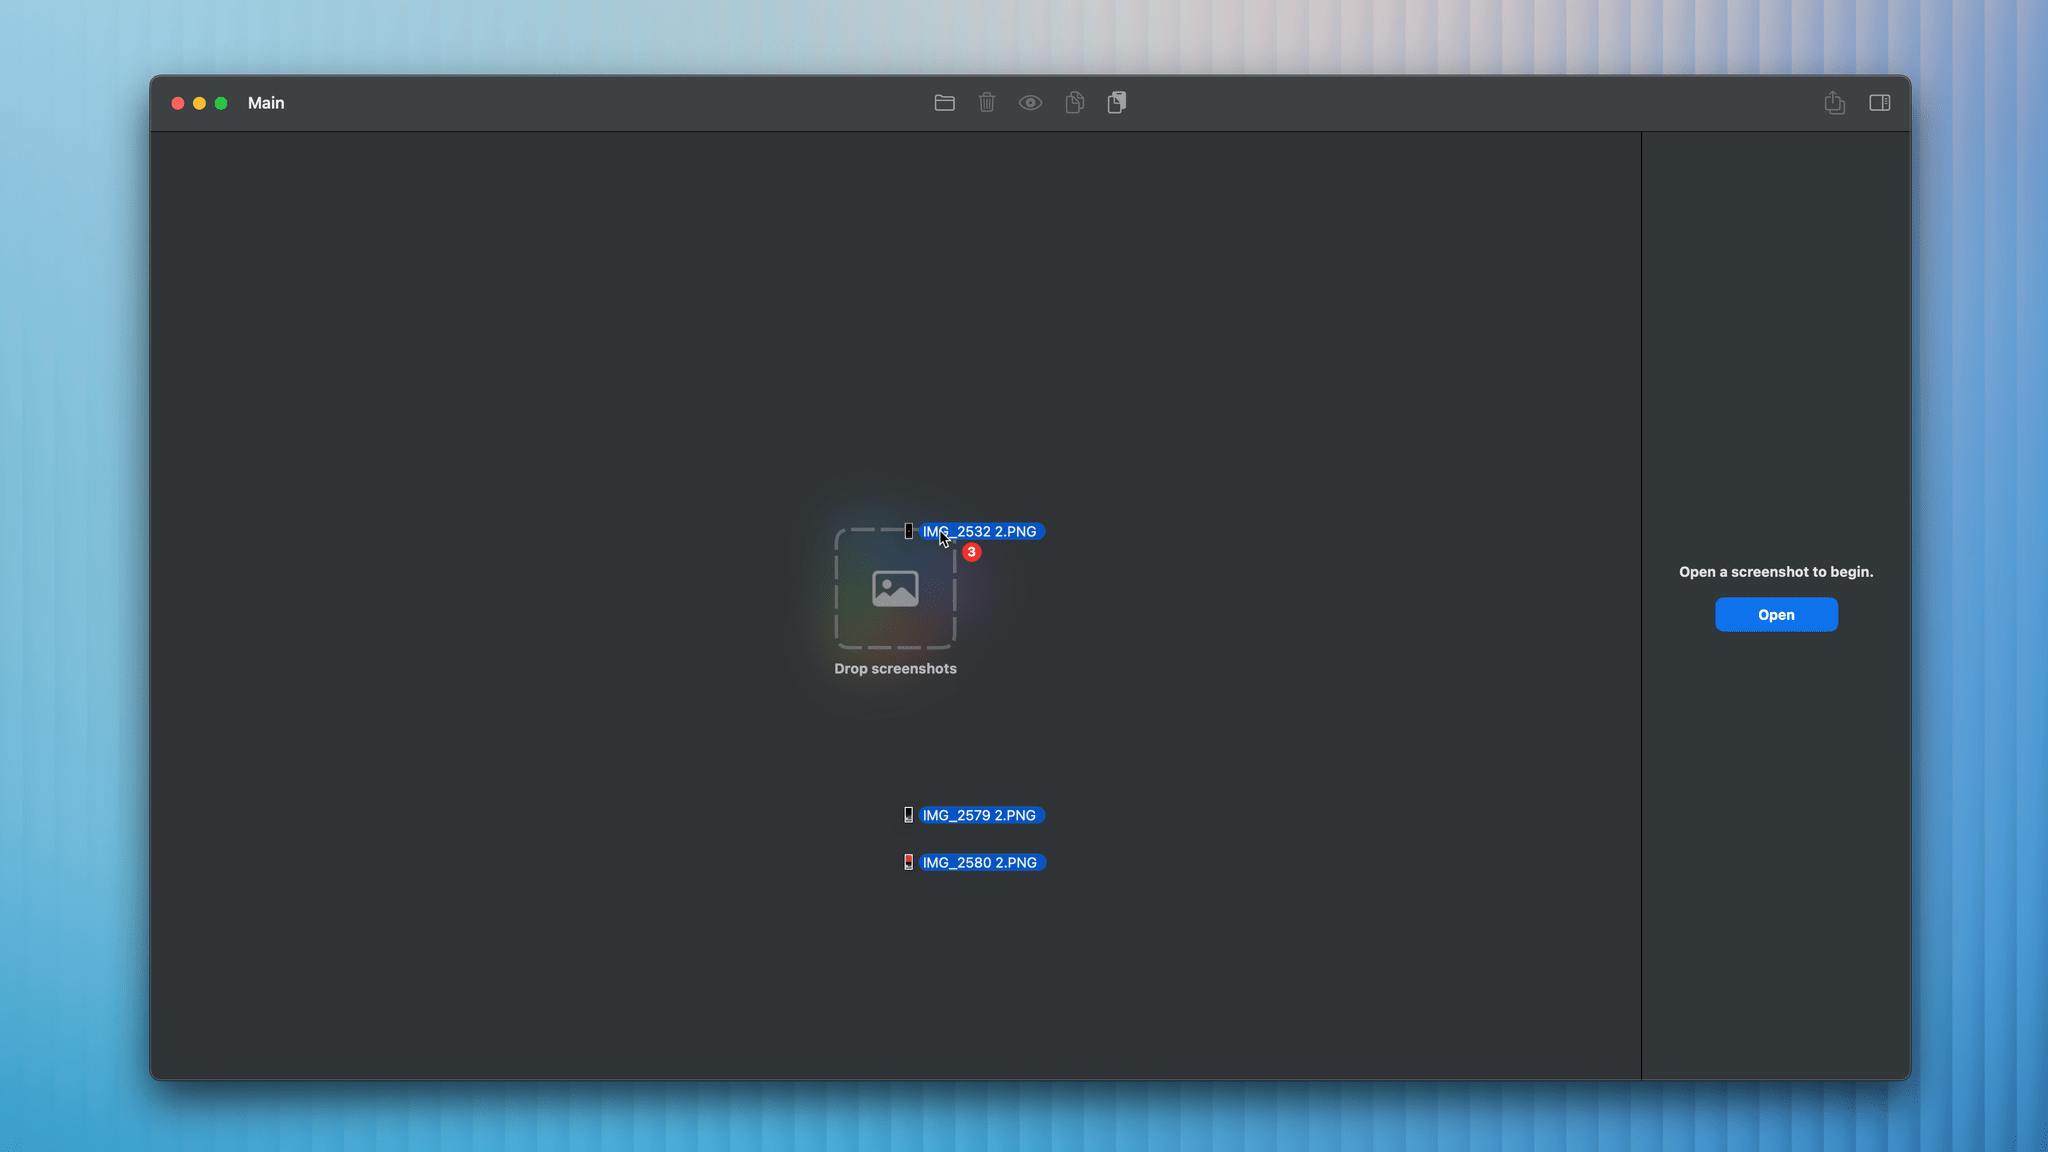
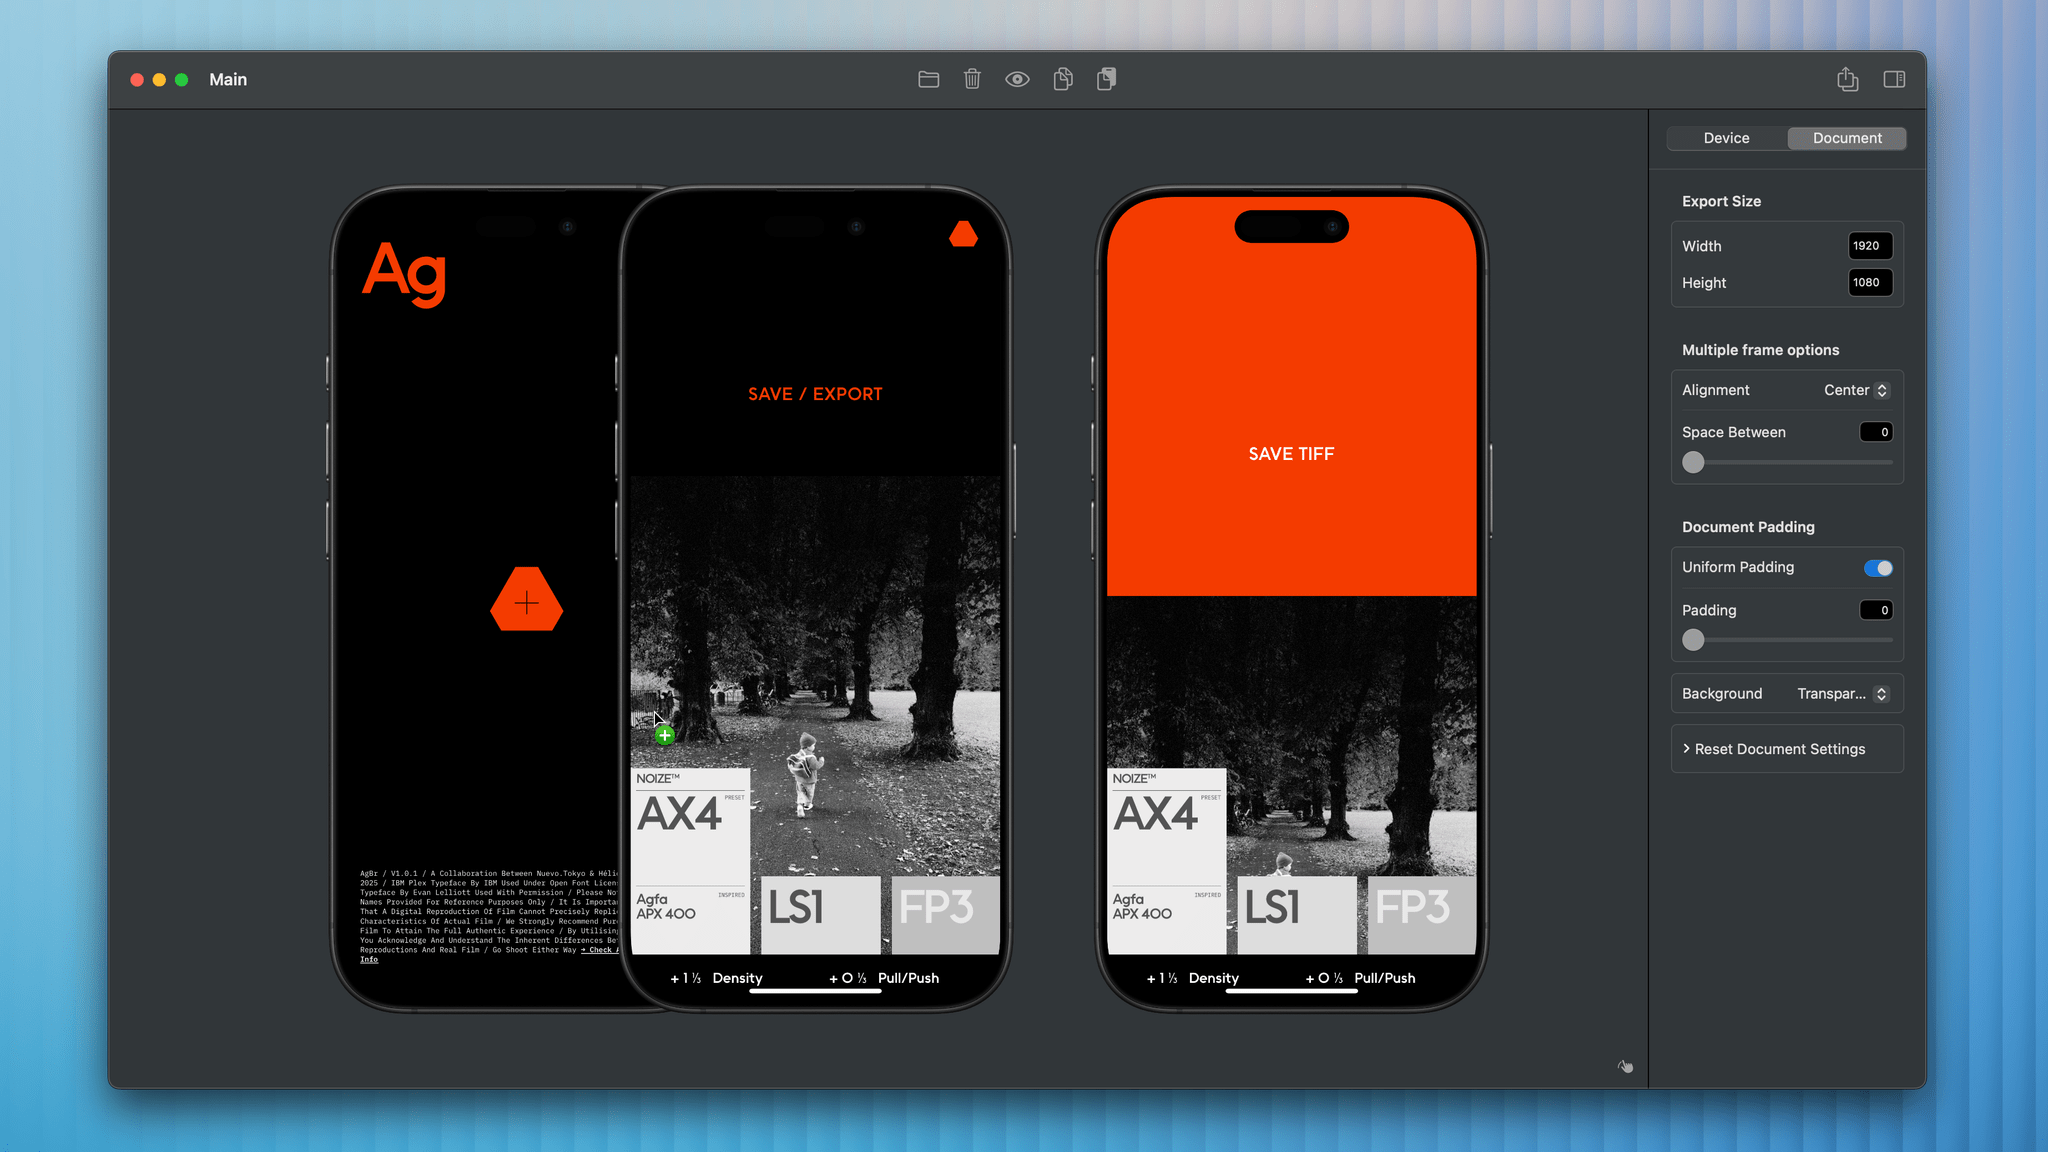
As in previous versions of Framous, you can use drag and drop or the file picker to add multiple screenshots to the main canvas. The app then chooses the appropriate device frame to use based on each screenshot’s dimensions and adds it around the screenshot. In version 1.0, the app’s relatively basic settings allowed you to adjust the padding between devices and change the color or model of each frame before exporting the canvas as a PNG. Version 1.2 offers much more customization, starting with more padding settings.
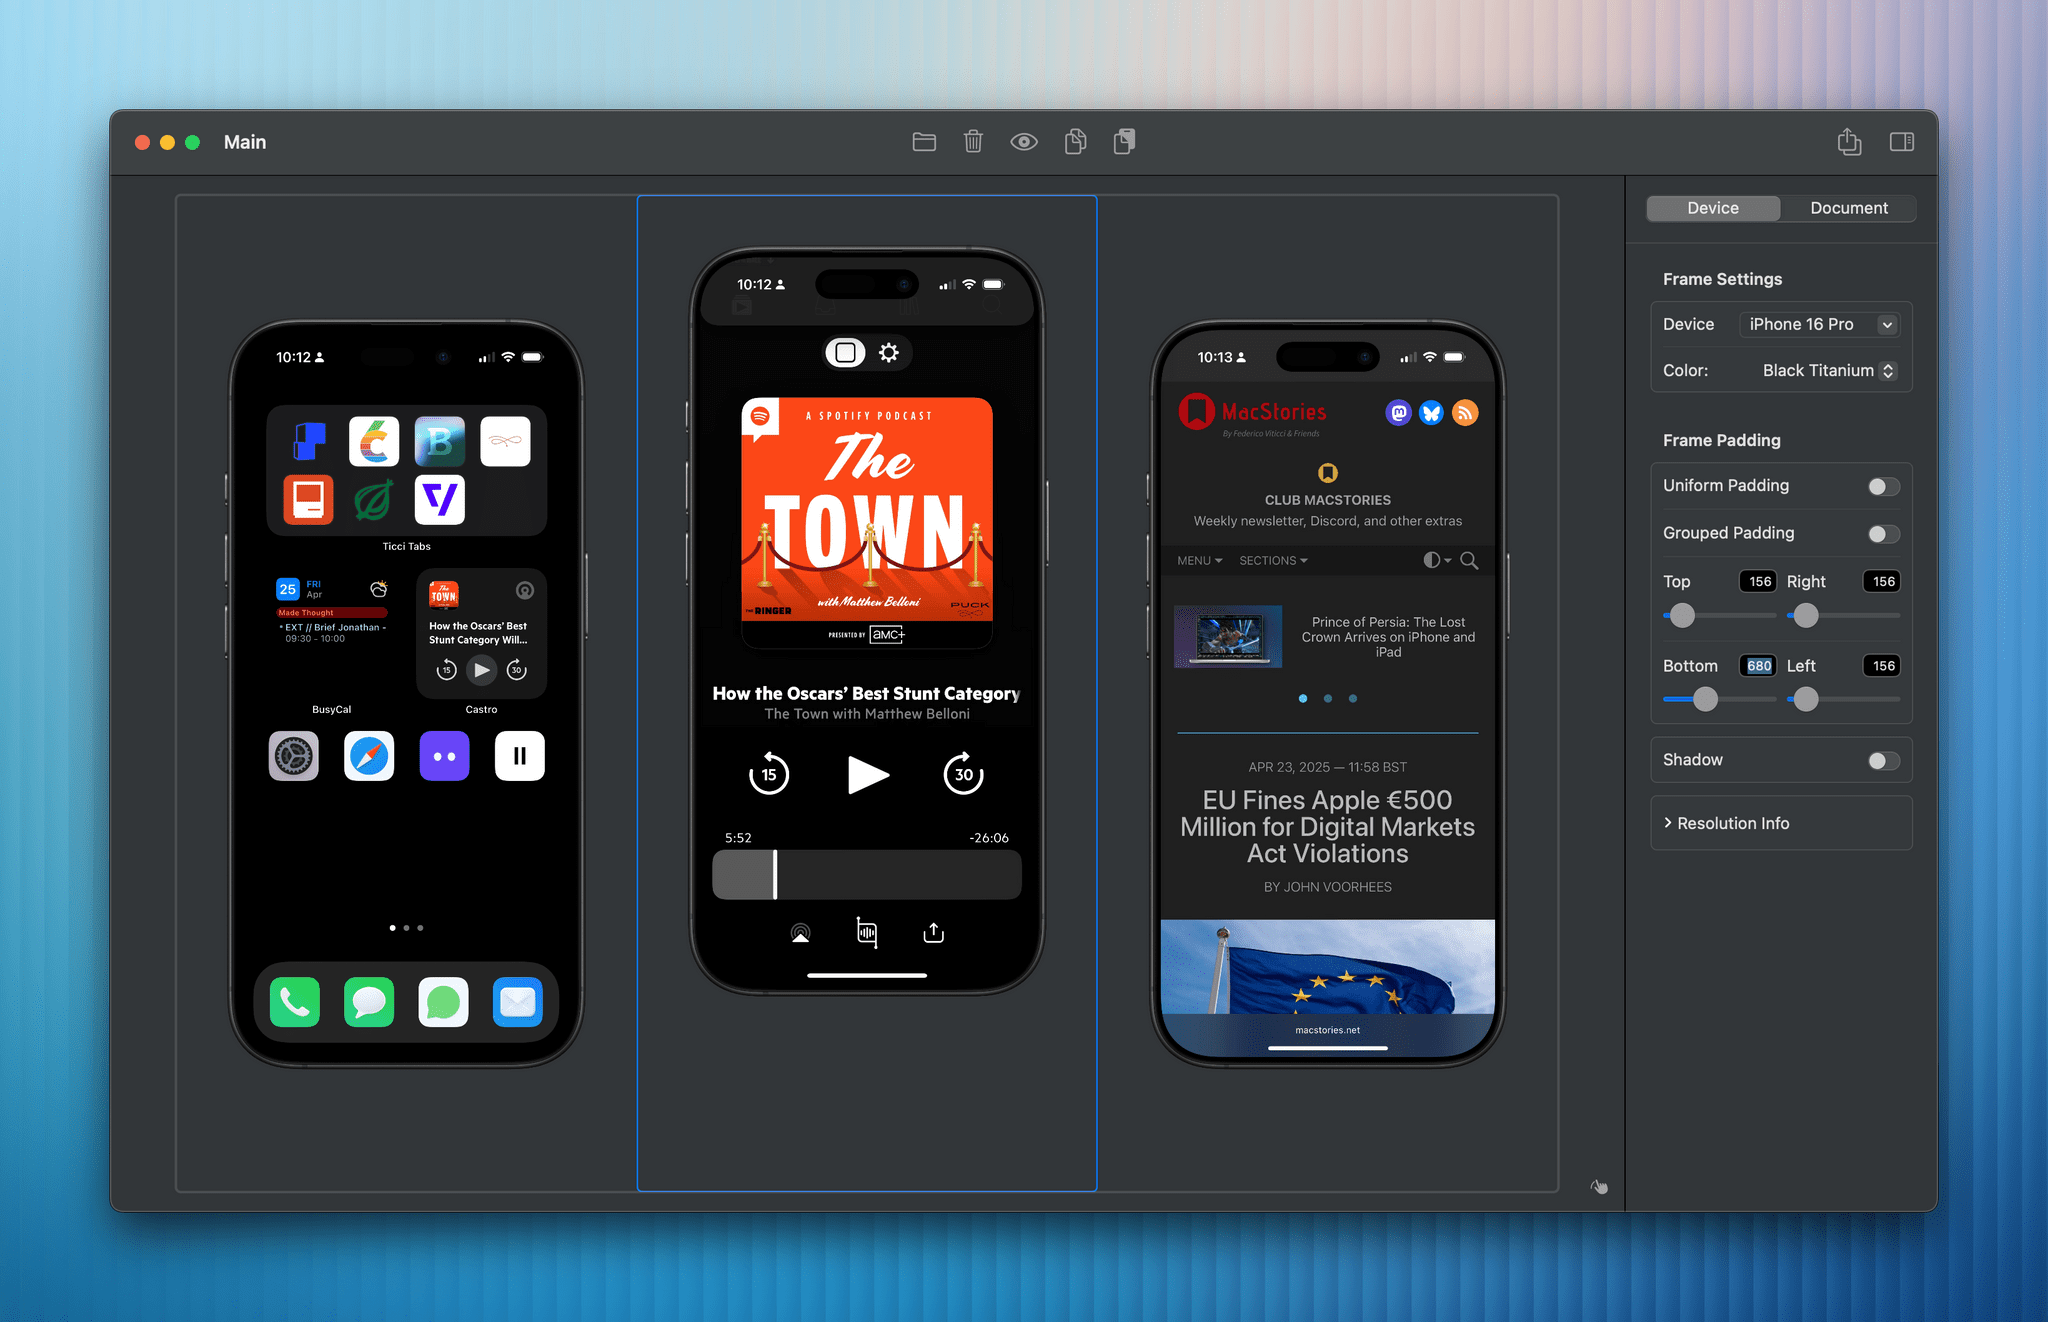
Padding is now specific to each device. This allows you to control the position of each device as it relates to the devices around it, as well as to the document as a whole. You can take that further still with the ability to specify the padding on each side of a device for ultimate control. For example, you could frame two iPhone screenshots and create a gap between them where you could add some text in another app.
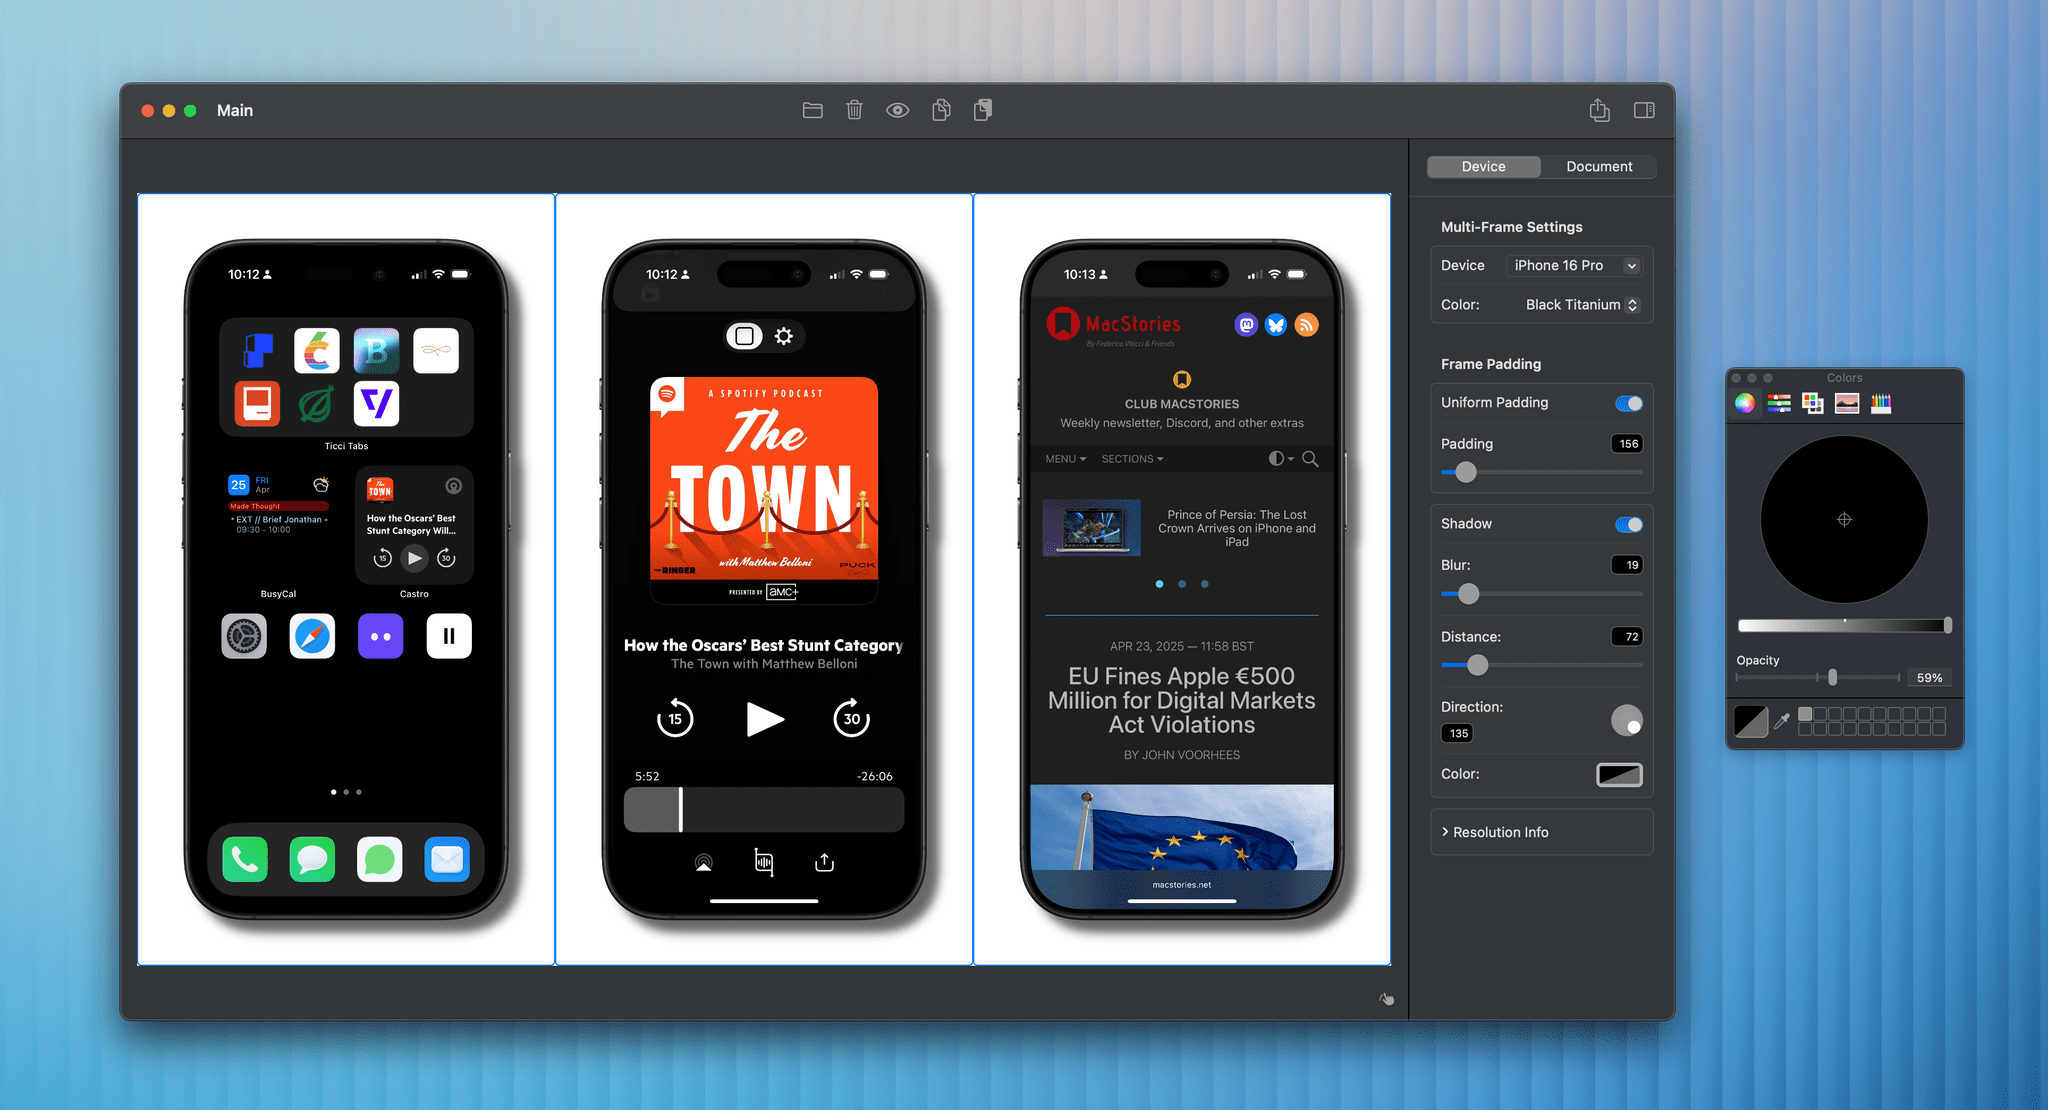
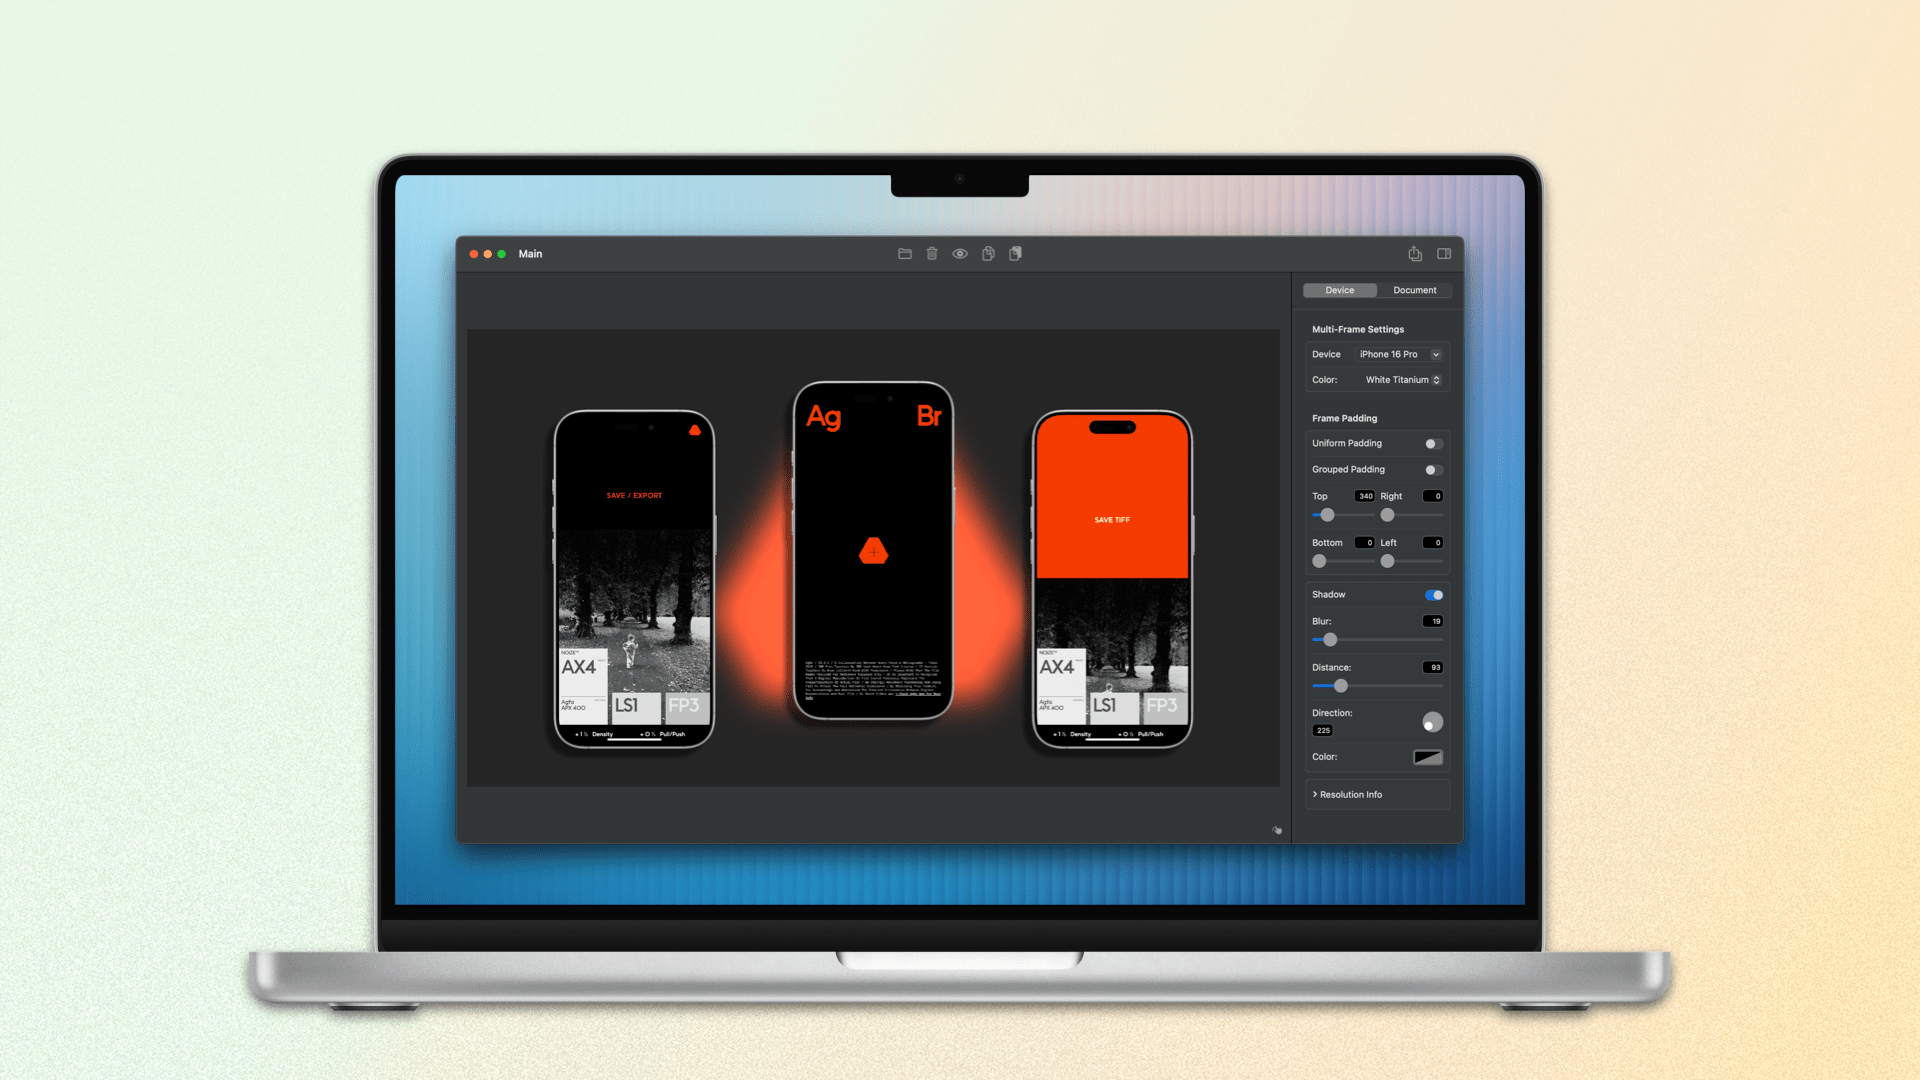
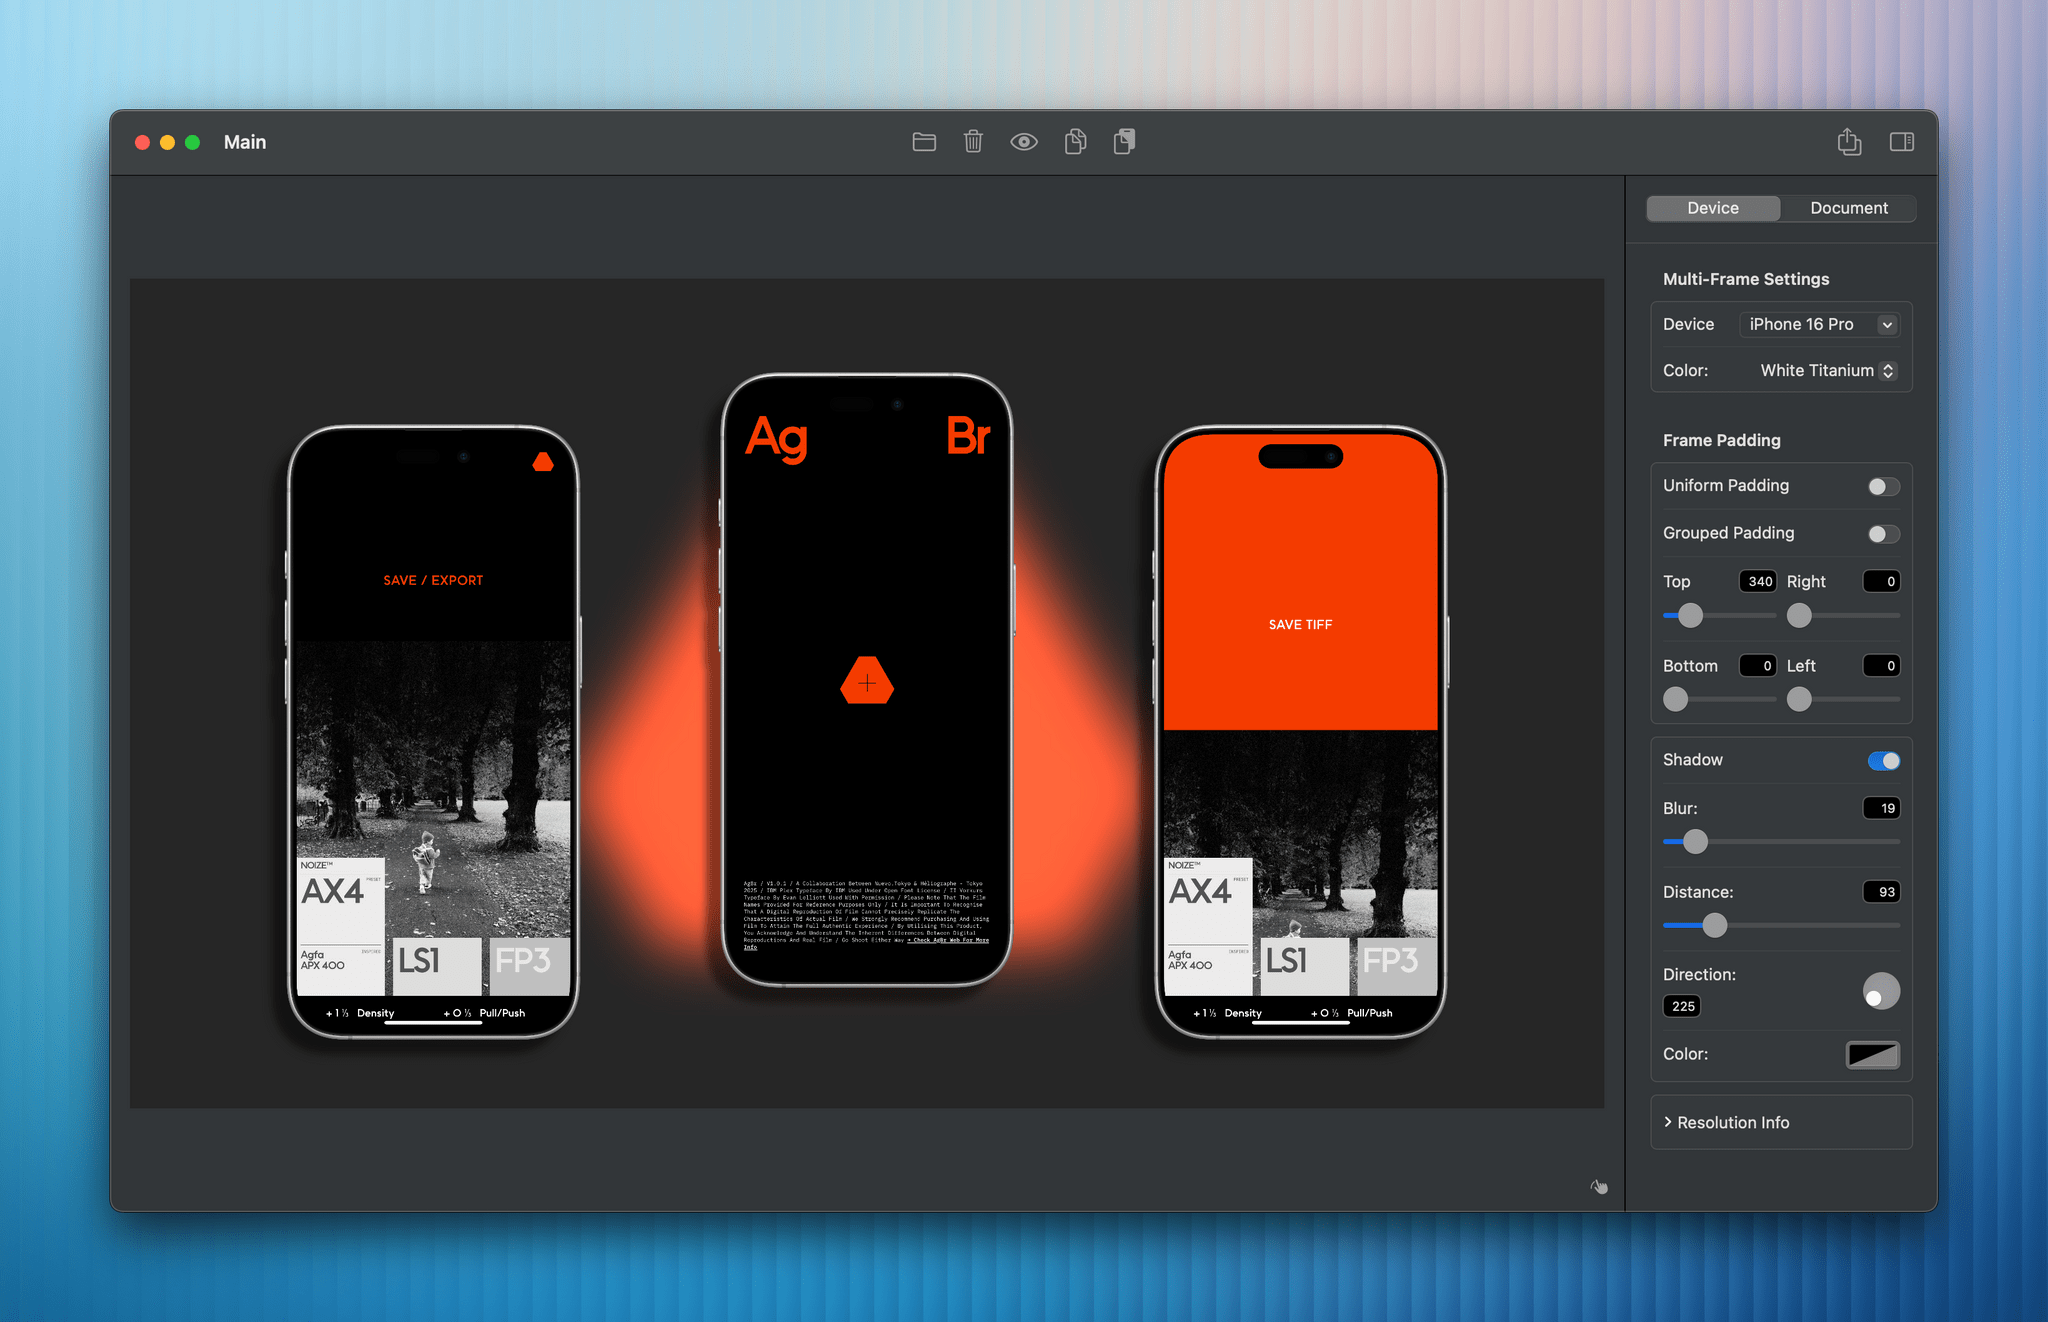
Entirely new in this release is the ability to add shadows to your frames. You can apply these to individual devices or the entire group on the canvas. When you turn the shadow on for a device, you are presented with four main options: Blur, Distance, Direction, and Color. You can adjust the values of the first two by dragging a slider or manually entering the number of pixels. For the shadow’s direction, you can again enter a figure (in degrees) or use the circle-within-a-circle widget to set the angle by hand. In a nice touch, the angle will snap to 45-degree increments if you hold down the Shift key. Choosing the color for your shadow is easy, too, using the native macOS color picker and its opacity slider.
Right at the bottom of the pane is a blink-and-you’ll-miss-it Resolution Info section. Here, you will find the dimensions for the currently selected screenshot, the screen dimensions for the device frame used, and the dimensions of the whole canvas.
All of these device-specific settings are stored in the new Device tab in Framous’s sidebar. The other tab is Document, which contains everything you need to adjust the document as a whole.
Document Settings
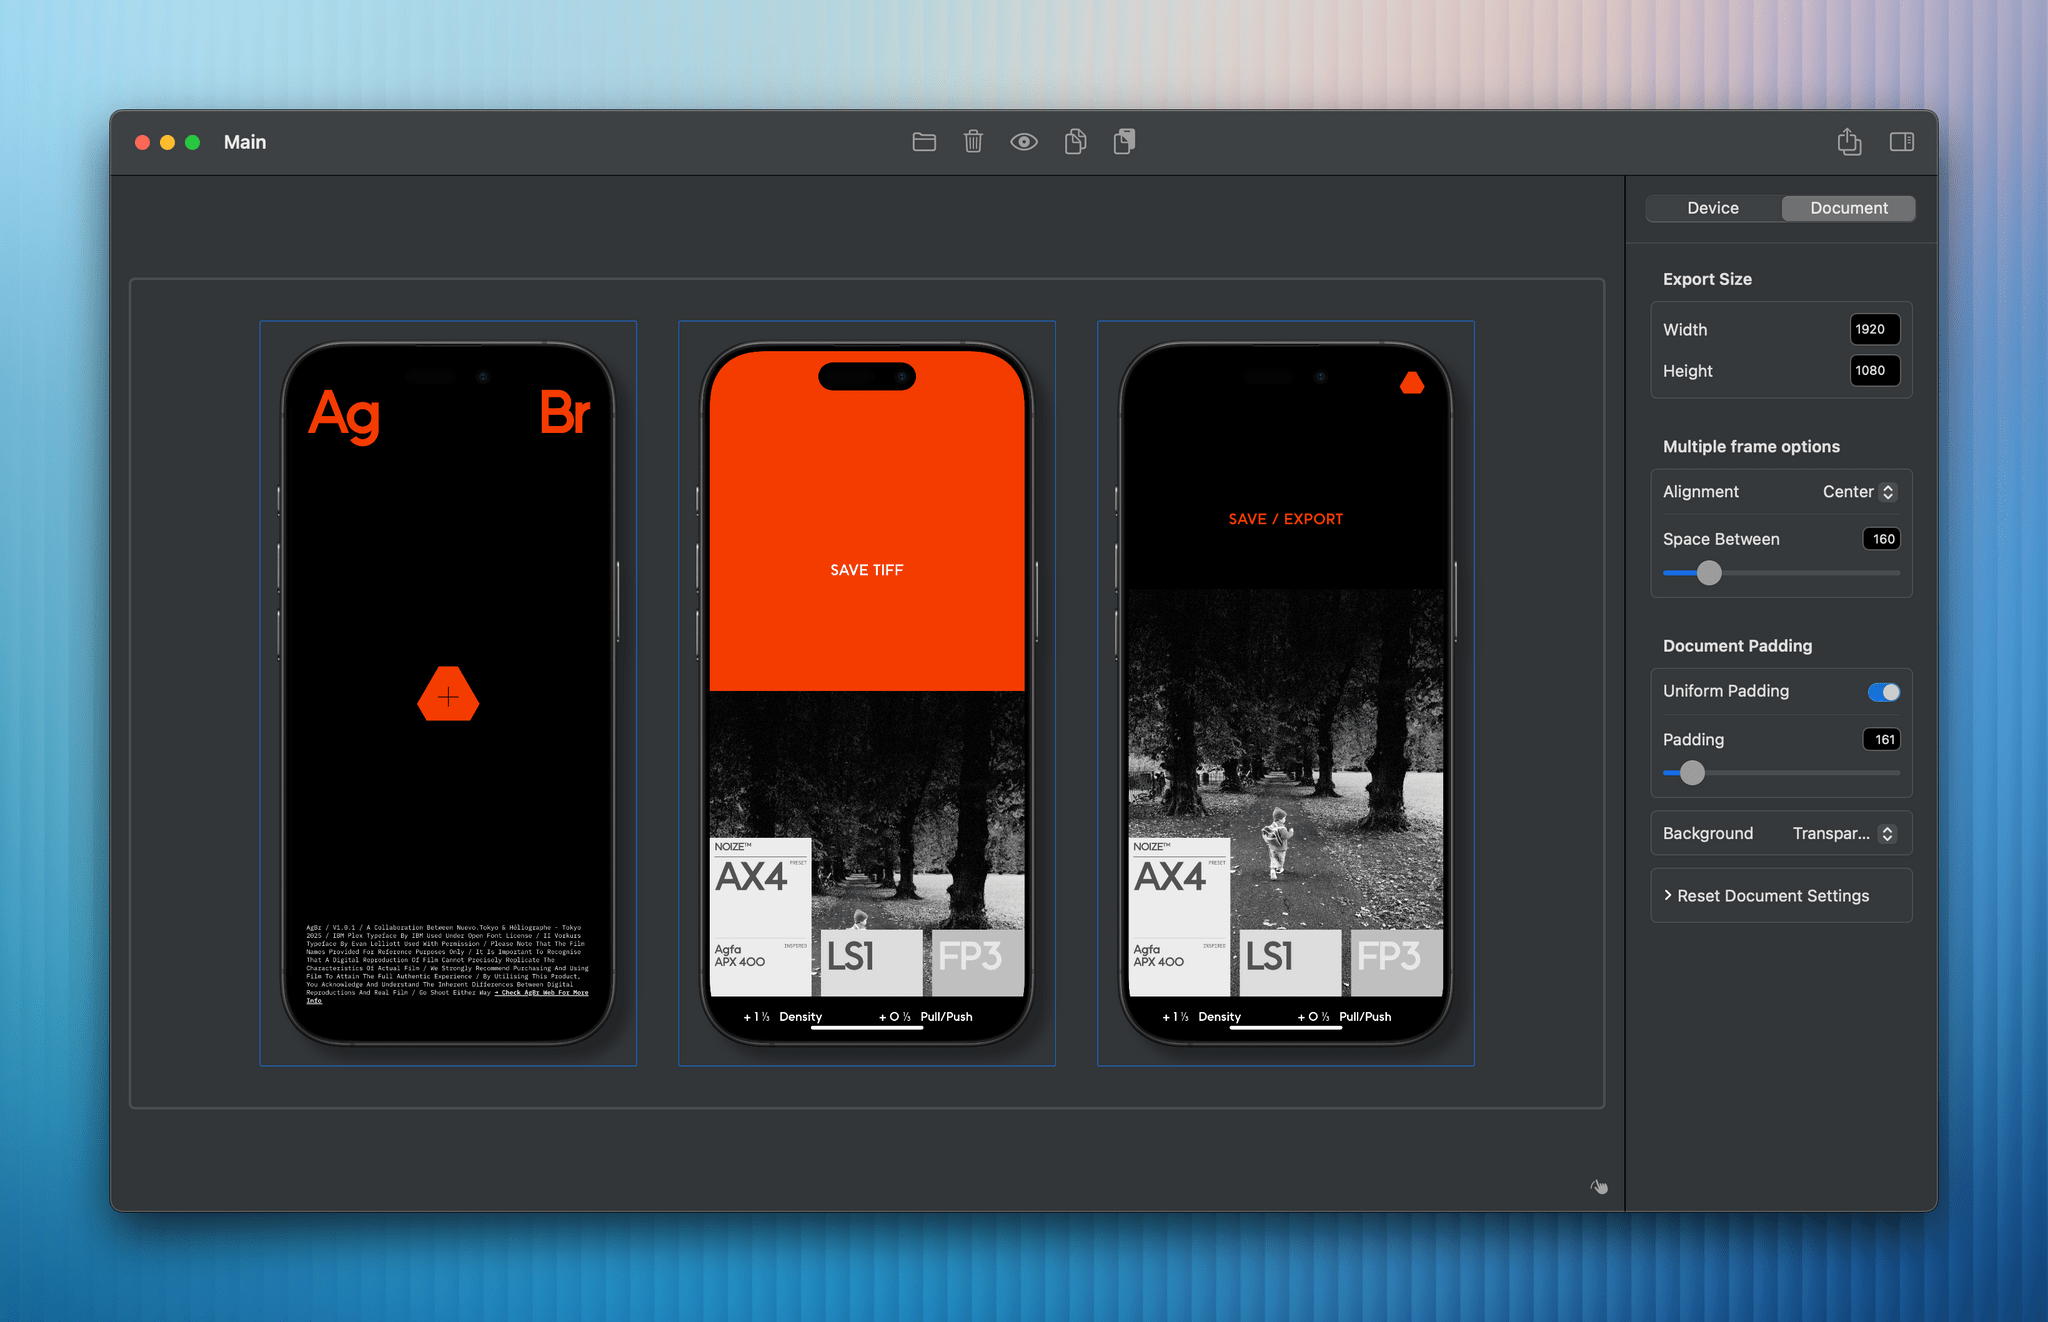
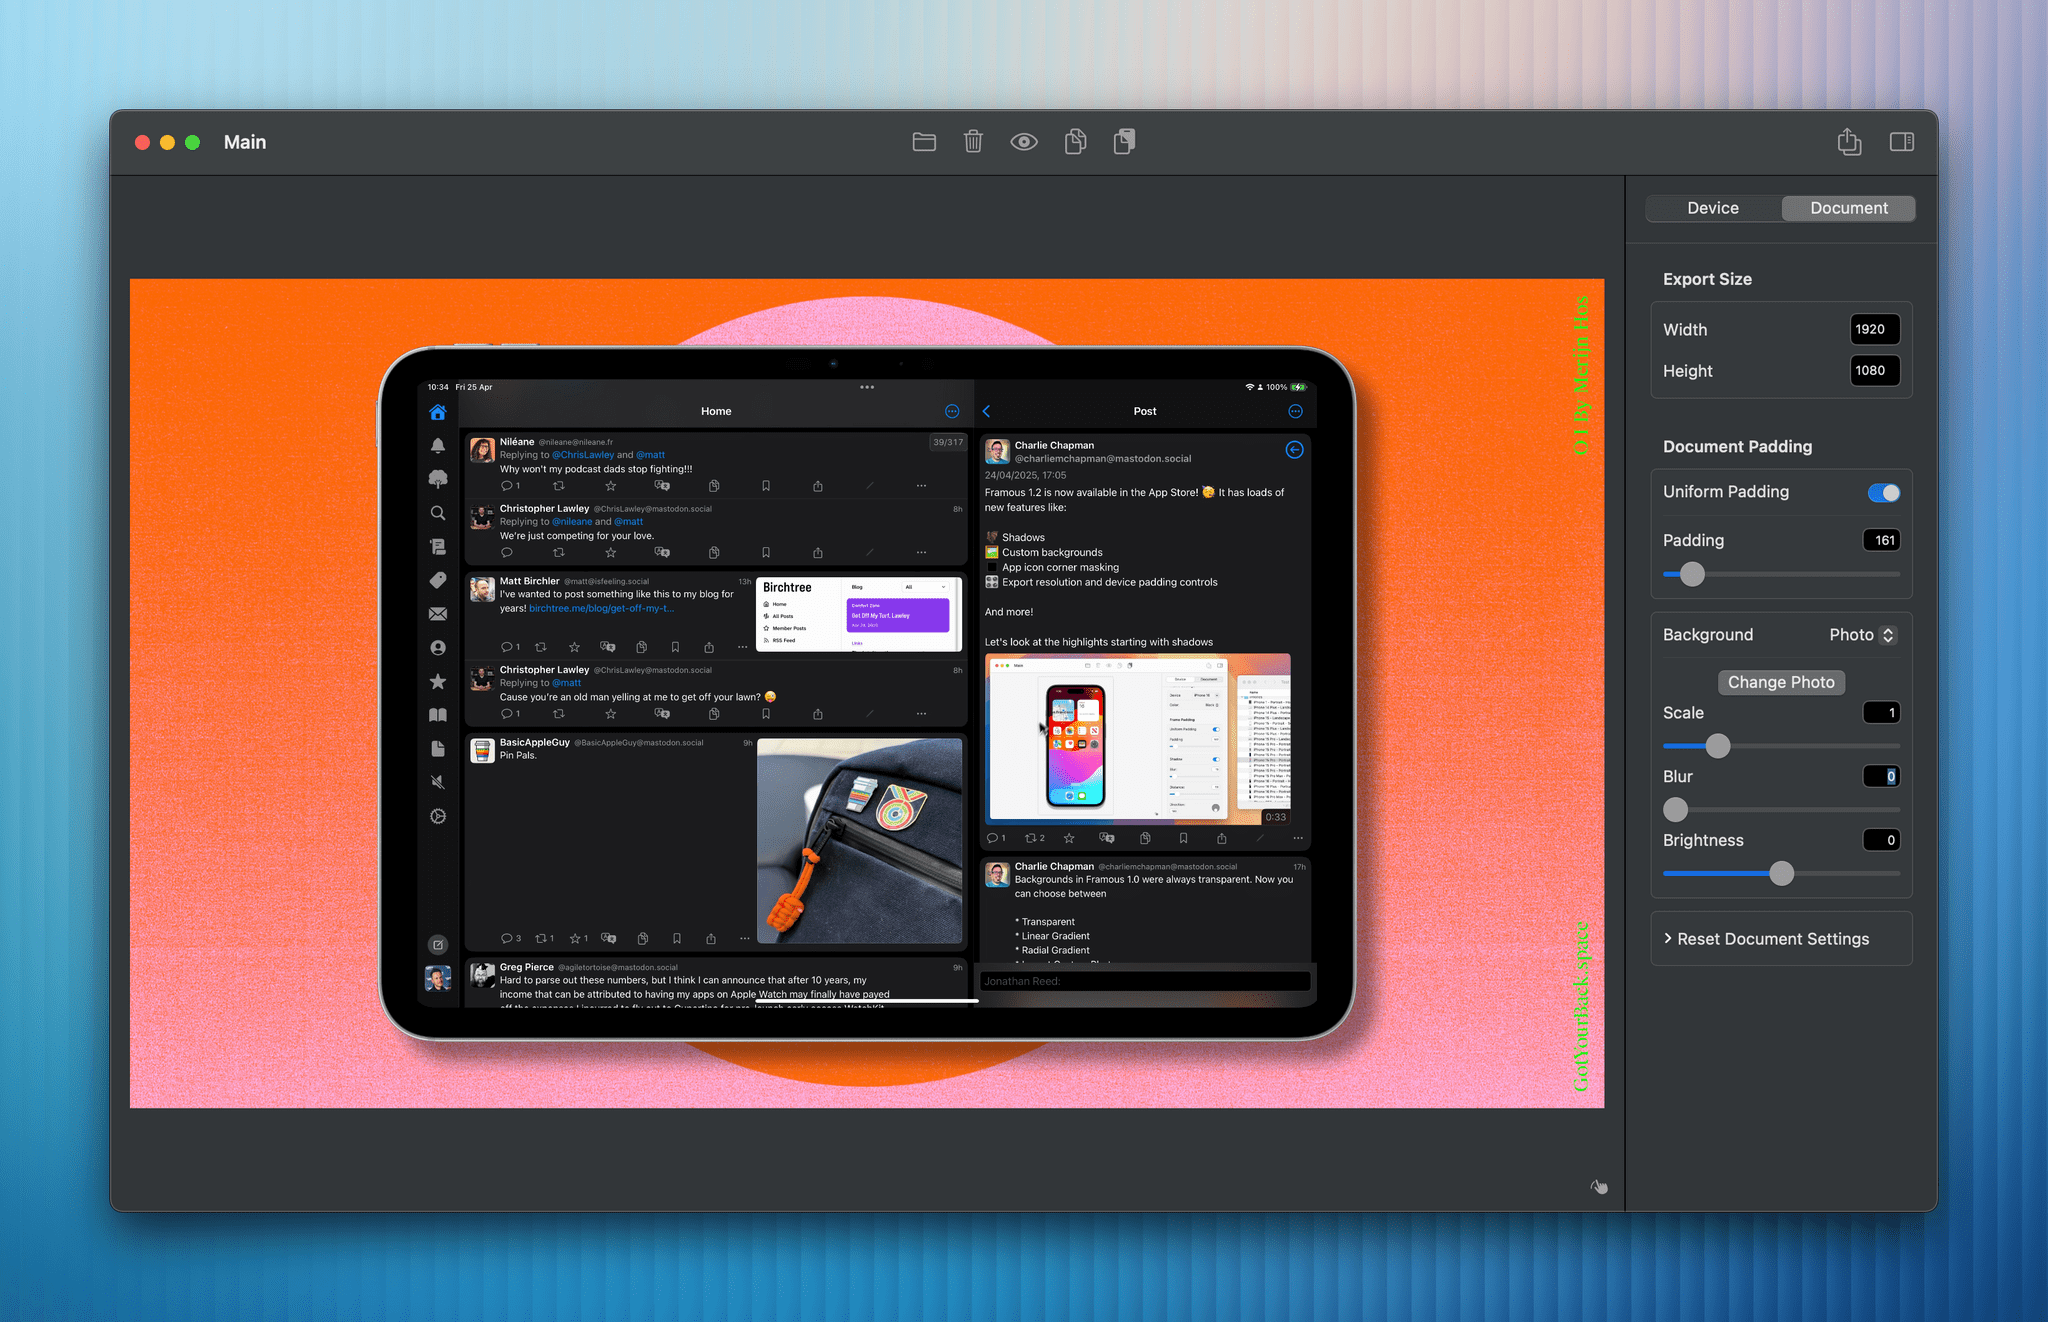
First up in the Document tab is another new setting, and probably one of the best additions in this update: Export Size. By default, the width and height are set to ‘Auto’, so the document output is determined by the previously mentioned ‘Whole Frame’ resolution plus any padding you have added. For many people’s use cases, this will result in documents that are far too large. (Multiple iPhone screenshots in a row can quickly add up.) Specifying the exact export size is an invaluable control. Personally, I like to create all the images that appear in my MacStories writing at 1920×1080px. Now, I can specify that document size precisely, and once I’ve exported my image, I can drop it directly into my articles – no cropping or resizing needed.
Setting your export size also allows you to go back and re-space your devices to look just right on the canvas. You can even specify the measurement for only one axis, and the canvas will automatically adjust depending on how many devices you’ve added. For example, you could set the height to 1080px, and as you add more and more devices to the image, it will grow wider while maintaining that constant height. If you get the devices in the wrong order, one of the app’s killer features is the ability to drag screenshots left and right to change their sequence.
Next in the Document tab is Alignment. If you’re framing several devices of the same kind, the alignment is irrelevant. However, if you have various devices of different sizes together, you can align them to the top, center, or bottom of the canvas, which is very useful. You can also align them right or left, but to be perfectly honest, I’m not sure what that does. As it is, the setting is a very welcome one.
The ‘Space Between’ and ‘Document Padding’ settings are next. The former controls the horizontal spacing between each device quickly and uniformly, while the latter controls the space around the edge of all the devices as a group. At first, I was confused about how this was different from the device padding setting, but I now understand the difference between the two. Nevertheless, with all of these settings in the app, I wonder whether some small explanatory text or tooltips would be a smart addition to help onboard new users.
Last up in the Document tab is a significant addition: backgrounds. Rather than simply allowing users to drop in a background image or select a color, Charlie has gone to town on this part of the layout process, and it’s all the better for it. You can select from a variety of options for your background: Transparent, Solid Color, Gradient, Photo, or Screenshot. Those first two are pretty self-explanatory, so let’s start with how you add a gradient.
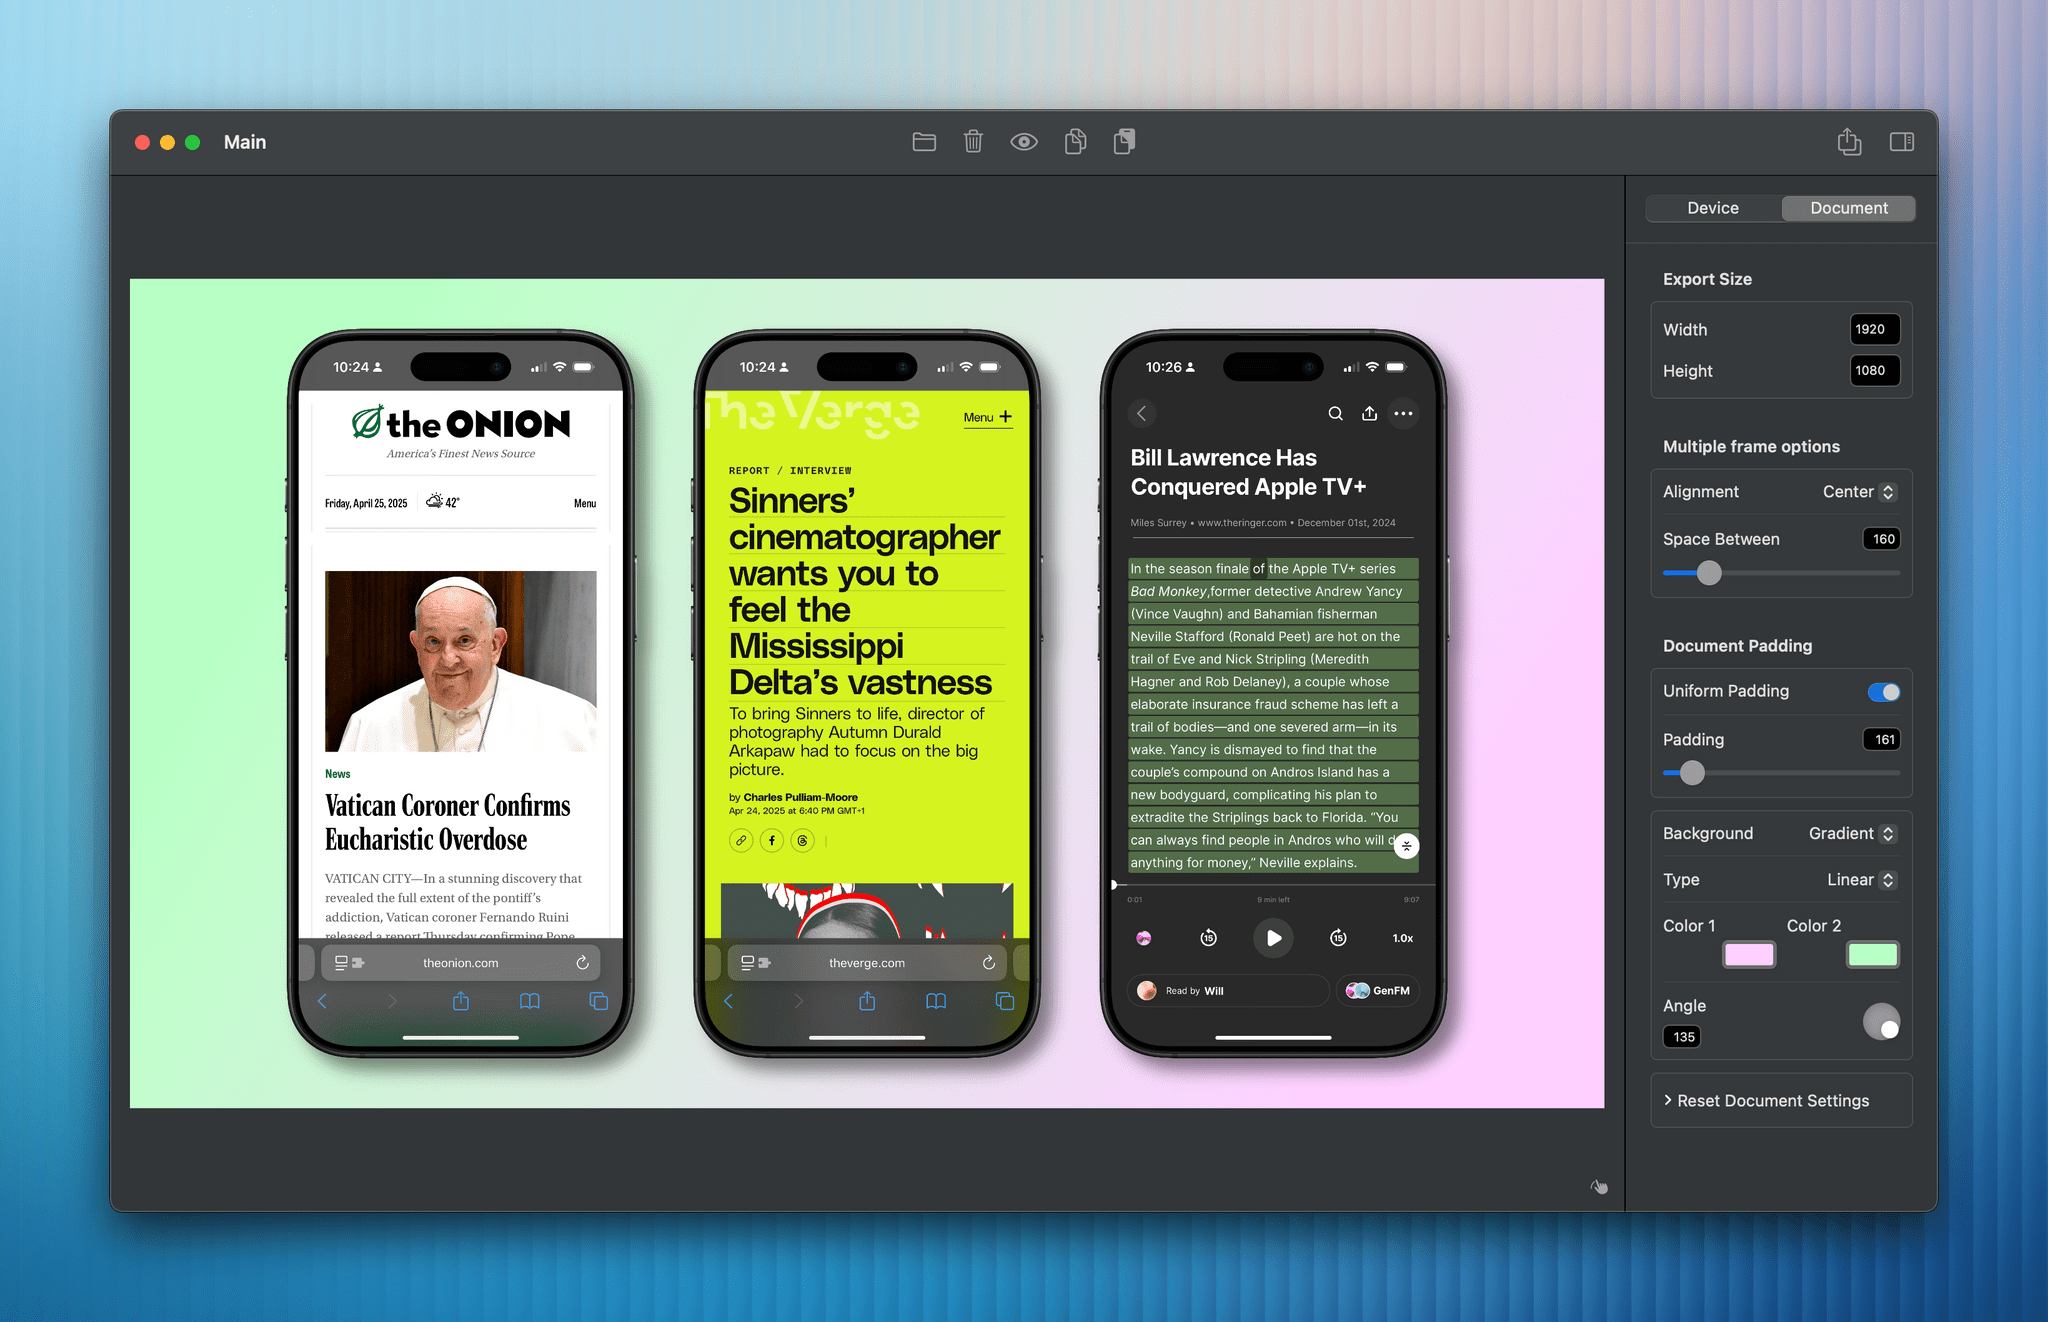
When using a gradient, you can choose the start and end point colors using the native color picker, as well as whether you’d like a linear or radial gradient. If you choose a linear gradient, you can change the angle; for a radial gradient, you can specify its start and end points, aligned from the center. It’s a solid start, but I would like to have the ability to add more color points to a gradient and an option to generate random, compatible color pairings.
Adding a photo background is simple, but the customization options once you’ve done so are excellent. You can scale the photo within your canvas, cropping out the edges as it grows larger. You can also blur the background and adjust its brightness. These options are great for adding any image you like while pulling it back a bit so that it doesn’t clash with your framed screenshots.
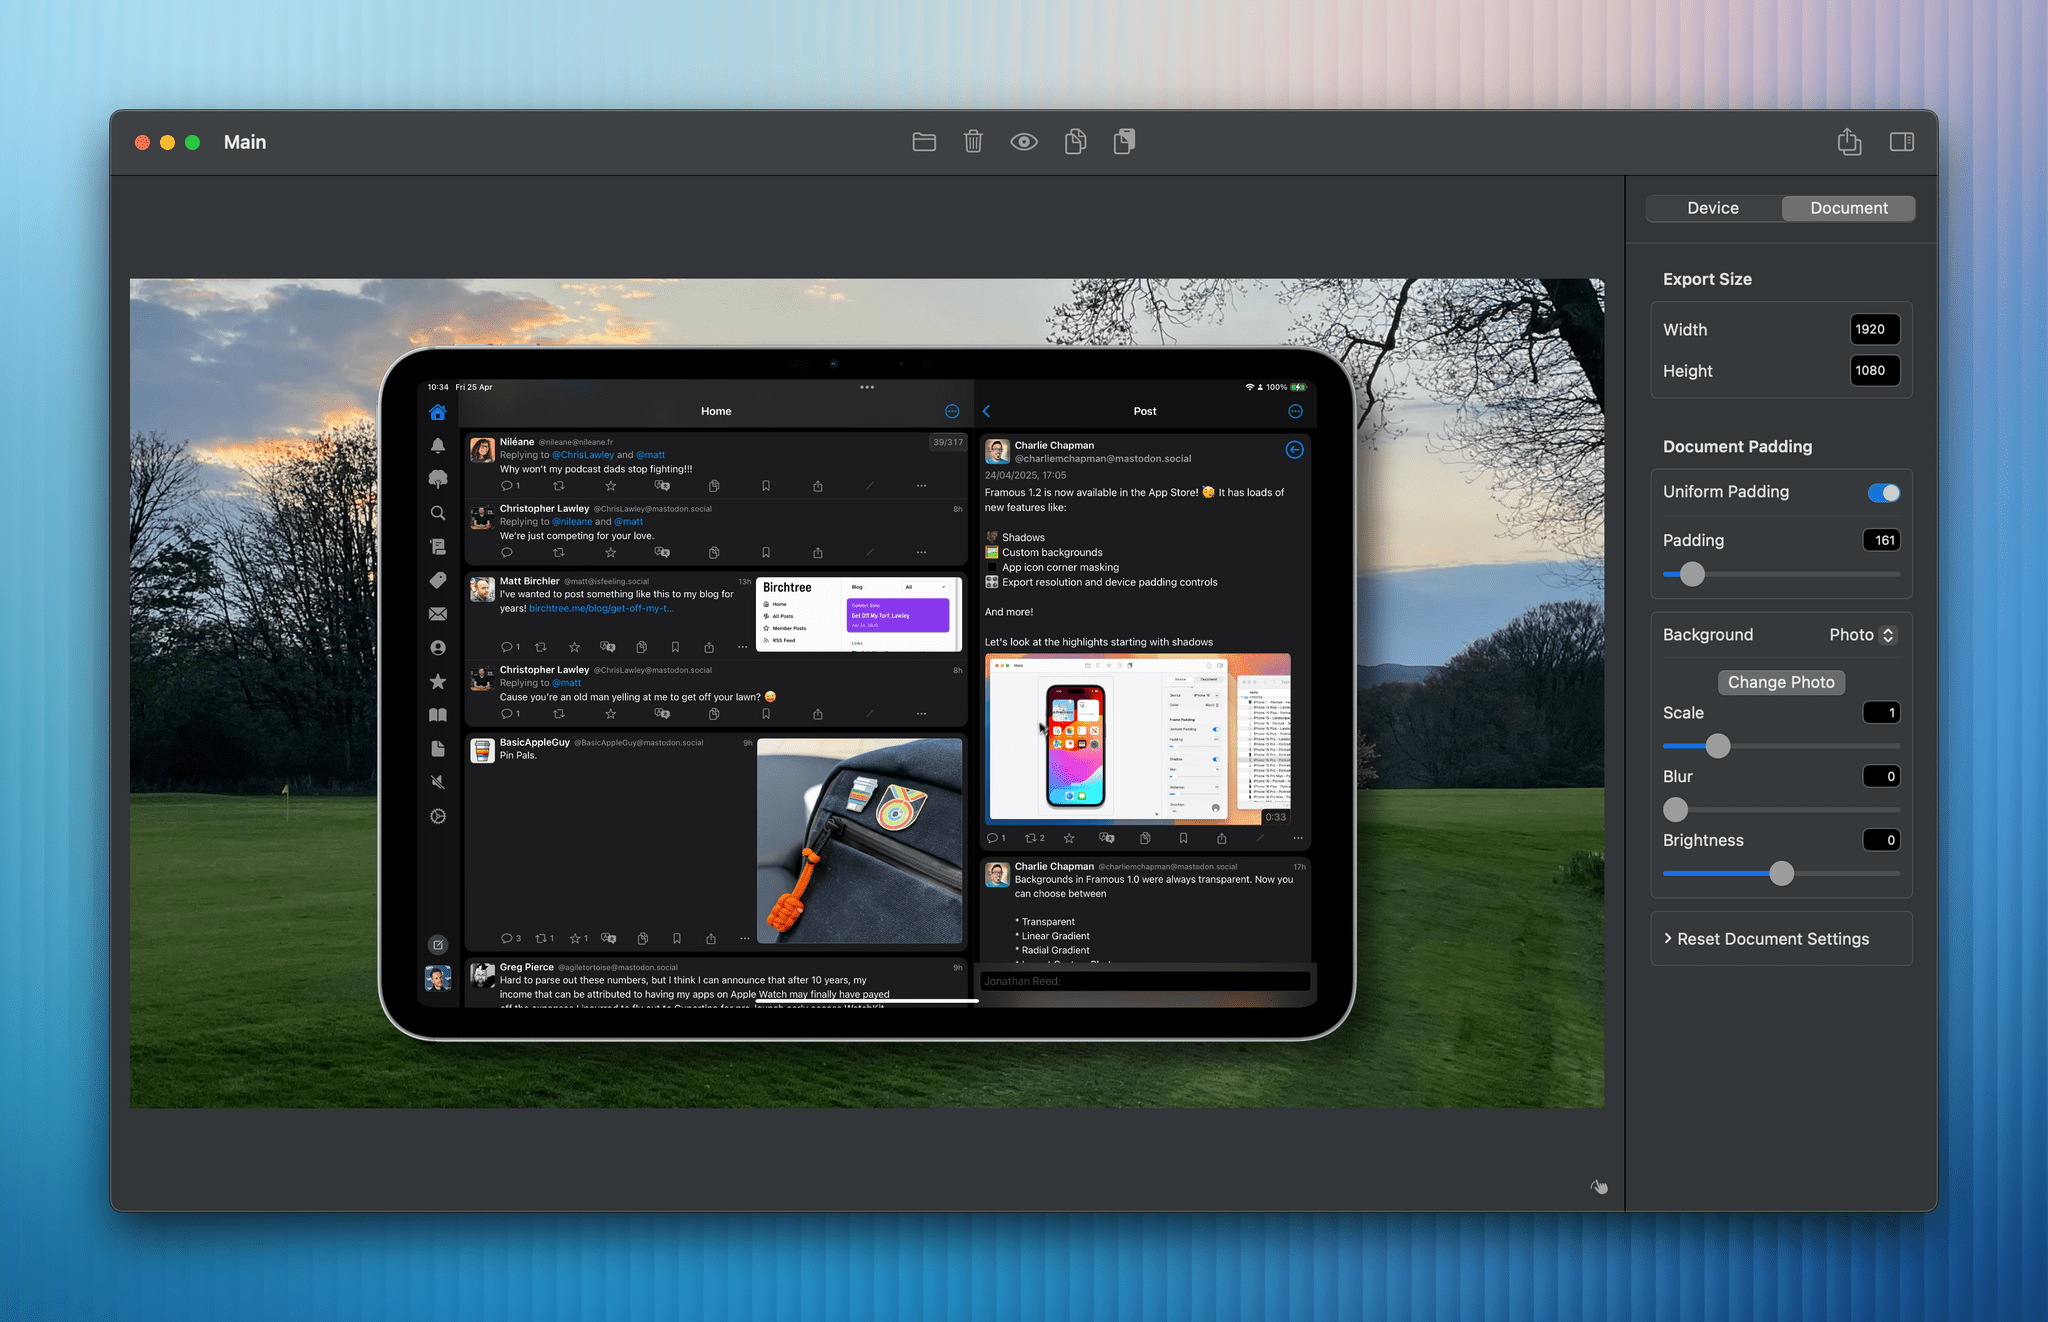

Finally, you can choose ‘Screenshot’ to use the left-most screenshot (without its device frame) as the background. I can imagine this setting being used extensively for blogs. As with adding a photo, you can scale the screenshot, blur it, and adjust its brightness.
These background settings are very flexible, and along with the new Export Size setting, they allow you to create really nice images containing framed screenshots, rather than a simple group of devices on their own.
Extra Touches
There are a couple more new features I want to touch on in this sizeable release. The first is the ability to paste an image into Framous instead of adding one via the file picker or drag and drop. I’ve been using this option in conjunction with Universal Clipboard: I take a screenshot on my iPhone, select ‘Copy and Delete’, switch to my Mac, and paste the screenshot directly into Framous. This removes a lot of friction. You can also do the reverse and copy the final image directly out of Framous without saving a file.
The second extra feature I want to point out is the addition of rounded corners to the ‘No Frame’ setting. In version 1.0, Framous would let you combine screenshots without adding the device frames. Now, having the ability to add rounded corners opens up additional design possibilities for people who want to capture nice screenshots without including the frames.
Framous can be used to create a lineup of several app icons on a background, too, and the app is optimized for this use case. If it detects a square image, Framous will automatically add the custom corners Apple app icons are so famous for. Above, you can see a sample Charlie created using the alternate app icons for his Dark Noise app, and I can easily see many other developers doing the same. It’s another example of how powerful Framous is despite its ease of use, and I wish I’d had it when I did my app icon roundup.
This is undeniably a chunky release, but there are still some capabilities I’d like to see added to Framous. I mentioned before my desire for the app to better explain some of its settings. I’d also like the ability to create templates for layouts so I can quickly apply the settings I want, add screenshots, and export the image. Additionally, it would be helpful if Framous would save your settings when you close and reopen the app. These features would allow users to apply consistent design guidelines across many images, and it would save a lot of time.
Framous is a Mac-only app, and there have been occasions when I’ve wanted to create these kinds of mockups with only my iPhone in hand. To fill in this gap, I built a shortcut to create some of the images for my regular column in MacStories Weekly. This workflow uses Federico’s Apple Frames API and includes adding custom shadows I have made myself. I’ll be sharing more about it with Club MacStories members in this week’s edition of the newsletter.
To sum up Framous 1.2, this update turned the app into an invaluable utility for my screenshot framing needs. I really care about how my screenshots look. I previously used Photoshop to achieve the desired result, but it took a lot of time. Framous takes all the hard work off my hands and allows me to quickly create custom screenshot lineups that I can craft exactly the way I want. For several weeks now, this has been my main solution for building these types of images. I don’t foresee that changing any time soon.
Framous is available on the Mac App Store and is free to use with generic frames. To unlock device-specific frames up to Apple’s 2025 products – including iPhones, iPads, Apple Watches, and Macs – you can purchase a one-time $19.99 upgrade or subscribe to Framous Pro for $9.99/year.