iPhone photography has come a long way in the past 13 years. The original iPhone had a 2 MP camera that produced images that were 1600 x 1200 pixels. Today, the wide-angle camera on an iPhone 12 Pro has a 12 MP camera that can take shots that are 4032 x 3024 pixels.
Hardware advancements have played a big role in iPhone photography, but so has software. The size of an iPhone and physics limit hardware advances, resulting in diminishing returns year-over-year. Consequently, Apple and other mobile phone makers have turned to computational photography to bring the power of modern SoCs to bear, improving the quality of images produced by iPhones with software.
Computational photography has advanced rapidly, pushed forward by the increasingly powerful chips that power our iPhones. Every time you take a photo with your iPhone, it’s actually taking several, stitching them together, using AI to compute adjustments to make the image look better, and presenting you with a final product. The process feels instantaneous, but it’s the result of many steps that begin even before you press the shutter button.
However, the simplicity and efficiency of computational photography come with a tradeoff. That pipeline from the point you press the Camera app’s shutter button until you see the image you took involves a long series of steps. In turn, each of those steps involves a series of judgment calls and the application of someone else’s taste about how the photo should look.
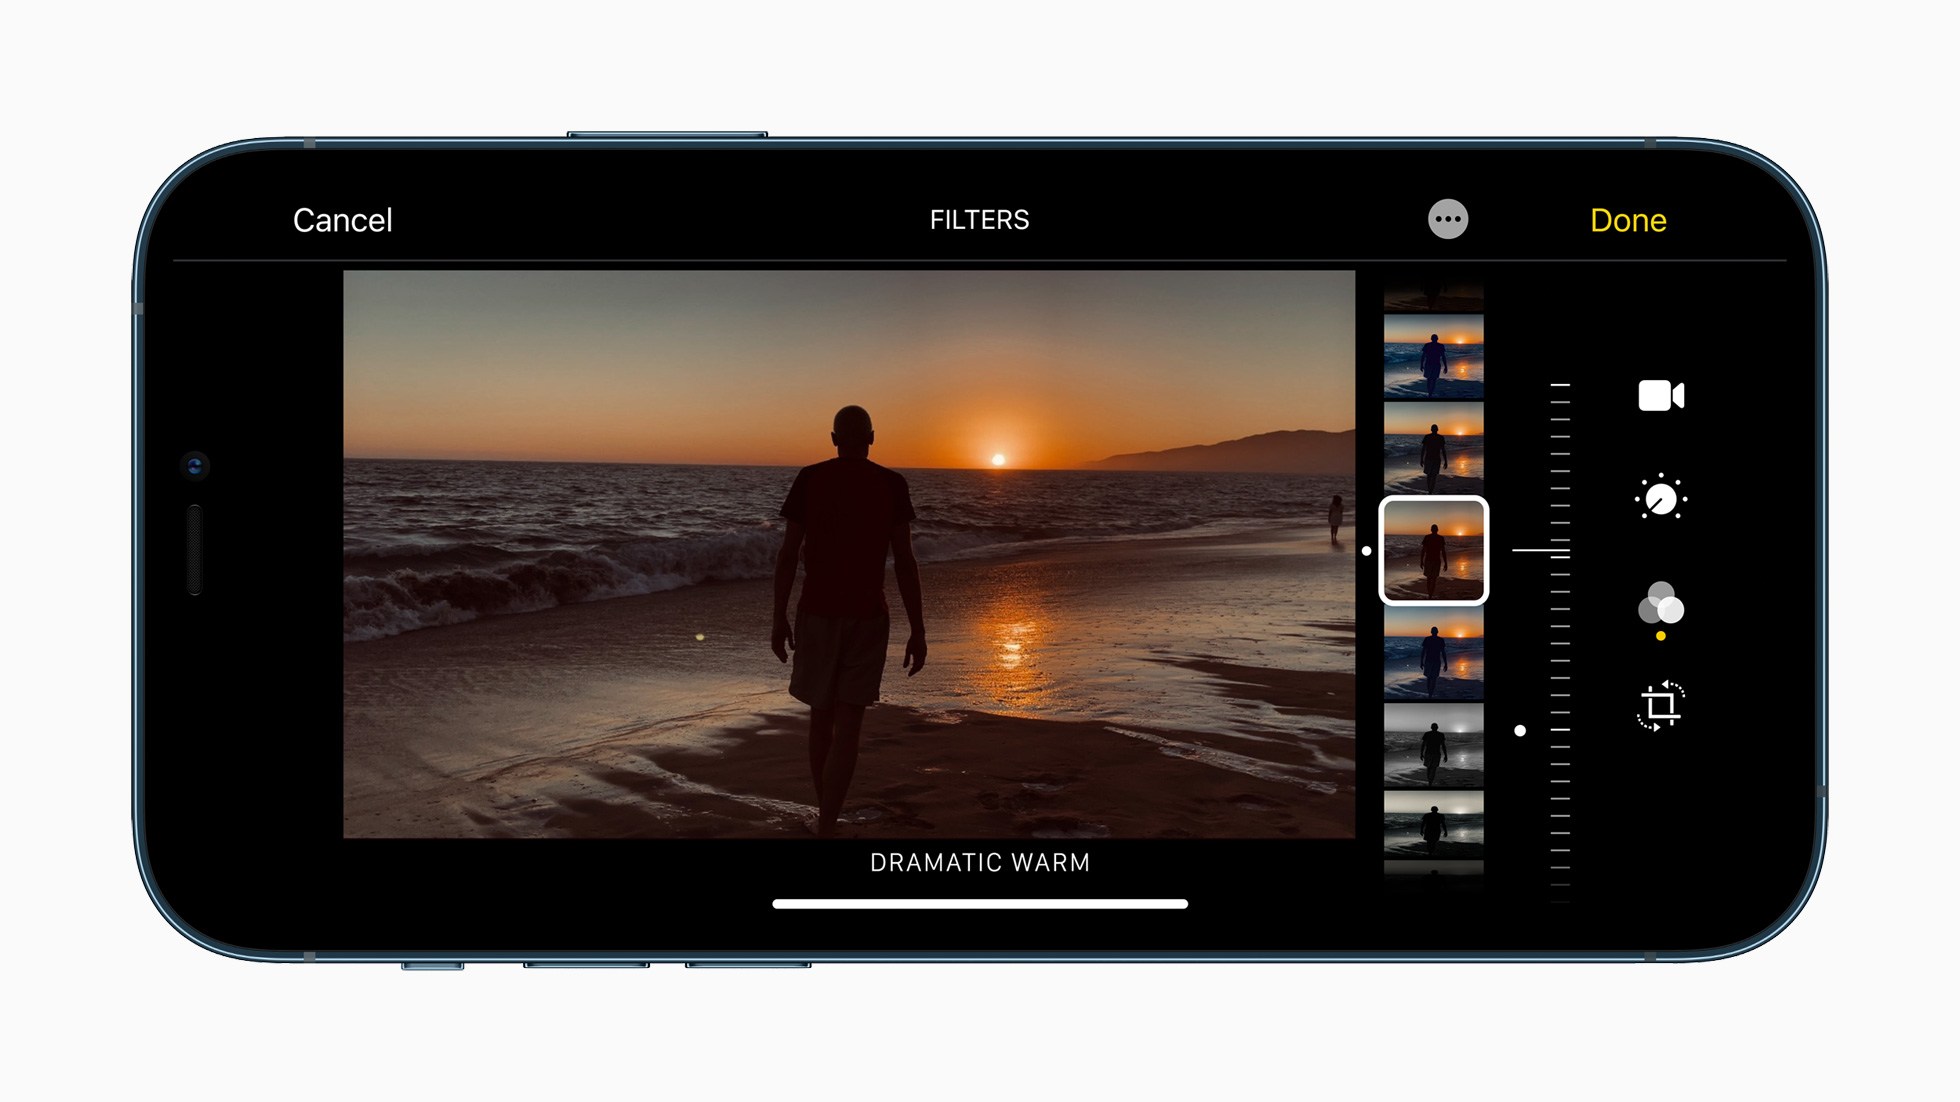
Apple has made great strides in computational photography in recent years, but it also means someone else’s taste is being applied to your images. Source: Apple.
In many circumstances, the editorial choices made by the Camera app result in great photos, but not always, and the trouble is, your ability to tweak the images you take in compressed file formats is limited. A more flexible alternative is to shoot in a RAW file format that preserves more data, allowing for a greater range in editing options, but often, the friction of editing RAW images isn’t worth it. The Camera app is good enough most of the time, so we tolerate the shots that don’t look great.
However, what if you could have the best of both worlds? What if you could capture a lightweight, automatically-adjusted photo and an editing-friendly RAW image at the same time, allowing you to pick the right one for each image you take? If you like the JPEG or HEIC image produced by Apple’s computational photography workflow, you could keep it, but you could always fall back to the RAW version if you want more editing latitude. That way, you could rely on the editorial choices baked into iOS where you like the results but retain control for those times when you don’t like them.
That’s what Halide Mark II by Lux sets out to accomplish. Halide is a MacStories favorite that we’ve covered many times in the past, but Mark II is something special. The latest update is an ambitious reimagining of what was already a premier camera app, building on what came before but with a simpler and easier to learn UI. Halide Mark II puts more control than ever into the hands of photographers, while also making it easy to achieve beautiful results with minimal effort. Halide also seeks to educate through a combination of design and upcoming in-app photography lessons.
By and large, Halide succeeds. Photography is a notoriously jargon-heavy, complex area. It’s still possible to get bogged down, fretting over which settings are best in what circumstances. However, Halide provides the most effective bridge from point-and-shoot photography to something far more sophisticated than any camera app I’ve used. The result is a camera app that gives iPhone photographers control over the images they shoot in an app that’s a pleasure to use and encourages them to learn more and grow as a photographer.
Opening Halide Mark II for the first time, I immediately knew big changes had been made. However, at the same time, the app was familiar, which made getting started straightforward.
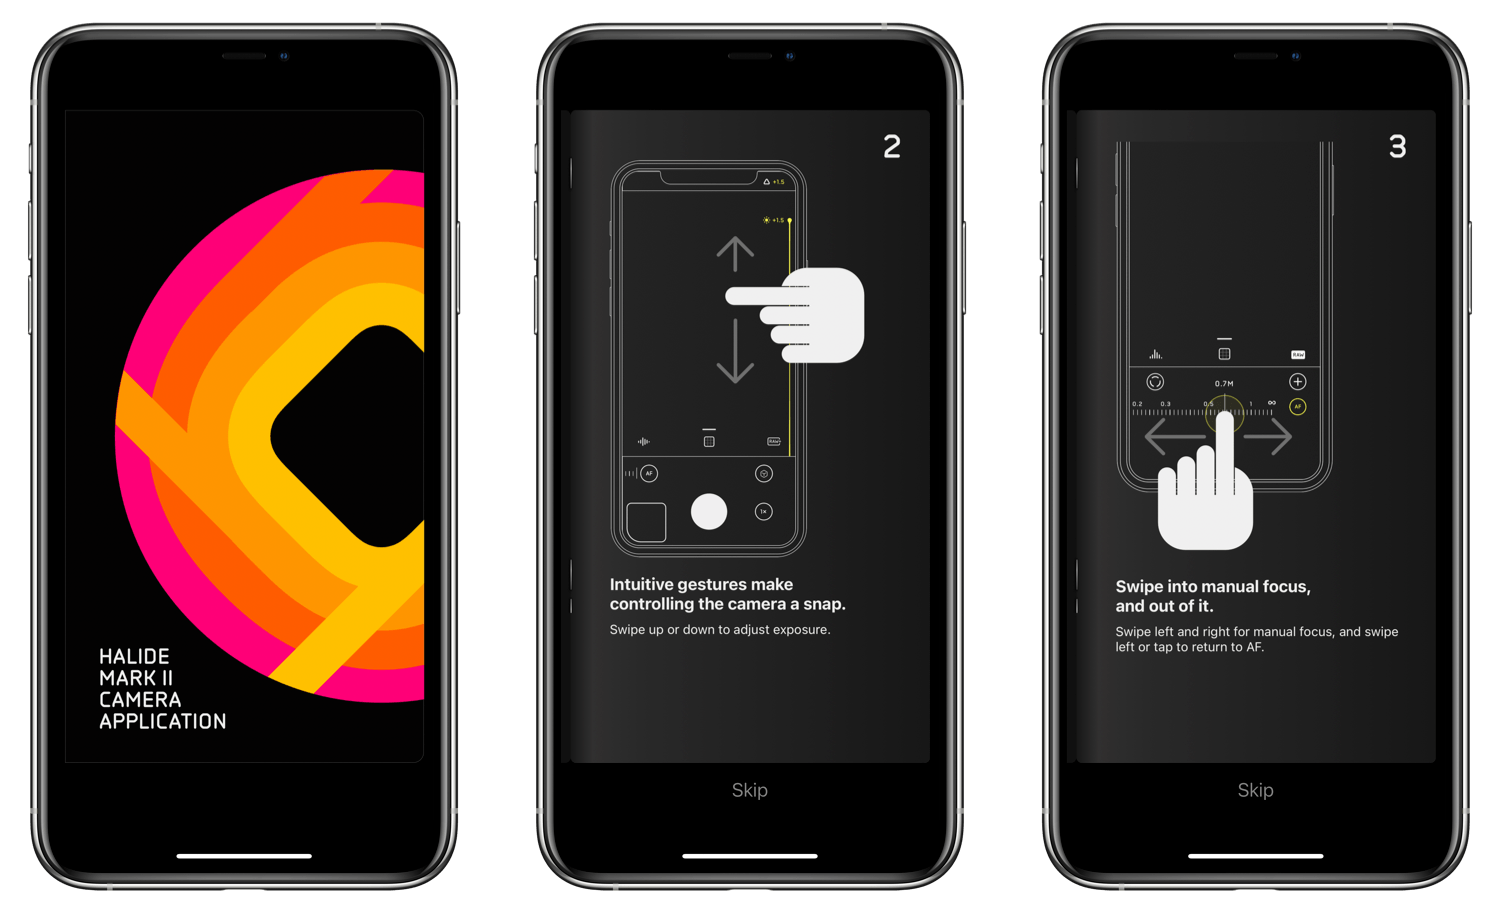
I’m not a huge fan of onboarding flows, but Halide’s is excellent and gets you up and running with the app quickly.
Halide’s design remains simple on first launch and includes a seven-step onboarding flow to familiarize you with the basics. The lion’s share of the onboarding covers the app’s gesture system, which is valuable because the UI contains so few obvious controls.
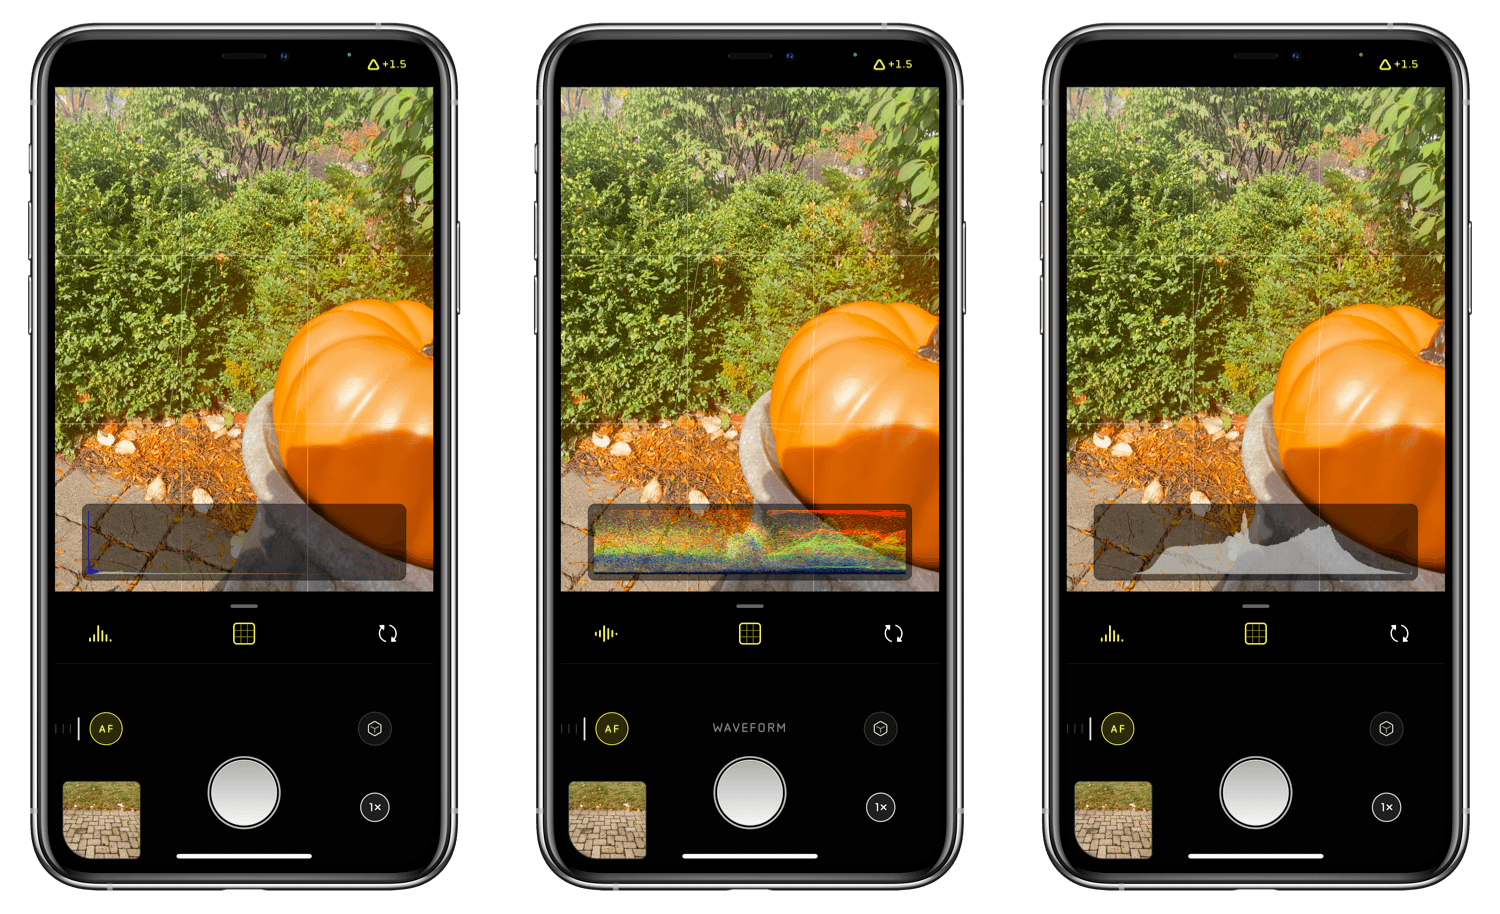
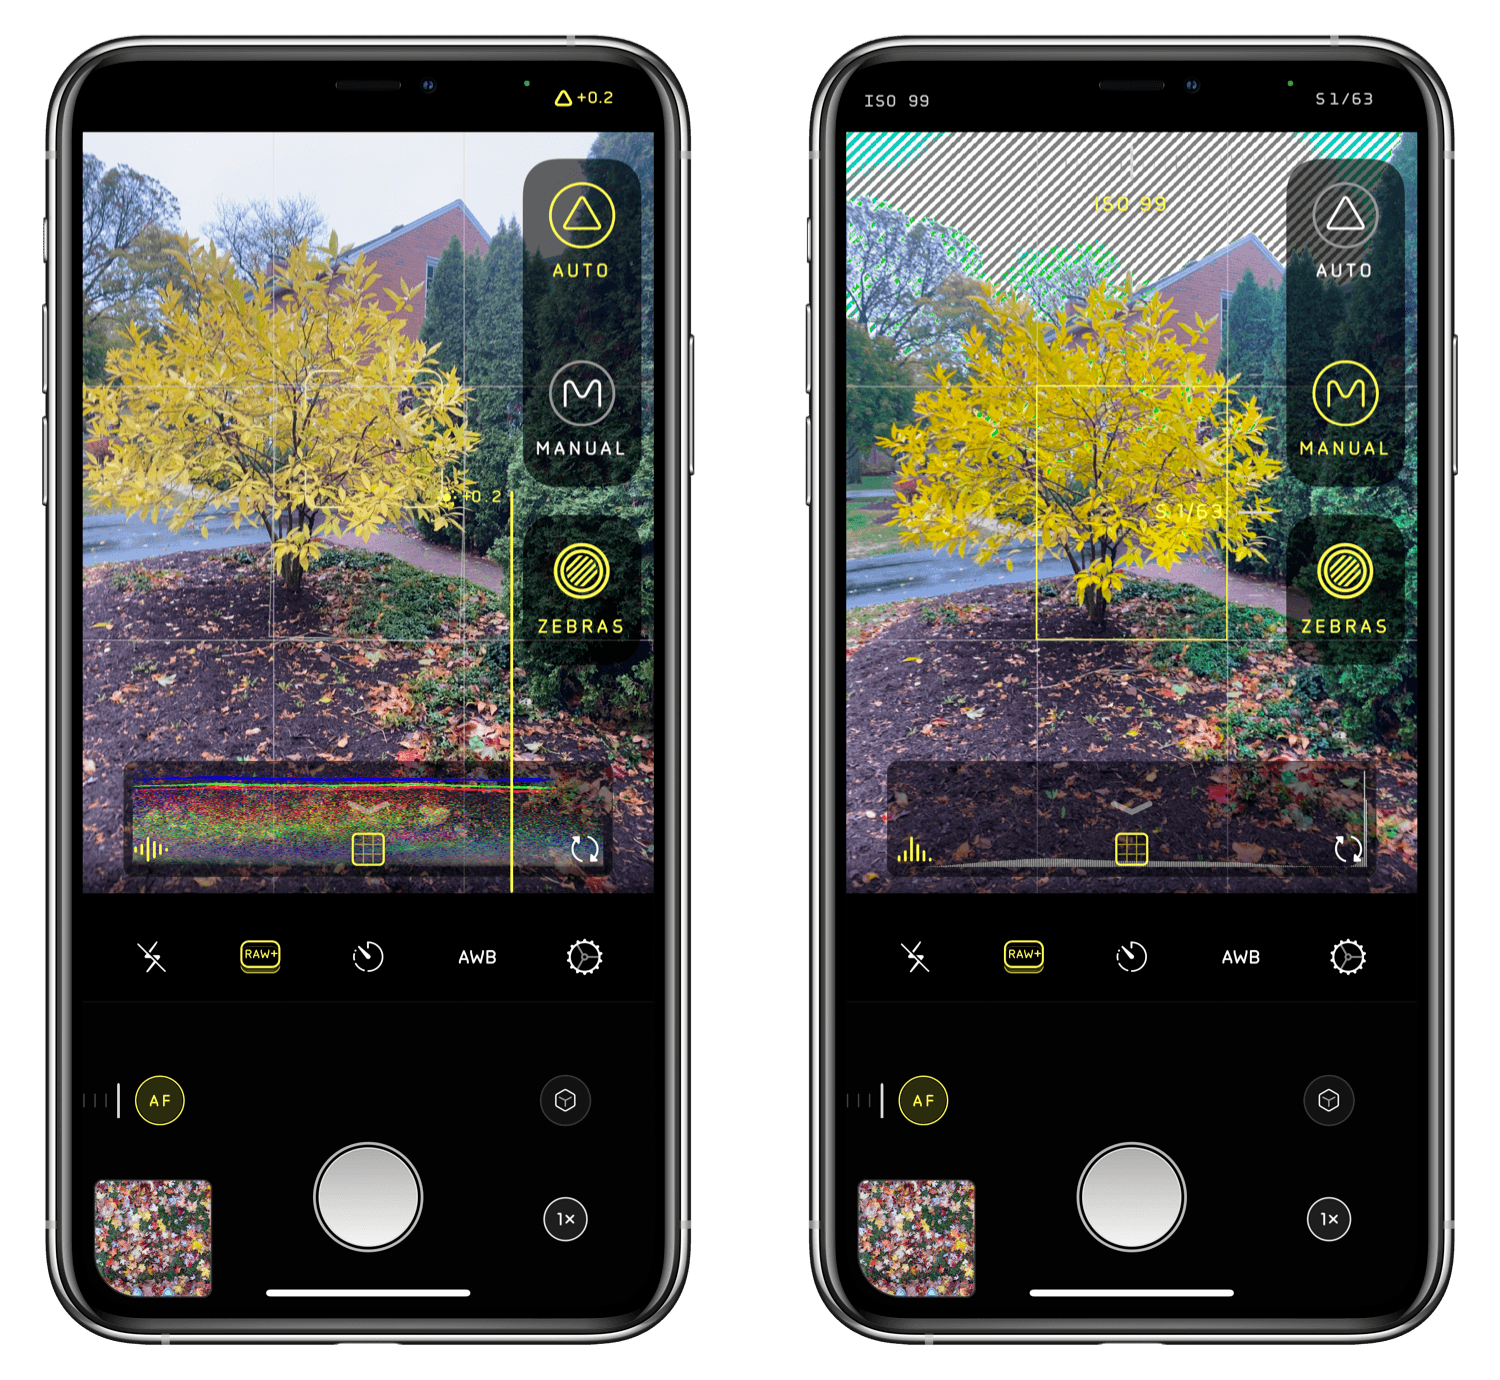
Halide Mark II can display histogram and waveform data next to the iPhone’s notch or at the bottom of the viewfinder.
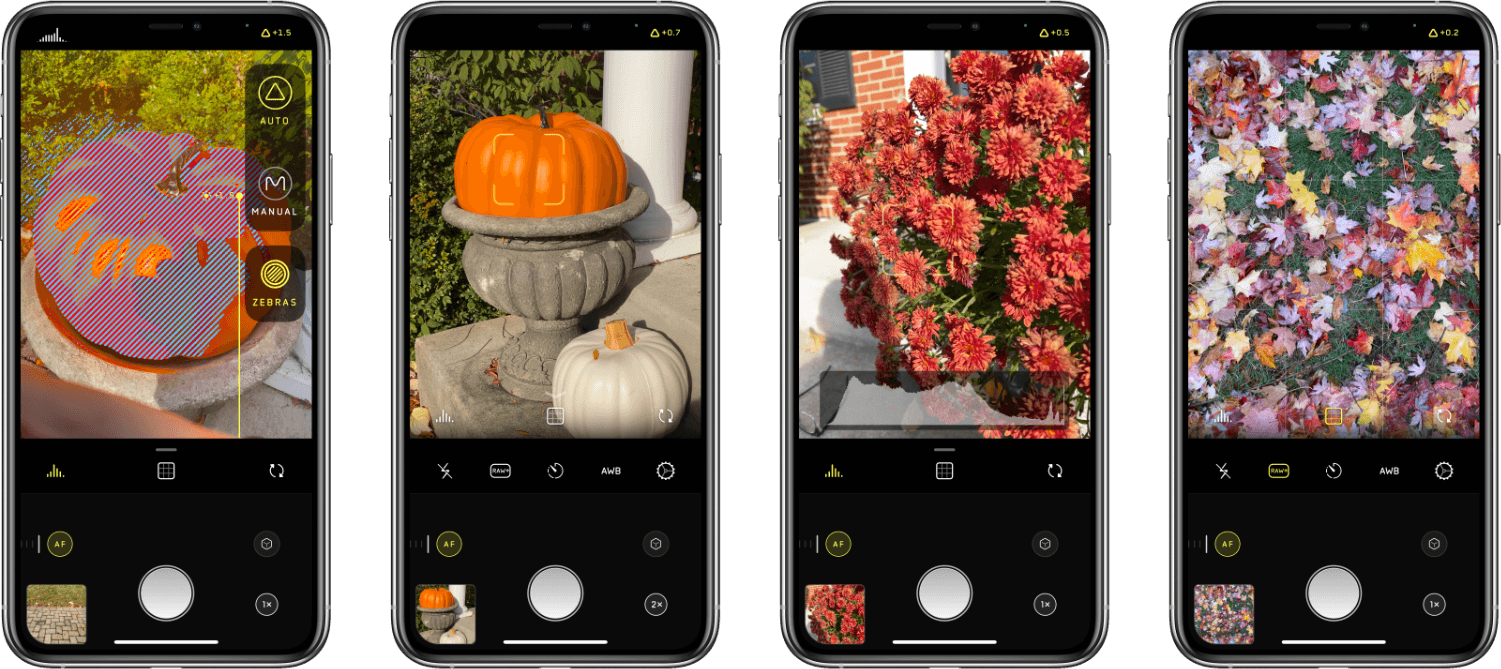
The main UI is dominated by the camera’s viewfinder. You can display a tiny histogram that reports luminance, color, or waveform data at the top of the screen to the left of the iPhone’s notch. Tapping on the histogram at the top of the screen cycles through each option, and tapping on the histogram button below the viewfinder cycles through three states: off, on in the left corner of the screen next to the notch, and on at the bottom of the viewfinder. To the right of the notch is an icon that indicates whether you are recording location metadata with the images you take and your current exposure setting. These visualizations are powered by what the Lux team calls XDR Analysis, a real-time 14-bit RAW data stream that you can read more about in the Halide announcement.
Swiping up and down in the viewfinder adjusts exposure, and swiping in from the right edge of your iPhone reveals buttons to switch between auto and manual modes as well as a button to turn zebra stripes on and off. In manual mode, you gain control over ISO settings and shutter speed, and in both modes, zebra stripes visualize whether your camera settings adjustments are causing you to clip aspects of an image.
Immediately beneath the viewfinder is the Quick Bar, which by default includes the histogram button that I already covered, a button for turning viewfinder grid guides on and off, which provide a satisfying bit of haptic feedback when the app detects your horizon line is level, and a button to switch between the rear and front-facing cameras.
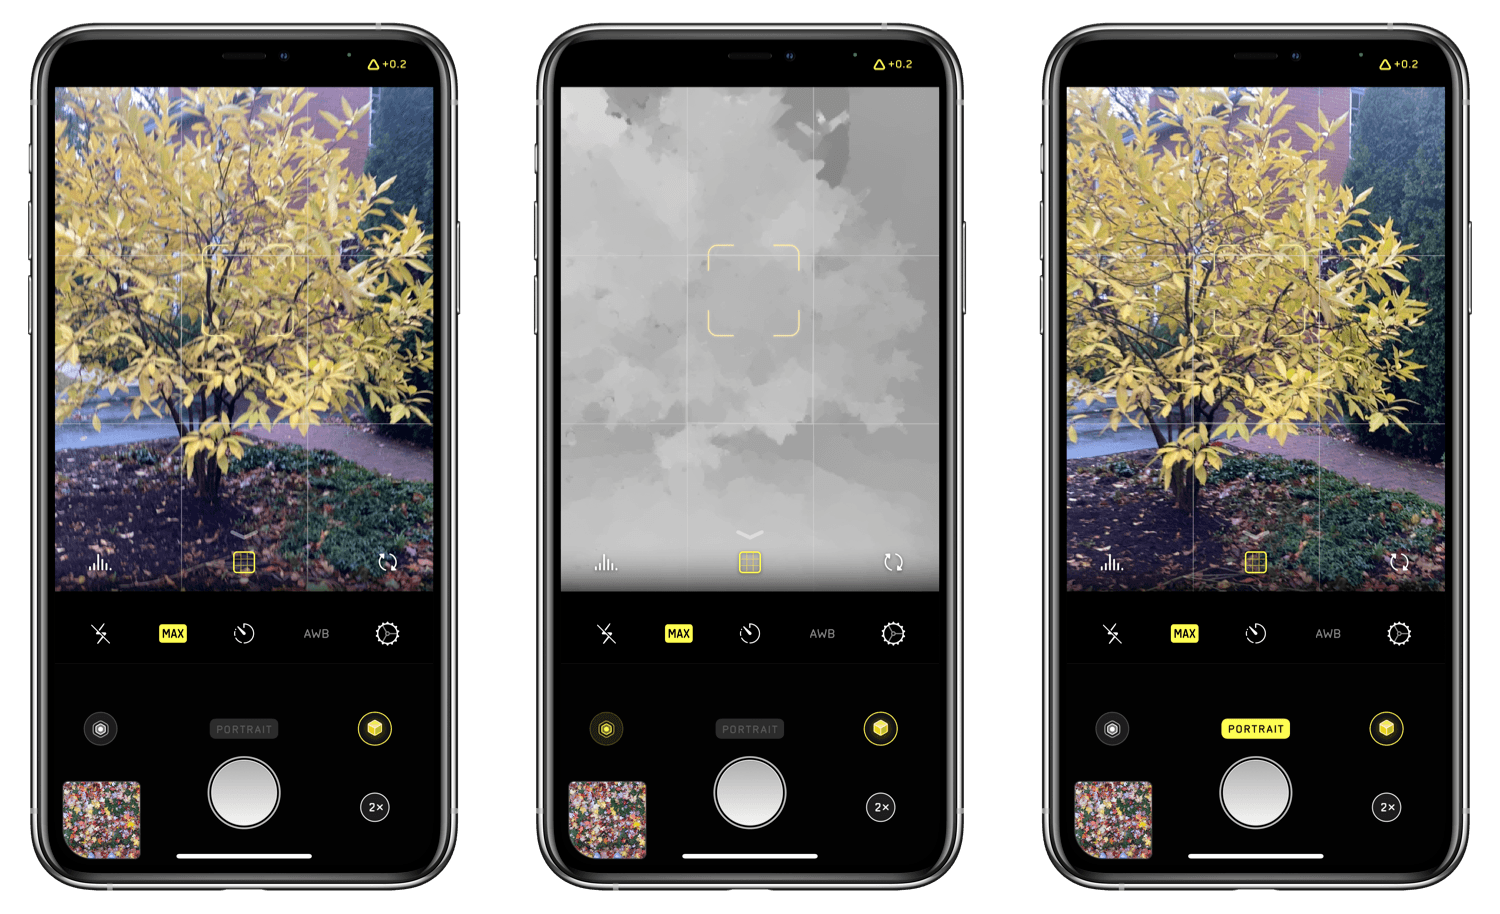
Swiping up on that toolbar reveals additional settings, including the flash, a toggle to turn RAW capture on and off, timer and white balance options, and the app’s settings. From Halide’s settings, you can swap these controls with the ones in the Quick Bar to create a personalized Quick Bar. The remaining controls in Halide’s main view are arrayed around the shutter button and include focus controls, a toggle to enter portrait mode, a button for switching among the wide, ultra-wide, and telephoto lenses, and a thumbnail of the last shot you took.
The default set of controls in Halide’s main UI strike an excellent balance. The tools people will want most often are easily accessible without getting in the way. Just as important, though, is that Halide Mark II’s UI is full of tiny affordances that make it a pleasure to use and easy to learn.
The app makes abundant use of haptic feedback to let you know when certain operations have been completed. There are also animations and other visual feedback that provide hints about what’s happening, such as the animation showing each shot you take landing in the thumbnail area at the bottom of the screen. Second-level controls are kept out of sight until summoned by interactions such as turning off auto-focus, which I appreciate too. However, my favorite touch is the readout above the shutter button that lets you know what the app’s buttons do. The messages only appear for a moment, but they’re unobtrusive nudges that help eliminate the intimidation factor of using such a feature-rich camera app.
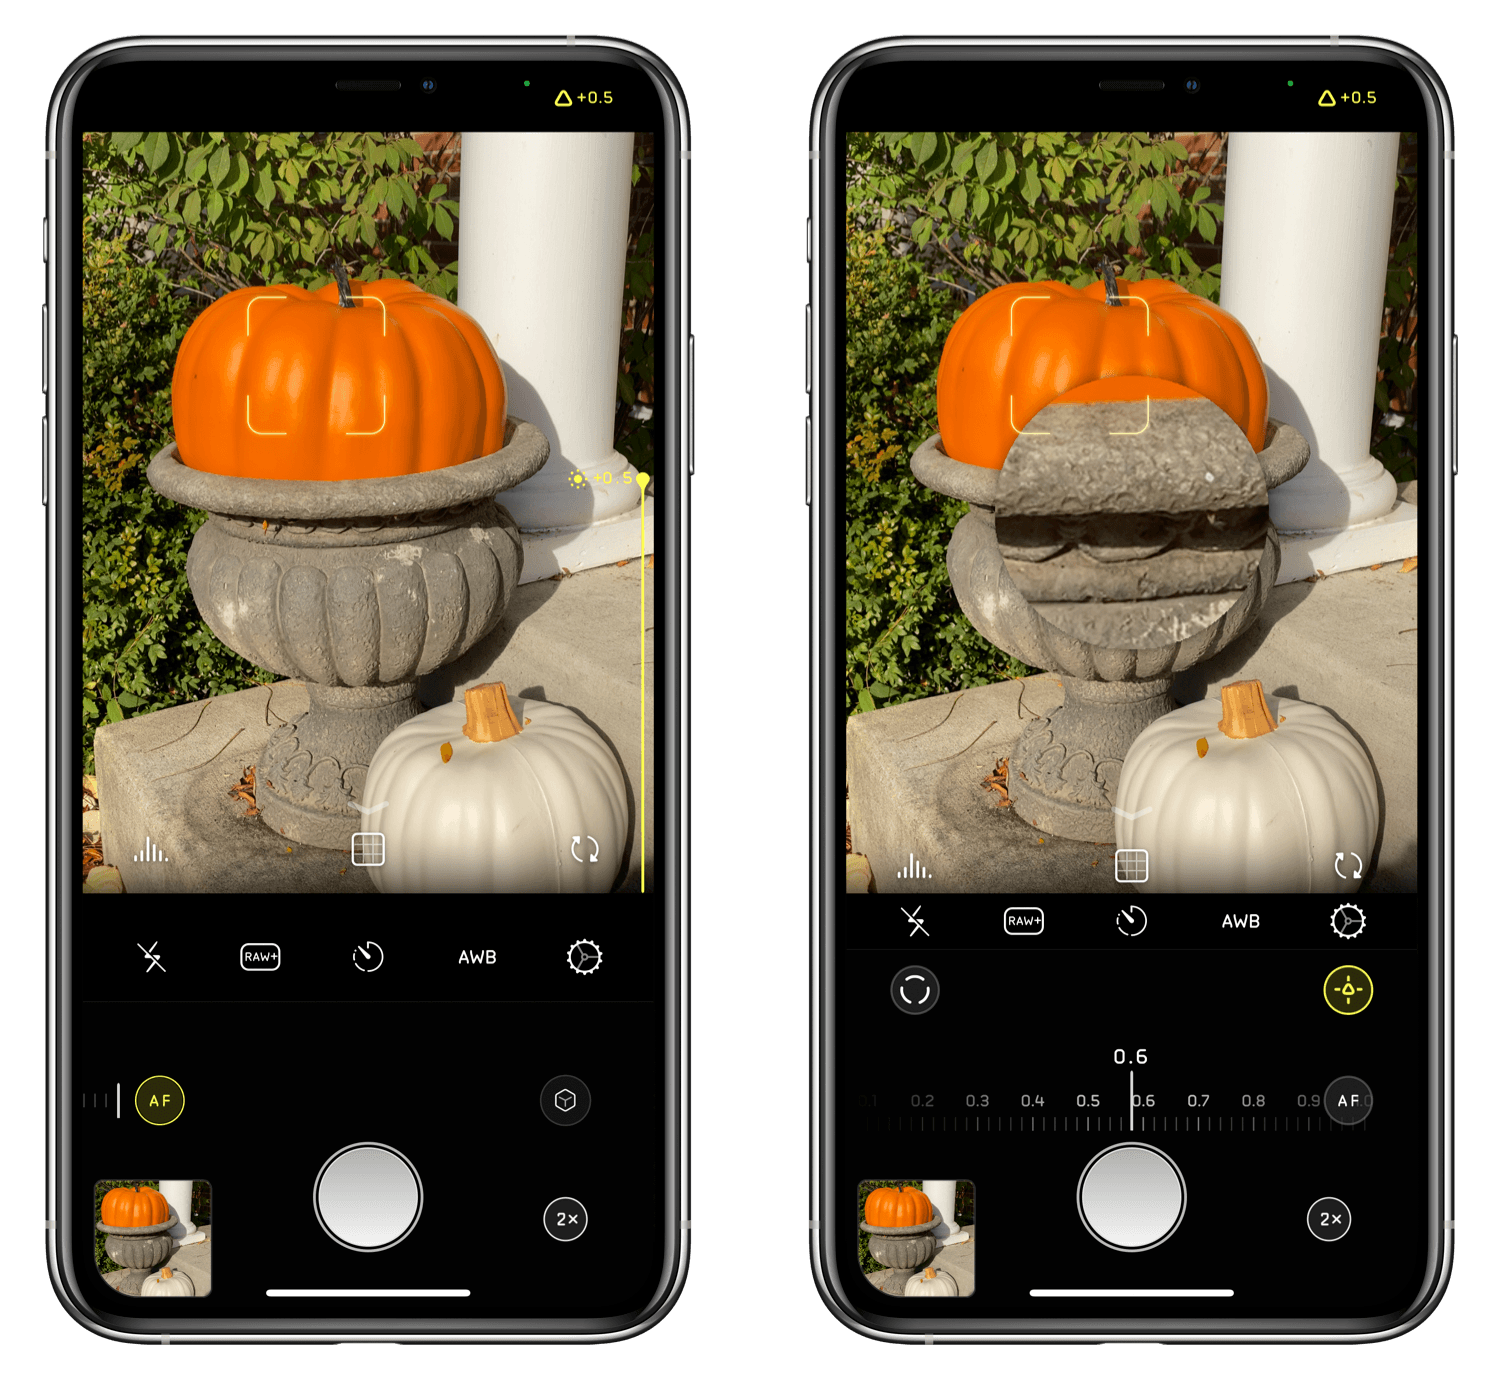
One of my favorite changes to Halide is its focus control. Auto-focus is on by default, but you can swipe right on the control to manually set focus. When you enter manual focus mode, a magnifier loupe appears onscreen that zooms in on the center of the viewfinder, making it easier to precisely dial in focus. There’s also a button to turn the focusing loupe on full time and a focus peaking button to visualize focus status.
The other setting beneath the viewfinder that’s worth exploring in more detail is the toggle for turning RAW capture on and off. This is Halide at its most complex. With RAW capture turned off, Halide takes a HEIC-formatted photo just like Apple’s Camera app. Halide also provides multiple options for shooting in RAW.
Halide uses the DNG RAW format, which like other RAW formats, retains more image data than compressed formats like HEIC or JPEG. Shooting in RAW gives you the latitude to make greater editing adjustments later. However, RAW images usually look worse than processed JPEG or HEIC images before they’ve been edited.
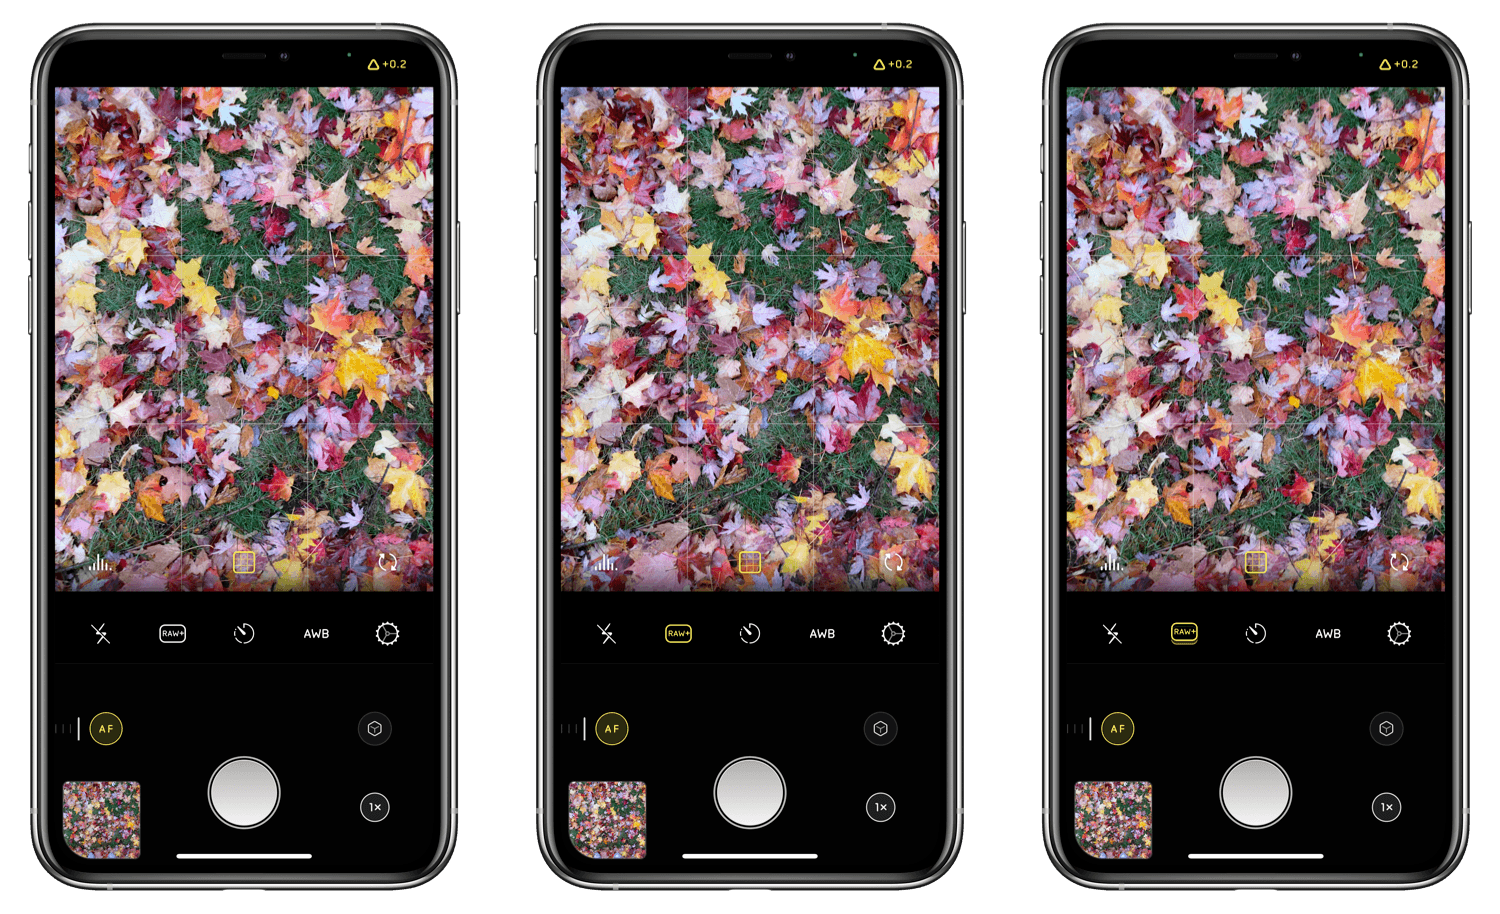
Beneath the viewfinder, the RAW button’s icon indicates whether you’re shooting in RAW or not and whether Coverage is turned on (far right image).
Halide can capture in RAW or what it calls RAW+, a RAW image plus a JPEG version of an image. As I understand it, the trouble with this approach is that Apple’s full suite of in-camera, computational photography adjustments aren’t applied to the JPEG image when it’s saved alongside a RAW image. It’s a nice option for quickly saving a fully-editable RAW image and a compressed version, but the JPEG version suffers to a degree.
Halide’s solution is a feature called Coverage. Instead of saving the RAW and compressed images at the same time, which is what RAW+ does, Coverage takes two separate shots one after the other – one RAW, one compressed – and then saves them together in the same file as just like RAW+. The advantage is a higher-quality compressed image that can take advantage of Apple’s Smart HDR and Deep Fusion processing. The disadvantage is that it takes a little longer for the camera to take two shots in a row, which is why the feature is turned off by default.
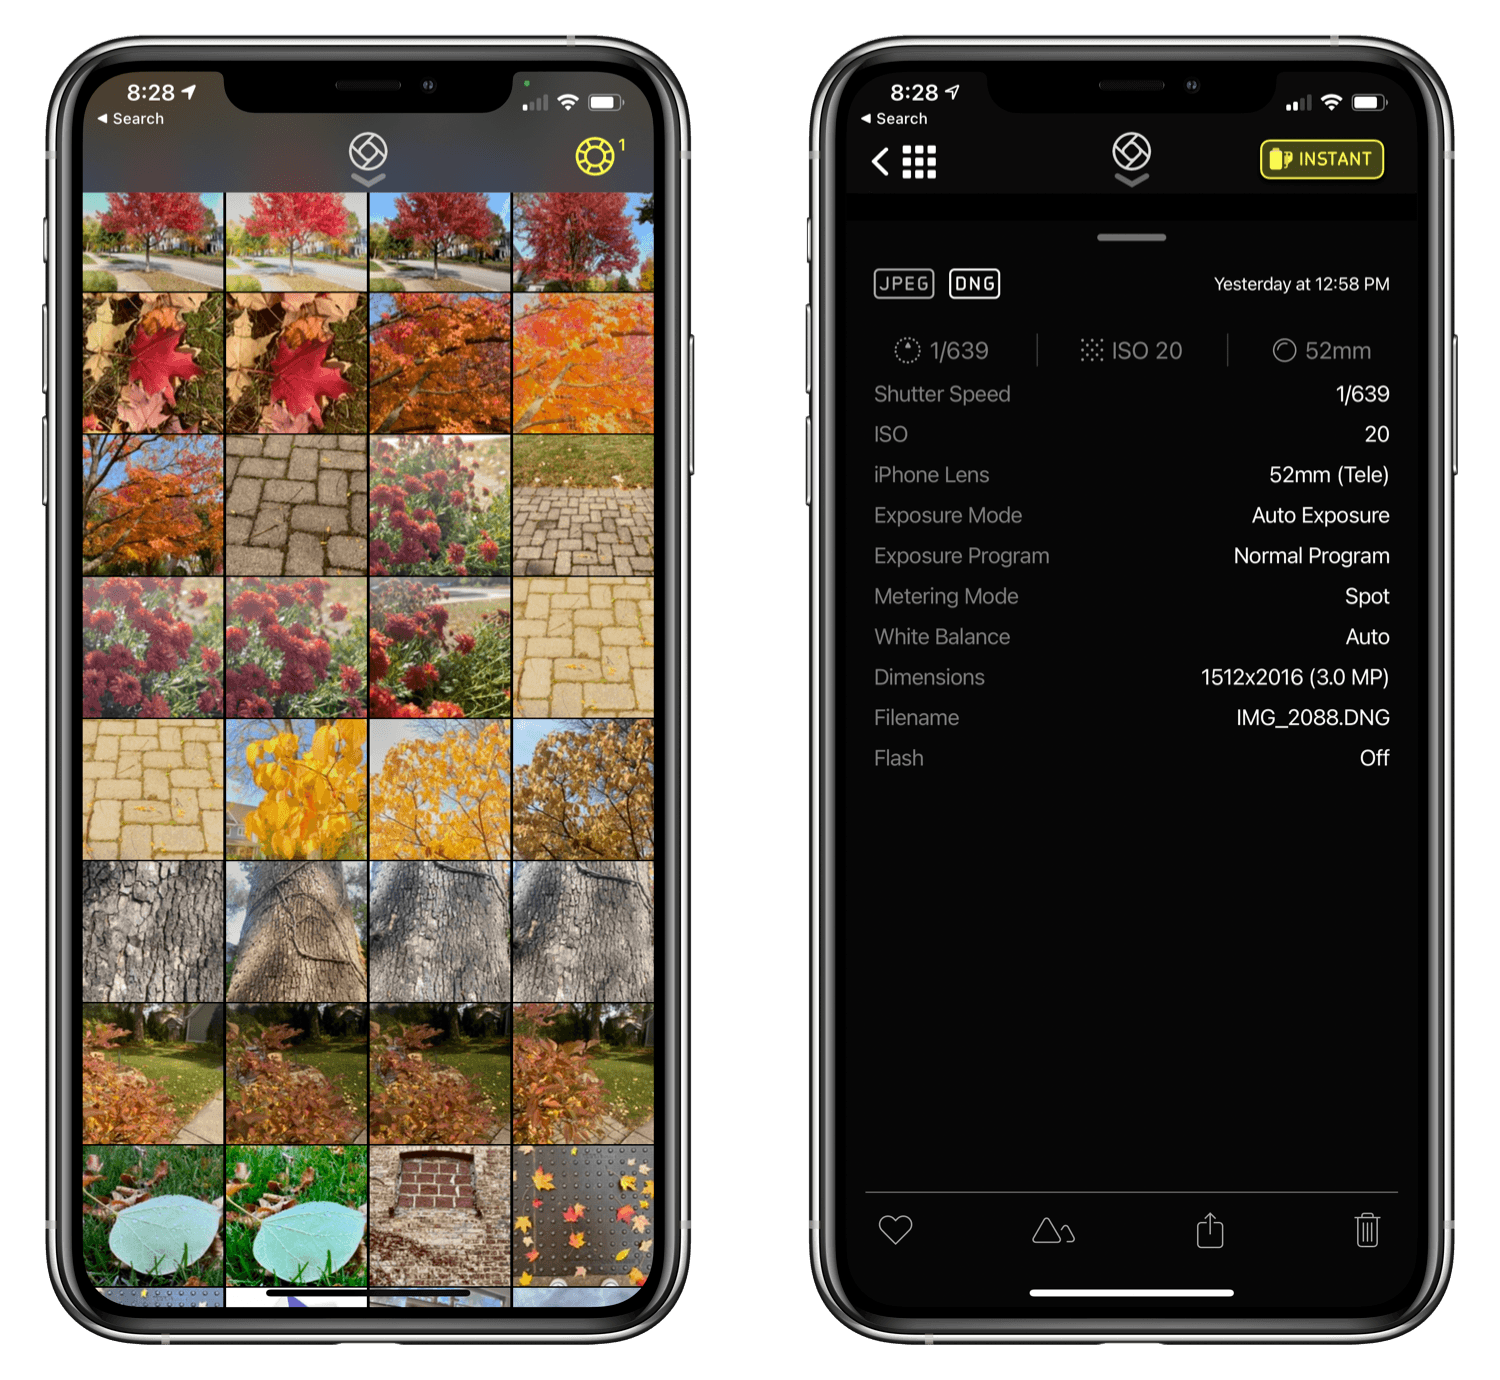
Coverage isn’t the only way Halide tackles the difficulty of shooting in RAW. When you click on the thumbnail in the lower-left corner of the screen, you enter Reviewer mode, which displays your images with EXIF metadata that you can swipe up on for more details. If you’ve shot an image in RAW+ with Coverage on or off, you’ll also see JPEG and DNG buttons. Tapping on each button switches between the two formats.
If you switch to RAW, you’ll see that images generally look less colorful and vibrant because they haven’t been edited in-camera the way compressed formats are, which is where Halide’s Instant feature comes in. Instant is a little like the magic wand tool in Apple’s Photos app. Found in the top righthand corner of the Reviewer, Instant applies a custom 17-step set of edits to your RAW image non-destructively. Often the results are good enough without making any further edits, but even when they’re not, the changes are a good head start on editing the RAW image because from here, you can export your RAW image to a separate photo editing app.
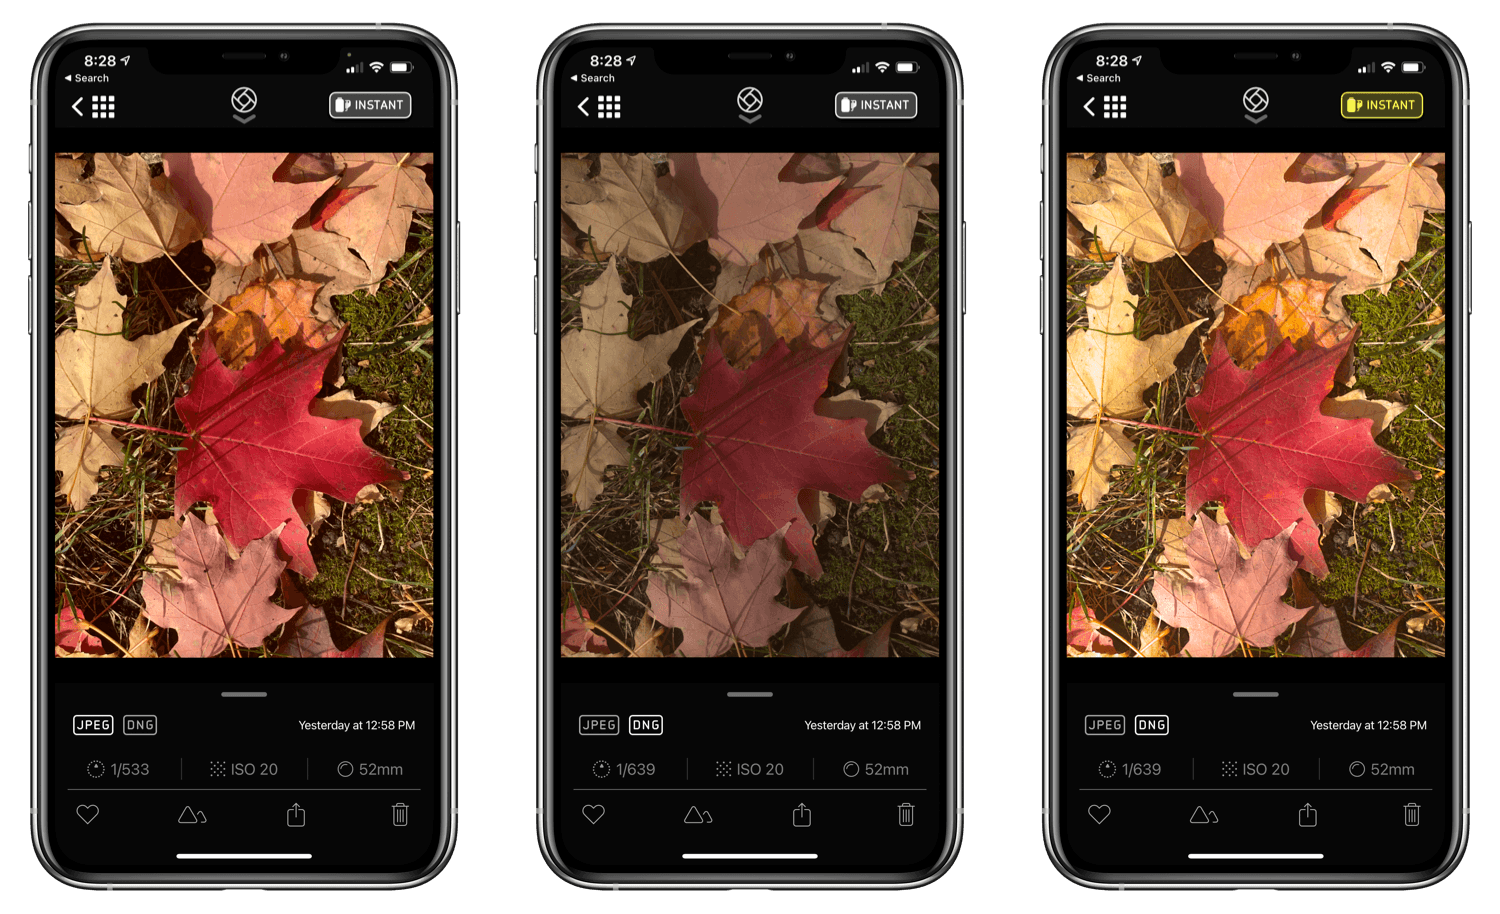
This photo was taken using coverage with the JPEG (left), RAW (middle), and RAW with Halide’s Instant feature applied (right).
Together, Coverage and Instant provide a clever way of ensuring a high-fidelity compressed image and a low-friction, easy-to-edit RAW option. If the compressed version of your shot is good, that’s all you need, which is terrific, but it’s nice to have the option to apply your own editorial choices and creativity to the RAW image Halide captures. Apple’s ProRAW image format, which was announced last week, may offer something similar through its API, but it will only work with the iPhone 12 Pro, while Halide works with many more iPhones now.
The downside is that the options in Halide’s settings need to be explained better. The Lux team’s post introducing the new app is an excellent overview, but coming to the options in the app’s settings cold without that background is a little tough. Halide offers the best of both the computational photography world and high-fidelity RAW capture in a unique and low-friction way, but it’s still a little hard to know where to get started.
Finally, I should mention that Halide will be offering in-app photography lessons beginning with a 10-day course. Halide’s course wasn’t available during my testing, but I’m keen to give it a try.
Halide was already such a solid app that the introduction of the Mark II version came as a surprise. Following up such a successful app is tough, but the team at Lux has delivered with Halide Mark II by coupling the flexibility and power of RAW photography with the simplicity of computational photography. Apple appears to be heading in a similar direction with its new ProRAW file format. However, I expect Halide Mark II will be fine and is worth checking out now. Not only does the Lux team say they will support ProRAW in the future, but the app also supports a long list of iPhones that ProRAW won’t, and it provides a level of control that Apple probably won’t.
No matter how you prefer to shoot photos, it’s unmistakably a terrific time to be an iPhone photographer. A wealth of excellent camera apps and photo editors are available, but if I had to recommend only one app for getting more out of your iPhone’s camera and learning the ins and outs of photography, it would be Halide Mark II.
Halide Mark II is available on the App Store for a one time $36 payment, which is currently discounted to $30 for a limited time, or you can join the app’s membership program for $11.99 a year, which is $9.99 for a limited time. The app also includes a one-week free trial. Halide’s membership alternative adds custom icons with other perks promised for the future. Existing Halide customers can download Halide Mark II for free and will get a one-year Halide membership for no additional charge using the ‘Restore Purchases’ option after the onboarding.


