Mail, Phone and Safari have all been around since the original iPhone launched in 2007. They all have seen subtle changes here and there over the years and in iOS 6 that trend continues but with the addition of some really neat new features.
The big new thing for Mail is VIPs which gives you more control over how you deal with your inbox and who you pay most attention to – but there’s also the addition of the pull to refresh gesture and the ability to add images directly to a new message. Phone gets two really useful and practical features: the ability to reject a call and then quickly reply to them or set a reminder to call back, and the new “Do Not Disturb” feature. Finally, the core of what made the iPhone a ‘smartphone’ in the early days, Safari, gets a new full-screen landscape mode, the ability to sync tabs across devices, upload photos and videos, and offline mode for Reading List.
To get the full overview of these new features and some neat tips, jump after the break.
More iOS 6 coverage here.
VIPs
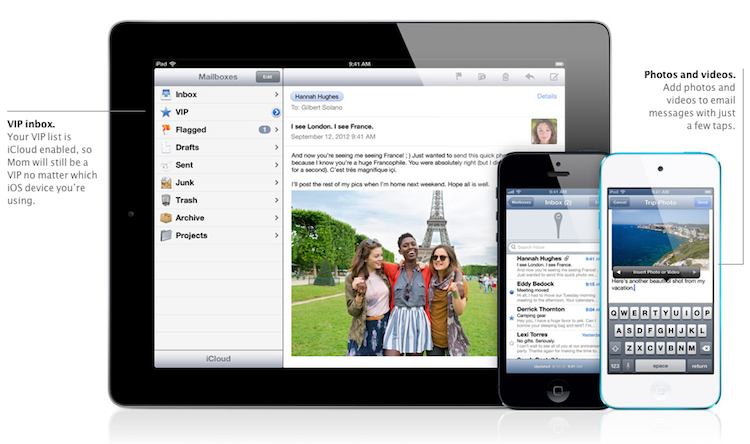
New to Mail in iOS 6 is VIPs, and it’s a super simple way of prioritising emails that are from important people in your life – whether they be your family, coworkers or perhaps a valued customer. Making someone a VIP will do a few things: firstly, it’ll display a star next to all their messages in the Mail app, but it’ll also allow you to quickly access them through a new “inbox” that filters out all messages from non-VIP people (see image below), and lastly, it allows you to set up custom notifications for VIPs.
Managing your VIPs
So how do you make someone a VIP? One method is to simply go to any email and tap the sender’s name to go to their little contact sheet; from there, simply tap “Add to VIP” and watch a little star pop-up next to their email address. The other method is to go to their Mailboxes page of Mail (tap the back button until you’re at the ‘root’ screen), tap the little blue arrow next to VIP, select the “Add VIP…” button and then select from your contacts who you wish to add as a VIP.
Removing a person as a VIP is just as simple – in the first method, that button changes to “Remove from VIP”; in the second method, tap the ‘Edit’ button and simply remove the relevent contacts from the VIP list.
Seamless Sync
You can make any contact a VIP and it doesn’t matter what email address they are sending their message to, whether it be your iCloud account, Gmail account or a work email – it works across any and all. If you want to sync VIPs across devices, this works seamlessly and you just need to have an iCloud account. One small note: you can have up to 100 VIPs.
VIP Notifications
Perhaps the most powerful feature of VIPs in Mail is the ability to set custom notifications. iOS already gives you the power to set custom notifications for each of your Mail accounts, but with iOS 6, VIPs are treated as another “account”. This gives you the full control over:
- Whether a message shows up in Notification Center;
- The Alert Style (None/Banners/Alerts);
- Whether new messages are indicated by a badge on Mail;
- What the new mail sound & vibration is;
- Whether notifications can show a preview of the message;
- Whether a message can be shown on the lock screen.
An Example of Mail’s VIP Flexibility and Power:
If you get a lot of email on a daily basis, you hardly want to be getting notifications for every single new mail, but still want to be notified of emails from important coworkers, friends, customers, and family. Before iOS 6 you had a few options: skim through every new message when you got it, ignore new mail until you wanted to go through it all or set up complex filters and rules. Whilst that may have worked (and even still works), VIPs is a far simpler solution that will work great for most people.
Now, simply mark your important contacts as VIPs and you can turn off all notifications for your Mail accounts but turn VIP notifications on. Now, emails still get pushed to your device, but you are only alerted of those messages from your VIPs. Because of the flexibility in VIP notifications, you can have an endless degree of customizability in this respect: perhaps turn off vibration and sounds for all new mail except for VIPs, but keep visual notifications on – it’s all up to you.
“Pull to Refresh”
Mail in iOS 6 adds a really small but powerfully delightful feature; pull to refresh. Pioneered by Loren Brichter in the old “Tweetie” iPhone app, it has since become a cornerstone of any iPhone app that features a vertical list of data (whether it be tweets, articles, or whatever) that requires occasional refresh. It’s not only a fun gesture but it is also immensely useful and quite discoverable for new users.
In Mail, pull to refresh works just as it does everywhere else: scroll to the top of the list and then pull down to reveal the refresh animation, keep pulling down and it’ll refresh. In Mail, the animation is some sort of elastic band ball (or is it a slime ball?) that stretches and stretches until eventually it flies back and sets off the refresh. It’s really such a small feature but whoever worked on it at Apple did a stunning job, it’s probably the best implrementation of “pull to refresh” in any app and it is extremely satisfying.
Insert Photos & Videos Into Messages
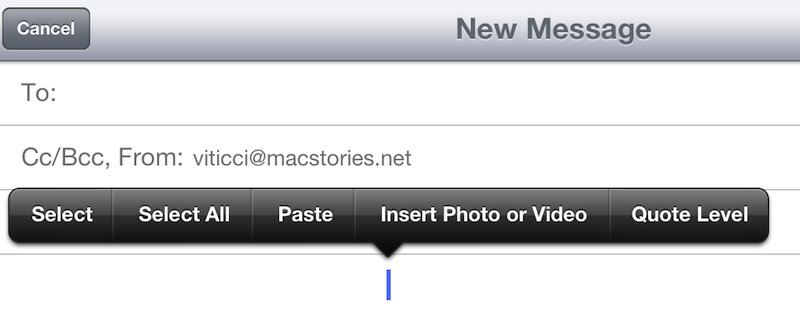
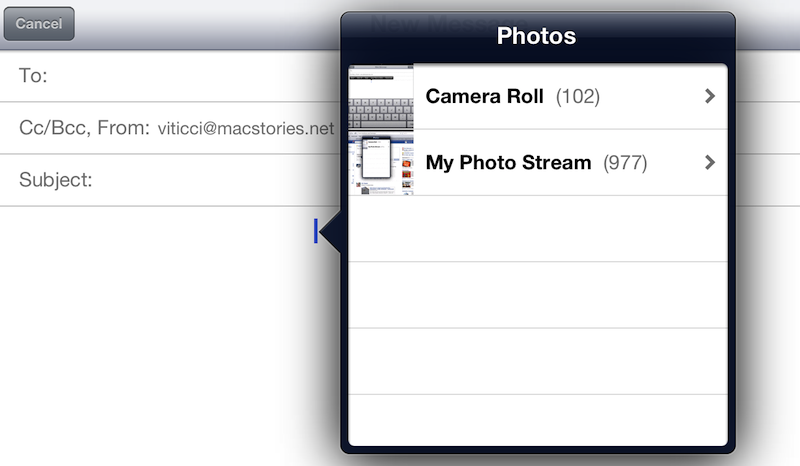
Something that had always frustrated me in Mail was the fact that you couldn’t add photos or videos to an email – you had to purposely go to the Photos app and ‘share’ them from there. Thankfully, in iOS 6, this oddity has been resolved as you can now add photos and videos directly into a Mail message. Simply tap and hold where you want to add them, tap the right arrow, tap the ‘Insert Photo or Video’ button and select it from your Camera Roll or Photo Stream.
Unfortunately, you can only add one image at a time, so it is still easier to send multiple photos by going into the Photos app and sharing them from there.
Phone
 Decline Call, Then Reply Or Remind
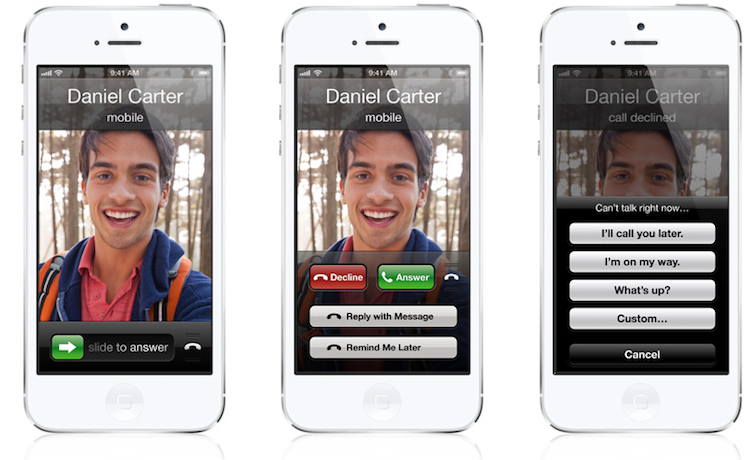
One of the really neat features in iOS 6 is the ability to instantly set a reminder or send a reply when you decline a phone call. All you need to do is swipe up when you get a phone call (similar to the Lock screen camera gesture) and then select “Reply with Message” or “Remind Me Later”. If you decide to reply, you’ll get the options to send a preset message (“I’ll call you later.”, “I’m on my way.”, “What’s up?”) or a custom message to the person who made the call to you. If you’re not a fan of the preset messages, you can change them to whatever you like by going to Settings -> Phone -> Reply with Message and override one of the original presets.
If you select the Remind Me Later option, it works in a similar way giving you the option to receive a reminder in 1 hour, when you leave your current location, when you get home or when you get to work. These options obviously depend on your current location, so make sure to add your home and work address to your own entry of your Address Book.
Do Not Disturb
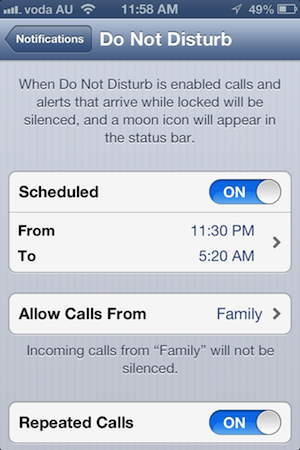
Whilst reply or remind is neat, the new ‘Do Not Disturb’ feature is even better, and a feature that many have been clamouring for a while now. When enabled (which we will get to in a moment), any calls or alerts that go to your iOS device will be silenced and won’t wake your device if in standby, like it normally does for notifications. But your phone will still receive those alerts so you can view them in Notification Center.
Do Not Disturb can be turned on manually from Settings (like you would for Airplane Mode), but the more useful method of using Do Not Disturb is the scheduling feature. Simply go to Settings -> Notifications -> Do Not Disturb and you can turn on scheduling and then set a time to turn DND on and then when to turn it off. Naturally, the best utilisation of this is to ‘silence’ your iPhone during the night whilst you sleep and that’s how I’ve used it since installing iOS 6.
But don’t leave that Settings page just yet, because you also have two important additional options that you might want to adjust. The first is the ability to allow calls from a certain group of your contacts to override the DND setting; I’ve allowed phone calls from my family to ignore DND, but this could also be useful for people who are required to be on-call 24/7 but still want to ignore calls from friends at 3am. The second, important feature is the ability to allow repeated calls to ignore DND: this feature is designed to allow any emergency calls go through when a person calls you for the second time within 3 minutes.
Safari
Offline Reading List
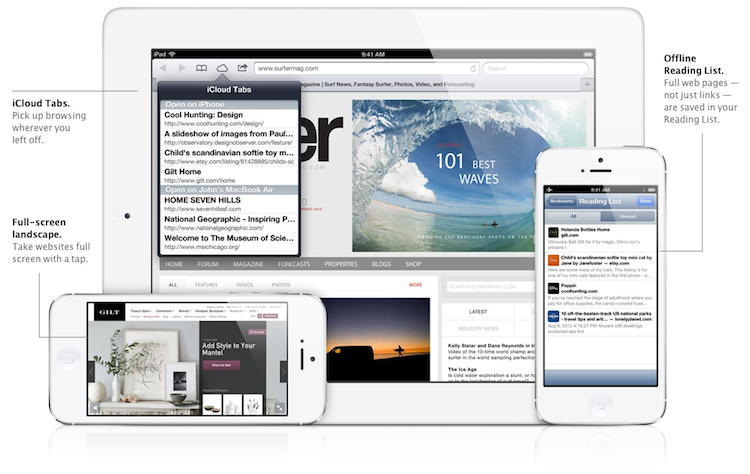
Reading List was added to Safari in iOS 5 and for the most part emulated popular iOS apps Instapaper, Pocket and Readability. With one notable exception: it didn’t save articles for later reading. It was mostly just a synced bookmark list for articles you wanted to read later, but with iOS 6 it now saves those articles for offline reading. The Offline Reading list works on all devices running iOS 6 and on Safari 6 for the Mac. It works simply enough – just add an article for Reading Later and then Safari will save the whole webpage (yes, it will save the entire webpage, not just the simplified text and image view) for offline reading. Just like in iOS 5, it will also use iCloud to sync your Reading List with any other device and now (if they are running iOS 6 or Safari 6) they will also download the full webpage for offline reading.
This means you can save a webpage on your Mac, then leave the house with your iOS device and that article will be available for offline reading - without even the need to open Safari, as is required with the third party ‘read later’ apps. From my testing, the syncing works really quickly and for most webpages shouldn’t take more than a minute to be available on all your devices. You’ll also notice that when downloading articles, the bookmark icon will change to the Readling List icon and display a progress bar to indicate how much is left to go.
iCloud Tabs
Another really cool feature in iOS 6 (and also in Safari 6 on the Mac) is iCloud Tabs. This is a super straightforward feature but one that is useful and well implemented. It essentially uses iCloud to sync what websites you have open in your Safari tabs on all your devices. Rather than cluttering the actual visible tabs, the open tabs are stored in a separate pane like your Reading List and History. On the iPhone and iPod touch, you’ll find iCloud tabs right below the History and Reading List section in the bookmarks pane, whilst on the iPad you’ll notice a new dedicated iCloud Tabs button next to History button in the top left area of the app. Syncing is done fairly quickly and the tabs are organised by what device they are open on.
Upload Photos and Videos Directly From Safari
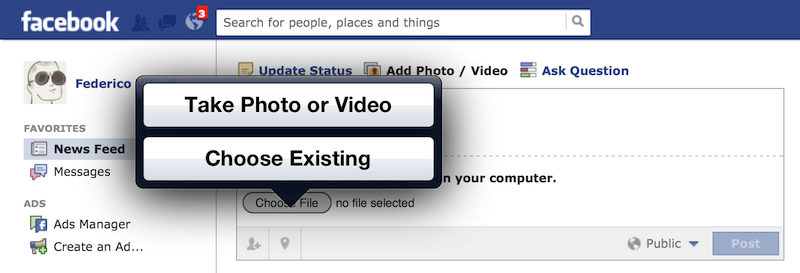
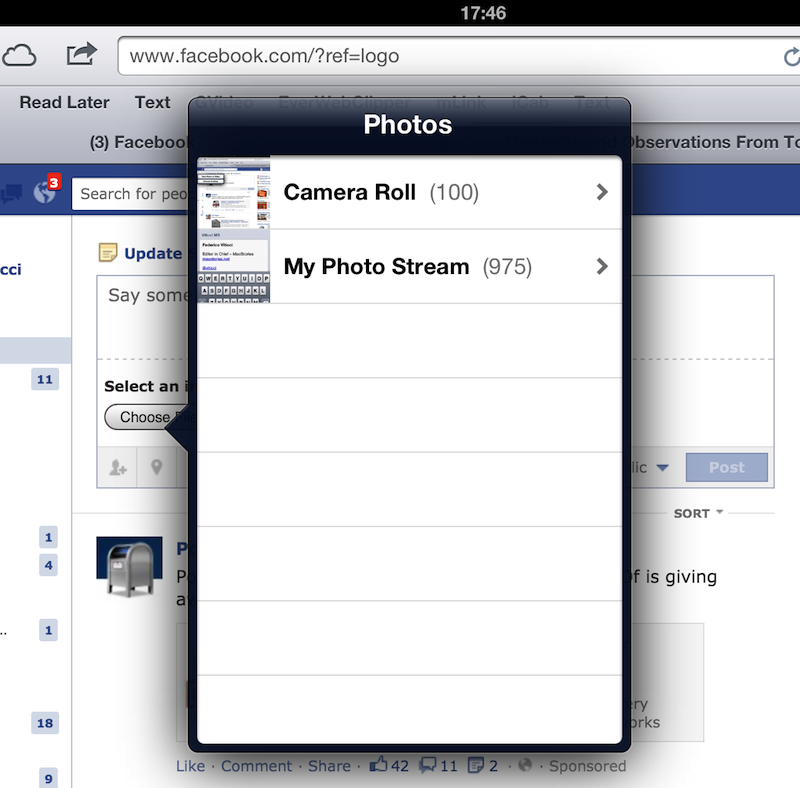
Something that has frustrated countless users, particularly those on iPads, has been the fact that you can’t upload images or videos from your iPad to a website from within Safari. If you wanted to write a blog post or add an eBay listing, you’d either have to use a third party app, or go back to a computer to do it.
Thankfully, iOS 6 finally rectifies this ommission and when you see that “Choose File” button, iOS 6 prompts you to upload an existing image or video from your Camera Roll or to take a new image or video.
Full-Screen Landscape
There really isn’t much to say, but in iOS 6 you can now remove the UI clutter when Safari is viewed in landscape. Just tap the little resize button on the bottom right corner and the chrome will go away to reveal just the website and two semi-transparent buttons in the bottom corners. On the bottom left you’ve still got a back button and on the right is the resize button, so you can go back to the traditional view. It’s a nifty little feature that I’ve certainly appreciated in my use of iOS 6.


