Pythonista 1.5, the latest version of Ole Zorn’s Python interpreter for iOS, has been released today on the App Store, bringing new modules, native integrations, UI refinements, and the removal of the Open In feature to comply with Apple’s App Store guidelines. Pythonista 1.5 is another fantastic update to one of the most powerful and flexible iOS apps ever made, and it follows in the footsteps of Editorial 1.1, released last month.
No More “Open In”
In November 2013, Zorn released Pythonista 1.4, which, alongside support for iOS Contacts and location settings introduced a scriptable Open In menu that allowed Pythonista to receive files sent from other apps and read the bundle identifier of the app that sent a file to Pythonista.
As I explained in my article, the addition was twofold. First, the Open In menu itself behaved like any other instance of the Open In feature for iOS – it allowed Pythonista to receive a copy of a file sent from another app:
The premise is that Pythonista can receive files sent through the Open In menu from other apps. Any app that can send an image (like Skitch or iPhoto), a text file (Byword), a PDF document (PDF Expert), or any other file with the native Open In menu can now send it to Pythonista. By default, Pythonista will add a received file to an Inbox folder in the sidebar and show it with QuickLook.
Zorn’s version of Open In, however, was clever as it also allowed Pythonista to see the bundle ID of the sender app, which opened up many possibilities for scripted Open In-based communications between apps:
The Open In menu can be automated and scripted with Pythonista 1.4. In the app’s settings, you can choose a script to automatically run when a file is received through Open In, and, in the script, you can reference the file’s path and sender app’s bundle ID as command line arguments. This is a huge addition for automated iOS workflows and chaining apps together – it means that you no longer need to manually pick files because you can use Open In as a script handler in Pythonista. You can run specific scripts automatically depending on the app that sent a file while also using that file without ever needing to manually pick it.
Pythonista’s Open In menu was a great addition to the app and a nice way to get around the feature’s limitations by creating scripts that behaved differently depending on the app that sent a file to Pythonista. I had scripts that launched an upload routine for files sent from Skitch, and others that posted to WordPress if the file had been sent by a text editor.
Last week, Apple’s review team got in touch with Zorn and asked him to submit an update to the app that removed the possibility to “import executable code from other sources”. Therefore, Pythonista 1.5 no longer has support for Open In as, in theory, it could be used to import .py files that contain executable Python code.
While I won’t dwell on Apple’s retrograde stance for third-party programming apps on the App Store in 2014, I think it’s important to stress that Pythonista’s Open In menu never allowed users to inadvertently execute code stored in other apps. Users had to deliberately open a file, tap Open In, and choose Pythonista as the destination app for the file. User intent was always a key element of the Open In menu, but, clearly, just being able to import files hasn’t gone well with Apple seven months after the release of Pythonista 1.4.
Ultimately, the Open In menu was useful, but it’s a price I’ll gladly pay to continue having Pythonista on the App Store. It removed a lot of friction from processing files with Pythonista, but I can live without it.1
Custom Interfaces
Like Editorial 1.1, Pythonista 1.5 can create custom interfaces using a ui module that can be combined with Python scripts. Modelled after Apple’s UIKit, Zorn’s ui module is consistent across Editorial and Pythonista, and it lets you design interfaces that are native to iOS with elements such as popovers, sheets, labels, views, buttons, and more.
Because the module is the same, I can include excerpts from my Editorial 1.1 review and point you to the relevant section for more information:
Modelled after Apple’s UIKit,
uiisn’t a complete wrapper for Apple’s framework, but it provides basic components for building native user interfaces and it simplifies some aspects of UIKit to make it easy to integrate custom interfaces with Editorial’s actions and scripts. Essentially, you can design your own visual workflows and widgets using native iOS UI elements and interact with them using data and actions from Editorial’s workflow system. In a way, it’s HyperCard for the modern iOS productivity scene, and it’s an impressive piece of work by Zorn.There’s an amazing depth to the
uimodule and the way it’s been translated to Python, but it’s meant for advanced users who are fluent in Python and know the basics of UIKit. I’ve tried to read through and learn from theuidocumentation, but it’s too much for me. While many features and settings for native GUIs are only exposed through Python right now, I’ve been absolutely fine using what I believe is the truly important, most user-friendly aspect of all this: the visual UI Editor.
The big difference between the ui module in Editorial and Pythonista’s version is that Pythonista doesn’t have a visual workflow system, which means that every action in a custom interface will have to be called via Python. While Pythonista does have the same UI Editor found in the Editorial with the same settings and management of attributes and views, there is no sub-workflow system to assign actions to specific UI elements. You’ll always have to write the code, design the UI (either in the editor or also via code), and then connect the two.
This makes Pythonista’s ui module undoubtedly more difficult to approach than Editorial’s, but Pythonista is, after all, a Python interpreter for programmers, not a visual workflow app. The relationship between custom UIs and Python scripts will enable advanced users to come up with powerful ideas for the app: beginners will likely stay away from Pythonista’s UI Editor, but the interplay with Python is what, I believe, will drive more Python users to Pythonista.
Even without visual workflows, creating custom interfaces for scripts that are better suited for Pythonista isn’t that difficult. The redesigned documentation of Pythonista 1.5 makes it easy to read through and understand how custom UIs are called in Python, and the only extra step will be to learn how to manually show UIs and set attributes for their views within a script. It’s a moderately steep learning curve, but doable and fun.
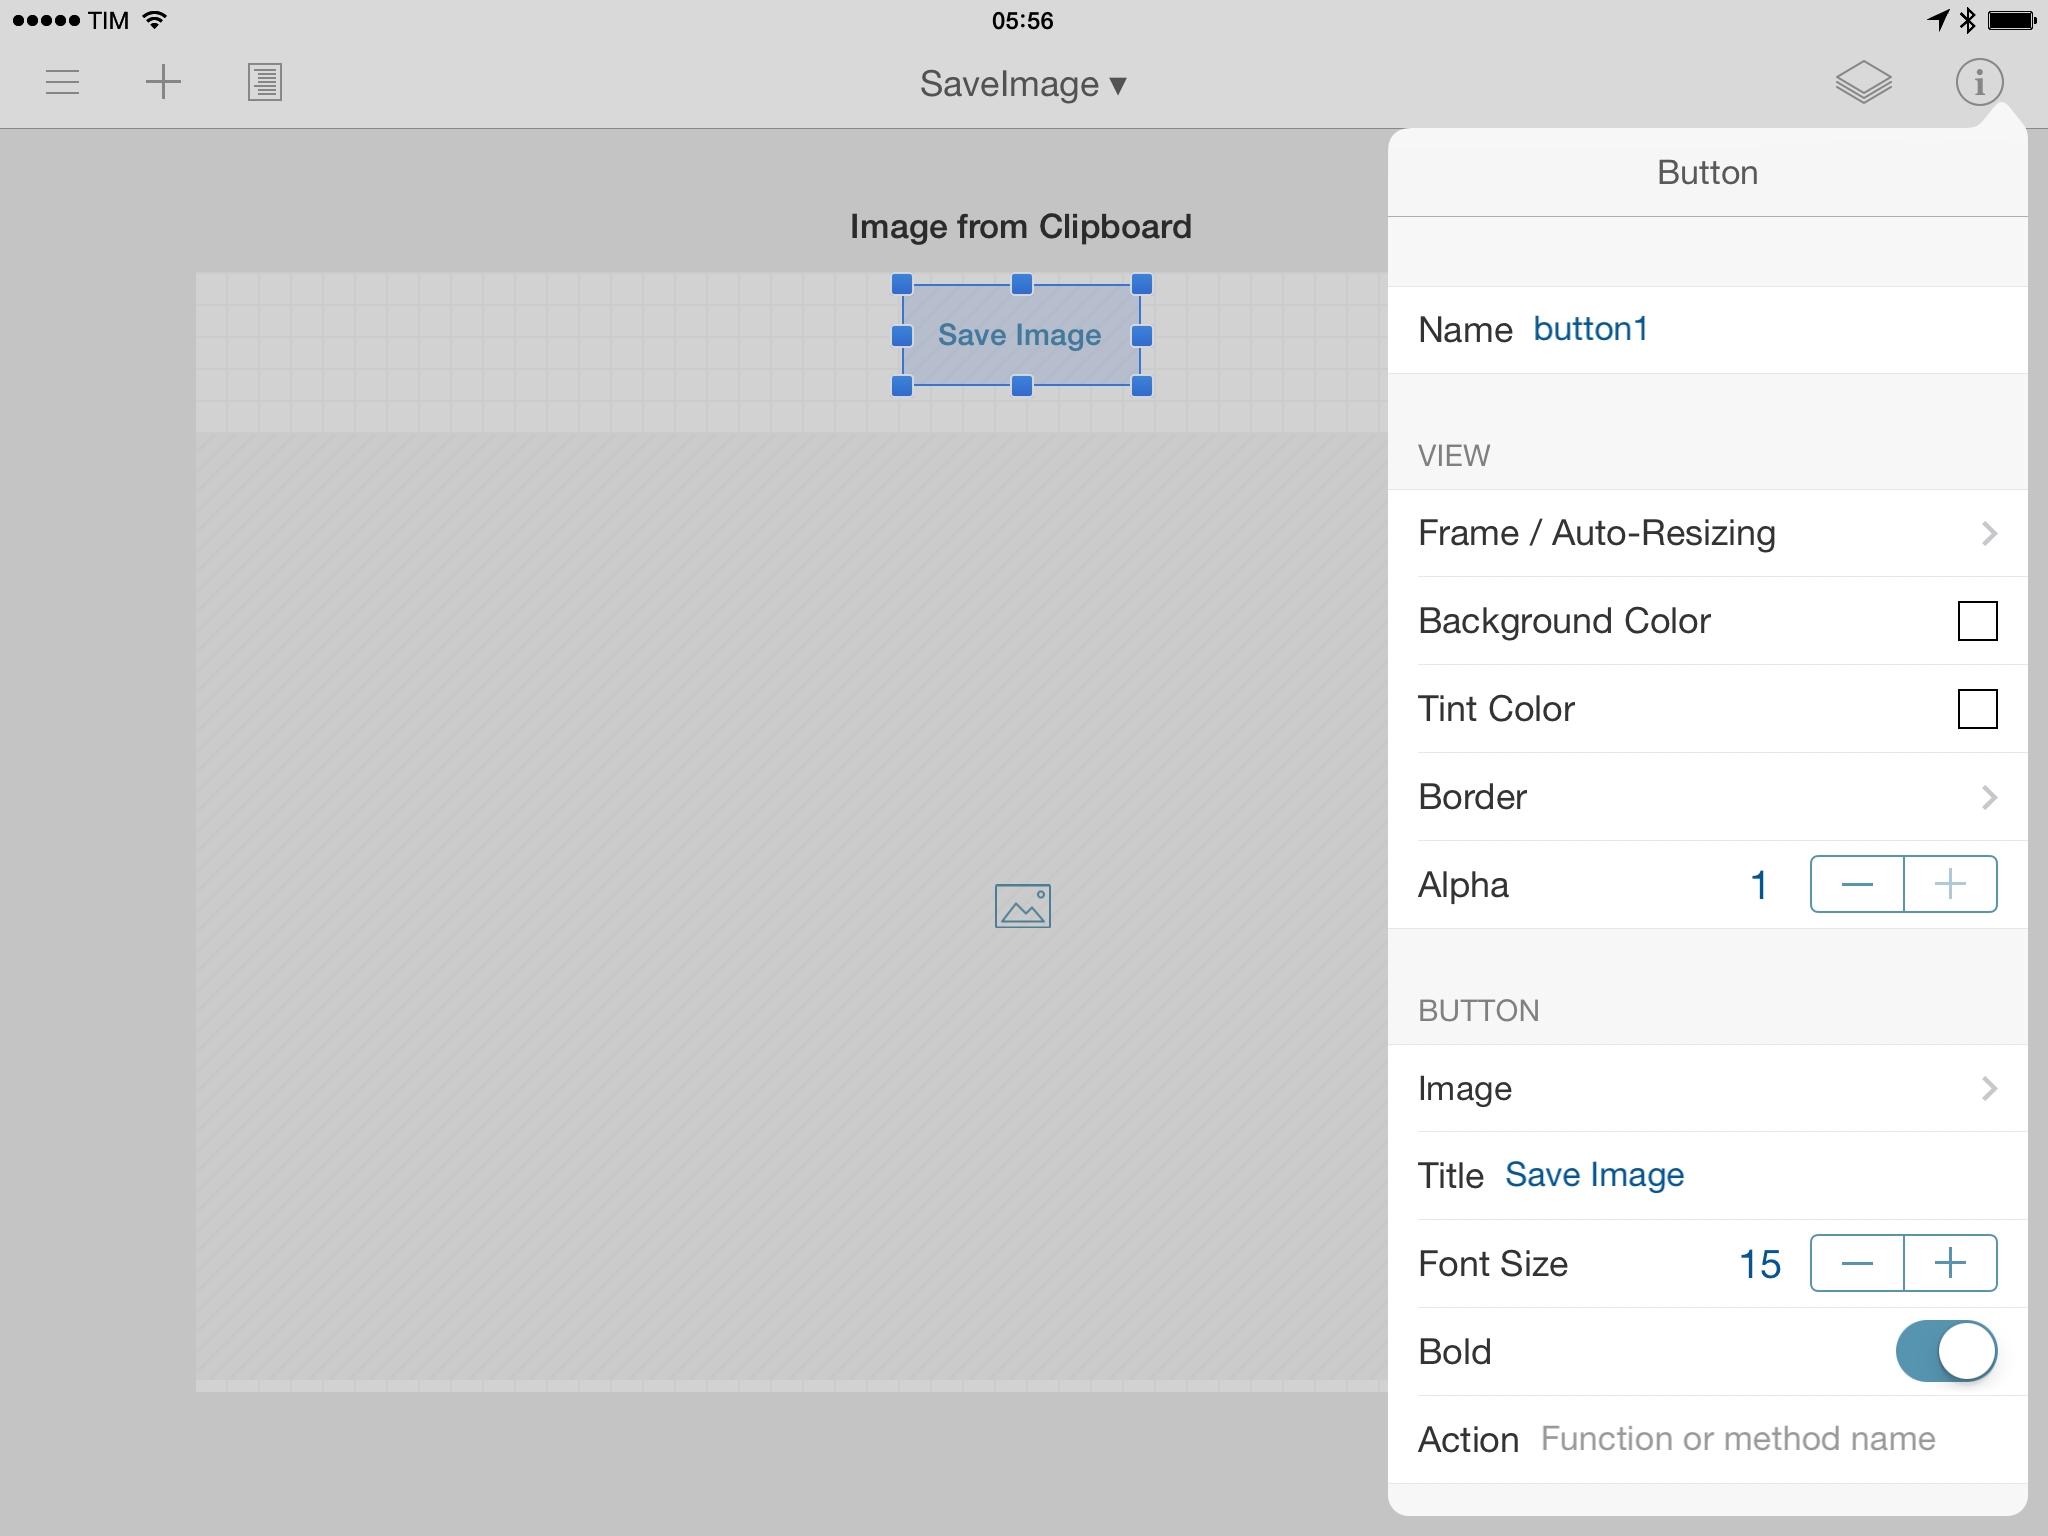
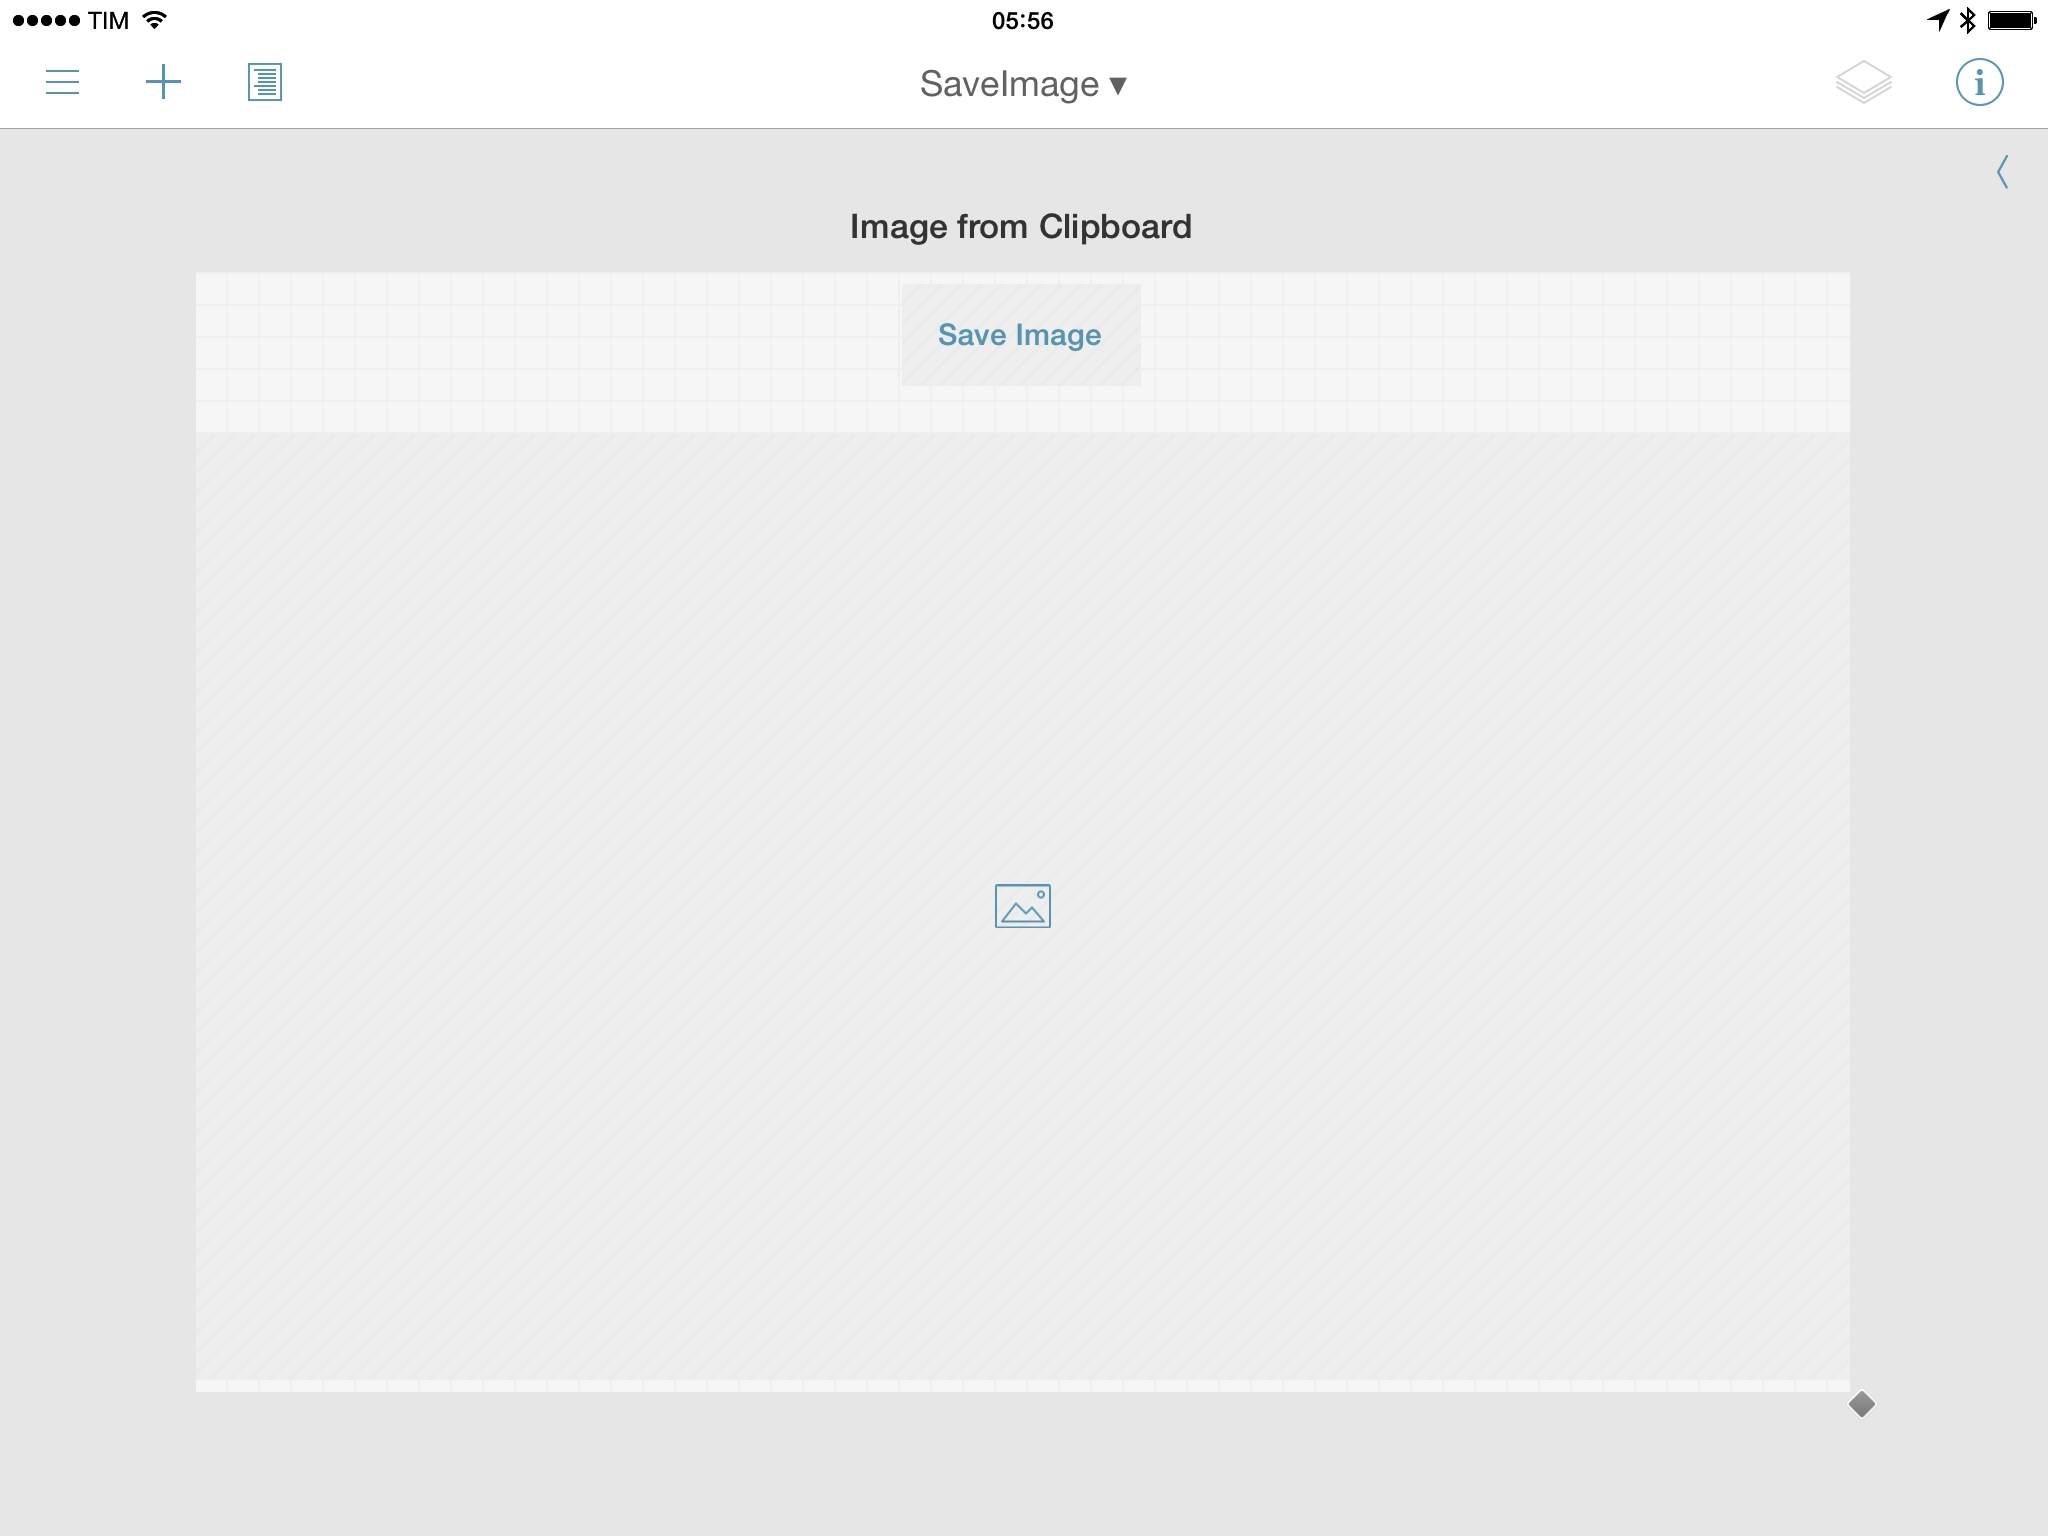
Here’s an example of a custom interface in Pythonista that lets me turn an image URL from the clipboard into an actual image in my photo library. In the UI Editor, I put together a simple sheet interface that has an empty ImageView and a button.
In Python, I import the clipboard, set up the UI, and define a function to save an image from URL into my local iOS library.
import clipboard
import urllib
import Image
import photos
import cStringIO
import ui

def button_tapped(sender):
	file = Image.open(cStringIO.StringIO(urllib.urlopen(URL).read()))
	photos.save_image(file)
	view.close()

URL = clipboard.get()
view = ui.load_view()
try:
	image = view['imageview1'].load_from_url(URL)
	button = view['button1']
	button.action = button_tapped
	view.present()
except ValueError:
	import console
	console.alert('No Valid URL In The Clipboard')
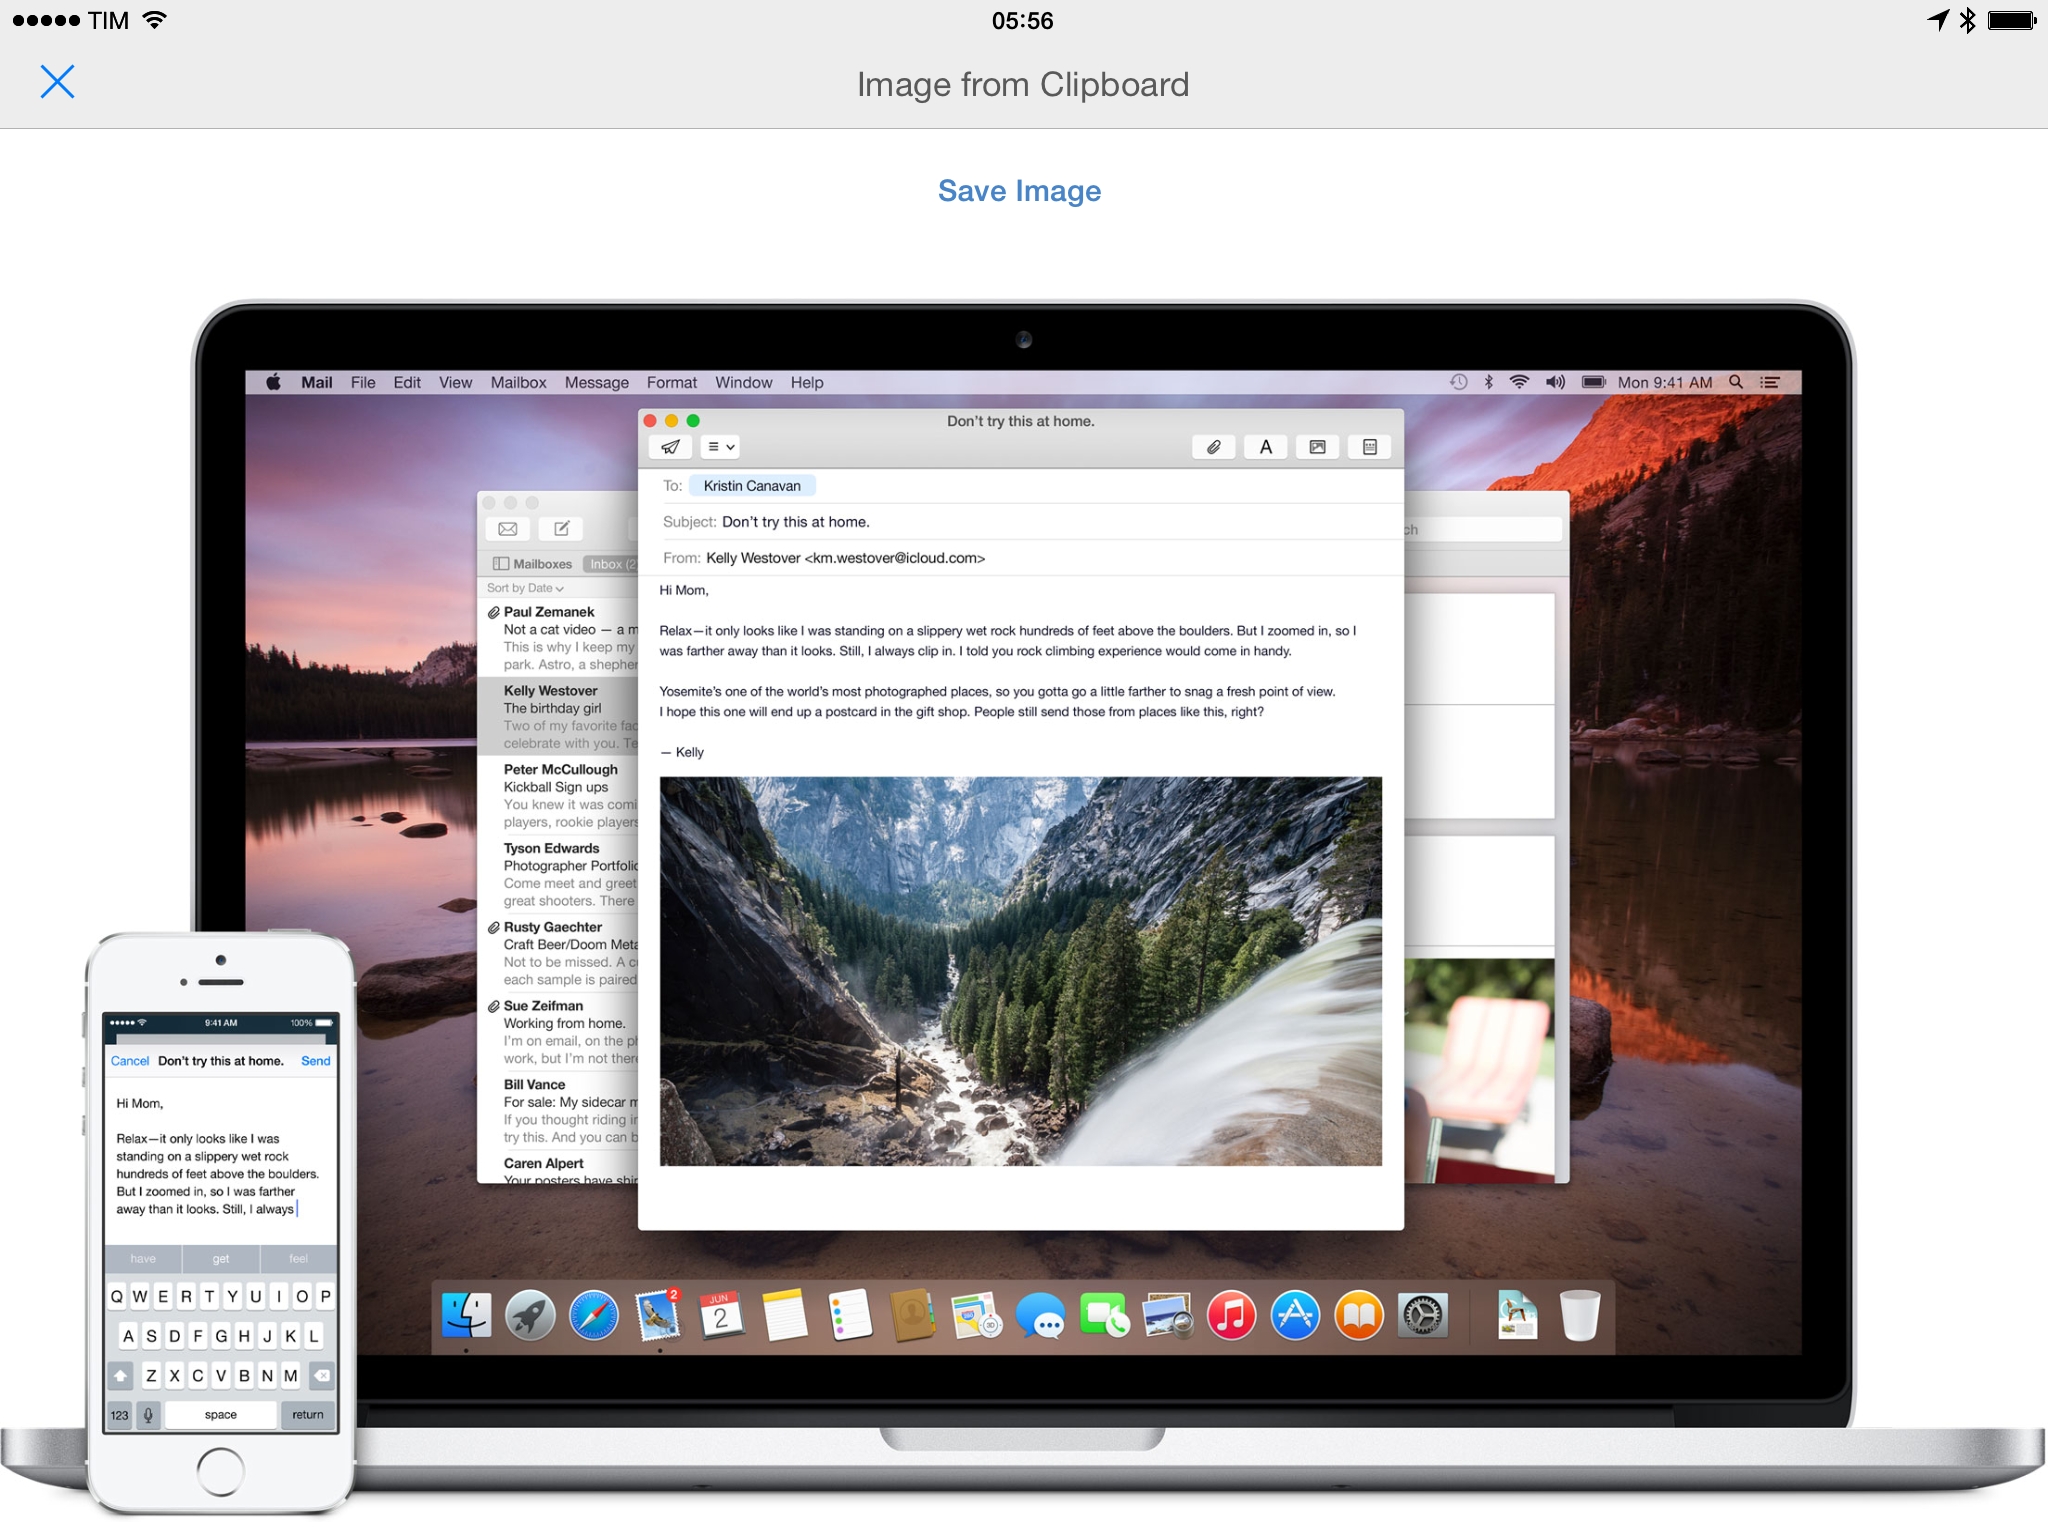
There are two important blocks in the script – lines 8-11 and lines 15-19. With a URL variable saved on line 13, line 14 loads the interface file created in the UI Editor, and line 15 tries to set the interface’s ImageView to the image URL in the clipboard. If the URL is valid, it will result in a custom UI like this:
What’s important about the try block is that, if the clipboard contains text that isn’t a URL (which can’t be loaded by line 16), an exception will be raised and the script will inform you with an alert dialog that you’re trying to load an image from a URL that isn’t actually a URL.
Lines 8-11, on the other hand, define the function that will run upon tapping the Save button in the interface. The image URL will be read by Pythonista and written to a file, which will then be saved to the local photo library, closing the custom interface.
This is a basic example of a custom UI that contains a view and a button performing a specific task with a visual preview; because this is Pythonista, you can launch the script from other apps such as Launch Center Pro, automating the process of saving images from URLs without using Safari.
As I wrote when Editorial 1.1 came out, the possibilities opened by custom interfaces connected to Python scripts and native iOS integrations are essentially endless – and I can’t imagine what Zorn will add with the new technologies coming in iOS 8. The ui module in Pythonista is made for advanced users who don’t need the visual actions of Editorial, and my same thoughts from Editorial 1.1 apply here. I can’t wait to see what Pythonista users create.2
The New Photo Picker
One of my most used Pythonista system integrations – the native photo picker – has received several interesting updates in version 1.5 that make it even easier to import your local images into Python scripts.
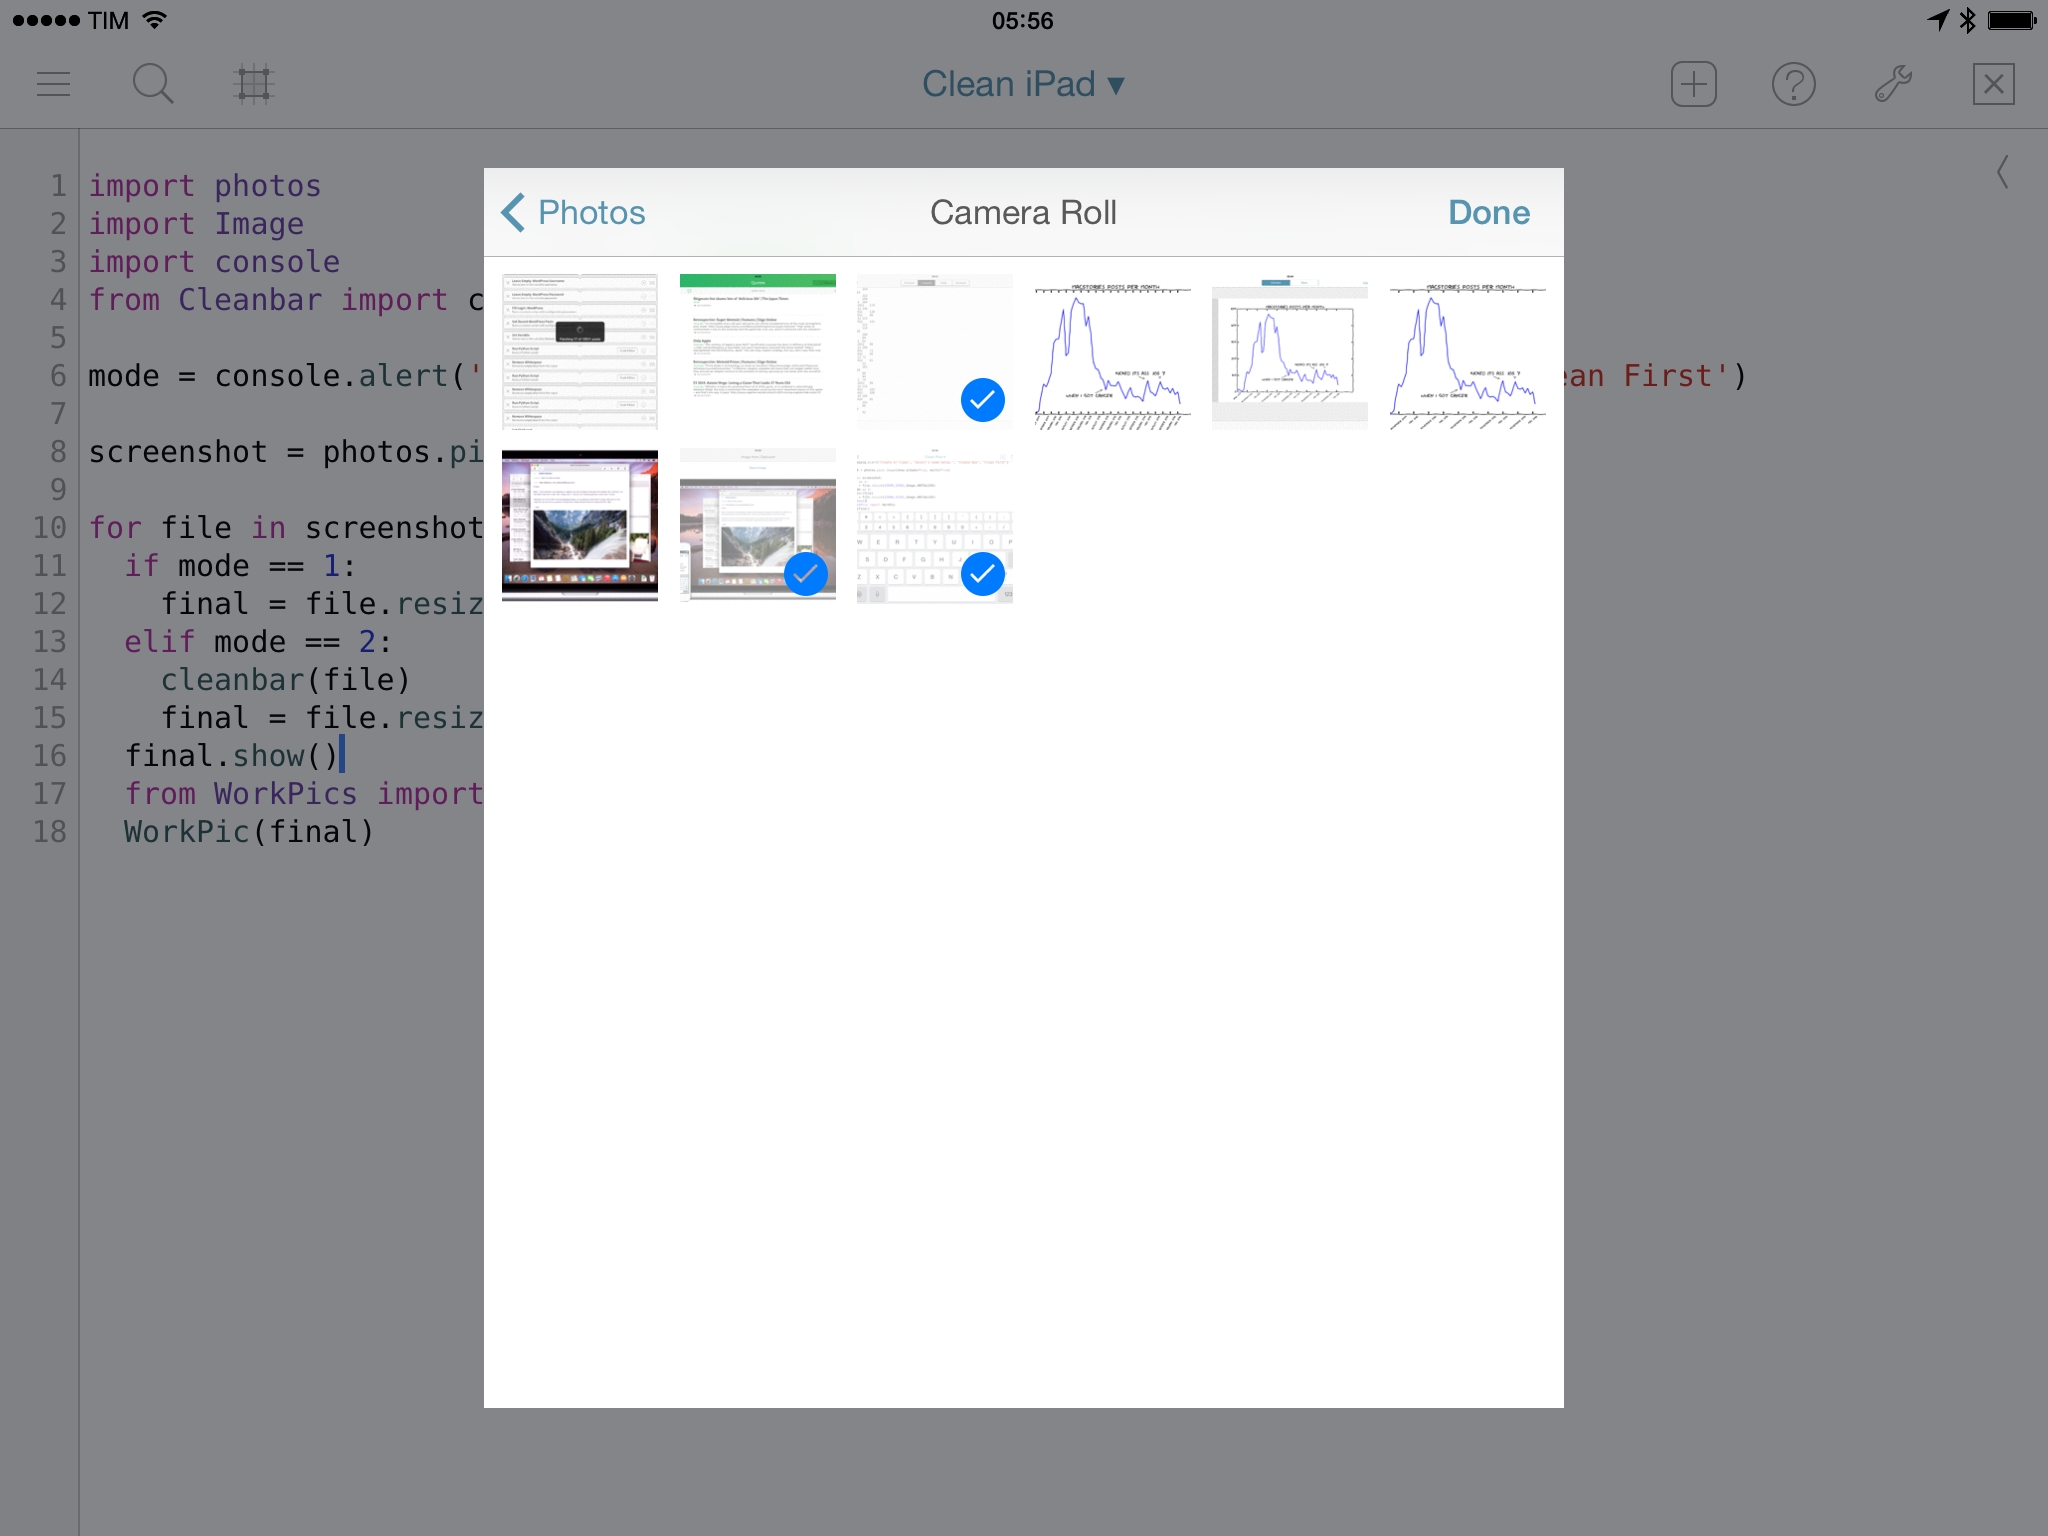
Alongside new arguments to return raw image data (useful when writing images to disk) and metadata, the photo picker now lets you pick multiple images at once without copying them from the Photos app first.
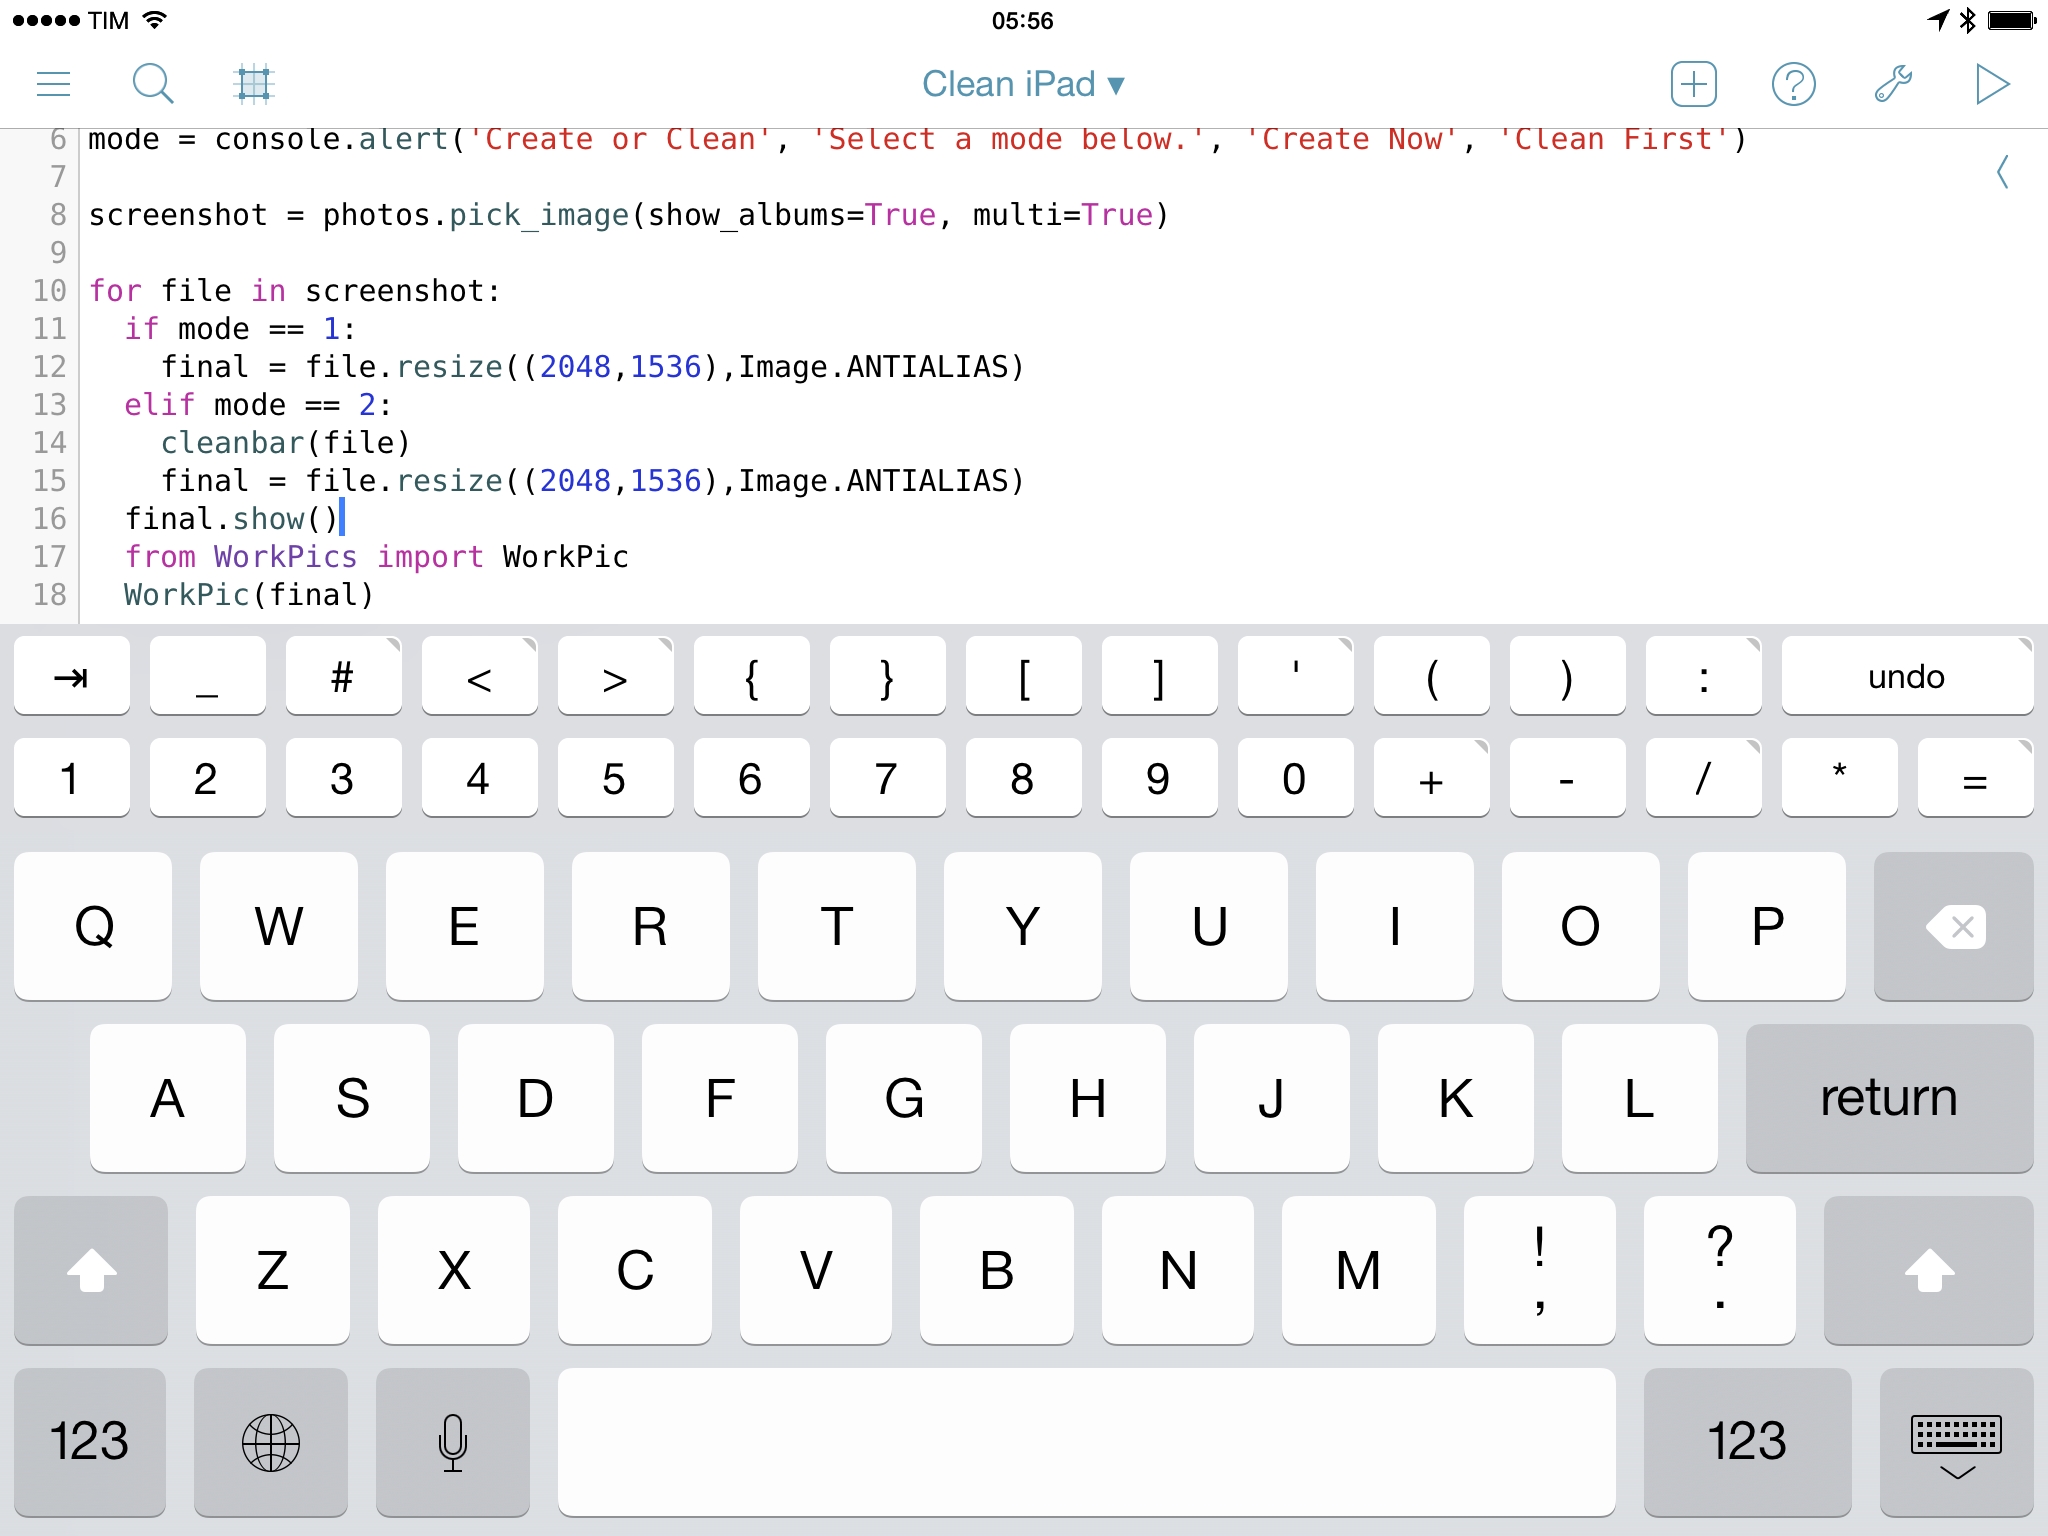
This is a major improvement for my screenshot generation workflow, as it allows me to skip Apple’s Photos app entirely and pick all the screenshots I want to clean directly in Pythonista – without repeat loops. Here’s an updated version of my CombineScreens script.
import Image
import photos
from Cleanbar import cleanbar
import console

# Ask if you want to clean status bars before combining screenshots
mode = console.alert('Create or Clean', 'Select a mode below.', 'Create Now', 'Clean First')

def CombineScreens():
	# Distance from left side of final image
	base = 0
	# Pixels between screenshots in final image
	offset = 14
	# Number of screenshots to combine
	screenshot = photos.pick_image(show_albums=True, multi=True)
	total = len(screenshot)
	# iPhone 5 resolution
	height= 1136
	width = (640*total) + ((offset*total)-offset)
	# Create image background
	background = Image.new('RGB', (width,height), 'white')
	for file in screenshot:
		if mode == 1:
			background.paste(file,(base,0))
		elif mode == 2:
			cleanbar(file)
			background.paste(file,(base,0))
		base = base + file.size[0] + offset
		background.show()
	# Upload to Dropbox folder
	from WorkPics import WorkPic
	WorkPic(background)

if __name__ == '__main__':
	CombineScreens()
I like to use photos.pick_image(show_albums=True, multi=True) in all my scripts that have a photo picker, so I can view all my iOS albums and pick multiple photos in a single action. When picking multiple images, remember that Pythonista will process them from oldest to newest (left to right) based on their position in the photo library.
matplotlib
Pythonista 1.5 also comes with matplotlib, the popular 2D plotting library for turning data sets into charts and other types of visualizations through Python. Alongside NumPy (which has been added to Pythonista as well), matplotlib was one of the most requested libraries by Python users, and it’s now available inside the iOS app.
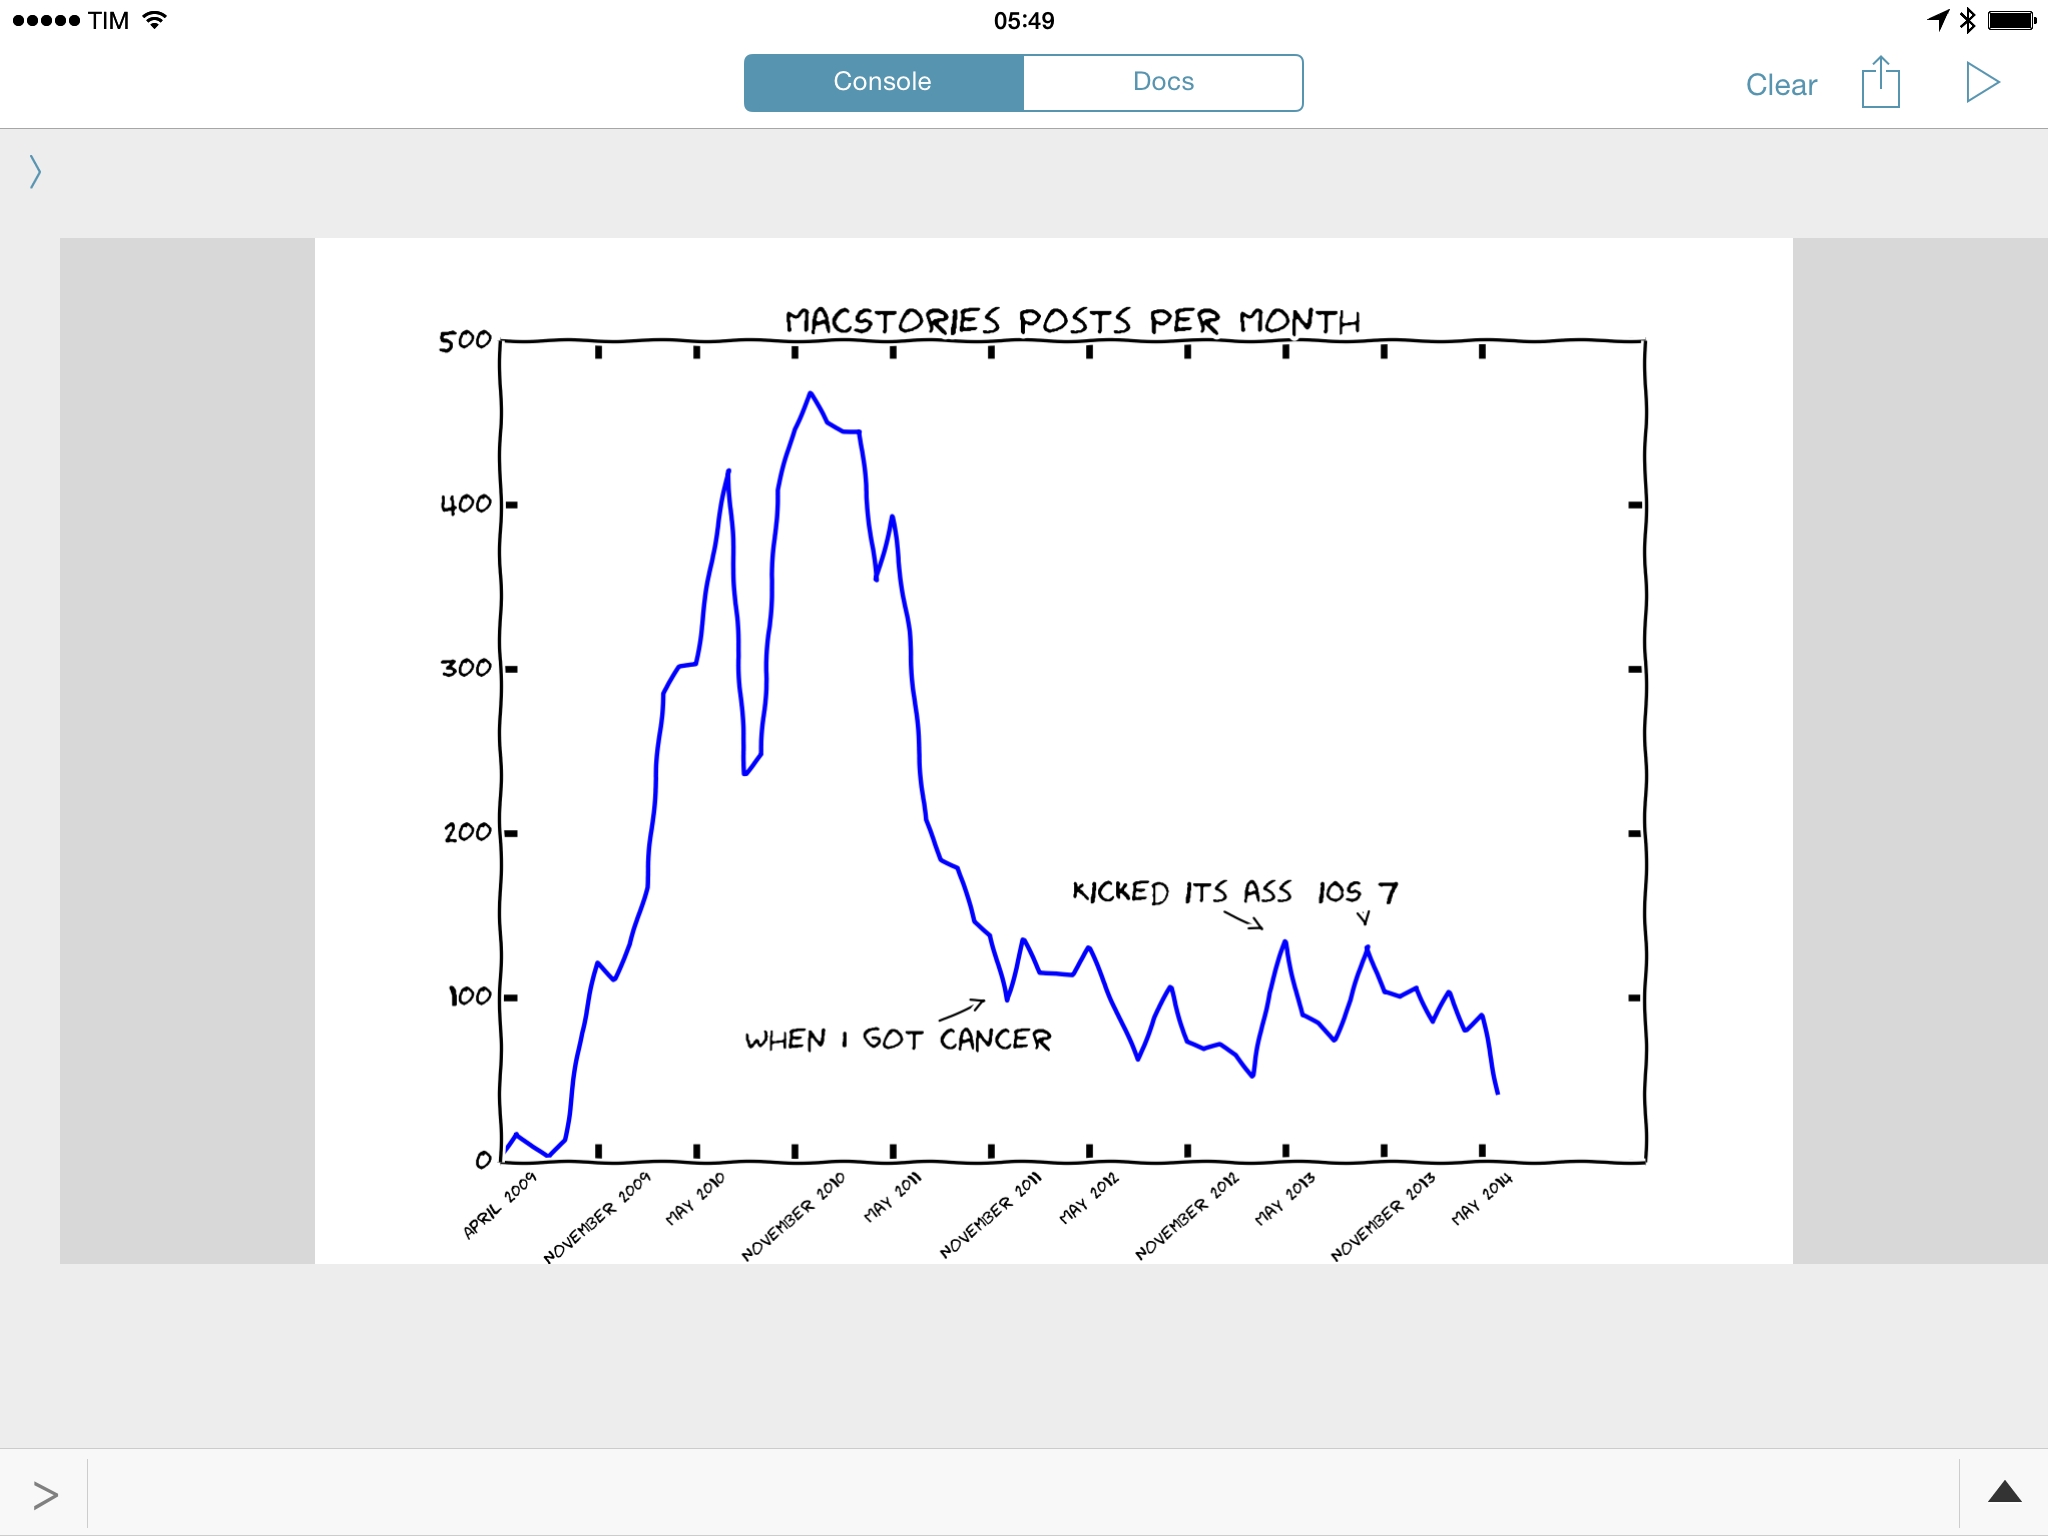
While I don’t need matplotlib’s features on a daily basis, I thought it’d be fun to learn the basics of the library through a simple chart that plots the number of MacStories articles per month over time. I’ve only briefly experimented with the functionalities provided by matplotlib on iOS, and I’m including my script as an example of what can be done with just a few lines of code.
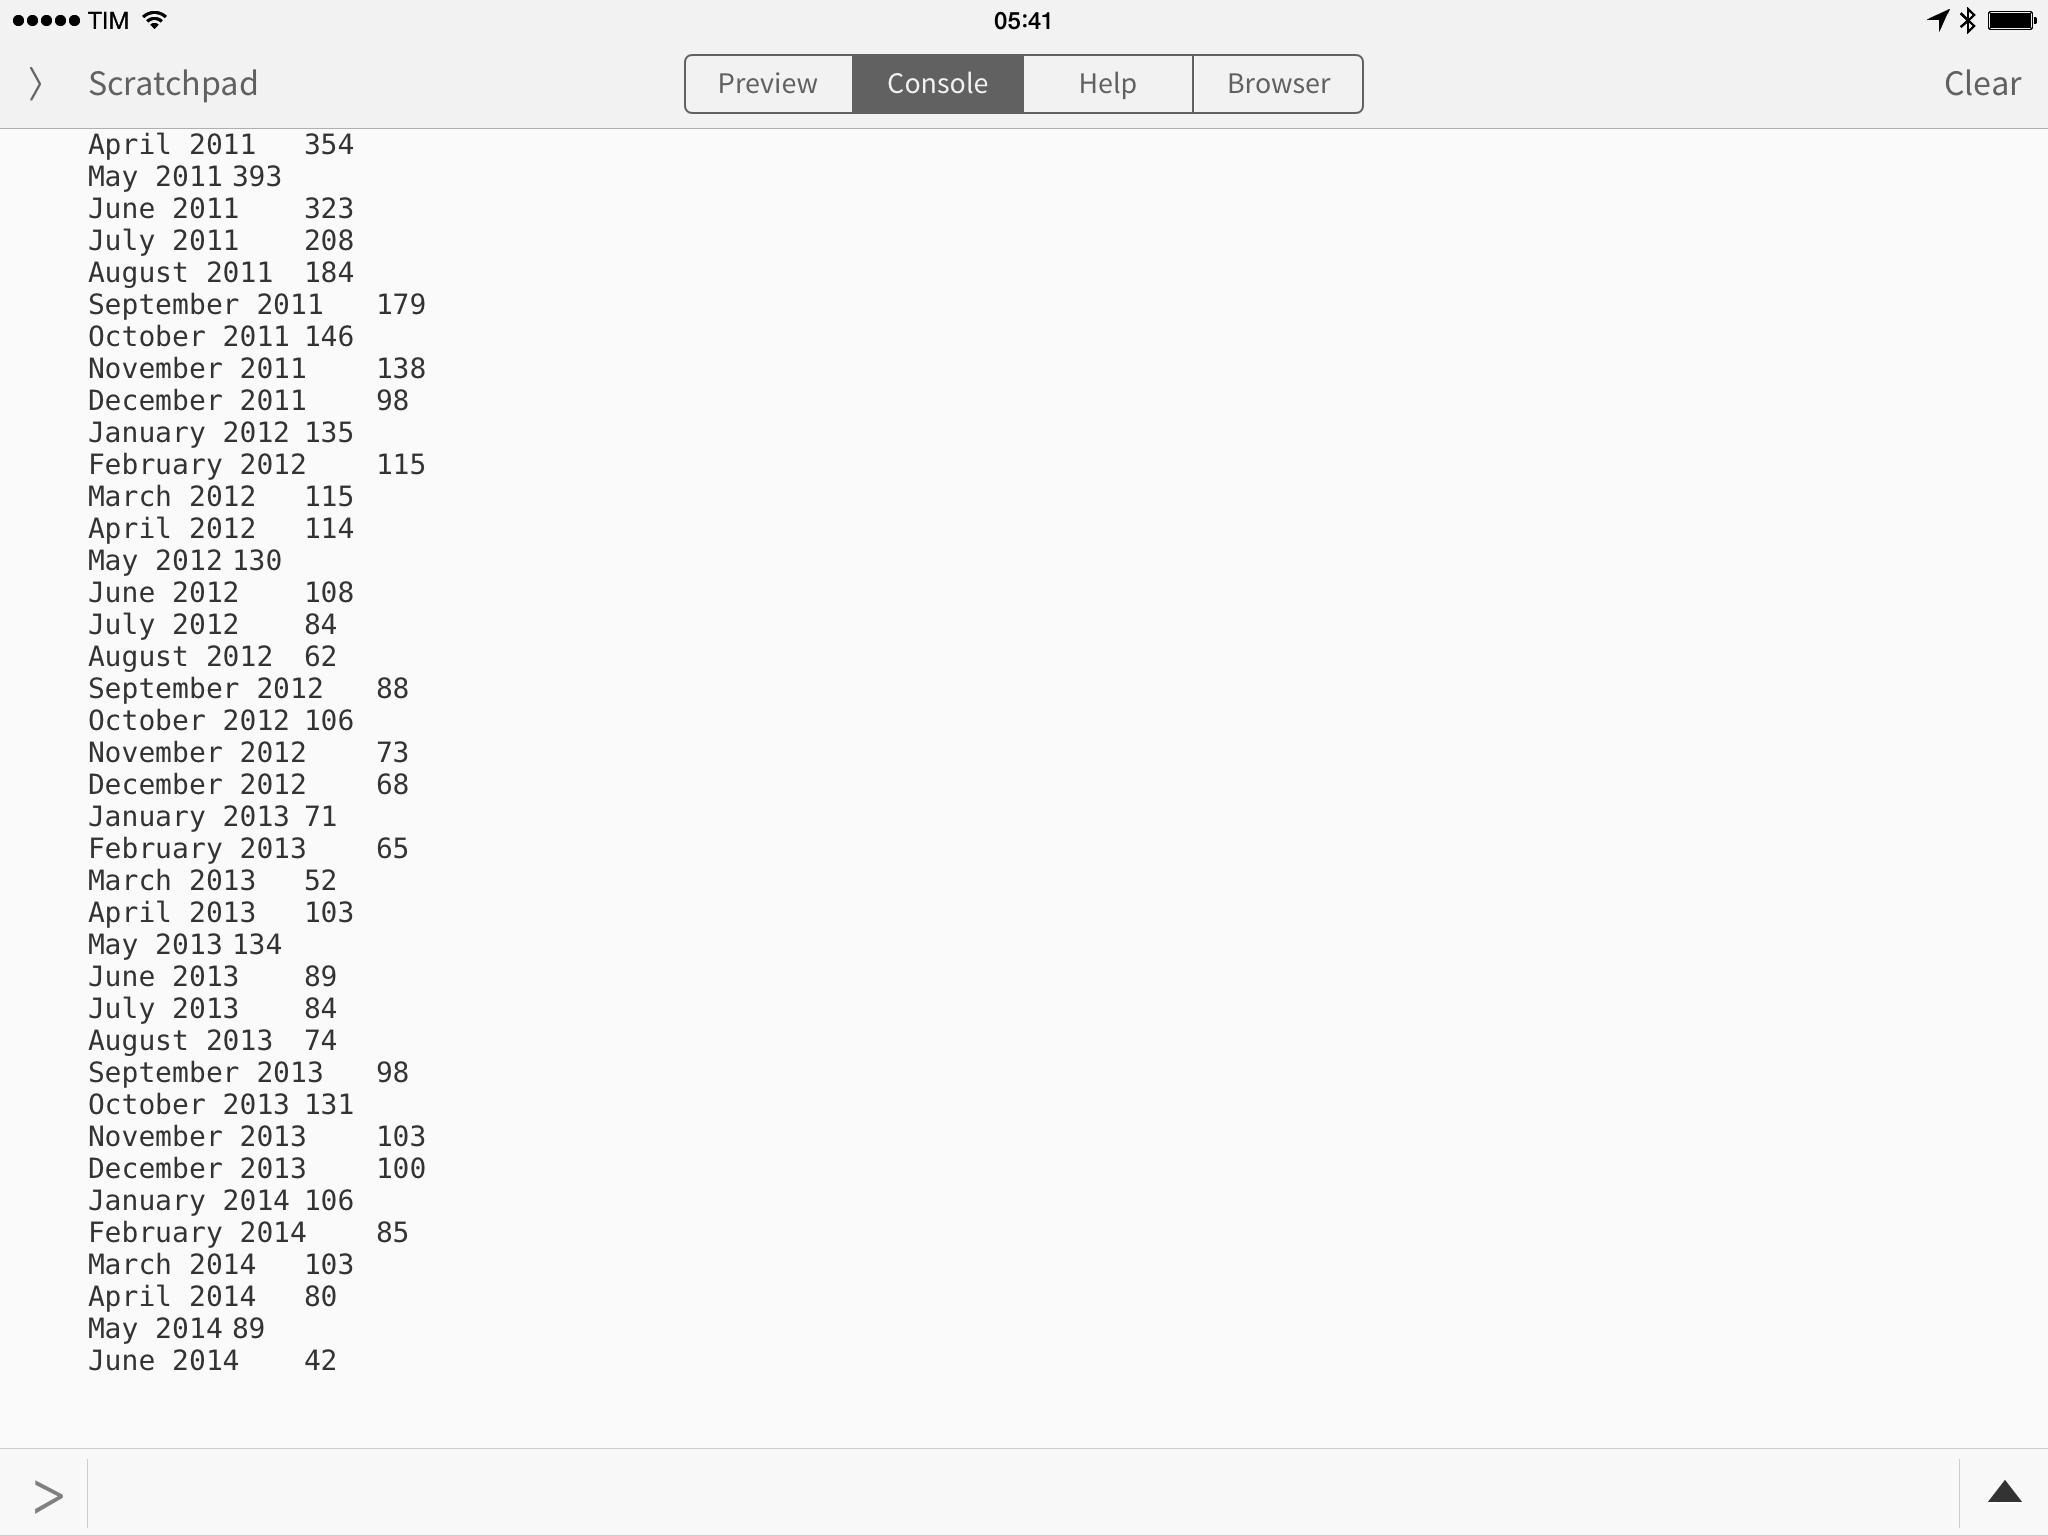
Given a string of text in the following format copied in the clipboard, where a tab character separates months and number of posts…
…generated from an Editorial workflow that counts all MacStories posts from the past five years, the following script generates a chart using matplotlib, NumPy, and the xkcd style for matplotlib:
import matplotlib.pyplot as plt
import numpy as np
import clipboard

data = clipboard.get()

lines = data.splitlines()
months = []
posts = []

for line in lines:
	month = line.split('\t')[0]
	post = line.split('\t')[1]
	months.append(month)
	posts.append(post)

x = len(months)
x = range(x)
plt.xkcd()
plt.annotate('When I got cancer', xy=(30,100), arrowprops=dict(arrowstyle='->'), xytext=(15,70))
plt.annotate('Kicked its ass', xy=(47,140), arrowprops=dict(arrowstyle='->'), xytext=(35,160))
plt.annotate('iOS 7', xy=(53,140), arrowprops=dict(arrowstyle='->'), xytext=(50,160))
plt.title('MacStories Posts Per Month')
plt.plot(x, posts)
plt.xticks(np.arange(min(x), max(x)+1, 6.0), months[::6], rotation=40, size='xx-small')
plt.show()
The end result looks like this:
Note how matplotlib makes it easy to add annotations, define arrow styles, and set appearance settings for fonts used in labels. Once Pythonista shows the final output, I can simply tap & hold the chart in the Console and save it to my photo library.
Like I said, I’ve only scratched the surface of what matplotlib makes possible without using dedicated apps, but I want to spend some quality time learning how I could use the library to automate static charts we need for MacStories articles. The addition of matplotlib and NumPy should make iOS an even more palatable portable Python environment for programmers.
Wrap Up
As Pythonista continues to raise the bar of what a programming app can do within the current limitations of iOS 7, Ole Zorn will need to find a balance between advanced features and what Apple thinks is okay for the platform.
With Pythonista 1.5, the removal of the Open In menu is a small compromise, instrumental in keeping the app on the Store and updating it with custom interfaces, matplotlib, NumPy, and plenty of other additions and refinements. While most of my text automation has moved to Editorial, I still rely on Pythonista for some key tasks in my iOS workflow, and I’m looking forward to seeing what Zorn will come up with for iOS 8.
Pythonista 1.5 is available on the App Store.
-
Xcode export has also been removed from Pythonista 1.5; Zorn has a solution to create Xcode projects from Pythonista files on OS X. ↩︎
-
Zorn’s built-in examples for a calculator, color mixer, and drawing “app” are very cool. ↩︎


