It’s Week 1 of Automation April, and as I announced last week, alongside the several initiatives we’ve prepared for this month-long automation event, I’ve been working on 30 shortcuts to share with everyone for free on MacStories this month.
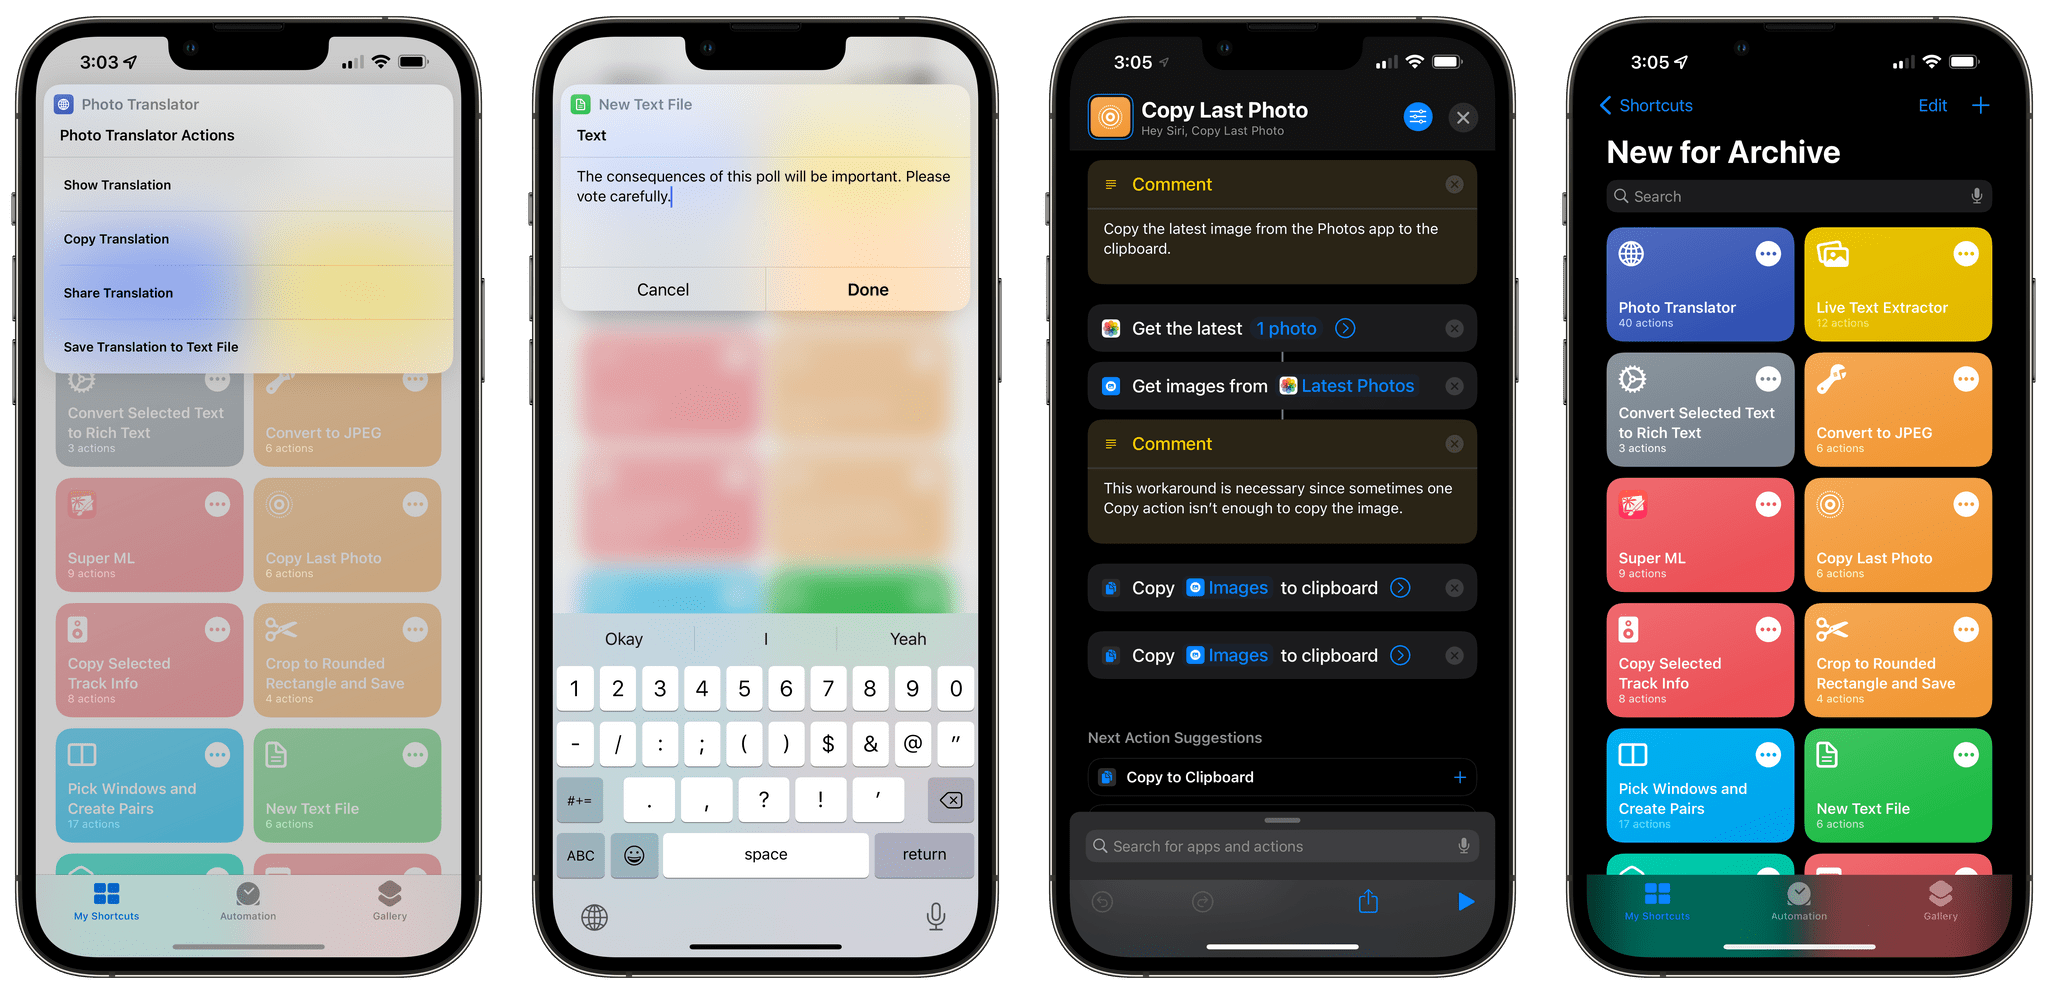
Today, I’m pleased to share the first group of 10 shortcuts that will join the other 250 on the MacStories Shortcuts Archive. These shortcuts are a diverse collection of utilities that have been specifically optimized for the latest versions of iOS, iPadOS, and macOS Monterey. Below, you’ll find shortcuts that take advantage of new actions for Translate and Live Text; there are Mac-only shortcuts that integrate with Finder and AppleScript; there’s even a shortcut that helps you speed up multitasking and window control on macOS.
As always, all the shortcuts I’m sharing as part of Automation April have been tested across all Apple devices and you can install them via the iCloud download links in this story. So grab a good cup of espresso, take a break from the Automation April contest, and let’s have a look.
Photo Translator
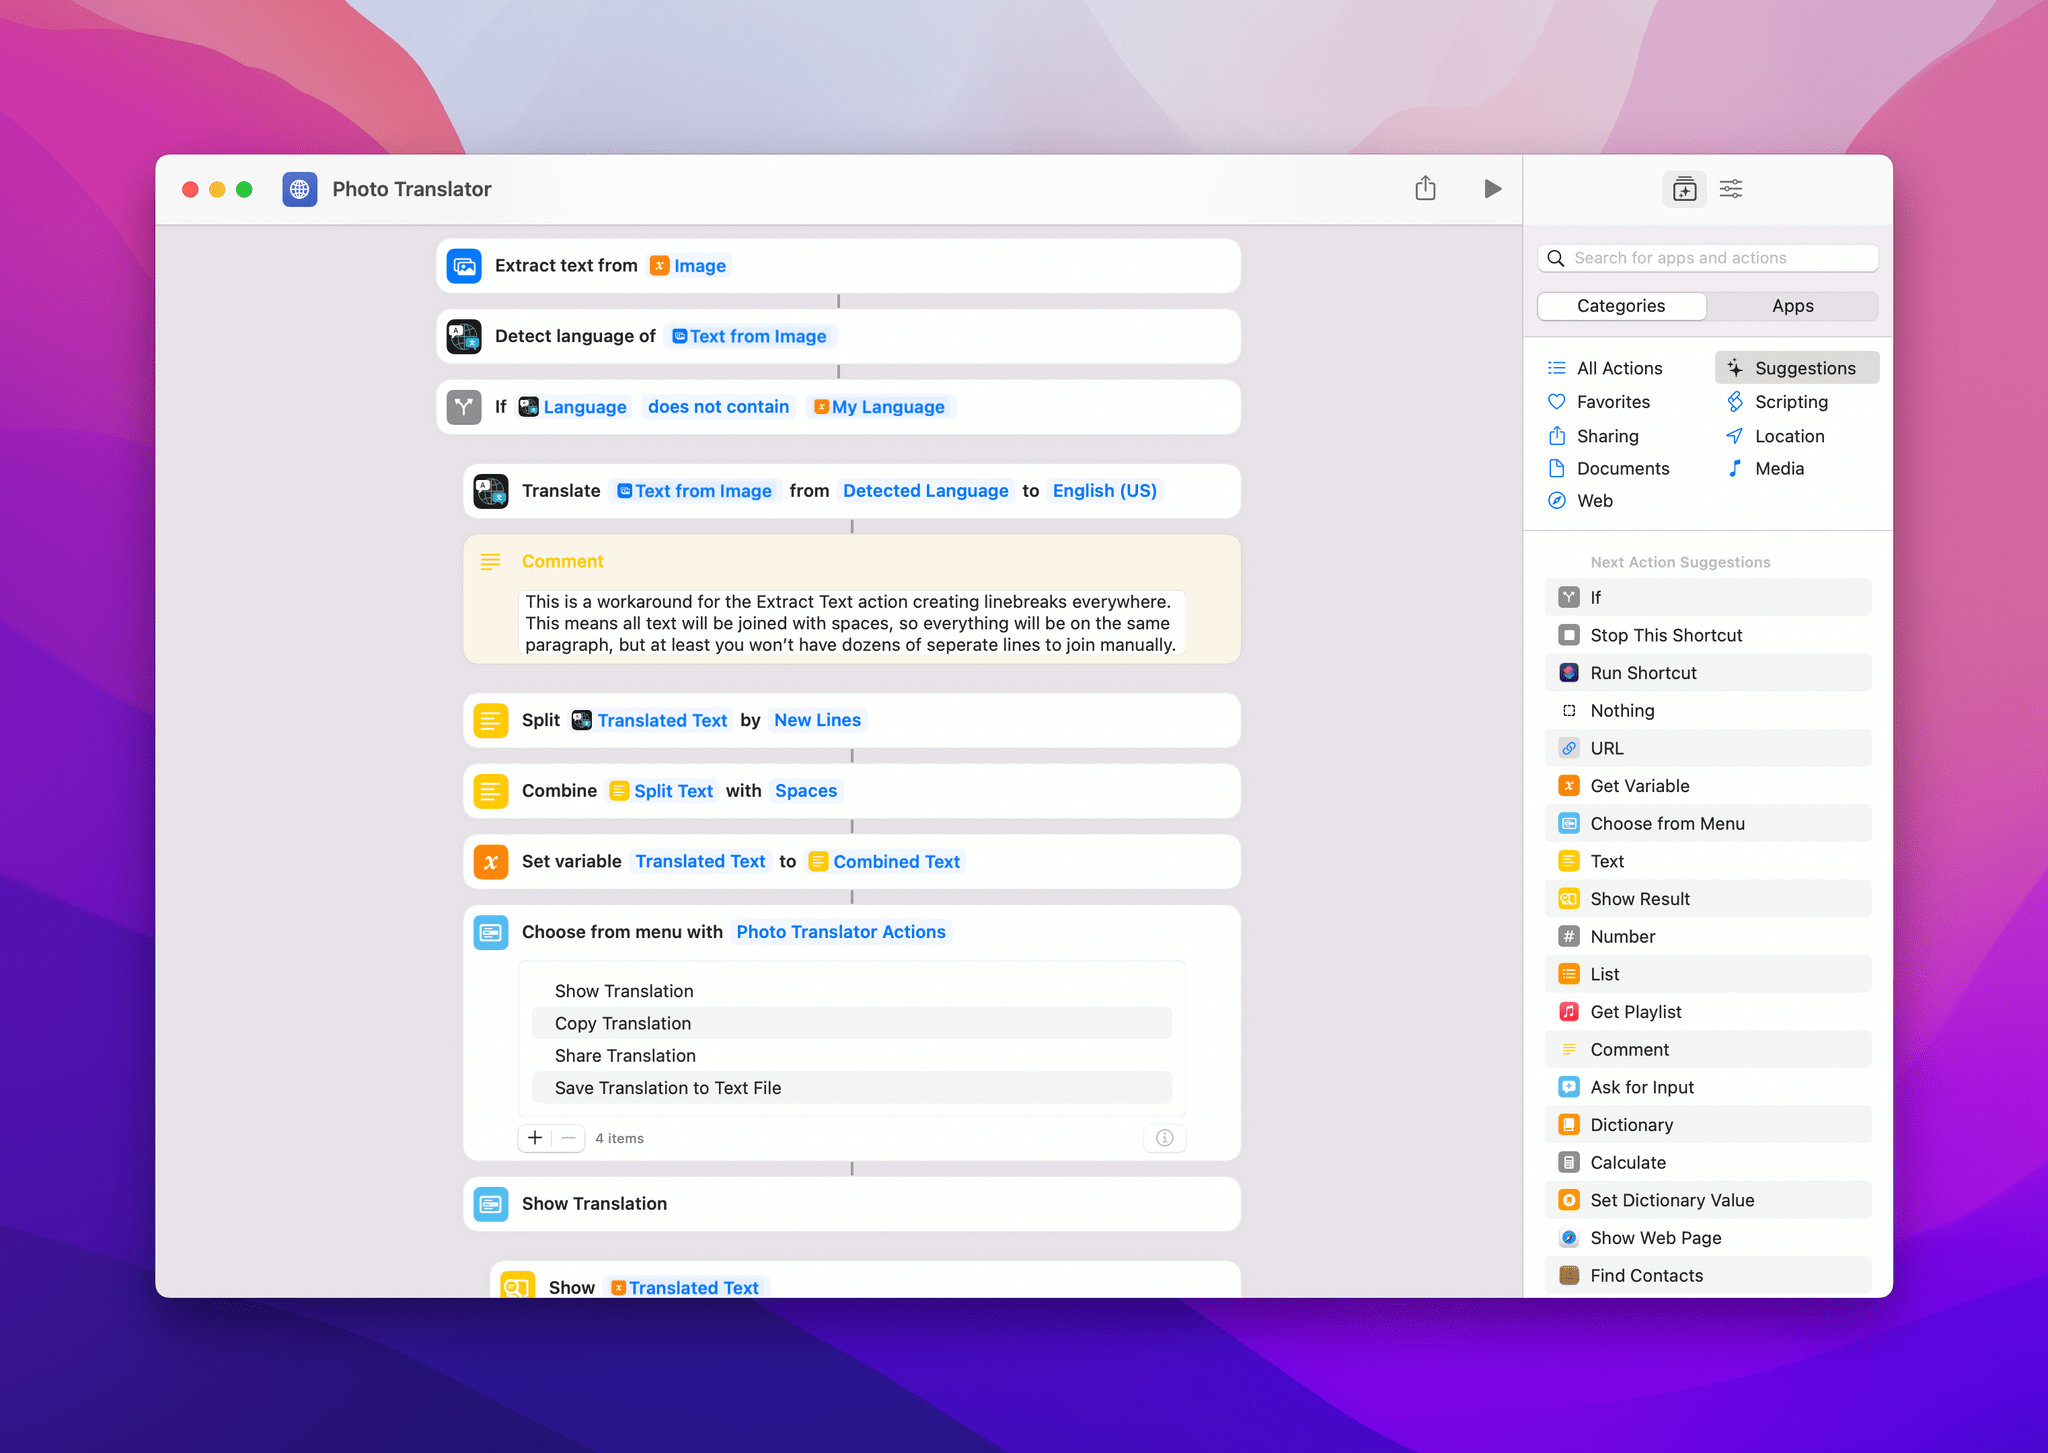
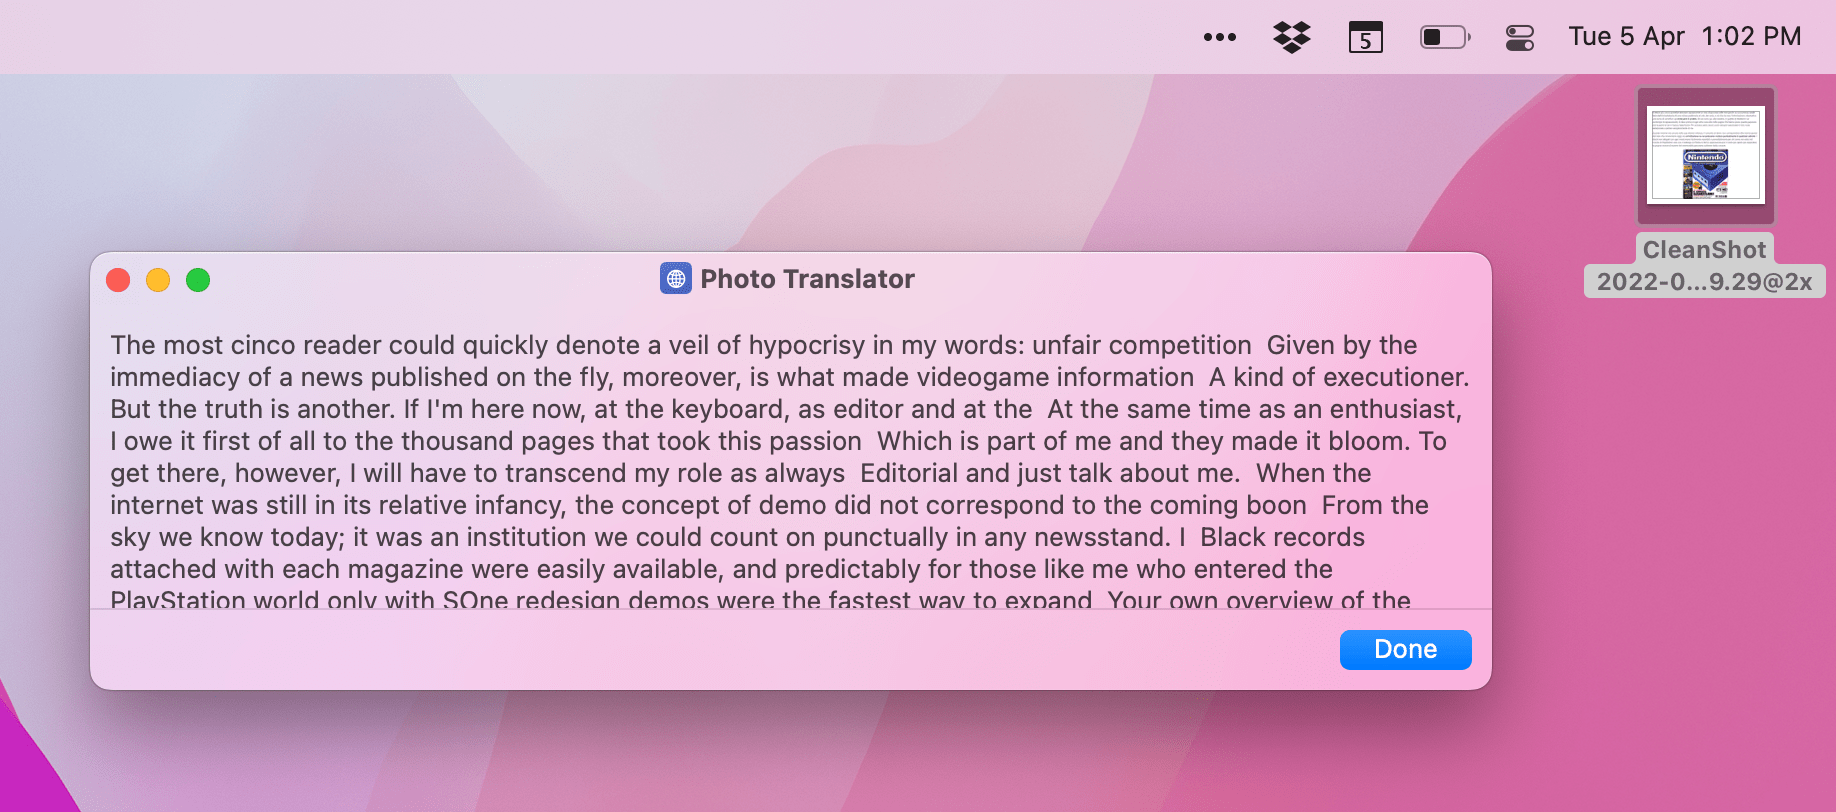
This shortcut is based on Apple’s new actions for the Translate app added with iOS 15.4 and macOS 12.3, and it lets you quickly translate any text recognized inside an image to a language of your choice. Thanks to the Neural Engine, Live Text can extract text from images and Translate can process it in a second, removing the need to open an image, manually select text, and paste it into the Translate app (which is also absent from the Mac).
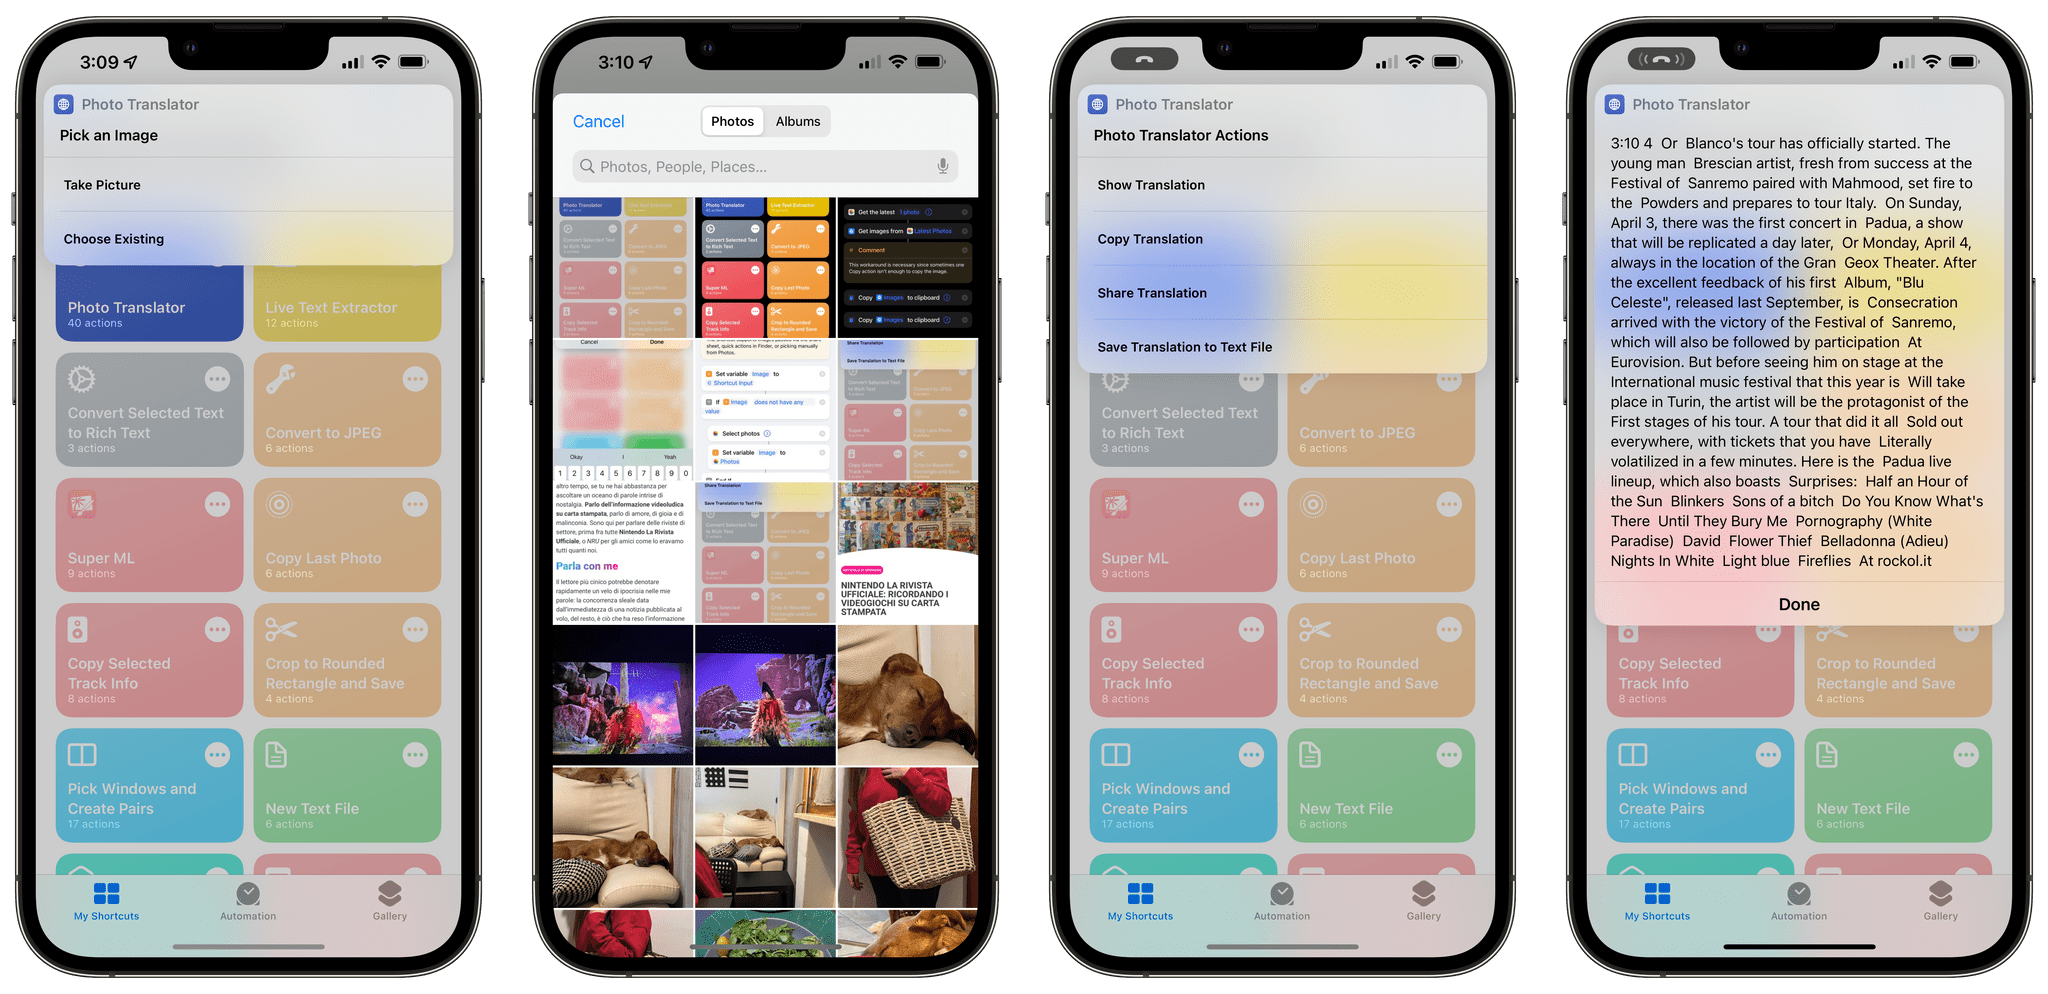
Once the text has been translated, you’ll be presented with a variety of actions you can perform: you can show the translation in a popup window; you can copy it to the clipboard or share it with other apps; you can also choose to save the original text and its translation to a plain text document anywhere in the Files app or Finder.
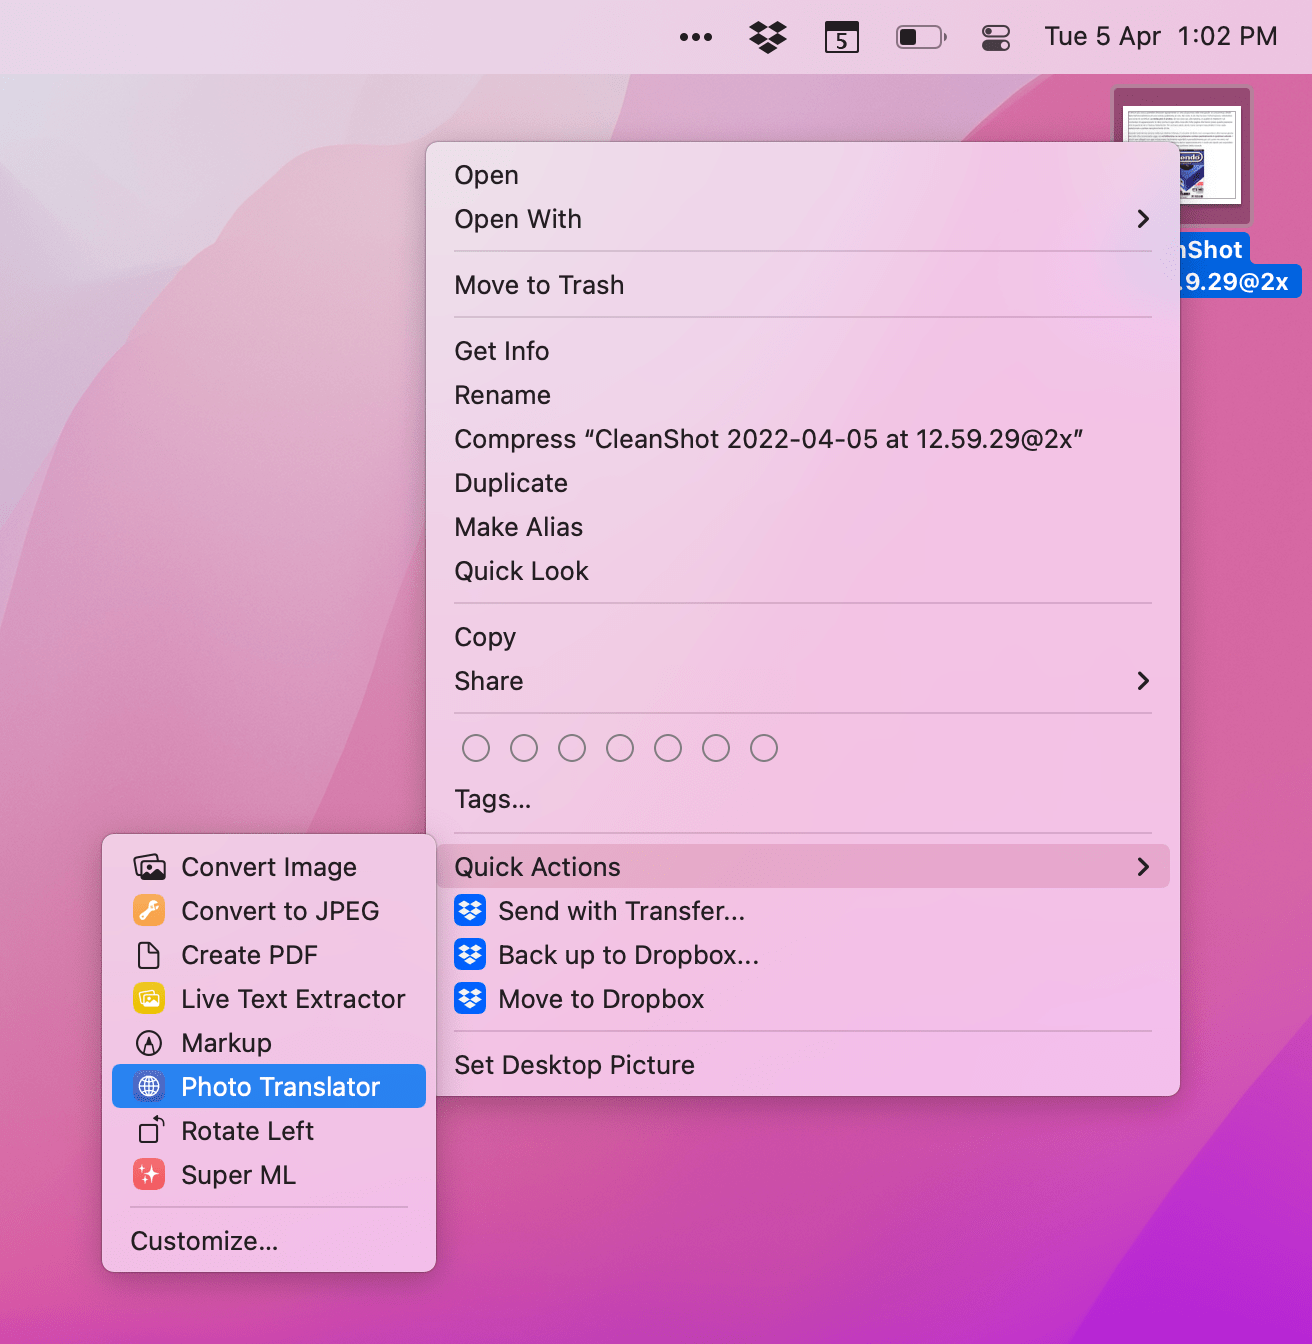
There are a few nice touches worth pointing out in this shortcut. For starters, Photo Translator can receive an image from the share sheet on iPhone or iPad or, alternatively, an image you’ve selected in the Mac’s Finder as a quick action.
In case you haven’t shared any image with the shortcut, you’ll be prompted to manually pick an image from the Photos library or take a picture with the Camera while the shortcut is running. The latter is a great option to have if you want to translate something in a hurry just by pointing your iPhone’s camera at it.
Additionally, you can configure the shortcut by telling it what your native language is. This way, if you select an image that already contains text in your own language, the shortcut will skip translation. You can, of course, change the ‘Translate To’ language at any time from the parameter in the ‘Translate Text’ action.
Photo Translator
Translate text recognized from images (thanks to Live Text) to any language supported by Apple’s Translate app. The shortcut accepts images from the share sheet, quick actions in Finder, picking from the Photos app, or taking new pictures with the Camera.
Live Text Extractor
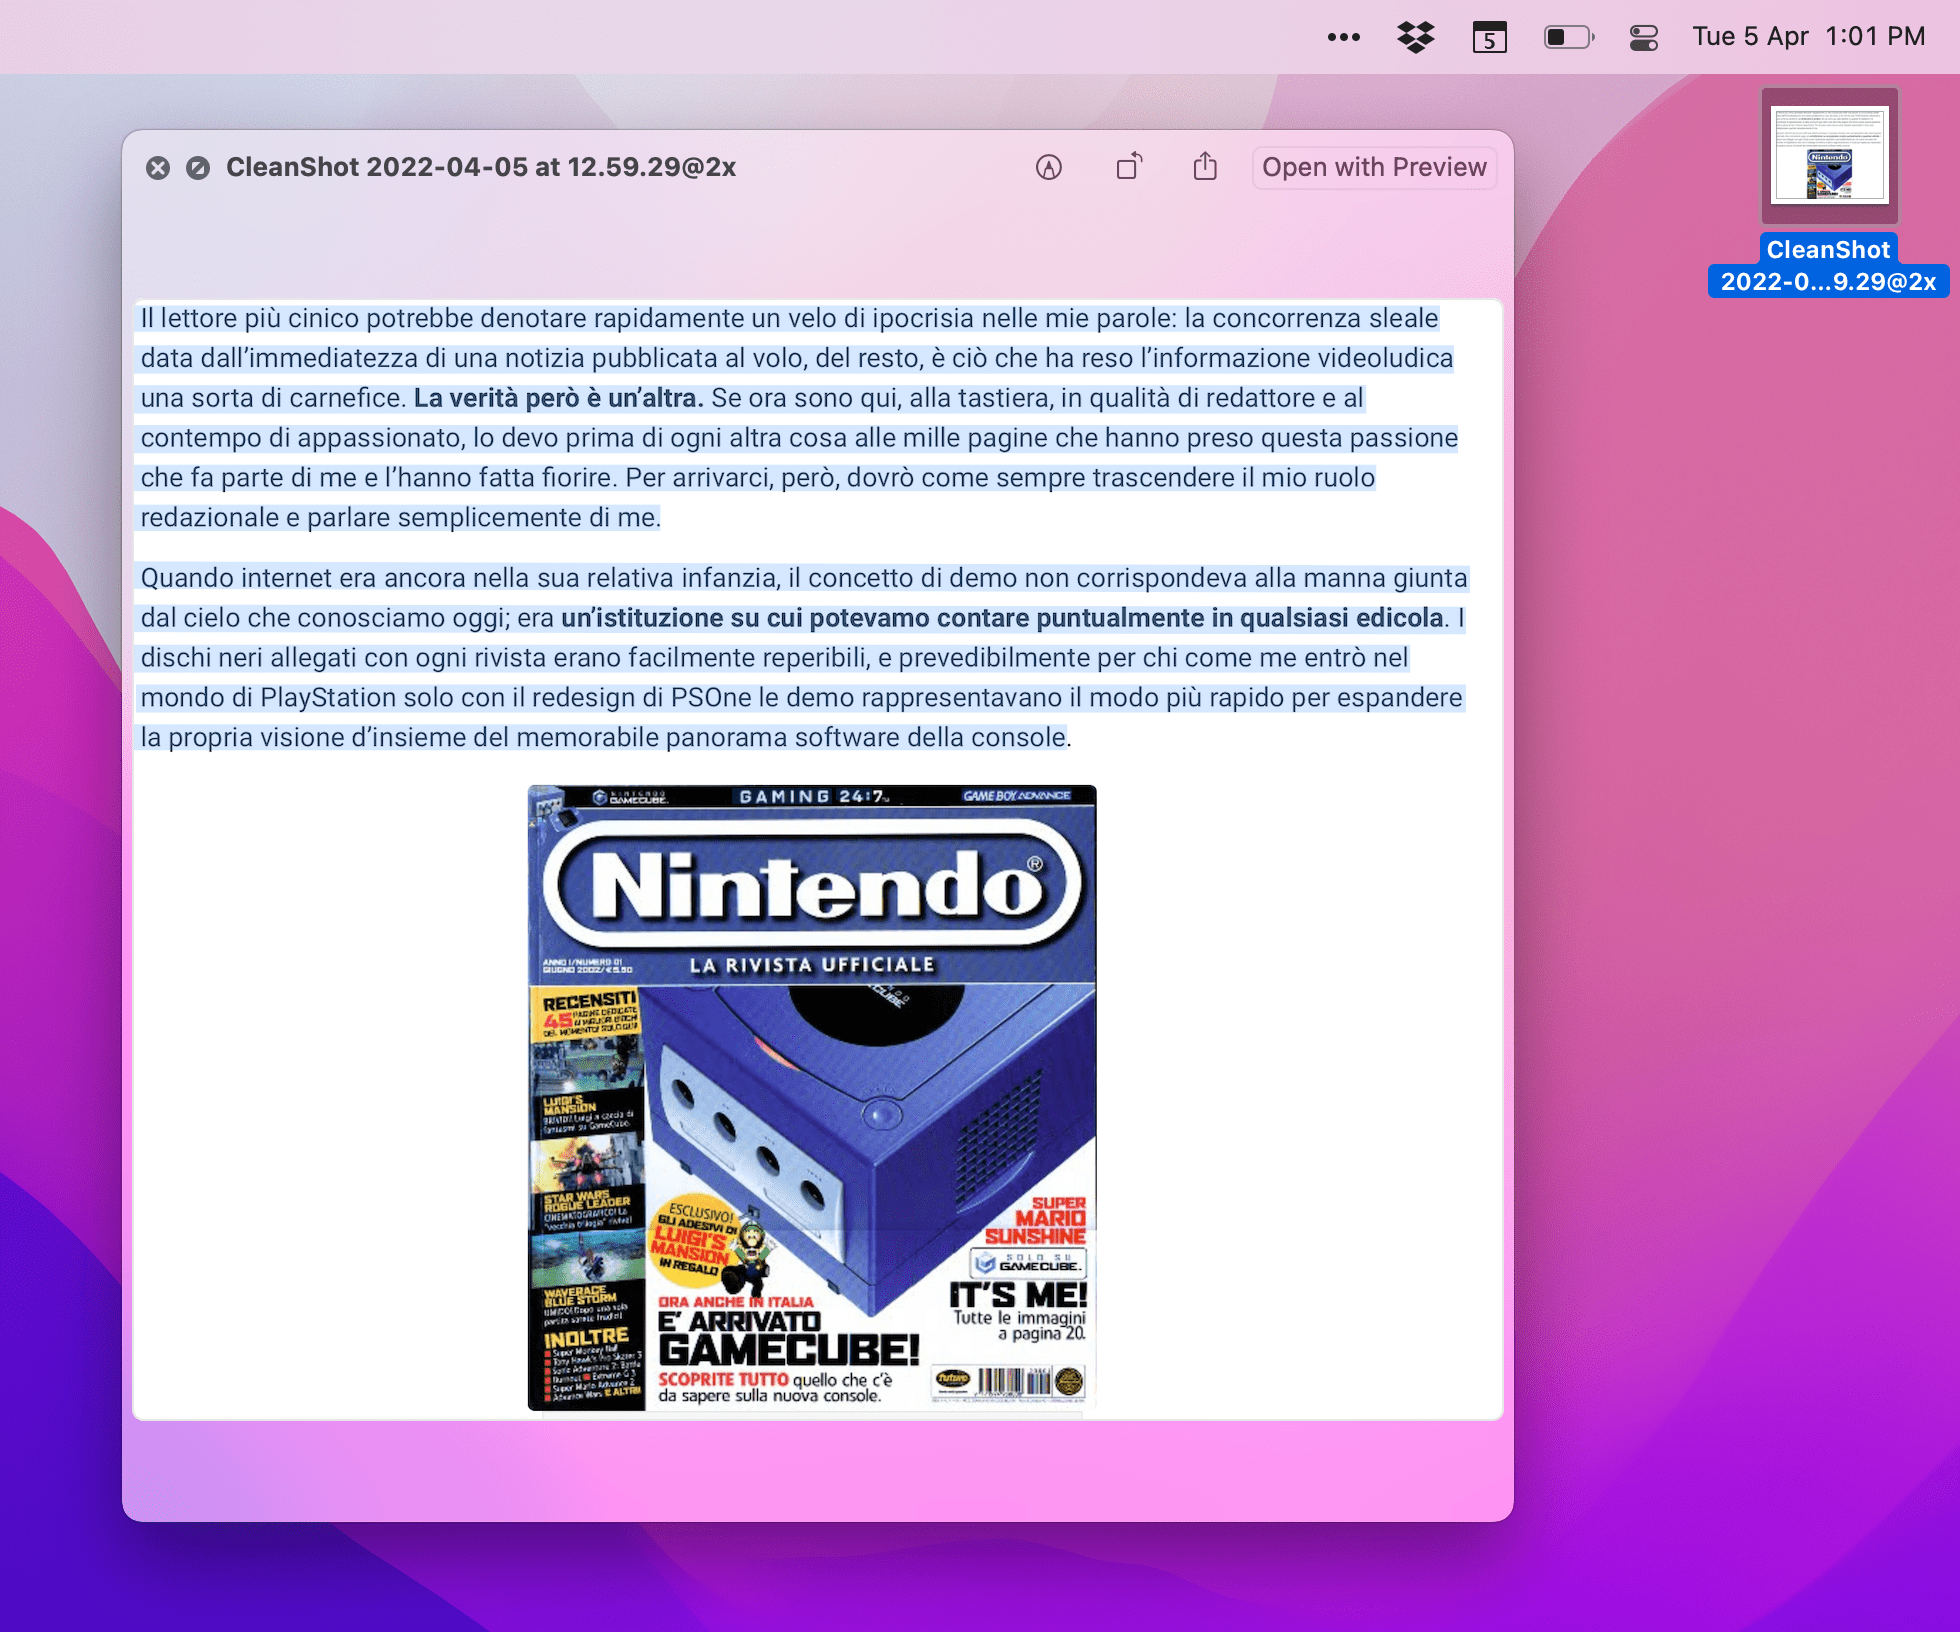
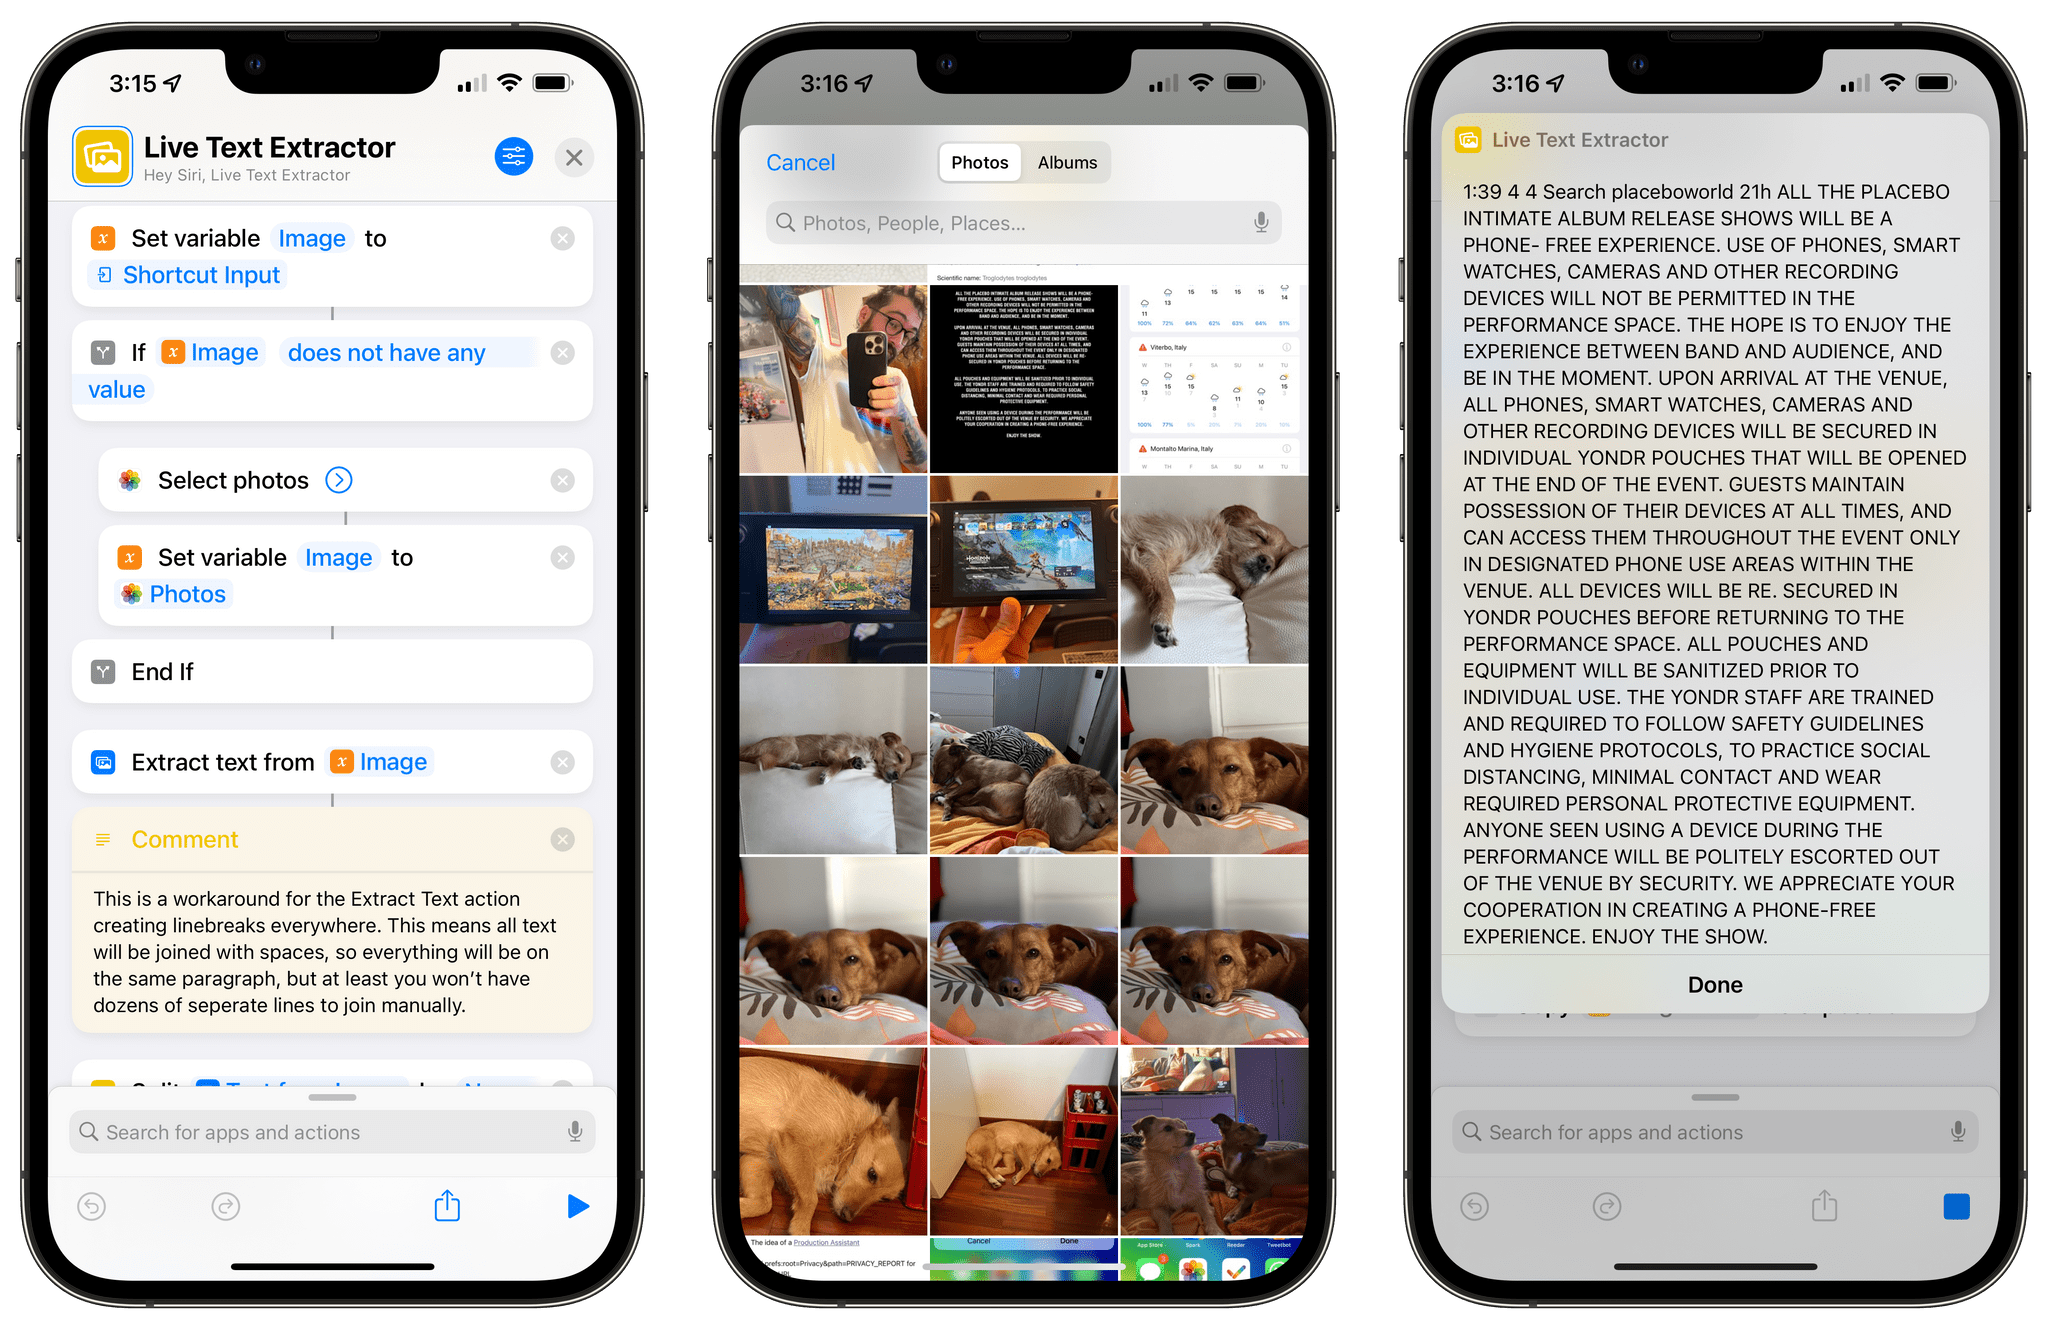
This shortcut is a simplified version of Photo Translator that simply extracts text found inside an image thanks to Live Text and immediately copies it to the system clipboard. Based on the ‘Extract Text from Image’ action, Live Text Extractor can even process large images containing lots of text incredibly fast. It’s the ideal utility for people who find themselves dealing with OCR workflows and extracting text from images on a daily basis.
Like the shortcut above, Live Text Extractor supports receiving images from the share sheet and quick actions in Finder, and it also lets you manually pick an image from Photos. I find the quick action integration especially impressive since you can go from an image on your desktop to copied text in your clipboard with, literally, just two clicks.
Live Text Extractor
Show and copy text found in any image via Live Text. The shortcut supports images passed via the share sheet, quick actions in Finder, or picking manually from Photos.
Convert Selected Text to Rich Text
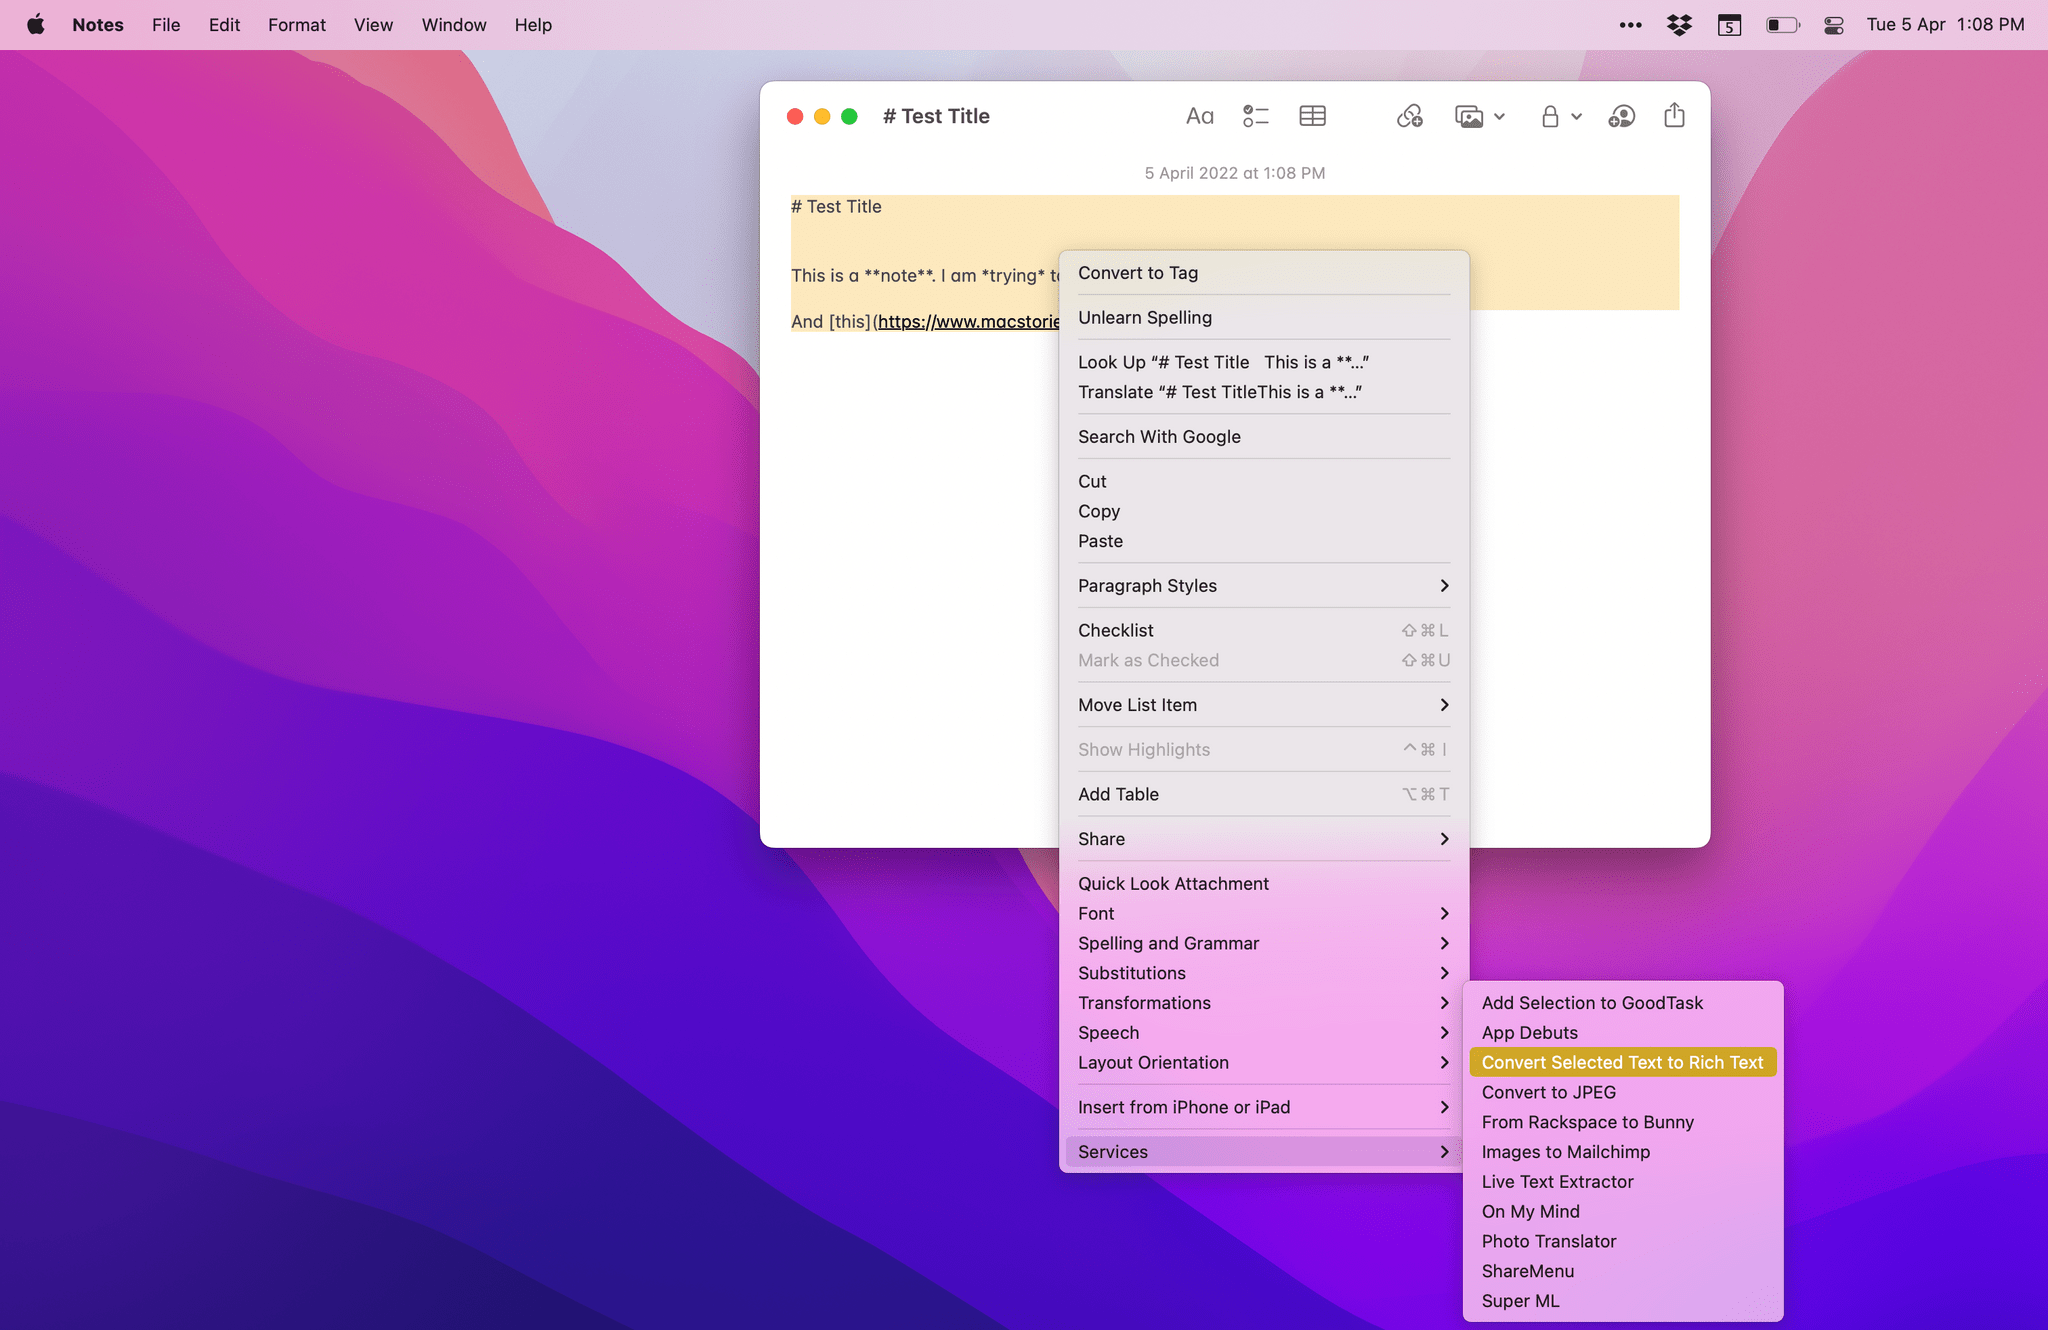
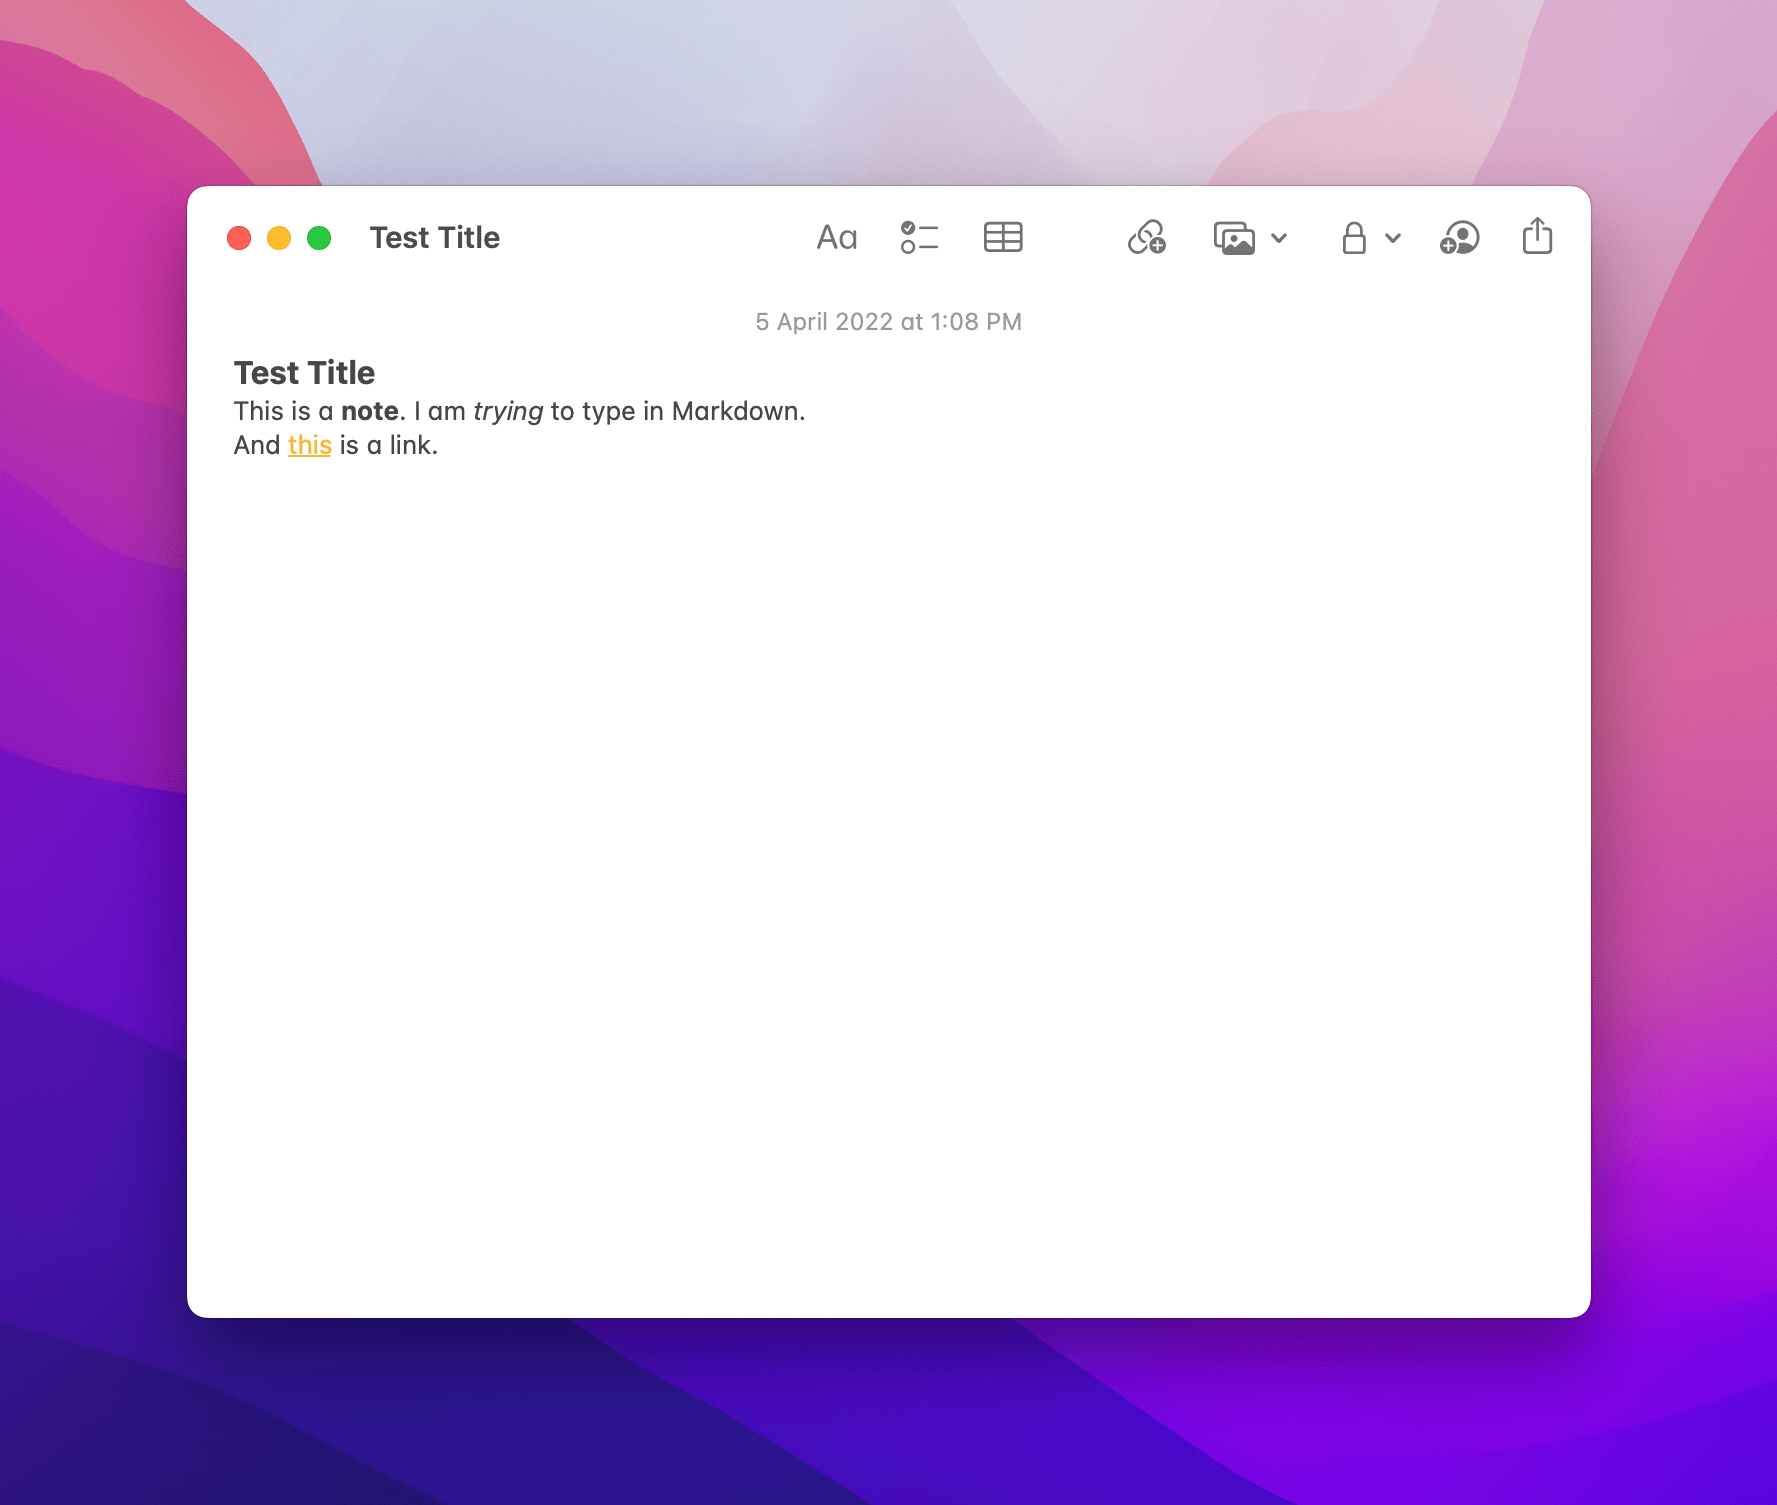
This shortcut does something you may have seen dozens of times on macOS as a ‘Service’: given some Markdown text selected in any text editor, the shortcut runs and replaces the selection with converted rich text. Write some Markdown in Notes, for instance, invoke this shortcut, and a second later the text will be replaced by its formatted equivalent.
How is this possible? The trick lies in a new, largely undocumented feature of Shortcuts for Mac that was added last month called ‘Provide Output’.
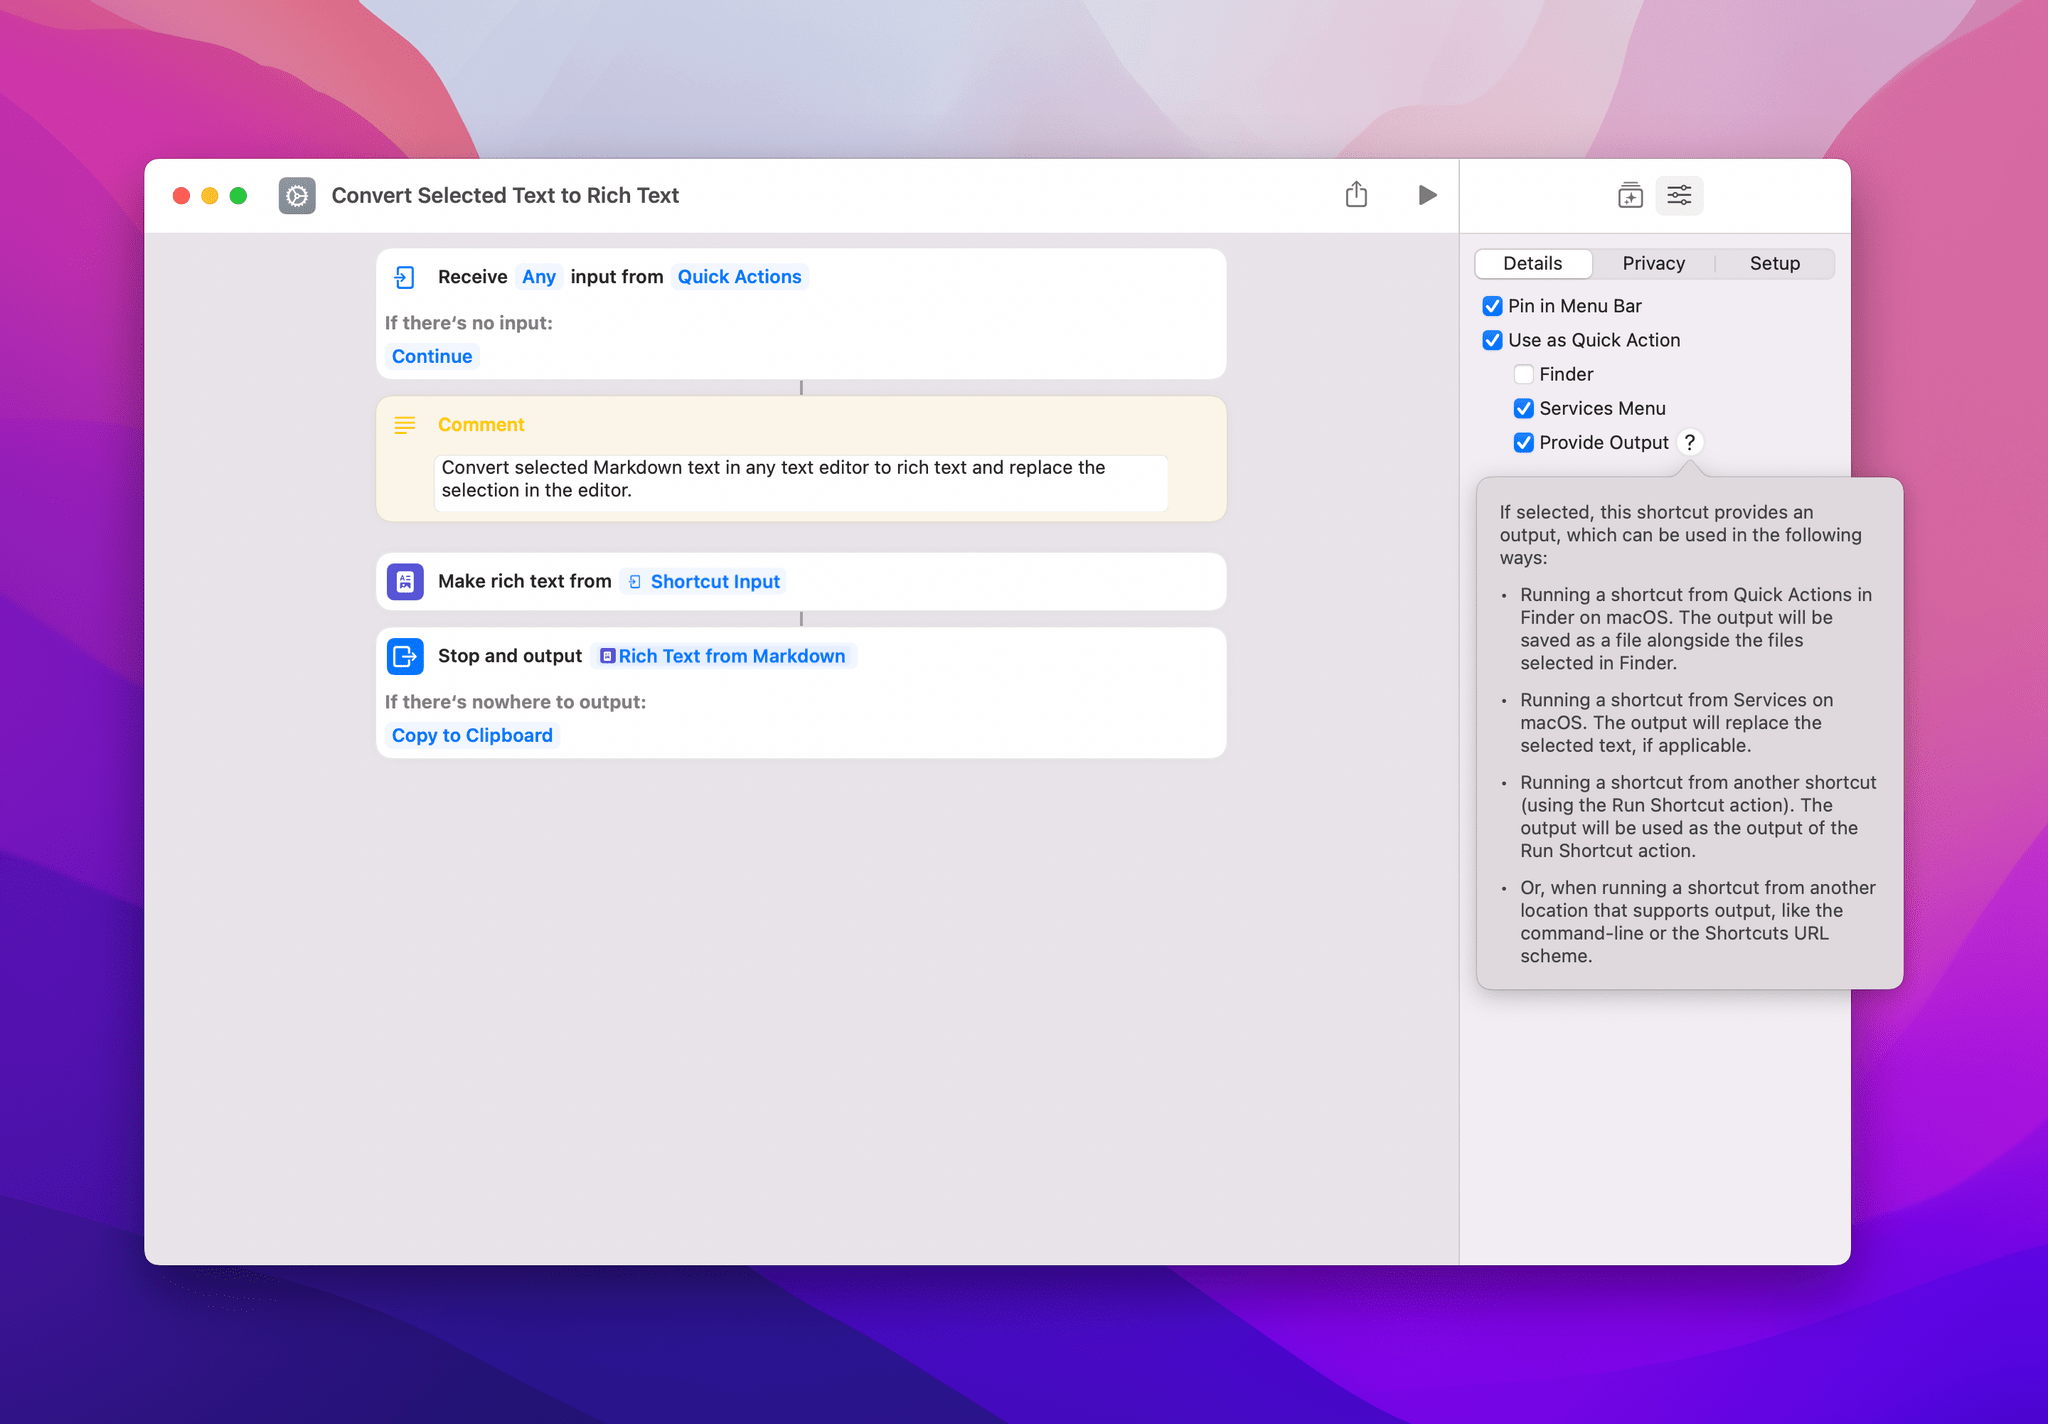
Available only on macOS for now, this option can be found in the Details screen of an individual shortcut under the ‘Use as Quick Action’ menu. Click the ‘?’ button next to it, and you’ll see Apple’s explanation for how this works:
Essentially, providing an output means that a shortcut can pass its results to something else depending on the context in which it is running. For instance, if a shortcut is running as a quick action in Finder and produces a file object as output, this option ensures the file is saved to the Finder alongside other files you may have selected; alternatively, if the shortcut is running as a service for text selected in a text editor, the output will replace the selected text. You get the idea. With this option, Apple has dramatically simplified the process of retrieving items from Finder, modifying them, and saving new versions from Shortcuts, and they’ve enabled new capabilities altogether with support for text selections. I’d love to have this feature on iPadOS at some point; in the meantime, I’m happy I can start using it on macOS.
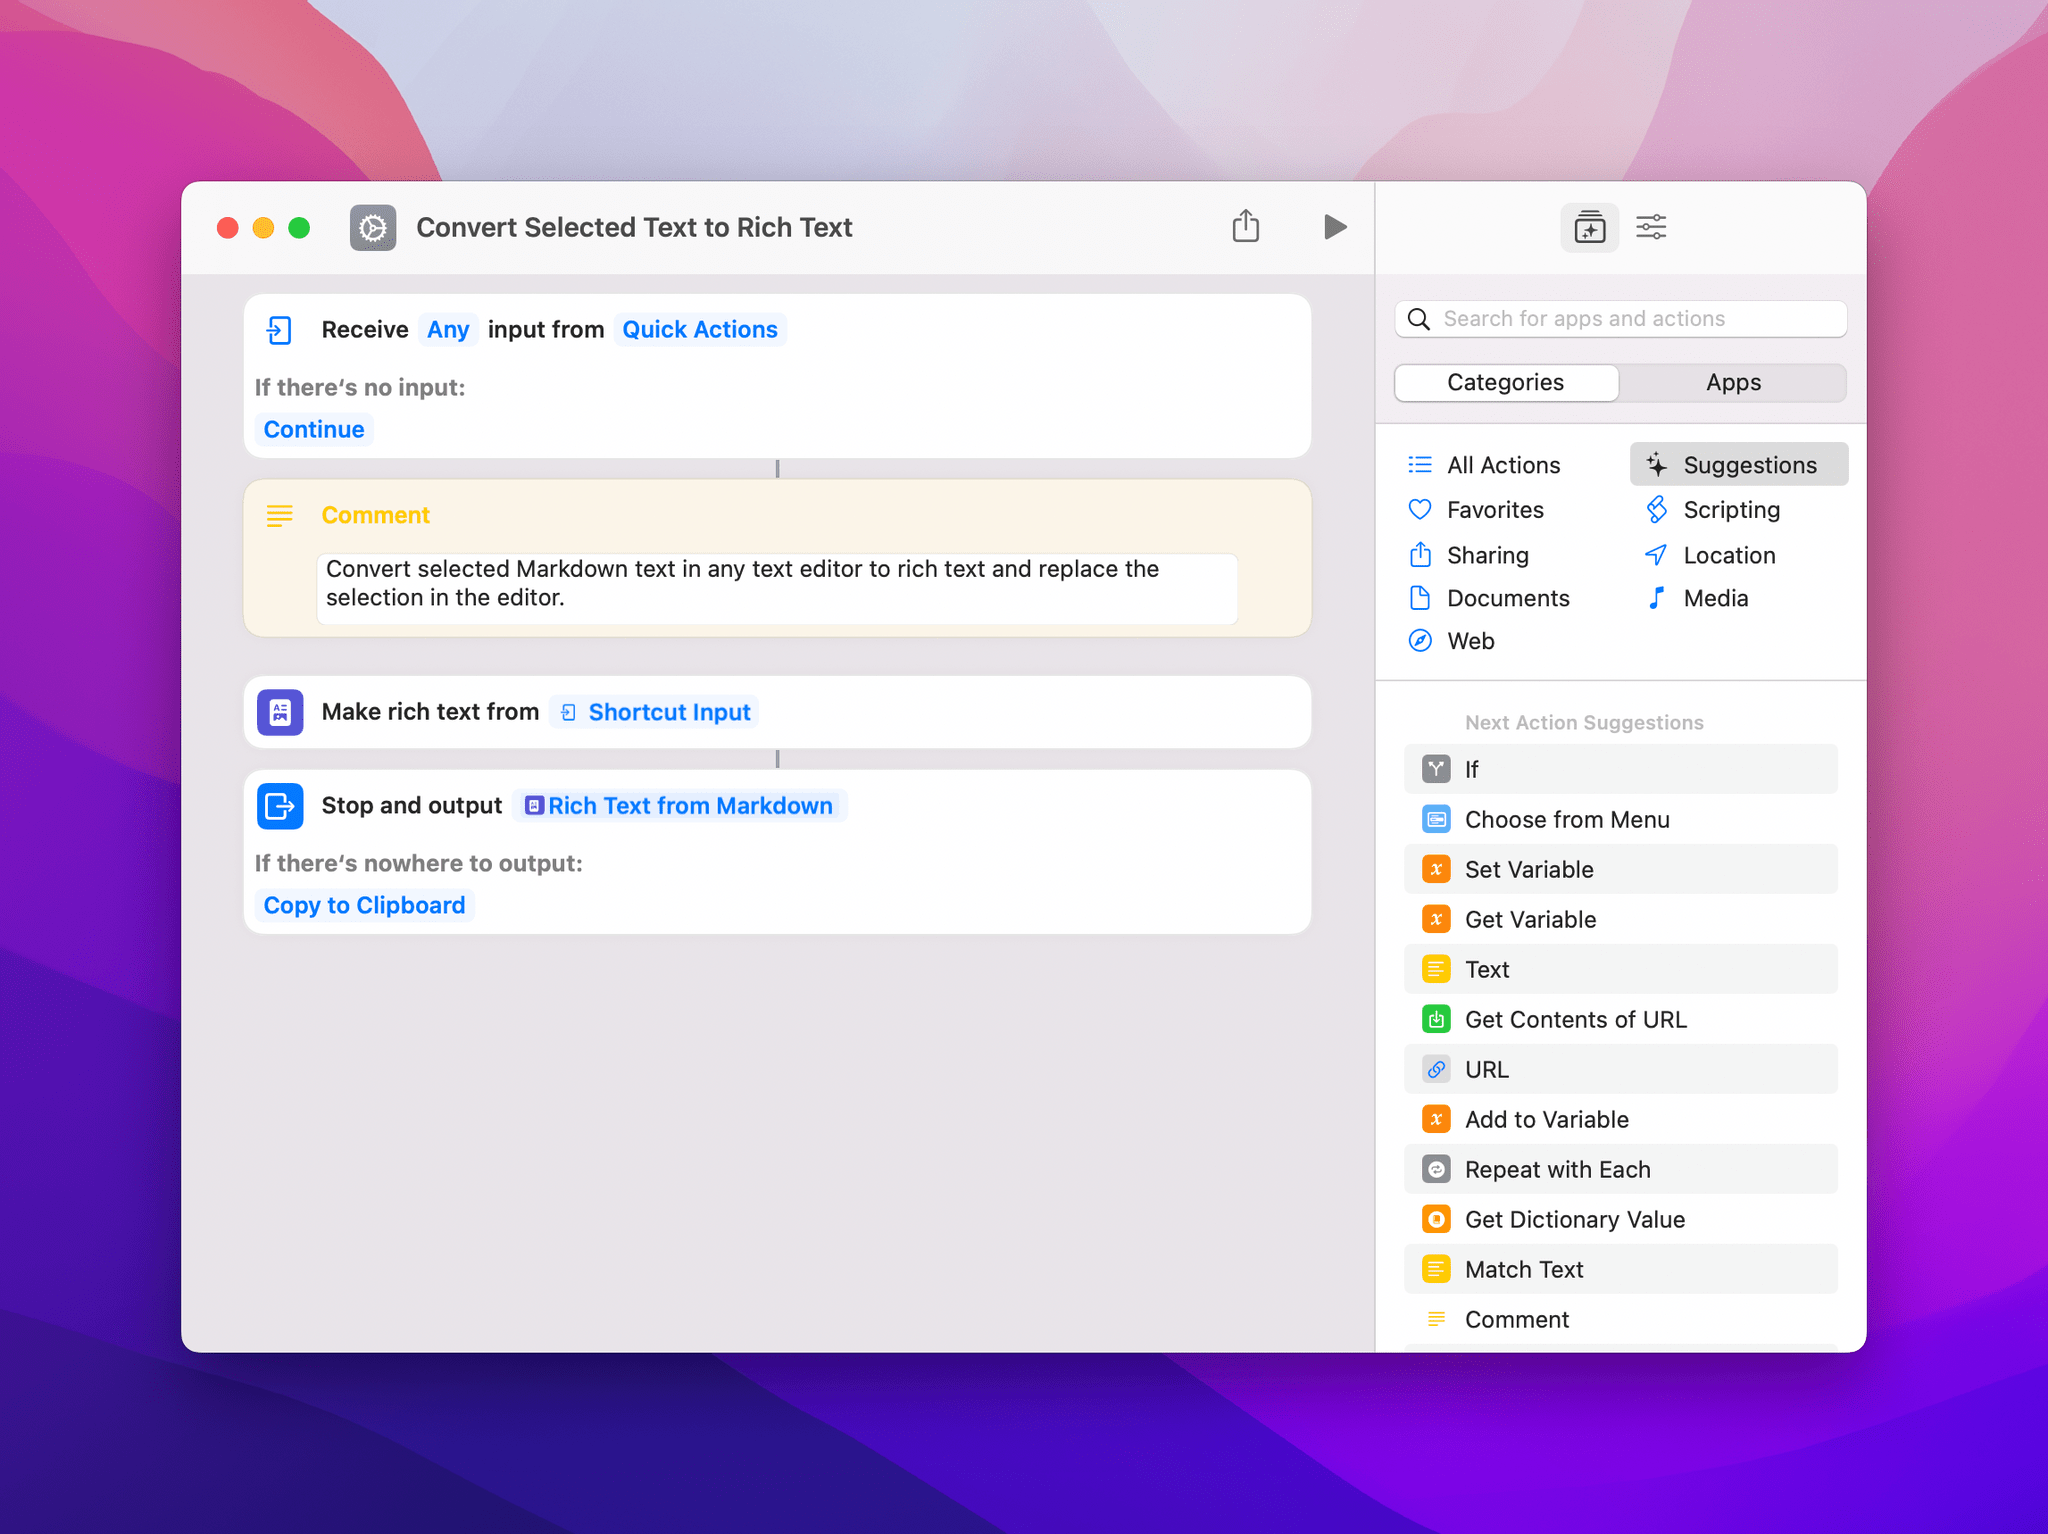
This first shortcut designed for Provide Output is a simple proof-of-concept that gets the job done. As you can see, to convert Markdown to rich text and insert it in an active text field all we need is one action; the ‘Stop and Output’ step is automatically inserted by Shortcuts when Provide Output is enabled, and there’s nothing else to do.
I’ll cover some other details of Provide Output later today in our Discord workshop for Club members. In the meantime, you can download Convert Selected Text to Rich Text below.
Convert Selected Text to Rich Text
Convert selected Markdown text in any text editor to rich text and replace the selection in the editor.
Convert to JPEG
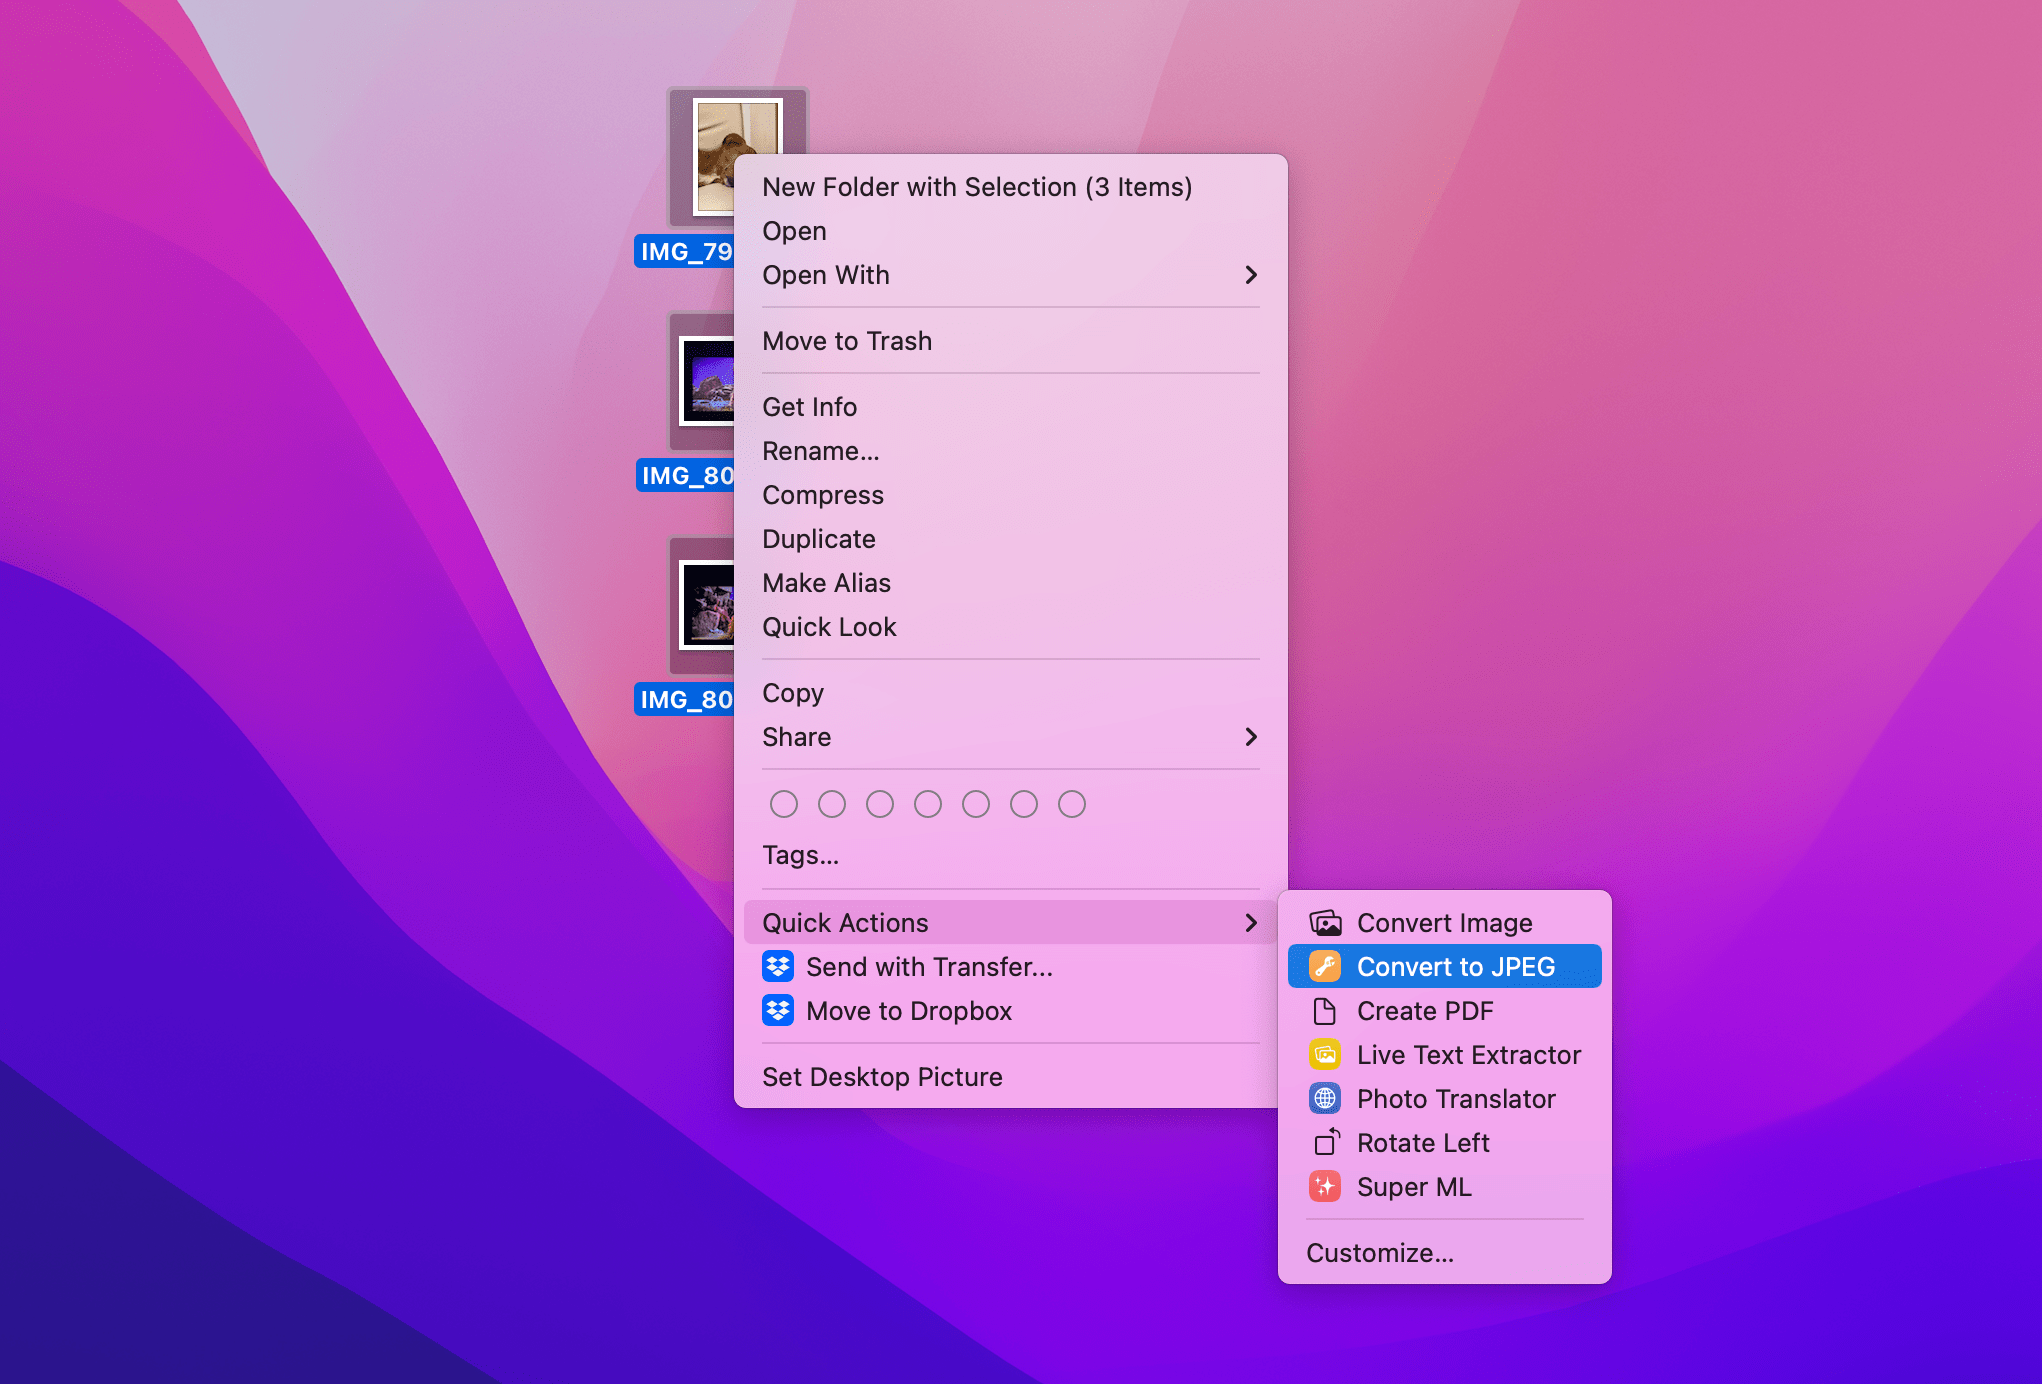
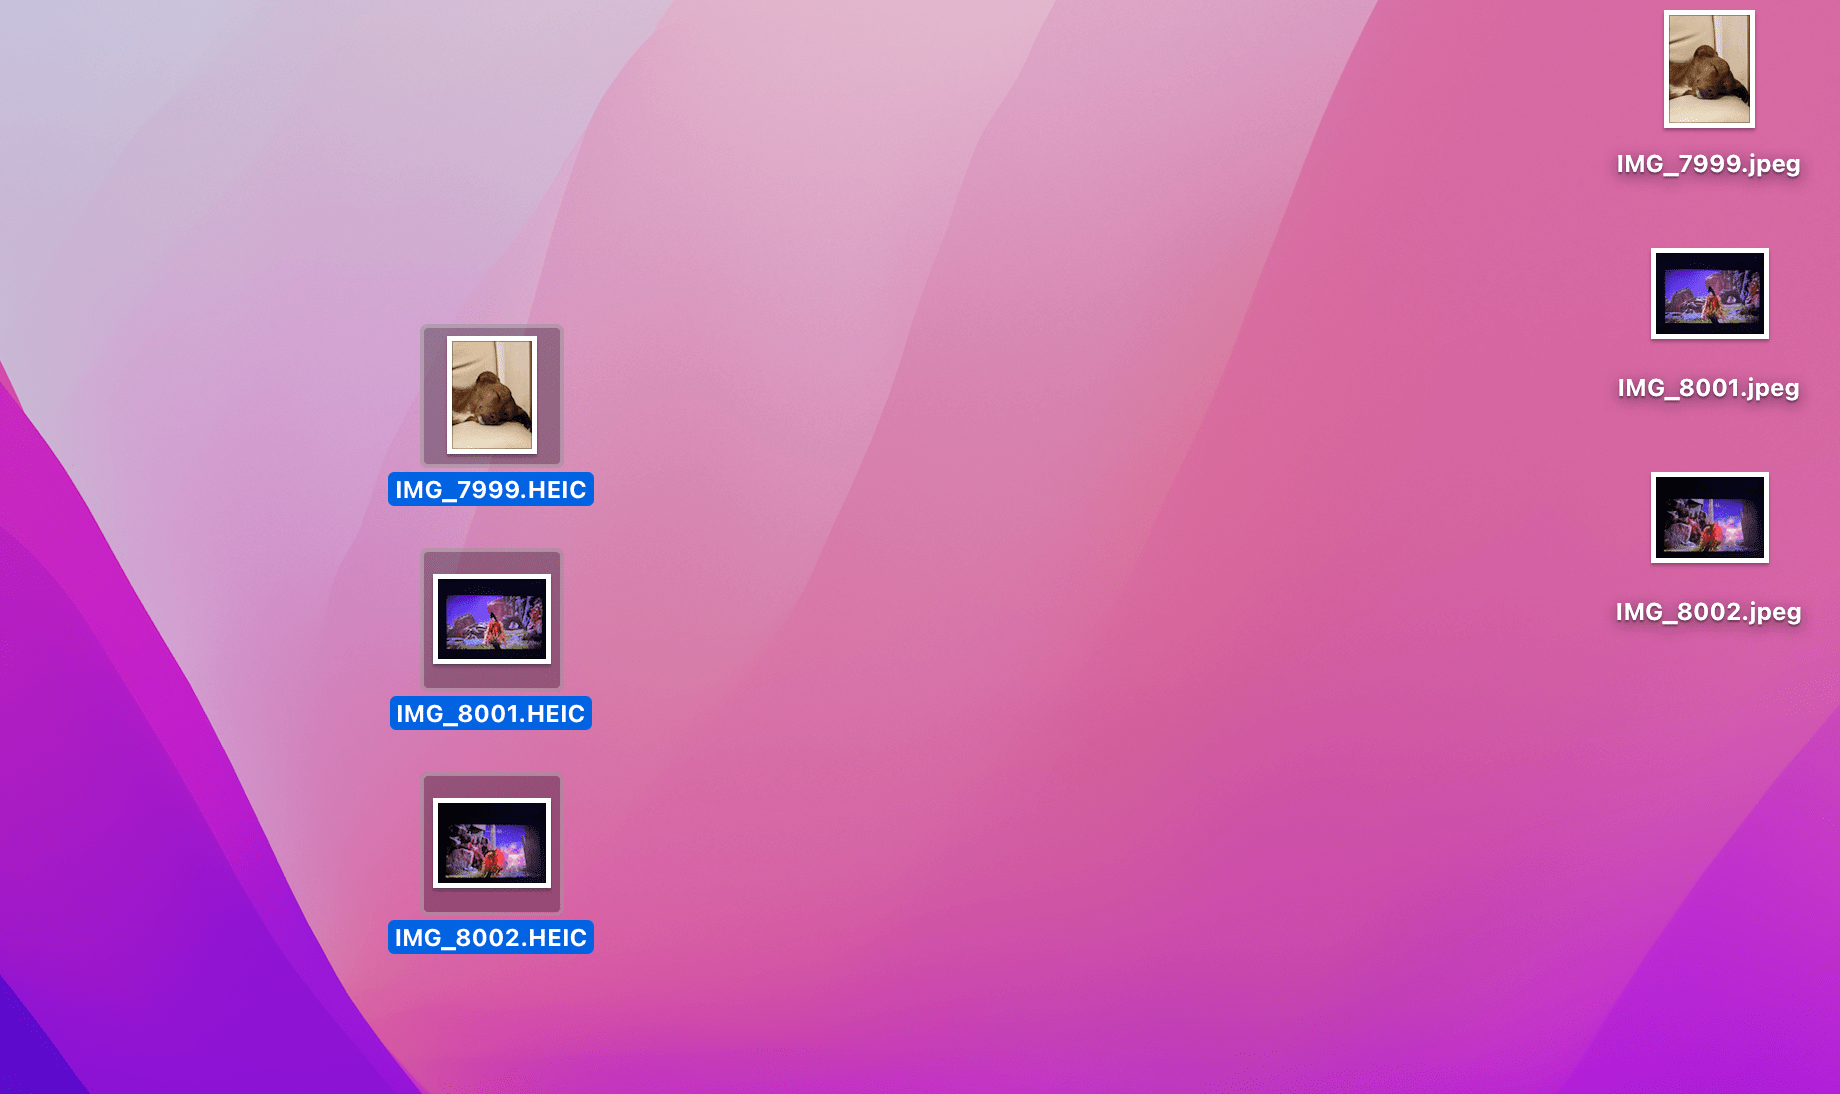
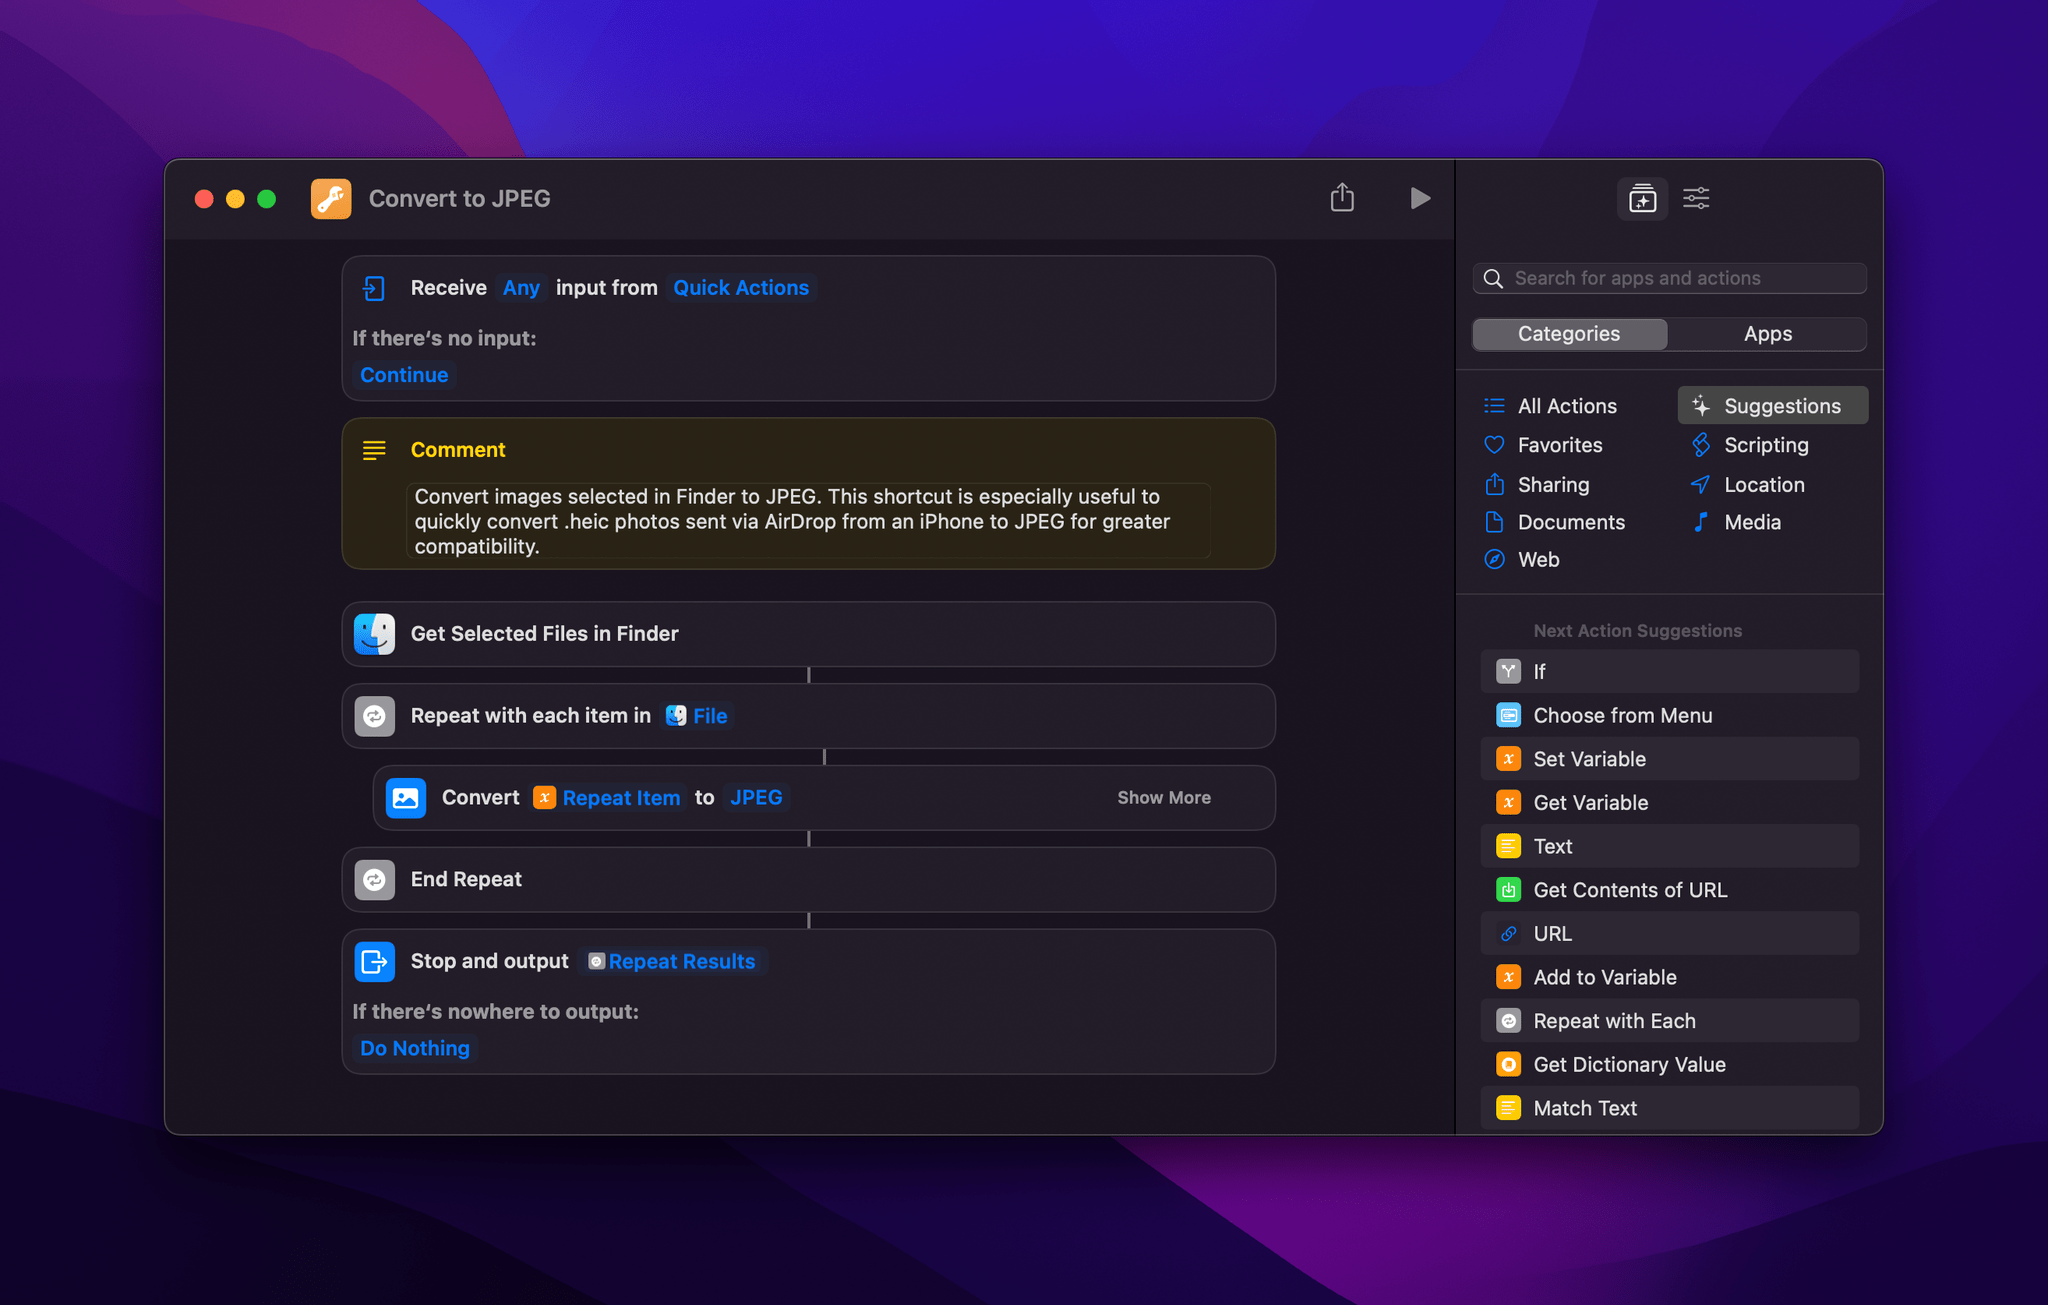
Speaking of the Finder and quick actions, I built this shortcut to automate something I was finding too tedious to perform manually: converting photos AirDropped from my iPhone to the Mac from the HEIC format to standard JPEG. With the Convert to JPEG shortcut, all I have to do now is select files in Finder, select the shortcut in the Quick Actions menu, and that’s it. The shortcut creates JPEG versions of each selected .heic file in the same folder I’m in; the original images stay selected in Finder so I can confirm that all JPEGs were successfully created and hit ⌘-Backspace to delete the .heic ones.
This shortcut is made possible by a few Mac-specific additions to Shortcuts: running shortcuts as quick actions in Finder is obviously only available on macOS1, and so is the ‘Get Selected Files in Finder’ action, which returns a list of files currently selected in the foremost Finder view. This shortcut also uses the Provide Output technique to save modified files alongside the original ones selected in Finder.
I’ve used this shortcut hundreds of times over the past few weeks; I hope you’ll find it as convenient as I did.
Convert to JPEG
Convert images selected in Finder to JPEG. This shortcut is especially useful to quickly convert .heic photos sent via AirDrop from an iPhone to JPEG for greater compatibility.
Super ML
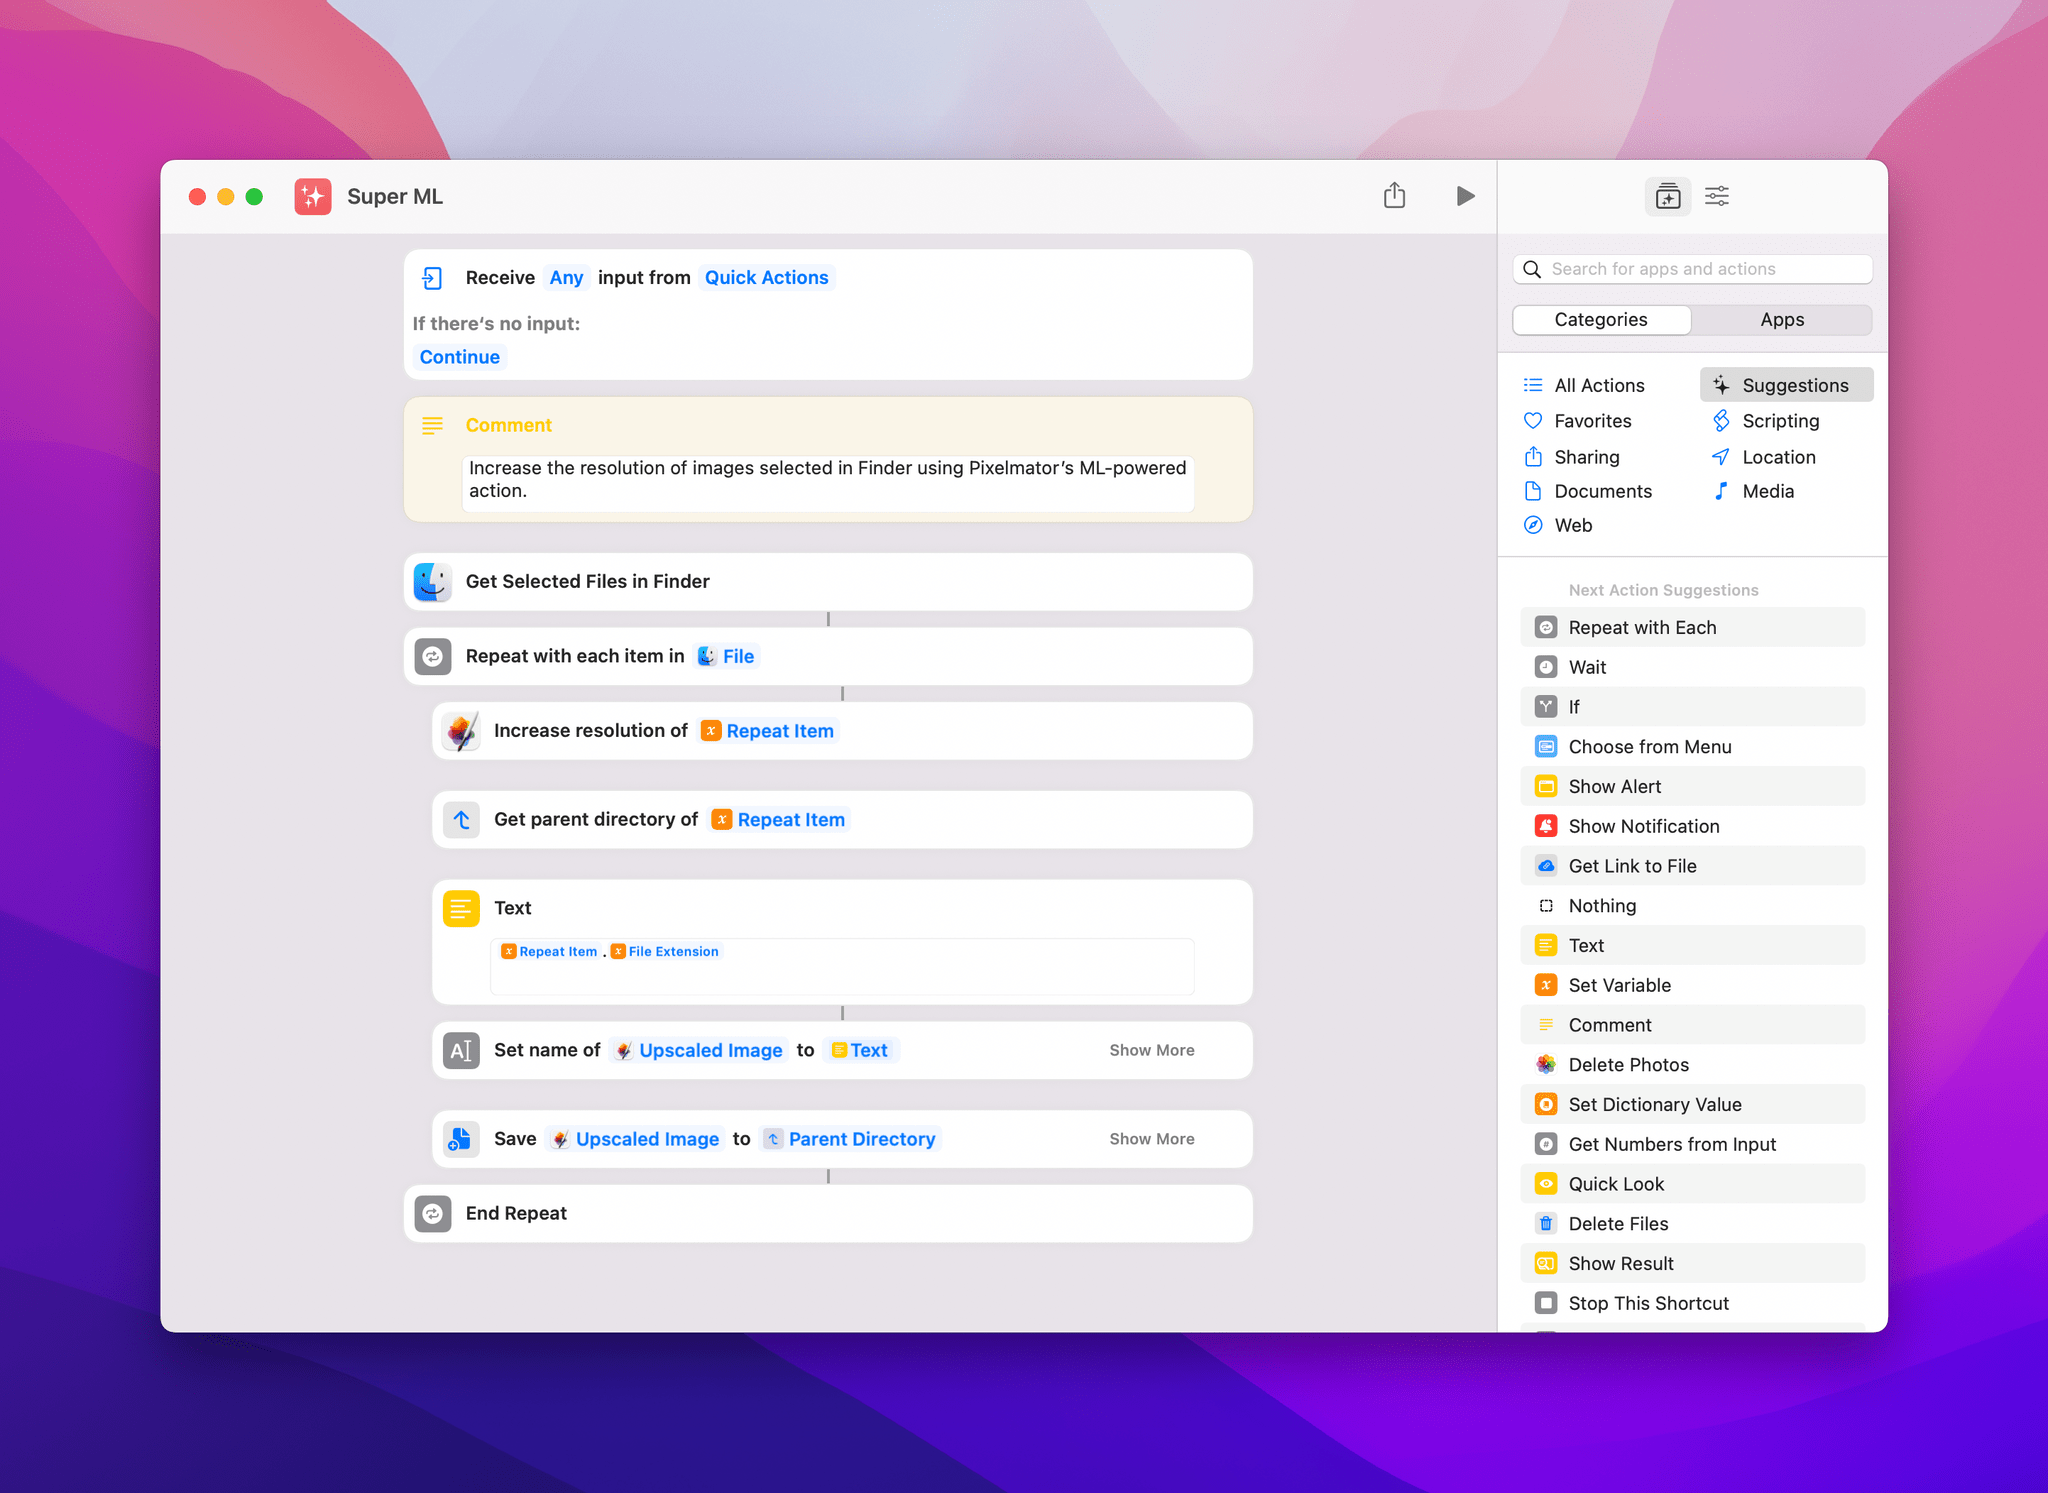
Based on the same technique as the Convert to JPEG shortcut I described above, Super ML doesn’t convert images to a different format: rather, it increases the resolution of selected images using Pixelmator Pro’s ‘Increase Resolution of Image’ action powered by the app’s ML Super Resolution algorithm. The shortcut couldn’t be easier to use: all you have to do is select images in Finder, run the quick action from the contextual menu, and wait as an upscaled (larger) version of each selected image overwrites the original one. That’s it.
I built this shortcut to speed up another task that quickly became tedious to perform manually.
A few months ago, Silvia and I were putting together a photo book for our two best friends, who are getting married this year. In doing so, we ended up with a collection of old photos of them dating back to over a decade ago. As you can imagine, pictures taken on an iPhone 3GS haven’t exactly aged well, and the website we used to design and print the photo book kept telling us that our images were too low-res. I had the idea of turning to ML Super Resolution for this, but when I realized that I had to upscale each image manually in the Pixelmator Pro app and save it back to Finder, I knew I had to figure out a system to automate the process for batch upscaling. This shortcut does that, and I’ve been using it for all kinds of images I want to upscale on my Mac.
Super ML
Increase the resolution of images selected in Finder using Pixelmator’s ML-powered action.
Copy Last Photo
This shortcut does one thing: it gets the most recent photo from the Photos app and copies it to the clipboard. I built this shortcut because I often find myself opening the Photos app to copy the most recent picture or screenshot I’ve taken, and that’s no fun.
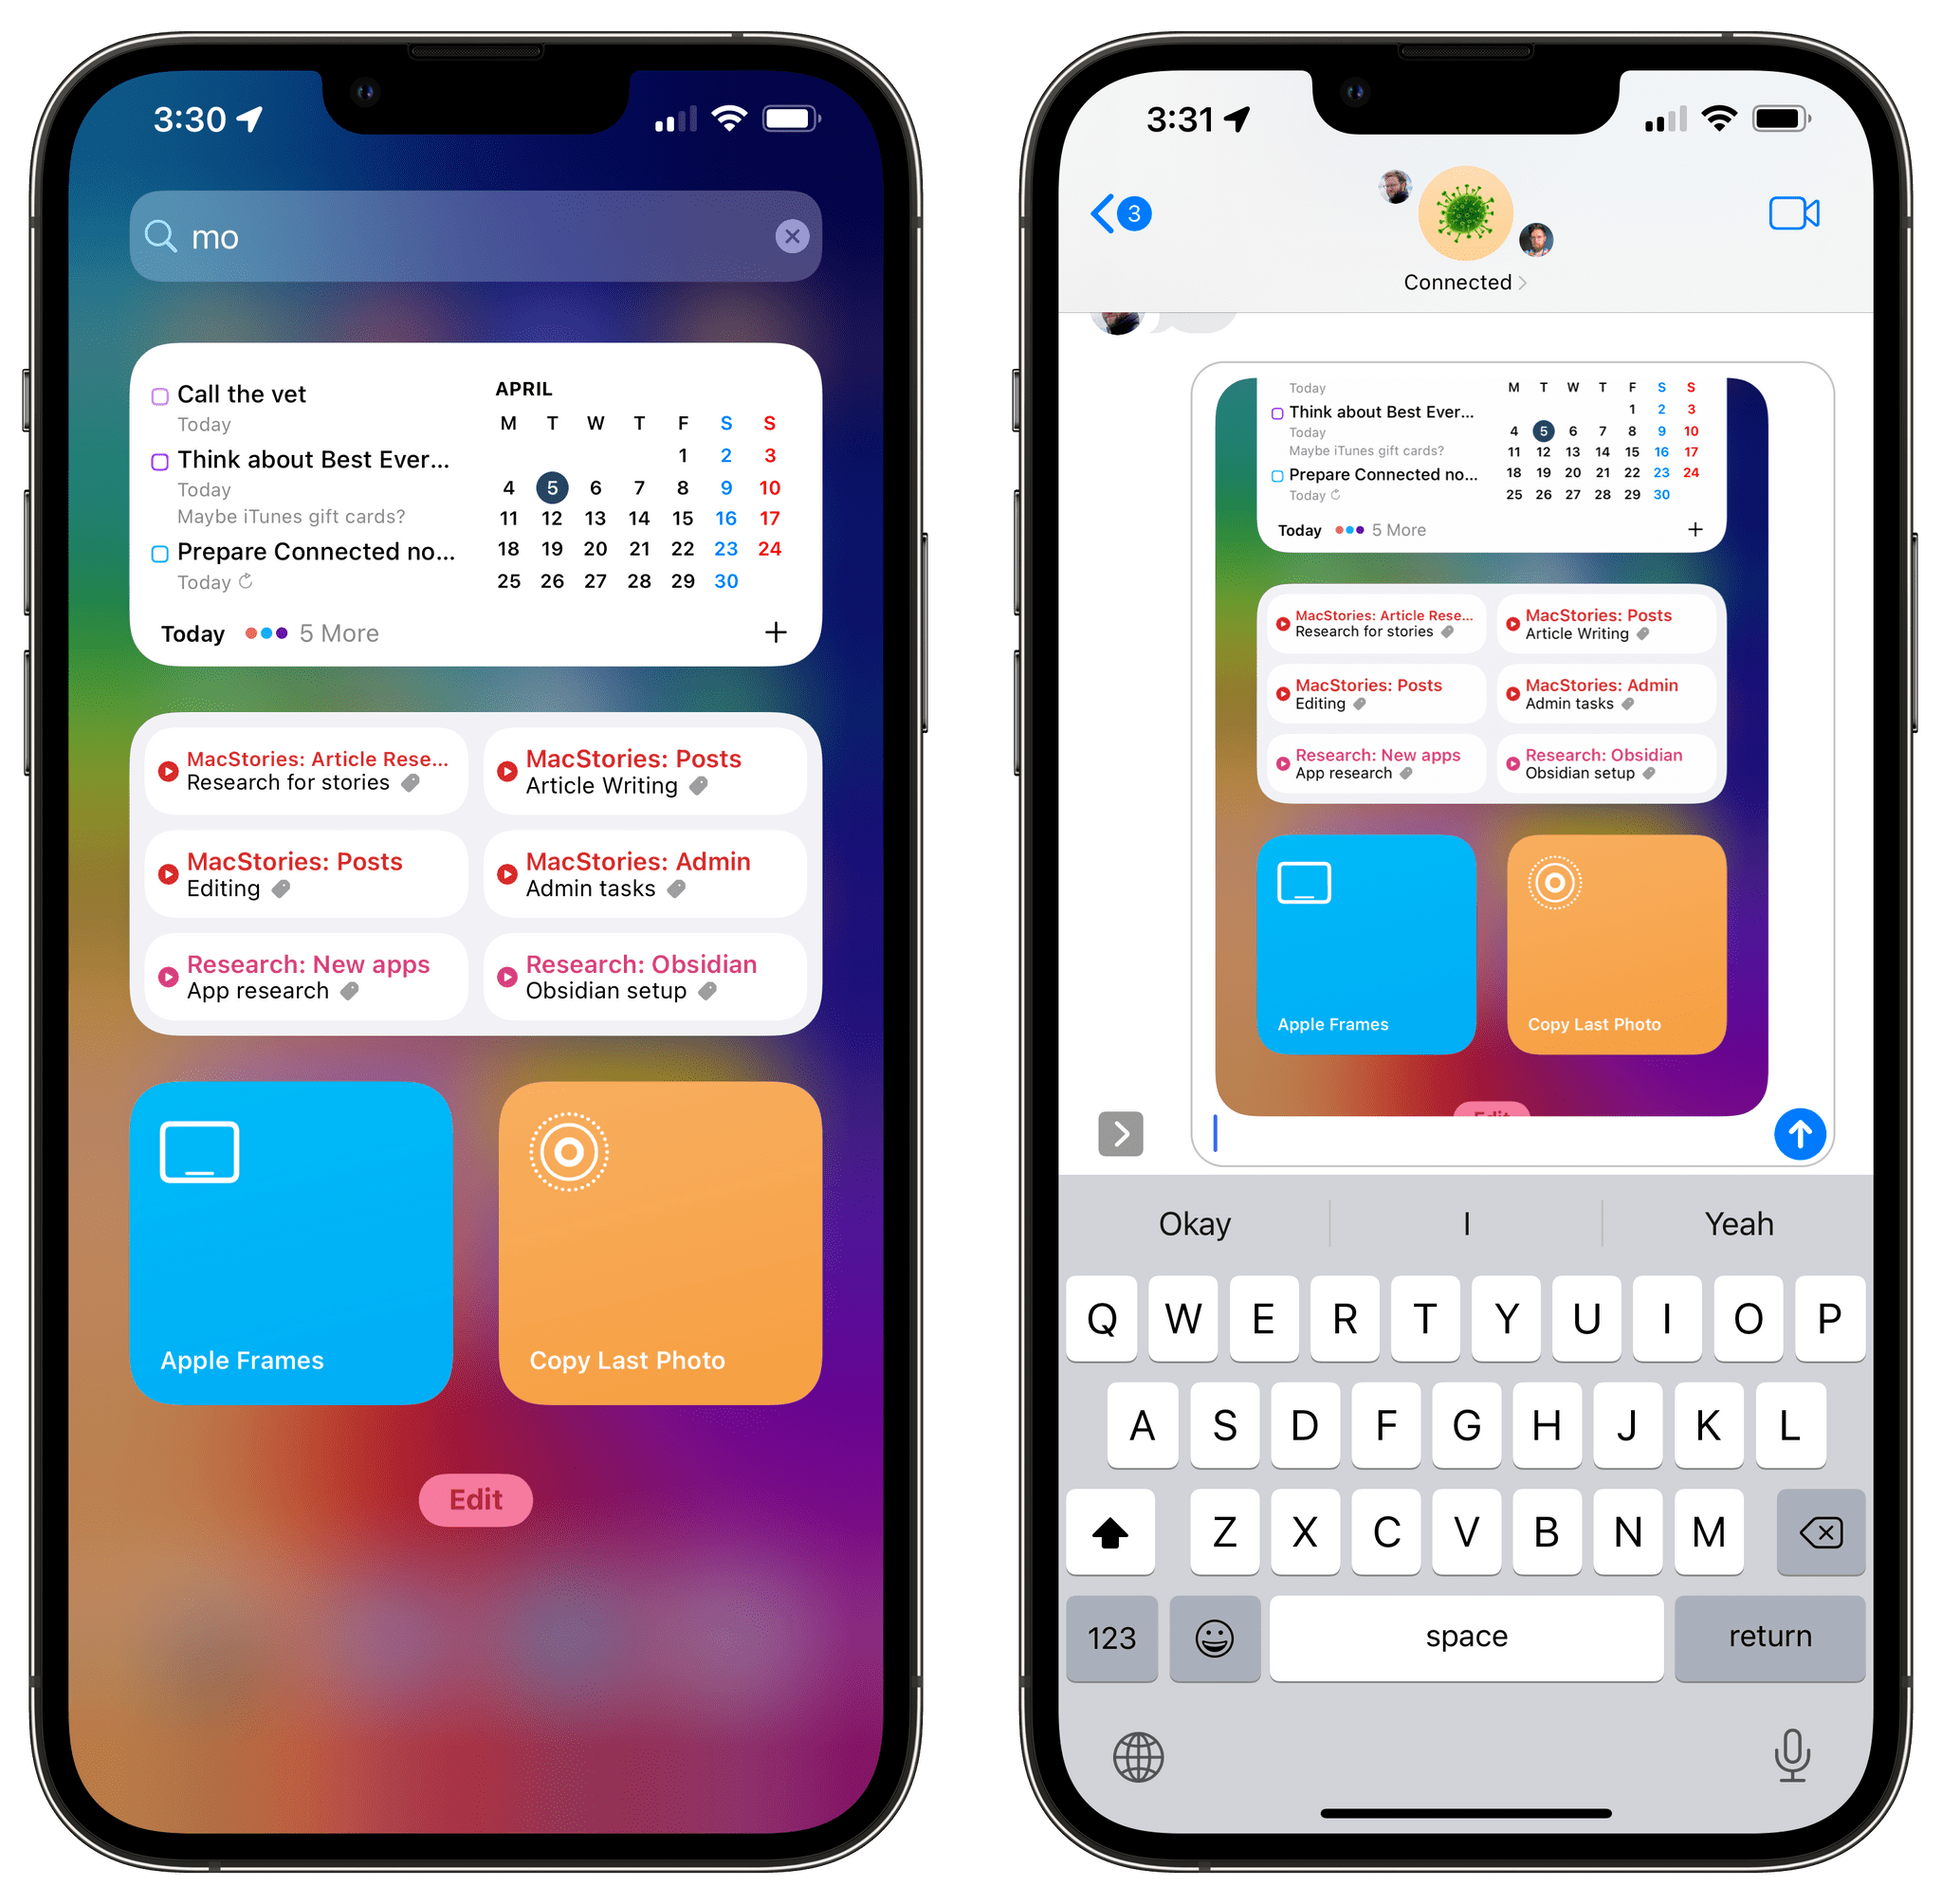
With this shortcut, you can copy the most recent image from Photos with a single tap and paste it elsewhere.
With Copy Last Photo, you can instantly copy the latest item from your Photos library from the widget, via Siri, or even by tapping the back of your iPhone if you’ve enabled Back Tap in Accessibility.
Copy Selected Track Info
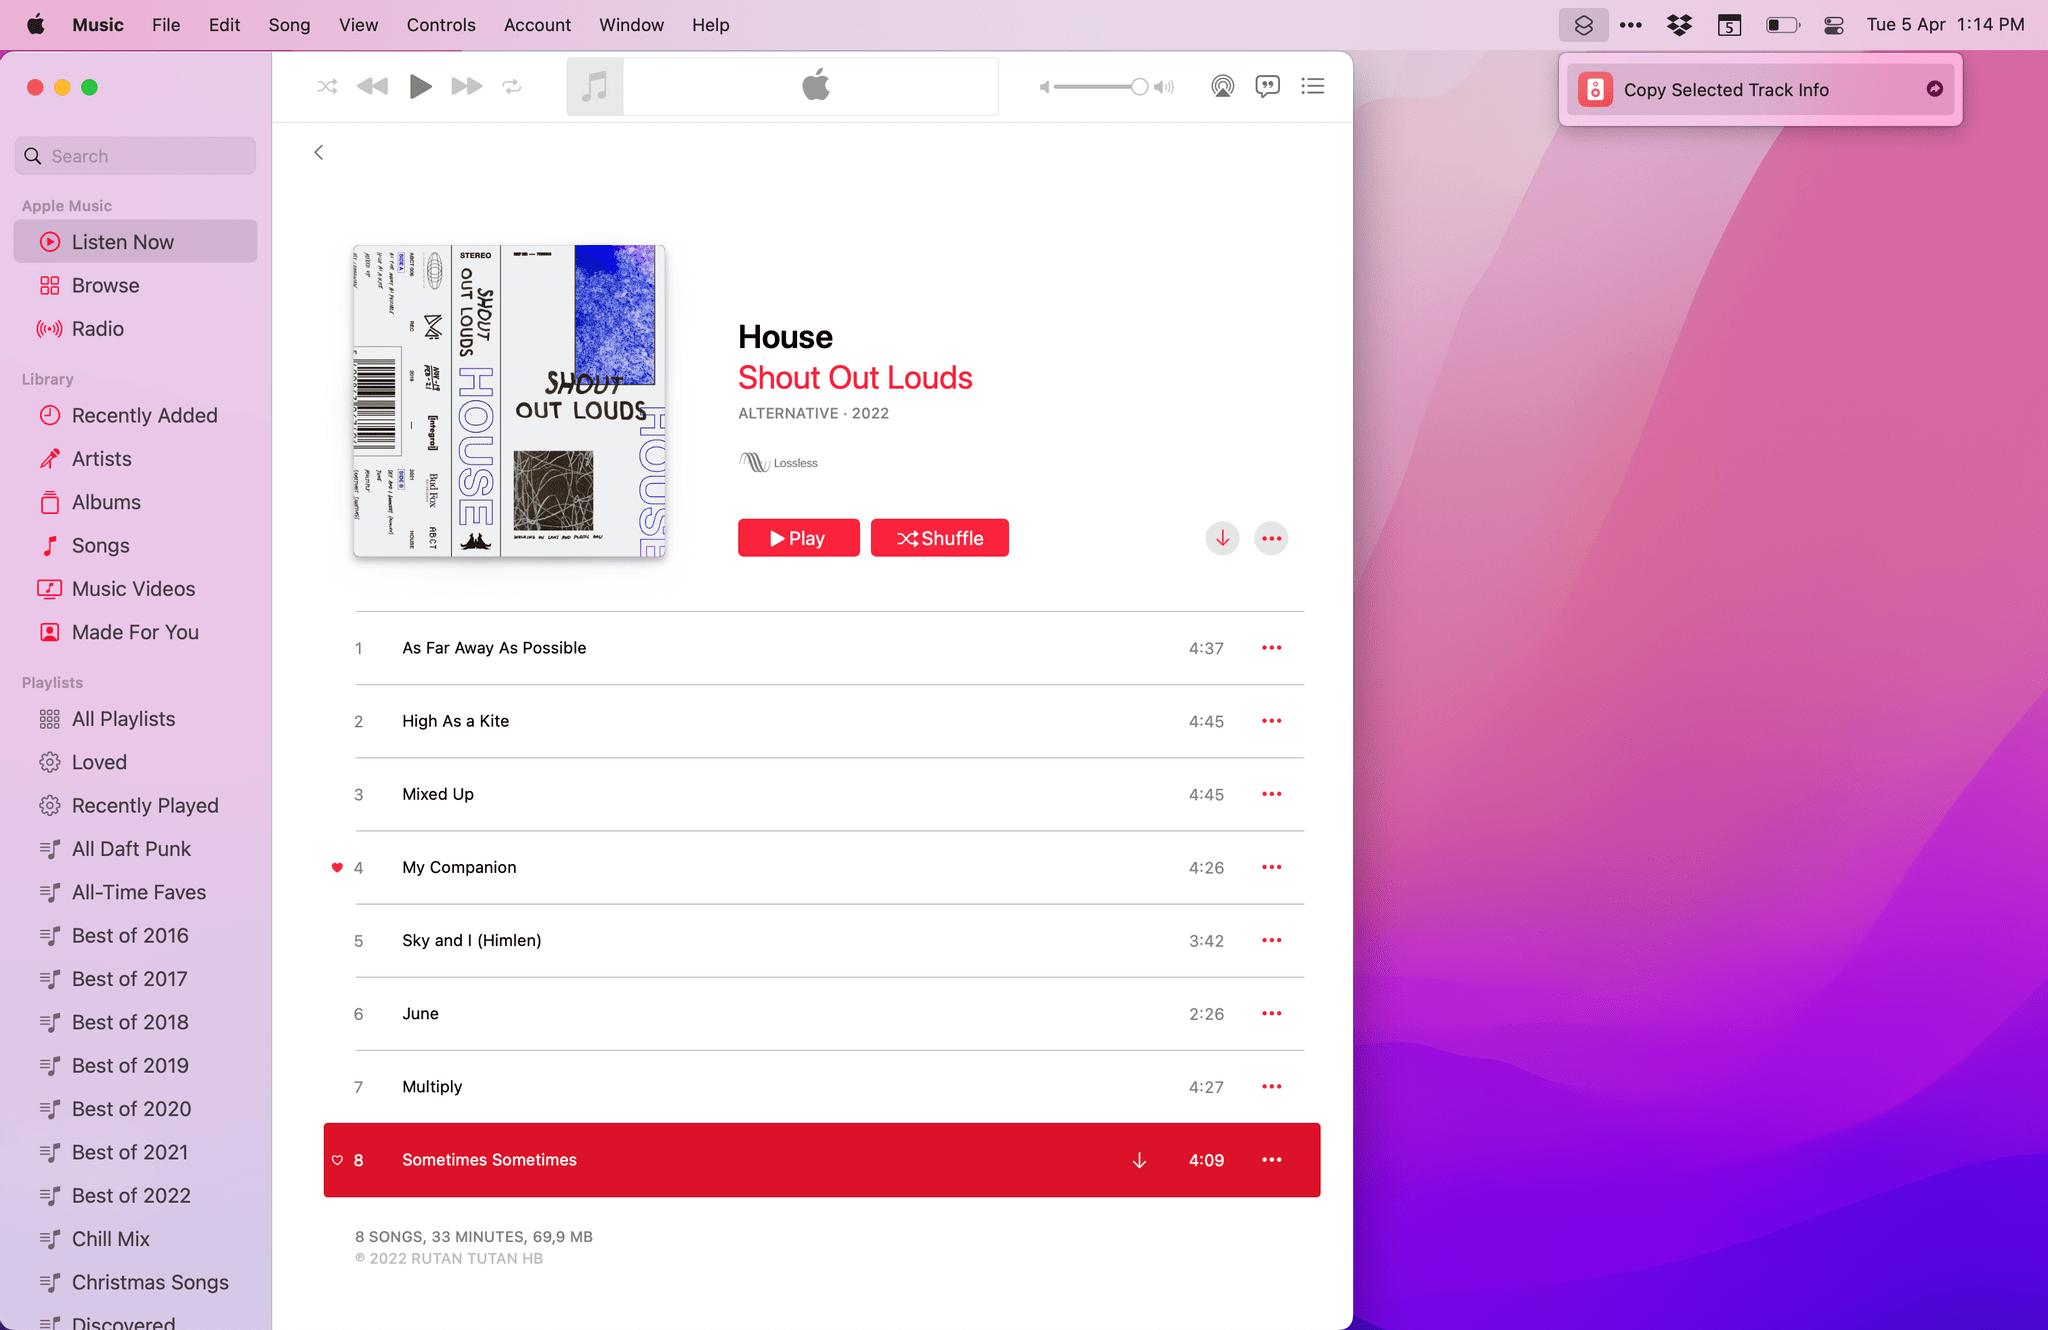
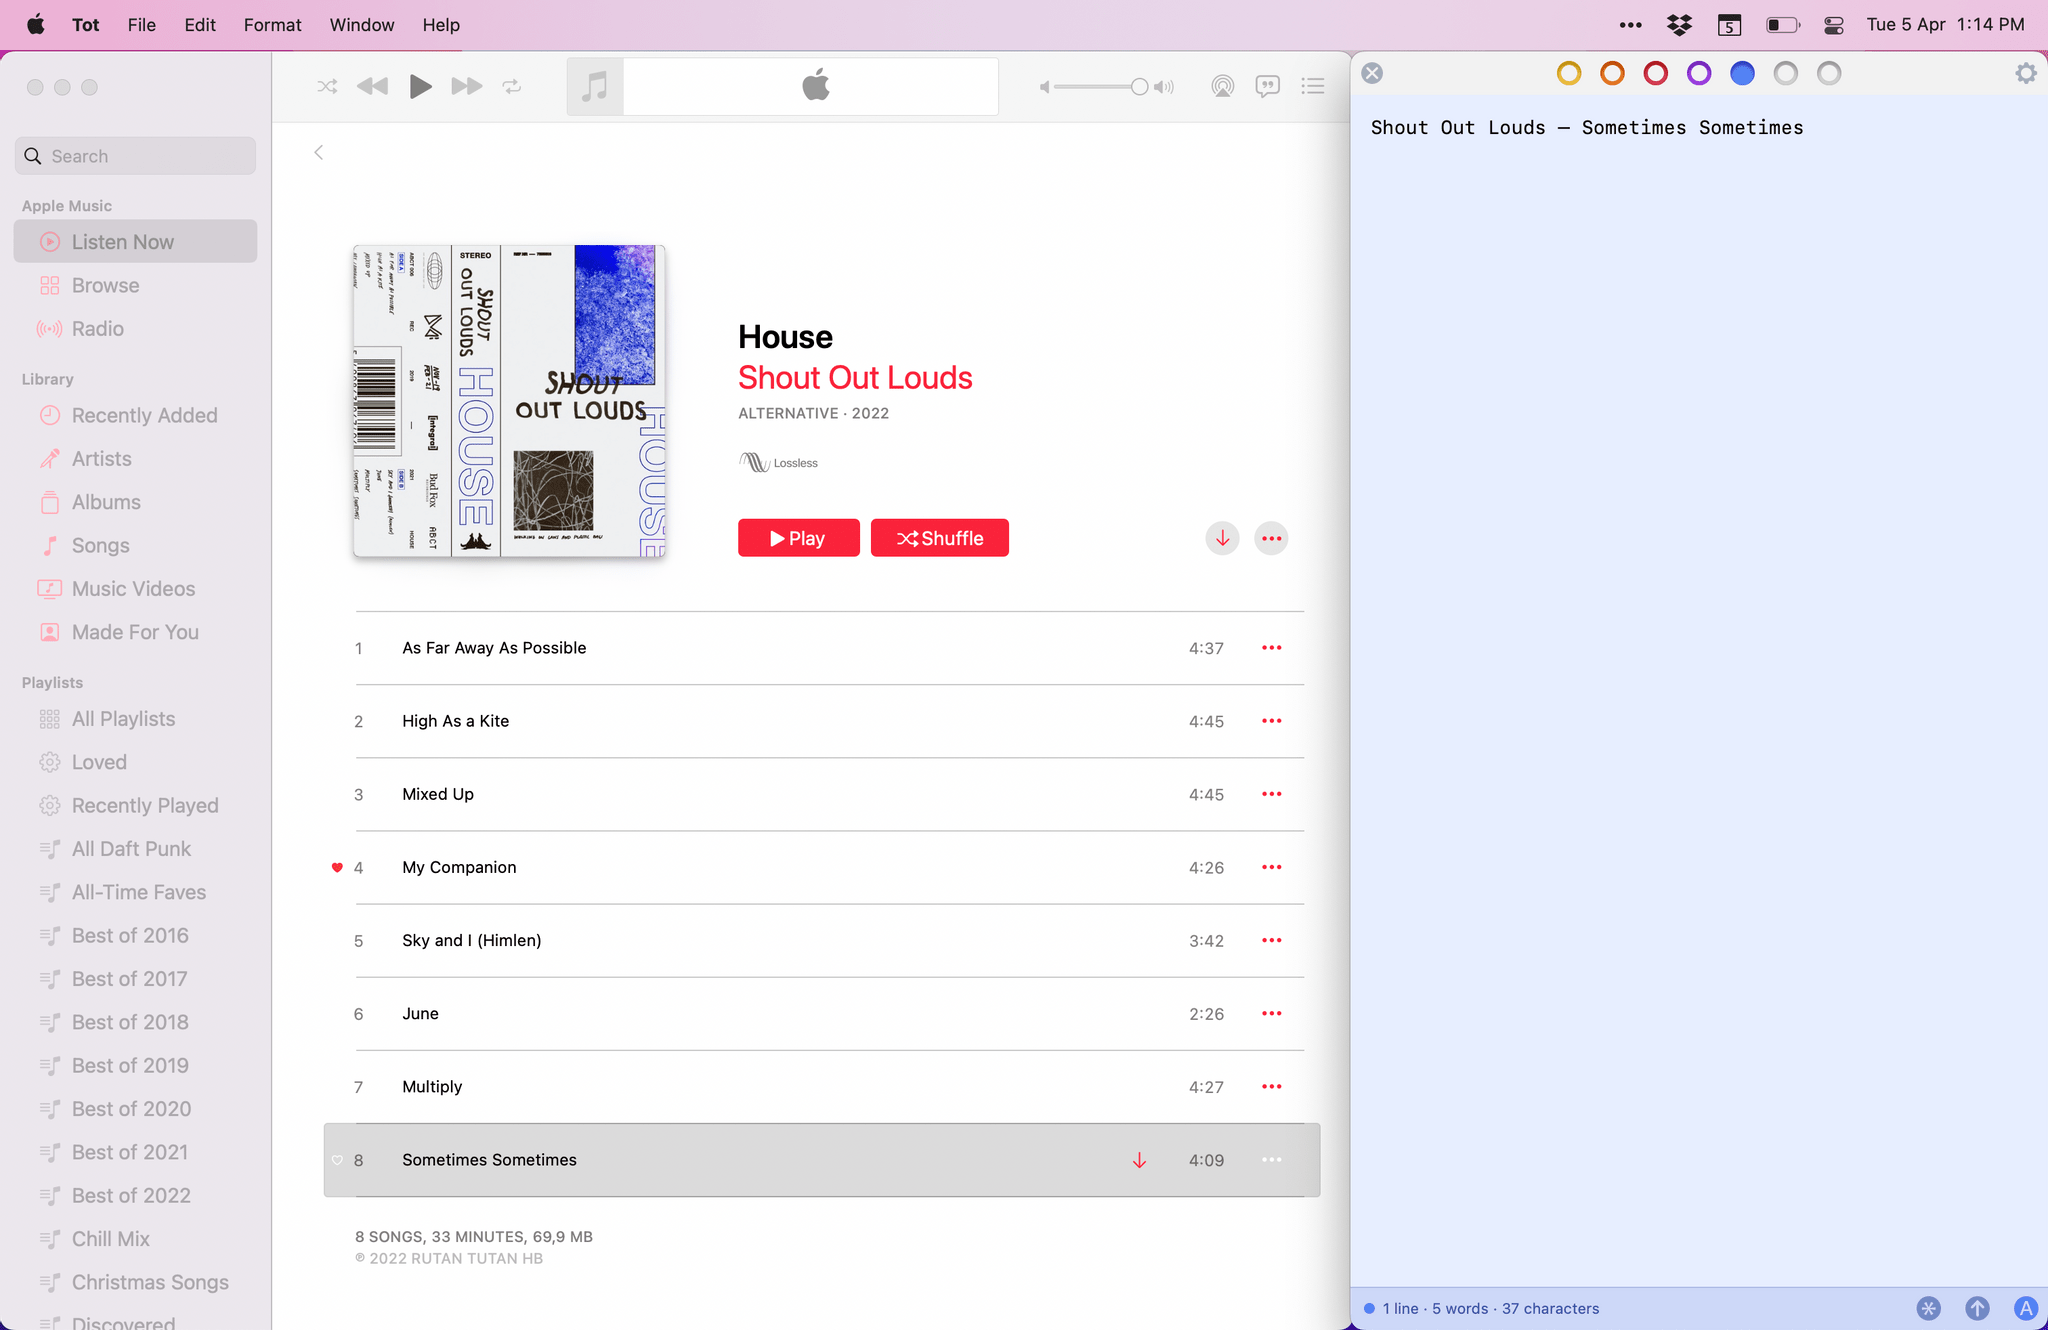
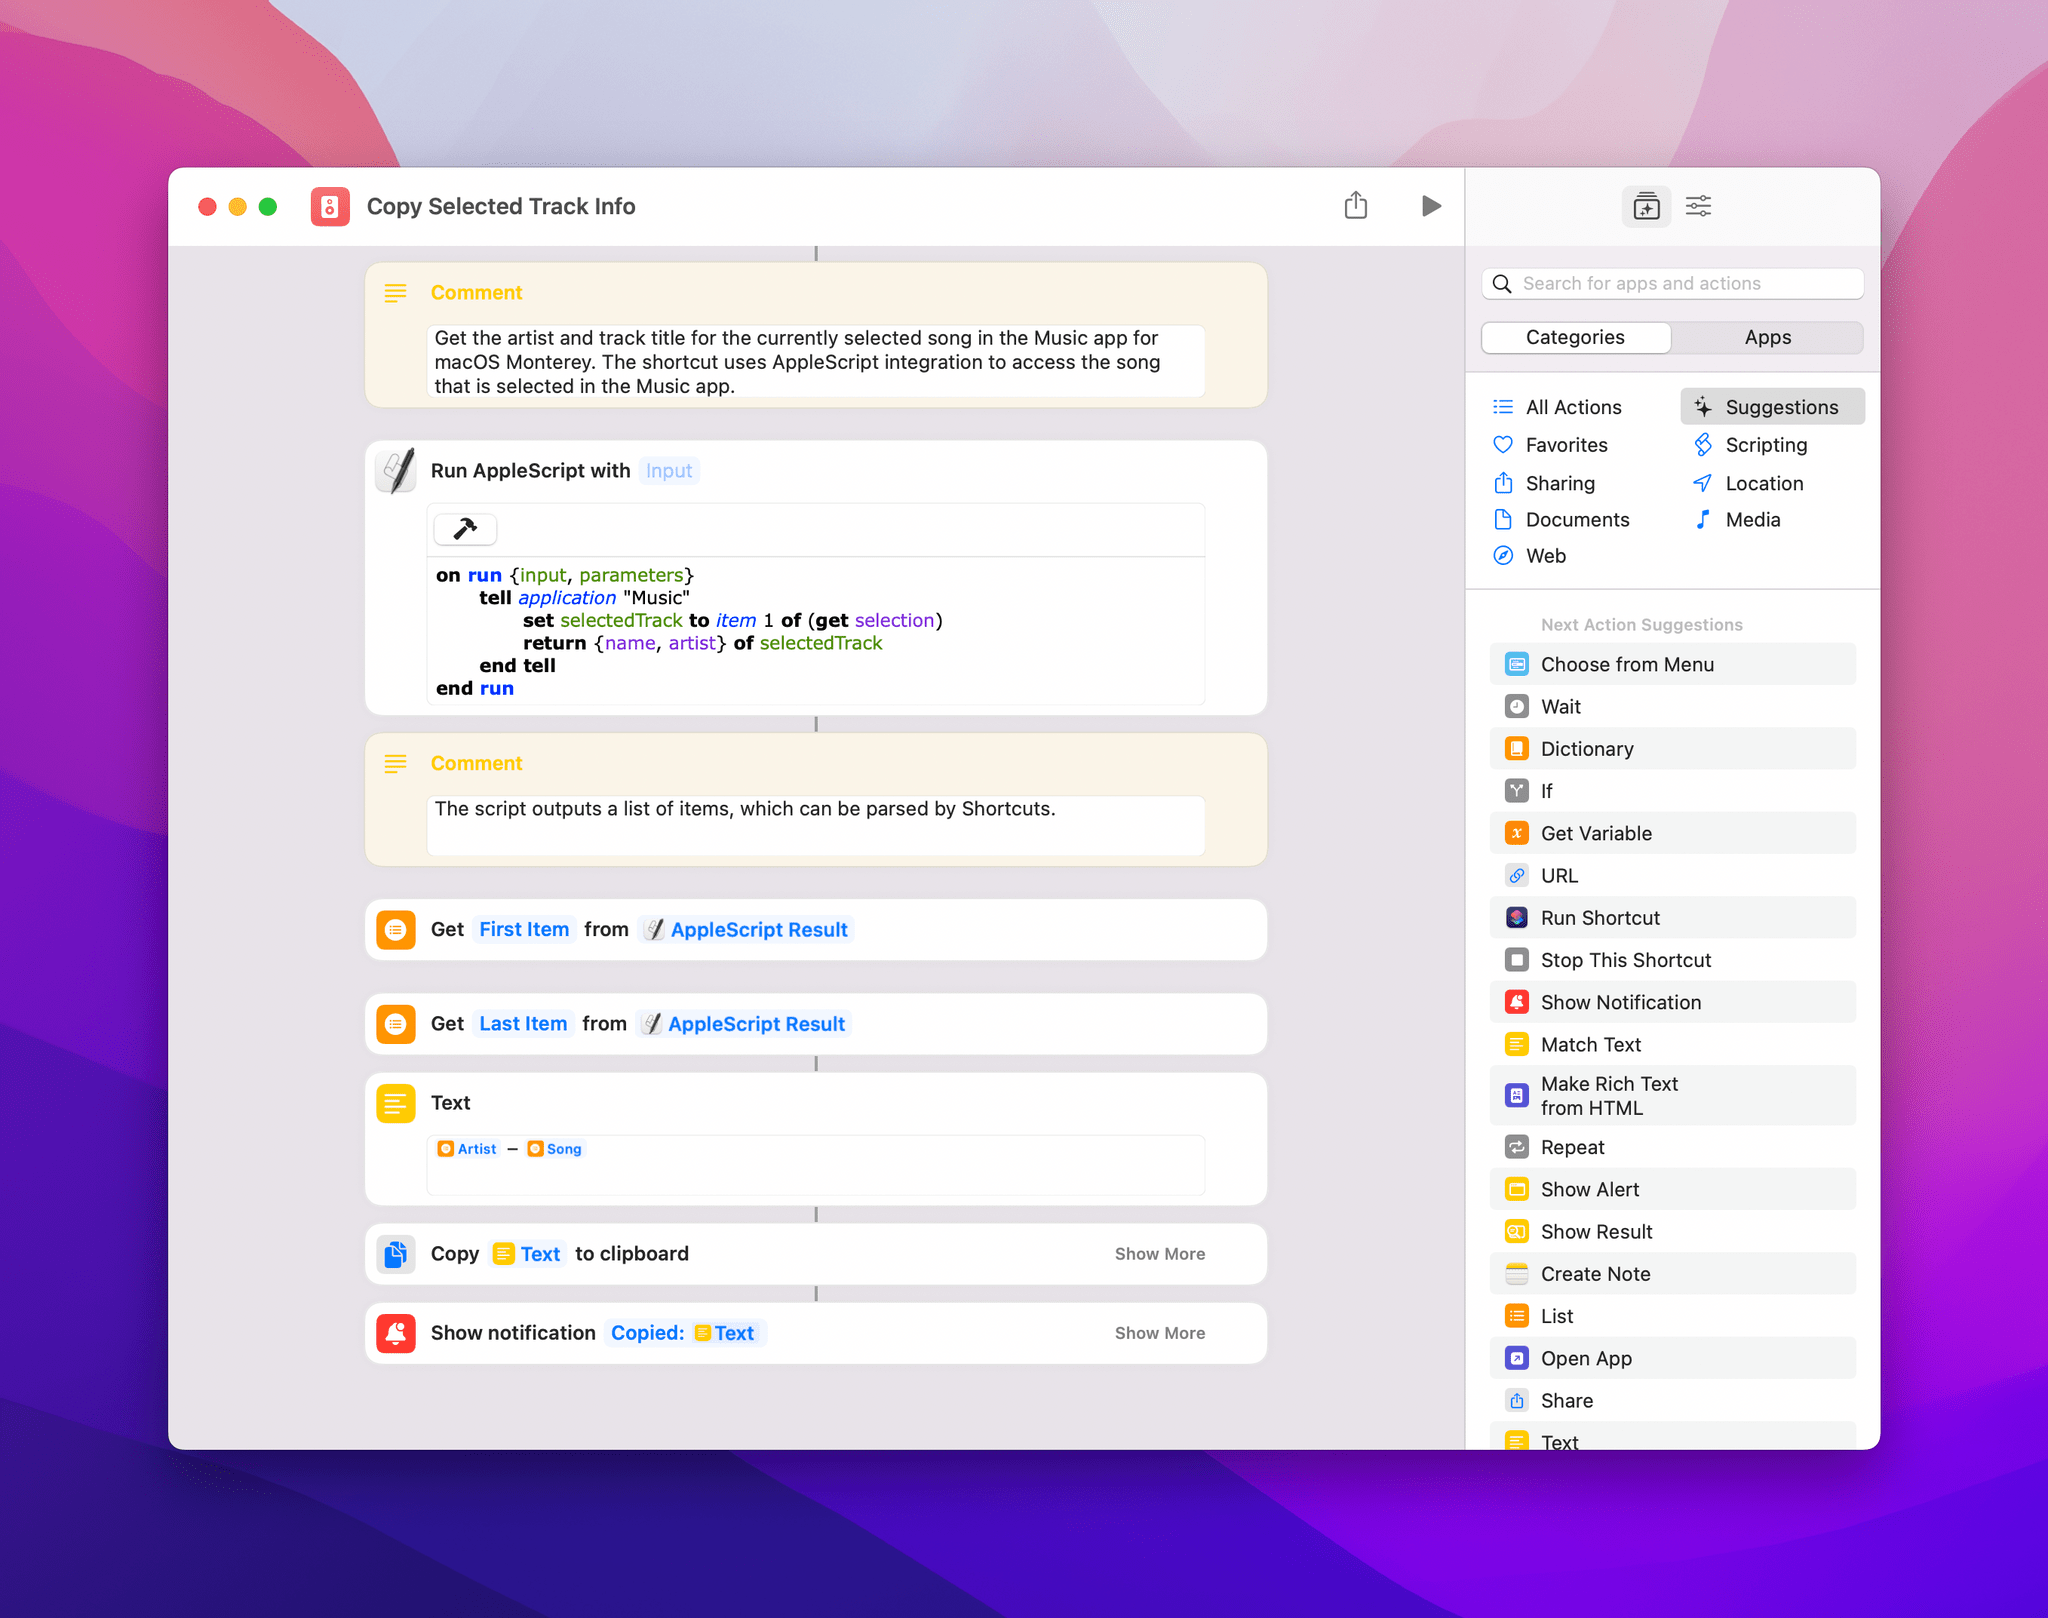
I built this shortcut one night when I realized I wanted a faster way to get the details for a song selected in the Music app for Mac. I was assembling a list of songs in a text document, and having to type each song’s title and artist got annoying quickly. So, obviously, I turned to Shortcuts and good old AppleScript.
Despite its many rewrites and redesigns, the Music app for macOS Monterey is still compatible with the AppleScript dictionary for the discontinued iTunes app. You can take any existing iTunes AppleScript you can find on the Internet, replace “iTunes” with “Music” in the script, and it’ll likely work. That’s precisely what I did for a script that returns the title and artist of the song selected in Music: when the shortcut executes the ‘Run AppleScript’ action, it checks for my selection in the Music app, then copies the selected song’s title and artist name as a string of text to the clipboard.
There is one caveat worth keeping in mind here: AppleScript only supports retrieving details for selected songs that are also in your library. If you select a ‘cloud item’ from Apple Music that is not in your library as well, the shortcut won’t work. There is a bigger conversation to be had here about whether Apple should build real Music integration in Shortcuts that doesn’t involve AppleScript, but I digress. The shortcut works well given its limitations, and I like to trigger it either from the menu bar or via a hotkey from Raycast.
There are also some interesting techniques I’ve used in this shortcut for AppleScript integration in Shortcuts, which I will explain later today in the first Town Hall Workshop for Automation April in our Discord.
Copy Selected Track Info
Get the artist and track title for the currently selected song in the Music app for macOS Monterey. The shortcut uses AppleScript integration to access the song that is selected in the Music app.
Crop to Rounded Rectangle and Save
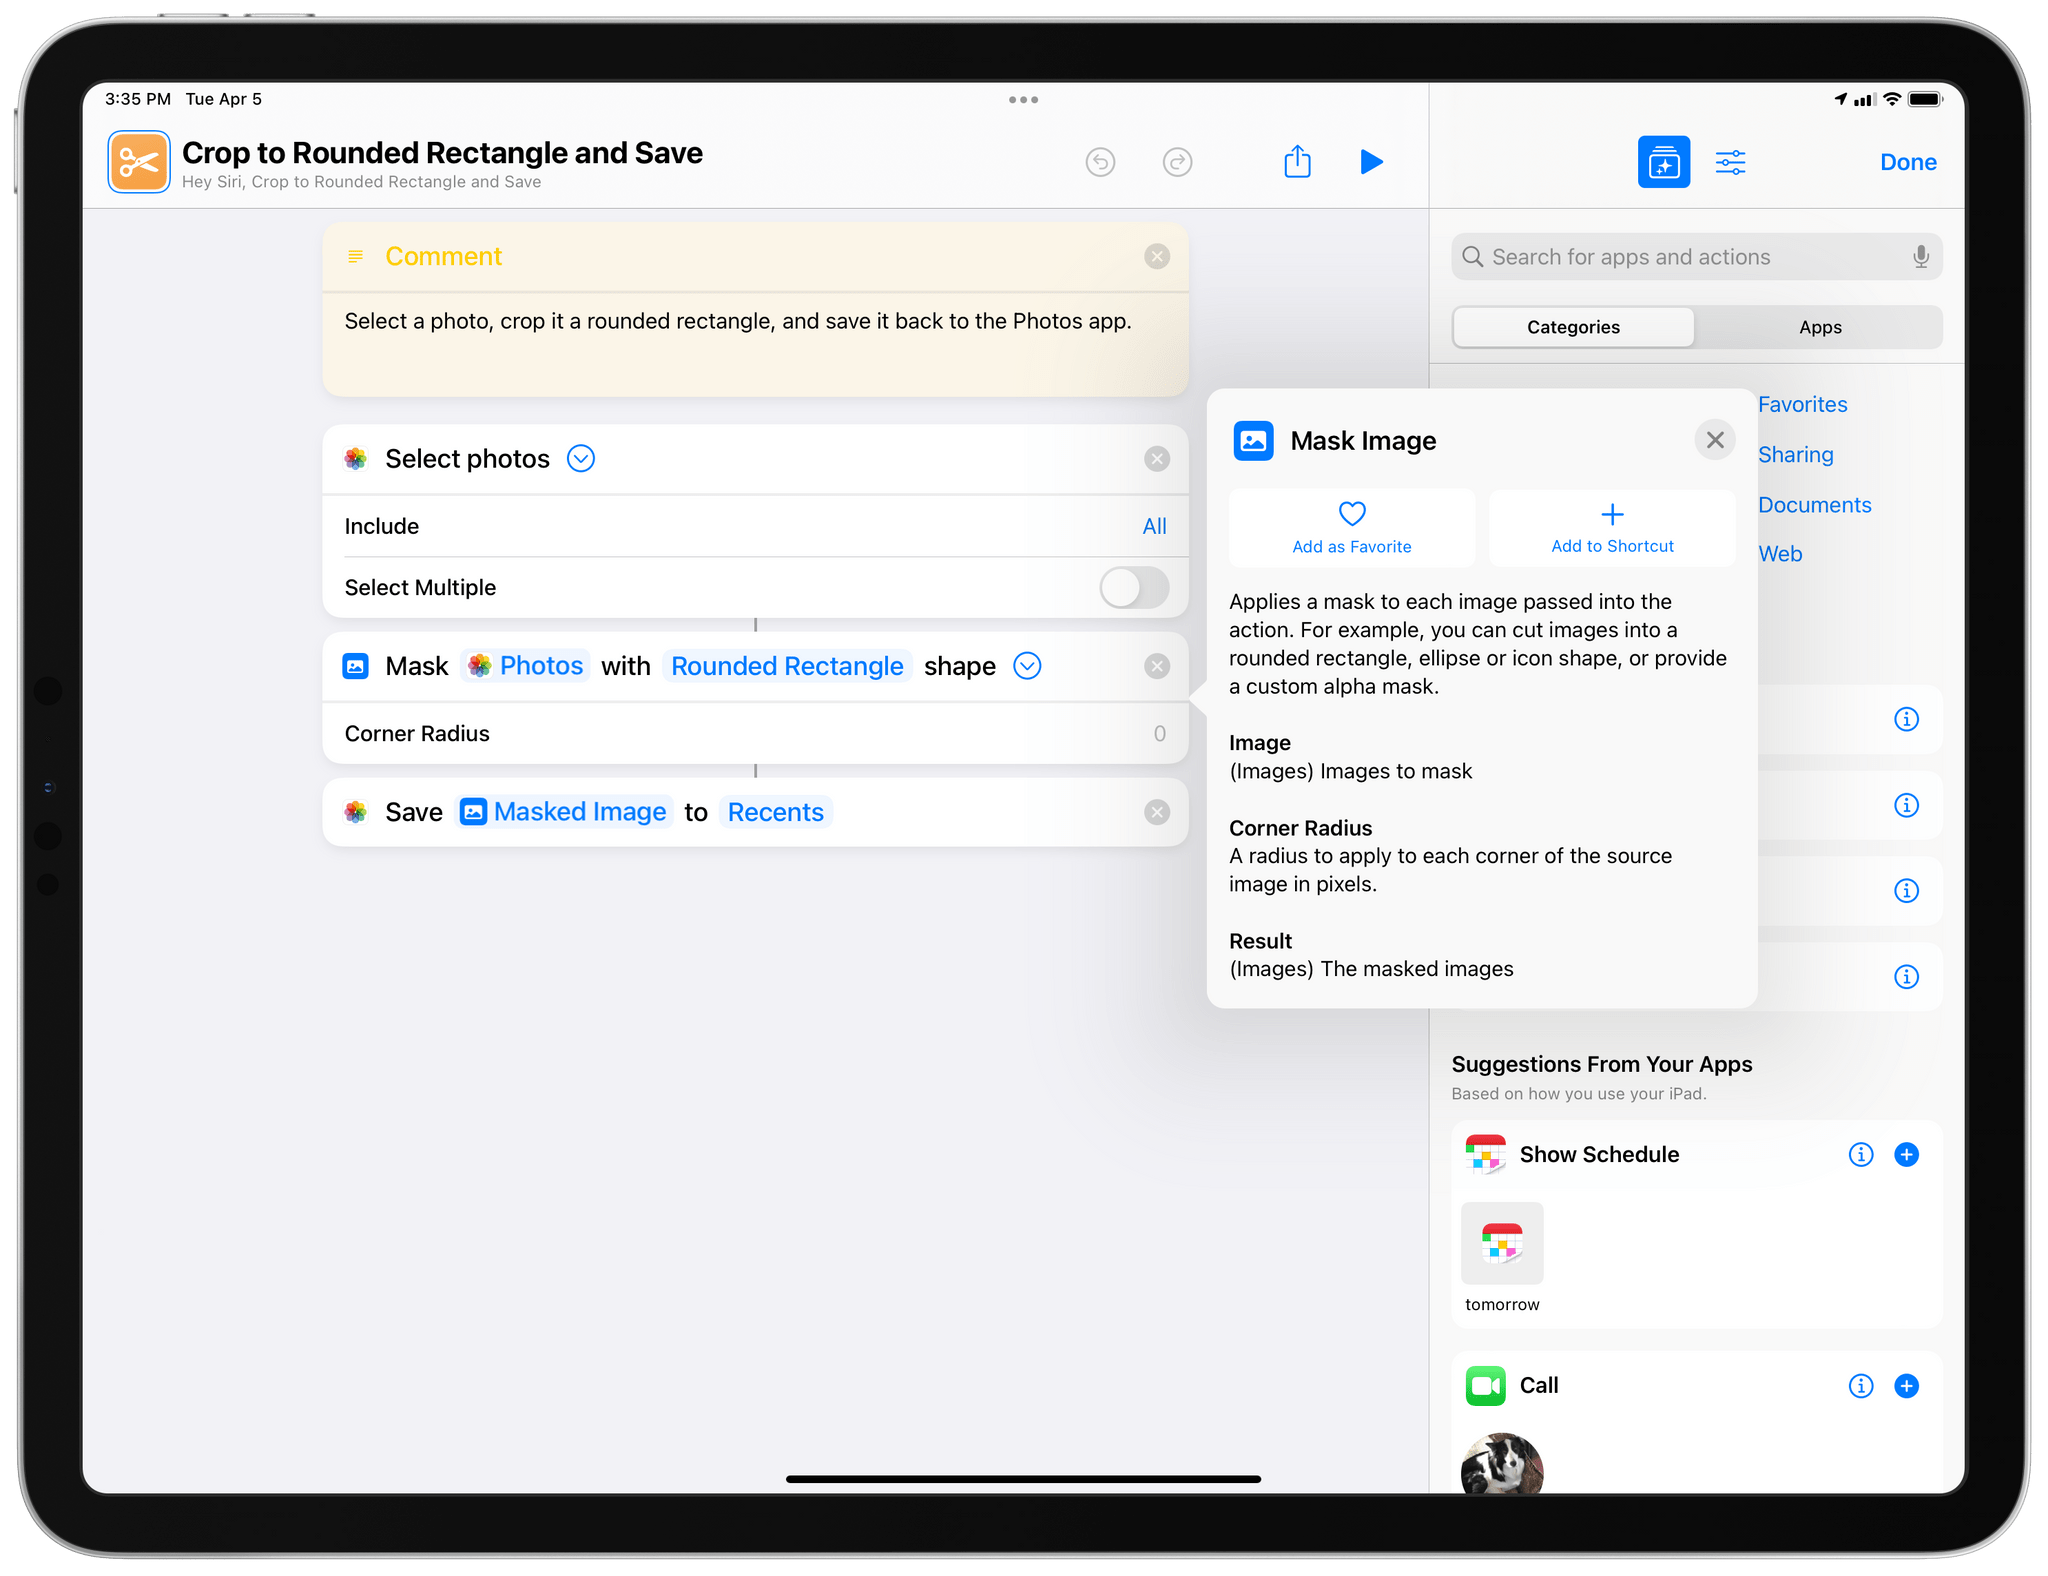
This is a great example of a very simple utility shortcut that does one thing well: the shortcut lets me pick a photo from my library, masks it with a shape of a rounded rectangle, and saves the resulting image with alpha transparency back to Photos.
I created this shortcut because I was tired of manually cropping pictures with rounded corners in image editors; now, Shortcuts does it for me and I can run this as an extension of the share sheet in Photos or from a widget on the Home Screen.
Crop to Rounded Rectangle and Save
Select a photo, crop it into a rounded rectangle, and save it back to the Photos app.
Pick Windows and Create Pairs
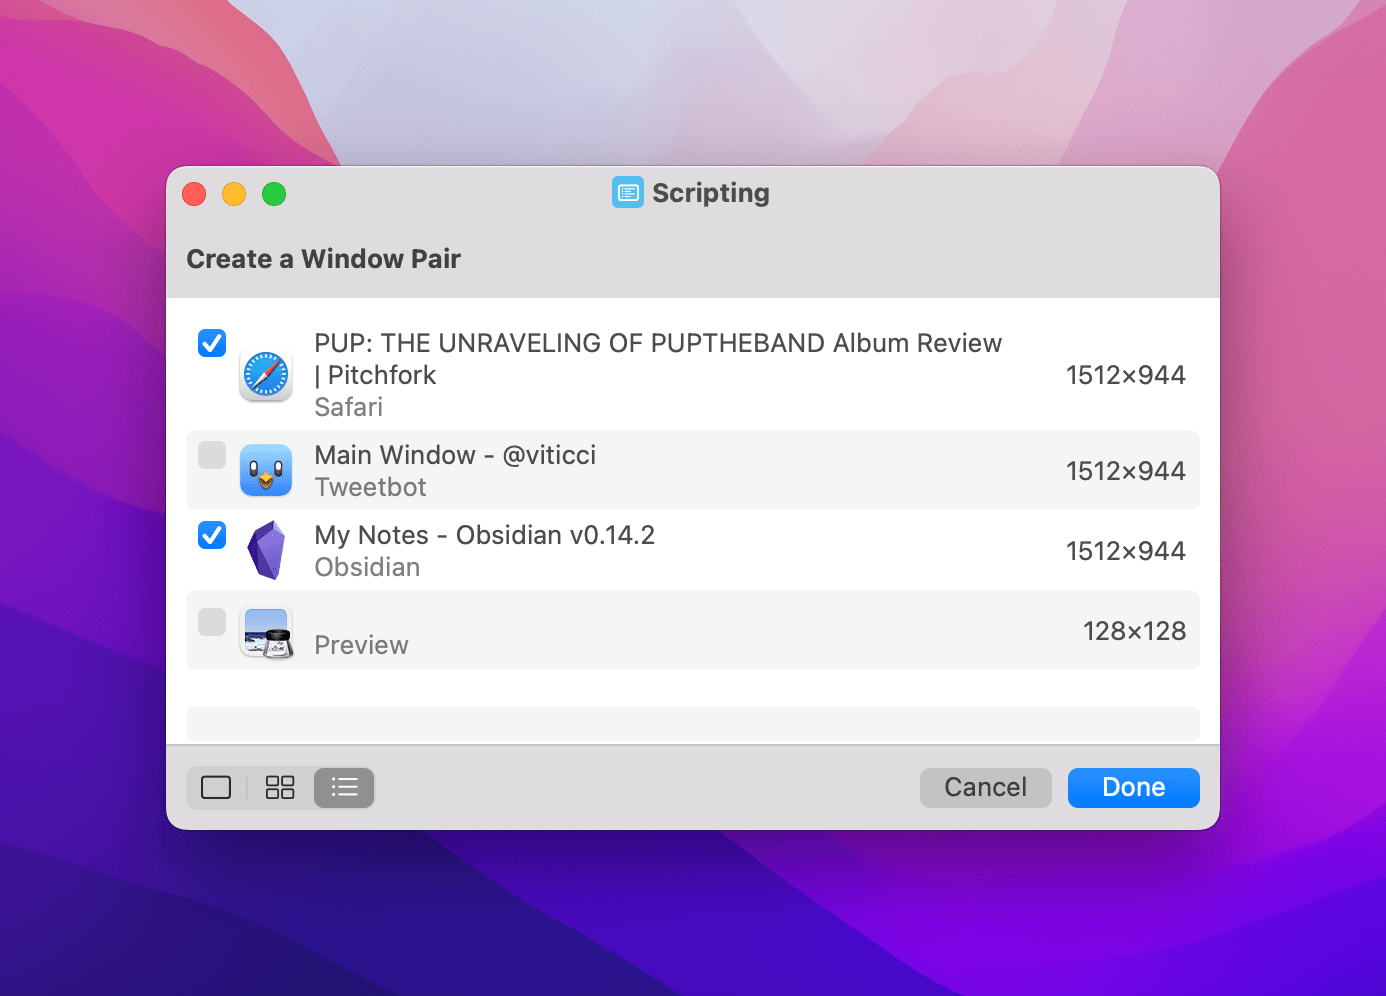
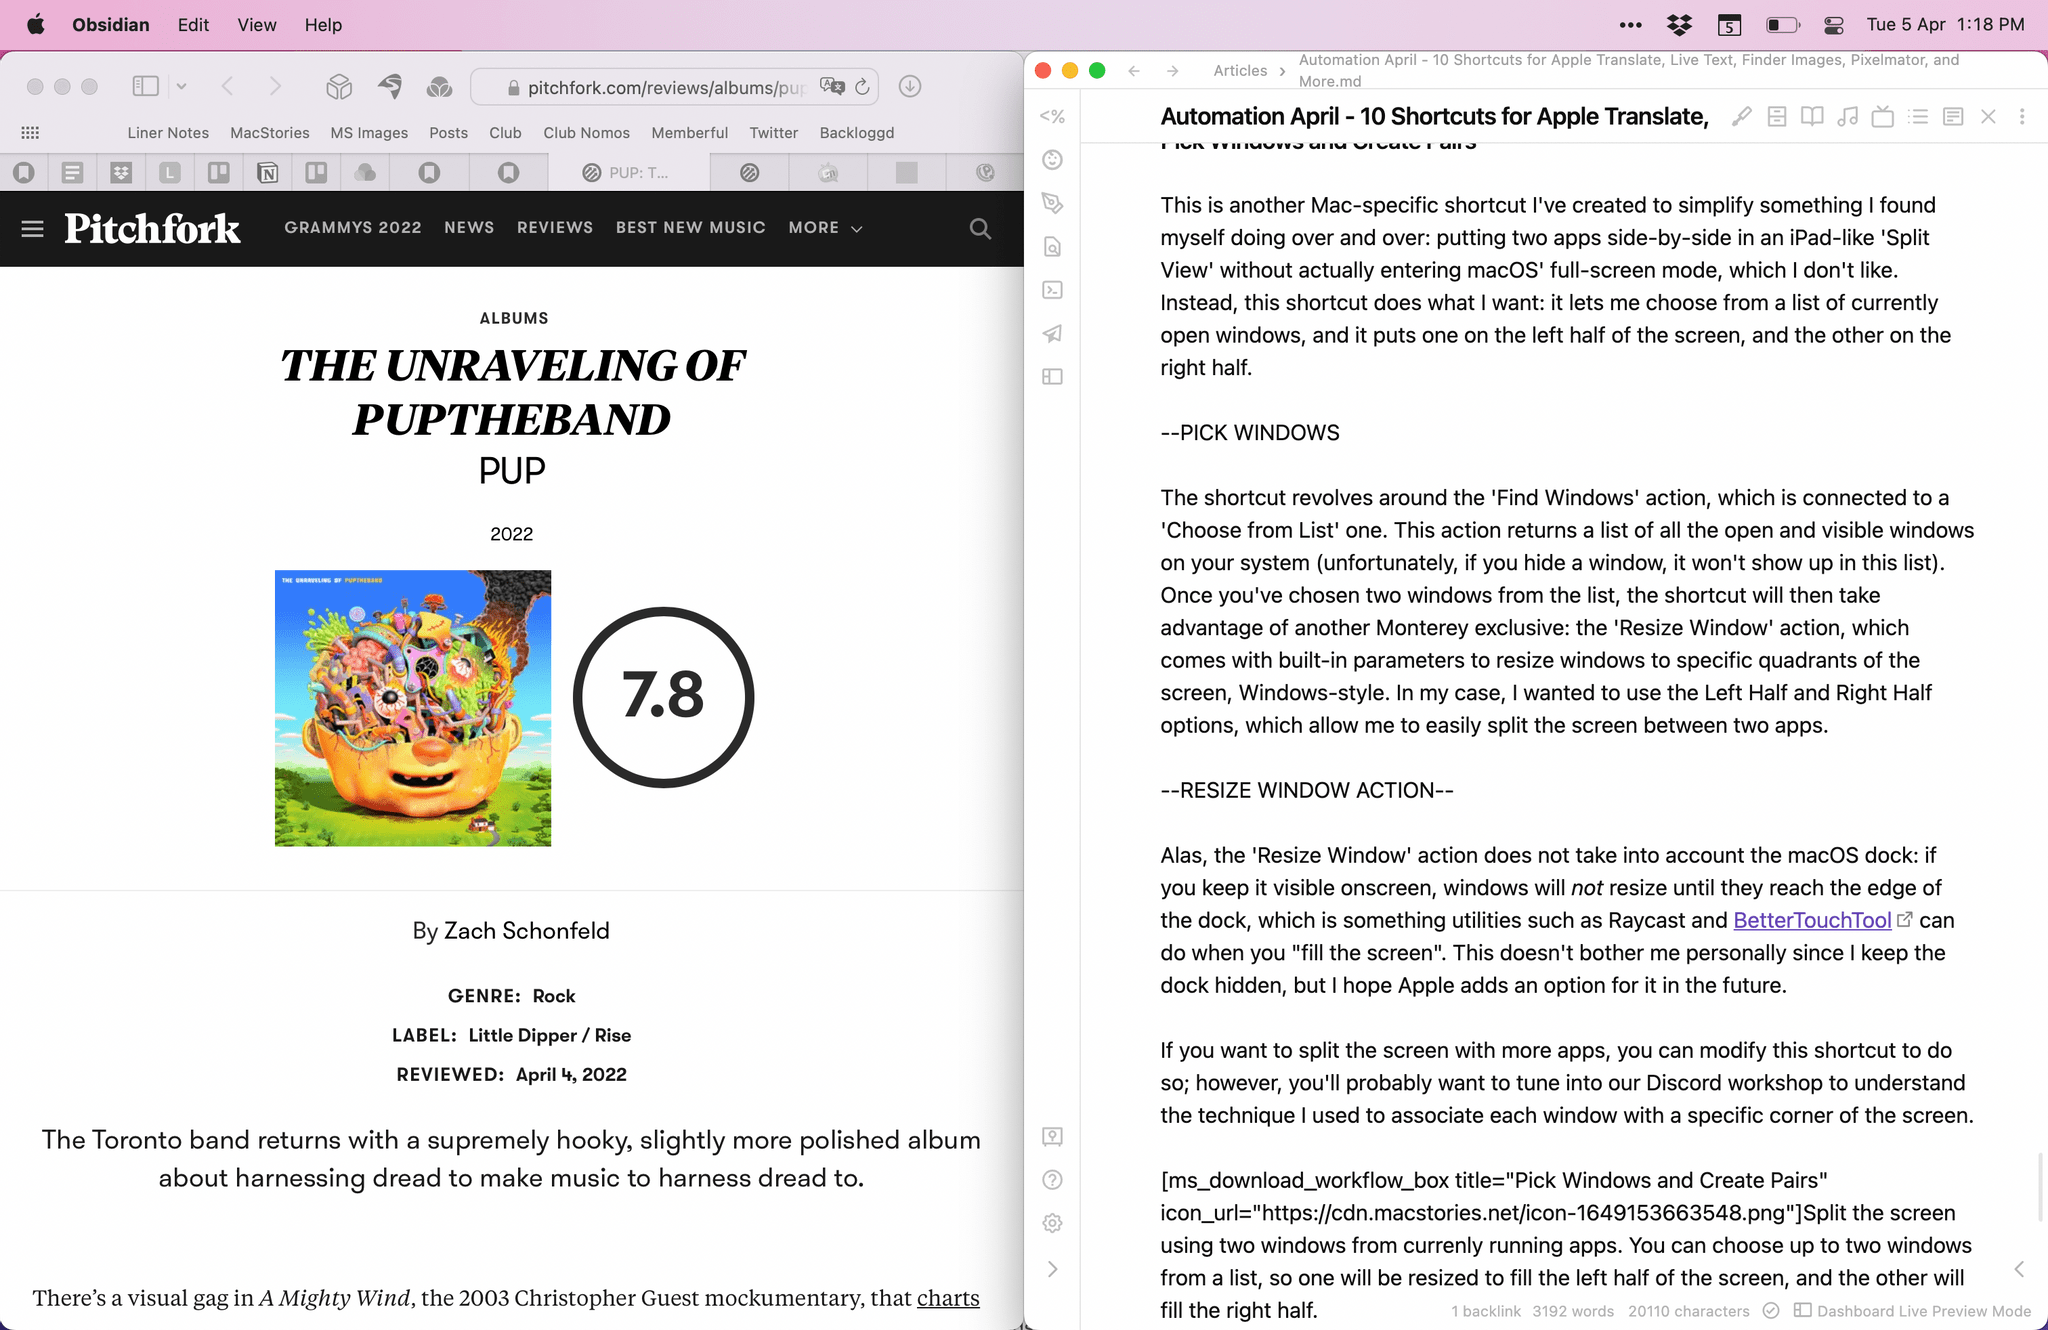
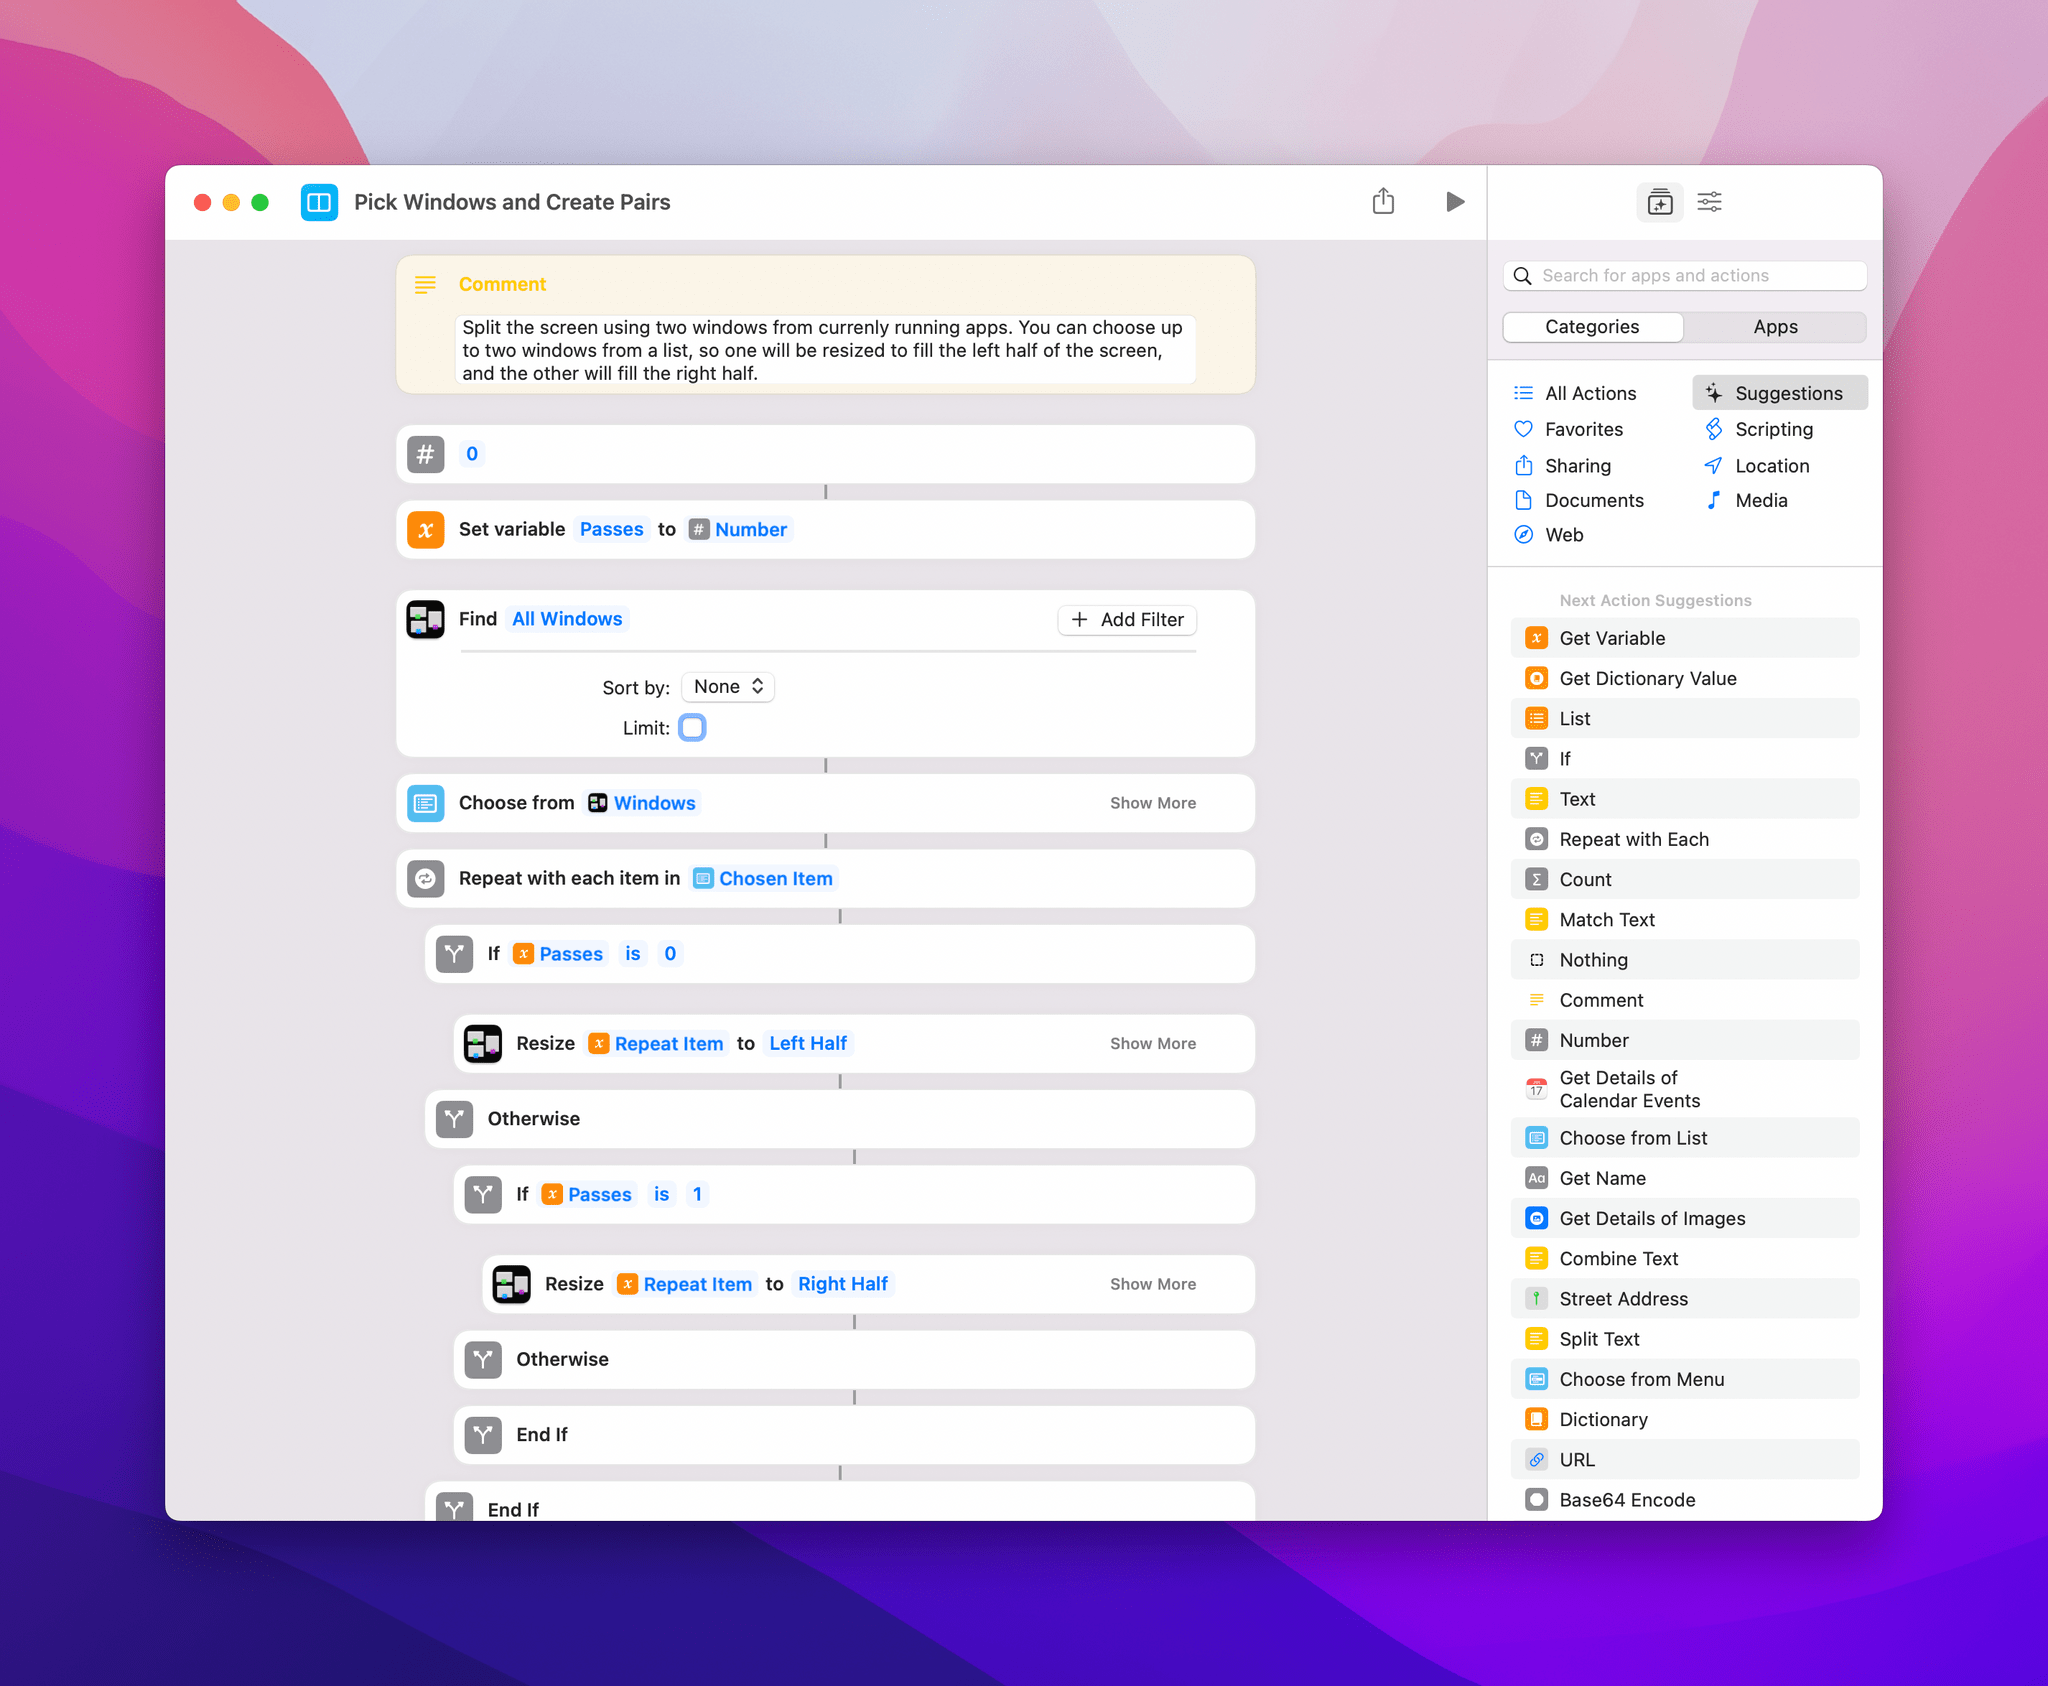
This is another Mac-specific shortcut I’ve created to simplify something I found myself doing over and over: putting two apps side-by-side in an iPad-like ‘Split View’ without actually entering macOS’ full-screen mode, which I don’t like. Instead, this shortcut does what I want: it lets me choose from a list of currently open windows, and it puts one on the left half of the screen, and the other on the right half.
The shortcut revolves around the ‘Find Windows’ action, which is connected to a ‘Choose from List’ one. This action returns a list of all the open and visible windows on your system (unfortunately, if you hide a window, it won’t show up in this list). Once you’ve chosen two windows from the list, the shortcut will then take advantage of another Monterey exclusive: the ‘Resize Window’ action, which comes with built-in parameters to resize windows to specific quadrants of the screen, Windows-style. In my case, I wanted to use the Left Half and Right Half options, which allow me to easily split the screen between two apps.
Alas, the ‘Resize Window’ action does not take into account the macOS dock: if you keep it visible at all times – say, on the right side of the screen – windows will not resize until they reach the edge of the dock, which is something utilities such as Raycast and BetterTouchTool can do when you “fill the screen”. This doesn’t bother me personally since I keep the dock hidden, and it’s not an issue if you keep the dock at the bottom either, but I hope Apple adds an option for it in the future.
If you want to split the screen with more apps, you can modify this shortcut to do so; however, you’ll probably want to tune into our Discord workshop to understand the technique I used to associate each window with a specific corner of the screen.
Pick Windows and Create Pairs
Split the screen using two windows from currently running apps. You can choose up to two windows from a list, so one will be resized to fill the left half of the screen, and the other will fill the right half.
New Text File
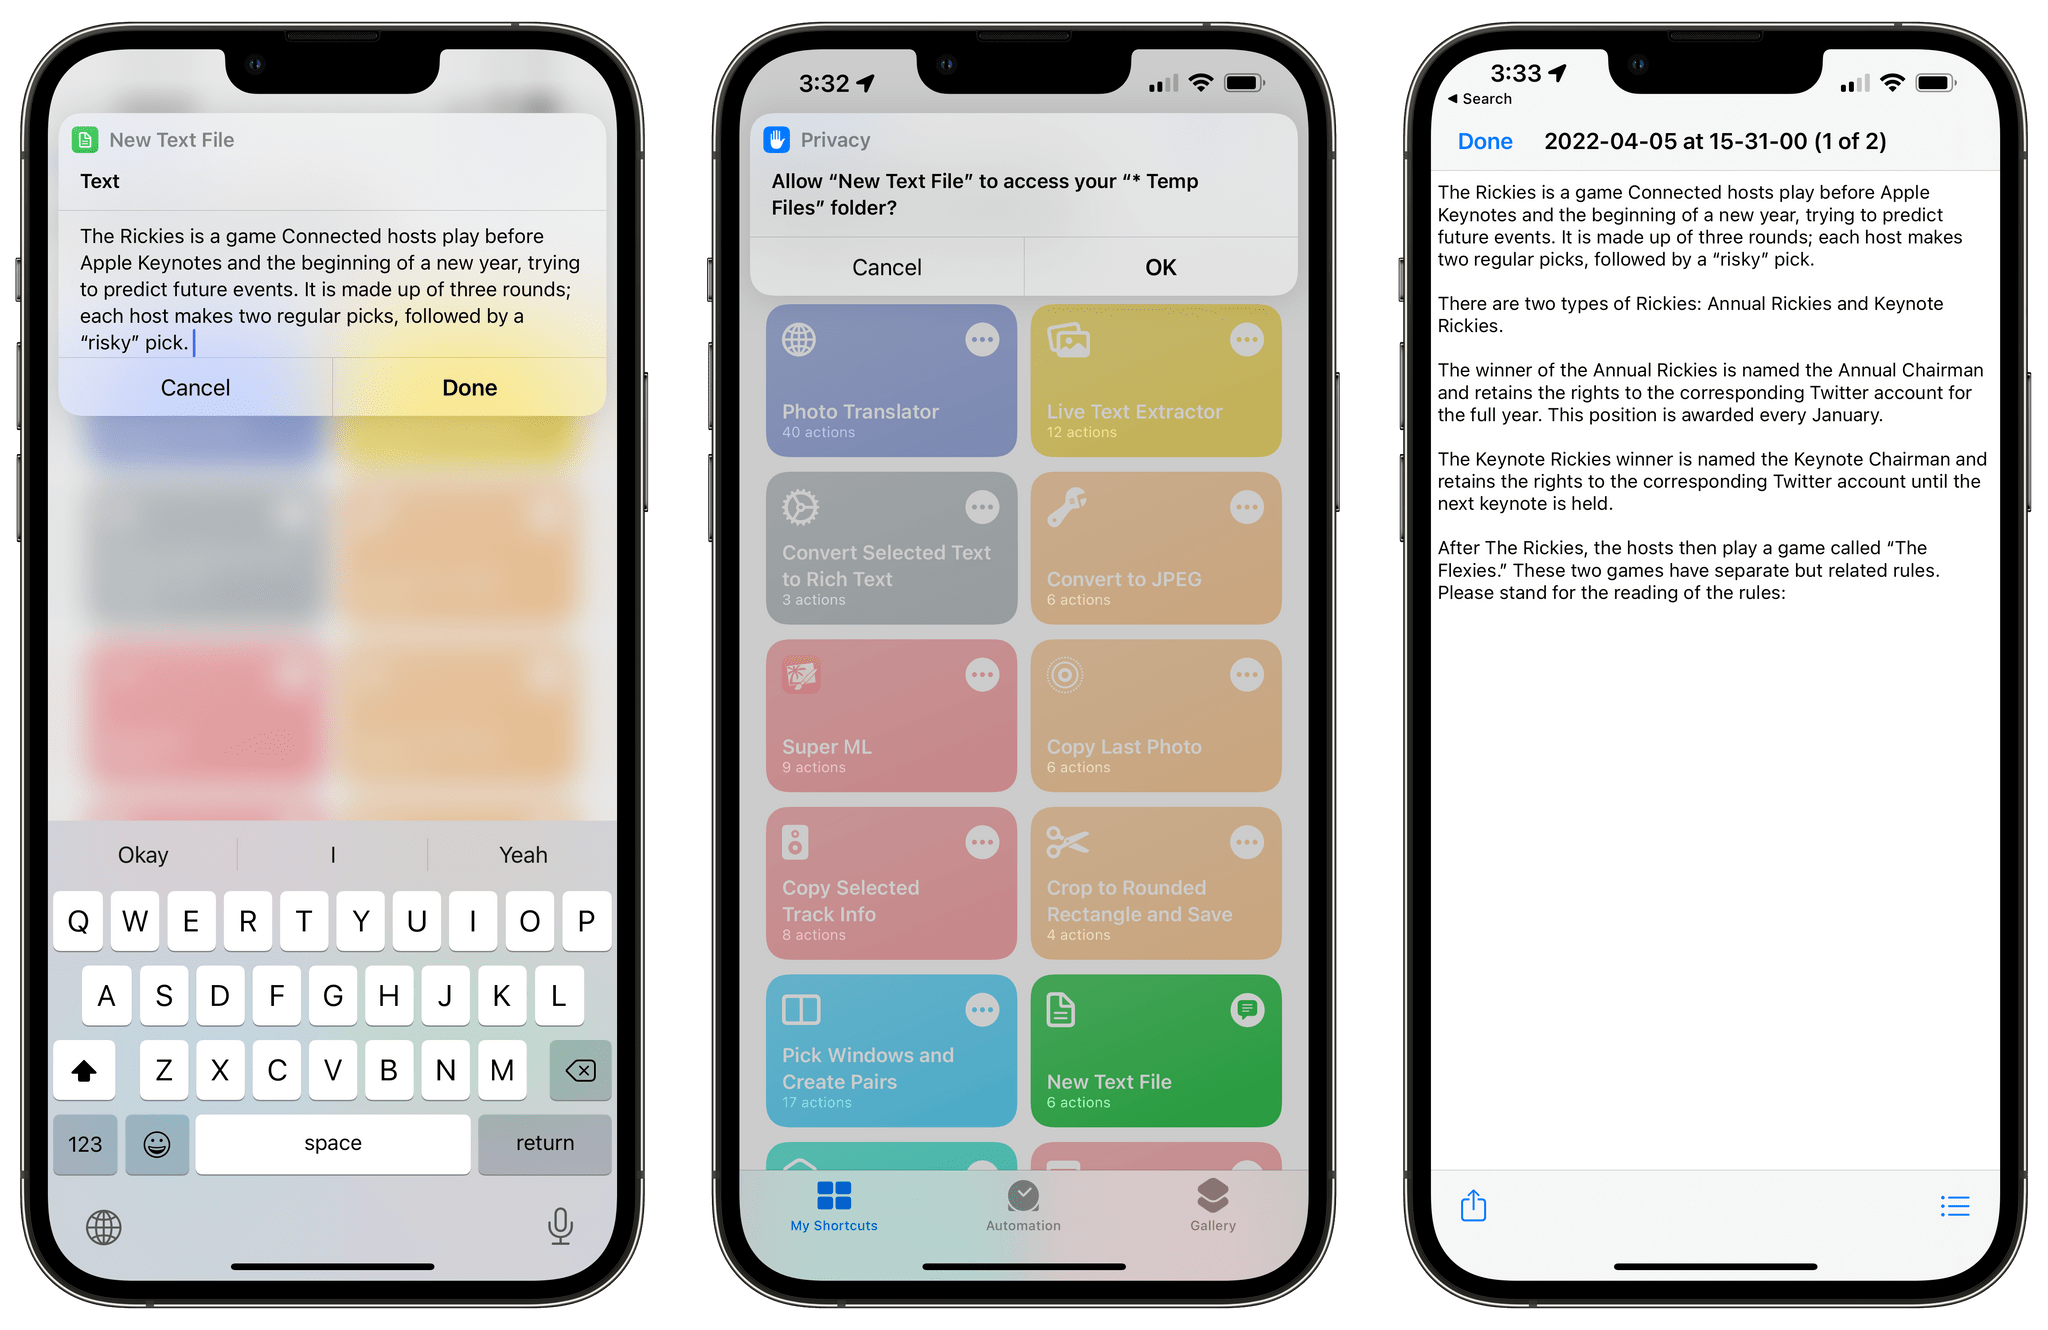
As the name suggests, this shortcut makes it easy to create a new text file anywhere in the Files app or Finder. It’s incredibly fast: run the shortcut, jot down whatever it is you don’t want to forget, and hit Return. A new .md plain text file will be immediately saved in the folder you specified upon installing the shortcut, which you can change at any time.
Text files are saved with a timestamp in their name, which is made possible by the ‘Format Date’ action in Shortcuts. You can use this shortcut in combination with apps such as Obsidian or iA Writer, or perhaps as a way to save quick ‘scratchpad’ notes for later on your Desktop. The choice is up to you.
You can also follow MacStories’ Automation April coverage through our dedicated hub, or subscribe to its RSS feed..
- Although I really think this feature should become available in the Files app too. ↩︎


