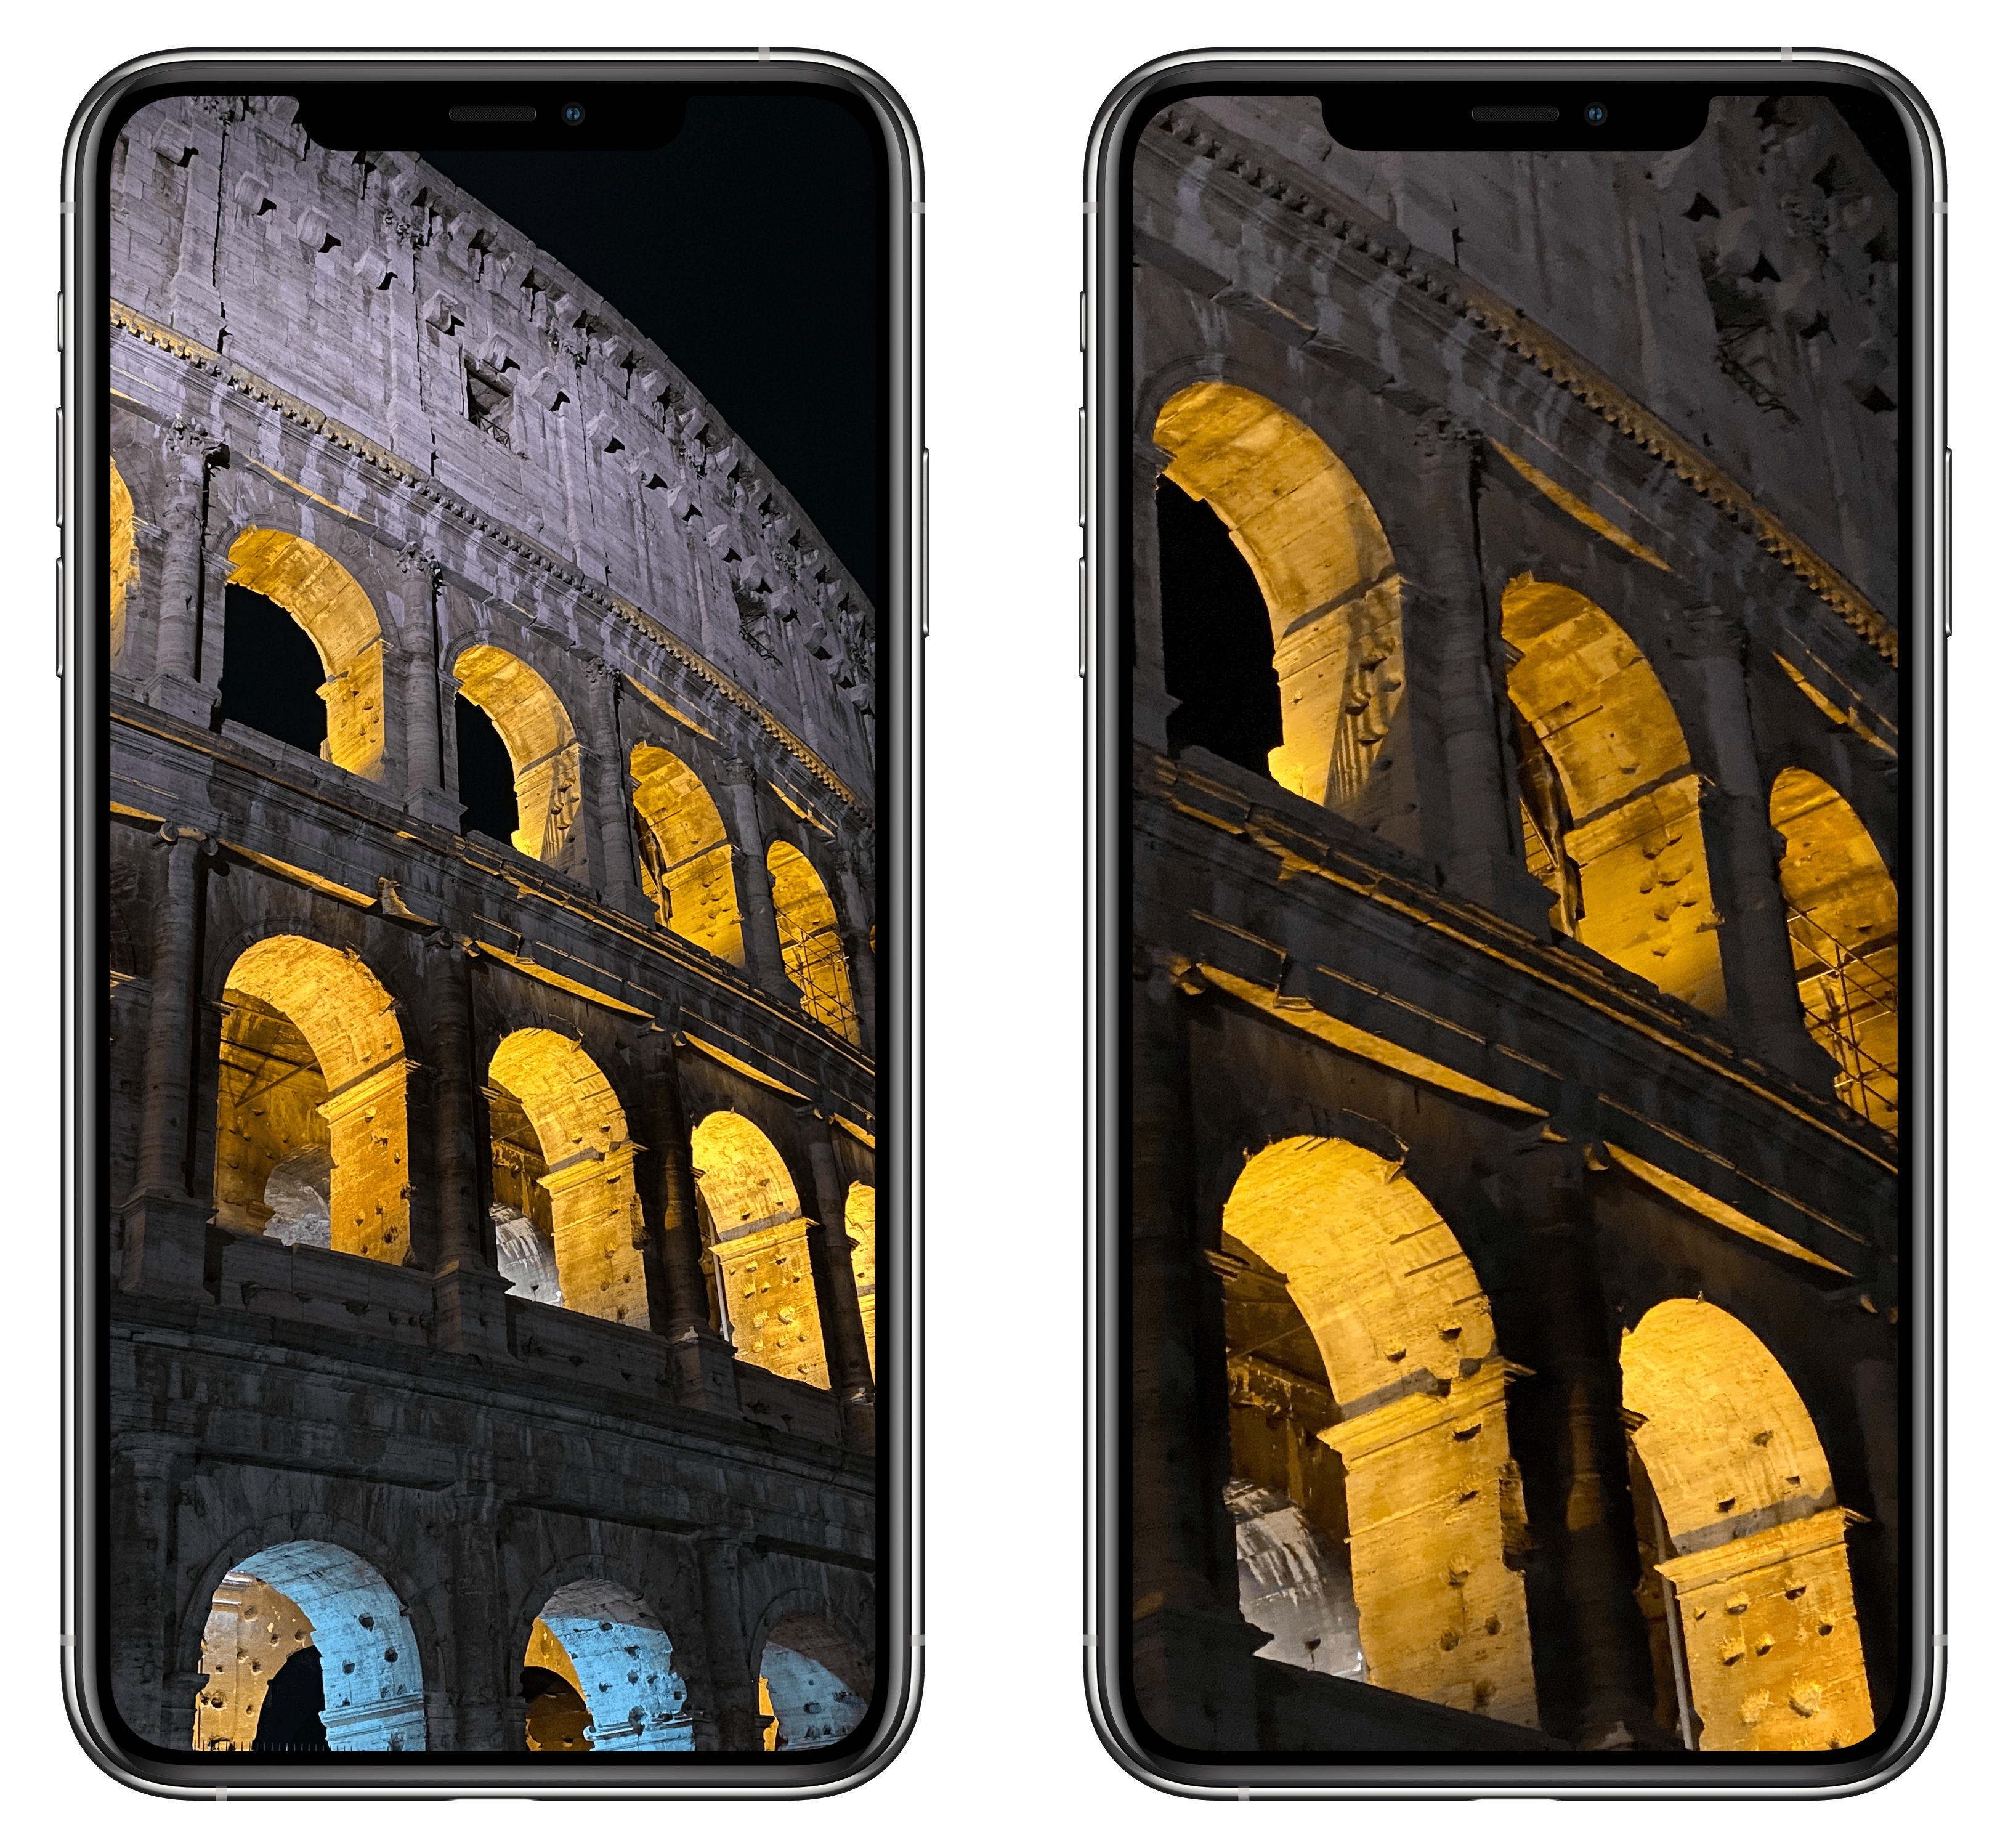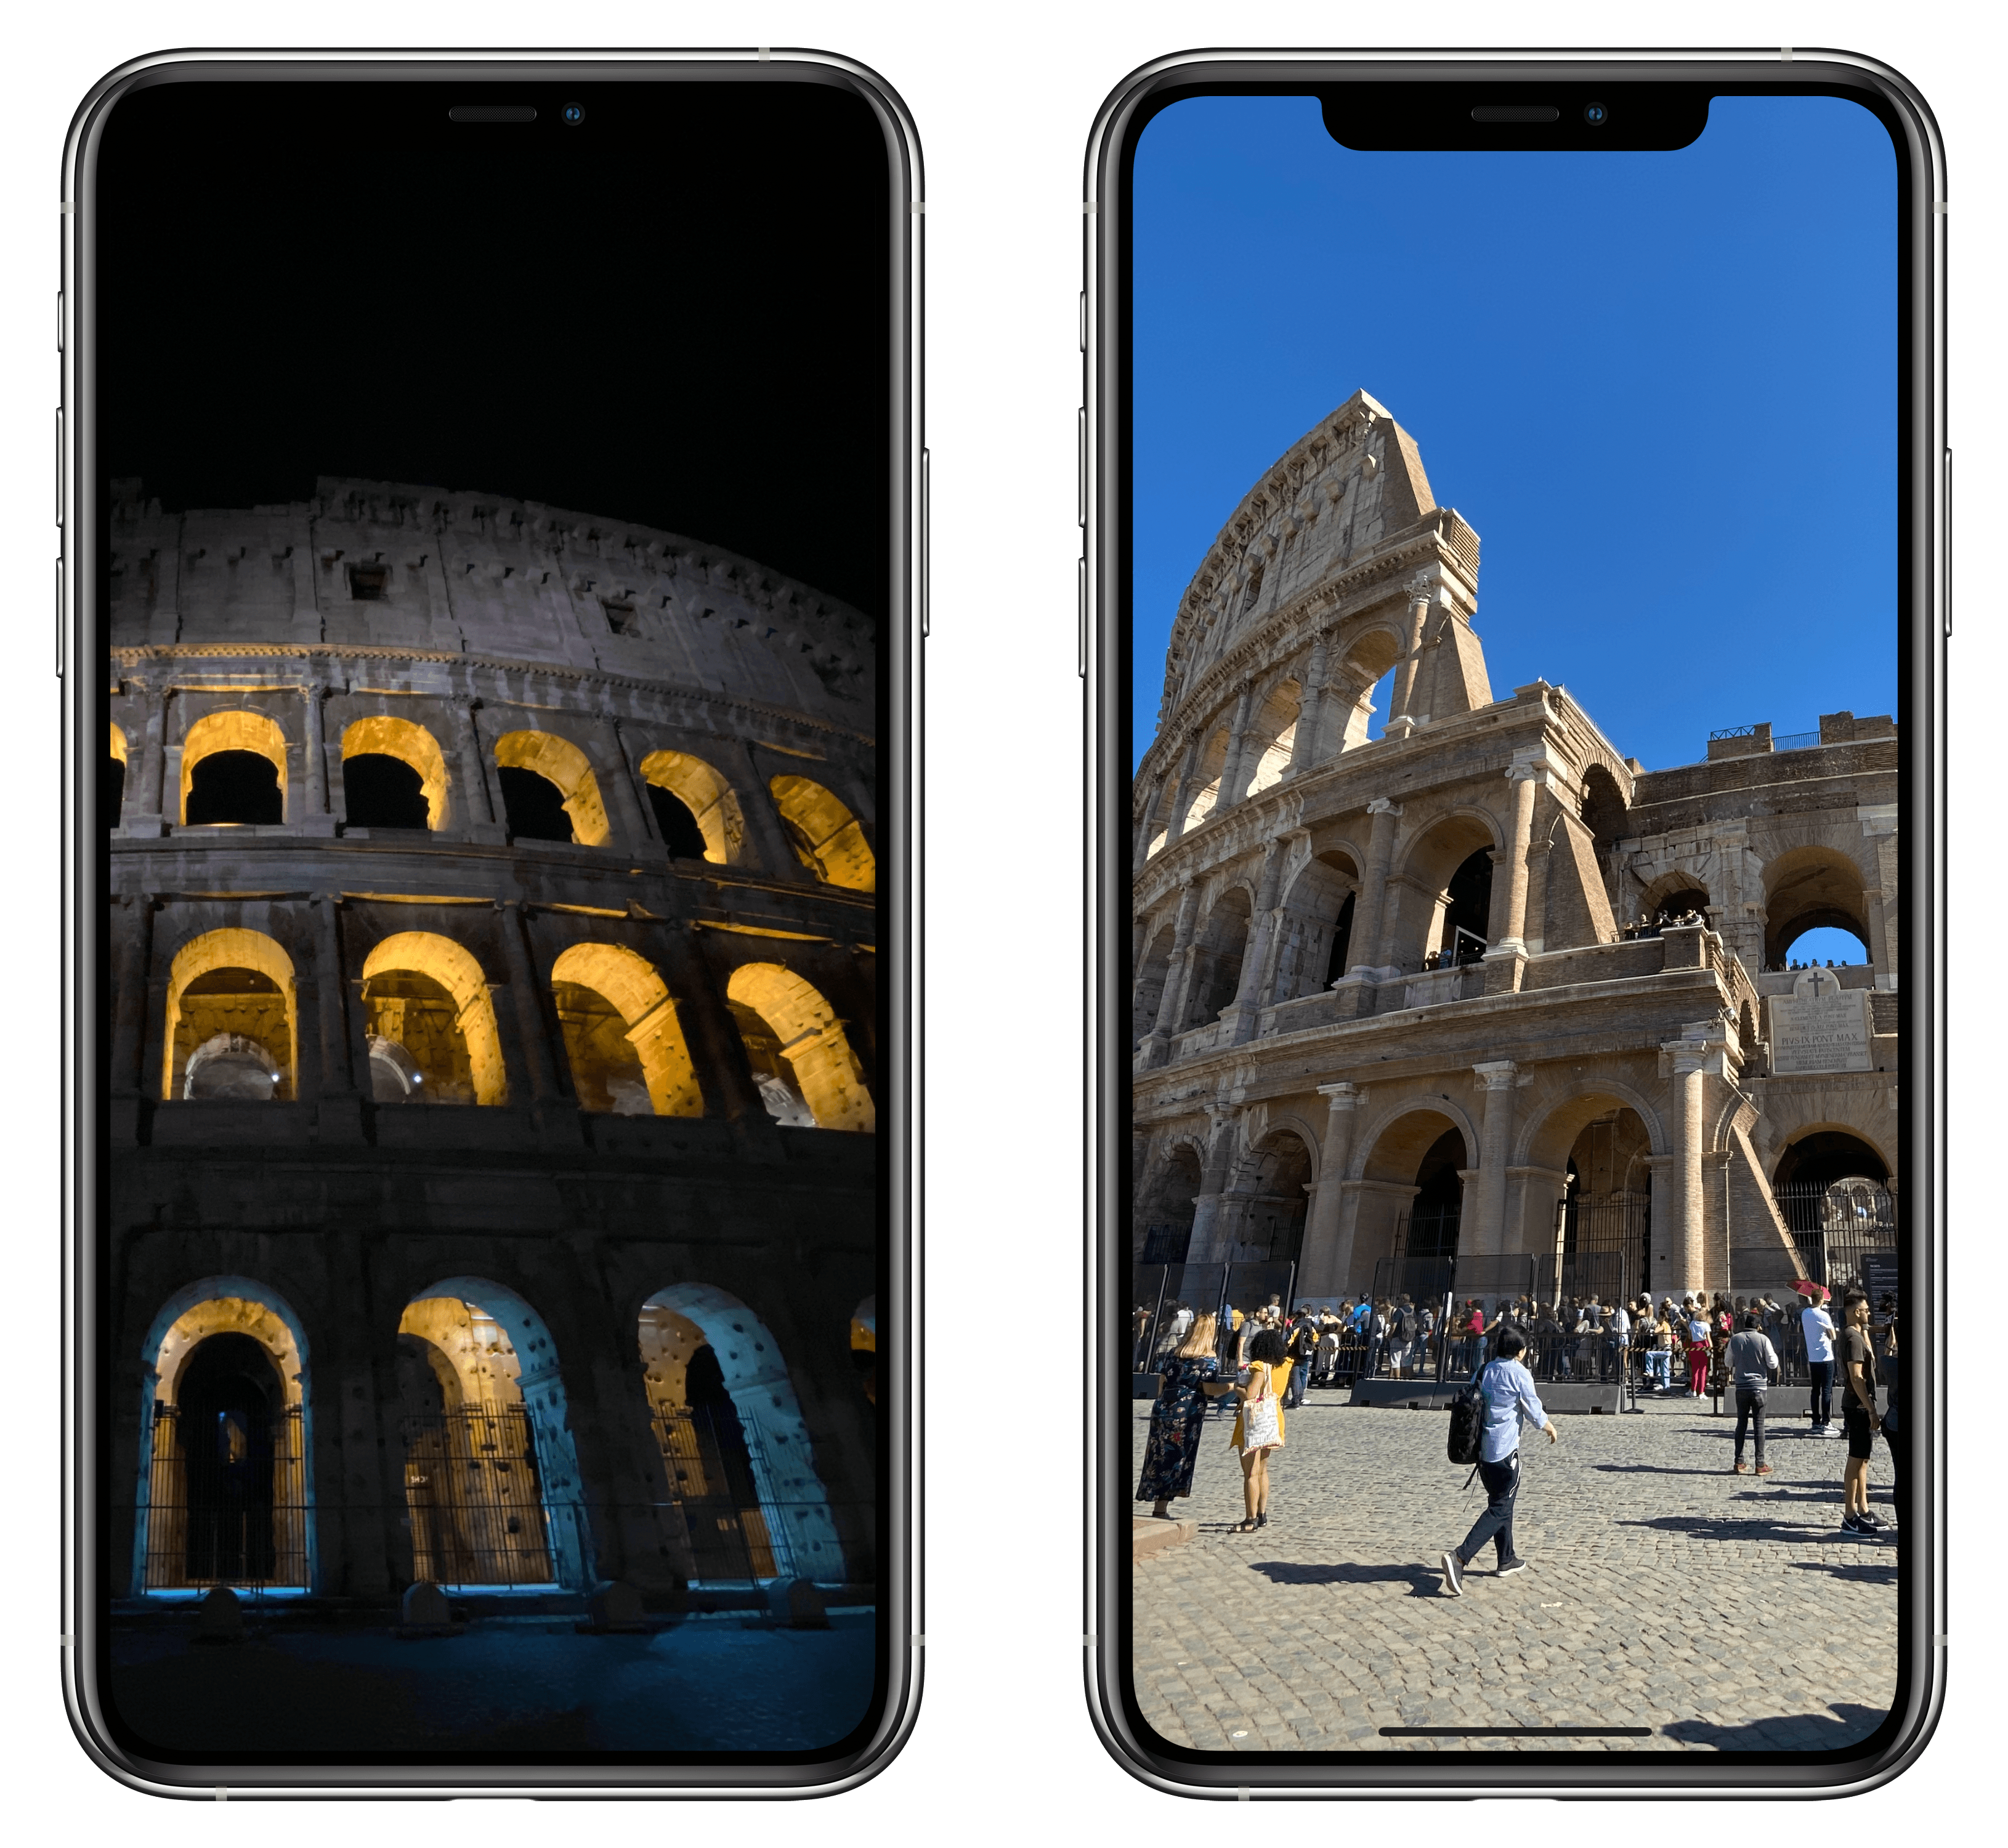
The Colosseum at night. Shot on iPhone 11 Pro using the wide lens, with night mode enabled. Unedited. Zoom in for details.
In many ways, the iPhone 11 Pro’s camera system feels like the culmination of over a decade’s worth of judicious, relentless improvements. Not only is the device’s camera the best and smartest Apple has ever shipped, but it also affords the most photographic freedom, allowing non-professional photographers like me to produce amazing shots with minimal effort.
I’ll cut right to the chase: I wasn’t a fan of the camera in last year’s iPhone XS line. As I argued on Connected several months ago, I always felt like pictures taken on the iPhone XS – even with Smart HDR enabled – were too muted and neutral. They didn’t pack the same punch as pictures taken on a Pixel; they were by no means “bad” photos – they just didn’t grab me as much as cameras in older iPhone generations did. Ultimately, it was a matter of taste: I know plenty of folks who appreciate the look of photos captured on an iPhone XS; I’ve never found them distinctive enough. As far as the camera was concerned, I didn’t consider the iPhone XS an exciting upgrade.
In the grand scheme of Apple’s camera plans, however, I can now see how the iPhone XS was a necessary step to lay the groundwork for a new kind of camera, one that is more than the sum of its lenses and which relies on machine learning, neural networks, and custom silicon to deliver pictures that are an intelligent interpretation of a moment in time rather than a mere capture of it. The camera in the iPhone 11 Pro line – and, to roughly the same extent, the iPhone 11 as well – is based on the same concept as the iPhone XS’, but builds upon it with more personality, new options, and more freedom to produce shots that would have been unthinkable on a smartphone just a couple of years ago.
I’m not a professional photographer, but the camera system in the iPhone 11 Pro, combined with the latest advancements in the Camera and Photos apps for iOS 13, makes me excited to go out and take as many pictures as I can again. And that’s precisely my point: the iPhone 11 Pro is called “Pro” for various reasons, including the several camera enhancements that real pros will leverage to push mobile photography to its limits; at the same time though, Apple has abstracted enough complexity from the iPhone 11 Pro’s camera experience to allow even someone like me to benefit from the same features without necessarily understanding the intricacies and minutiae of the entire system. That’s the beauty of software paired with humane design: it democratizes challenging tasks, resulting in a more inclusive experience that is accessible to all kinds of users.
I wanted to put all this to the test, and I had an idea: what better way to show off the iPhone 11 Pro’s three lenses, night mode, and new Deep Fusion technology than taking a walk around Rome and seeing what the iPhone 11 Pro would make of it?
Rome is a city that spans over 2,000 years of history, and it offers unique photographic opportunities – from beautiful vistas that are perfect for ultra-wide shots to monuments and ruins of the Roman Empire, which lend themselves well to classic wide-angle shots as well as zoomed-in close-ups taken with the telephoto lens. The center of Rome is very walkable and provides photo-worthy material at every corner, which makes it an ideal testing ground for a new iPhone model; additionally, each of the famous monuments and buildings is constantly illuminated at night, making night mode possible, but not necessary – which is perfect for before/after comparisons. And last: I may be biased, but Rome is the most beautiful city in the world, and it’s a fantastic subject to photograph either during the day or at night. I’m lucky to be able to live here.
So here’s what I did: I lived like a tourist in my own city for two days. Armed with just an iPhone 11 Pro Max and a tripod (which I only used for night mode photos), I took a tour of Rome with Silvia and a couple of friends, and I ended up taking hundreds of pictures. My goal wasn’t to publish a detailed iPhone 11 Pro “camera review” – you should look elsewhere for that. Rather, I wanted to demonstrate how, even without any formal photographic knowledge, the iPhone 11 Pro’s camera can produce stunning results that, at least for me, are downright incredible for a smartphone.
I wanted to prove how, despite my lack of expertise, the iPhone 11 Pro’s powerful interplay of hardware and software could capture the essence of Rome and do it justice. I think I’ve succeeded in this, but I’m going to let Rome speak for itself.
Table of Contents
- Setup and Methodology
- The Colosseum
- Night Mode and the Eternal City
- Daytime Photography
- Other Notes
- iPhone 11 Pro: Photographic Freedom
Setup and Methodology
Here’s the short version:
- This story contains 50 photos;
- All photos in this story were taken with an iPhone 11 Pro Max;
- All photos have been uploaded in full-resolution, with a Display P3 color profile, with no edits.
And for those seeking a few more details:
A few weeks ago, Apple provided me with review units for the iPhone 11 Pro Max and iPhone 11. I only tested the Pro model for this story since I wanted to test the wide-angle, telephoto, and ultra-wide lenses.
Photos shared in this article were captured on the first beta of iOS 13.2 exclusively with Apple’s Camera app; I had ‘Capture Outside the Frame’ disabled in Settings to ensure that, whenever possible, the system could apply its Deep Fusion technology.
When shooting and previewing pictures, I was able to confirm multiple times that Deep Fusion was indeed working since I could see the “proxy” image in the Photos app while the Deep Fusion shot was being processed. However, in the spirit of replicating the average user’s experience with the iPhone 11 Pro and the Camera app, I didn’t annotate which shots used Deep Fusion and which ones didn’t – I shouldn’t have to know. By design, iOS 13 makes it extremely hard to guess when Deep Fusion is enabled – and that’s the point: Deep Fusion is a feature that works in the background and kicks in when iOS thinks it’s needed. My recommendation: try to zoom in on photos in this story and look at the finer details the iPhone’s camera retained.
Photos shared below are the original files – as saved by the Camera app – uploaded in full quality with no compression or edits. By default, exporting from Apple’s iOS Photos app generates .heic files that cannot be embedded on a webpage; the photos in this story are JPEG files exported at maximum quality, with metadata intact, and with their original color profile (Display P3) using the Photos app for macOS Catalina. You can tap on the button underneath each photo to view it in full-size in a new browser tab; you can also download each file and inspect its metadata and GPS coordinates.
The photos in this story weigh around 400 MB. For this reason, to maximize performance and avoid potential browser loading issues, I’ve split the article in multiple pages. You can move between pages with the navigation tool at the bottom of the story.
Lastly, the majority of night mode photos were taken by setting night mode’s capture time to ‘Max’ and using a tripod (this one); a handful of night mode shots were taken in handheld mode. I attached the iPhone 11 Pro Max to the tripod using the excellent Studio Neat Glif.
The Colosseum
Our tour around Rome happened on two separate days: the night between October 6-7 and the morning of Tuesday, October 8. On both occasions, we were lucky enough to have great weather conditions, which comes through in the daytime shots with a gorgeous blue sky. Also of note: the nighttime shots were taken between 11 PM and 1 AM; I’ve been living in Rome for over 6 years now, and this was the first time I walked around the center of the city with so few people around. It was incredible, and if you happen to visit Rome in late summer or the beginning of fall, I highly recommend taking a walk after dinner on a weekday – you’ll be able to enjoy the hundreds of monuments and hidden corners without the typical tourist chaos.
We began our photographic tour at the Colosseum, the famous amphitheater located in the center of Rome and visited by thousands of people every day. The Colosseum was built roughly 1,950 years ago and, despite issues involving deterioration, stone robbers, earthquakes, and weather conditions, it’s still standing, and it’s the monument to see in Rome. Its sheer size (the outer wall’s height reaches 48 meters/157 feet) makes it a great subject to photograph from a distance, as well as from directly below to play around with interesting perspectives and angles.
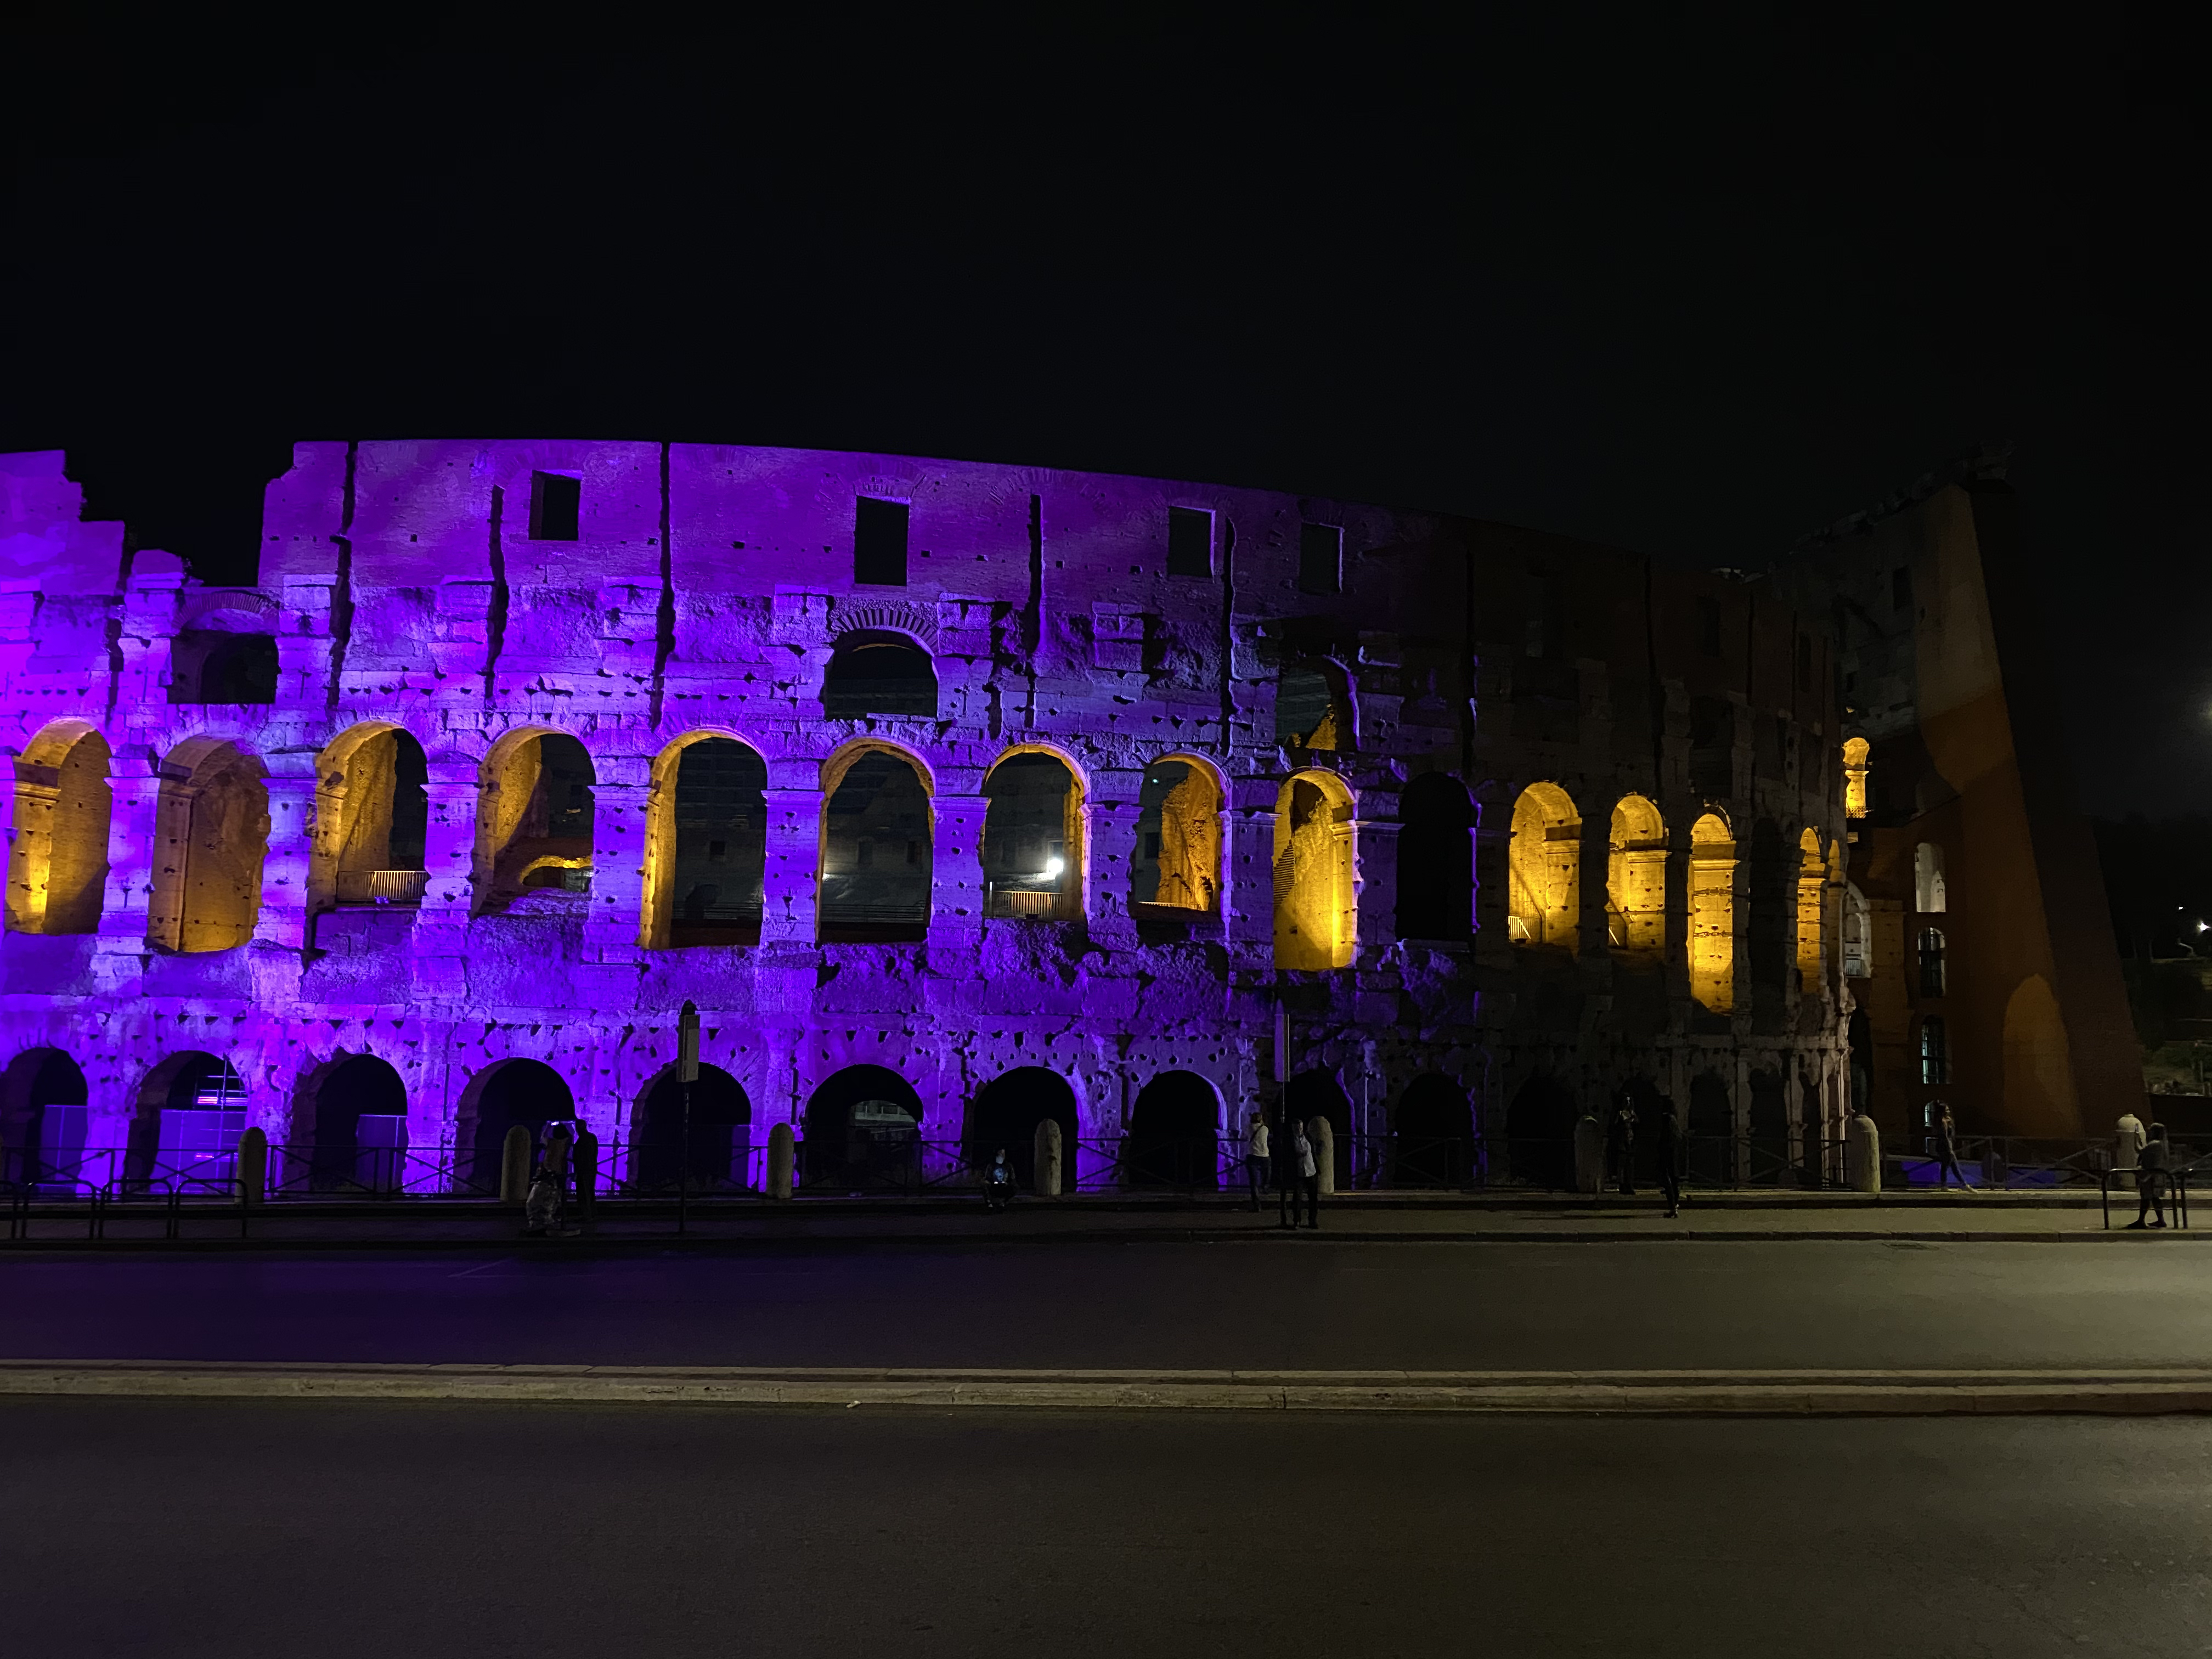
In this first photo, you can see how, even with night mode disabled, we have a perfectly usable, gorgeous shot of the Colosseum at night. The outer wall is illuminated by LILT’s pink/purple lights (it’s a cancer awareness campaign), while lights from the inner section are shining through the wall’s arcades.
By switching to night mode with a 6-second exposure (also taken with the wide camera on a tripod), we can observe a few interesting changes. Night mode has retained the detail of the wall and arcades (zoom in to judge for yourself), increased the brilliance of the purple lights, and – the improvement I was after – brightened the right side of the structure as well as the street in front of it. Amusingly, you can see the result that night mode’s longer capture time has on passing cars and scooters with the white and red lights at the bottom of the picture.
I’ve visited the Colosseum several times in my adult life since I moved to Rome in 2013, and I’ve always loved the feeling of being a minuscule, ephemeral human in front of a towering structure that was built nearly 2,000 years ago and is still here with us today. It’s hard to reflect on this aspect of history during the day, while the exterior of the Colosseum is packed with tourists and you have to be mindful of pickpockets. At night, with only a few other people around, admiring the Colosseum takes on another meaning altogether, at least for me. And if you have an iPhone 11 Pro, you can capture some amazing perspectives of the most iconic symbol of the Roman Empire.
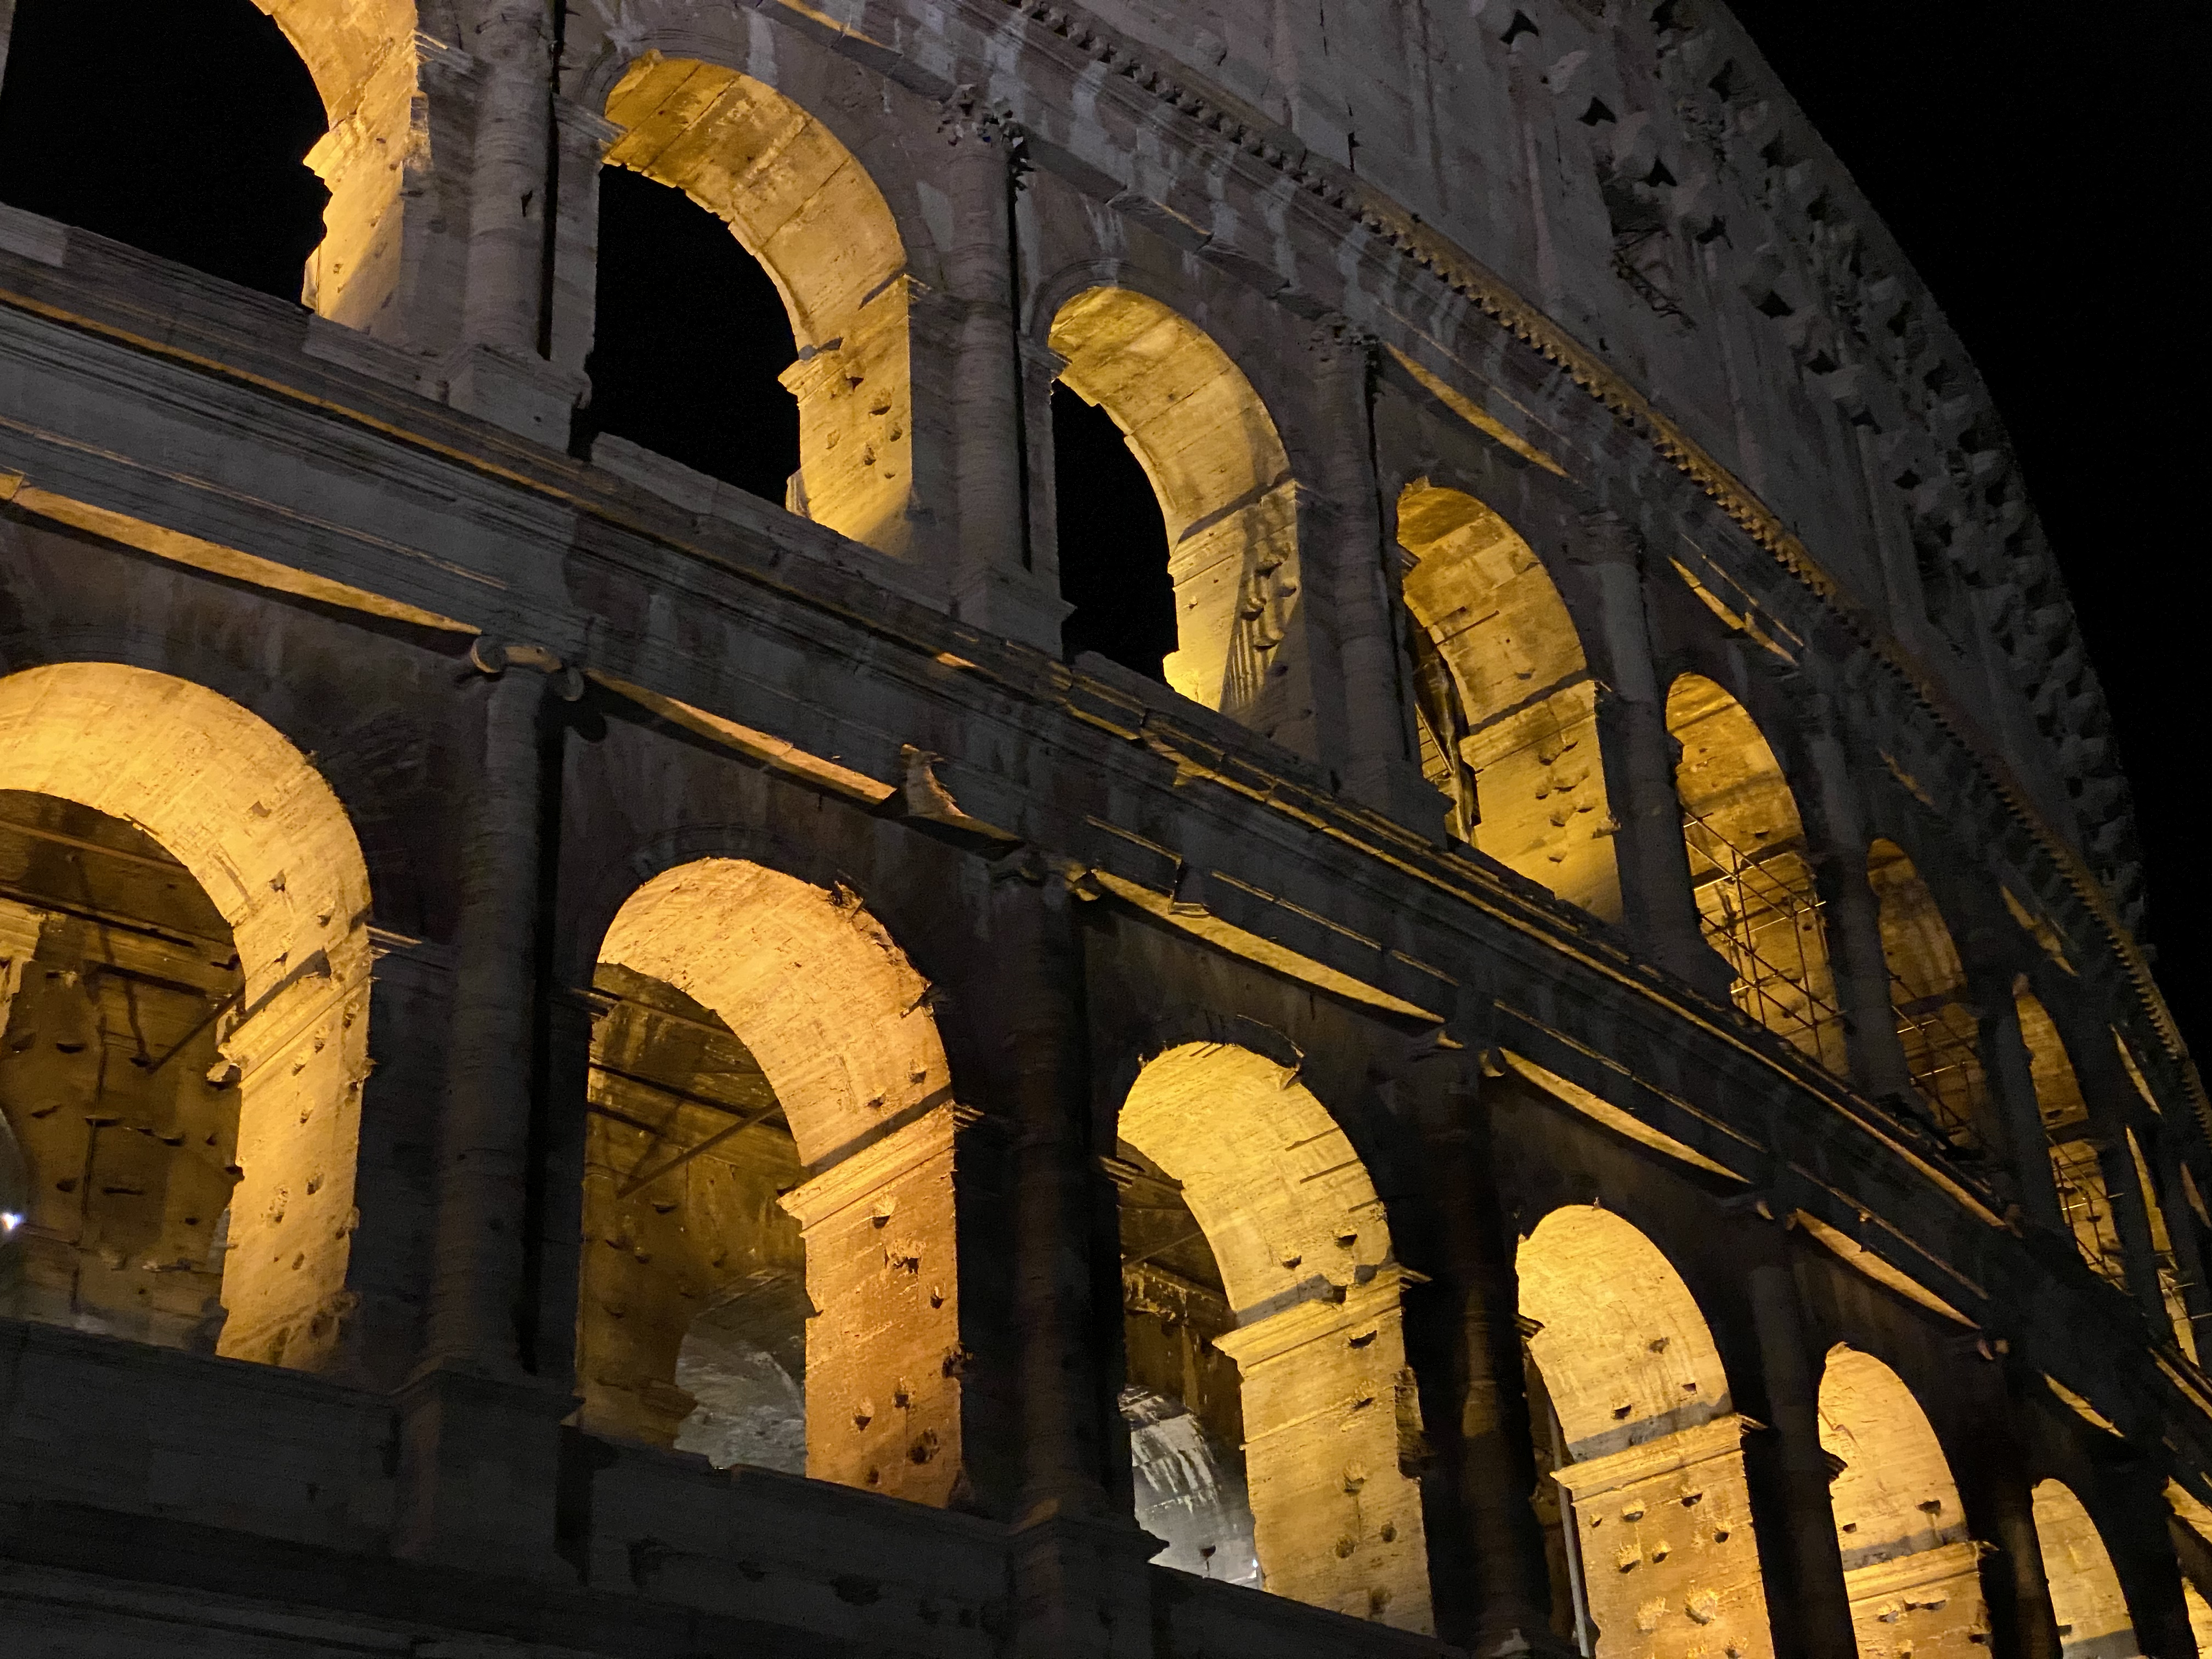
In the wide-angle shot above, you can see how night mode retained all the finer details of the Colosseum’s facade, which I find incredible. The telephoto shot, as you can confirm by zooming in on the photo, has a bit more noise and it’s a touch darker – it was taken with night mode disabled since the telephoto lens doesn’t really support it.

Zoomed-in comparison of the wide-angle shot (left) and telephoto one. (Both zoom levels achieved via double-tap in the Photos app.)
I’ve been impressed with the performance of the telephoto lens in the iPhone 11 Pro: at ƒ/2.0 aperture, it captures 40% more light than the XS’ telephoto lens. I’ve been able to take brighter, sharper shots with the telephoto camera on the 11 Pro thanks to its wider aperture.
Obviously, with a structure as tall and large as the Colosseum, it’s almost mandatory to play around with the iPhone 11 Pro’s ultra-wide lens to get some fun shots out of it. I’m going to share a few more ultra-wide examples later in the story; in the meantime, here are two of my favorite ultra-wide shots taken with a tripod in front of one of the Colosseum’s entrances.

The ultra-wide lens struggles with maintaining sharpness in a dark scene, but the perspective is too cool to pass on.
Night mode doesn’t work with the ultra-wide lens, which, with an aperture of ƒ/2.4, captures less light than the wide-angle or telephoto lenses.1 In my tests, I’ve noticed that the ultra-wide lens really doesn’t like low-light situations. But with the right composition and a sufficient amount of light, the ultra-wide lens can produce great results at night too.
As expected, the ultra-wide lens fares much better during the day with a lot of light hitting the sensor. Note how, with plenty of sunlight, this ultra-wide shot has preserved details in the facade and inscription:

Zoomed-in comparison of an ultra-wide shot taken at night (left) and during the day. Sunlight considerably helps with retaining sharpness in the daytime shot.
The ultra-wide camera doesn’t yield the same dynamic range of other daytime shots taken with the wide and telephoto cameras I’ll share later, but the result’s pretty good. The edges of the image are somewhat distorted, but that’s a natural consequence of the ultra-wide lens, which is why I’m trying to be very conservative with my ultra-wide shots. I want to make sure I can find subjects – such as large panoramas or structures – that lend themselves well to this kind of look.
Due to physical limitations in its first version, I’ve mostly been using the ultra-wide lens during the day, when lots of light is available. I have no doubt that Apple is already planning major improvements to the ultra-wide lens for future iterations; it seems fairly obvious that the lens will eventually gain a wider aperture, higher dynamic range, support for Focus Pixels, and integration with night mode. I’d love to take more low-light ultra-wide shots with my iPhone; as far as the ultra-wide camera is concerned, I already know what’s on my wish list for next year.2
- It’s also lacking 100% Focus Pixels, found in the wide lens this year. ↩︎
- Broadly speaking, I also hope Apple can figure out how to enable Deep Fusion and Capture Outside the Frame at the same time. Being able to shoot QuickTake videos in 4K would be nice too. ↩︎


