The Finder
Cover Flow was first implemented by Apple in iTunes in 2006 but found its way into the Finder in 2007. The interface element was originally meant to imitate flipping through record albums, but the Finder extended the metaphor to folders and files. As tastes changed, Cover Flow was dropped from iOS devices and iTunes but remained in the Finder, which has always struck me as the least natural fit for its card flipping interaction. In any event, we can all pour one out for Cover Flow today, because with Mojave, it has now been eliminated from all of Apple’s products.
Gallery View
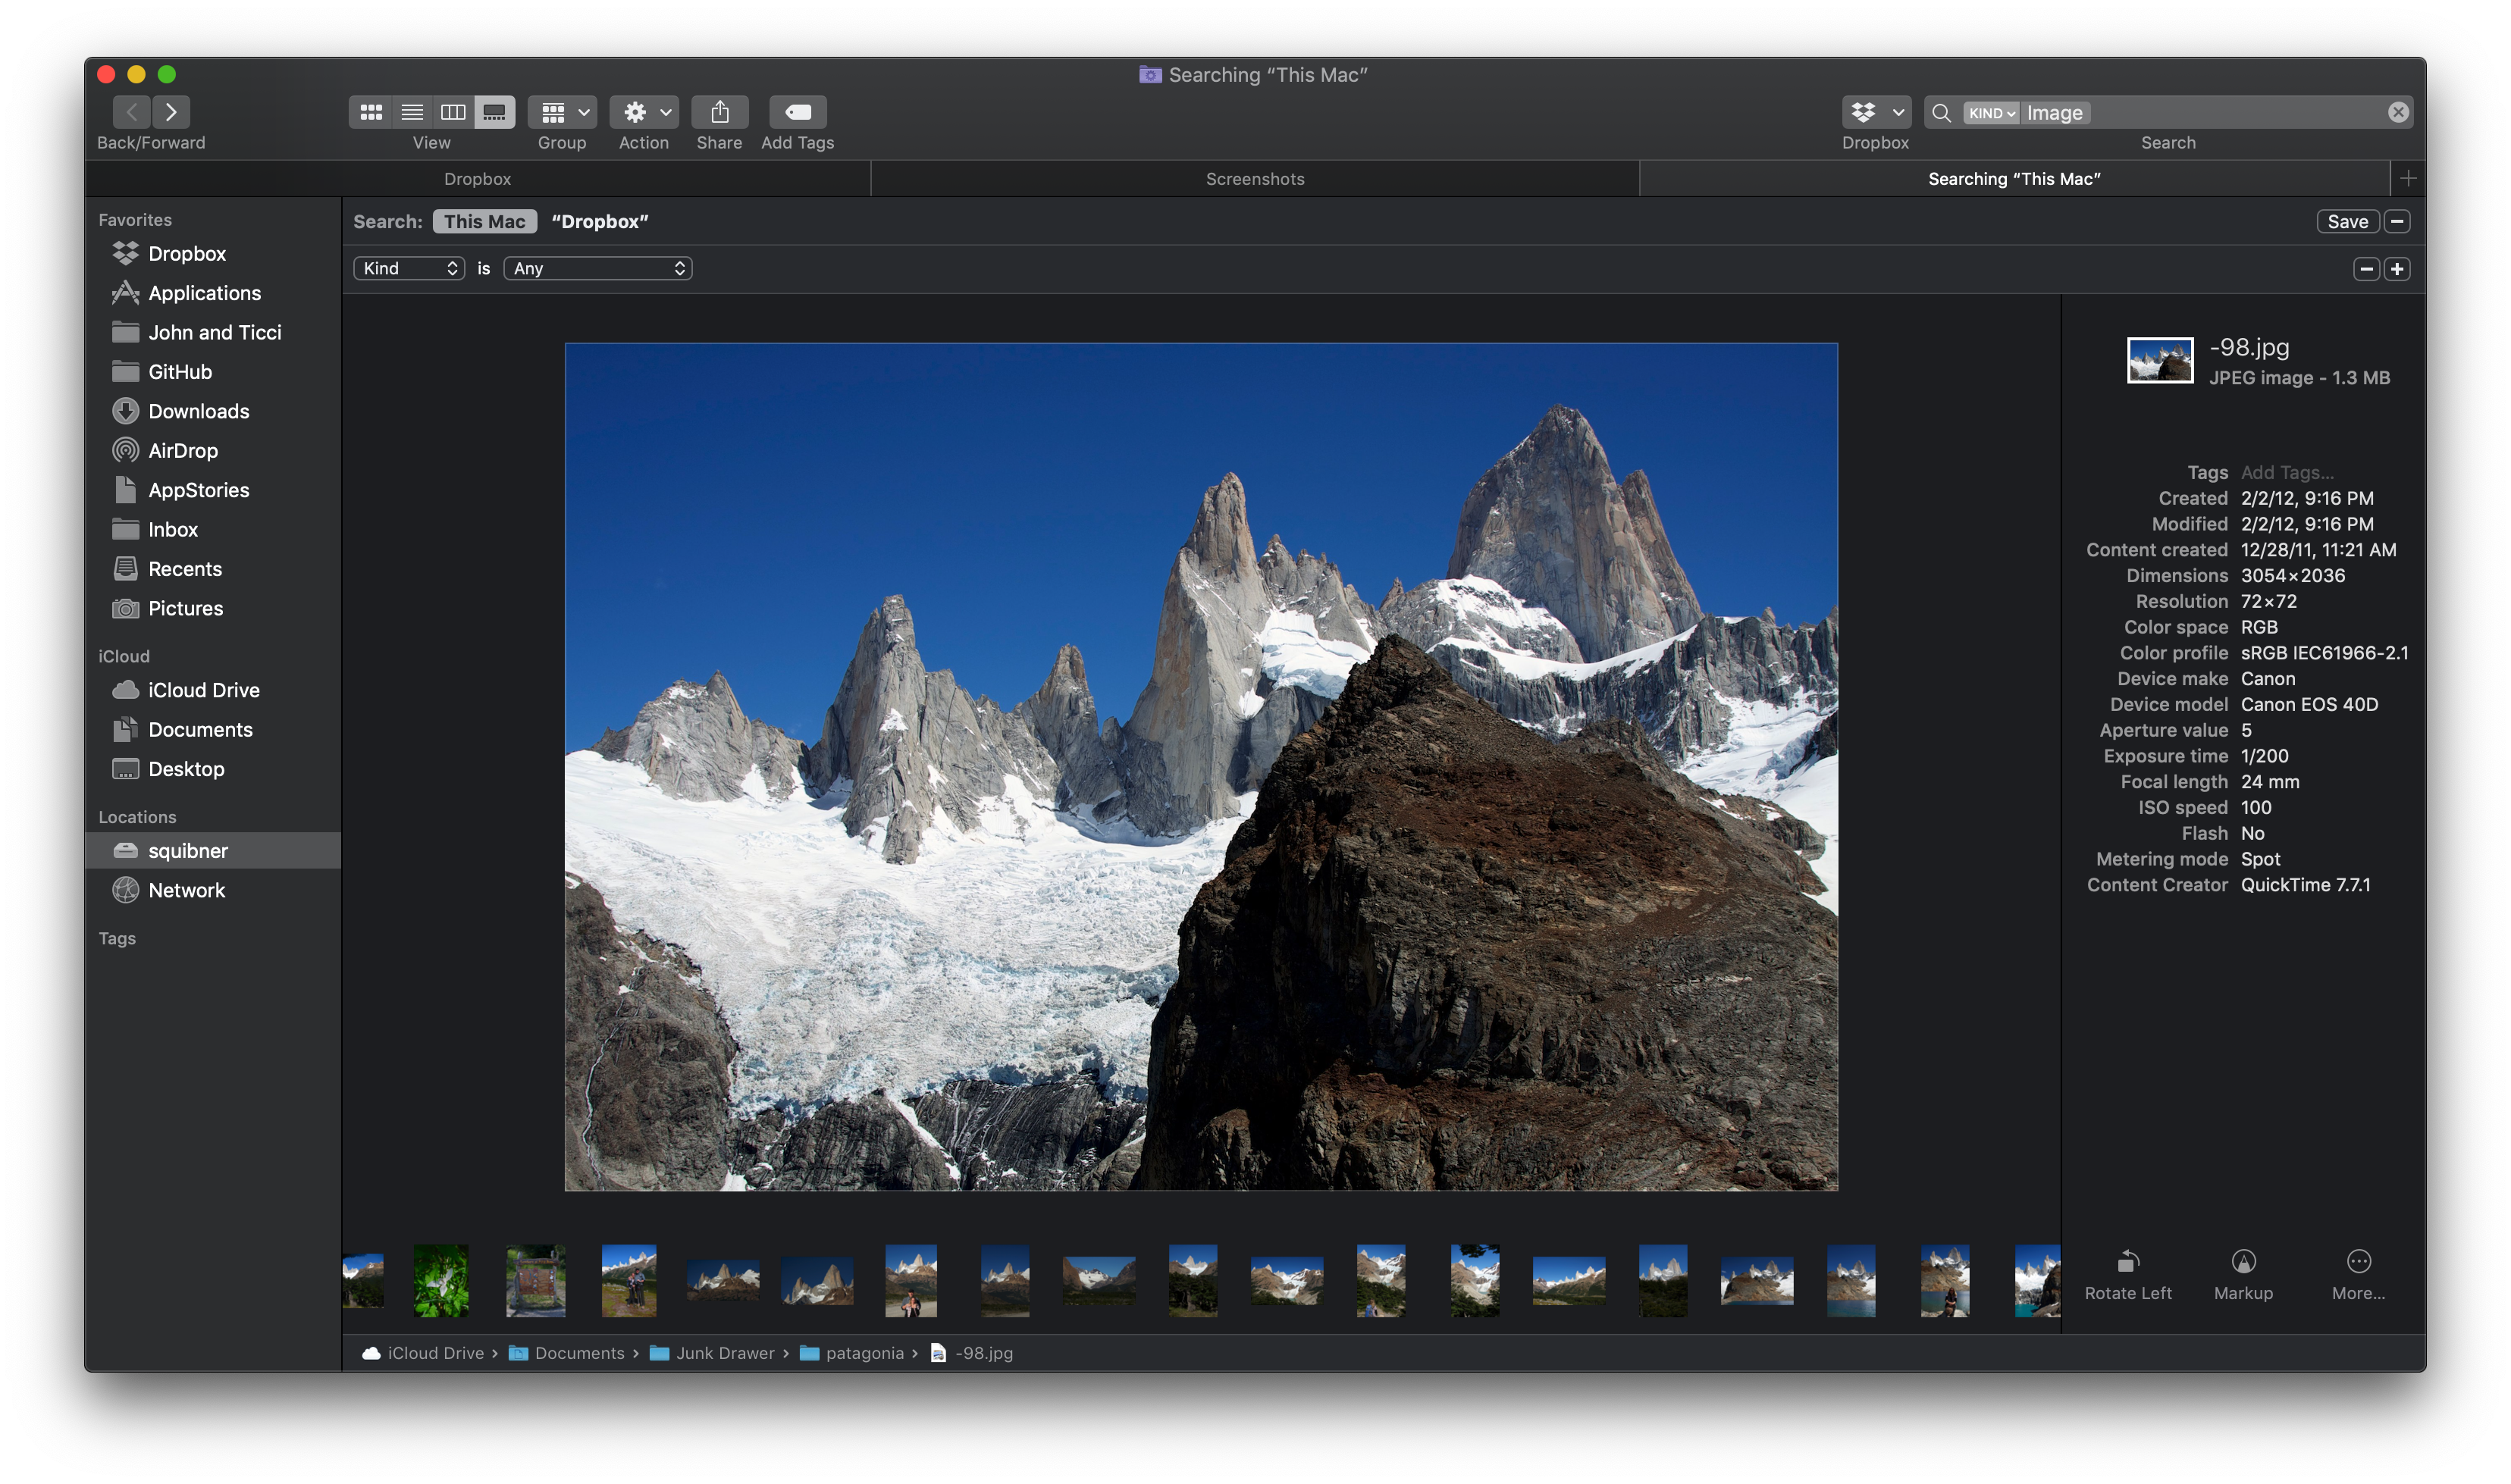
Not great for navigating folder structures, but the Gallery View is perfect for browsing photos and video.
The spiritual successor to Cover Flow is Gallery View, which displays a row of small thumbnails along the bottom of the Finder window with a preview of the selected file above it. If you have a folder of images to review and manage, Gallery view is useful, but it’s not a good option for folder navigation. I find moving through folder hierarchies harder with the Gallery view because depending on your window size, there aren’t many icons in the row at the bottom of the window at one time. Also, to see what the name of a folder is, you have to hover your pointer over it or click on it and view the name in the Preview pane unless you turn on ‘Show filename’ in the Finder view options. That makes the Gallery view a much better option for visual content where you don’t need to move up and down a complex folder structure.
Finder Preview Pane
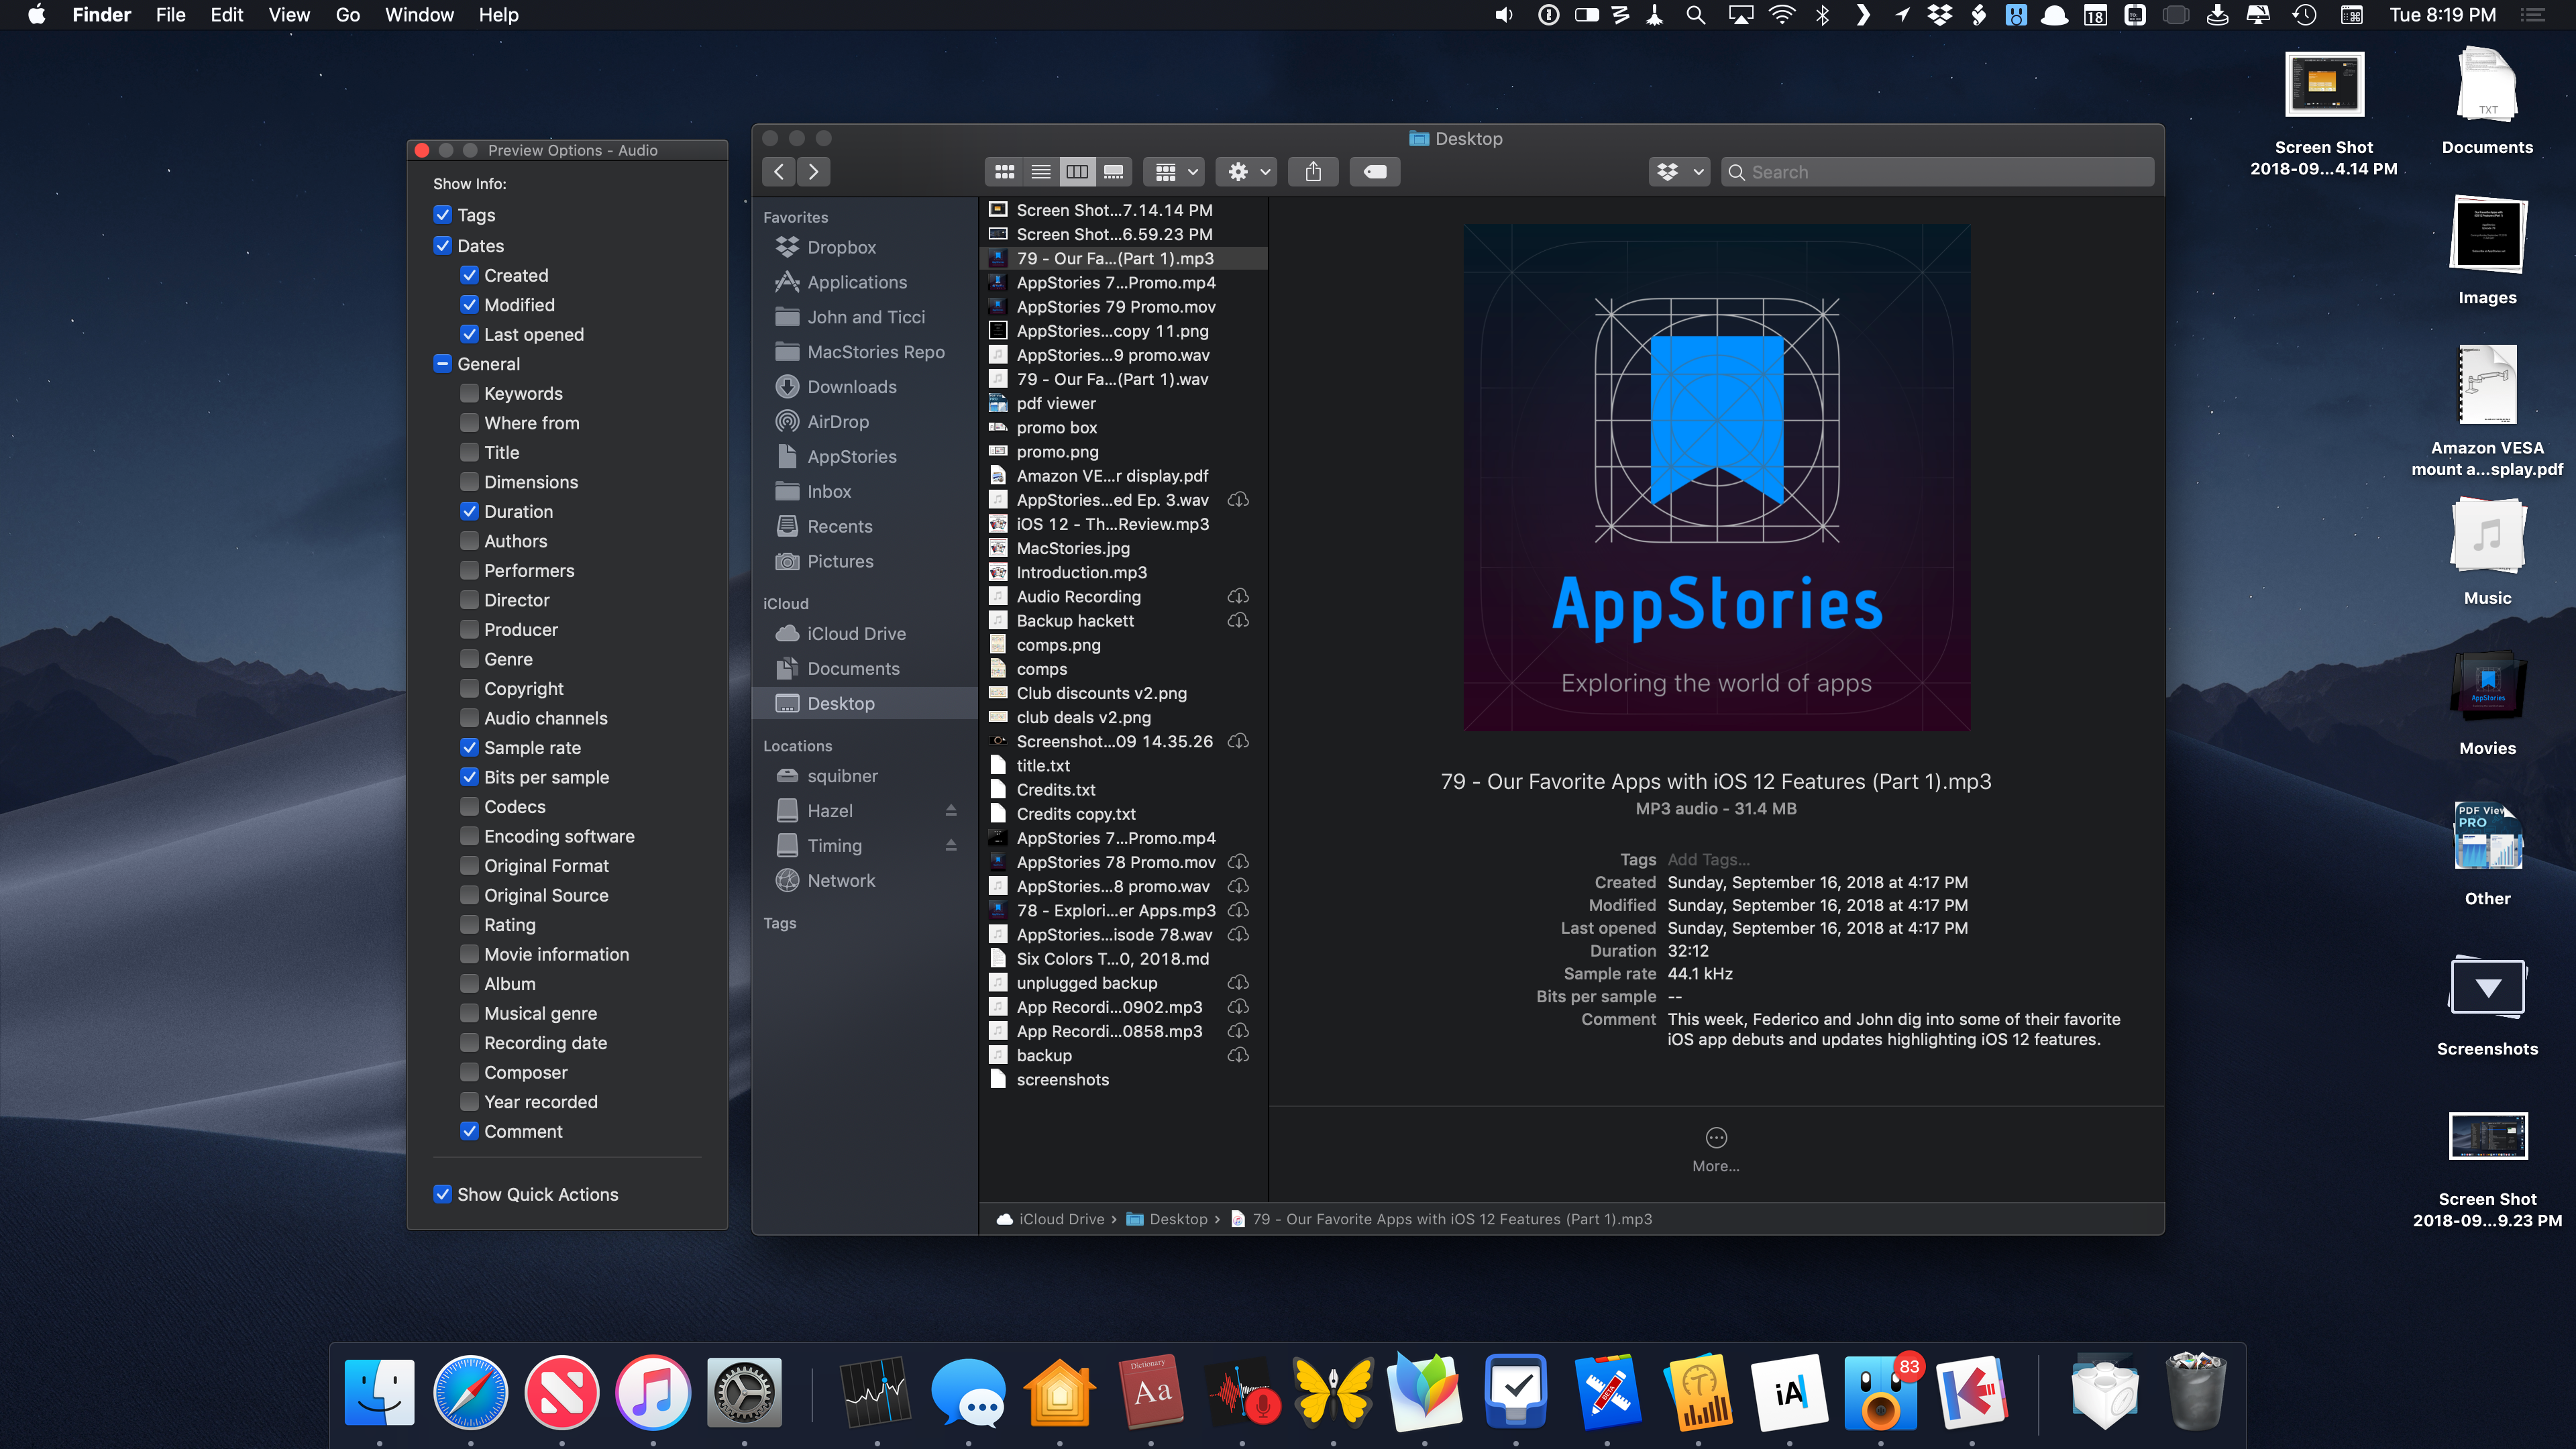
The Preview pane got much more useful with Mojave too. Until recently, I rarely kept the Finder’s Preview pane open. If that sounds like you, I’d suggest giving it another try. Use the shortcut ⌘⇧P to open the pane if it’s not showing in your current Finder view.
The same information available in the High Sierra Preview pane is in Mojave too, but there are options to include so much more. From the Finder’s View menu you can select the new Show Preview Options menu item. That will open a separate window with a list of every bit of metadata that can be shown in the Preview pane for the currently-selected file type. Just tick off the checkboxes for the data you care about and you’ll see the information appear in the Preview pane.
The ability to customize the Preview pane on a per-filetype basis makes it much more useful. Although everyone has hundreds of different kinds of files on their Mac, most people probably only work with a handful on a regular basis. If you work with the same types of files over and over, you probably need certain data about them time and again, which is what makes the new Preview options so powerful. One drawback though is that for some types of files, like video files, the metadata window can get very long, so viewing it isn’t a great experience on a smaller laptop screen.
Quick Actions
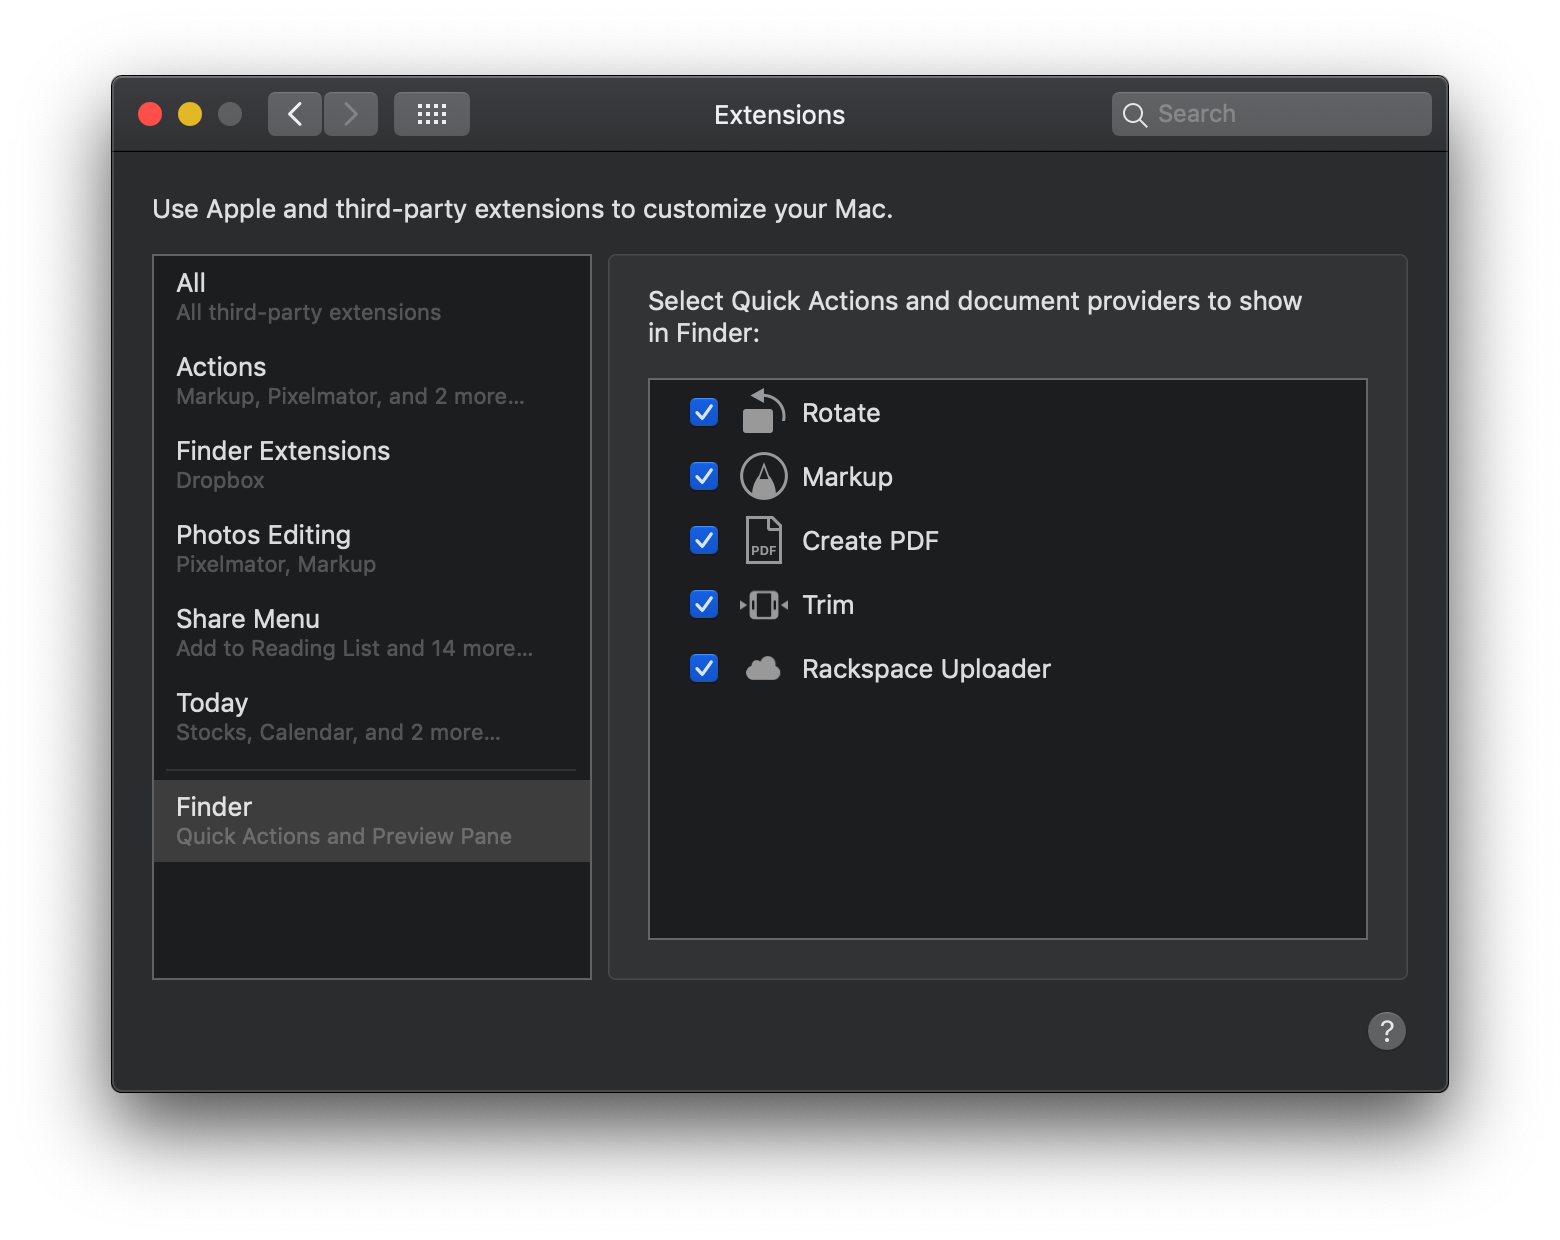
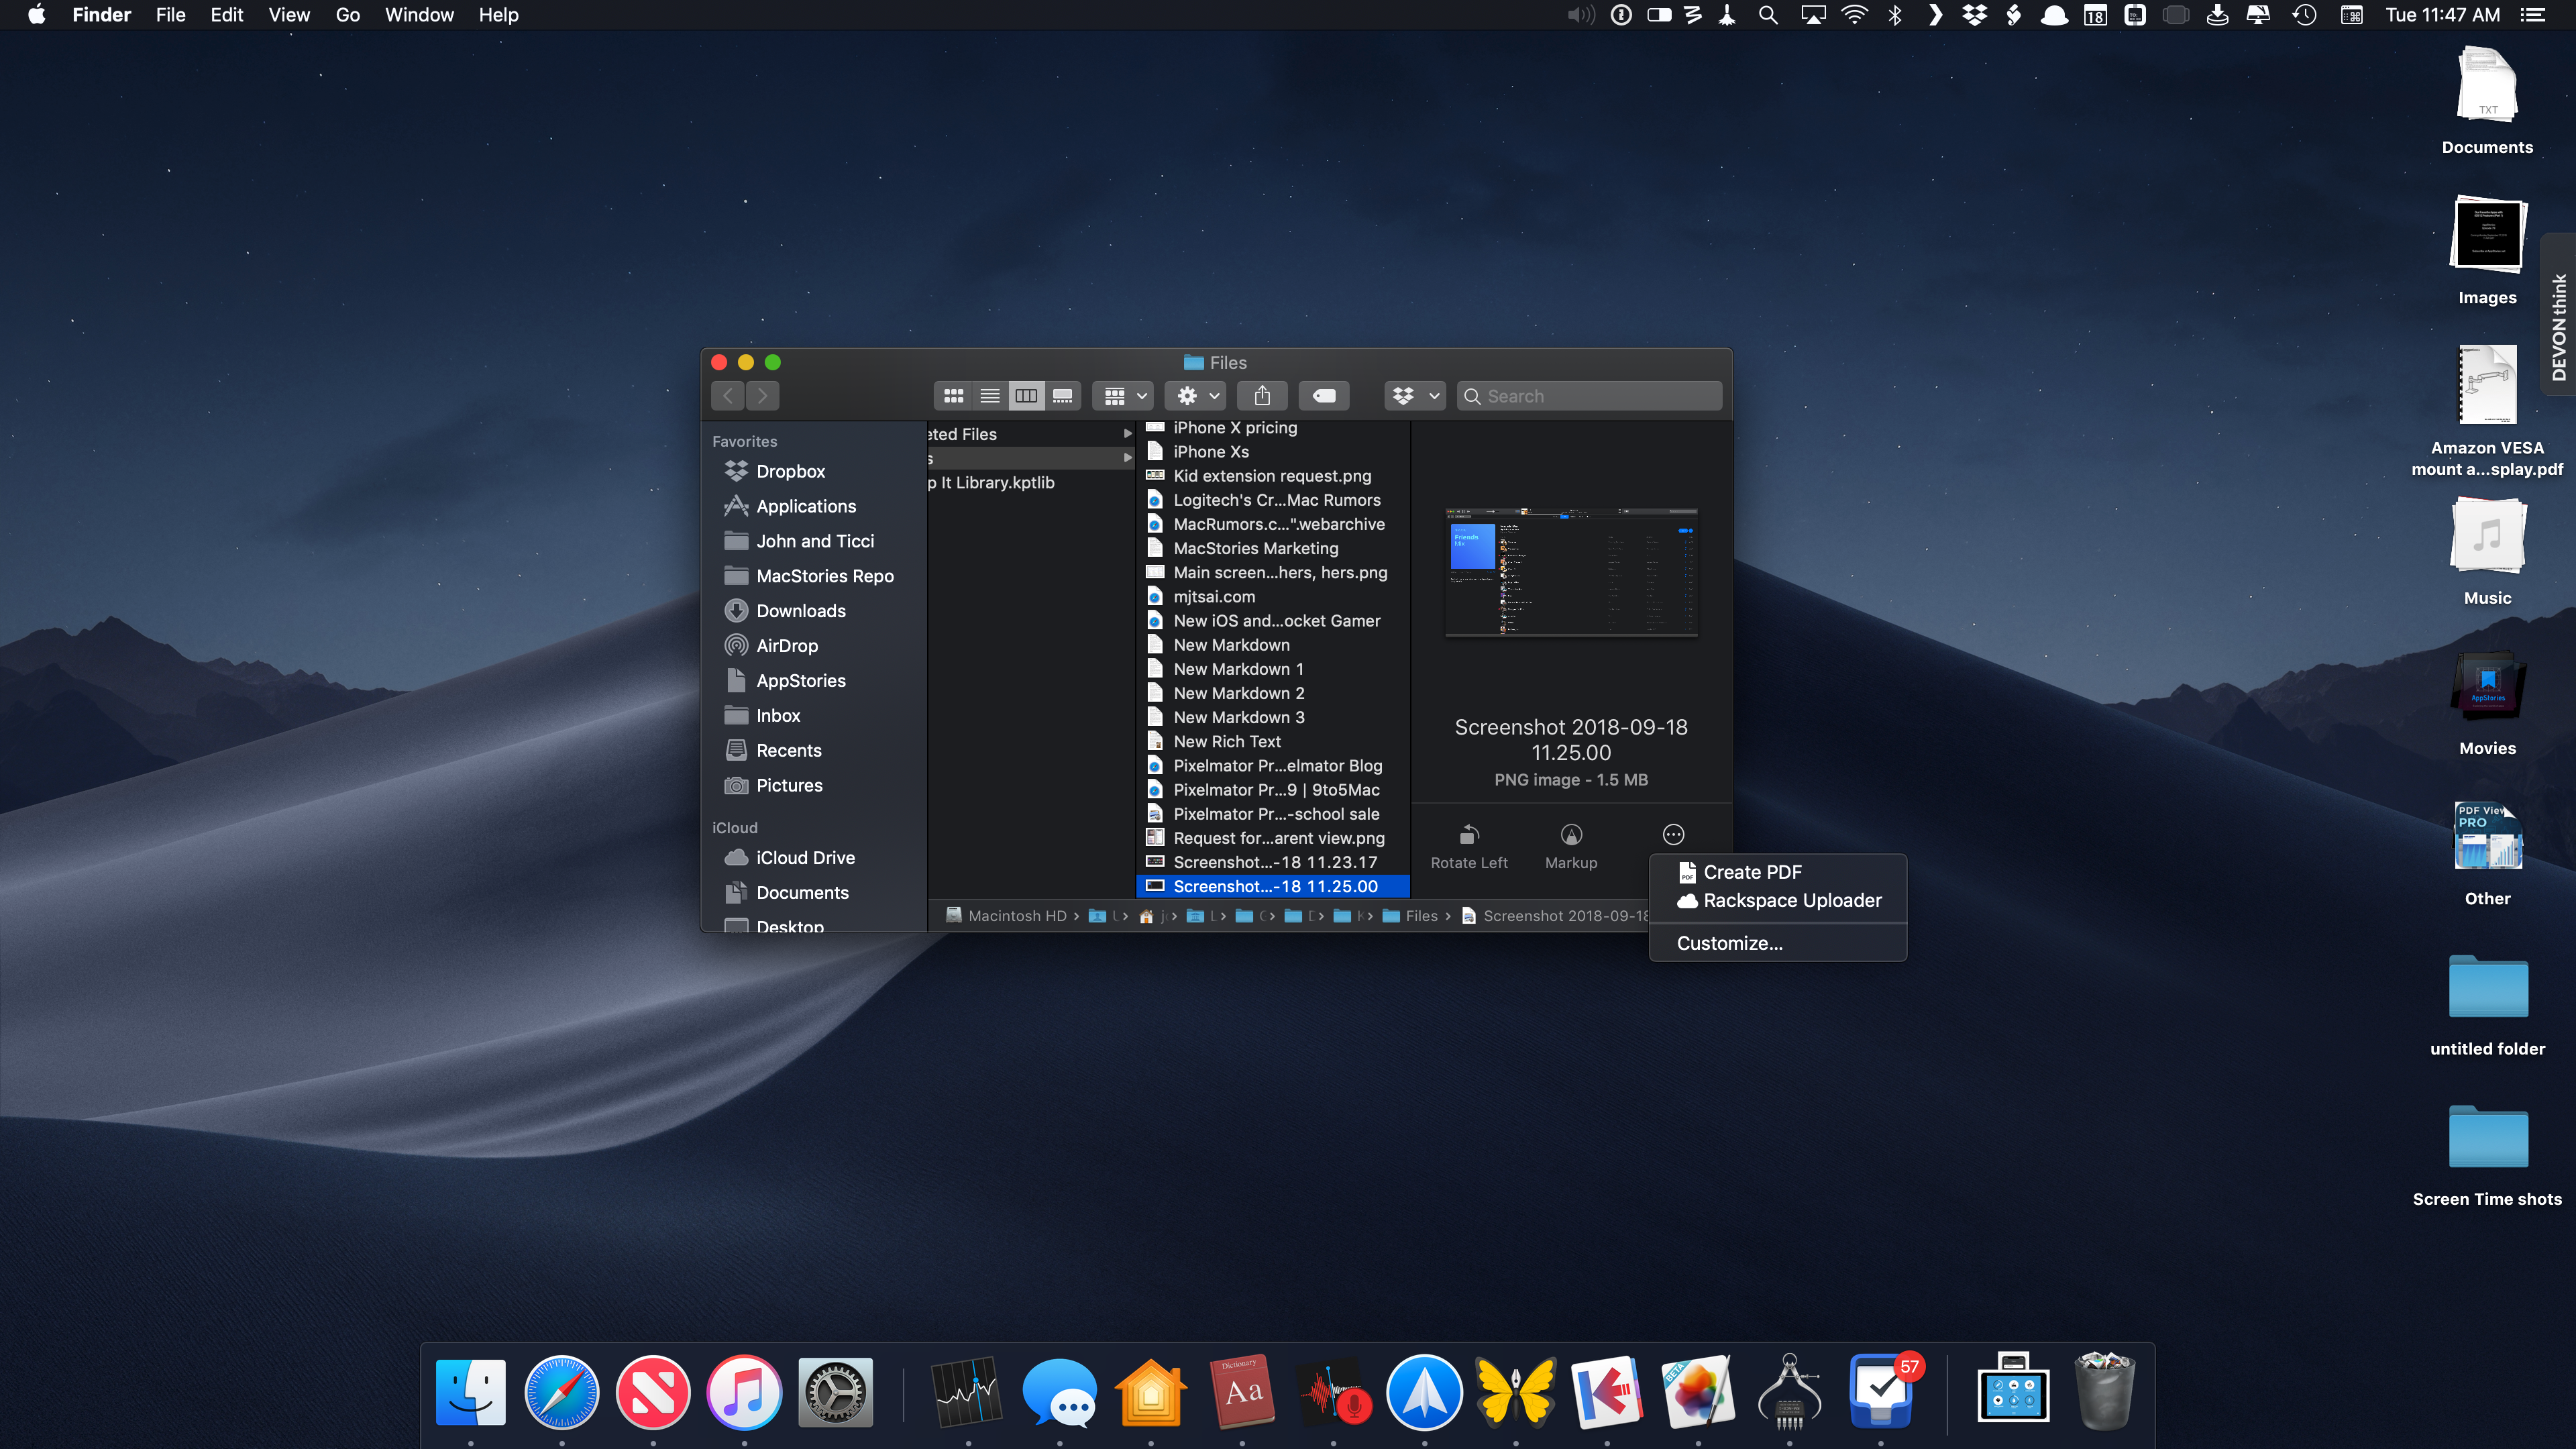
The other new feature of the Preview pane is Quick Actions, which are located at the bottom of the pane. Quick Actions are a new type of system extension for manipulating files from the Finder’s Preview pane or the Touch Bar. Mojave has Quick Actions to Rotate, Markup, Create PDF, and Trim, all of which work great with images. Trim and Rotate also work with certain video files as does Trim with MP4 audio. Third-party apps can add their own Quick Actions, which are available behind a ‘More…’ button next to any built-in Quick Actions. You can create Quick Actions yourself in Automator too.
None of the third-party Mojave-compatible apps or betas that I’ve tried include their own Quick Actions yet. The lack of support for Quick Actions among third-party developers is a little surprising. It’s also disappointing because I’ve found that I like Quick Actions a lot.
Whether you’ll take to them too will depend on how you use the Finder. I tend to navigate folders and files from my Magic Trackpad and not with the keyboard. As a result, having a shortcut to a commonly performed file actions close by has been extremely handy. It’s better than a Service too because the icons next to Quick Actions make them easier to identify.
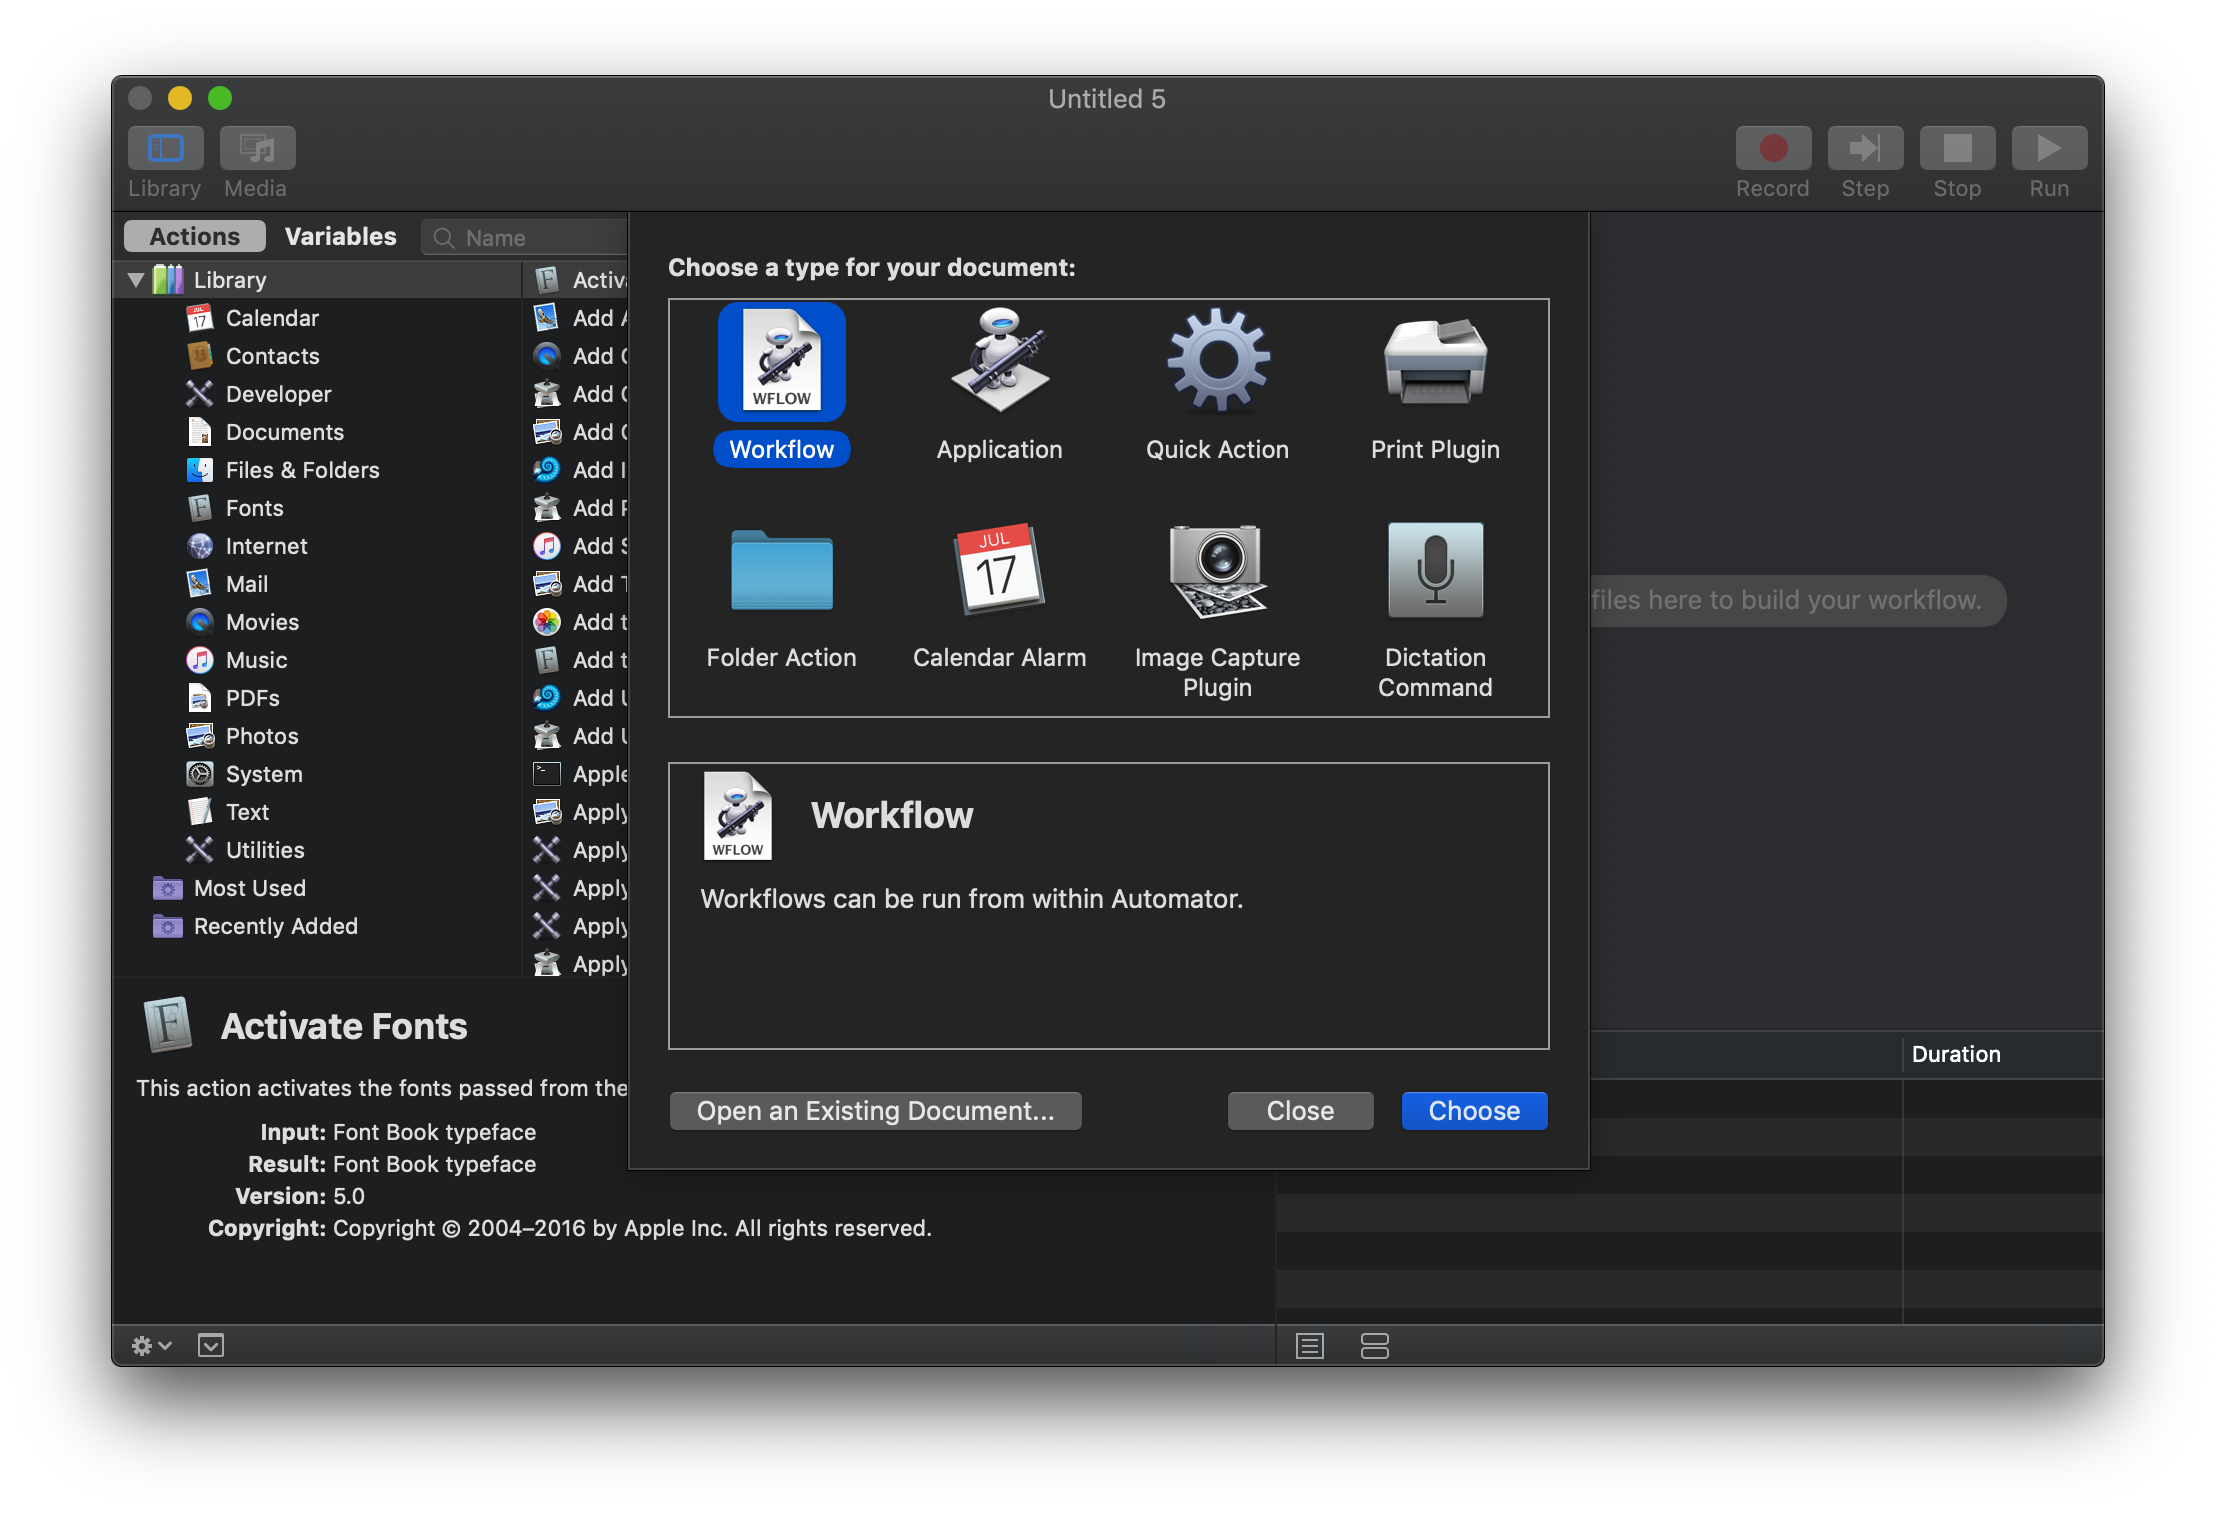
Even if third parties are slow to adopt Quick Actions, I’ve begun to extend them myself with Automator. One of the file actions I perform over and over every day is uploading screenshots to the MacStories CDN. The process is actually a few steps. First, images are sent to Kraken.io to be compressed, then they are uploaded to Rackspace, and a URL is returned. We have a web app that can manage the process, but it’s a little slow and cumbersome.
Quick Actions are a new output of Automator. With the help of one of my kids who was sitting around on the couch all summer, we built an Automator Quick Action that runs a Python script which handles the process end-to-end. When it’s finished, the Quick Action copies the URL to the Clipboard and sends a notification that it’s finished, showing how much the image’s size was reduced by Kraken. Because I’m already browsing in the Finder for images to upload, it’s trivially easy to pick my custom Quick Action and a few seconds later have a URL I can paste into a Markdown document.
My hope with Quick Actions is that they are the first step in a ground-up re-imagining of automation on the Mac where Quick Actions become the equivalent of shortcuts on iOS and Automator is replaced by something closer to the Shortcuts app on iOS. Automator has served Mac users well for years, but it doesn’t take long using Automator before you need to resort to scripting inside Automator workflows to get things done. Shortcuts supports scripting too, but I’ve found I can create far more complex automations on iOS without resorting to scripts, which makes it accessible to more people.
Finder Miscellany
As with any OS update, there are hundreds of little changes scattered throughout Mojave. Some are inconsequential, but others, while small, are nonetheless handy and worth noting.
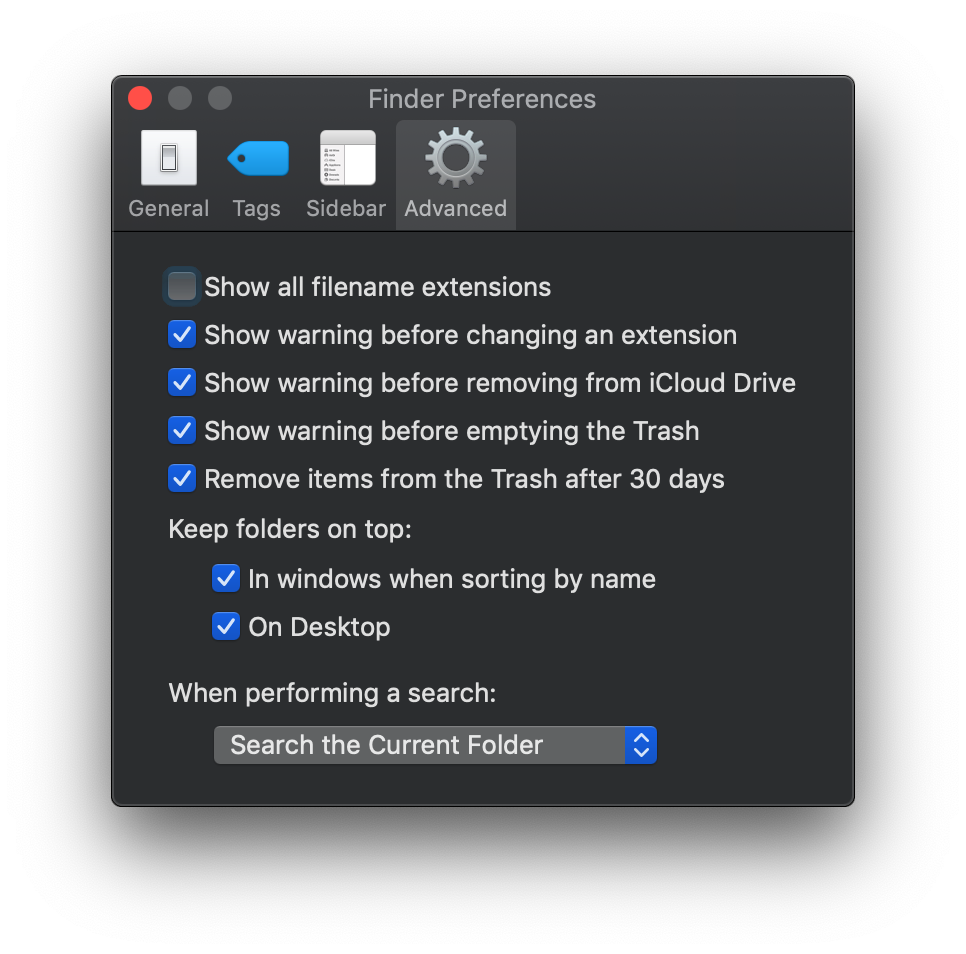
In another nod to the reality that many people use their Desktop as their primary Finder folder even if they don’t think of it like that, Apple has added an option for folders to appear at the top of your Desktop when sorting by name. The ability to do that in a Finder window isn’t new, but previously, that was impossible when organizing your Desktop. I don’t expect to get much use of this myself, but combined with Stacks, it’s a much better system for organizing files and folders on the Desktop than was available before.
Screenshots and Screen Recording
As you can tell from reading this review, I take a lot of screenshots. The Mac has always had a rich set of keyboard shortcuts for taking screenshots of your whole screen, a portion of the screen, or a window, saving either to the Desktop or Clipboard. With Mojave, Apple has expanded the tools available and made the experience more like what you find on iOS.
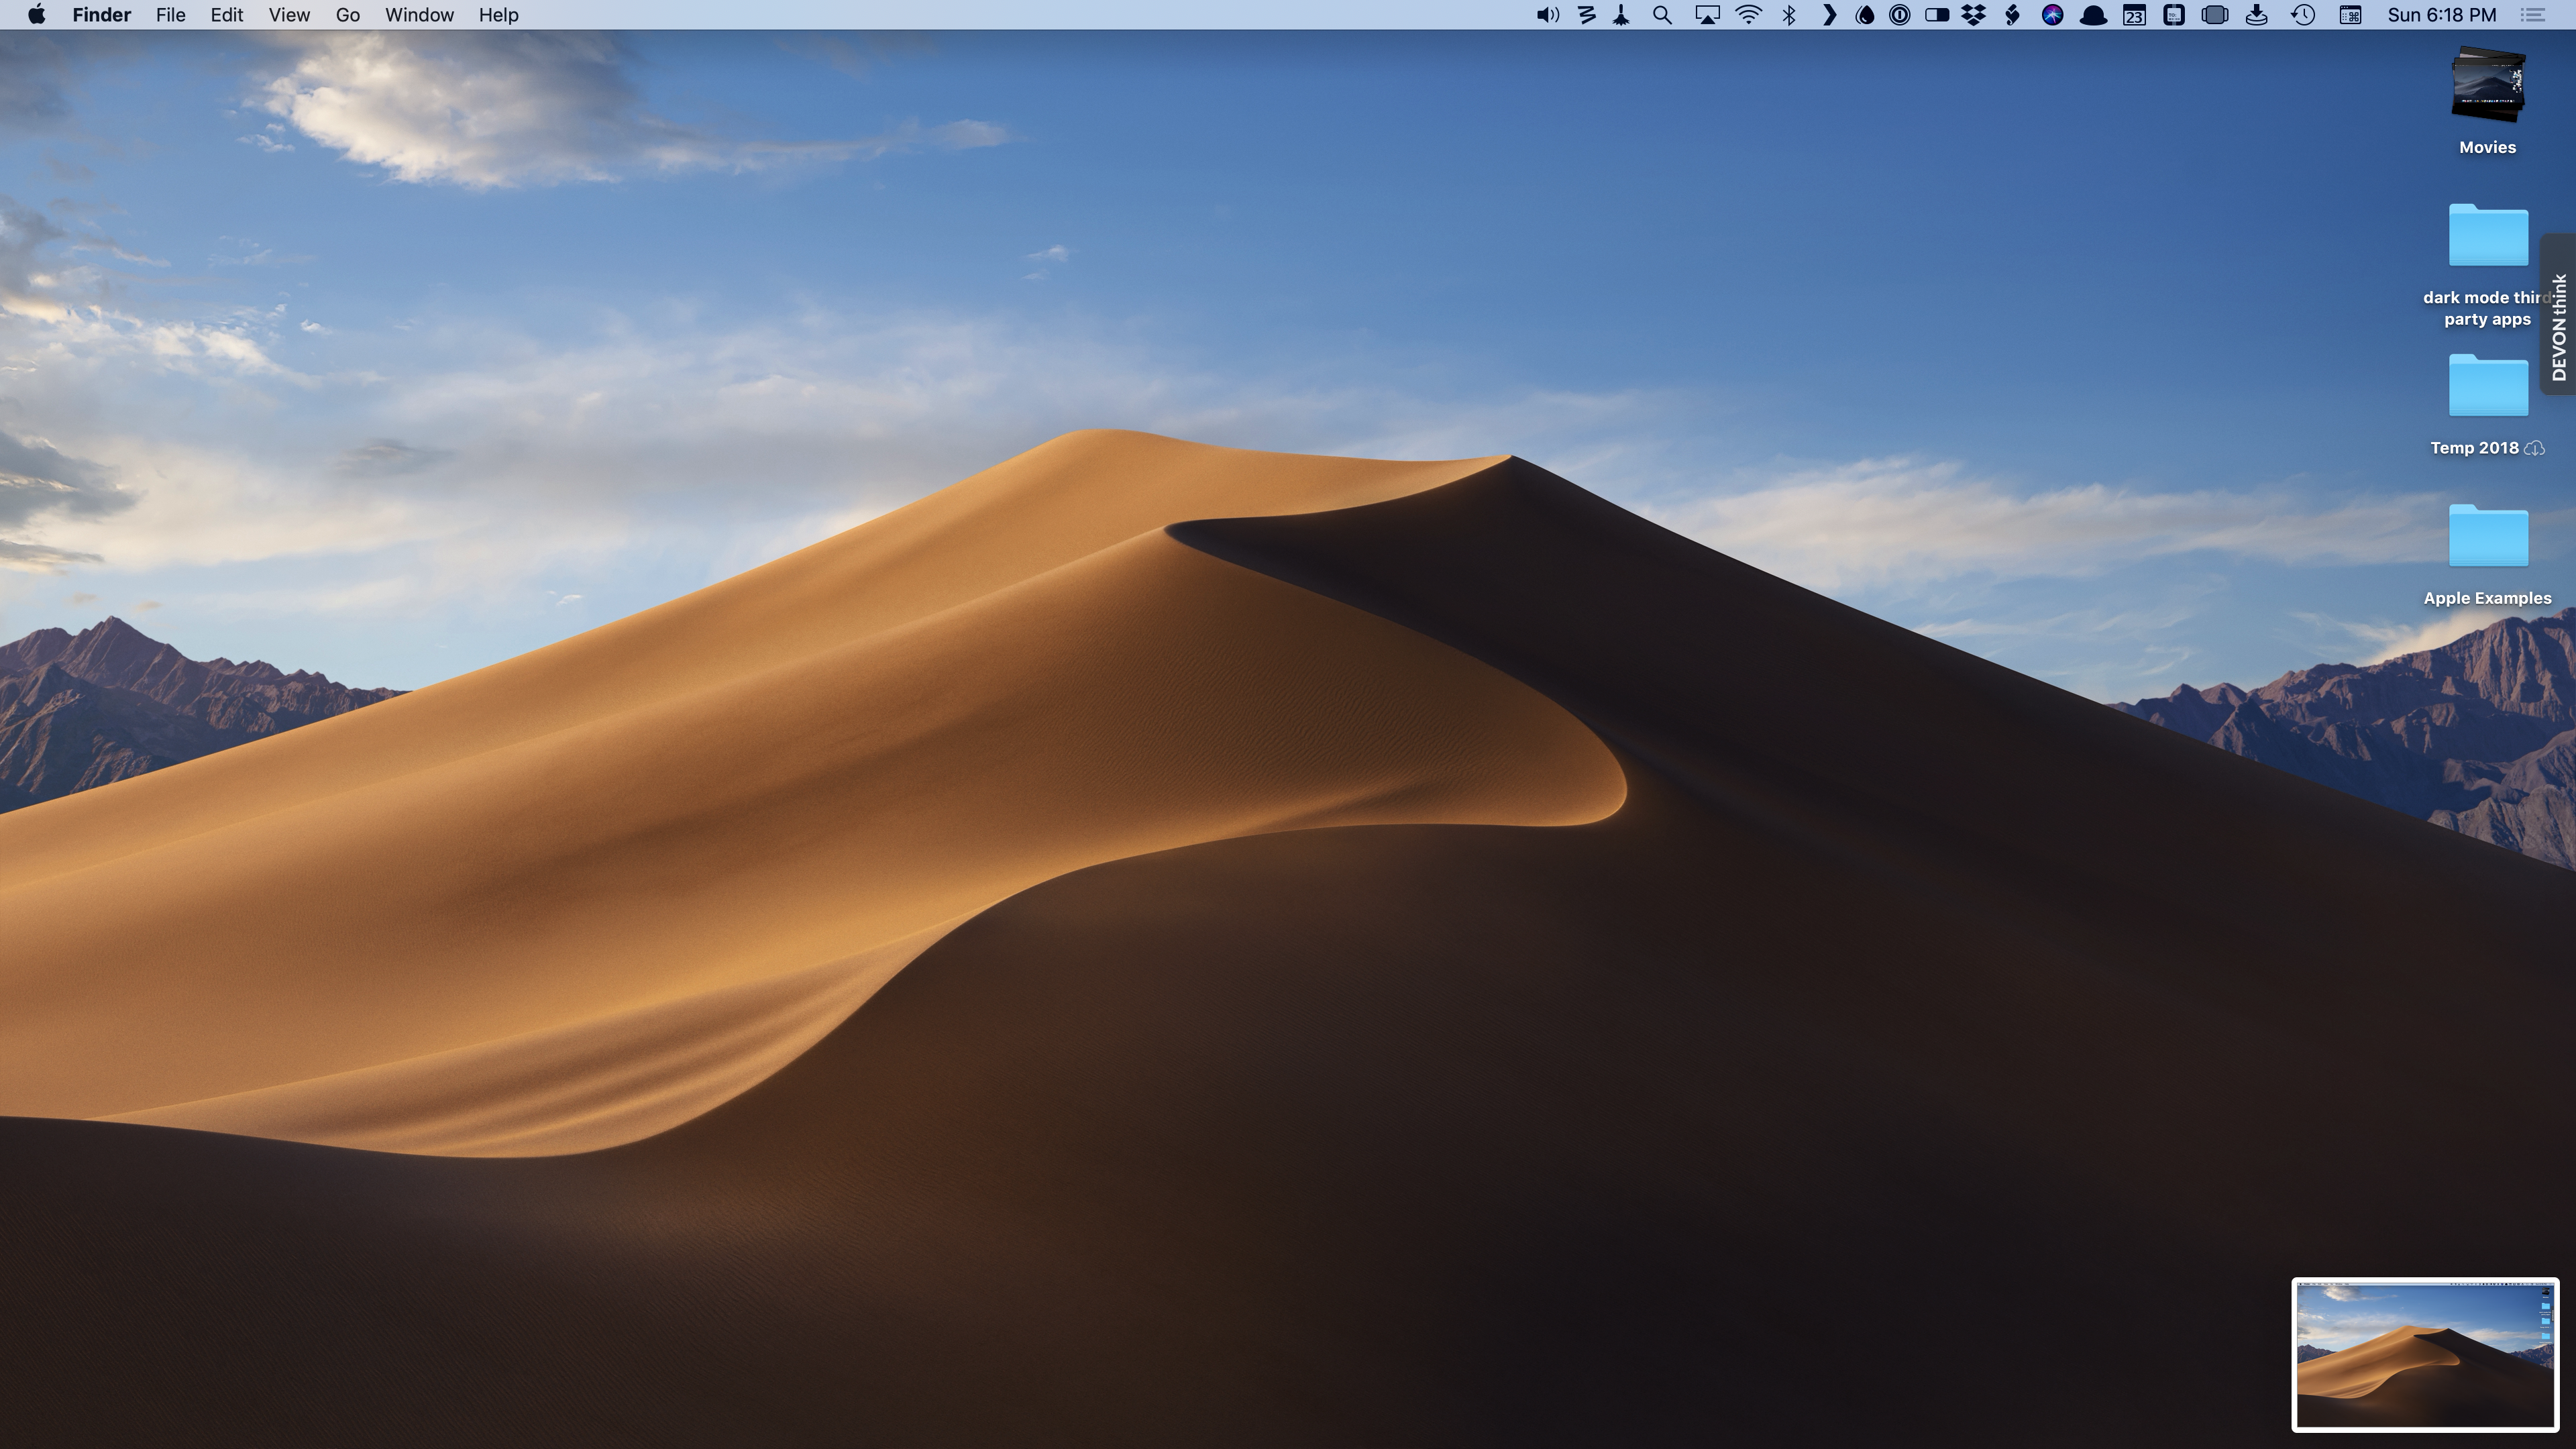
When you take a screenshot, a thumbnail appears briefly in the lower right-hand corner of the screen.
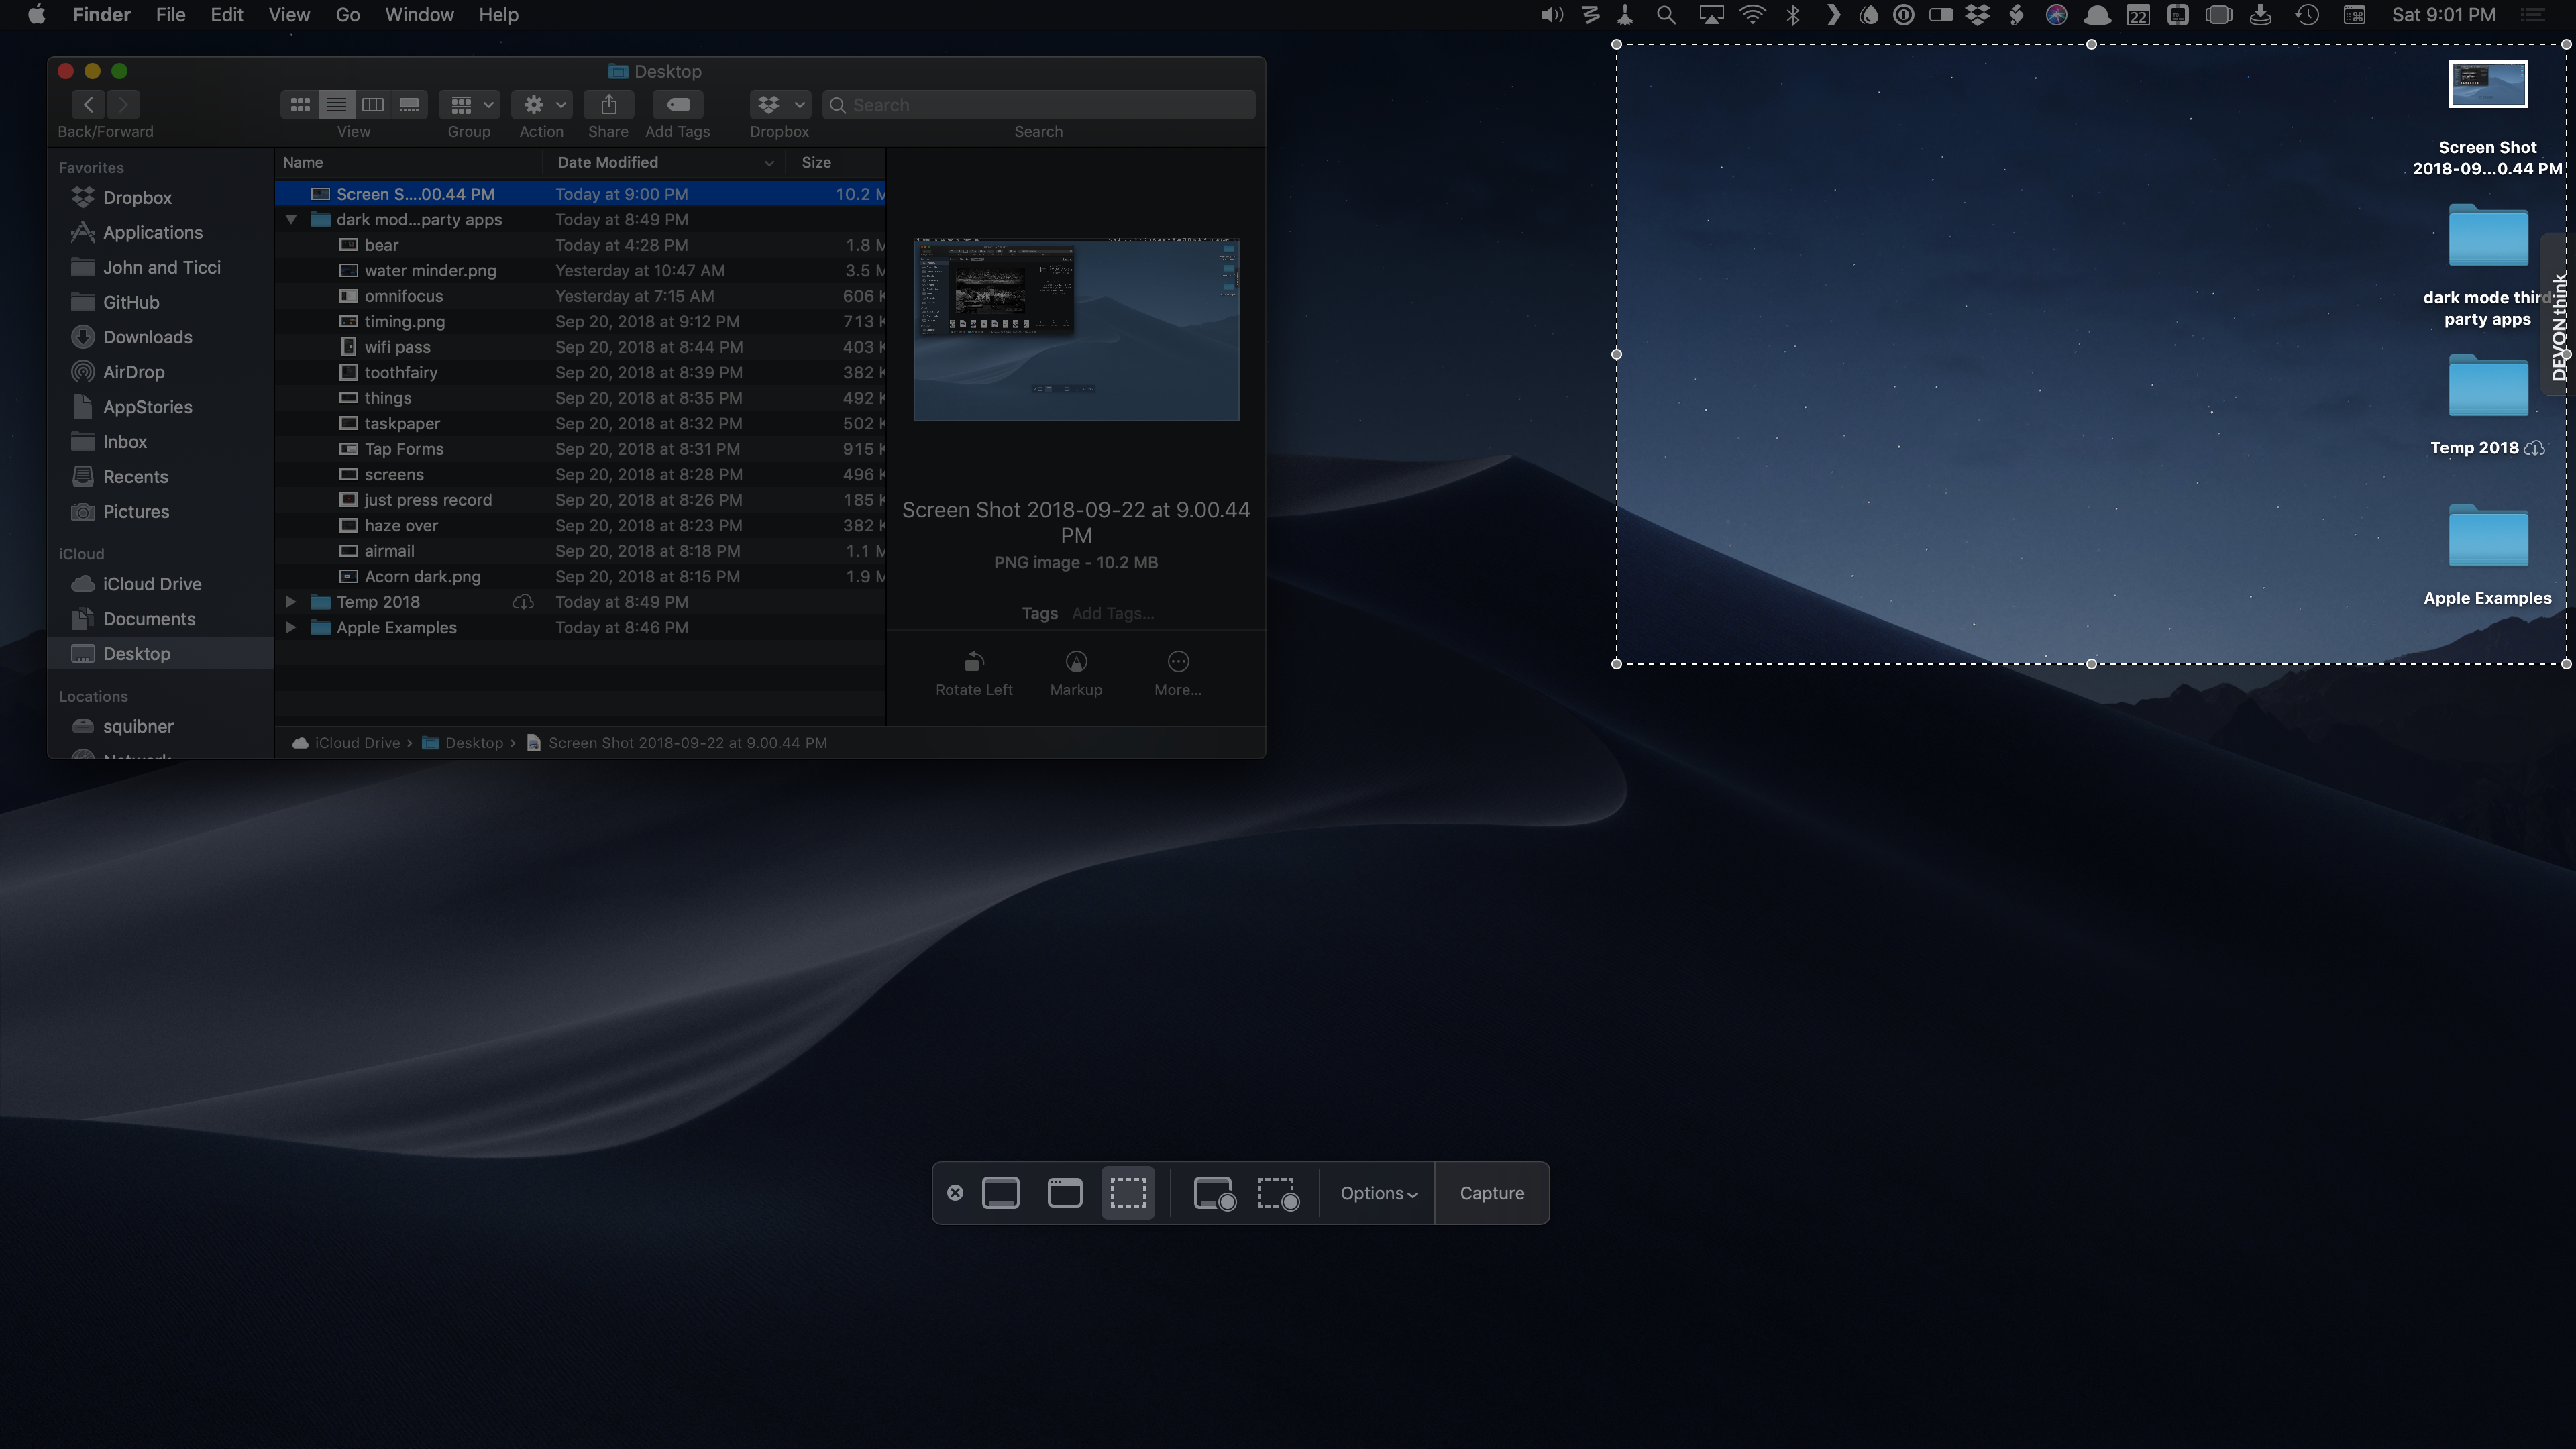
The first thing you’ll notice when you take a screenshot in Mojave is that a little thumbnail appears in the lower right-hand corner of your screen, similar to what happens on iOS. Click on the thumbnail and a preview opens, giving you an opportunity to make simple edits to the screenshot, which I cover below. After a few seconds, if you don’t do anything with the thumbnail, it slides off the screen to the right and is saved wherever you’ve designated screenshots to go, which by default is the Desktop.
Apple has also added a new screenshot shortcut: ⌘⇧5. Press that combination of keys and a small, translucent toolbar appears at the bottom of your screen with buttons to create the same screenshot types described above as well as some new options.
The new toolbar can also grab screen recordings. There’s a button for a full-screen recording and a user-selected portion of the screen. There’s also a timer option to delay the start of a screen recording 5 or 10 seconds, which gives you time to click record then set up your windows for the recording.
The timer can be set with the new Options button on the toolbar, which also offers additional save locations for your screenshots and recordings. Screenshots can be saved to Desktop, Documents, Clipboard, Mail, Messages, Preview, or Other Location, which opens a Finder window. Screen recordings have a similar set of saving options with the addition of QuickTime Player, but not Preview or the Clipboard. There are also options for the toolbar to remember your most recent selection, show or hide the floating thumbnail in the corner of your screen, and to show or hide the pointer in screenshots and recordings. If you’re making a screen recording, you’ll also see a list of any available microphones.
Quick Look
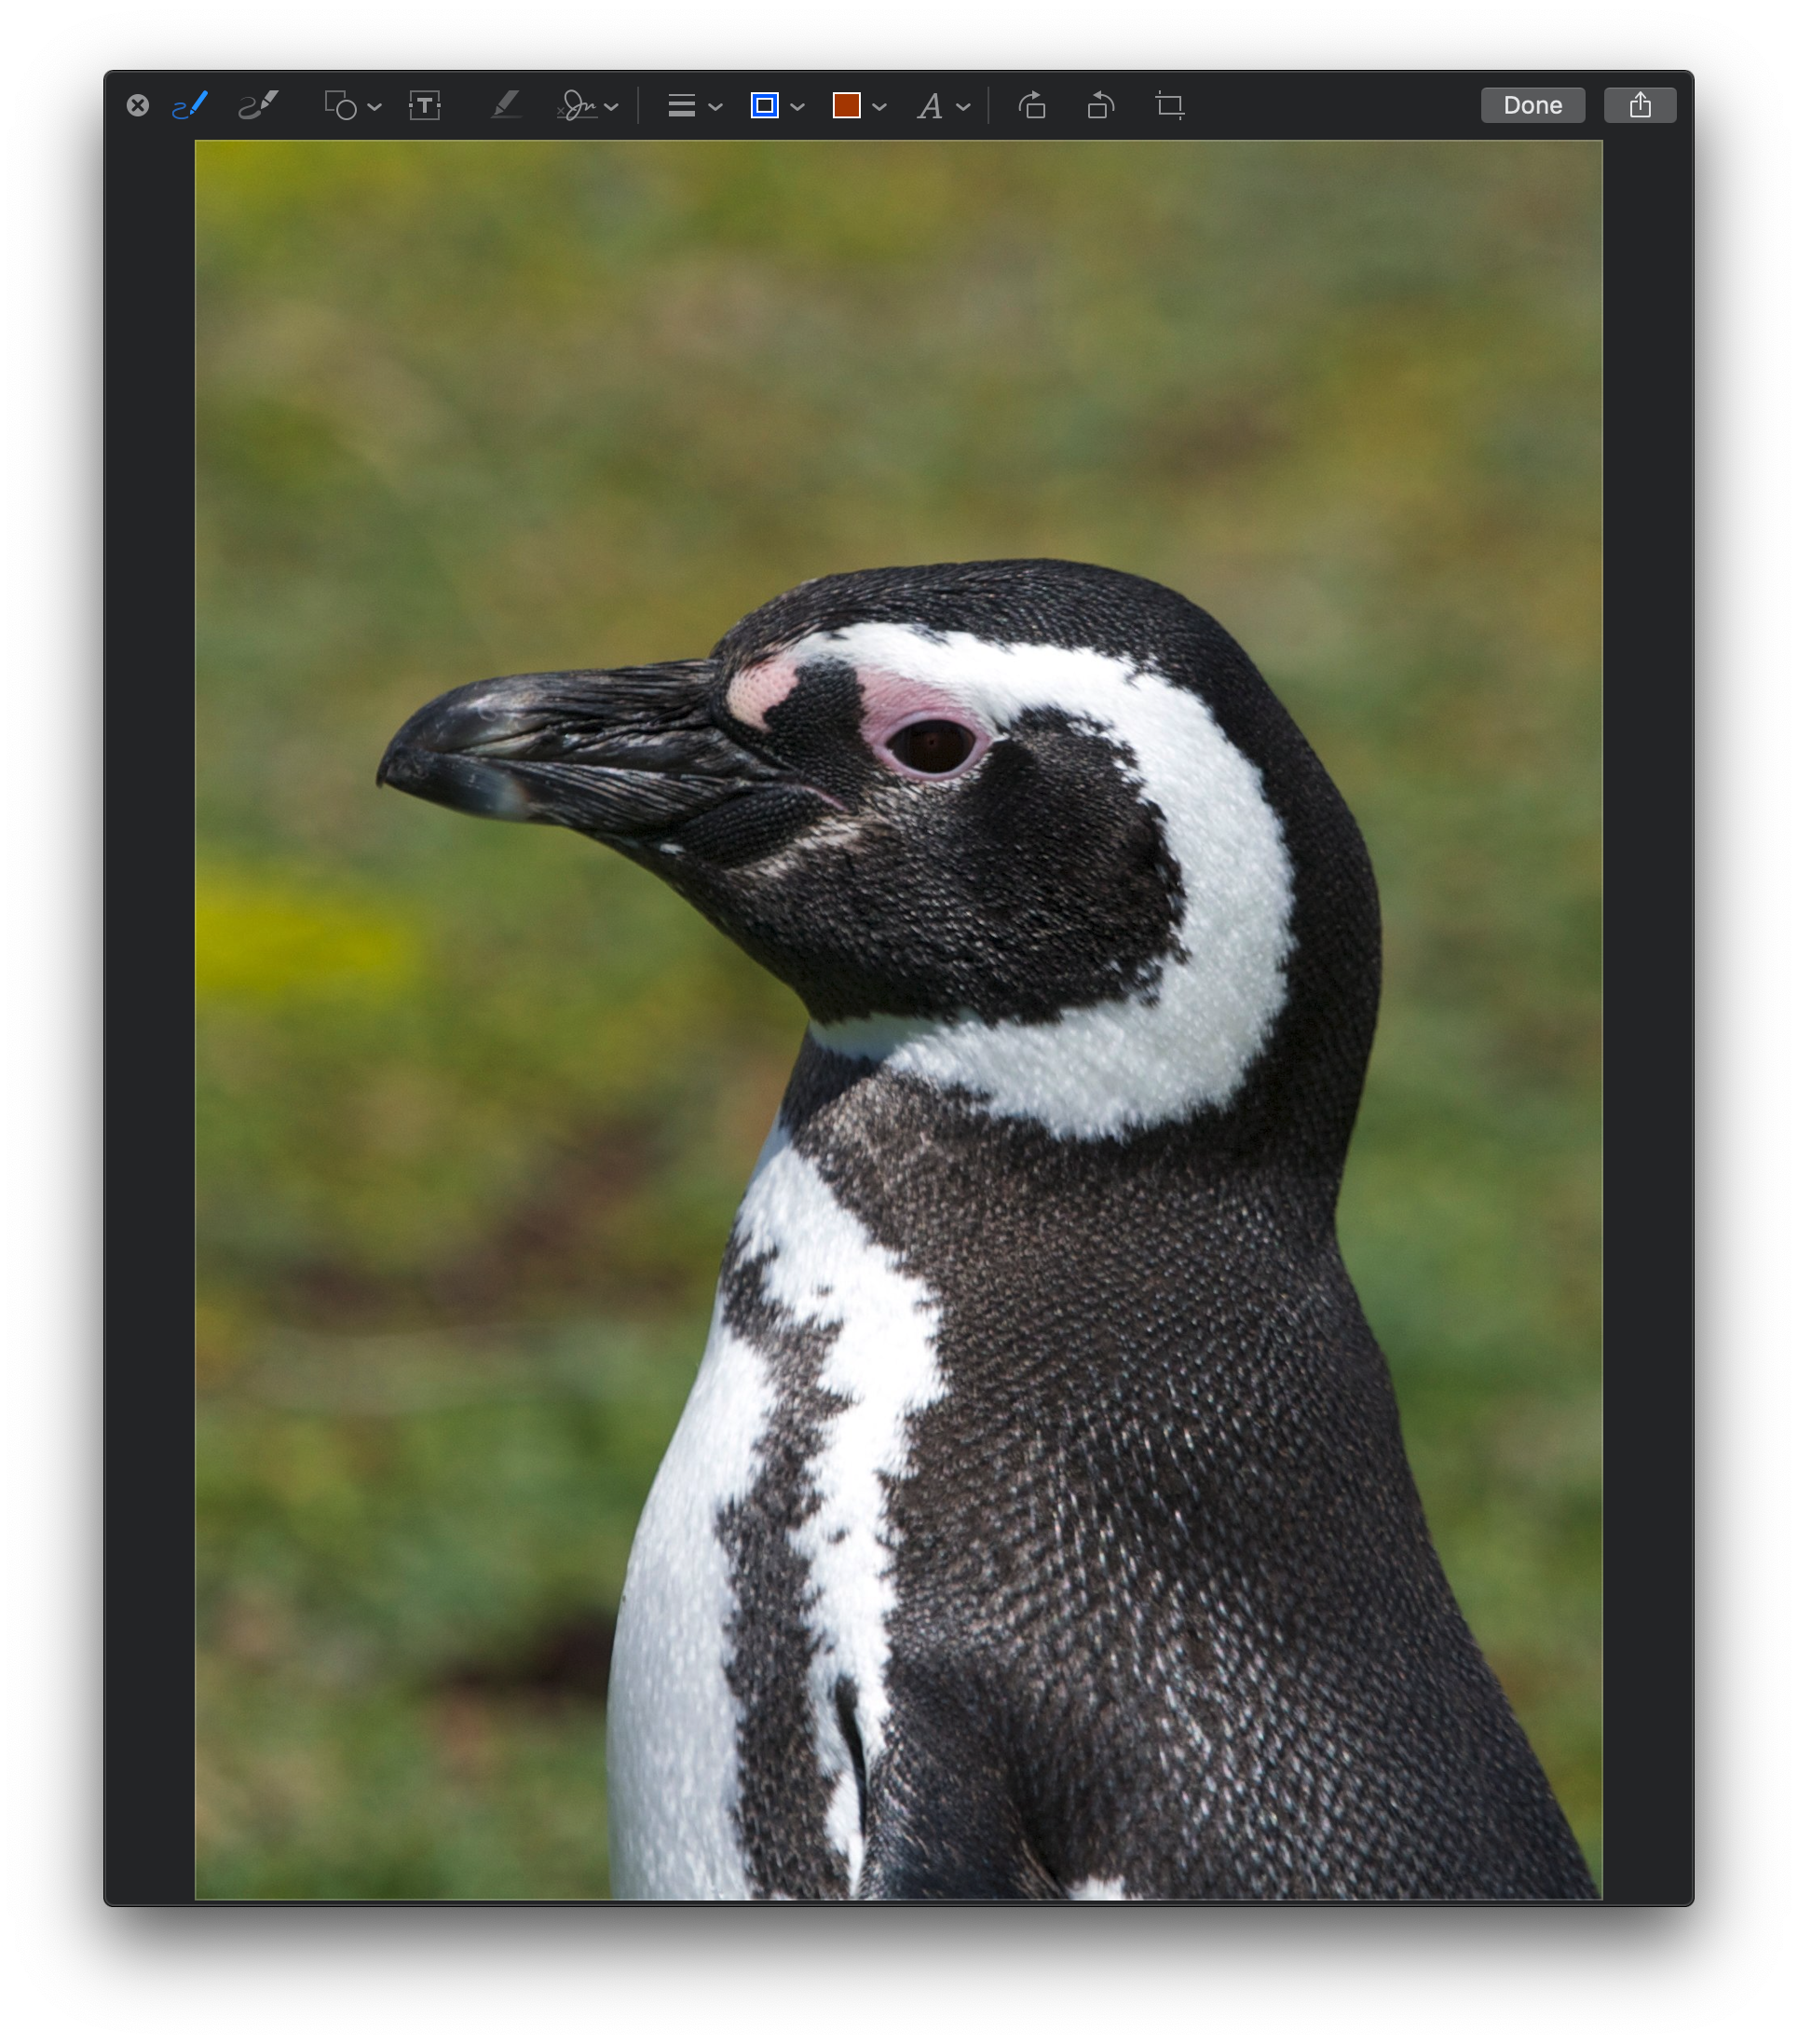
Quick Look has been revised too, dovetailing nicely with Mojave’s new screenshot and screen recording features. Previously if you performed a Quick Look of a file, you had only two options: a button to open the file in the default app for that file type and a Share button for sending it to another app. Those two buttons are included in Mojave too, but Apple has also added tools to allow you to make basic edits to a document without ever opening another app.
For images, the new tools available via Quick Look closely mirror what’s available under the Markup button in Preview. You can draw on images, create shapes, magnify or highlight portions of the image, add text, crop, rotate, and add a signature too. As someone who uses Preview all the time only to add my signature to contracts or make minor edits before sending a PDF or image to someone, this new feature is going to be a significant time saver and leave me with one less app to close later.
For video and .M4A audio files, the options are simpler, but useful. Mojave adds buttons to rotate a video and trim it. Used in conjunction with the new screen recording feature, the trim tool is particularly powerful for video. Instead of opening the file in QuickTime, you can trim it in Quick Look then click the share button to send it to another app. That’s exactly what I did with the videos in this review. After recording the videos with the new Mojave screen recording feature, I trimmed any extra footage off the ends, saved them, and later uploaded the files to our CDN. The trim feature is less useful for audio files since it only seems to support M4A files and not WAV, MP3, or other file types.
Continuity Camera
Continuity Camera is the type of feature from Apple that I love. As much as people like to argue about whether the Mac or iOS is a better productivity platform, the reality is that sometimes, one is better than the other, but other times, they’re best together. Continuity Camera is one of the best demonstrations I’ve seen in a while of macOS leveraging the mobility of iOS to make the two together greater than the sum of their parts.
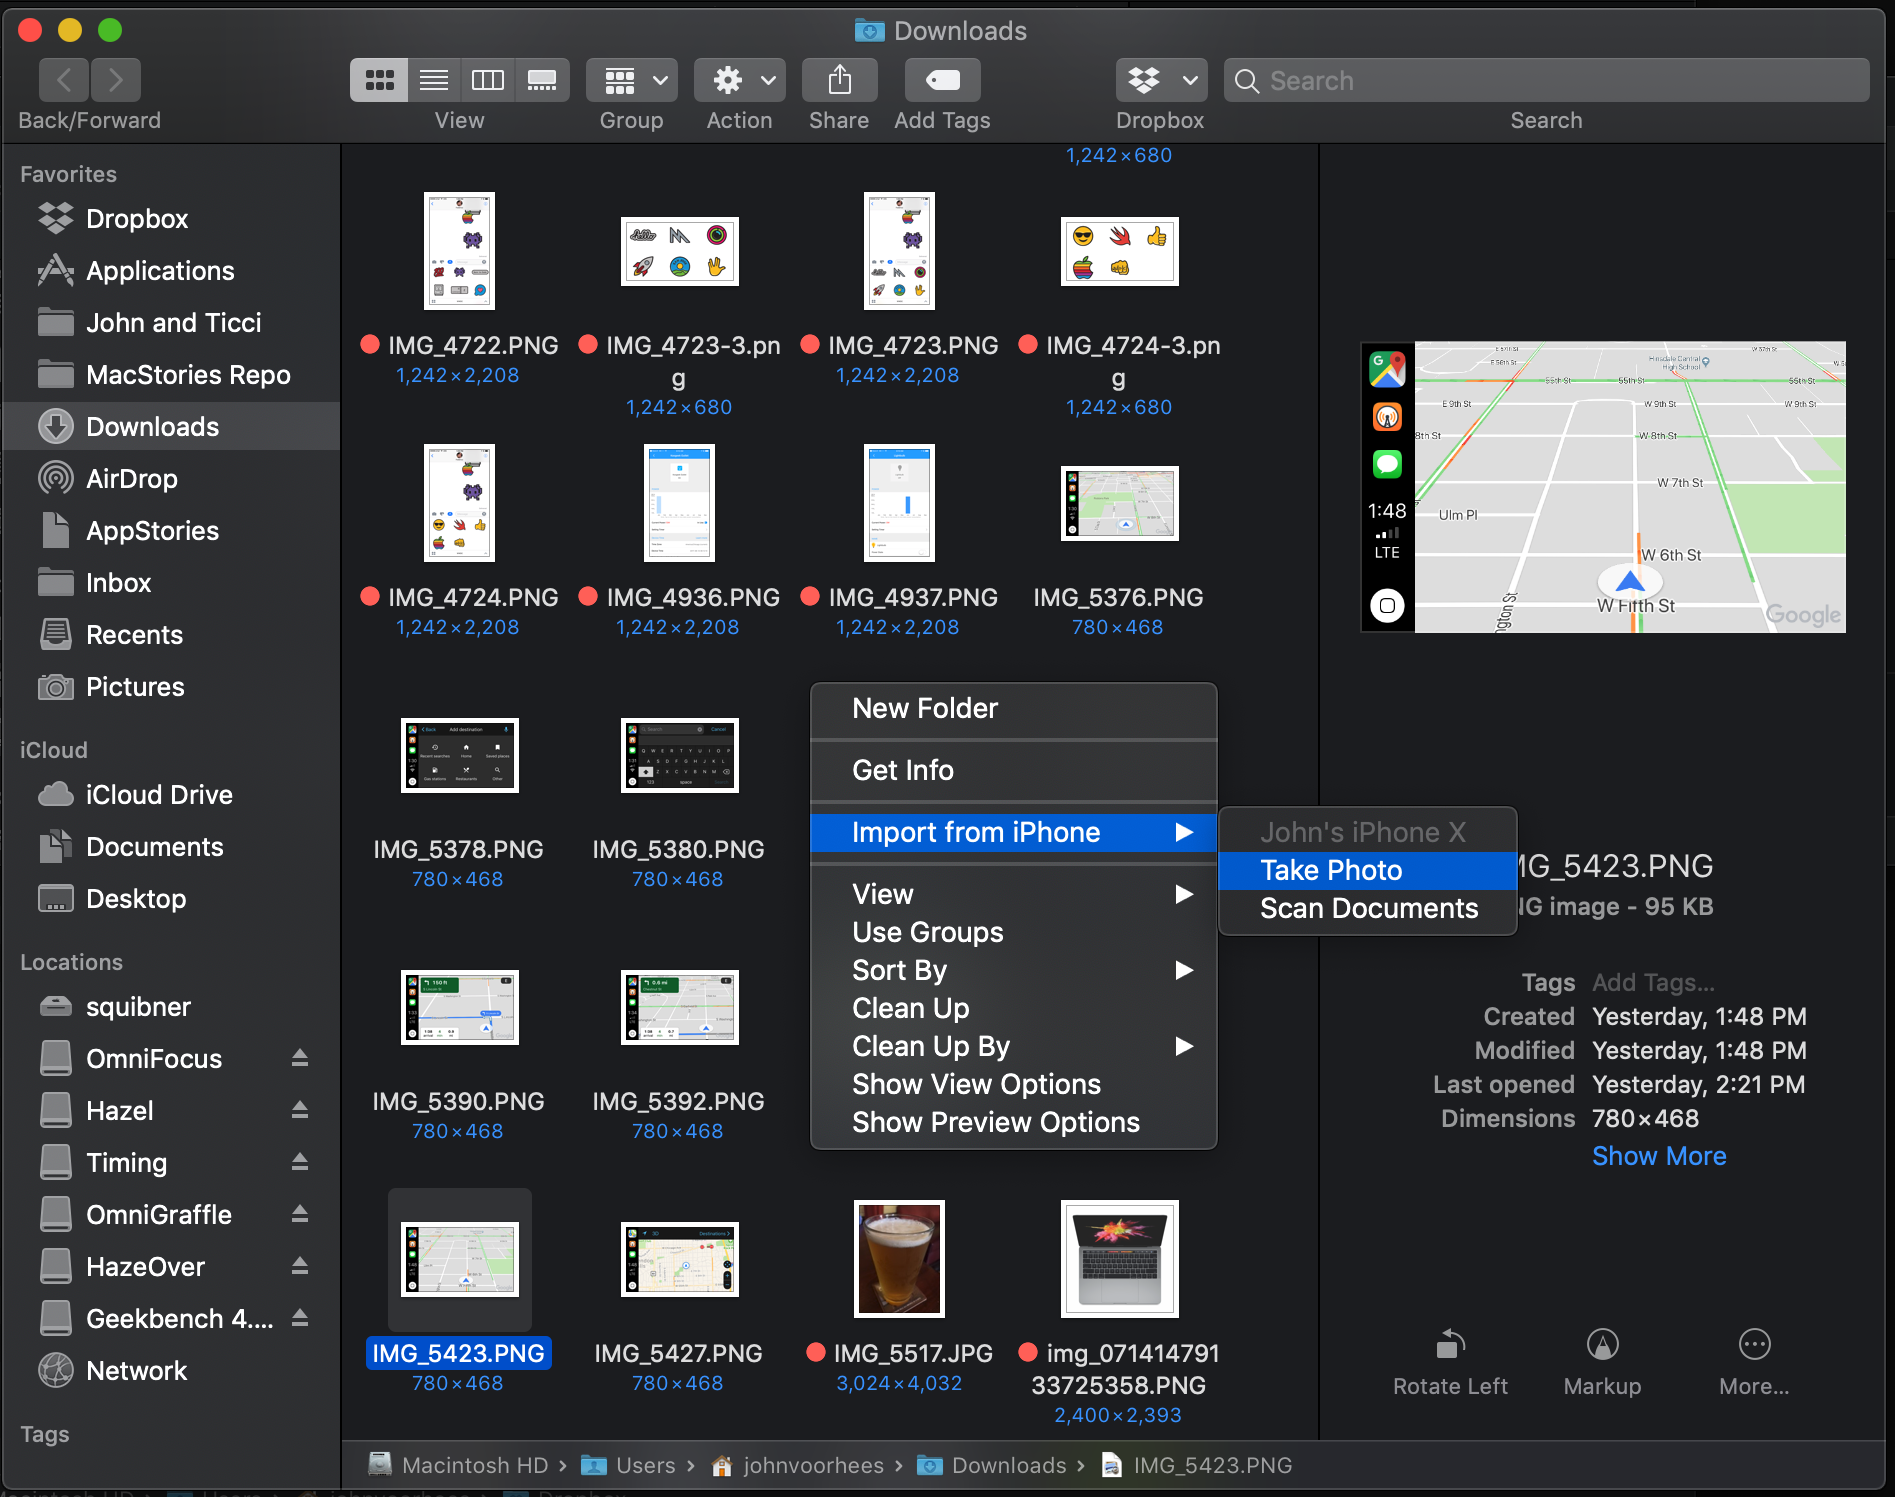
With Continuity Camera, you can insert a photo or scan anywhere on your Mac that can accept an image using your iPhone or iPad’s camera. For example, you can right-click in TextEdit, Ulysses, Pages, and many other apps, pick Take Photo or Scan Document and your iPhone comes to life ready to go. You can even use Continuity Camera inside the Finder where the right-click menu item is called ‘Import from iPhone.’
If you’re taking a photo, you can use either the rear or front-facing cameras. After tapping the shutter, you’re asked to confirm whether to use the photo or retake it. Exiting to the home screen cancels the operation.
Scans work the same way they do on iOS with the same flash, color, and shutter controls that you find on iOS if you scan a document into Apple’s Notes app. The key difference is that with Continuity Camera, you can drop a scan into any app that will accept an image, while the same scan capture interface is limited to Notes on iOS.
As someone who moves between a Mac, iPhone, and iPad all day long, I love Continuity Camera. If I’m already in Messages on my Mac and want to share a quick photo of something or scan a receipt to a folder in the Finder, my iPhone is a great solution because it’s fast and sitting there next to me ready to help.
I wish though that Apple would adopt this sort of tight integration elsewhere. I’ve long argued that Handoff should work with iTunes on the Mac so I can continue listening to something at my desk that I started on my iPhone. Hopefully, Continuity Camera is a sign of more Mac and iOS integrations to come.


