Notes
Note Linking
The macOS update to Notes this year includes an important cross-over theme with Reminders. Both implemented new features that make navigating the app much nicer for anyone who uses it to store a lot of information. For Reminders, that meant implementing a column view, which lets you take a long list of tasks that’s been divided into sections and display multiple lists horizontally, taking advantage of wide screens. In Notes, the story is a little different. Instead of a different view, Notes obviates the need for long notes entirely by allowing users to link them together in a web of related content.
For anyone who is familiar with wiki-style links or has used an app like Obsidian that allows you to link documents together, this kind of linking is old news. However, it’s a big deal for a mainstream tool like Notes. And, of course, Apple has put its own spin on inter-note links.
What’s different from some linking systems you might know is that Notes’ links are one-way links. That means you can create a note, link it to another, and when you follow the link, you won’t see a link back to the original note. What is known as back-linking is a very nerdy feature that some people love, but I suspect that most people will be fine with the way Apple has implemented linking. For everyone else who tries inter-note linking for the first time and finds Apple’s implementation too limiting, there are plenty of third-party apps that support backlinks. For them, I expect Notes’ linking implementation will serve as an introduction that will actually spur more interest in apps like Obsidian, Logseq, and Roam.
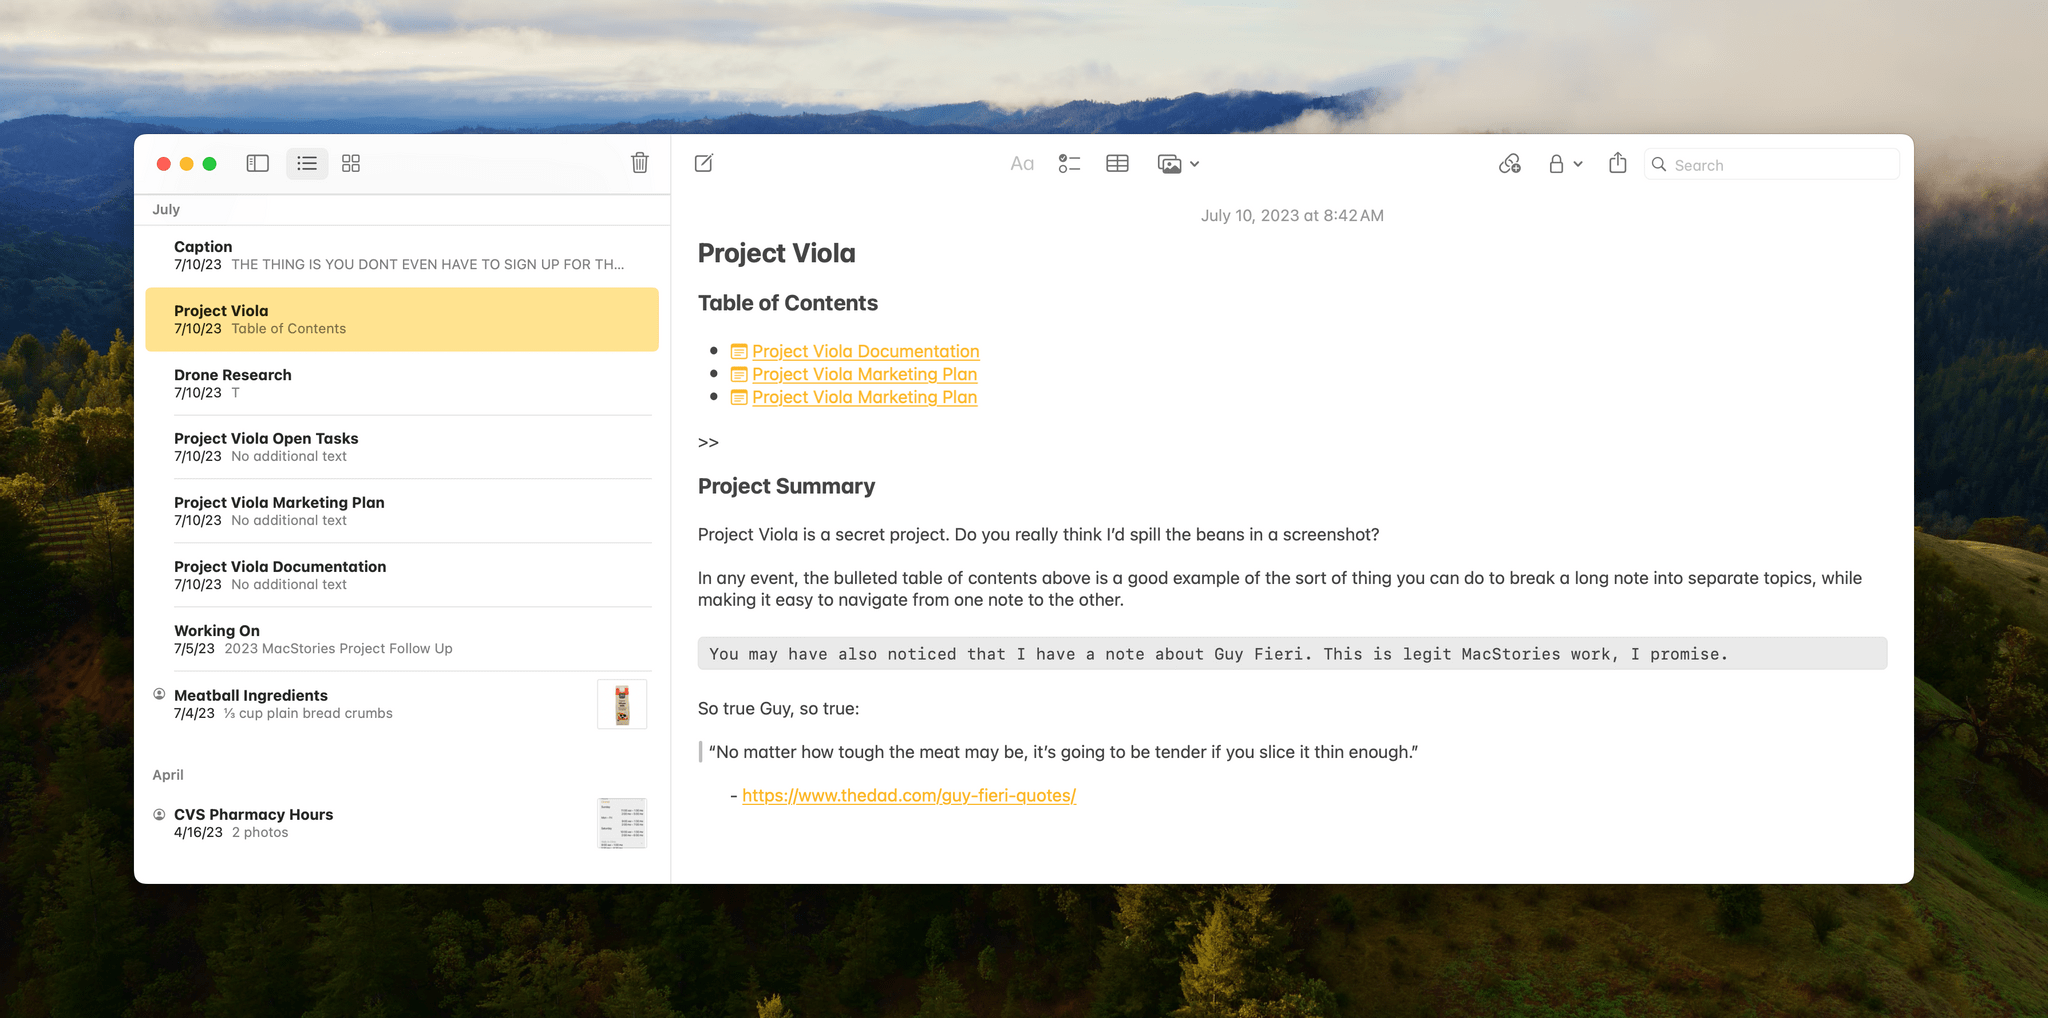
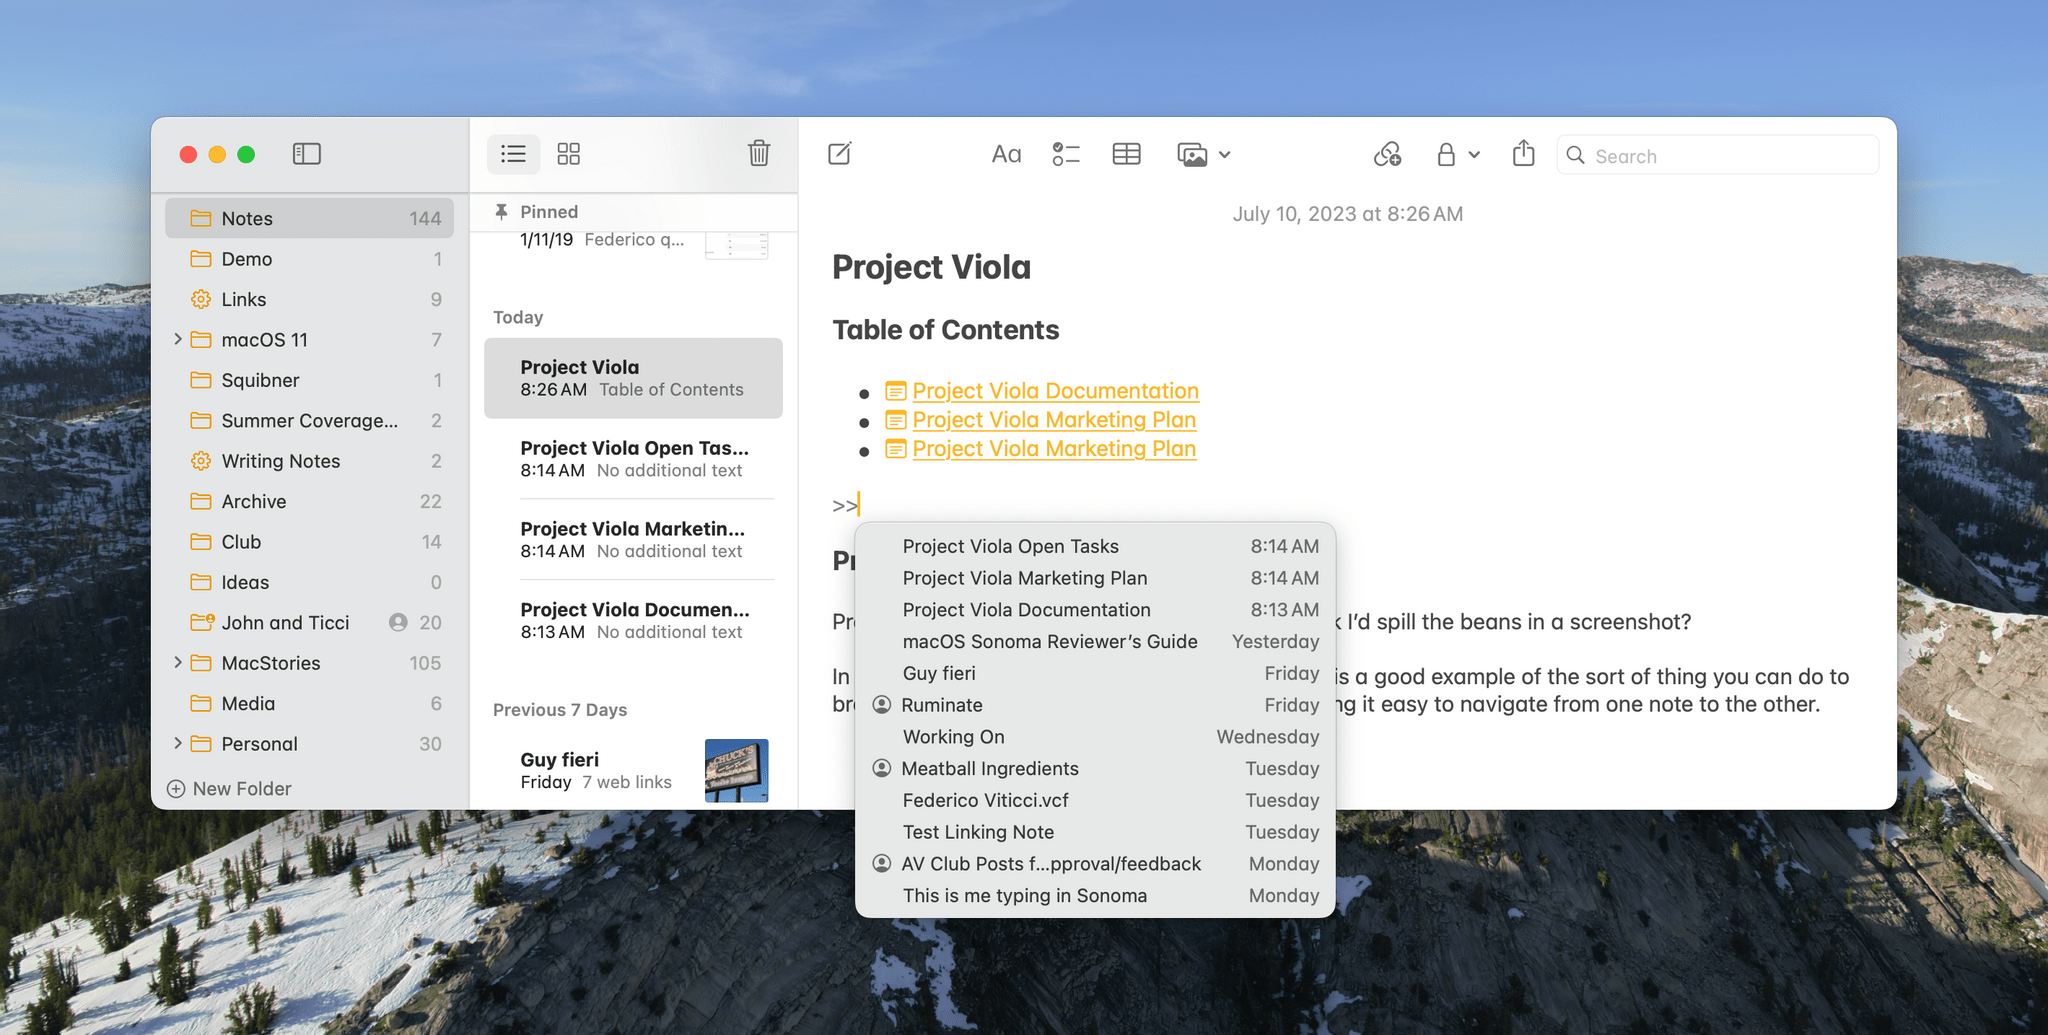
To create a link in Notes, all you need to do is type the familiar ⌘K keyboard shortcut that’s used in multiple places throughout macOS and many third-party apps. That opens a window where you can type or paste a URL or start typing the name of a note. As you type the name of a note, a dozen suggestions appear and update as you type. Alternatively, you can type the shortcut » to immediately pull up a list of recent notes to link. Pick one, name it something different than the title of the note if you’d like, and click ‘Ok.’ That’s it. Alternatively, you can highlight some text and follow the same steps to directly link a note to that text. It really couldn’t be easier.
What I love about linking notes is it lets you break up a topic into chunks, so you’re not facing a huge wall of text. Notes’ existing formatting tools do a nice job of organizing the contents of a note, but linking to related content is often better. This is especially good for reference material because it makes it easier to skip around to the parts you need instead of endlessly scrolling past information you don’t.
PDFs
Even if creating webs of notes isn’t your thing, I think a lot of MacStories readers will be happy to see what the Notes team has done with PDFs. Everyone deals with PDFs at least now and then, and for some people, that’s one of the main sources of information with which they work. That’s true of anyone working in an academic or another research field, lawyers, and many others.
You could already add PDFs to Notes, but they were just file attachments. To do any markup or editing, you had to open them up in Preview or another app. Most people won’t need that anymore because Notes’ new PDF integration, which allows you to read and mark up PDFs inline, is so good.
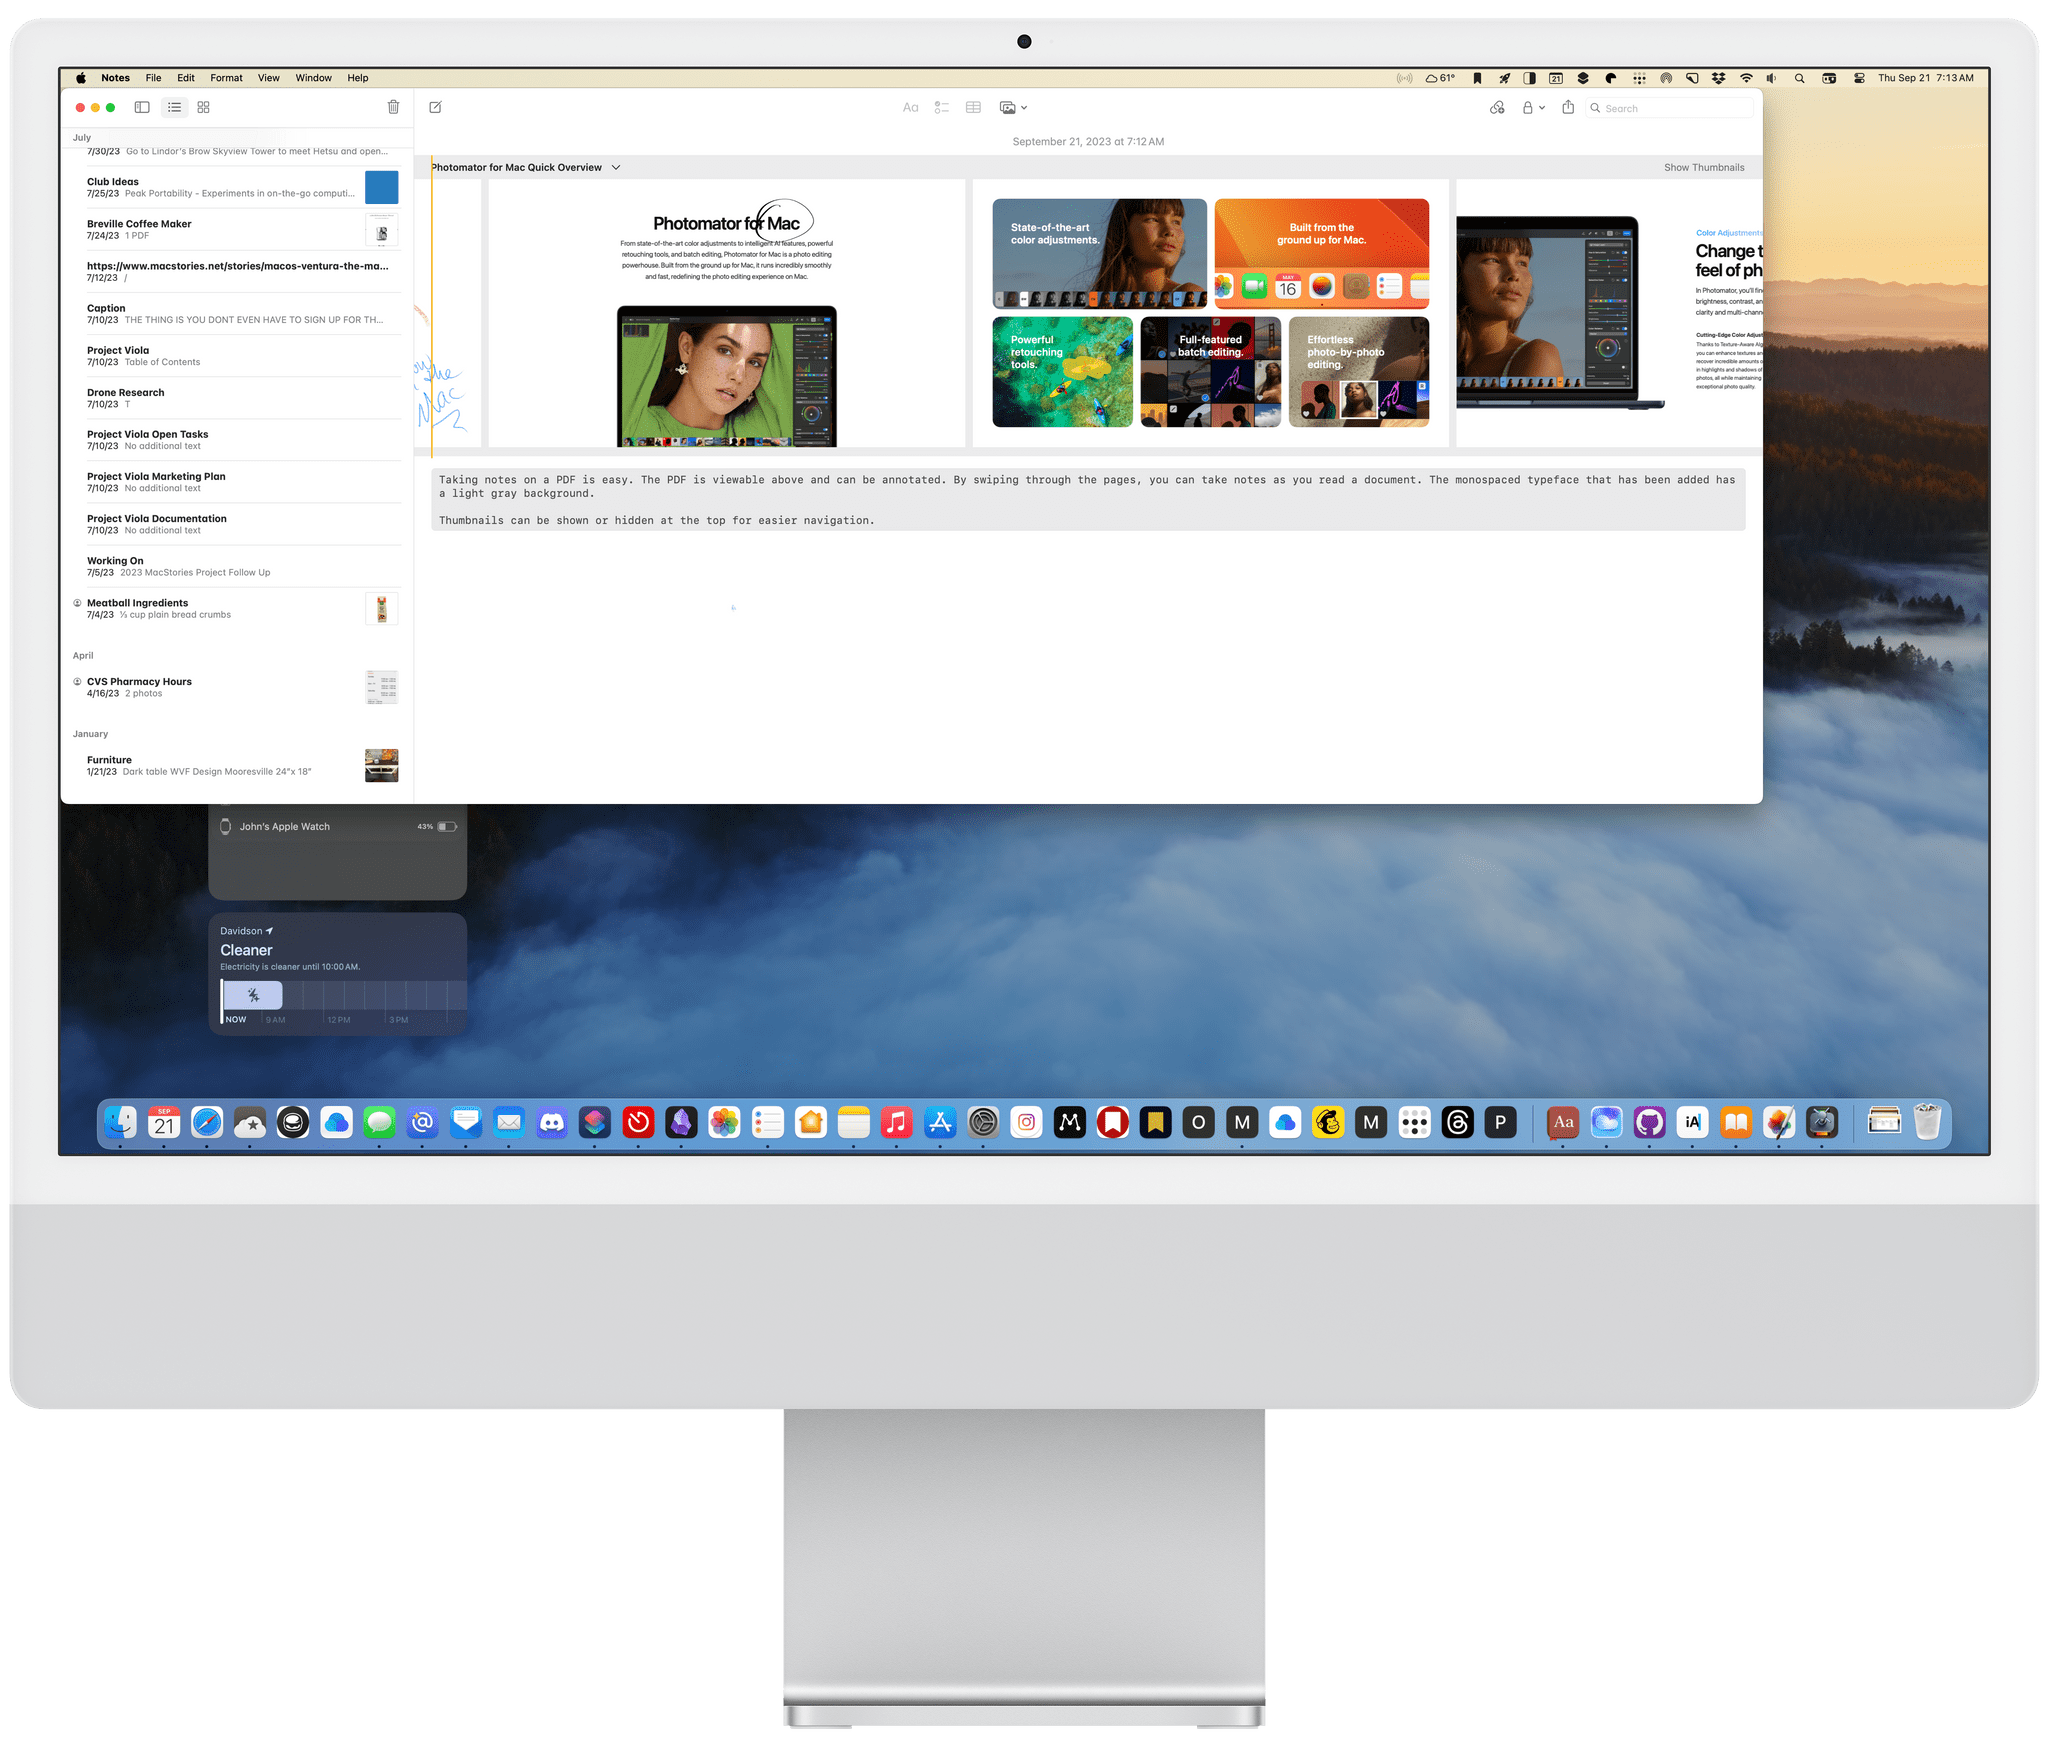
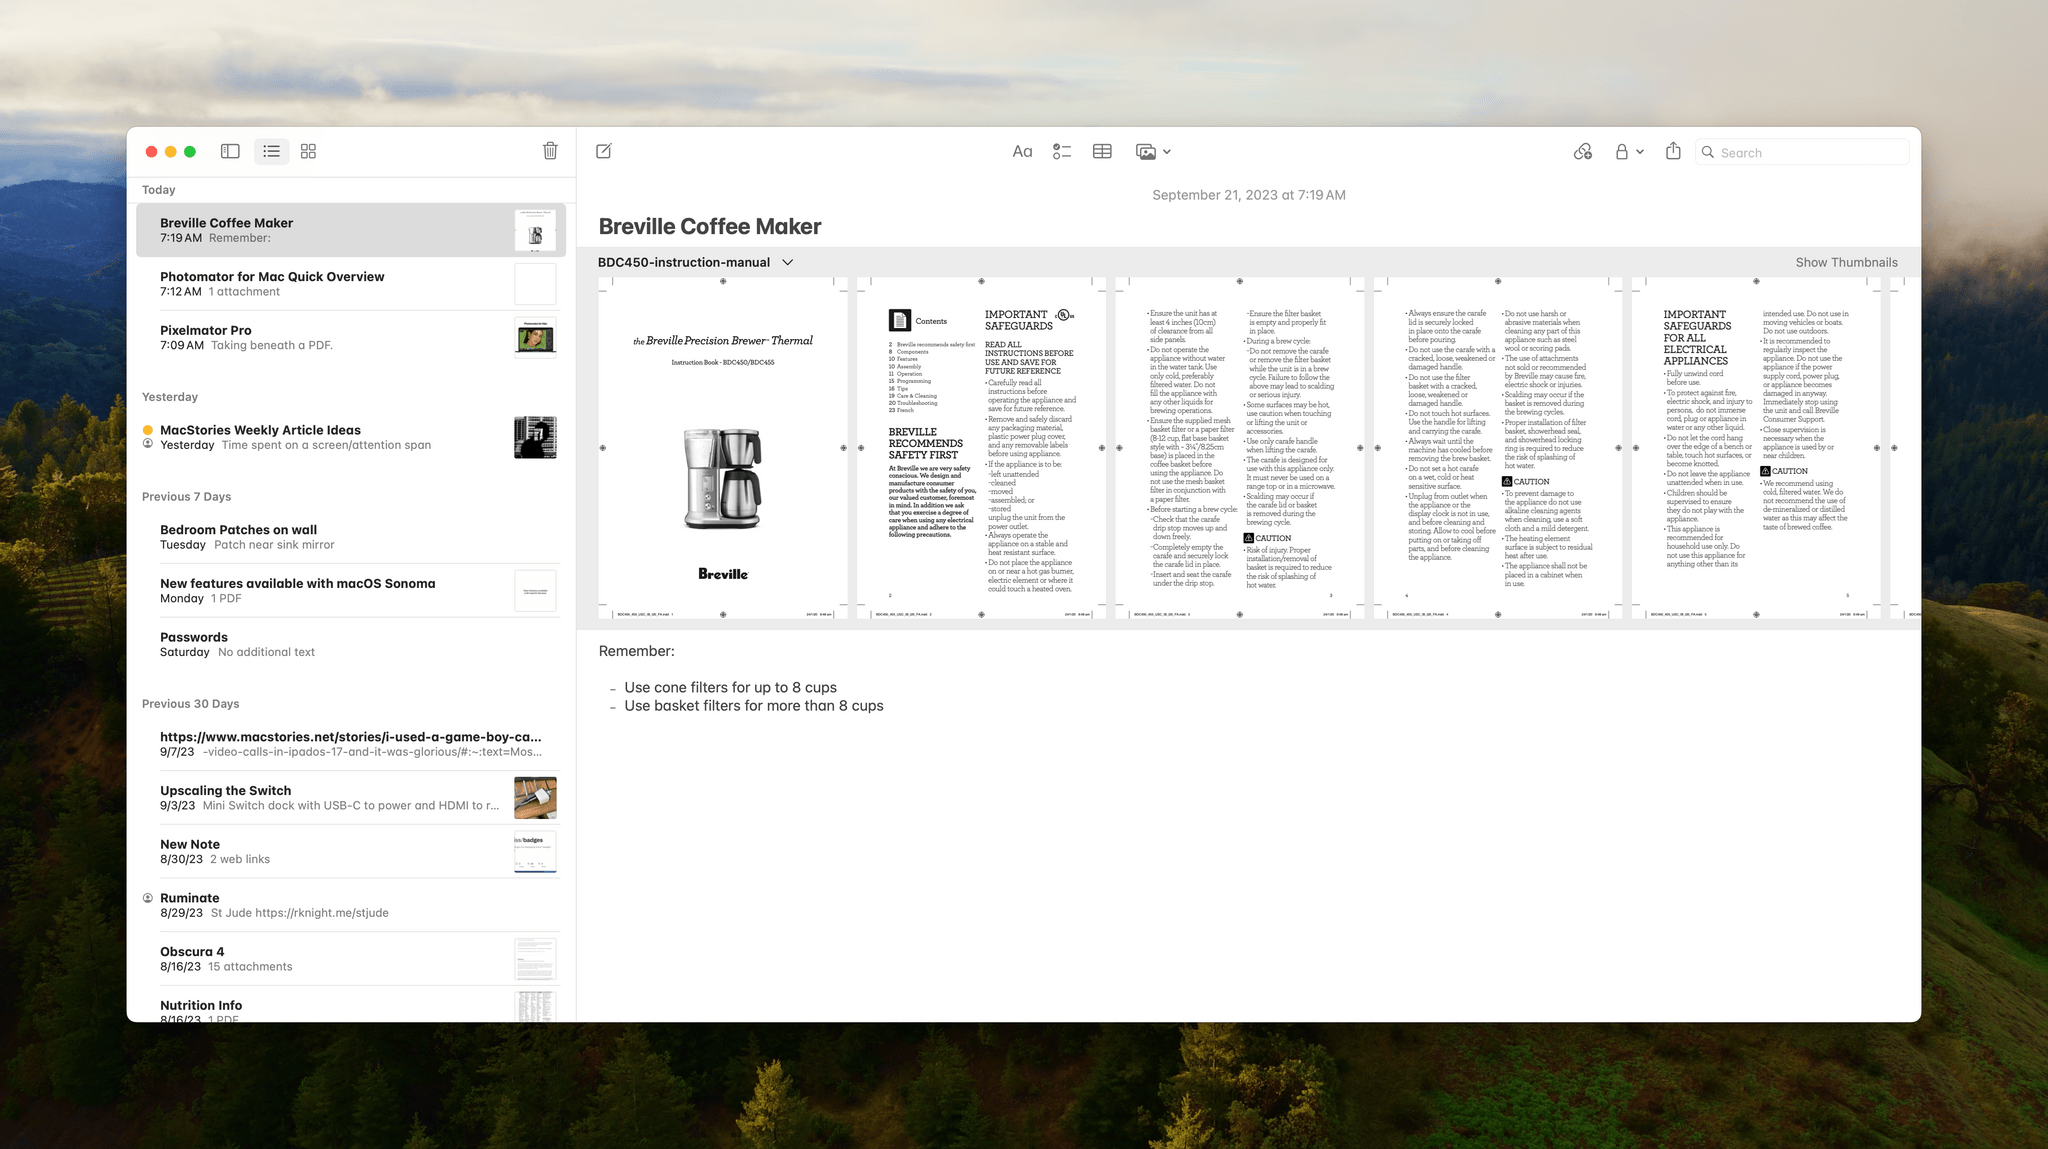
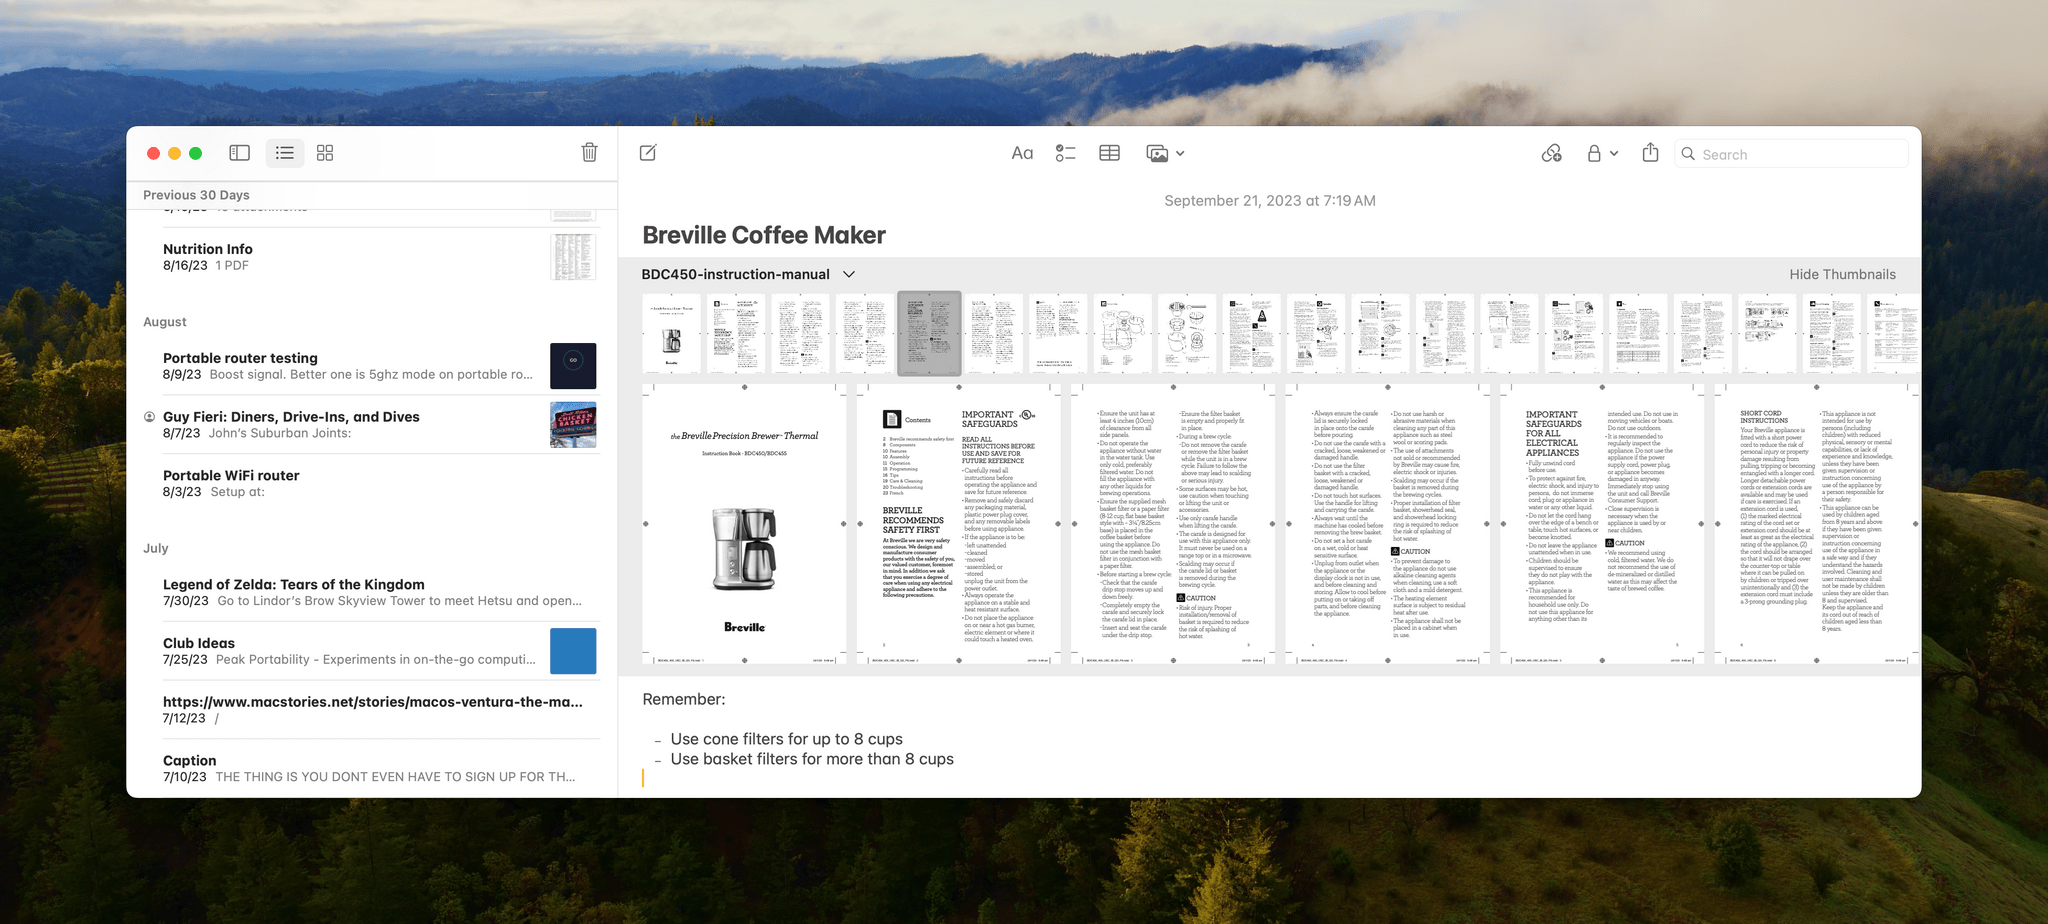
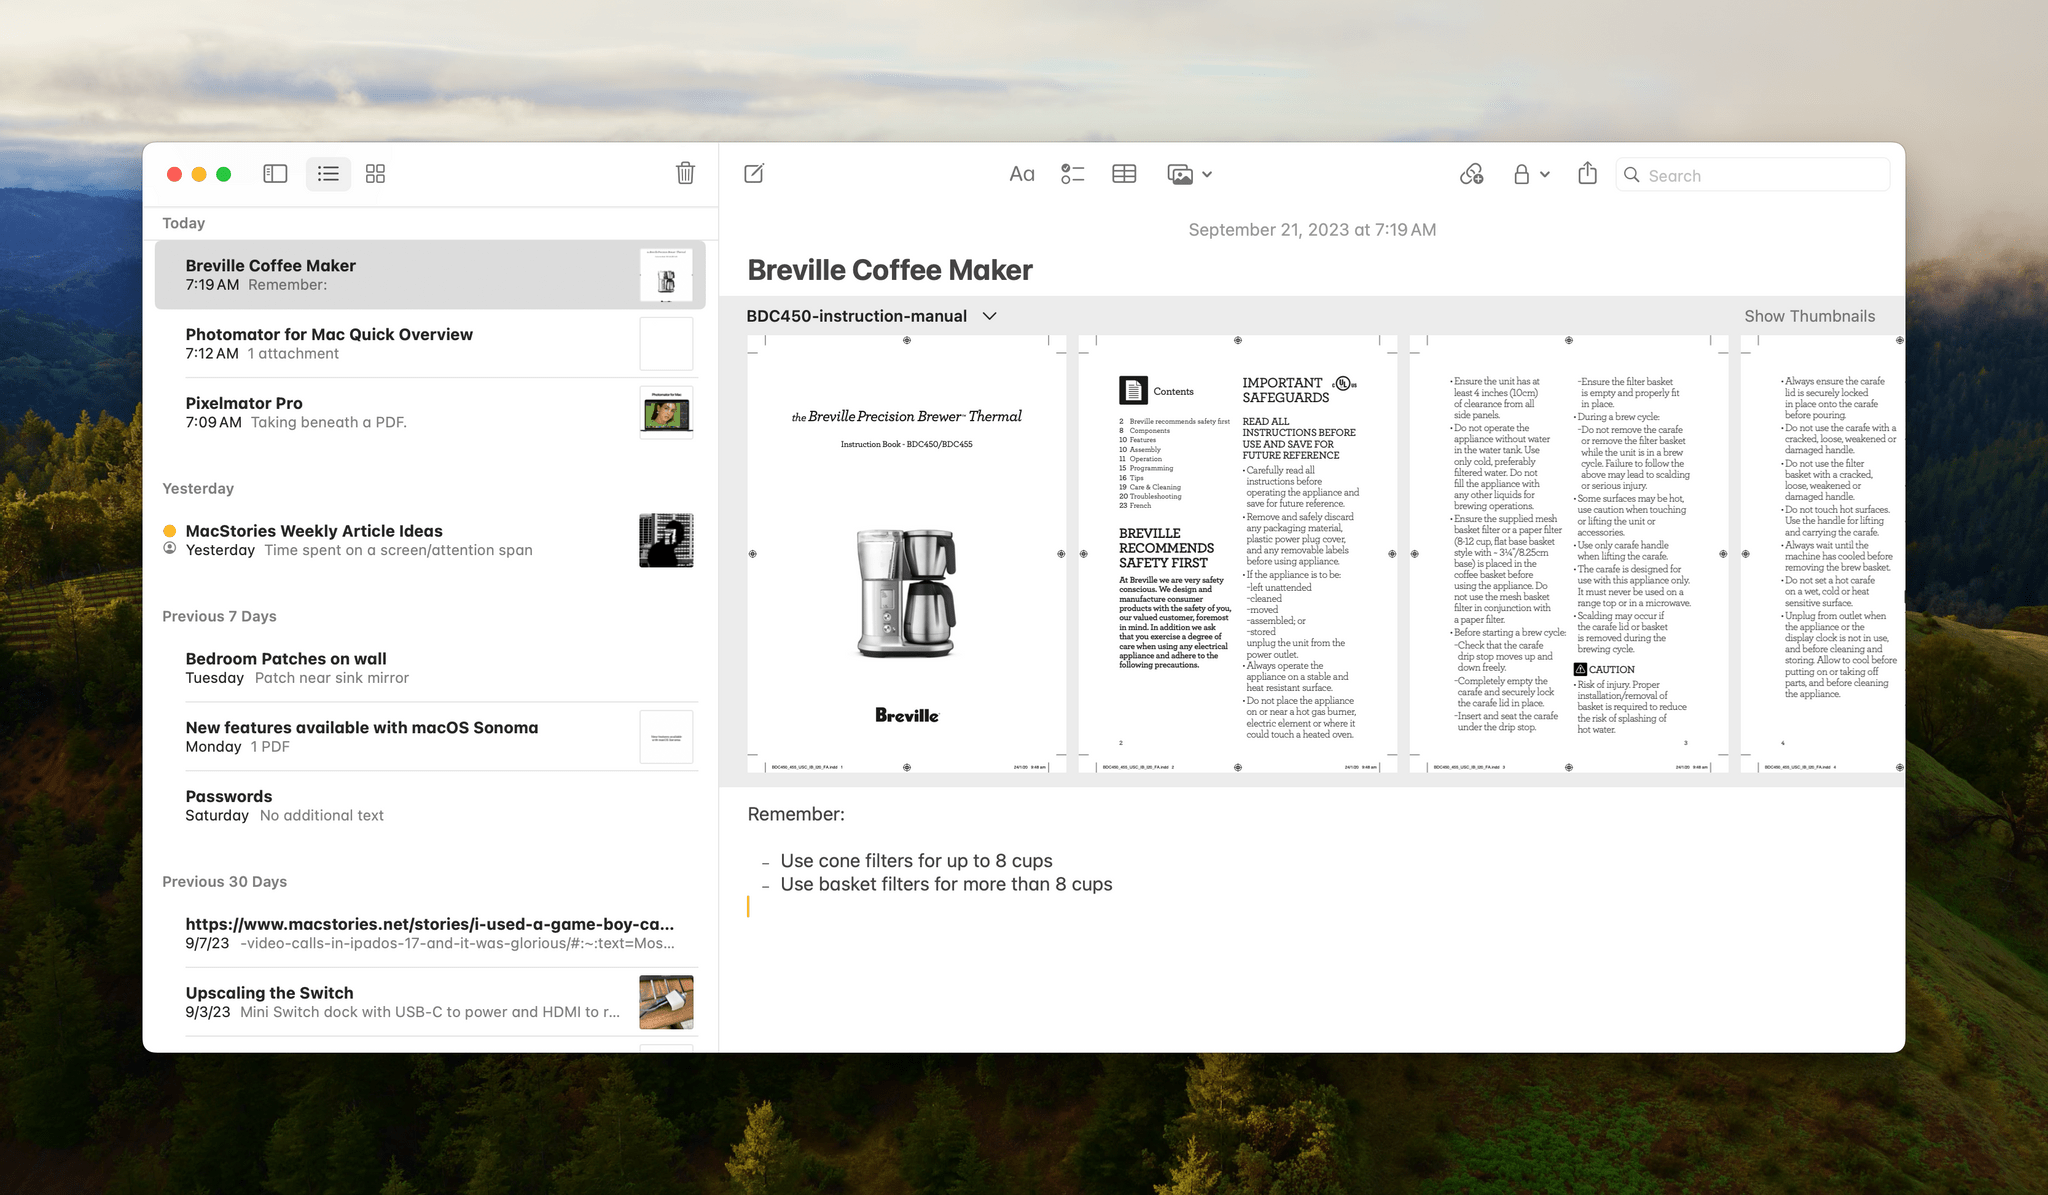
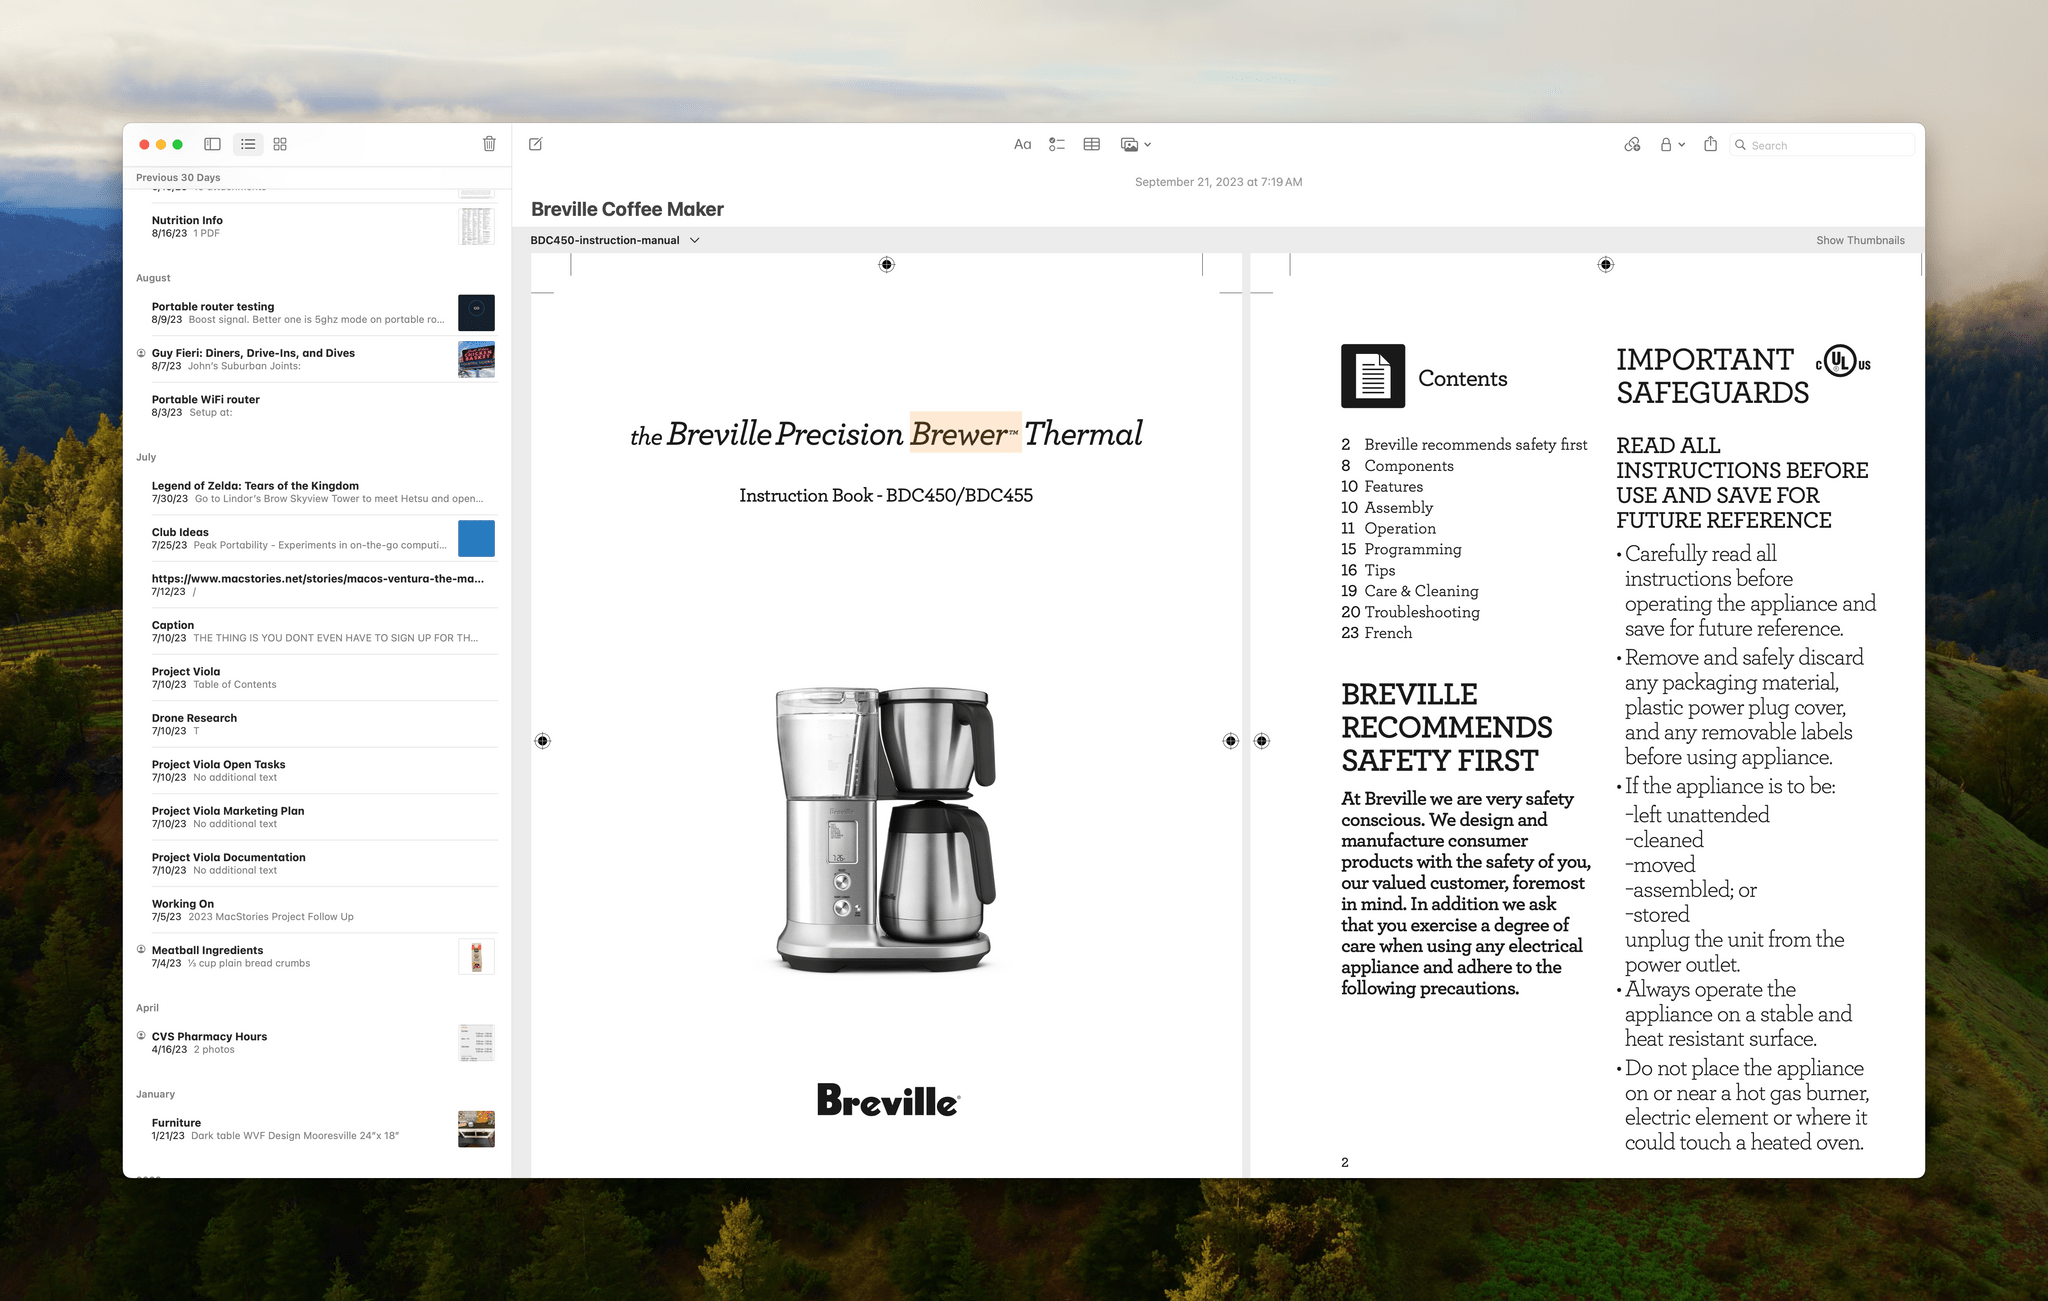
When you drag a PDF into Notes, it’s laid out horizontally. It’s a great design for a couple of reasons. The first is the practicality of working inside a note that includes a PDF. By lining the pages up horizontally, there’s room for you to take notes above or below the PDF. A lot of apps offer a vertical scrolling option as if the PDF were a webpage, which is fine, but with a document that’s been paginated like a PDF, I prefer moving through it like a book.
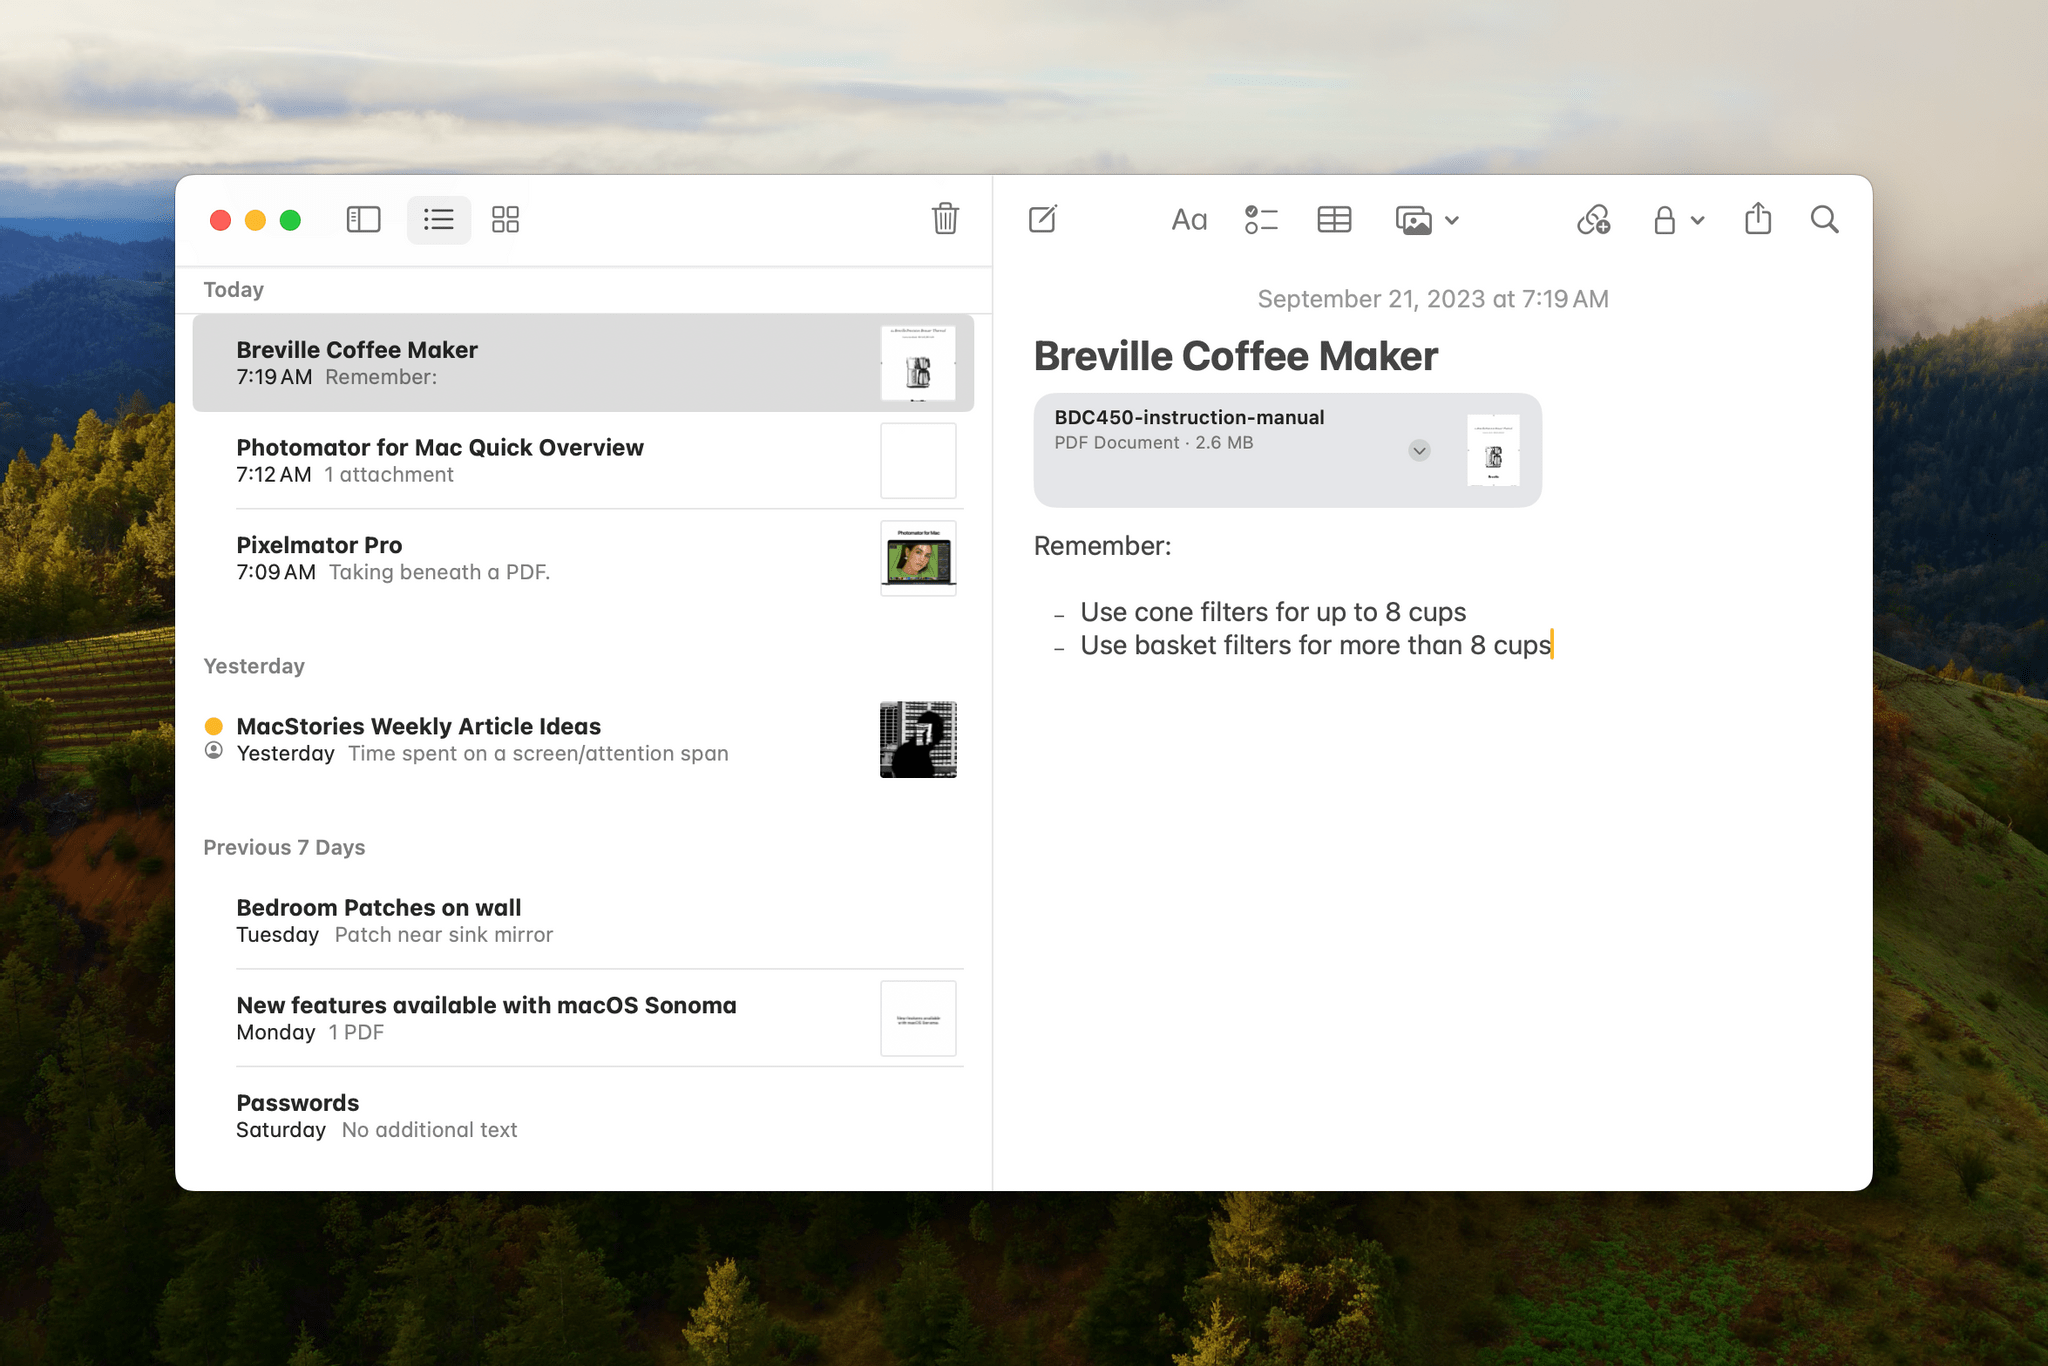
Navigating a long PDF is easy. You can scroll the document from left to right or use the ‘Show Thumbnails’ button at the top of the PDF and skim through those even faster. Right-clicking a thumbnail also reveals options to copy, rotate, or delete it and insert a blank page or file. You can also adjust the size of the PDF at the top of your note, using the drop-down menu next to the PDF’s filename and selecting ‘View As,’ which provides small, medium, and large options. Small is just a file thumbnail without previews of individual pages of your document, but medium and large display every page of the PDF, with medium offering more room for taking notes.
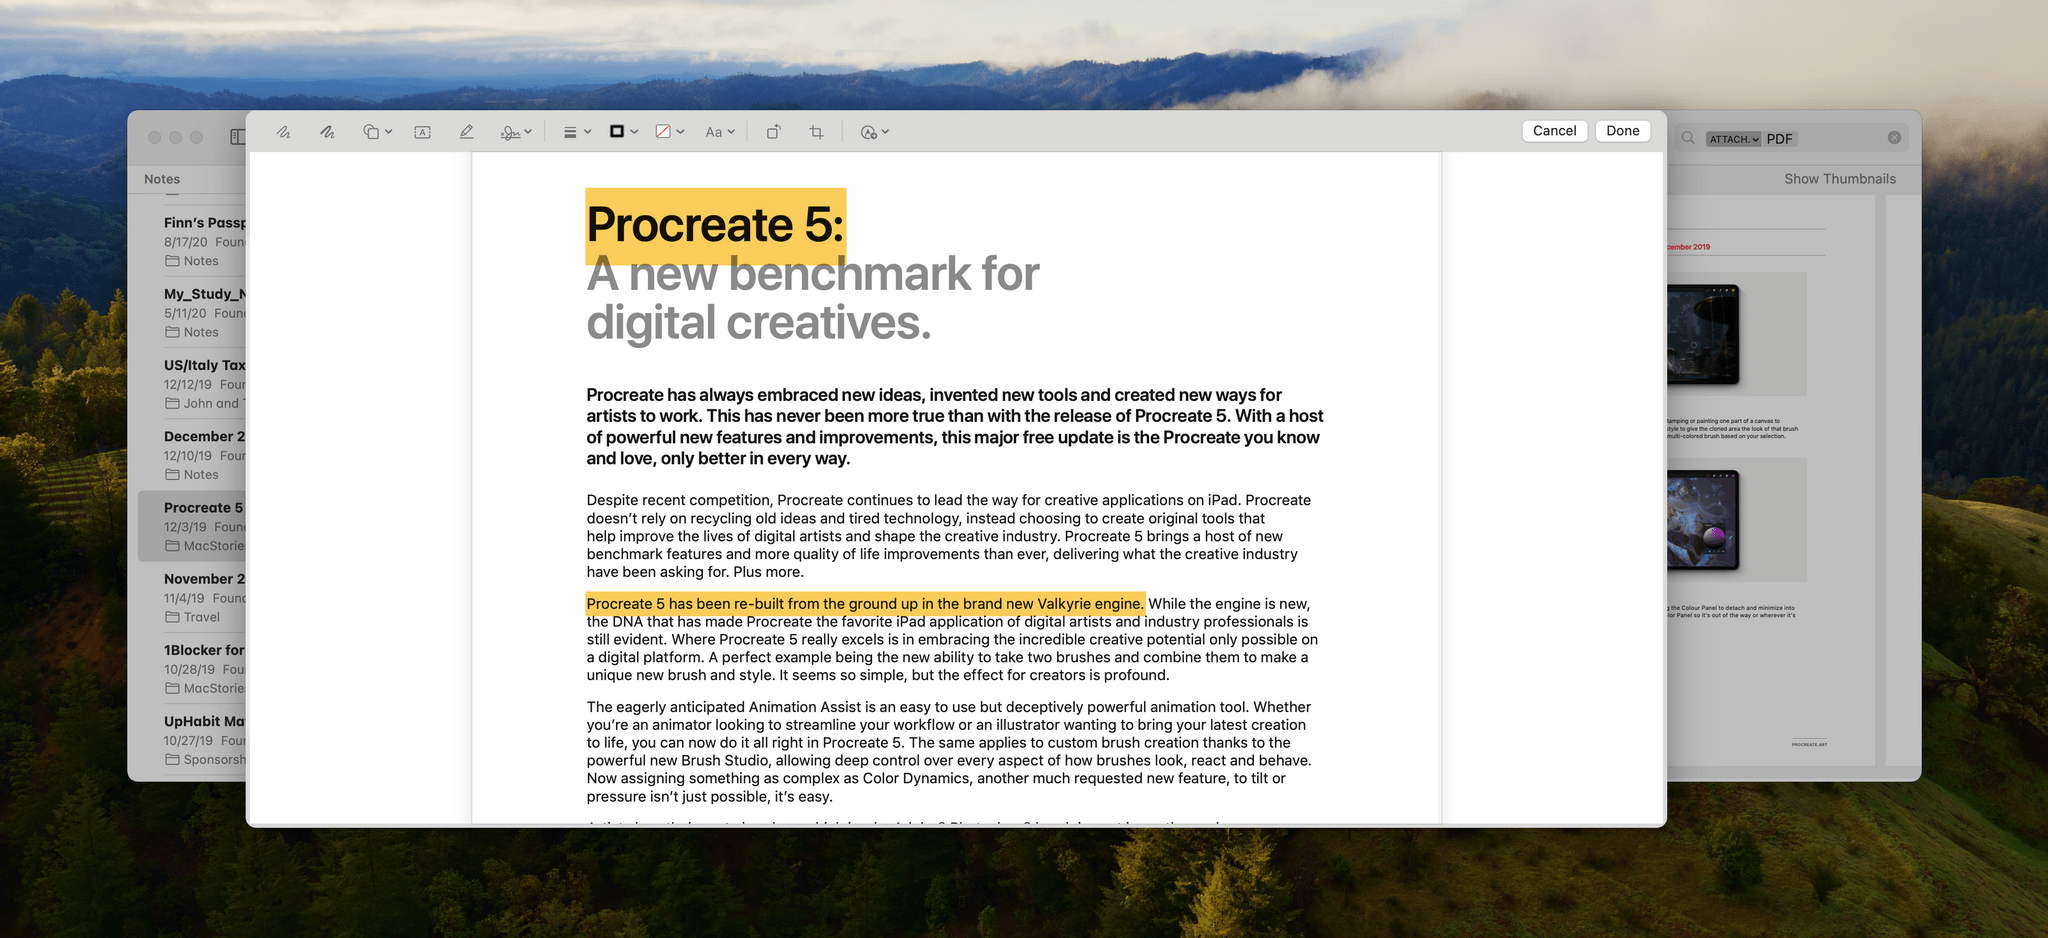
There are a couple of ways to mark up a PDF, too. If you want to highlight text, you can right-click on it and choose ‘Highlight.’ However, if you want to do more than that, you’re going to have to go to the drop-down menu next to the PDF’s filename and pick ‘Markup’ or ‘Open Attachment.’ Markup will be the better option in most circumstances because it opens your PDF in what is essentially a stripped-down version of Preview with similar annotation tools. Most importantly, though, the Markup option saves the changes you make back to the version of your PDF that’s attached to your note. If you choose to ‘Open Attachment’ instead, it will open in Preview, and any changes will be saved to a new copy of your document elsewhere on your Mac.
The one thing I don’t like about the Markup interface is that you have to scroll through your PDF vertically. Which kind of scrolling you prefer is a matter of personal taste, but I think horizontal scrolling in Markup mode should at least be an option so it’s consistent with navigating your document in Notes.
In the future, I’d also like to see the ability to link highlighted text to notes. If you’re working on a long document and taking notes above or below it, you can reference page numbers if your document has them, but that’s a pain, and documents like presentations often don’t have page numbers at all. If you could create a link when you add the highlighting that could be pasted into your notes, that would make PDFs more navigable, a lot like Apple’s done with its excellent inter-note linking, but between the notes you type and the reference materials you’re reading.
Other Notes Updates
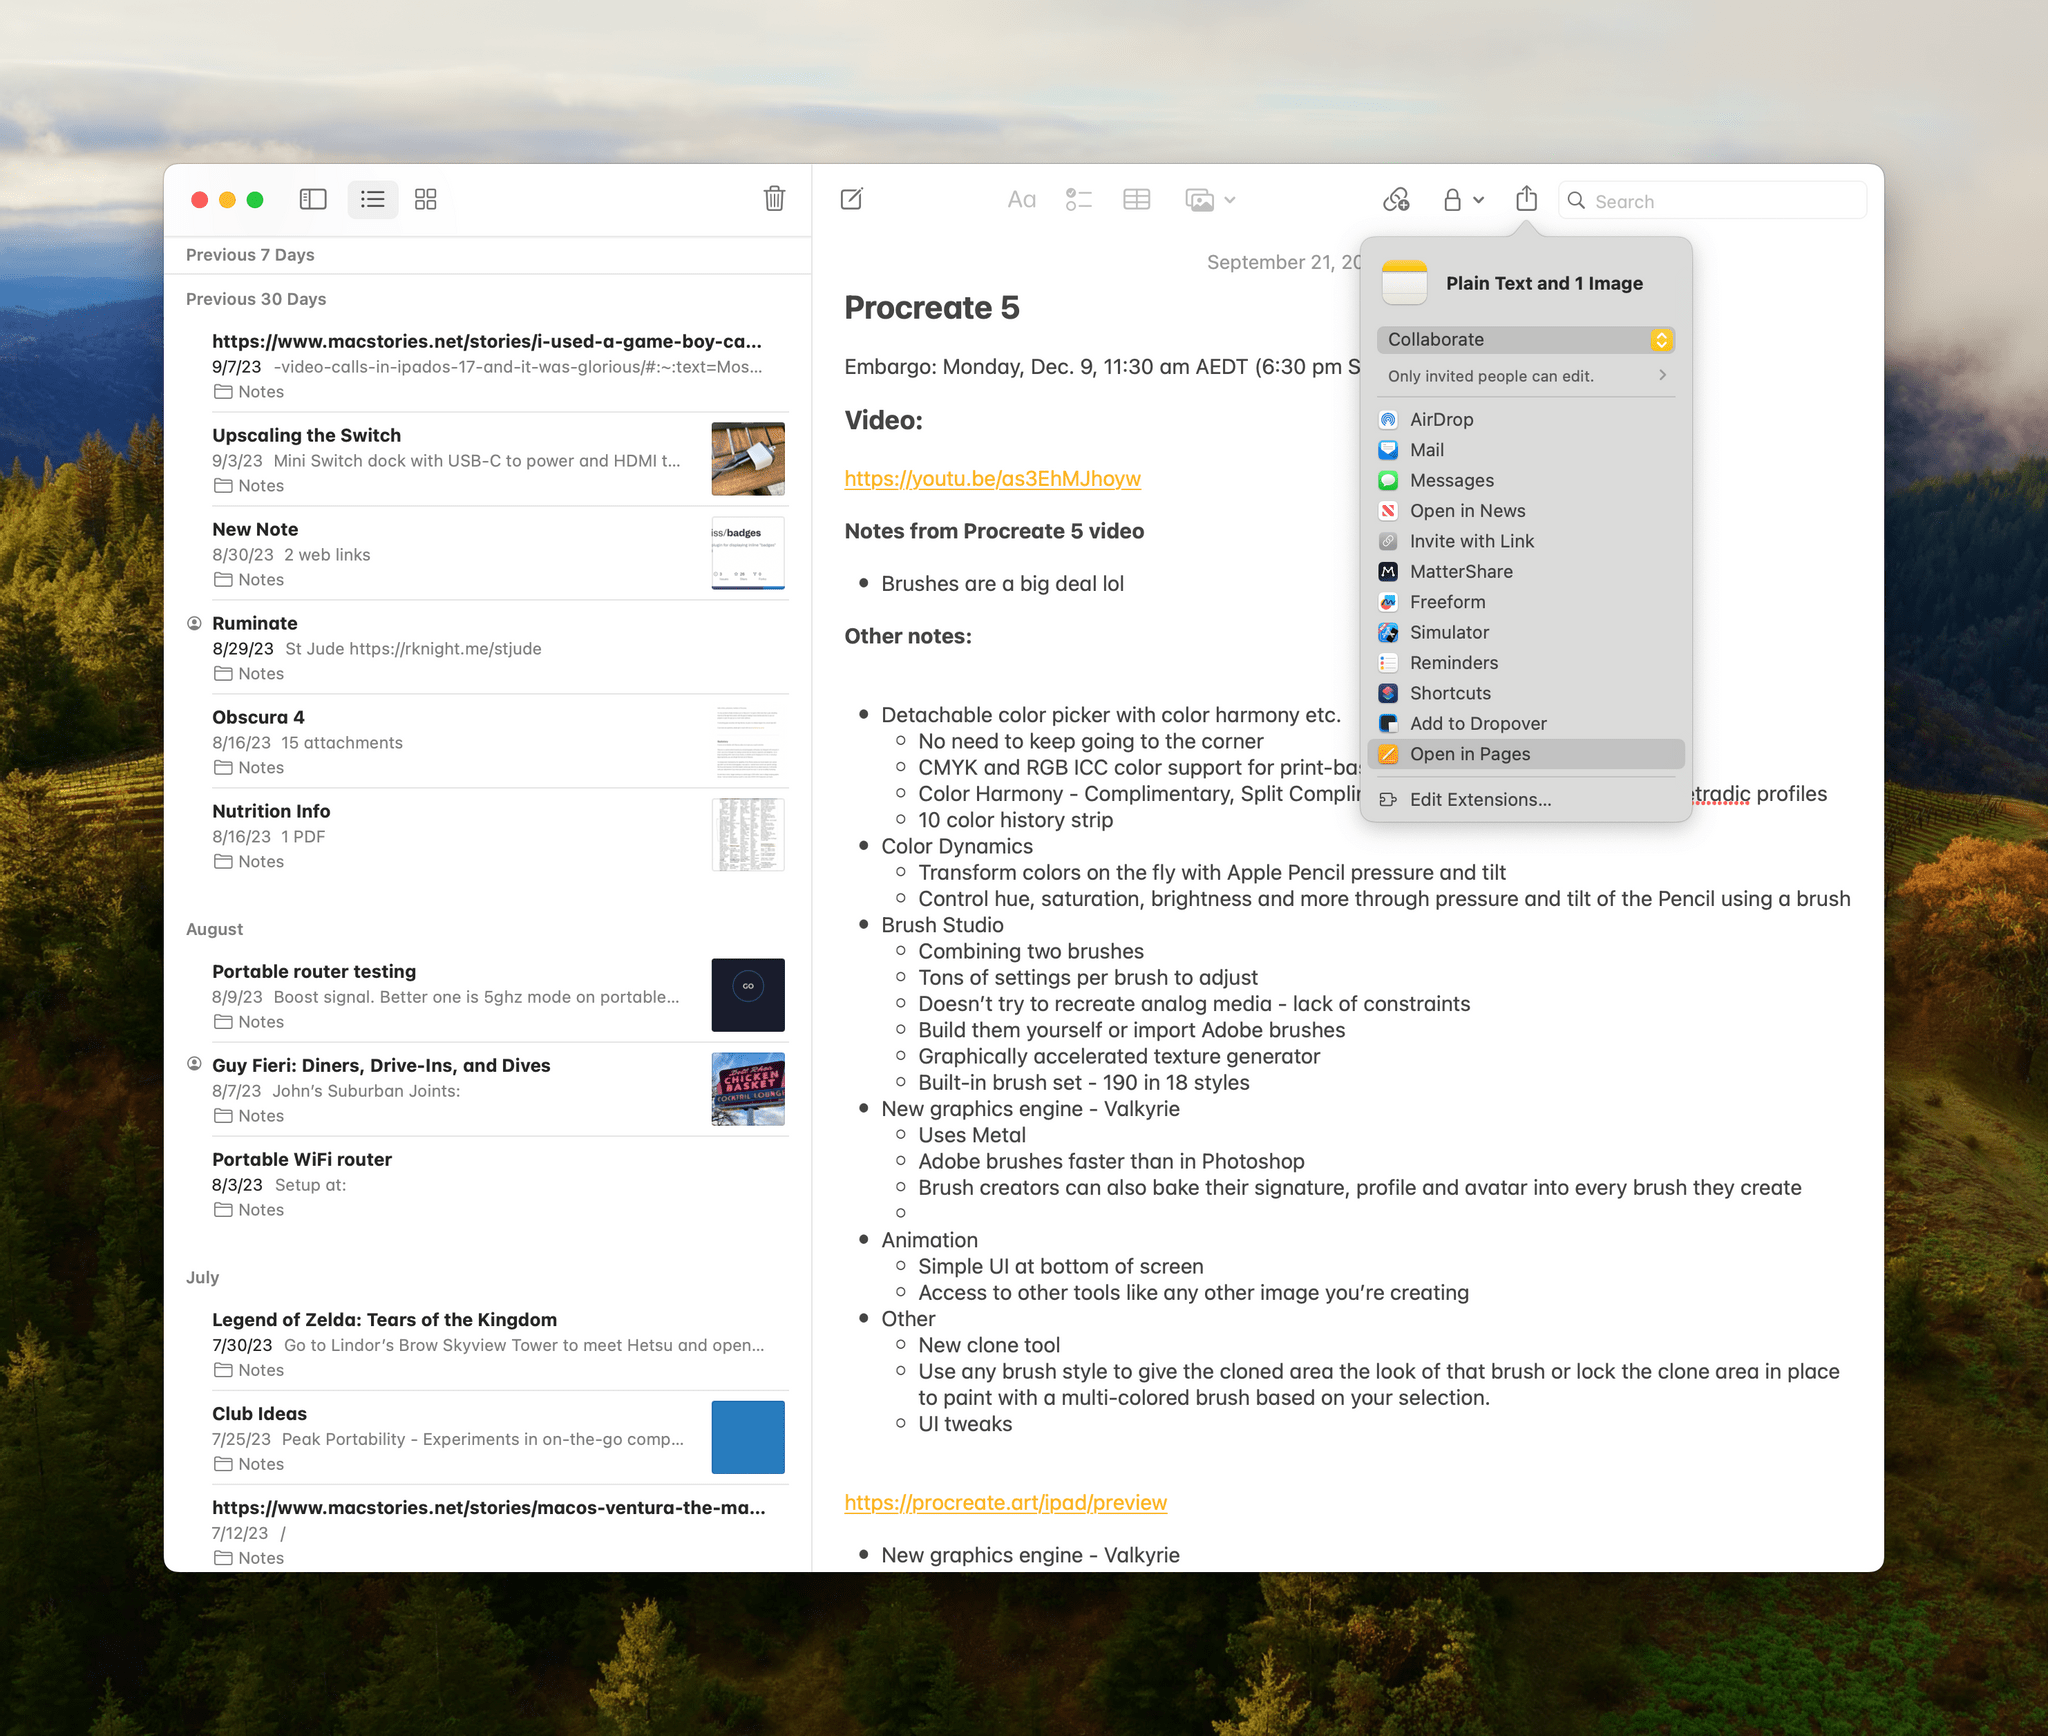
There are a few other changes to notes worth mentioning. First, you can move a document from the Notes app into Pages. This is accomplished with the ‘Open in Pages’ option that’s new to the Notes Share button. Once your note is in Pages, you’ll have access to that app’s wider variety of formatting and other features, but your changes won’t sync back to Notes. Nor can you send Pages documents to Notes. This is a one-way process designed to let you expand a note into a full-blown word-processing document when you need more features than Notes offers.
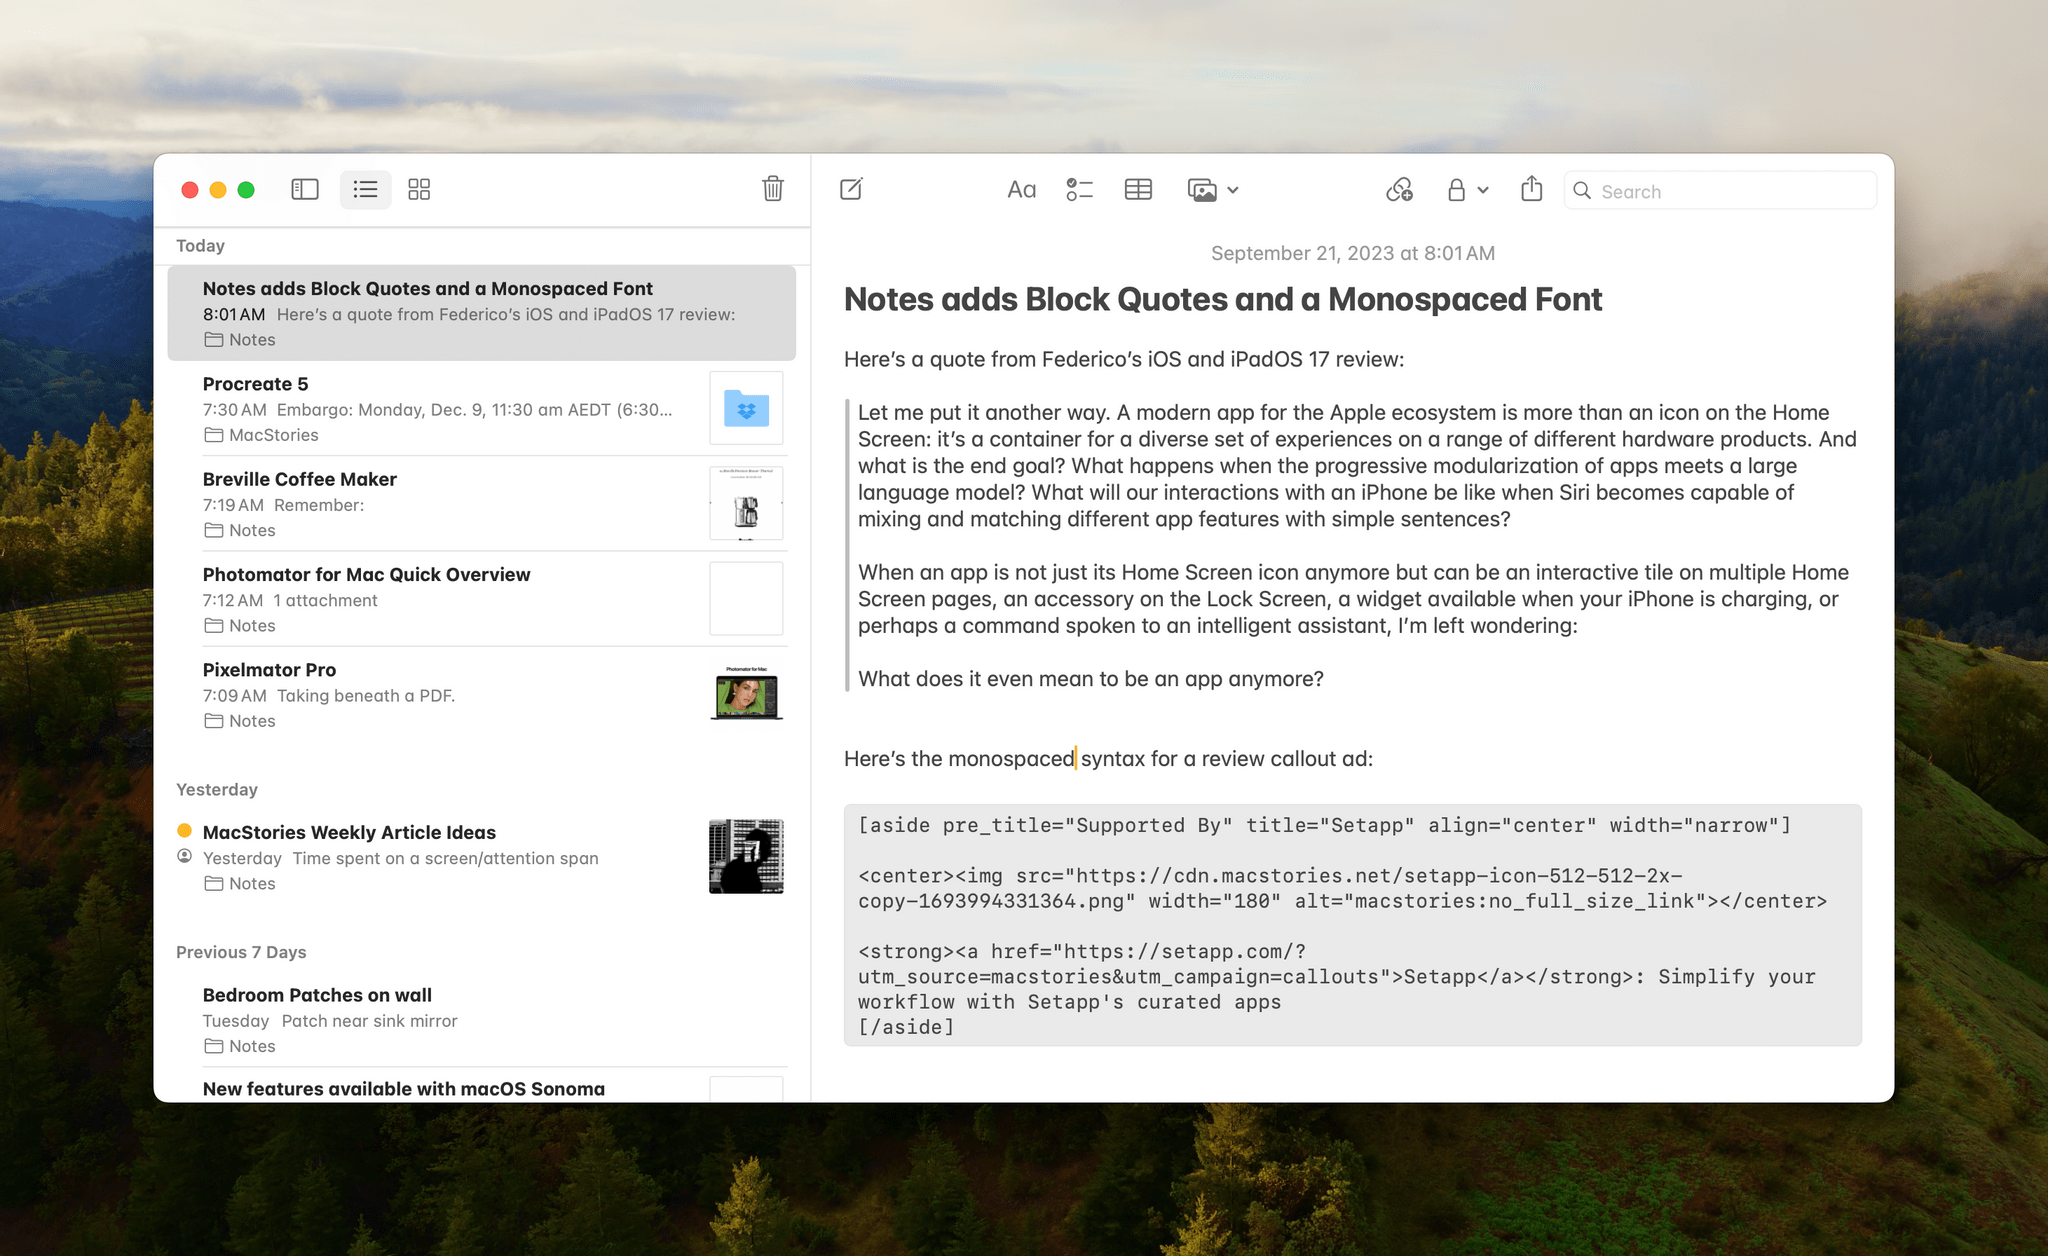
Second, there are new formatting options in Notes this year. There’s a monospaced font that has a unique background. If you’ve ever tried to store snippets of code in Notes and been tripped up by its rich text causing problems when you paste your snippets into a plain text editor, you’ll appreciate this feature. Now, you can store those snippets and easily move them out of Notes and into a code editor. There’s also a block quote format, which will be handy for anyone doing research.
There was a time when PDFs were a big deal to me. That’s because when you’re a lawyer and are sent a 500+ page PDF to read and analyze, you’re going to want an efficient way to navigate the document, highlight the parts that are important, and take notes on what you read. These days, my obsessions are RSS, read-later services, and bookmarking apps. However, I remember what those PDF days were like, and I appreciate how far Apple has come with its PDF integration in Notes, which, along with the new formatting options and internal linking, makes Notes a much more robust and realistic alternative to students and anyone else looking for a place to pull together their research notes and PDFs.


