Anyone new to a job has probably thought or even asked:
“Why do you do it that way?”
and gotten the age-old answer:
“Because that’s how we’ve always done it.”
It’s human nature to stick with a solution that works and is familiar. When a workflow is so ingrained that it’s a habit, that’s good because it allows the task to become less about the tools and more about what you’re creating.
Paradoxically, though, familiarity can also lead to inflexibility, a resistance to change that undermines the very productivity that the solution enabled in the first place. It’s an inertial force that’s hard to resist, but I think it’s important to push back against it. Not solely for the sake of efficiency, but also to improve the results of your efforts.
The trick is knowing when experimentation with new workflows is unproductive fiddling and when it’s meaningful exploration. I’ve seen too many people fall into the trap where improving the process becomes the goal itself.
Early last year, I decided I was finished with letting tasks dictate how I work. I work across the Mac, an iPad Pro, and an iPhone all day long. Some jobs are more suited to one device than another, and some I just prefer to do on a particular device. The point is, though, that it’s something I want to be my choice, instead of something foisted on me by the nature of the work itself.
I’m fortunate that most of what I do migrates effortlessly from one device to another. Still, I’ve historically had two weekly responsibilities where I’ve felt tied to a Mac.
The first was producing the Club MacStories newsletters using Mailchimp’s web app. As I wrote last January, Safari’s updates in iOS and iPadOS 13, which made web apps work roughly the same on my iPad Pro as on my Mac, solved that problem for me.
The second Mac-bound task was podcast recording and production. I recognize that there have been ways to accomplish podcasting on an iPad for a while. However, when it comes to recording in particular, I didn’t want to change the way I record episodes to work around the iPad’s limitations for the same reasons Federico articulated in Beyond the Tablet.
What made these two tasks frustrating is that they’re both tied to schedules that have limited flexibility. When I was traveling more, that left me with little choice but to take a Mac. I prefer to travel with my iPad Pro, but regardless, I’d rather pick how I work myself, even when I’m at home.
I’m not doing as much traveling now, but a recent road trip to Michigan led me to start thinking about my podcasting setup again. As with many trips in the past, I wound up taking my MacBook Pro along, in this case so I could record interviews for an episode of AppStories. The setup was perfectly fine, but it felt like too much equipment for recording a few short interviews. Plus, I took my iPad Pro because I prefer it for writing and wanted to stay connected to mobile data as I wrote a story in the car.
Ever since Jason Snell wrote about his iPad Pro podcasting setup on Six Colors early last year, and Federico adapted it for his setup when he can’t use his Mac mini, I’ve wanted to try something similar. What held me back, though, was a combination of the complexity, cost, and infrequency with which I assumed I’d use the setup.
I also held out hope that iPadOS 13 or 14 would include improved audio routing that would make it possible to talk on Skype and record a local audio track. That hasn’t happened. Although I expect Apple will add that functionality eventually, it’s been 18 months since Safari solved my Mailchimp problem. With only podcasting standing in the way of my goal of device independence, and no software solution from Apple in the early iPadOS 14 betas, I figured it was time to revisit my hardware options.
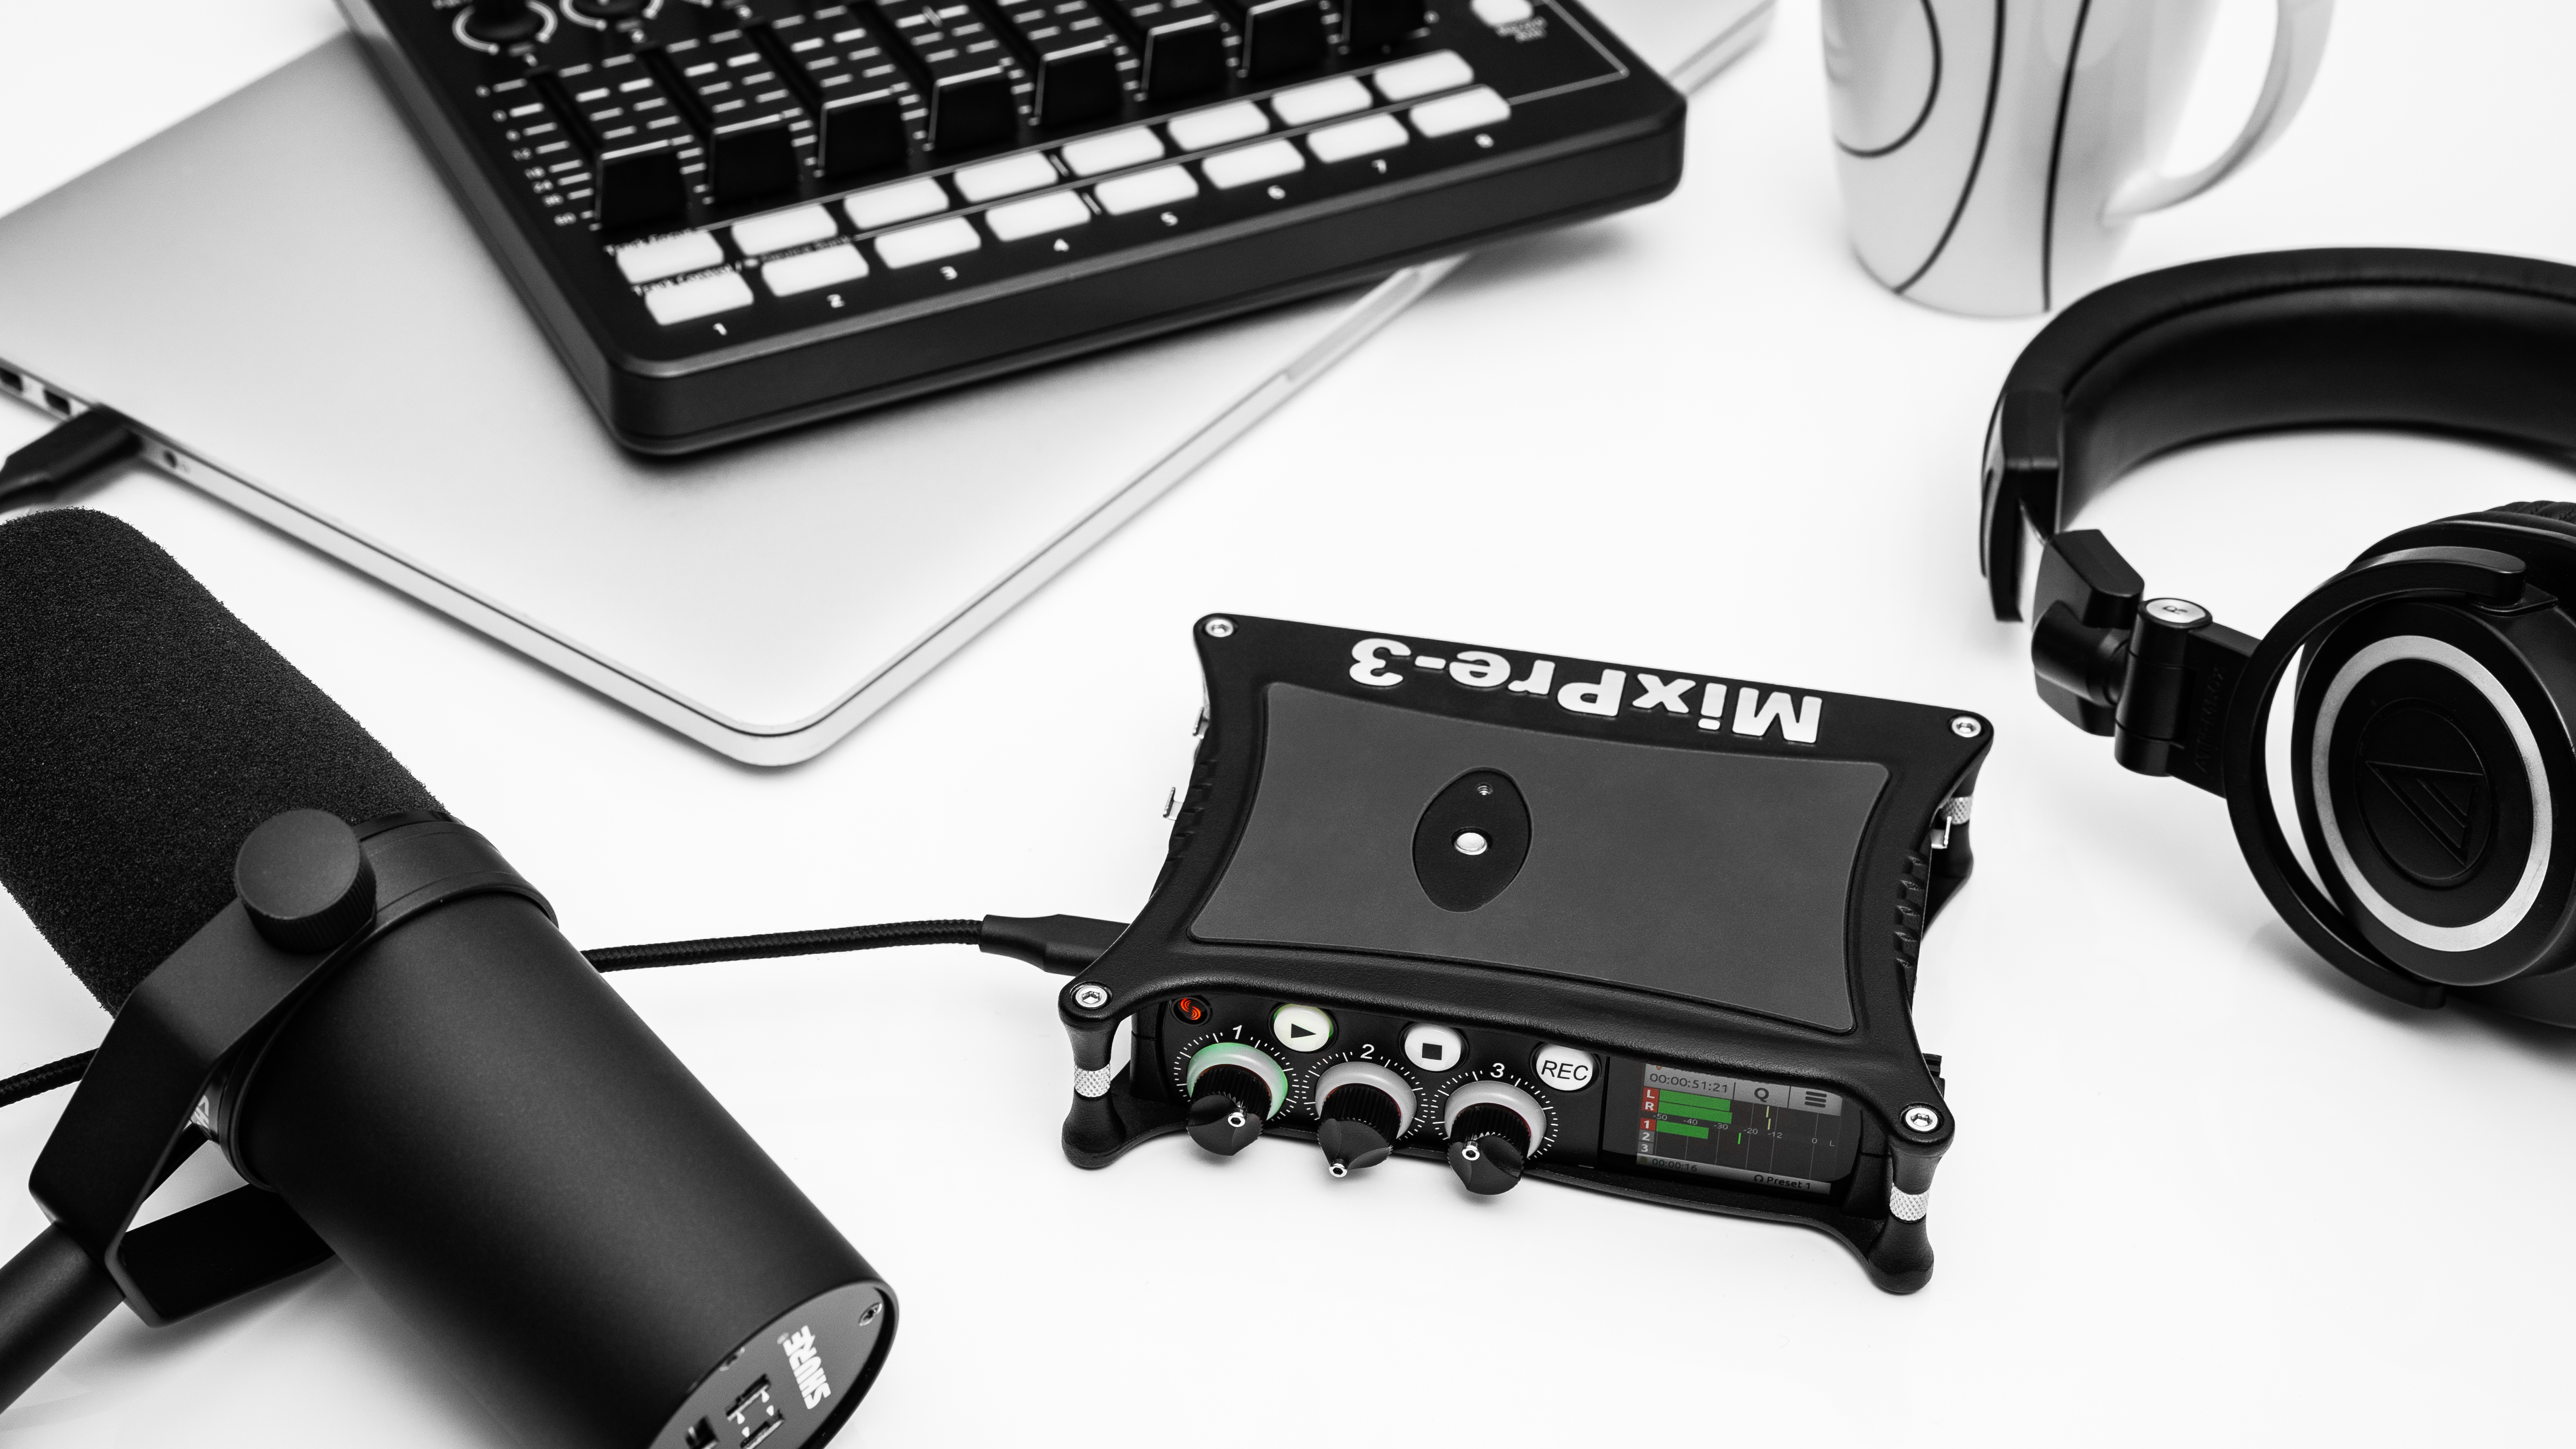
I wanted a solution that worked equally well when I’m sitting at my Mac or iPad, allowing me to talk over Skype and record myself locally. What I discovered was an incredibly versatile solution that accomplishes in a single device what Snell and Federico cleverly constructed from a field recorder and USB audio interface: the Sound Devices MixPre-3 II.
There is more than one way to record a podcast, so it’s worth a brief aside about how we record at MacStories. As I already mentioned, Federico covers the same ground in more detail in his Beyond the Tablet story, so I won’t belabor it here. However, it’s important to keep in mind that the conversation happens over Skype, and we each record our audio tracks locally. When we’re finished, Federico sends me his track, I line everything up, and edit them to produce the show. We record the Skype call as a reference track and backup, but we don’t use that audio in production. Like Federico, I wanted an iPad solution that replicates what I do on the Mac to cut down on the equipment I need and ensure consistent quality from episode to episode regardless of whether I’m using a Mac or iPad.
The trouble with the iPad is the inability to run a Skype call and record your local audio track at the same time without some sort of additional hardware. Snell and Federico’s solutions work around this by recording to an SD card in a Zoom H6 field recorder, routing the audio from the H6 to a Sound Devices USBPre 2 audio interface, which handles the Skype call on the iPad Pro, so everyone can hear each other. What’s cool about the MixPre-3 II is that it replicates the same setup in a single, smaller device that costs less and has a few additional features that make it easy to use.
It’s not surprising that the solution to what I was looking for is hardware made by Sound Devices. After all, Snell and Federico’s approaches incorporate the company’s USBPre 2 audio interface, which is a terrific piece of equipment. Due to the limitations of iPadOS, though, the USBPre 2 isn’t enough on its own. Snell’s insight that led him to add a Zoom H6 recorder to the mix captures the difference between the MixPre-3 II and the USBPre 2.
When I came across the MixPre-3 II, I quickly realized that I couldn’t be sure if the MixPre would suit my needs until I tried it. That’s because there doesn’t seem to be anyone using gear like the MixPre with the iPad Pro and writing about it. Fortunately, Amazon has a generous return policy, so I decided to see if I could figure it out for myself.
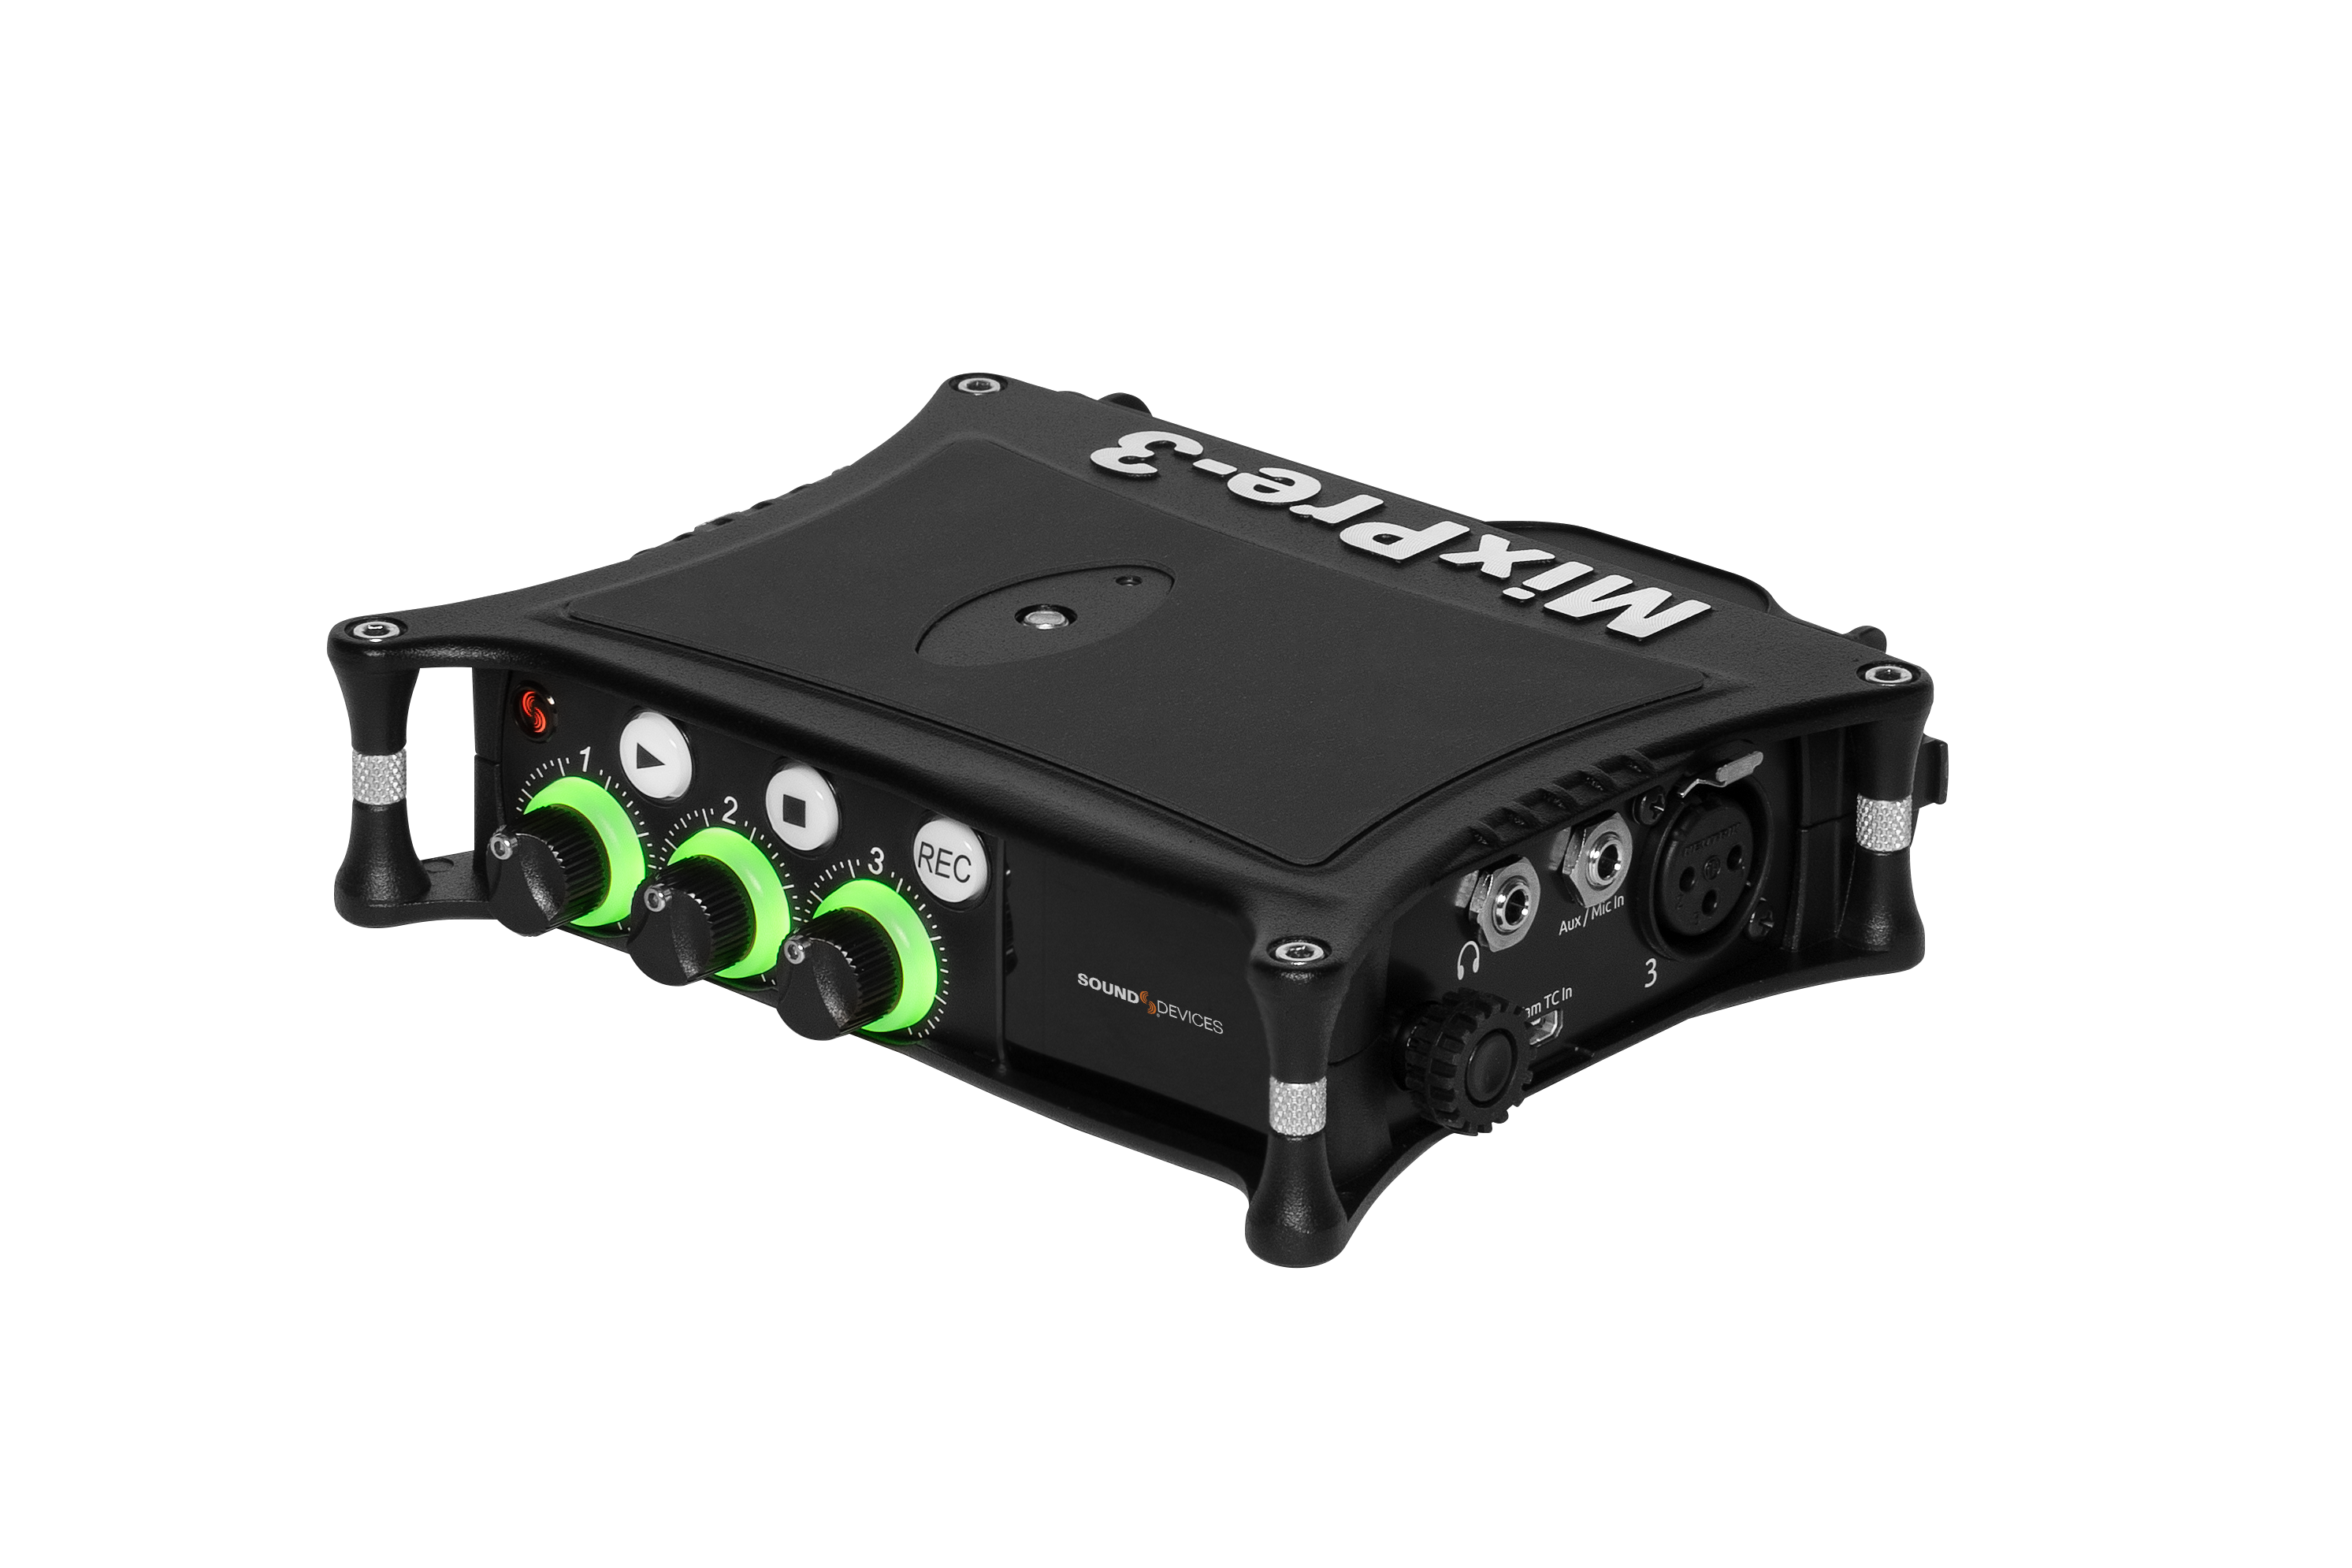
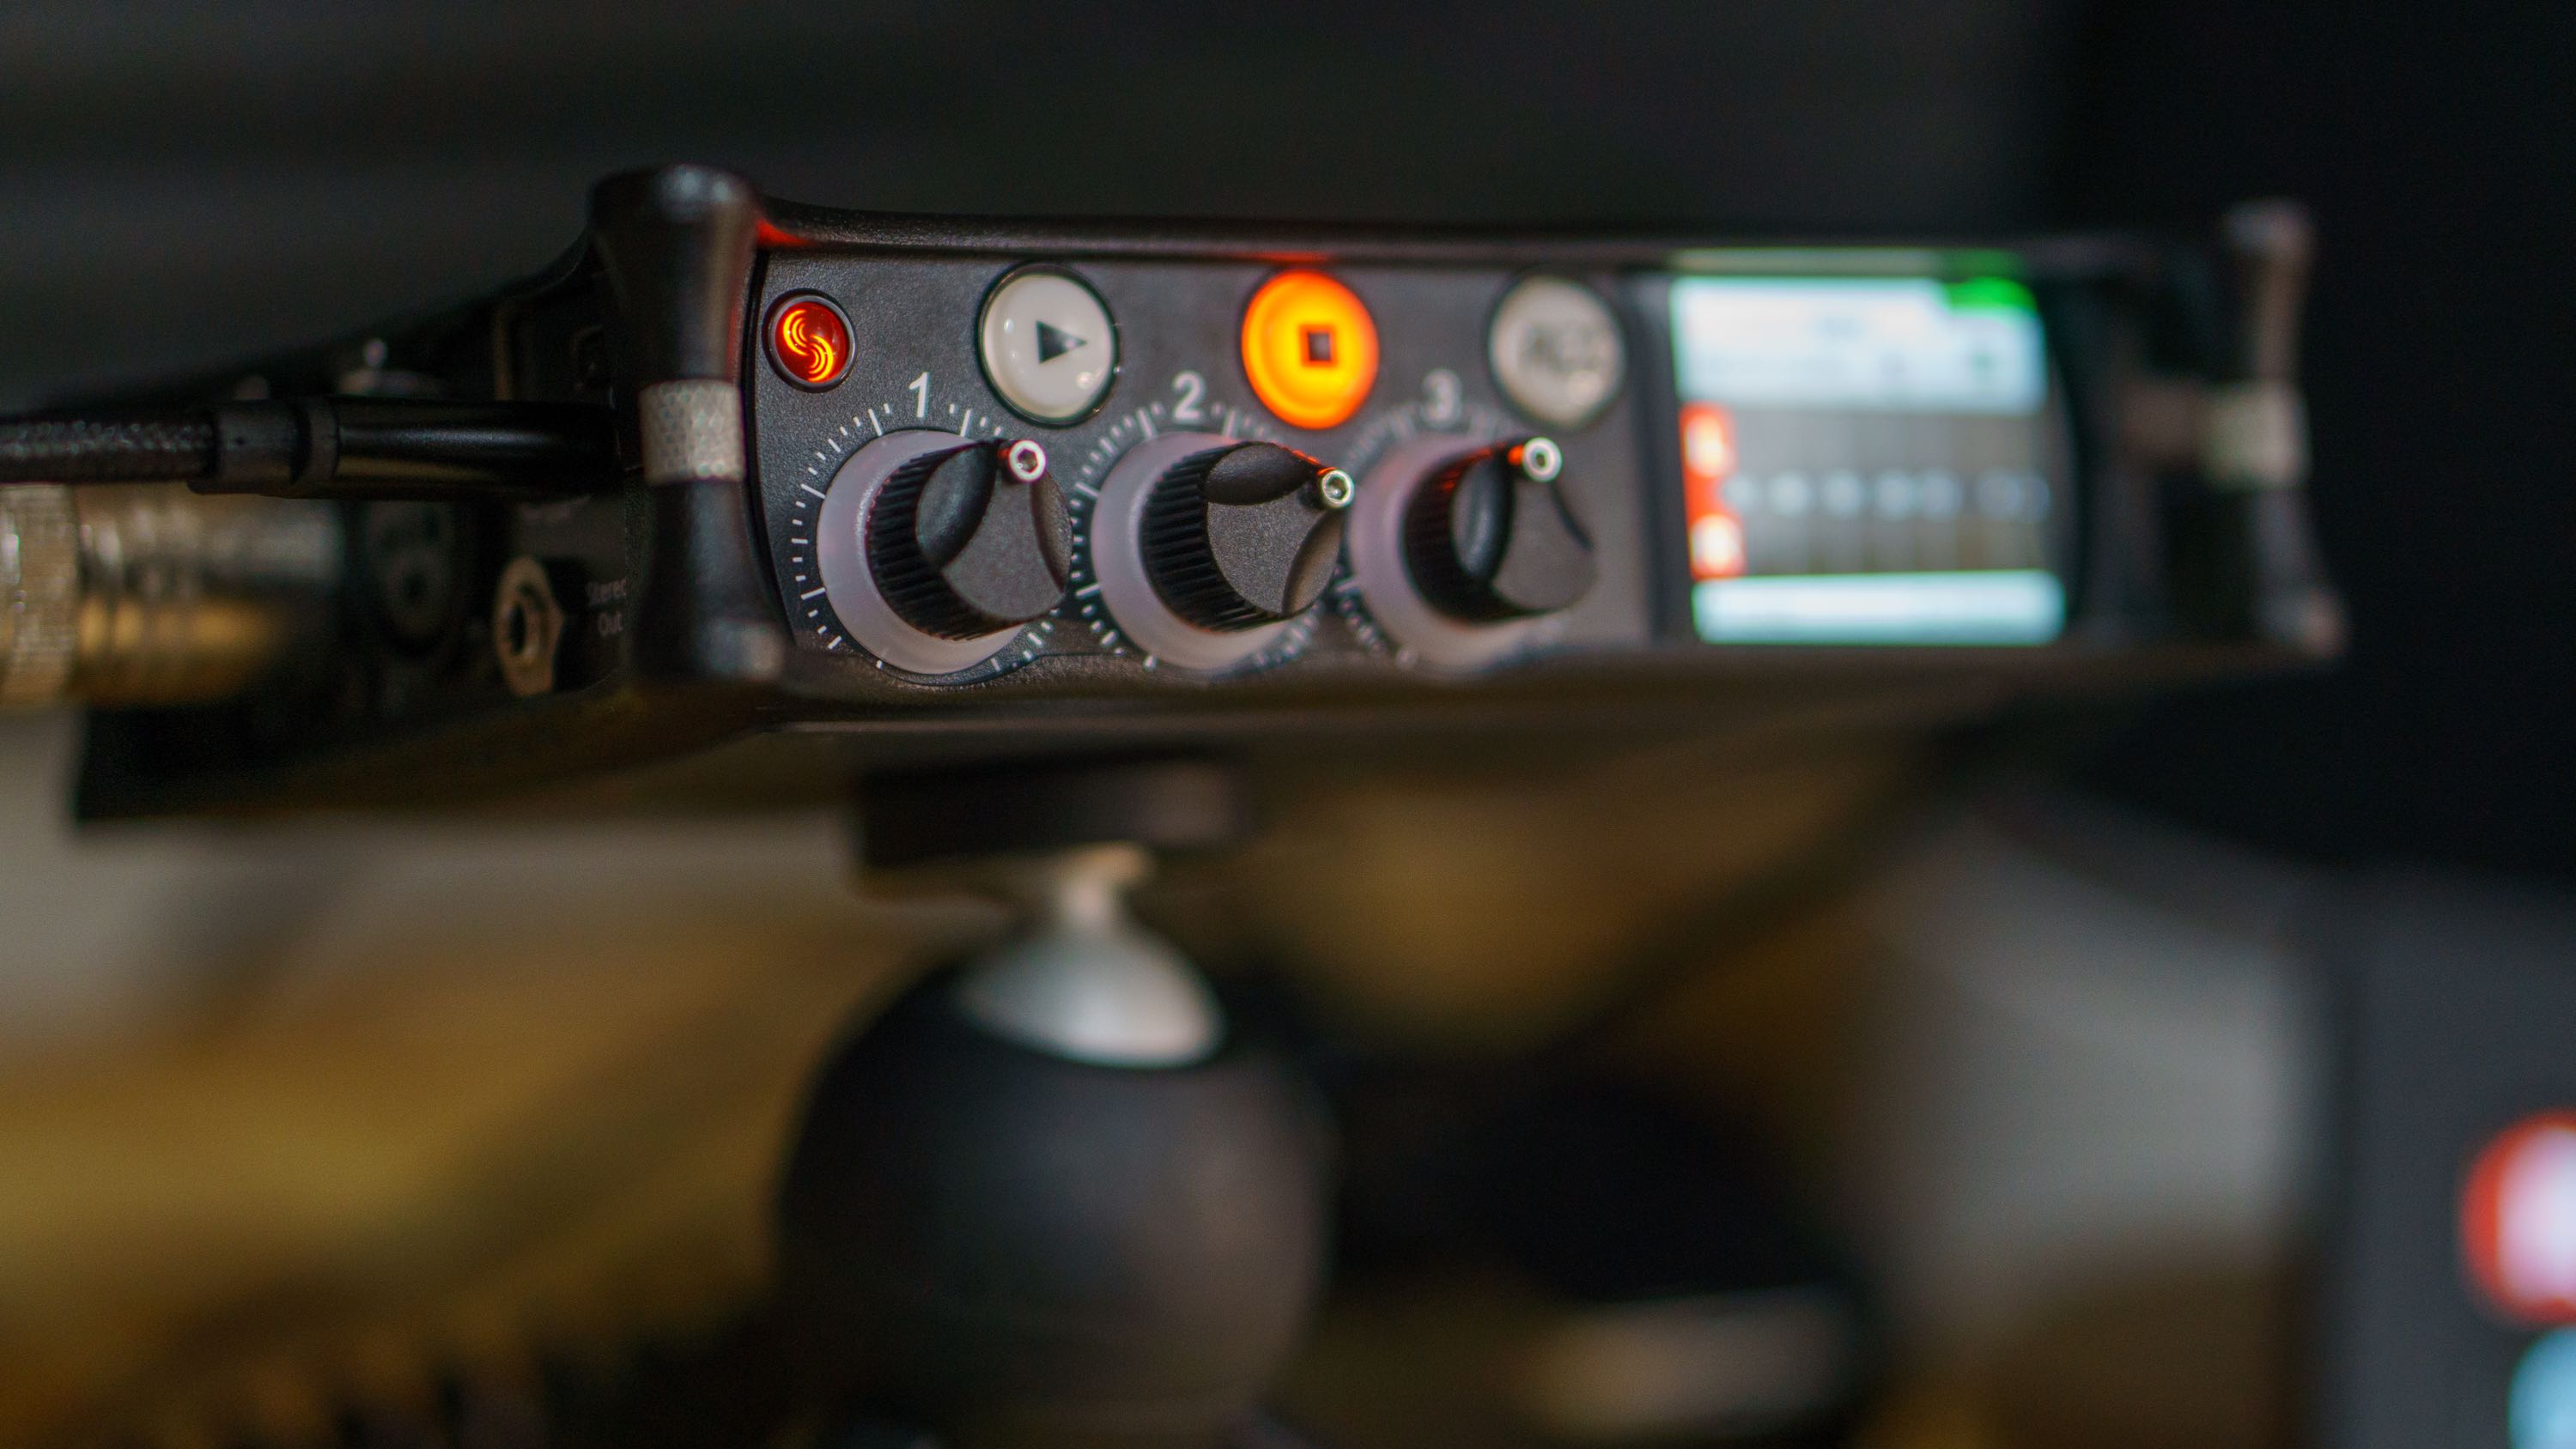
The MixPre-3 II is an incredibly versatile device, which makes it inherently complex. However, most of the complexity is tucked away in the device’s menu system, accessible from a tiny touchscreen on its front, and once it’s set up, you can ignore the complexity. In addition to the touchscreen, the face of the MixPre-3 II includes three satisfyingly metal knobs for each channel, plus play, stop, and record buttons. The left side of the MixPre-3 has two XLR microphone inputs, an on/off switch which is too hard to access, USB-A and USB-C ports, and a 3.5 mm stereo out jack. On the right is another XLR input, a 3.5 mm headphone jack, a 3.5 mm Aux/Mic In jack, a micro HDMI port that records codes from a connected camera, and a dial that serves as a volume control for the headphones and an alternate means of navigating the touchscreen UI. The back of the device houses a battery pack that can be used to power the MixPre, and behind it is a slot for an SD card to capture recordings.
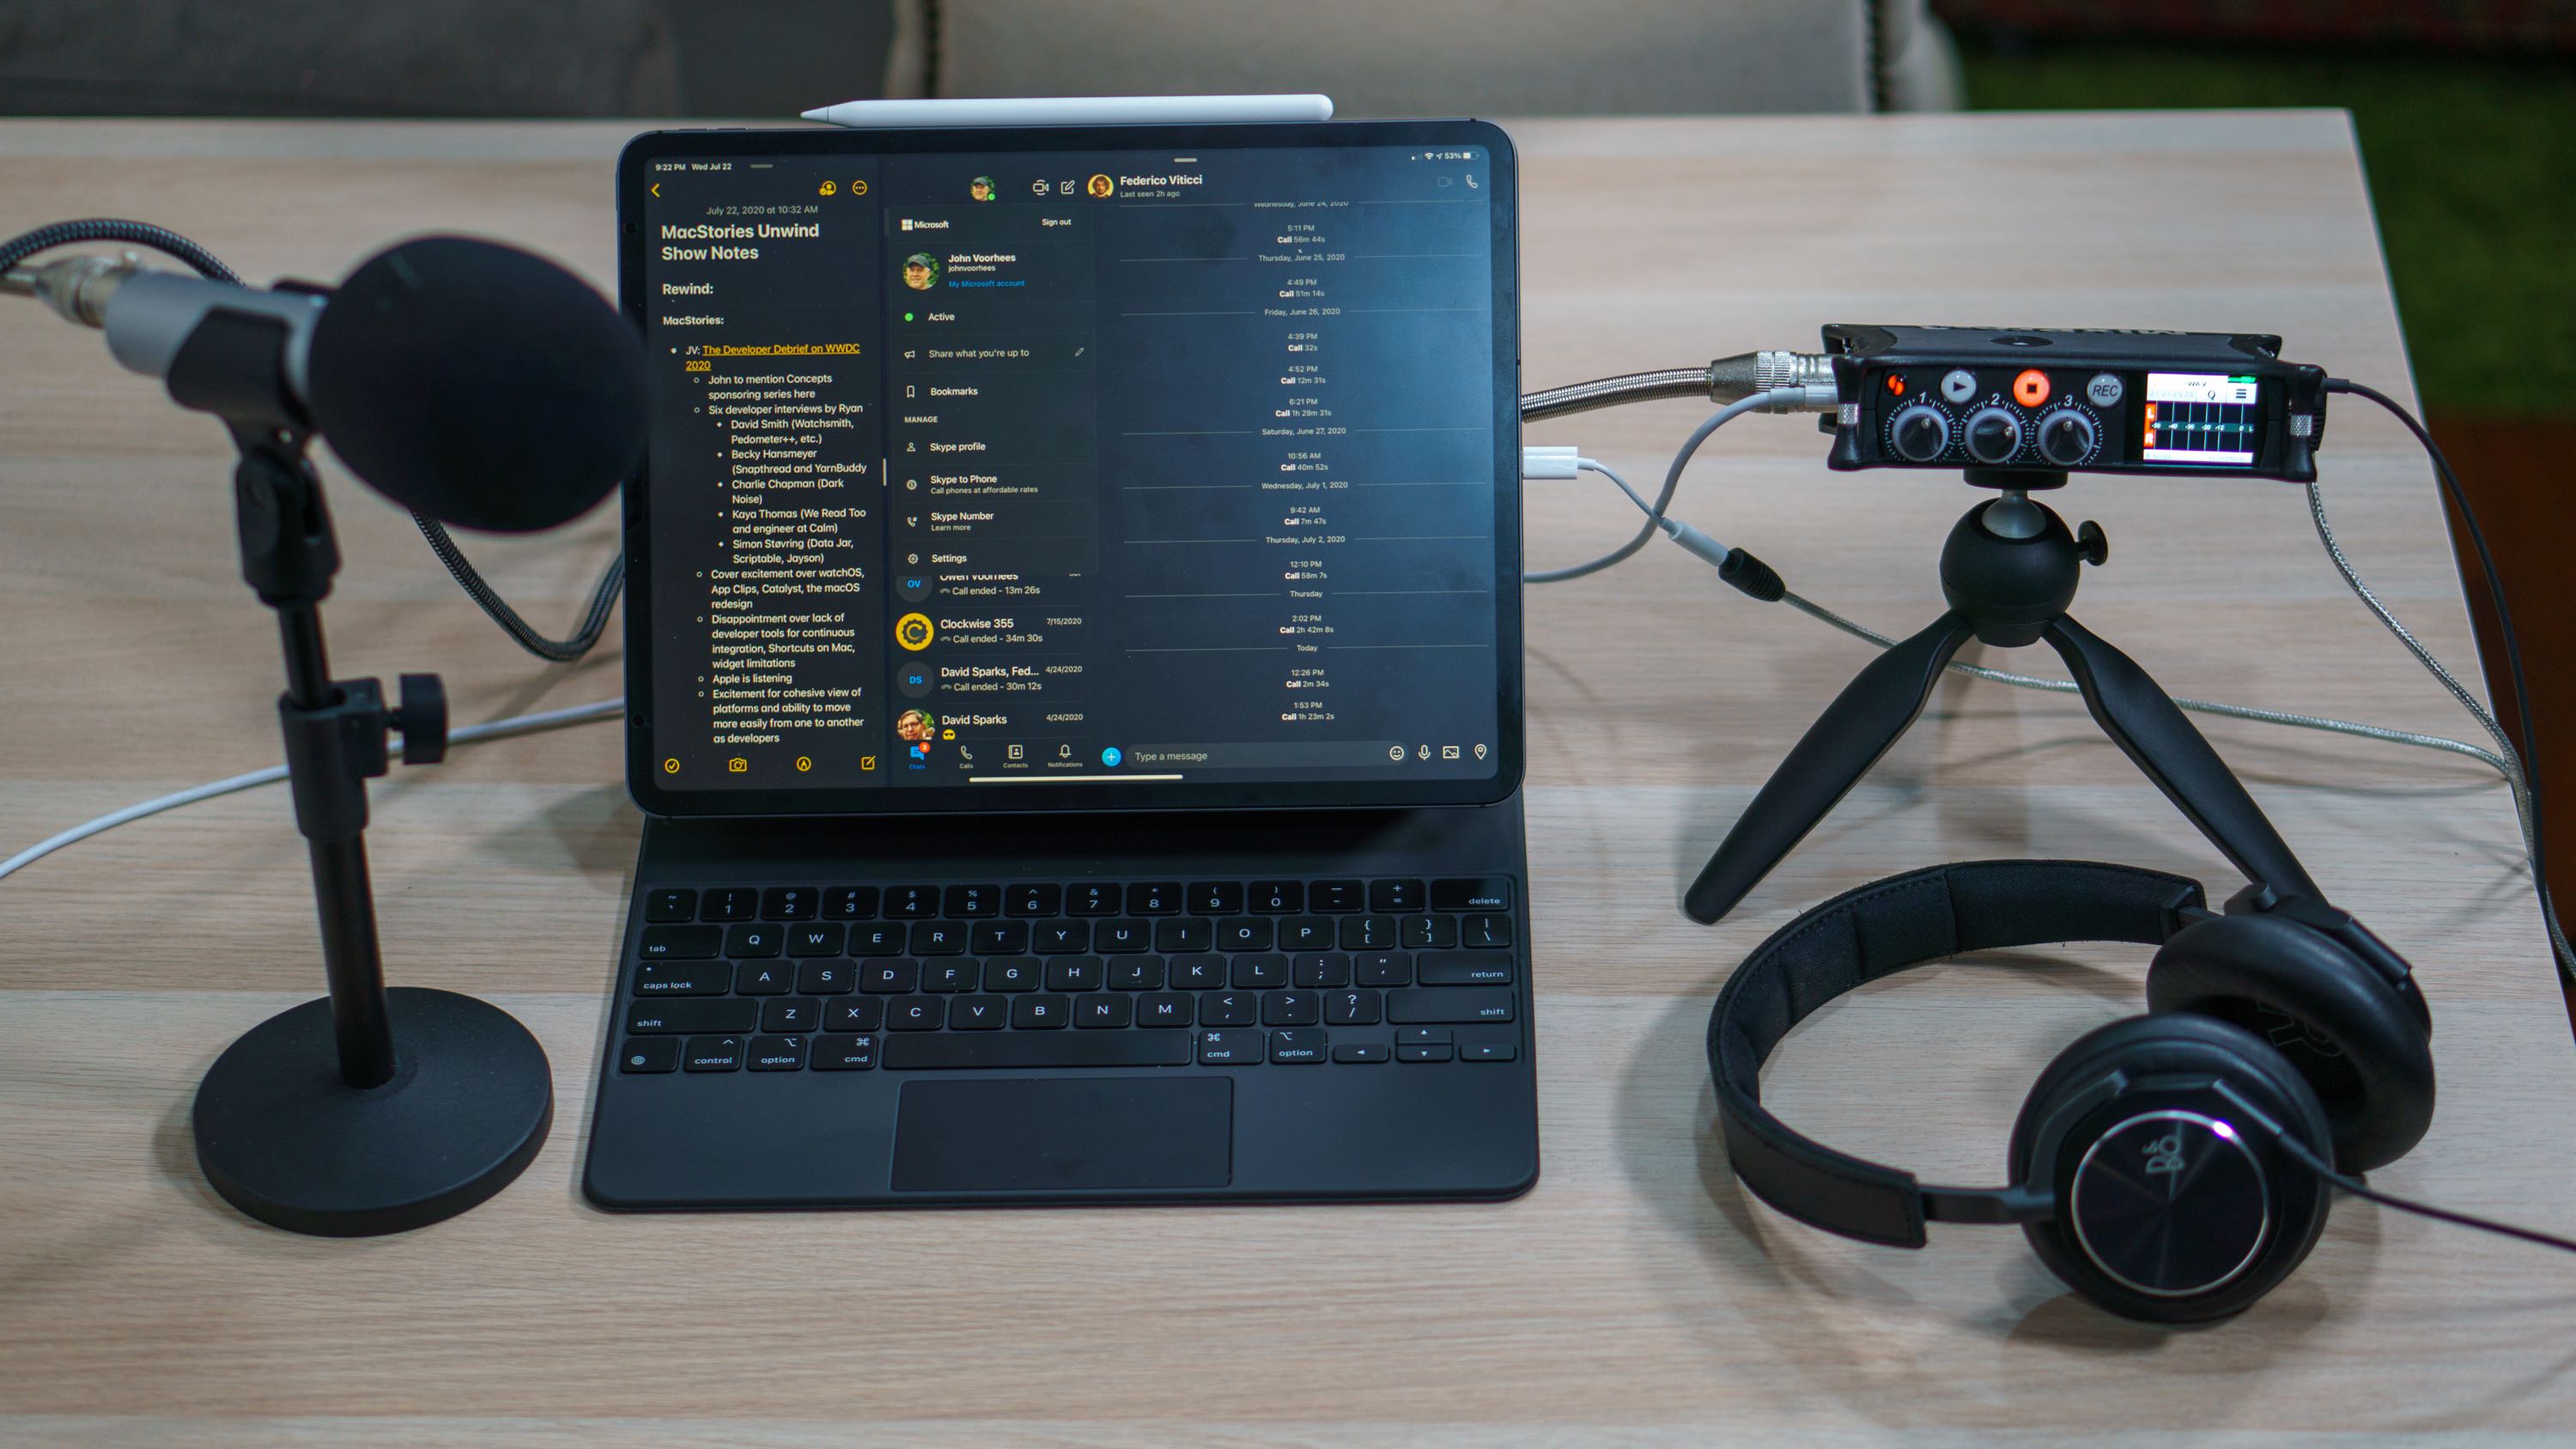
When the MixPre-3 II arrived, I immediately set it up using my Audio Technica ATR2100-USB microphone that I use when I travel, connecting an XLR cable to channel 1 on the MixPre. I grabbed some headphones, connected those, and tethered the MixPre to my iPad Pro using the USB-C to USB-C cable that came with it. What followed was several frustrating hours of experimentation.
The trouble was that, although I could record my audio locally to the SD card, the audio of the Skype call still played over my iPad’s speakers and used the iPad’s microphone. It was a perplexing problem because audio from other apps was properly routed over the USB-C cable.
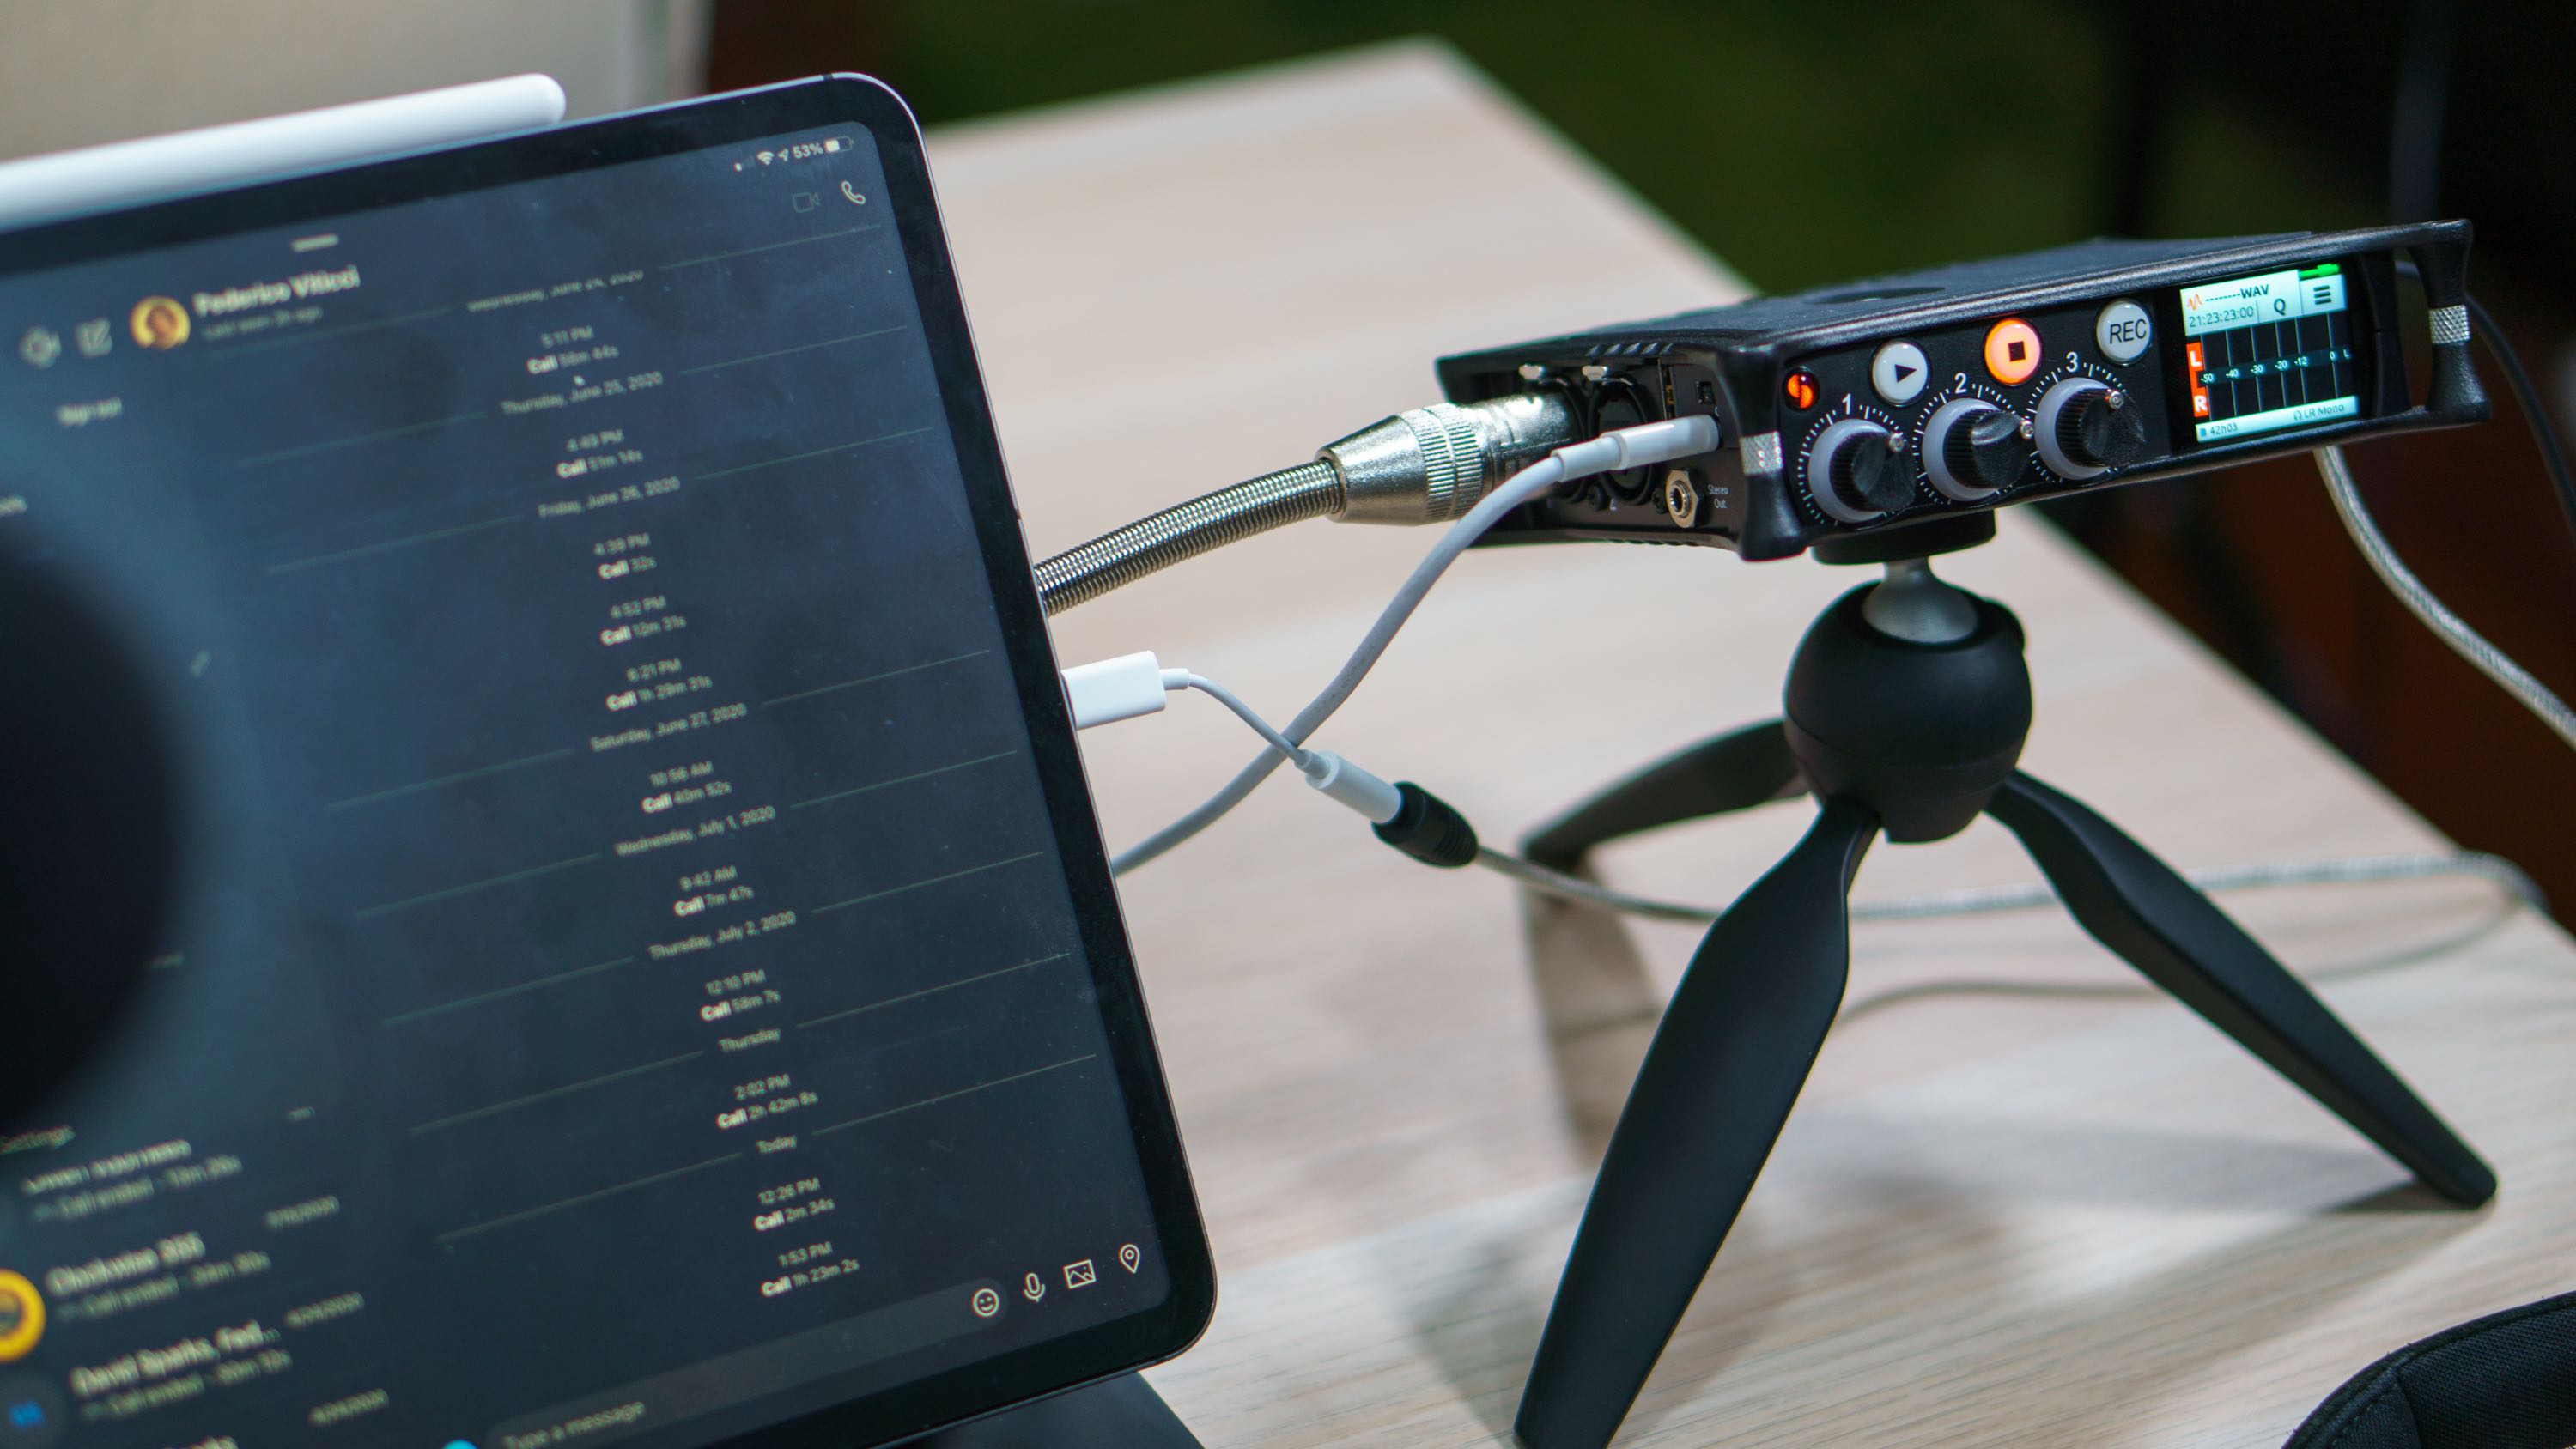
The solution for Skype was to route its audio from the USB-C port on the iPad Pro to the MixPre-3 II’s Aux/Mic In port.
The solution was to disconnect the USB-C cable from the iPad Pro and use the USB-C to 3.5 mm adapter Apple sells for wired headphones plus a 3.5 mm to 3.5 mm cable from the adapter to the Aux/Mic In jack on the MixPre-3. That properly routed the Skype call, including my voice, to my headphones. This solution comes with one pretty significant caveat. Although the audio is routed over the 3.5 mm cable, Skype still uses the internal iPad microphone. The sound quality of conducting a Skype call this way is acceptable. However, it means that if the local track recorded by your external microphone fails, your only fallback is a Skype call where you’ve been recorded over the iPad’s internal microphone, which will not sound as good as it would if your external microphone was used for the Skype call too. Whether this is a Skype, MixPre, or iPadOS limitation isn’t entirely clear, but it’s worth keeping in mind.
There are several ways to power the MixPre, including its USB-C port and the battery sled that attaches to the device’s back and can take AA batteries or Sony L-Mount batteries. The MixPre needs 7.5W to operate, so it can be powered by the iPad Pro’s USB-C port, which delivers the necessary power. However, because I’m using the iPad’s USB-C port to route audio to the MixPre, I’ve been powering the MixPre with a USB-C cable connected to a rechargeable battery pack or plugged into the wall with the AC adapter that comes with the MixPre.
The setup is nearly the same when I’m at my Mac, except in that mode, I attach the USB-C cable to my Mac mini. Because the Mac doesn’t have the same audio limitations as the iPad, I can use Skype’s Mac app to conduct the call and Audio Hijack to record my audio just as I’ve always done.
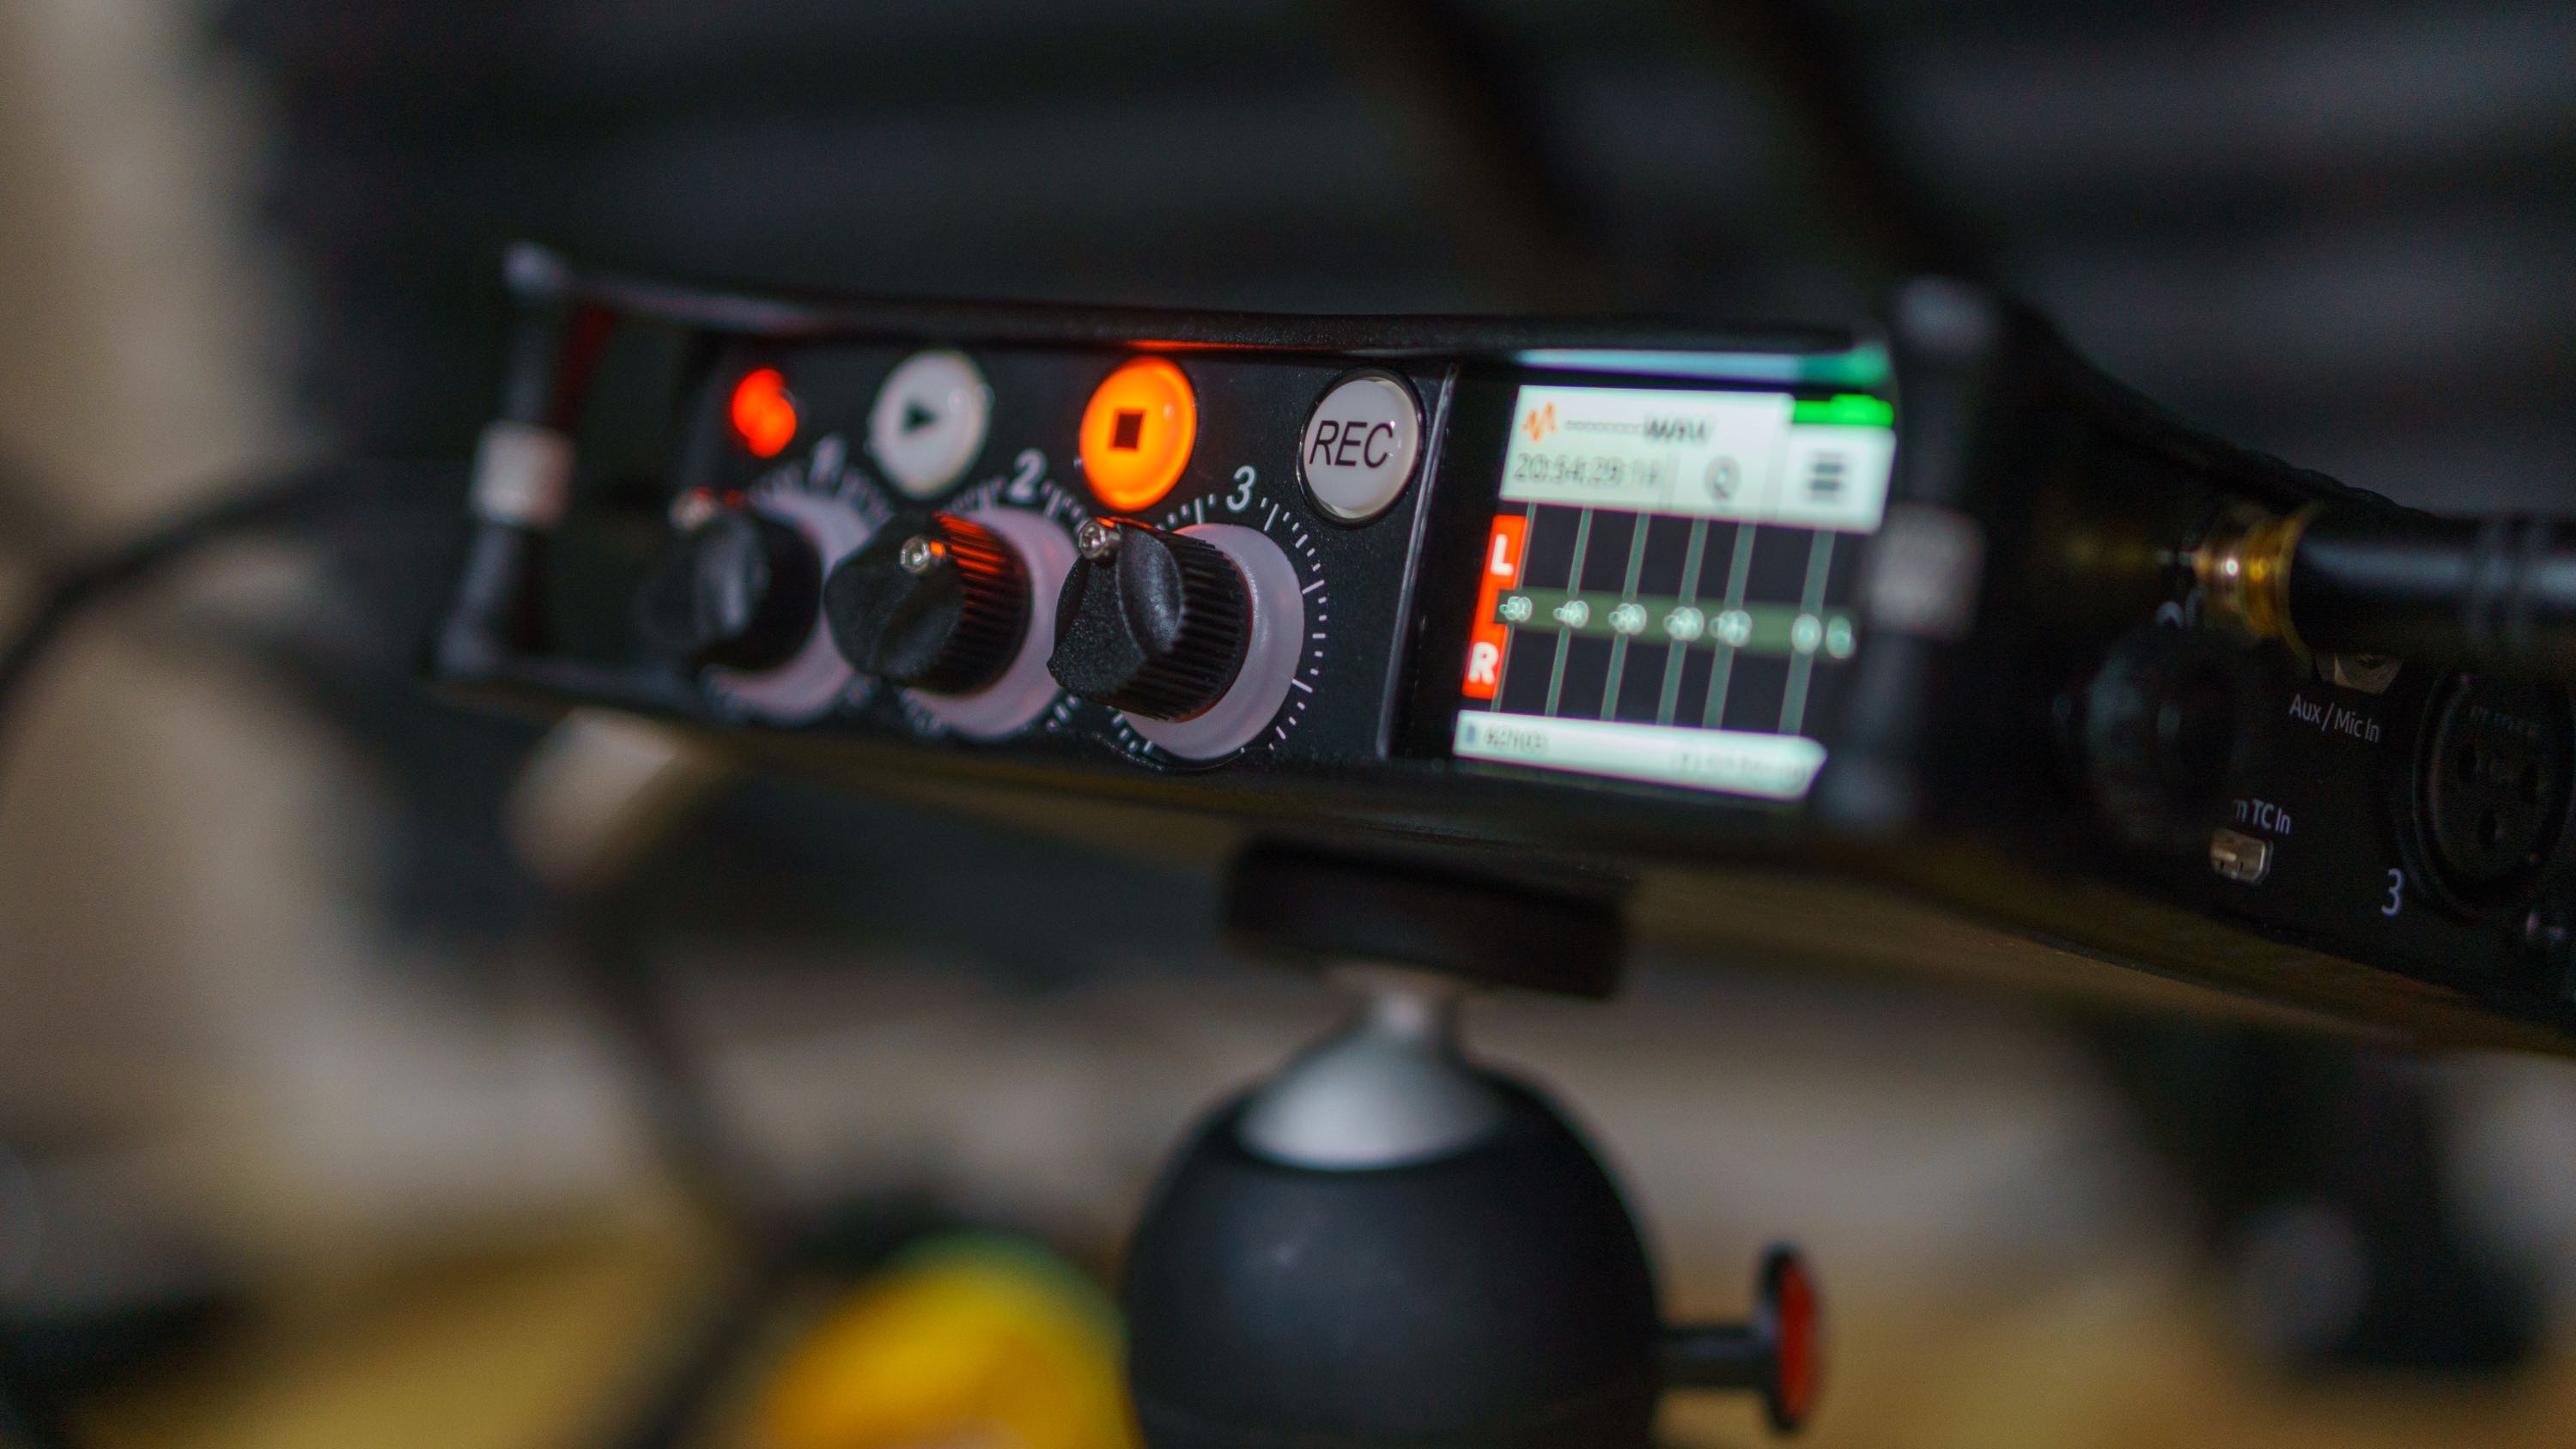
I have only recorded a couple of podcast episodes with this setup so far, but I like it a lot already. The hardware is solidly built, and the touchscreen is bright, showing off each track’s levels as I record. Another nice touch is that the channel knobs are ringed with LEDs too, which provide a second visual indicator of your levels.
However, one of the biggest advantages is just how little needs to be changed to move from the Mac to my iPad. The USB-C cable needs to be connected to a power source, and I need to add the 3.5 mm cable to the Aux/Mic In jack, but that’s it.
Because the MixPre handles three separate channels, the adjustments I need to make there are minimal too. I dedicated channel 1 to my microphone, which needs a couple of tweaks when switching between my Shure Beta 87A and Audio Technica ATR2100-USB microphones. Channel 2 handles audio coming into the Aux/Mic In jack when I’m recording on my iPad, and channel 3 handles audio coming over USB-C when I’m working on my Mac. Whichever channel I’m not using can be turned off. Better yet, I can save my Mac and iPad settings as tiny files that sit on my SD card, where they can be reinstalled if things get messed up.
The hybrid solution developed by Snell and Federico took advantage of hardware they already owned, which is perfectly understandable, but purpose-built hardware like the MixPre has several advantages. Two are size and weight, which is important if you’re using an iPad Pro to record on the go. The USBPre 2 is 180 x 100 x 43 mm in size and weighs 500 grams. The MixPre-3 II is 144 x 110 x 36 mm and the same weight as the USBPre 2, but about 33% smaller by volume. To provide additional context, the MixPre has about the same footprint as a Magic Trackpad and thickness of an Apple TV. When you add the Zoom H6 to the mix, which is 77.8 x 152.8 x 47.8 mm and 280 grams, the entire package becomes substantially bigger and heavier than the MixPre alone.
Another issue is cost. The MixPre-3 II isn’t cheap at $680. However, it’s nearly half the price of a USBPre 2 and Zoom H6 together. You’re still paying a premium price for pro-level gear, but in the world of high-end audio equipment of this quality and versatility, $680 is a fair price.
I’ve discovered a few other advantages to the MixPre that I didn’t anticipate too. The first is that the device records poly WAV files to its SD card. That means it can record multiple channels to a single WAV file that you can later split into separate tracks for editing. This isn’t limited to the usual left and right channels used for stereo sound. I can record the full Skype audio, my local audio, and a track that isolates Federico’s audio simultaneously in both configurations. Federico’s audio is still coming over Skype, so the quality isn’t as good as his locally recorded track. However, if his recording ever fails, having a separate track with just his voice will be an advantage when editing.
When I record on my Mac, I record to its internal SSD using Audio Hijack. What the MixPre gives me that I didn’t have with the Tascam US-2x2 that I used before is the ability to record on an SD card too. What’s nice about that is it’s a backup that’s completely separate from my Mac’s hardware in the event the Mac catastrophically fails.
The backup situation with the iPad isn’t quite as robust, but it’s better than I expected. The MixPre has a USB-A port to which you can attach a small USB thumb drive or even a powered external drive.1 As soon as you stop recording on the MixPre, the record button begins to flash, indicating that the file saved to the SD card is being automatically backed up to the thumb drive, while the progress is shown on the MixPre’s display. Having a second copy even if it’s not created simultaneously as you record provides additional protection. Because it’s automatic, you won’t forget to do it either, provided you leave the thumb drive plugged into the MixPre.
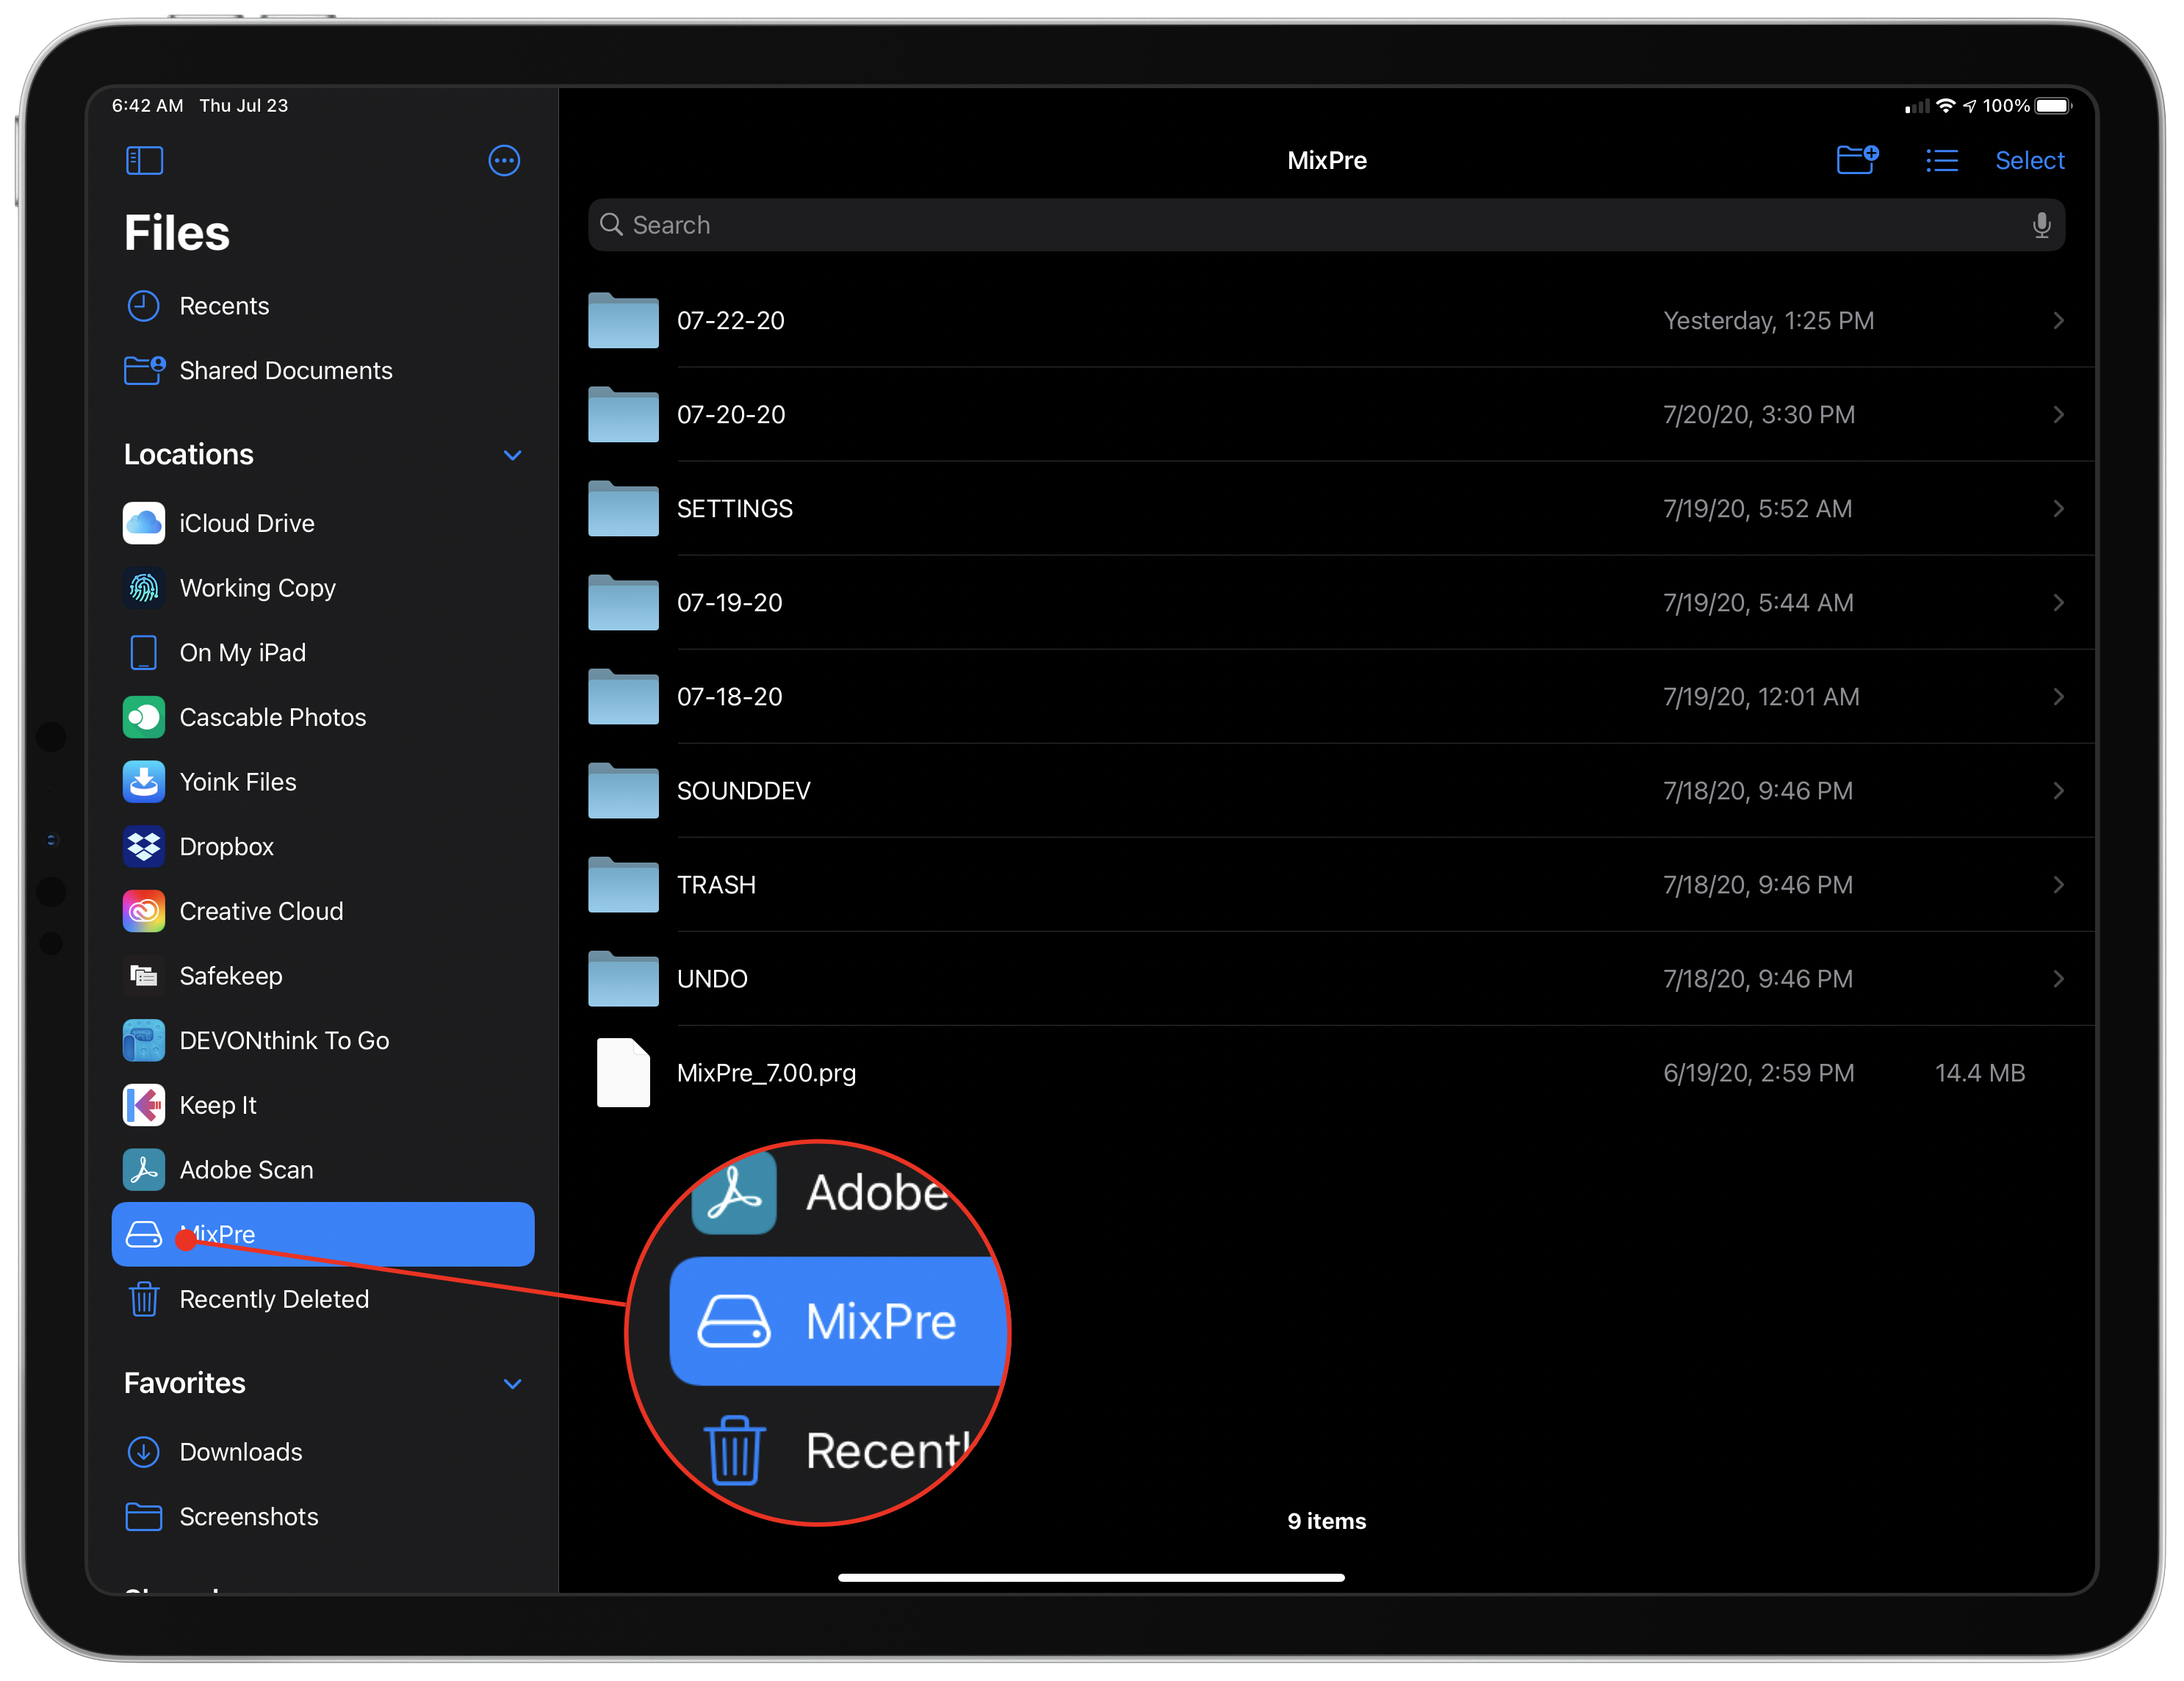
When I’m finished recording, I can switch the USB-C cable from powering the MixPre-3 II to the iPad Pro’s USB-C port for transferring files, eliminating the need for an SD card reader.
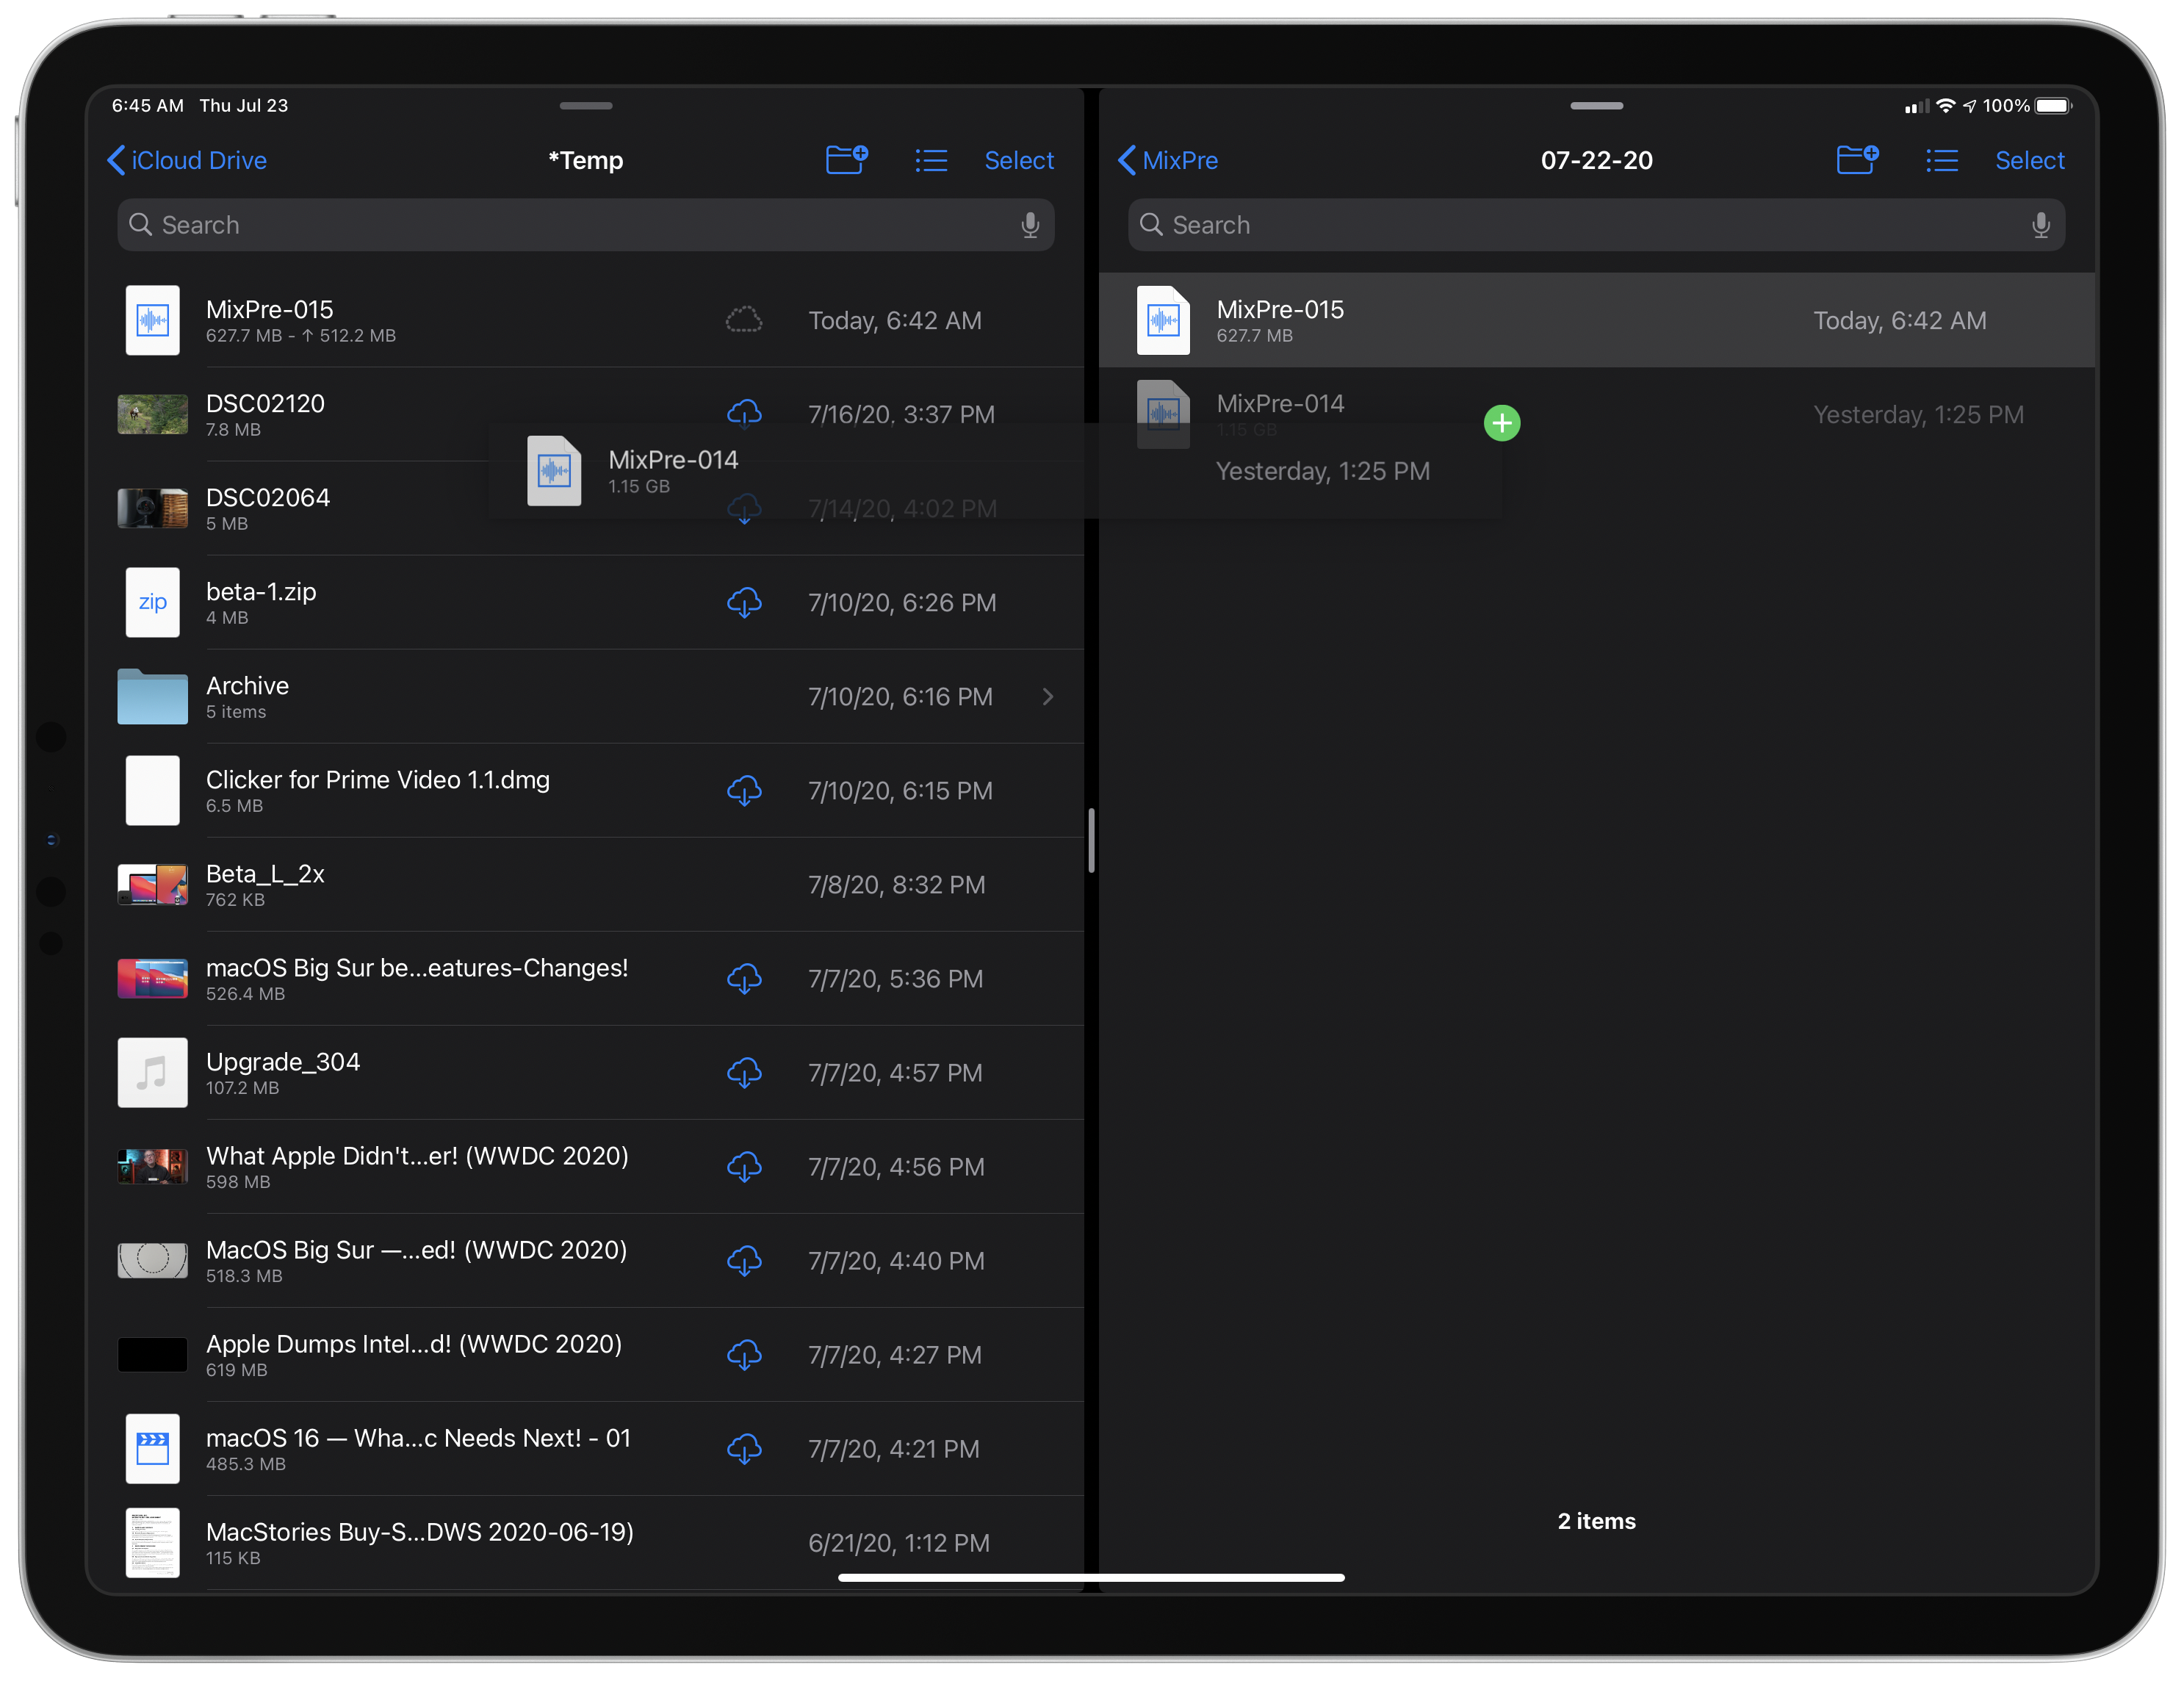
I also love that the MixPre can act as a mass storage device. From the System menu on the device, tapping File Transfer switches the MixPre to storage mode. In this mode, moving the USB-C cable from powering the MixPre to plugged into the iPad Pro is a quick way to copy files from the SD card to the iPad without needing to open the battery compartment and remove the SD card. It’s both a convenience that avoids the need for an SD card reader and another way to quickly offload recordings for safekeeping in the cloud and locally on your iPad.
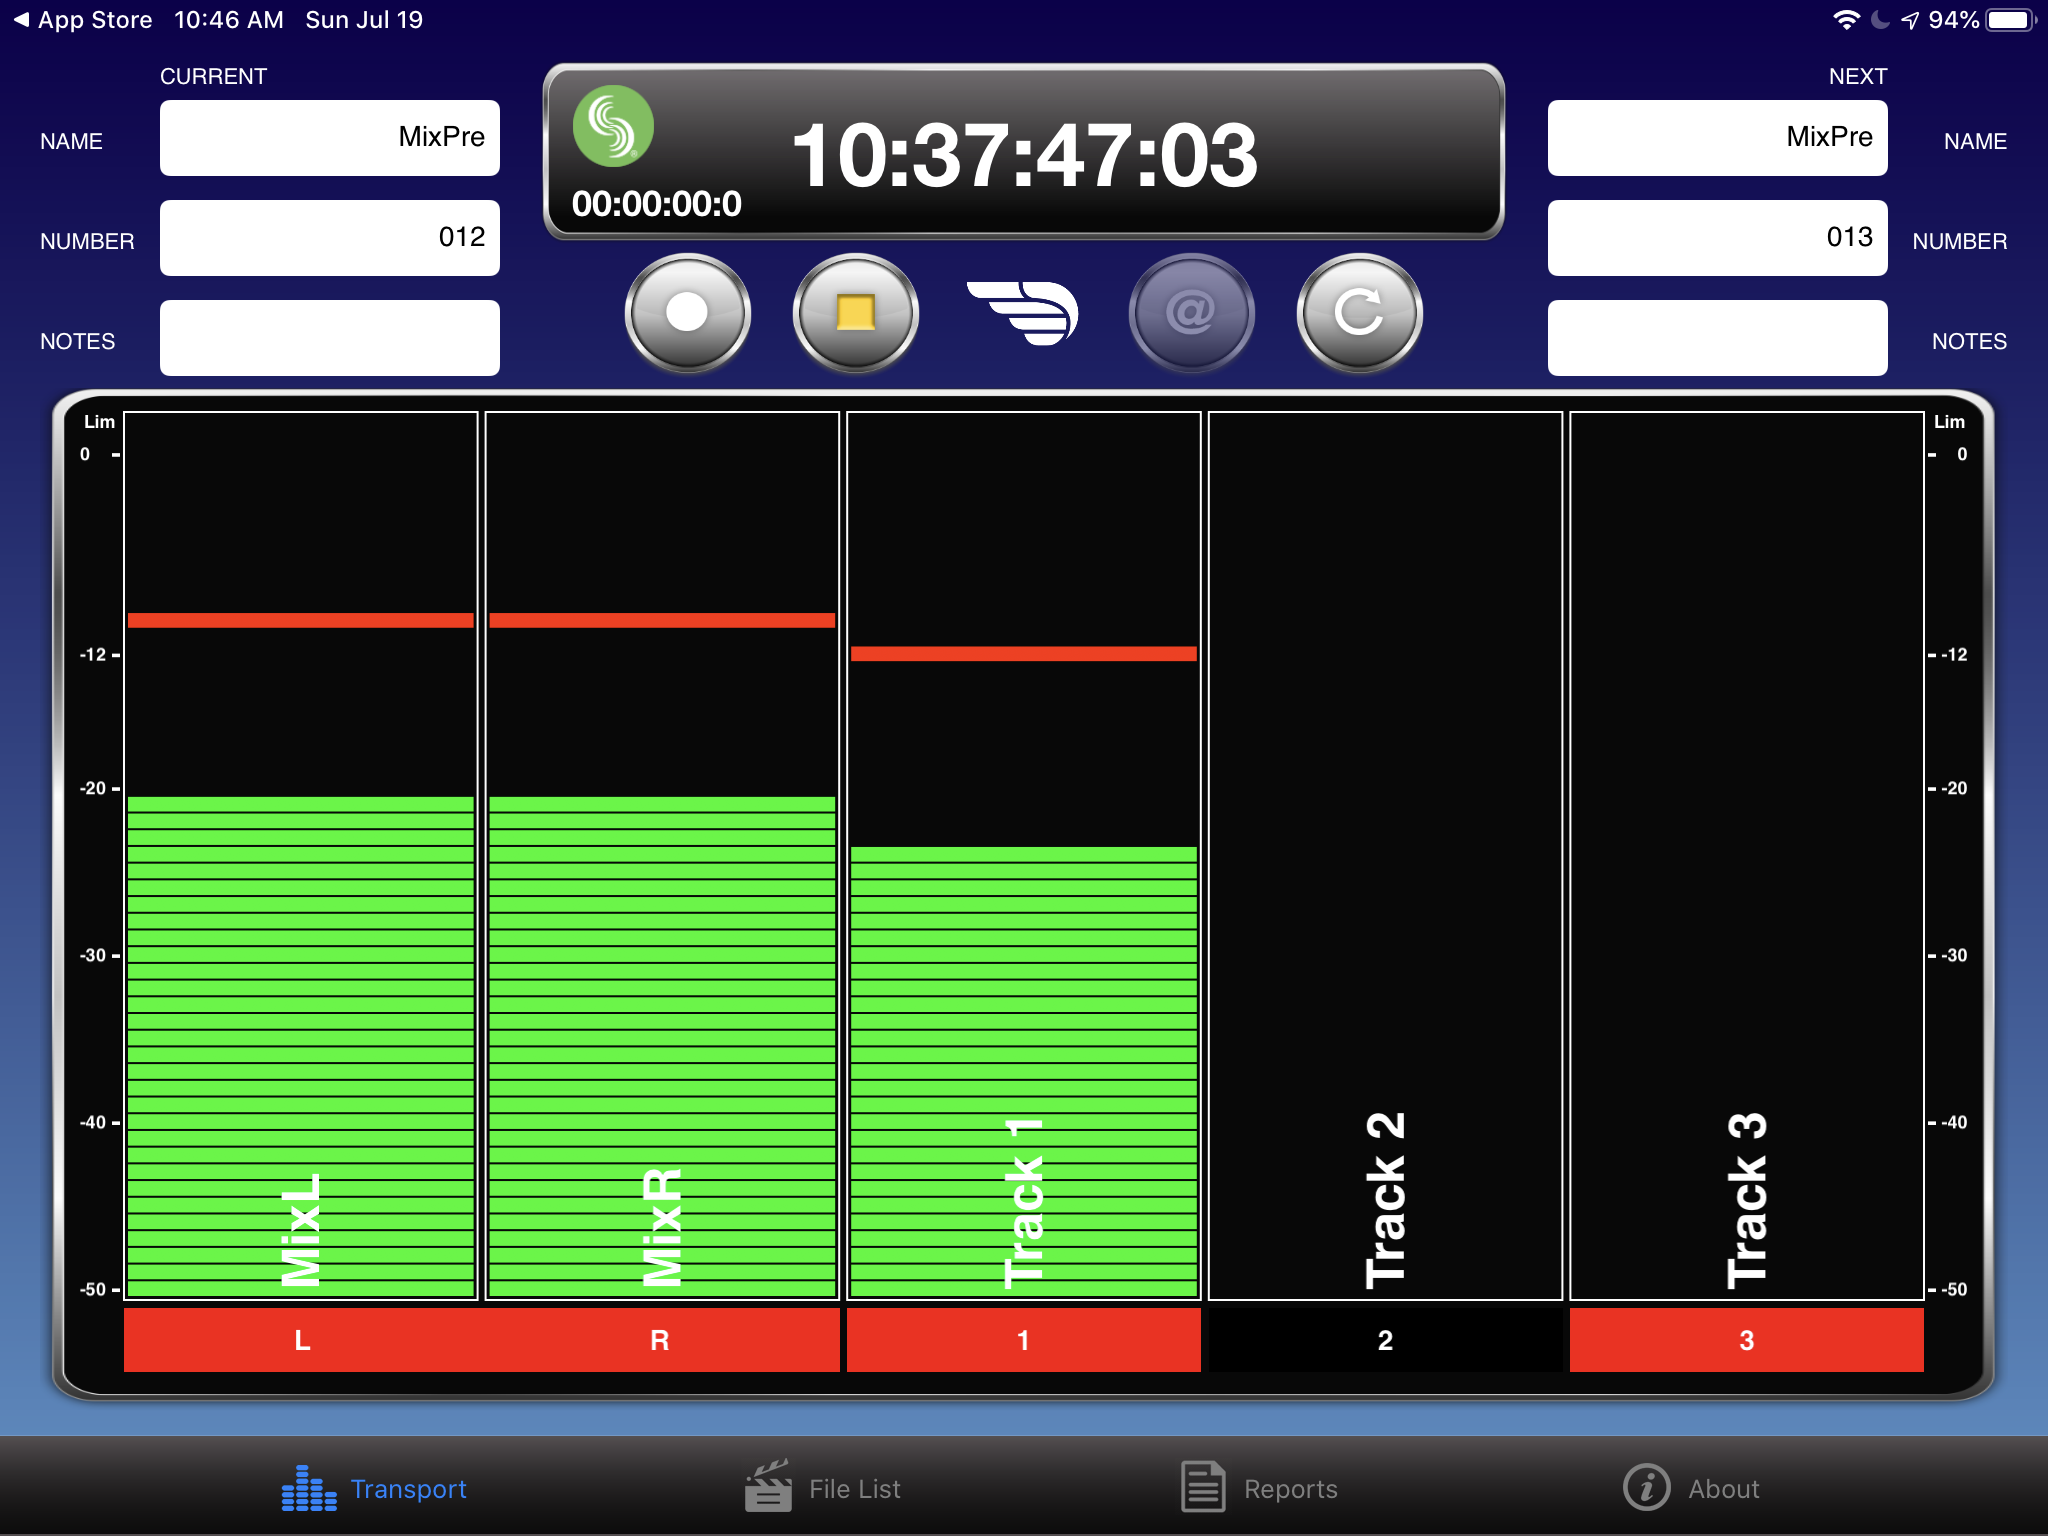
Sound Devices also makes an iOS and iPadOS app called Wingman that works with the MixPre using Bluetooth. The app is in serious need of some design love, but it works well. The app allows me to start and stop recordings, monitor levels, edit file metadata, which is much nicer with the iOS keyboard than the MixPre’s touchscreen, and manage recordings. Especially with a new device like this, I’ve appreciated the ability to prop up my iPad mini nearby while keeping an eye on levels and making small adjustments.
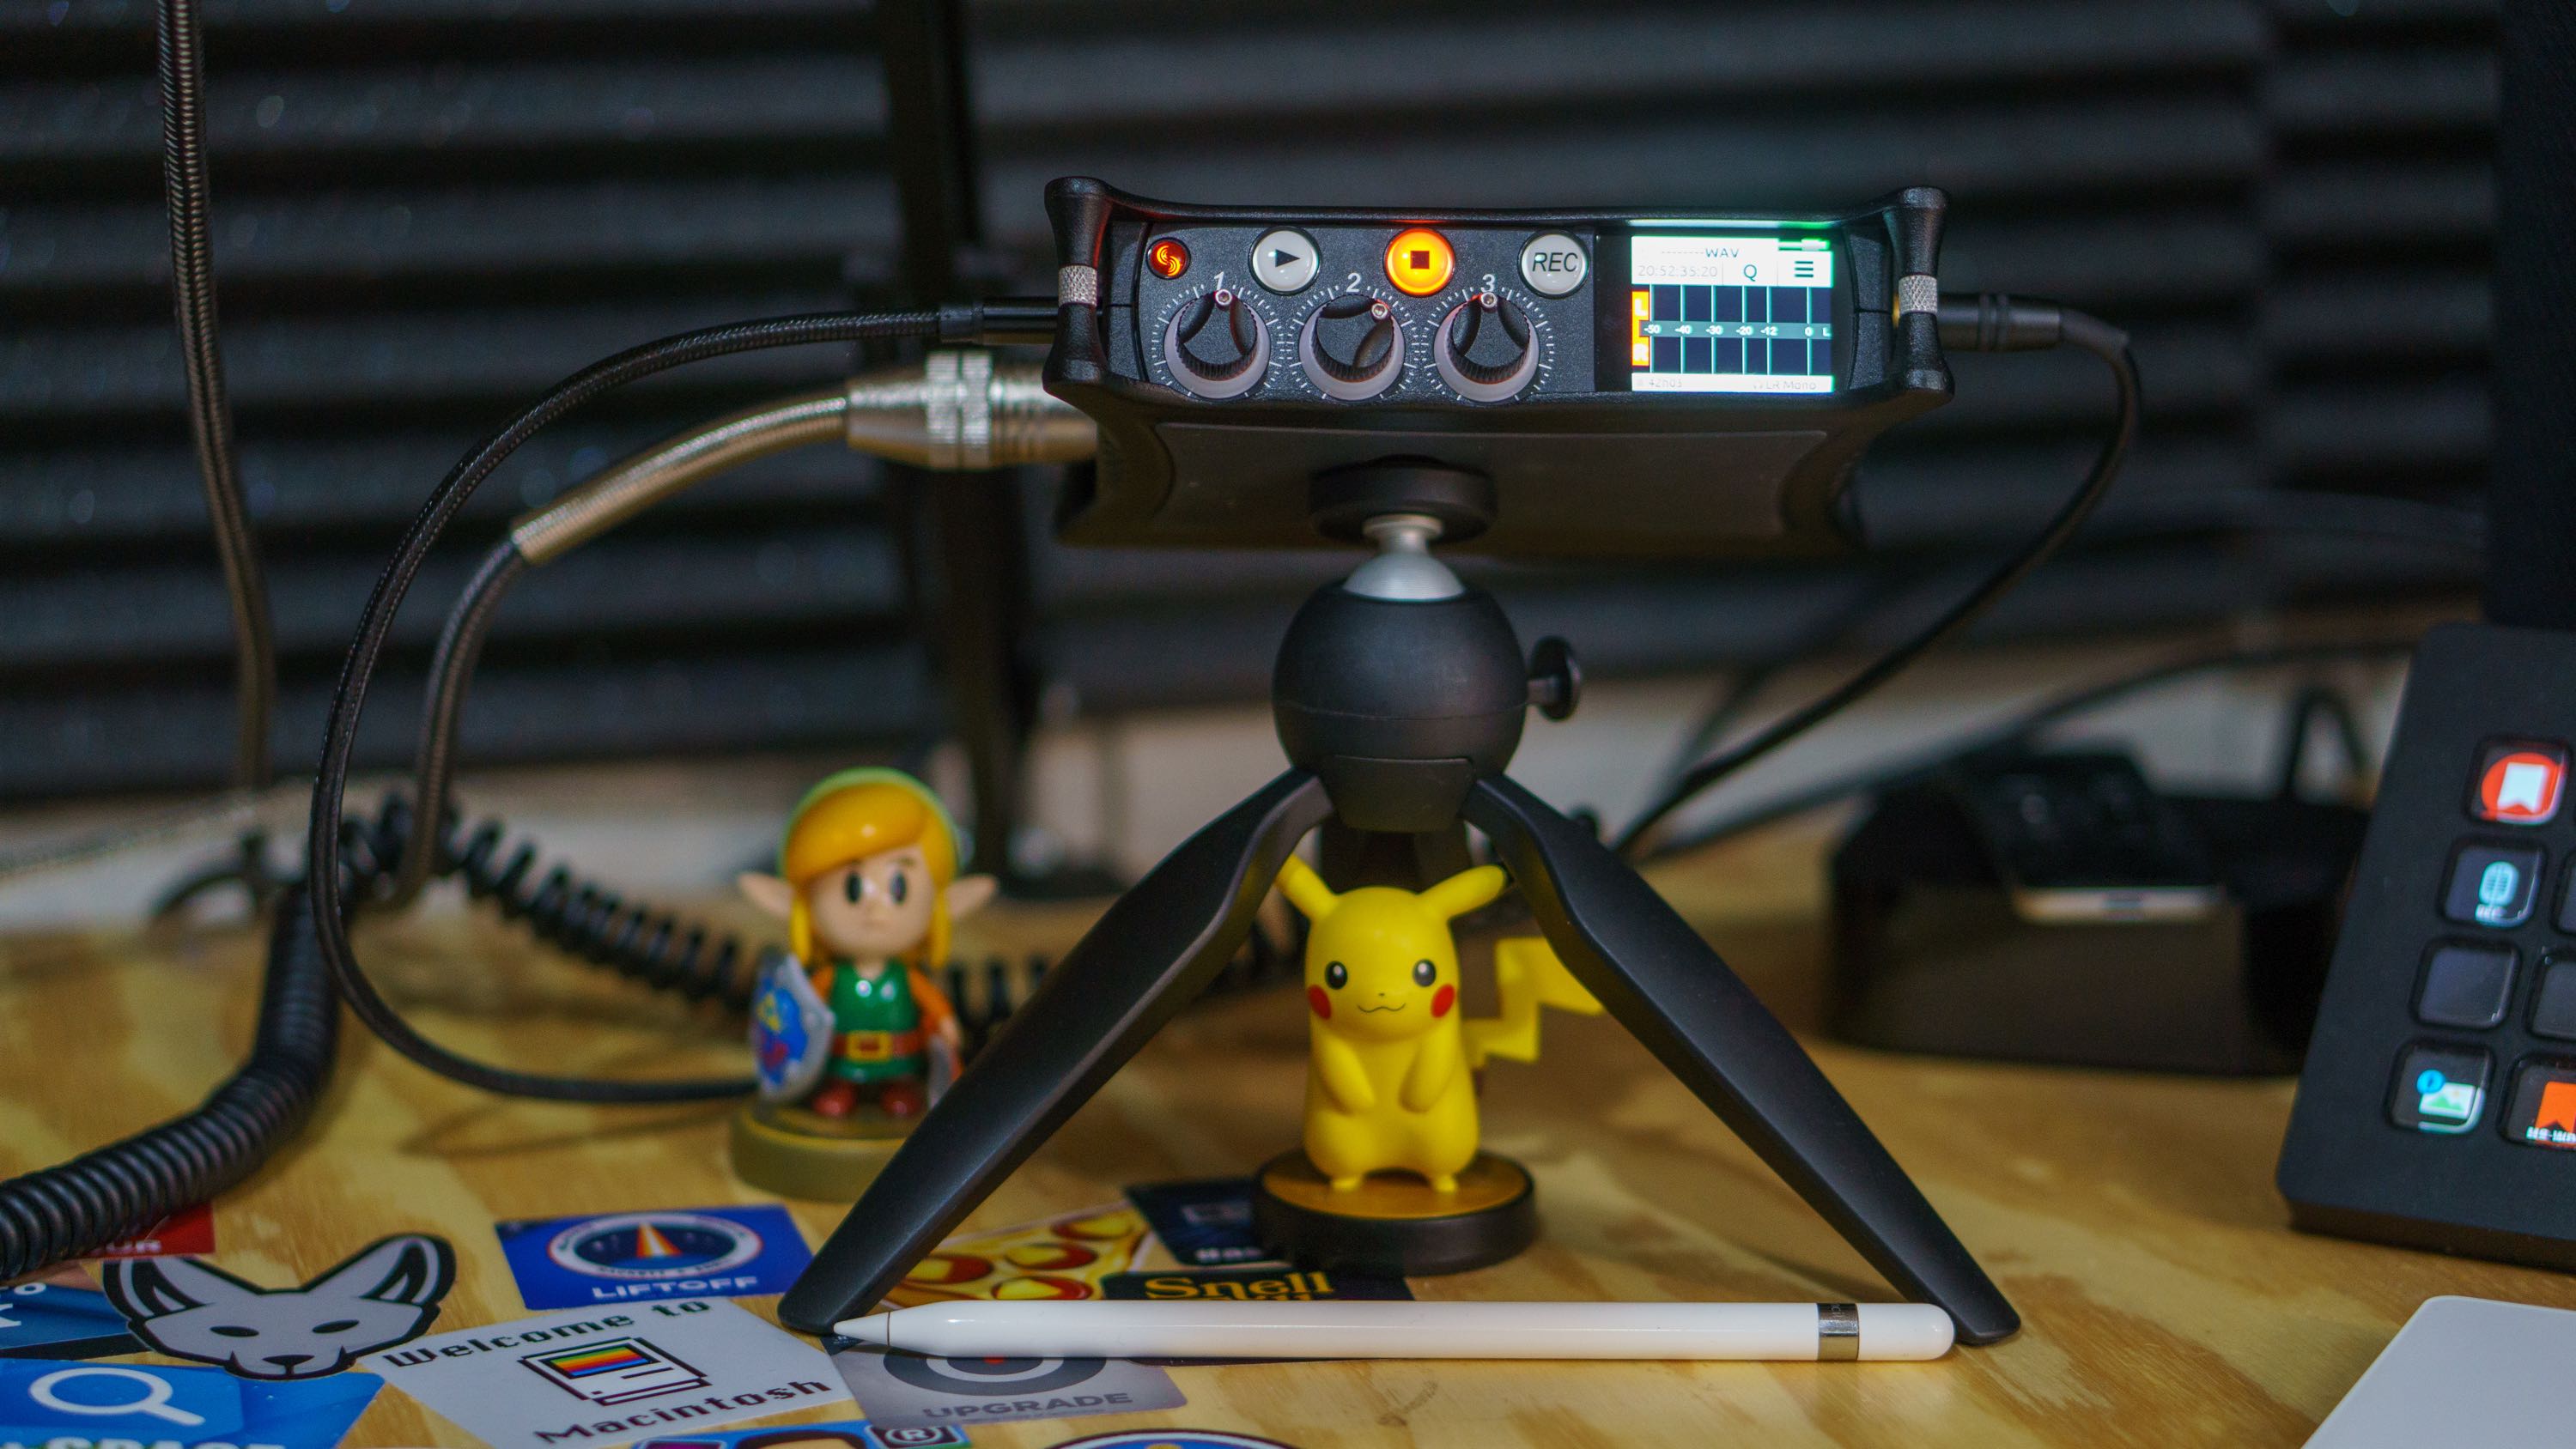
It’s fairly common for field recorders, but the MixPre comes with tripod connection points on the unit’s top and bottom too. That allows you to connect a camera when you’re shooting video and using an external microphone. However, simpler alternatives work too. I’m using a small tabletop tripod by Manfrotto to elevate the MixPre off my desk and tilt it up a little, making the display easier to read and creating a shelter for Pikachu.
With a hardware solution to recording locally and monitoring a Skype call, the only other piece of the iPad Pro podcasting puzzle is editing, which is straightforward. My editing process involves file preprocessing for loudness matching and cleaning up audio. I use Mac tools for that step of the process, but they are easily accessed by saving remotely-recorded tracks to iCloud Drive and then opening them by accessing my Mac mini from anywhere with Screens. I wouldn’t want to edit that way, but preprocessing requires me to open the files and click only a few buttons to start the processing.
For editing on the go, I’ve been experimenting with Ferrite. I haven’t produced a released episode with Ferrite yet, but I’ve experimented with it enough to be comfortable that I can. It took a while to find my way around the app. Still, between Jason Snell’s excellent video demonstrating how he edits using the Apple Pencil, the app’s terrific help system, and finding the keyboard shortcuts I needed, Ferrite is ultimately easier to use than Logic Pro X. I like Logic a lot, but it does so much more than the subset of tools I use that Ferrite is a refreshing change. I just wish it existed on the Mac too, so I could edit in similar ways on the iPad Pro and Mac.
I started podcasting in 2015 and used a Tascam USB 2x2 for the last four years. It has served me well, but it was never a device that was designed for travel. The Tascam is just a little too big for that. When I traveled, I used a Zoom H5 field recorder, but I didn’t use the Zoom regularly, which meant I always had to refresh my memory on how to use it before a trip. The Zoom’s monochrome display is also difficult to read compared to the MixPre.
In contrast, I’ll use the MixPre to record 2-3 shows per week, regardless of whether I’m in front of my Mac. That means its menus and settings will become second nature quickly, making recording on my iPad Pro just as effortless and comfortable. That alone makes the MixPre-3 II worth its price to me. The MixPre-3 II liberates podcast recording from a single device, allowing me to choose how I want to record instead of having how I work dictated by the task at hand.
Still, I don’t expect to start recording our shows all over my house or in the backyard. There remains an advantage to recording in a controlled environment sitting in front of my 27-inch display. That isn’t going to change. The point is not to escape from the Mac’s clutches; it’s freeing me up to choose how I work and providing more options when recording at my Mac isn’t possible.
If you’d asked me a month ago why my podcasting setup and workflow was the way it was, my answer wouldn’t have been very far from “Because that’s how I’ve always done it.” Fortunately, my awkward recording setup while vacationing rekindled my quest for a device-independent workflow that started last year.
The difficulty and expense of solving a problem to work around an iPadOS limitation show that Apple still has work to do to support creative professionals on the iPad. For many people, the MixPre-3 II is probably not worth the cost. But for me, the MixPre is worth it because podcasting is a big part of the work I do each week, and I was no longer willing to wait for a software solution.
Workarounds are inherently frustrating. I spent several hours experimenting and studying Sound Devices’ documentation before I was content that the MixPre-3 II would work the way I wanted. I expect Apple will eventually get to iPadOS limitations like the inability to record locally while conducting a VoIP call. After all, it’s the sort of involved production workflow the company seems to want the iPad to be able to address. Until then, though, the MixPre-3 II is an excellent solution to recording podcasts on an iPad Pro if you record the way we do here at MacStories.
- Keyboards and audio control surfaces can also be connected to the MixPre’s USB-A port. ↩︎


