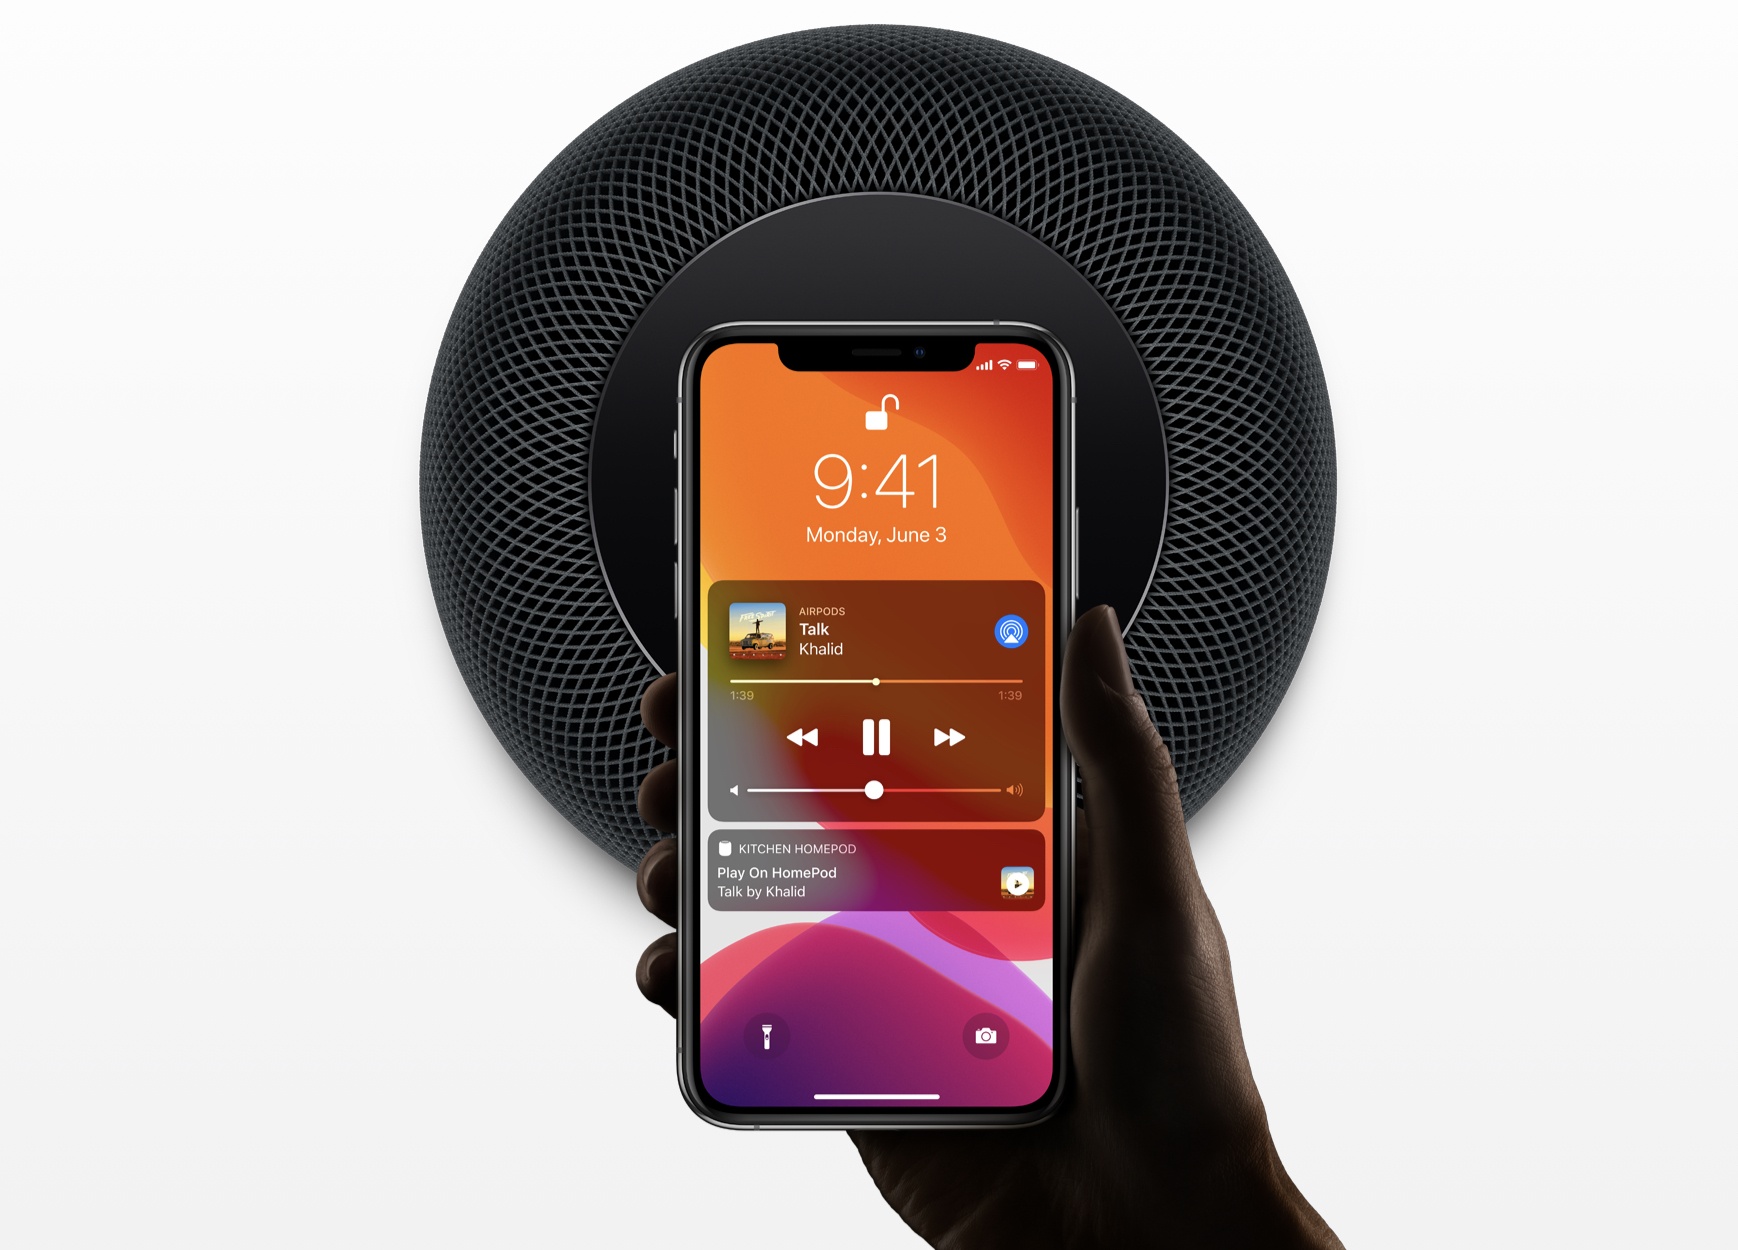
Apple’s audio products – especially AirPods and AirPods Pro – are becoming major players in the company’s product ecosystem, and as a result it’s no surprise that new features for these products were announced at WWDC. Easily my favorite audio announcement was automatic switching between devices, but there’s a lot of other great audio news too: spatial audio on AirPods Pro, third-party music services on HomePod, audio sharing on tvOS, headphone accommodations, and more.
Posts tagged with "AirPods"
Apple Audio: AirPods Receive Automatic Switching, Spatial Audio on AirPods Pro, and HomePod Integrates with Third-Party Music Services
How I Modded the Silicone Tips of AirPods Pro with a Memory Foam Layer
I love my AirPods Pro and, ever since I bought them last October, I’ve been taking advantage of their noise cancellation technology to use them in more contexts than the original AirPods.1 They sound better than any other wireless earbuds I’ve tested (obviously, they sound much worse than my Sony IER-Z1R, but that’s to be expected) and they cancel almost as much noise as my Sony WH-1000XM3, which is pretty remarkable for such tiny earbuds. AirPods Pro retain all the magic of the non-Pro line, but they bring the additional freedom granted by noise cancellation and transparency mode. There’s one thing I don’t particularly like about them, though: the default silicone tips.
Unlike others (e.g. my girlfriend), I can use in-ear silicone tips without getting a headache after 20 minutes. It’s not my favorite method of listening to music, however, because I know that memory foam tips are a better fit for my ears since they can better adapt to the shape of my ear canal and, as a result, provide better isolation and a more bass-y response. Over the years, I’ve developed an appreciation for Comply’s popular foam tips (right now, I’m testing their Audio Pro and Comfort tips with my IER-Z1R) and was hoping they’d release AirPods Pro-compatible tip replacements made of memory foam.
Much to my disappointment, the only foam tips designed for AirPods Pro I’ve found so far are these no-brand tips from Amazon US that I can’t purchase from Italy (and which do not inspire a lot of confidence). I’m assuming that since AirPods Pro require tips to have a special clip attachment that secures them onto the earbuds themselves, it’s taking a while for third-party manufacturers to come up with a compatible design. I really wanted to figure out a way to use foam tips with my AirPods Pro though, so I kept looking for ideas or recommendations on how to make it happen.
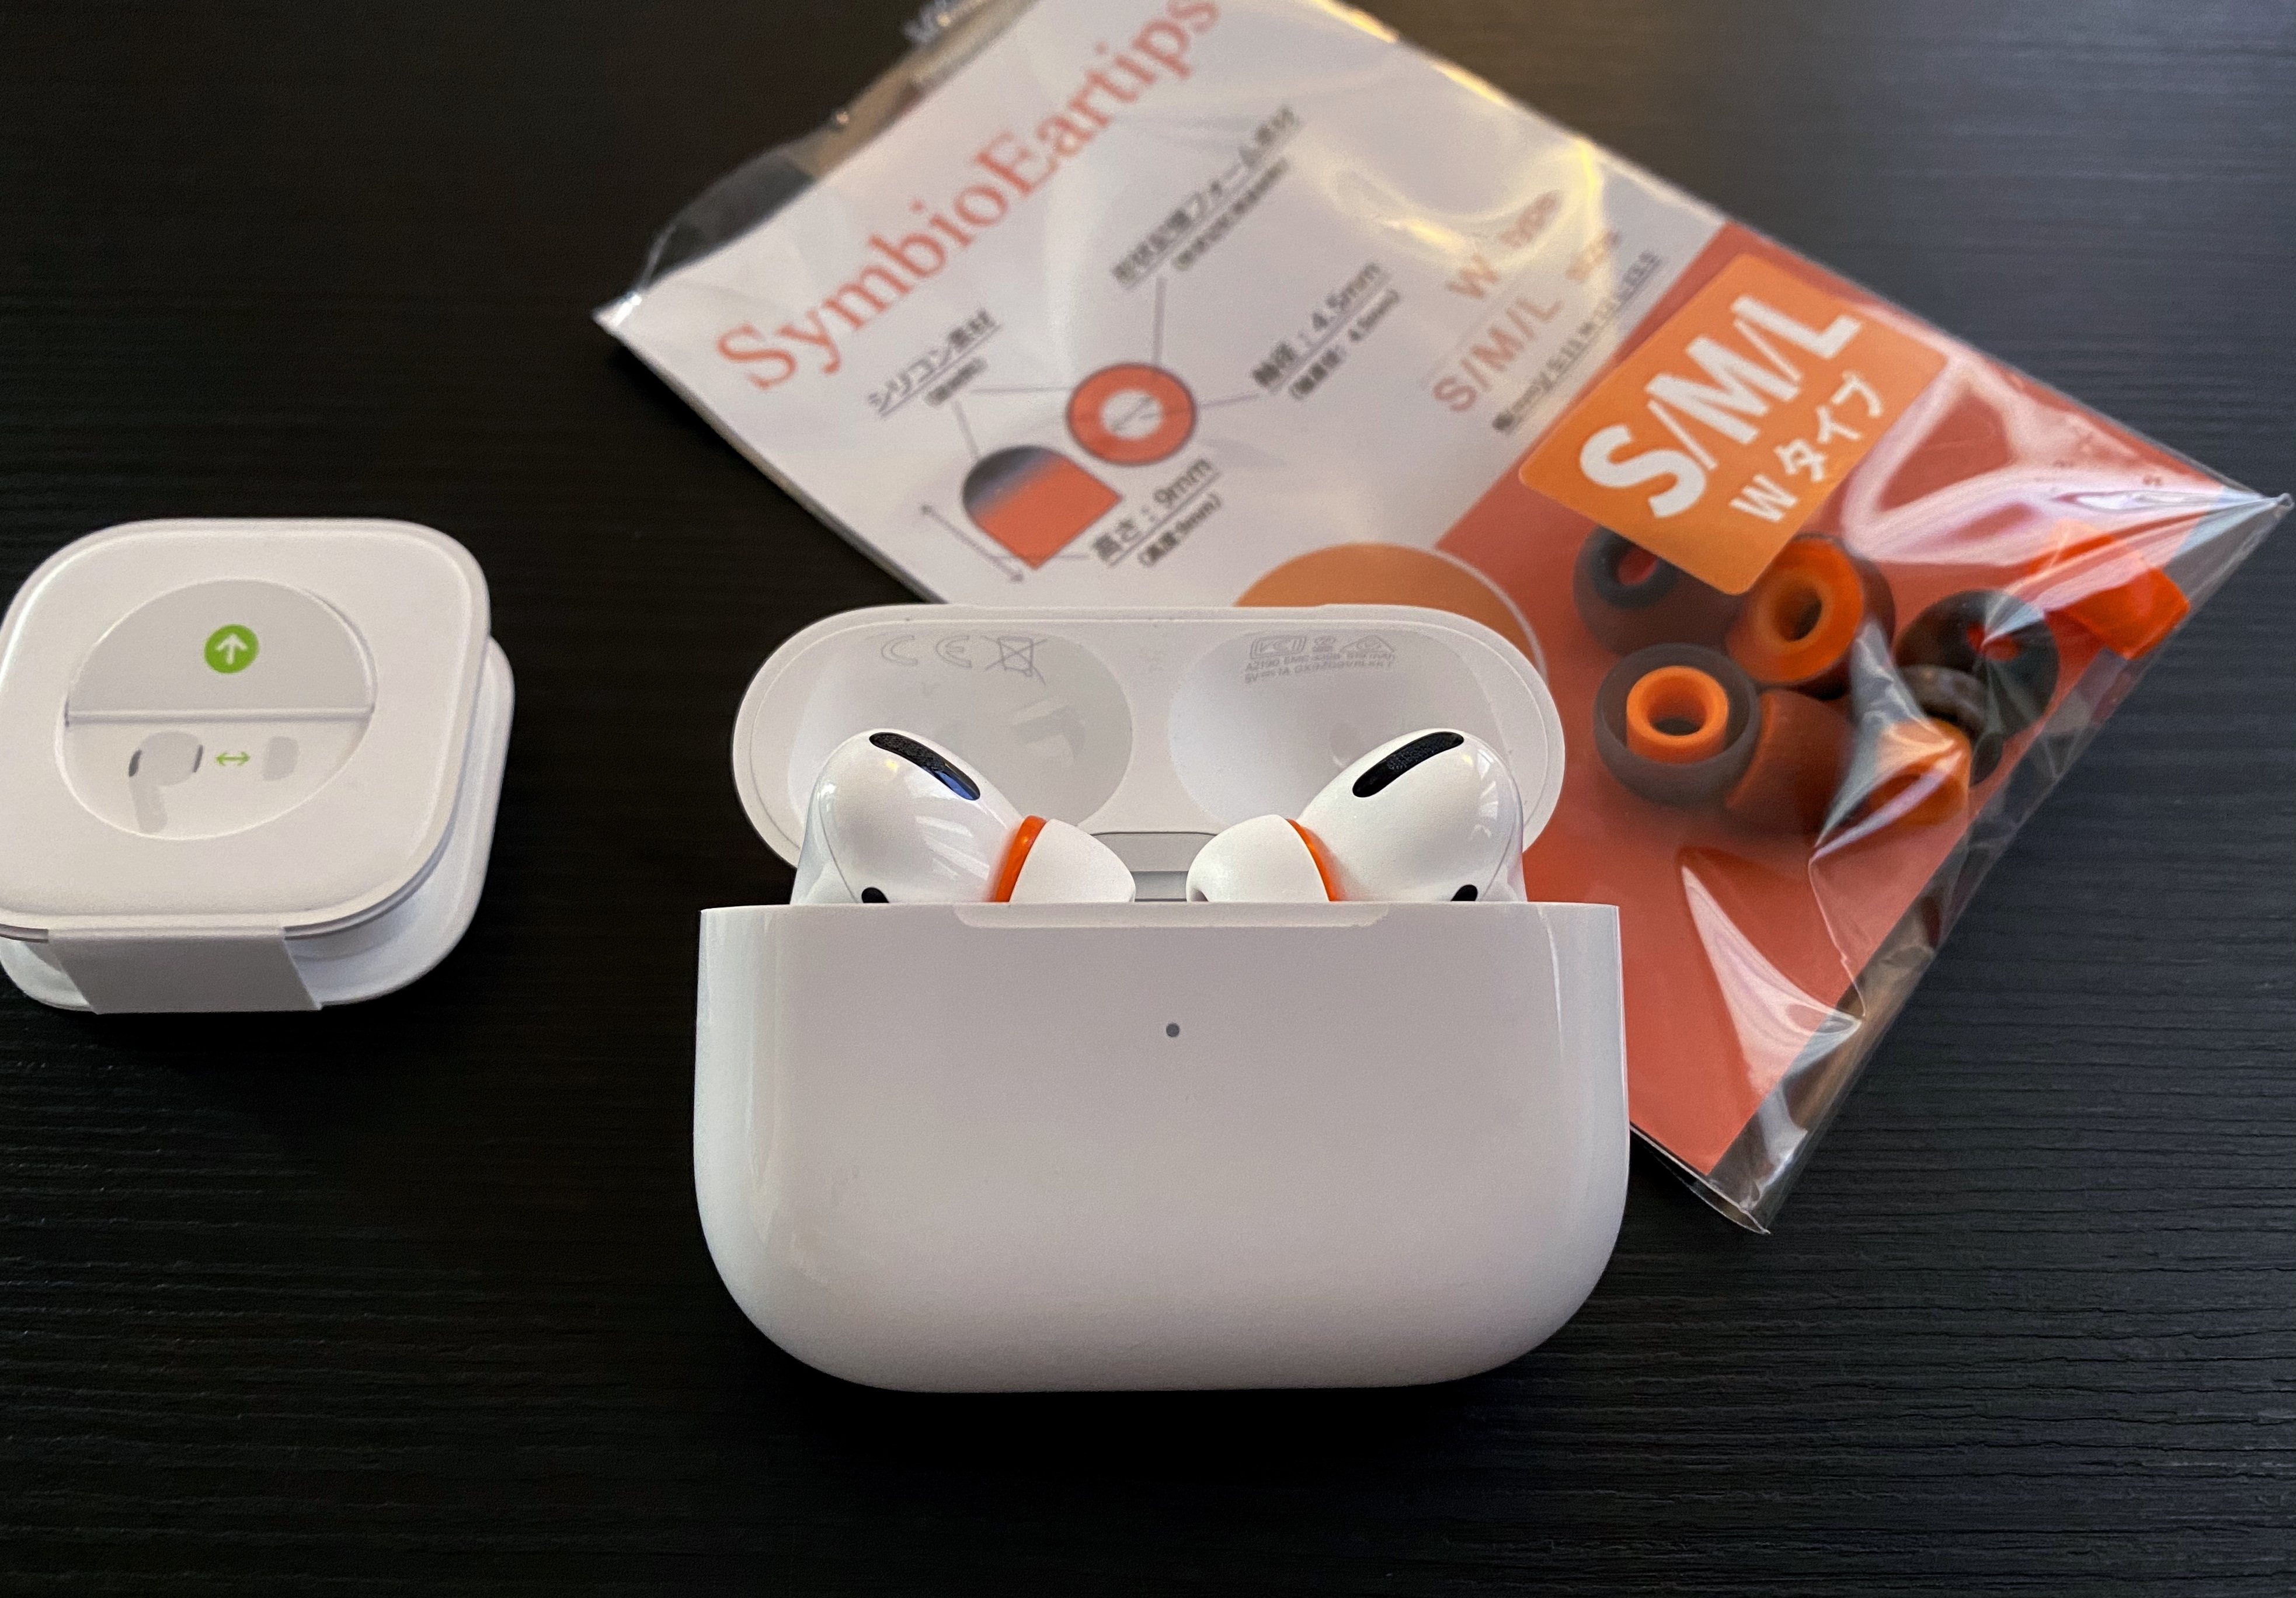
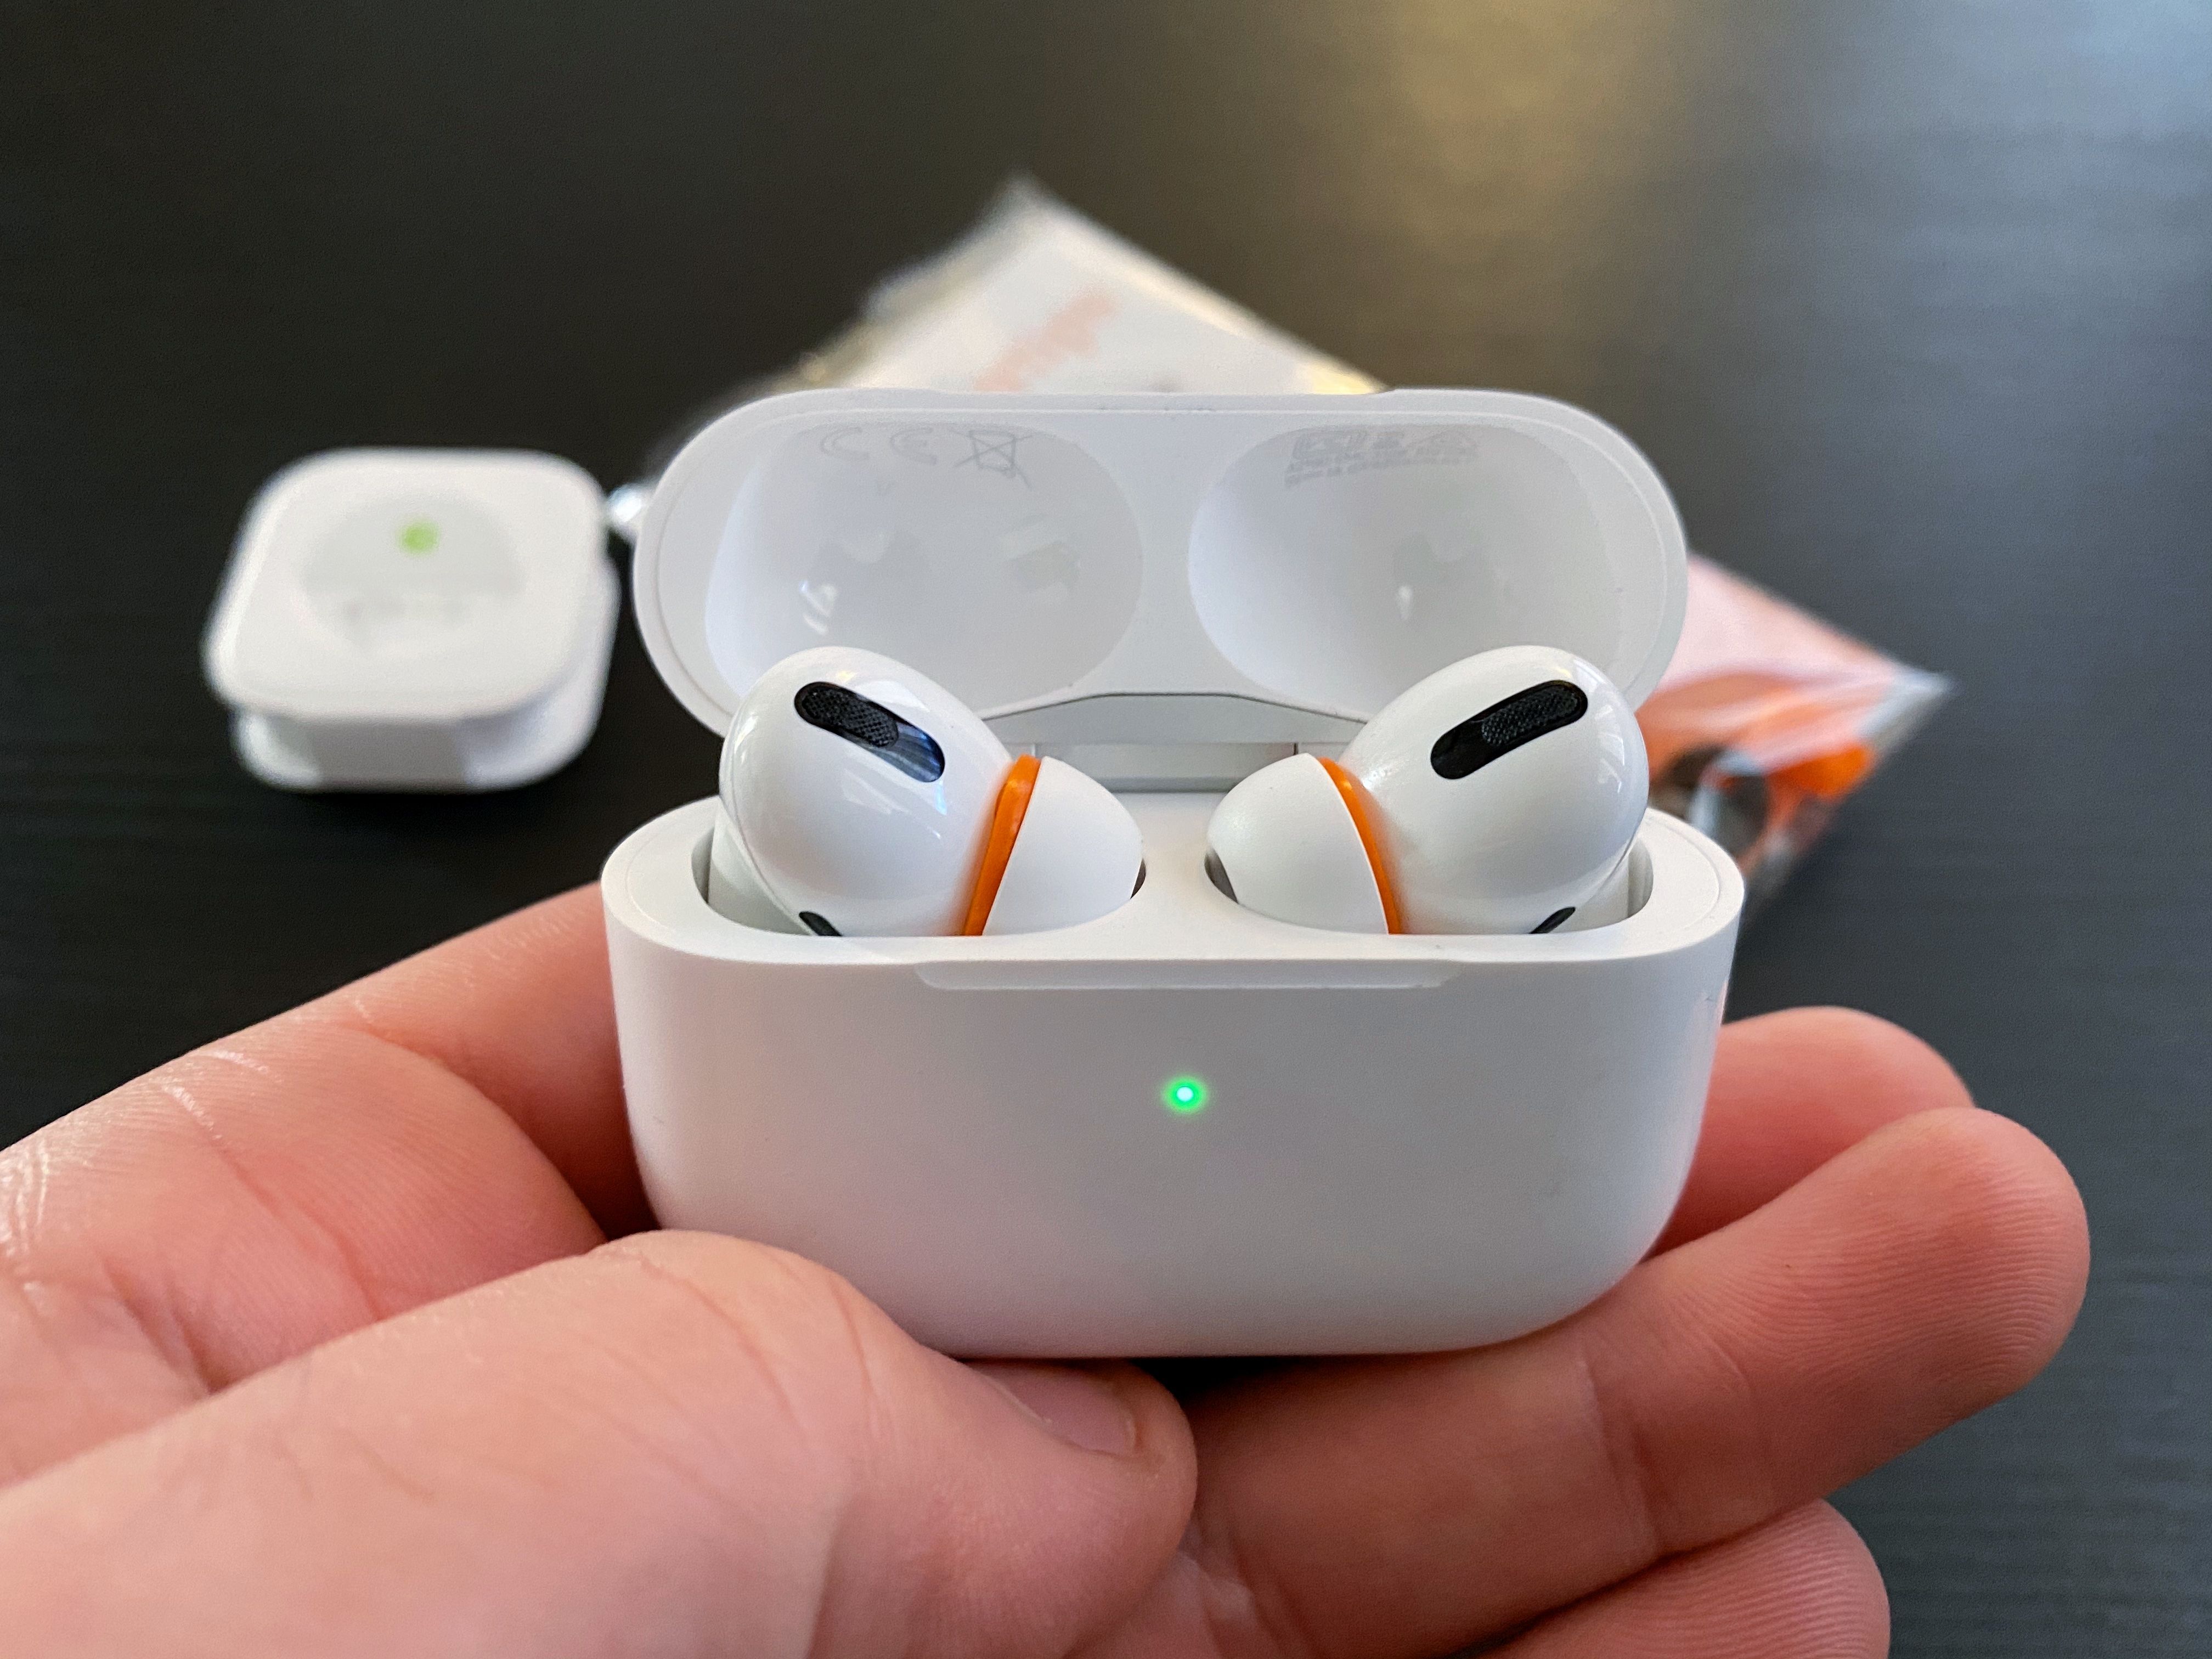
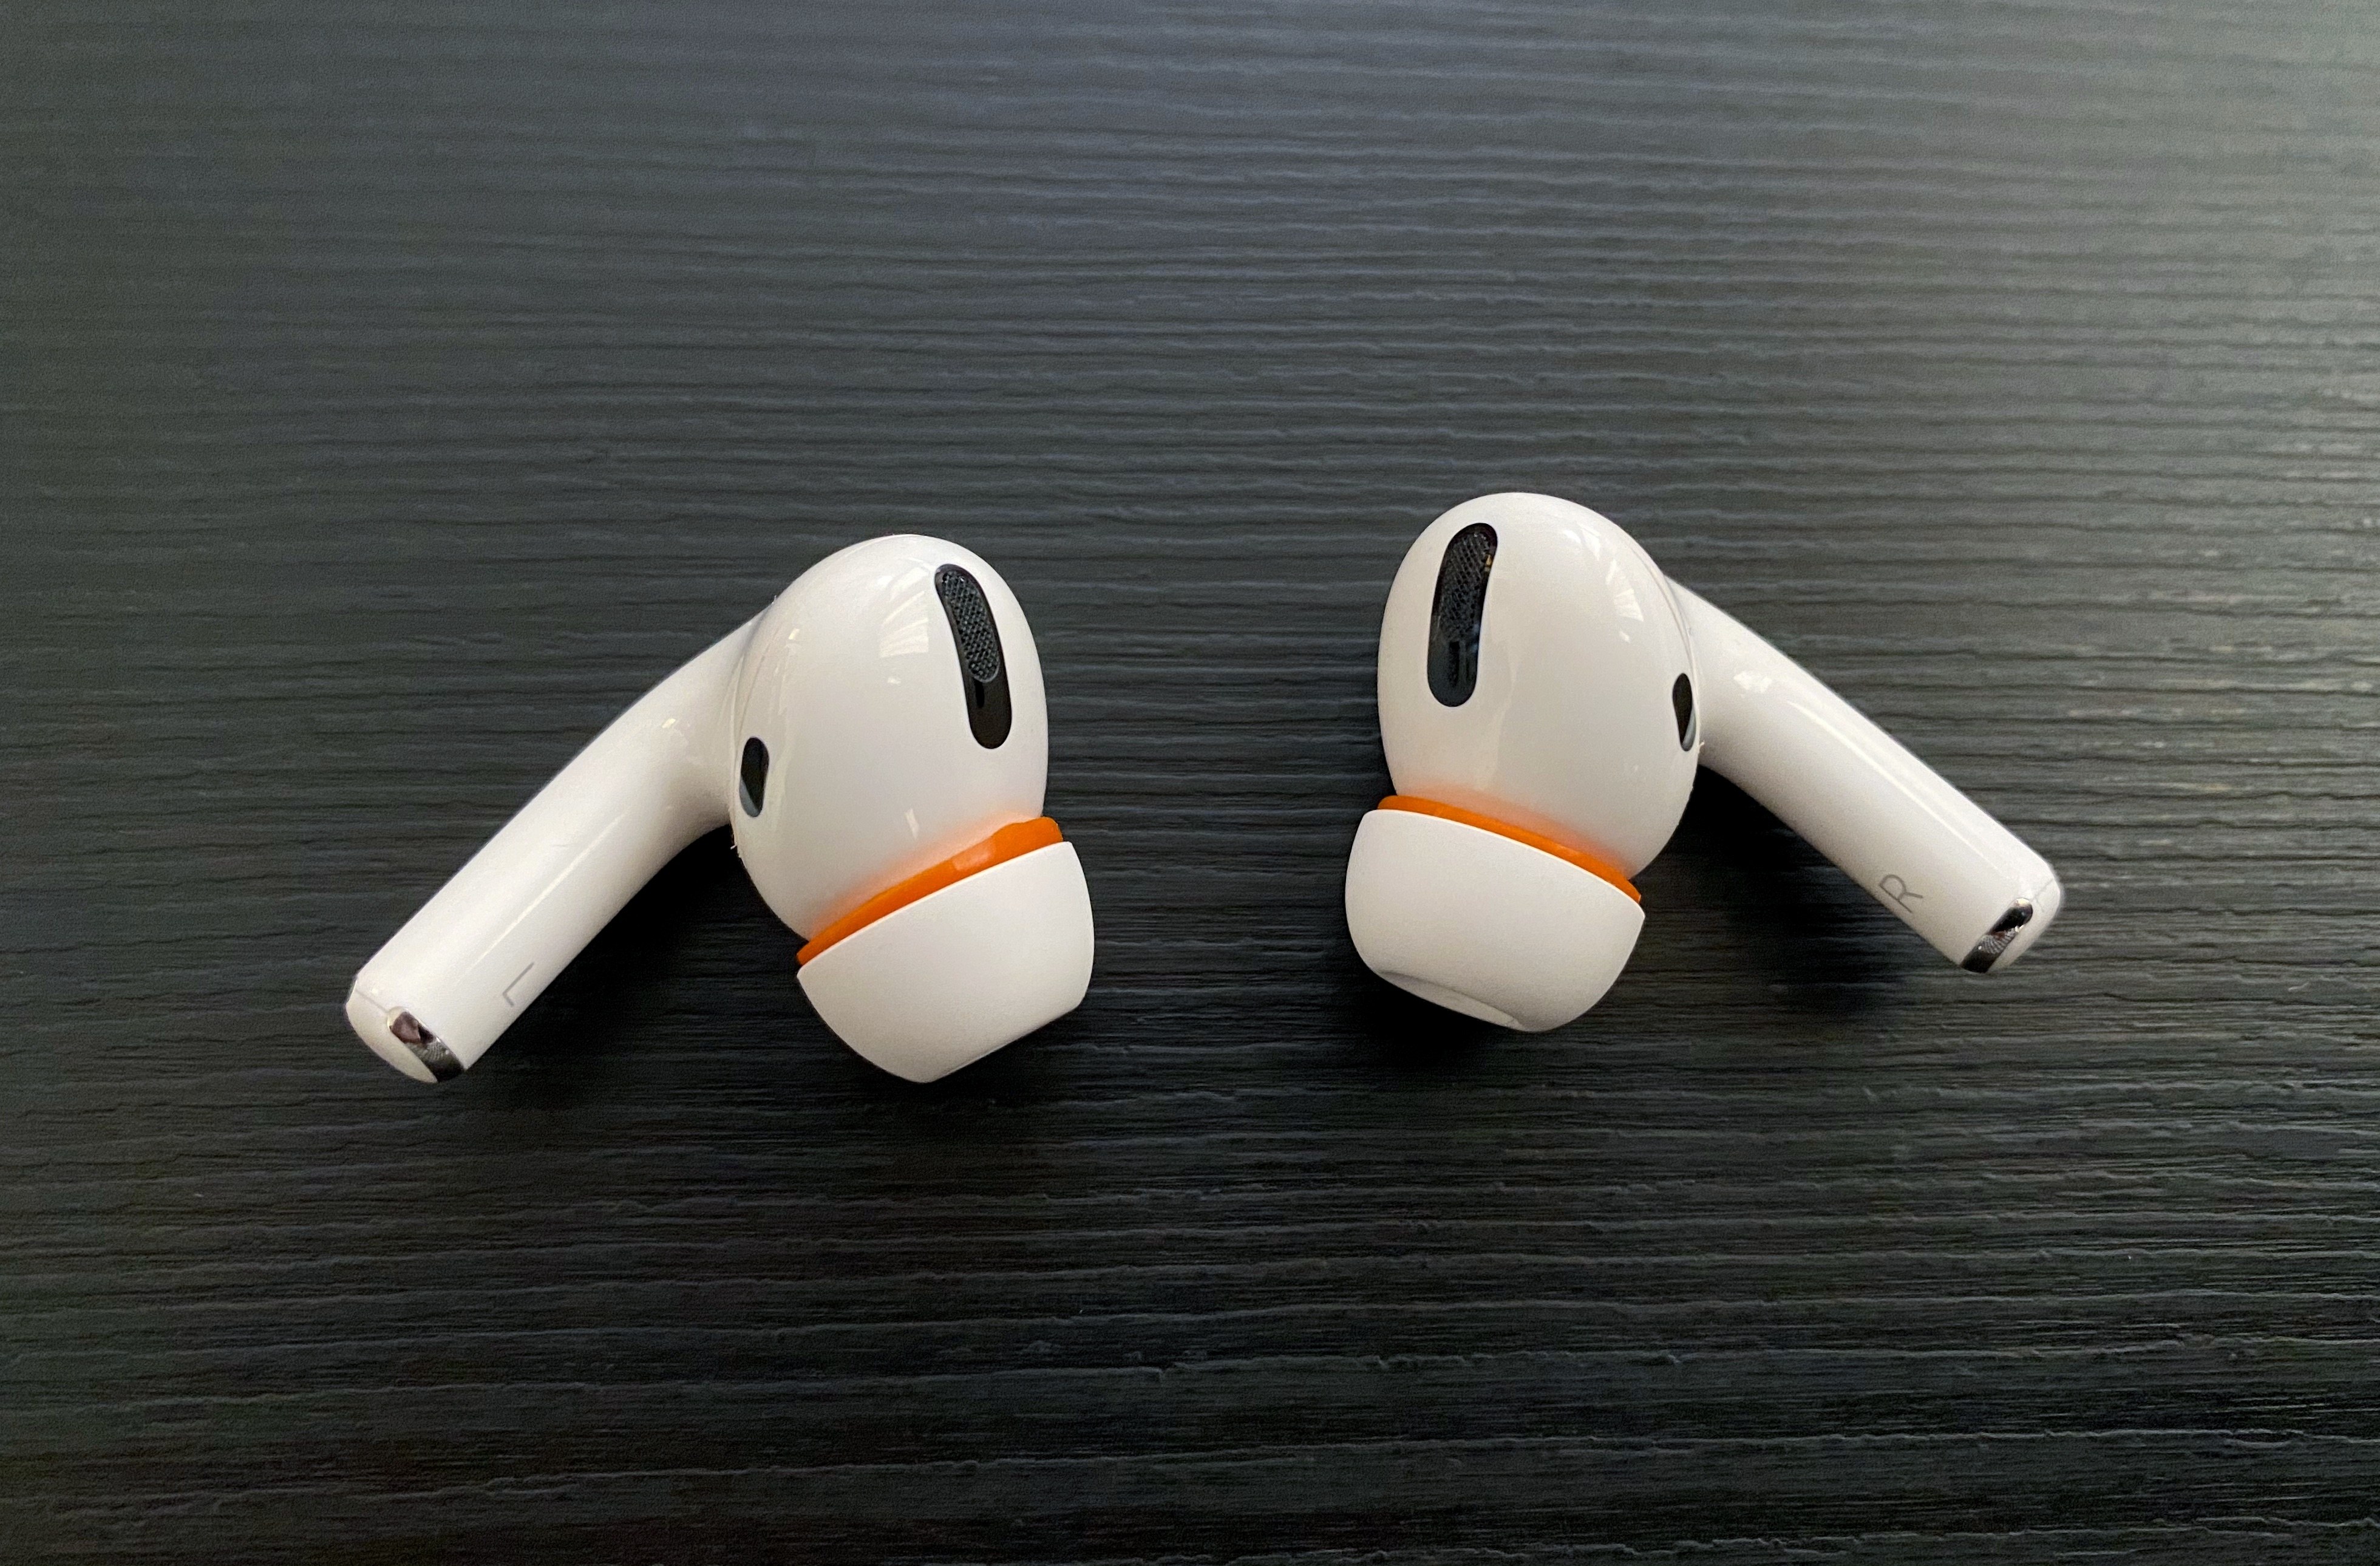
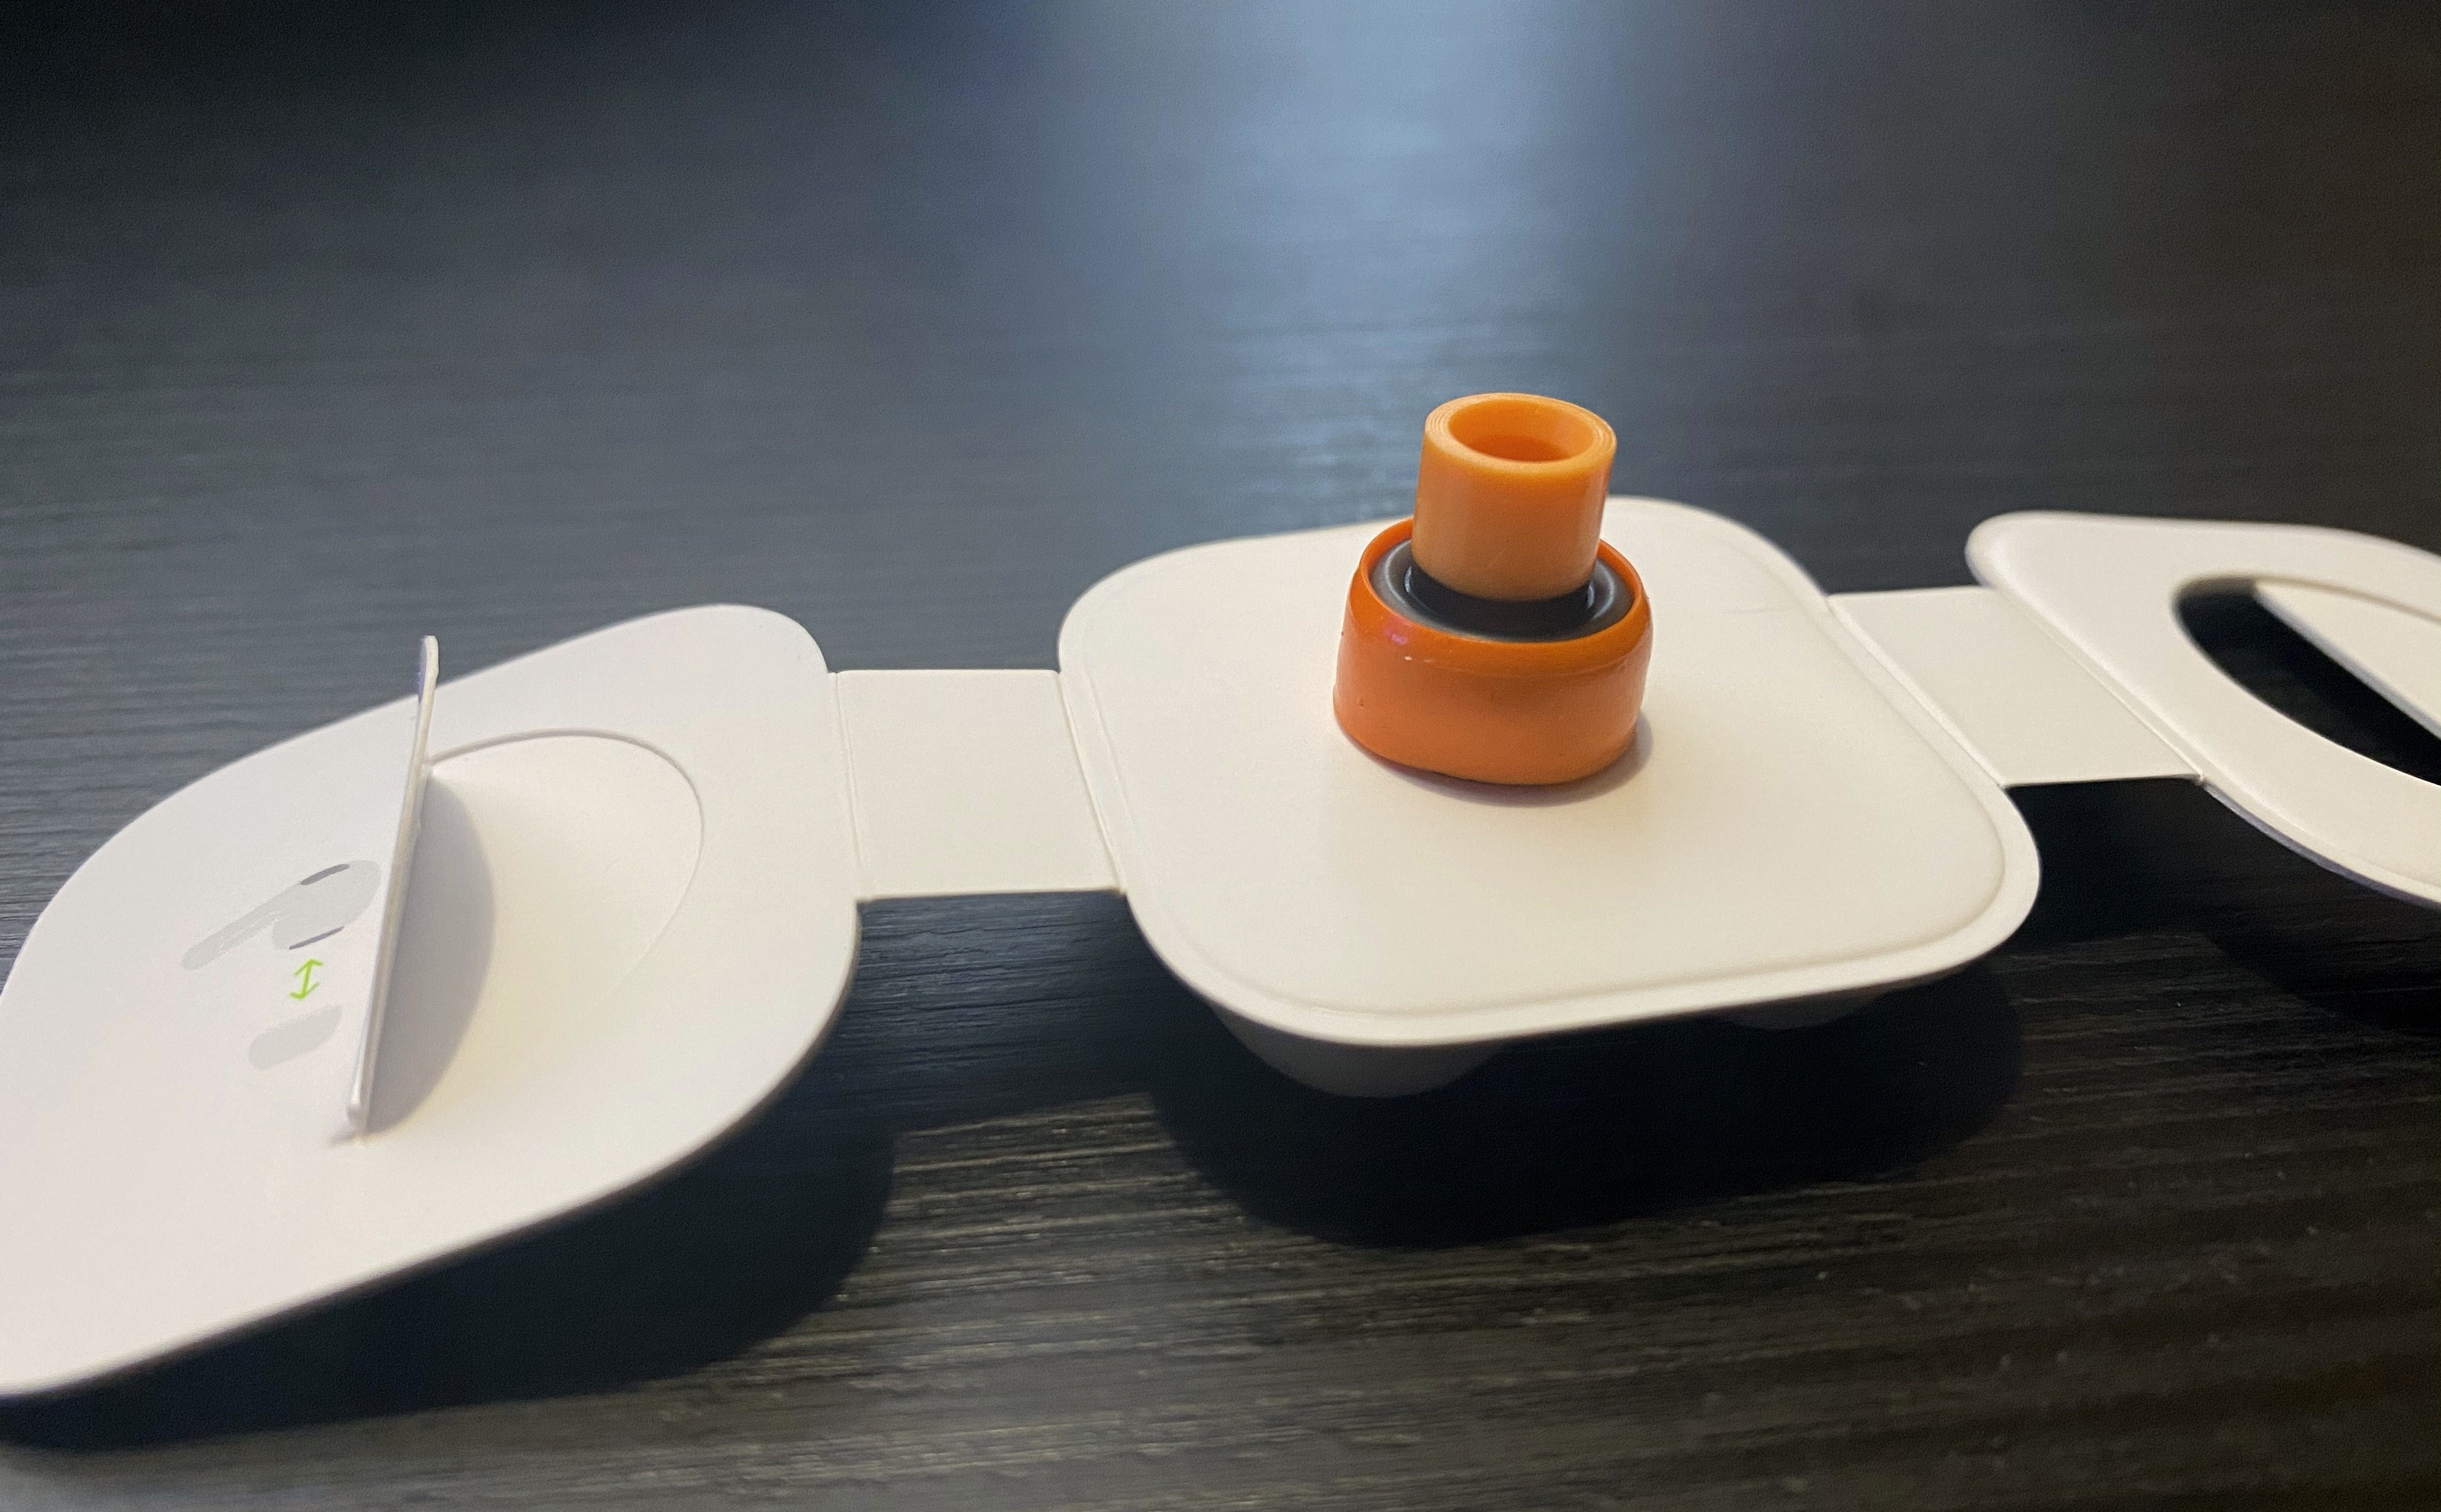
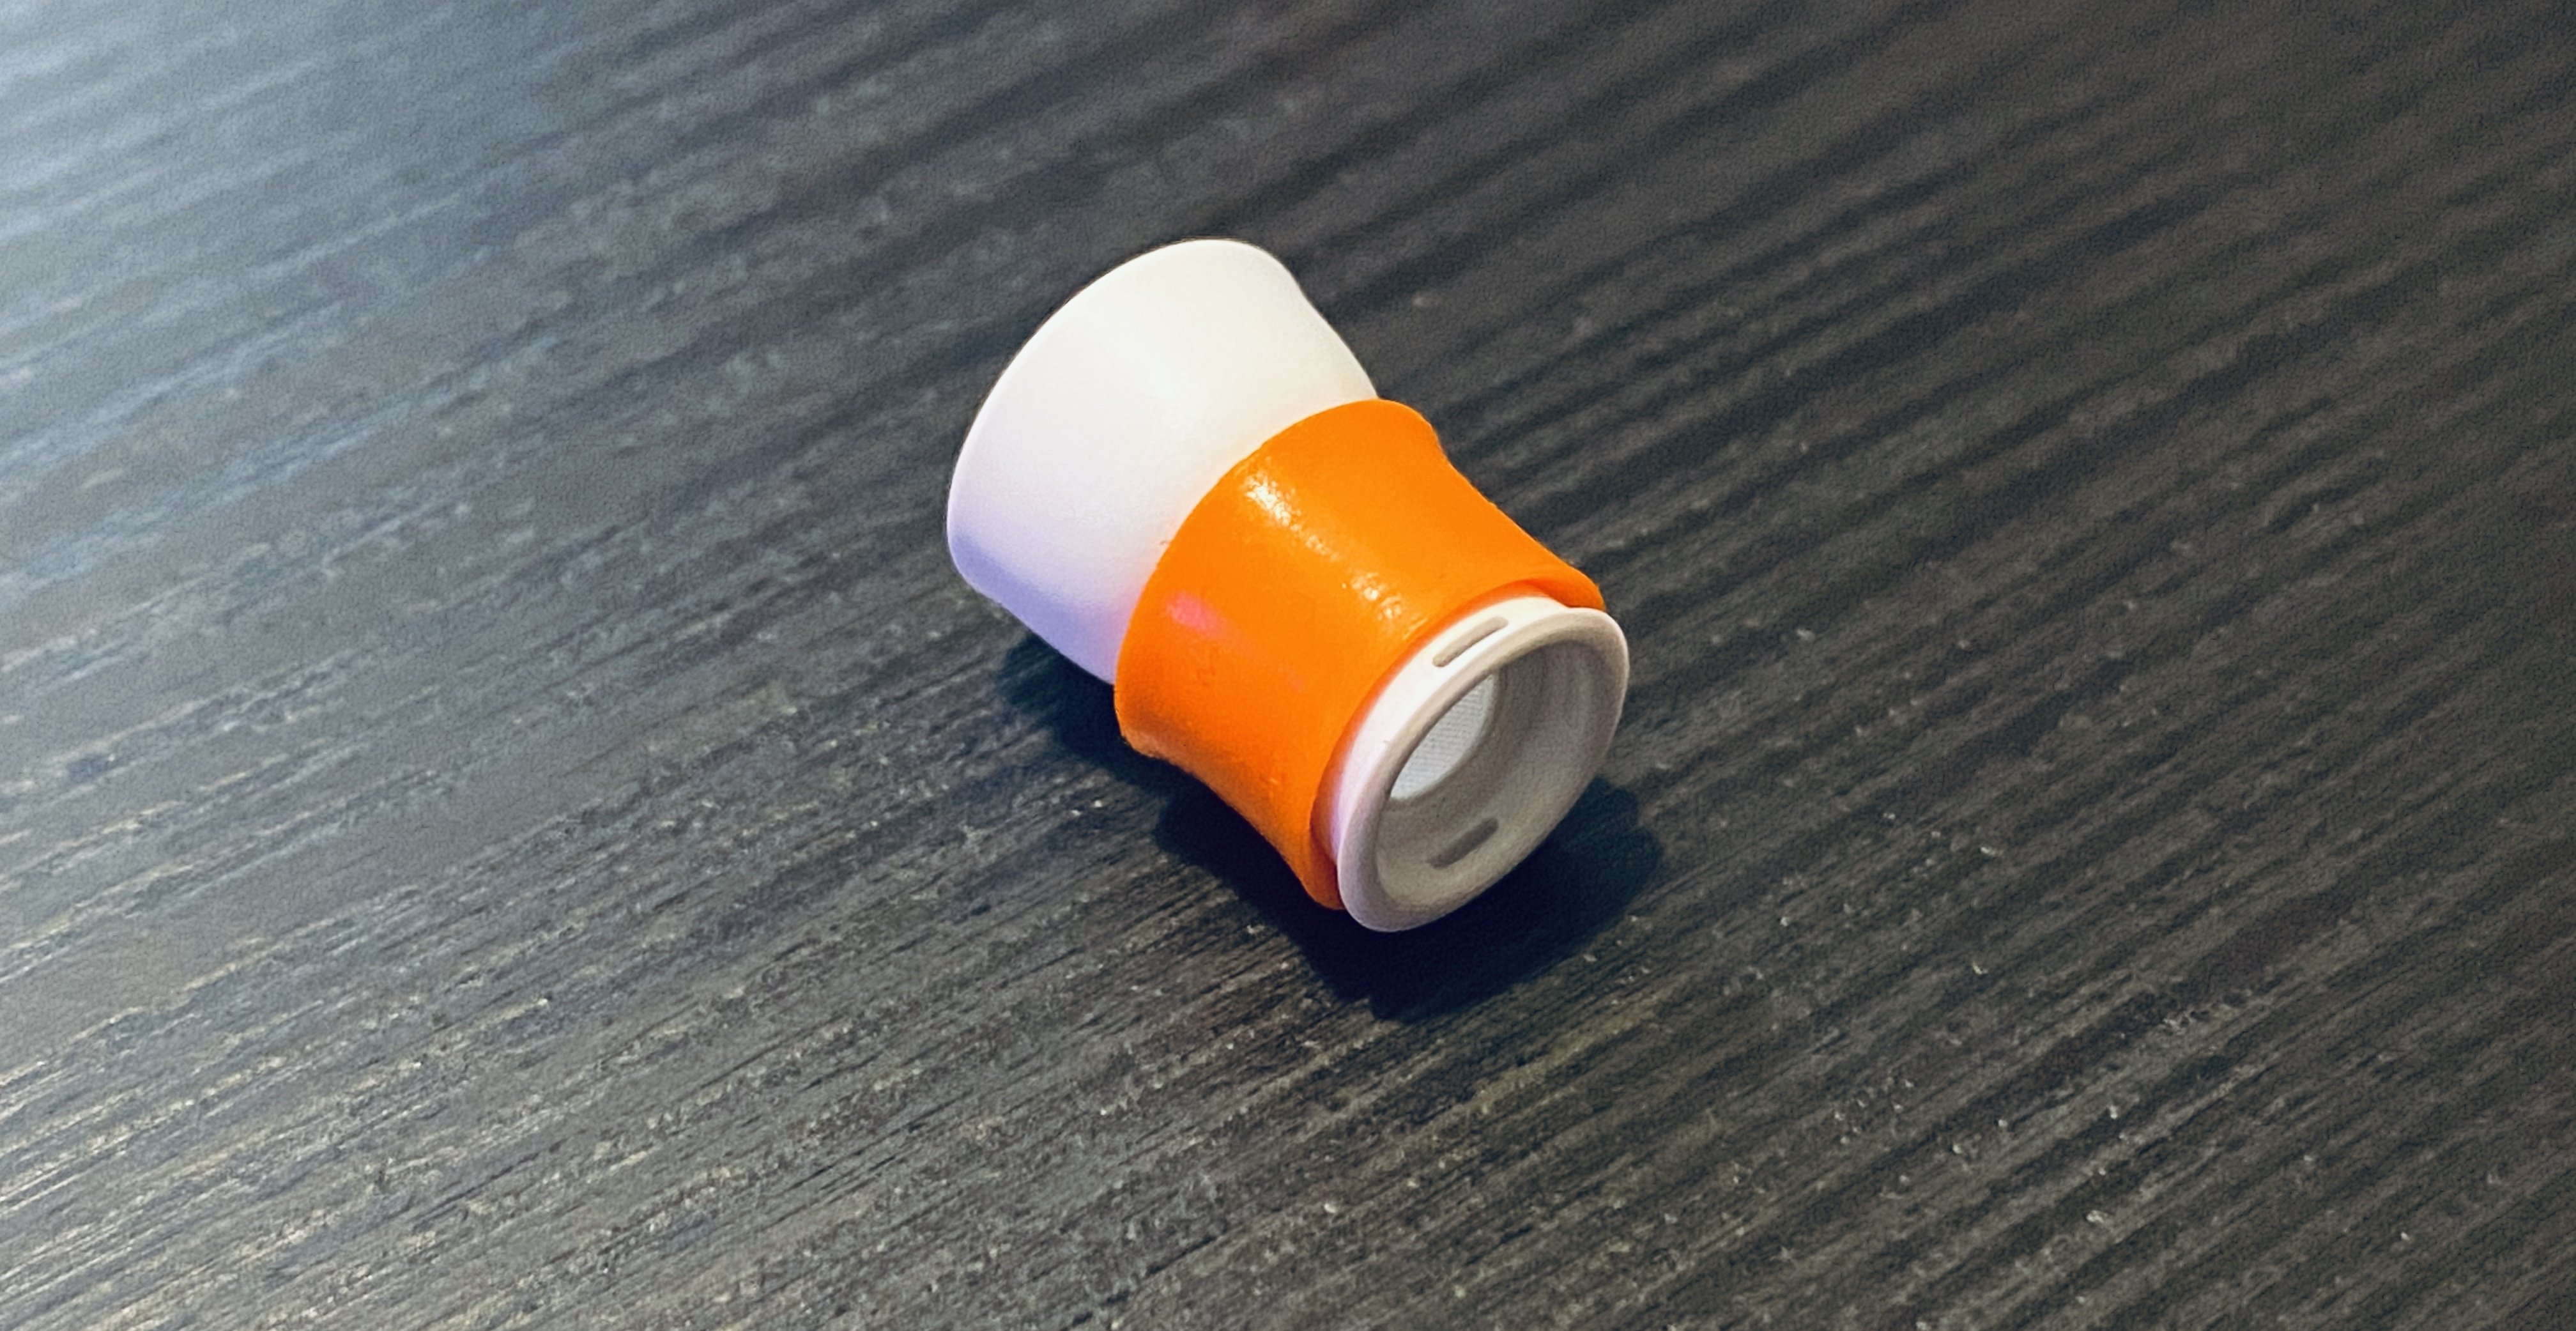
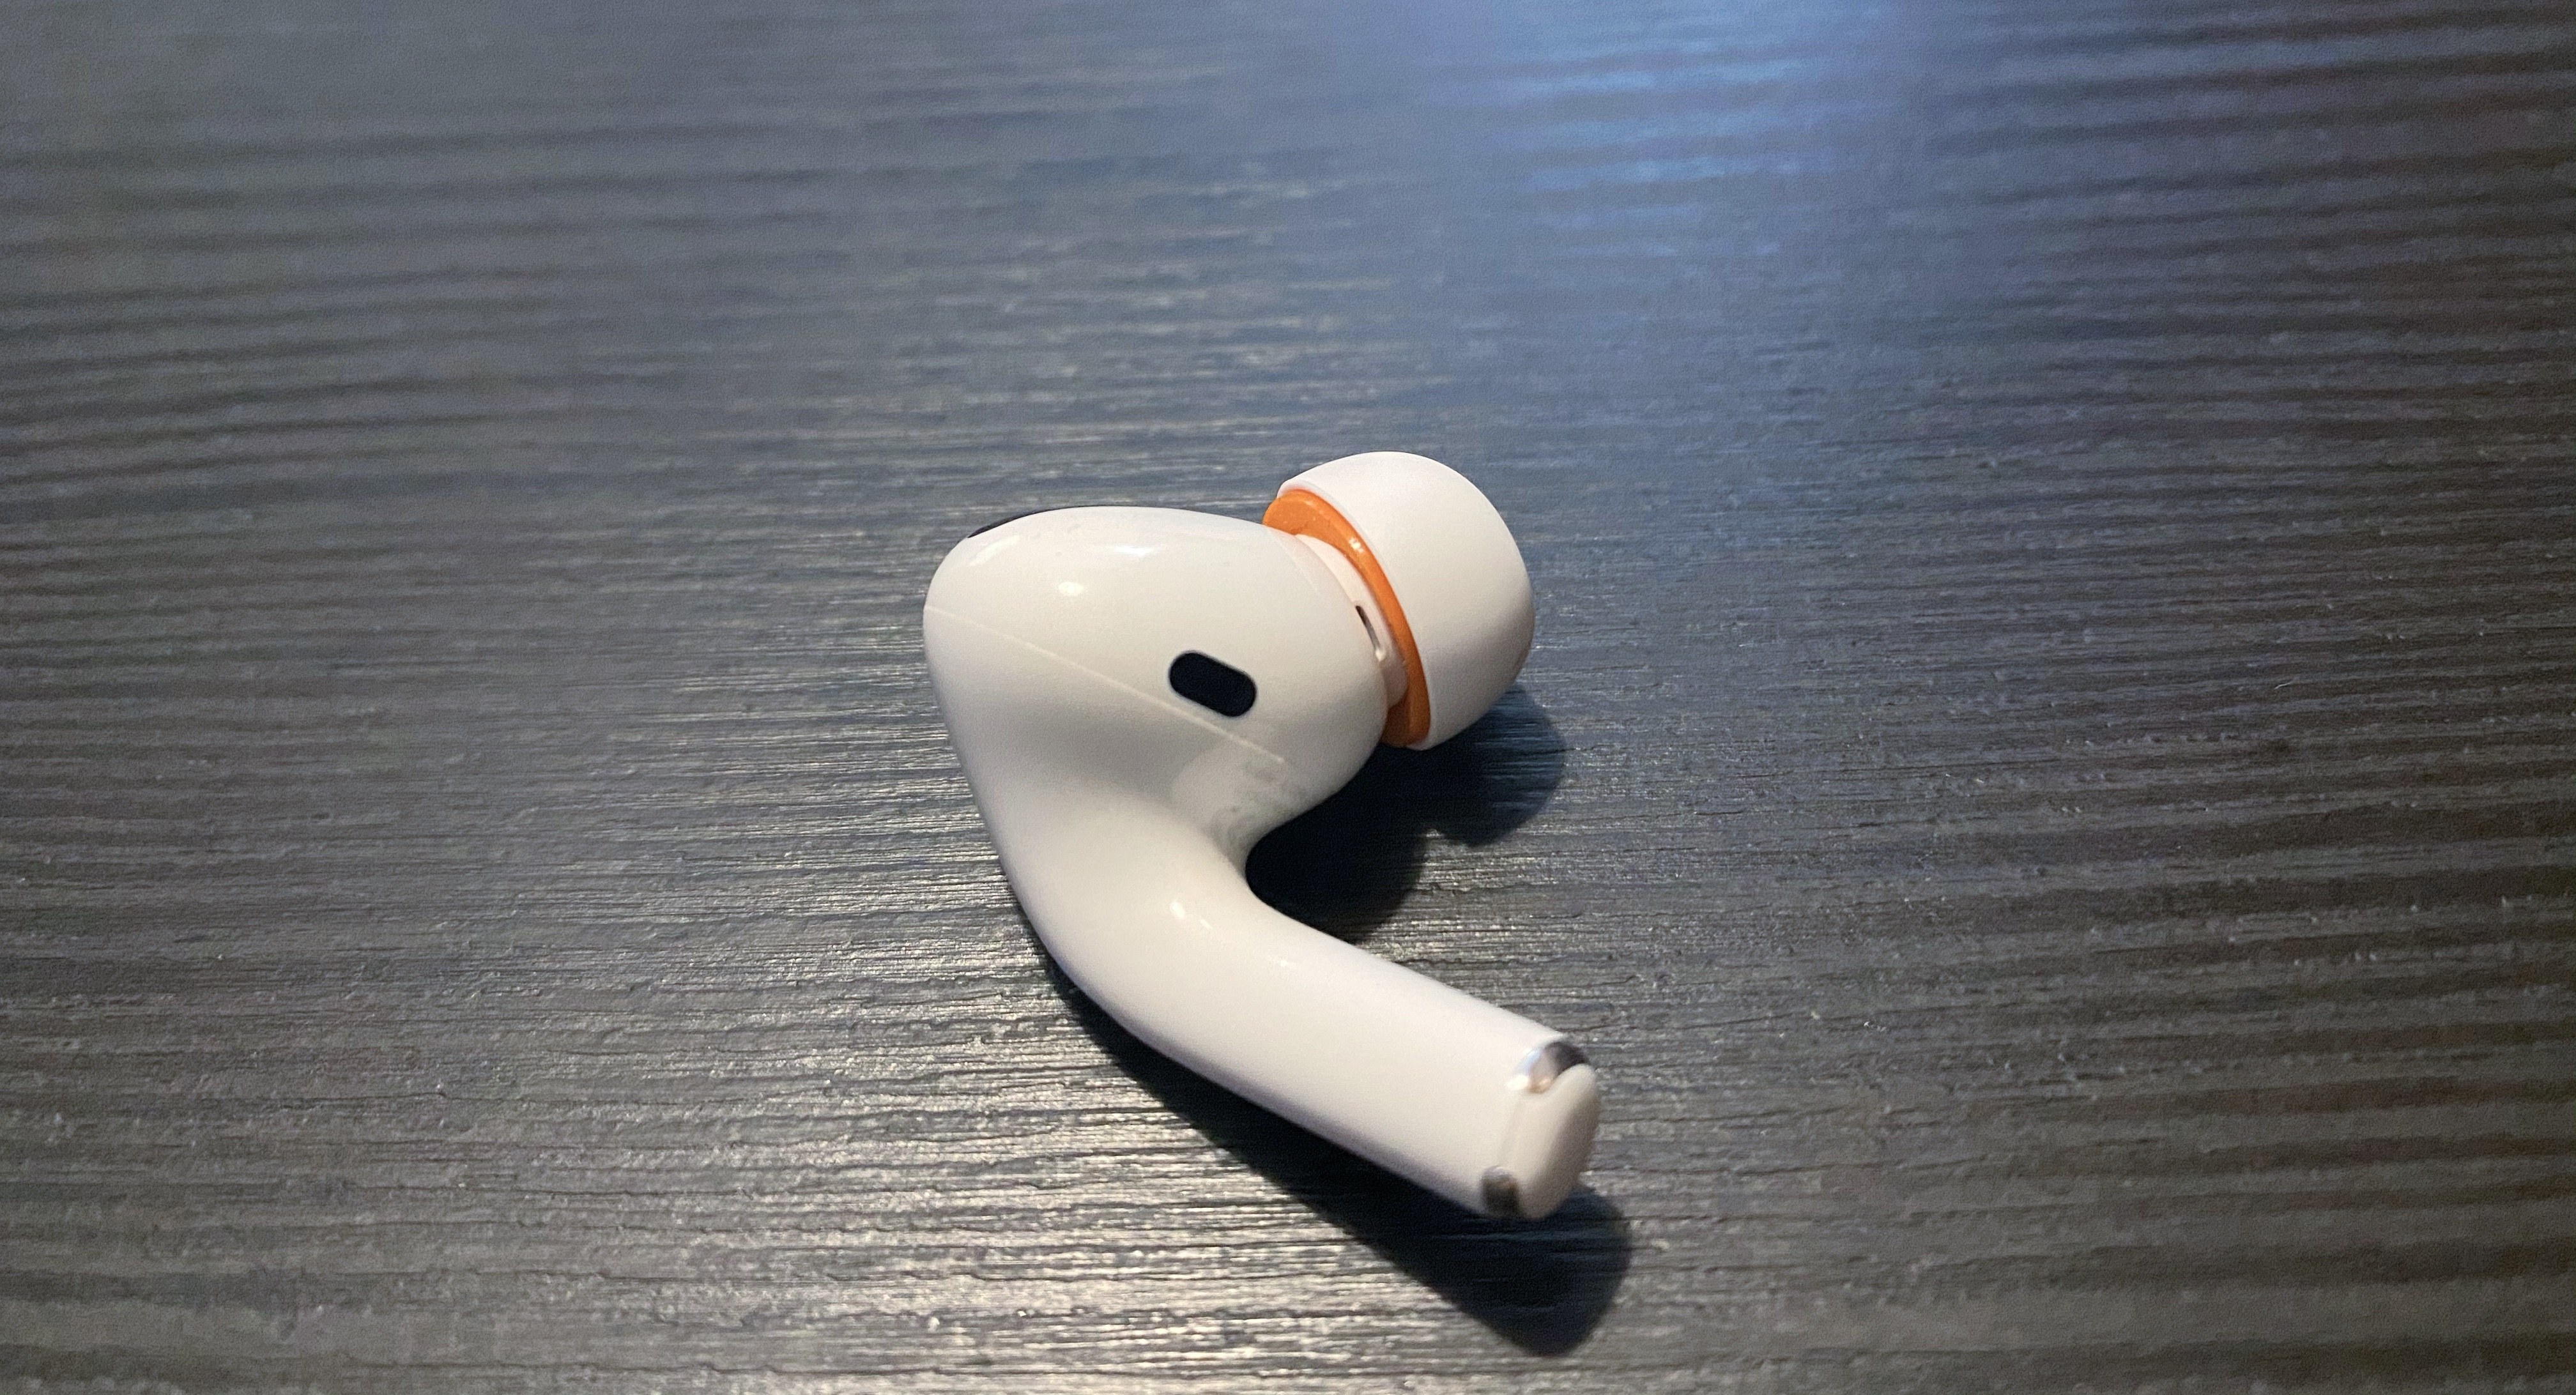
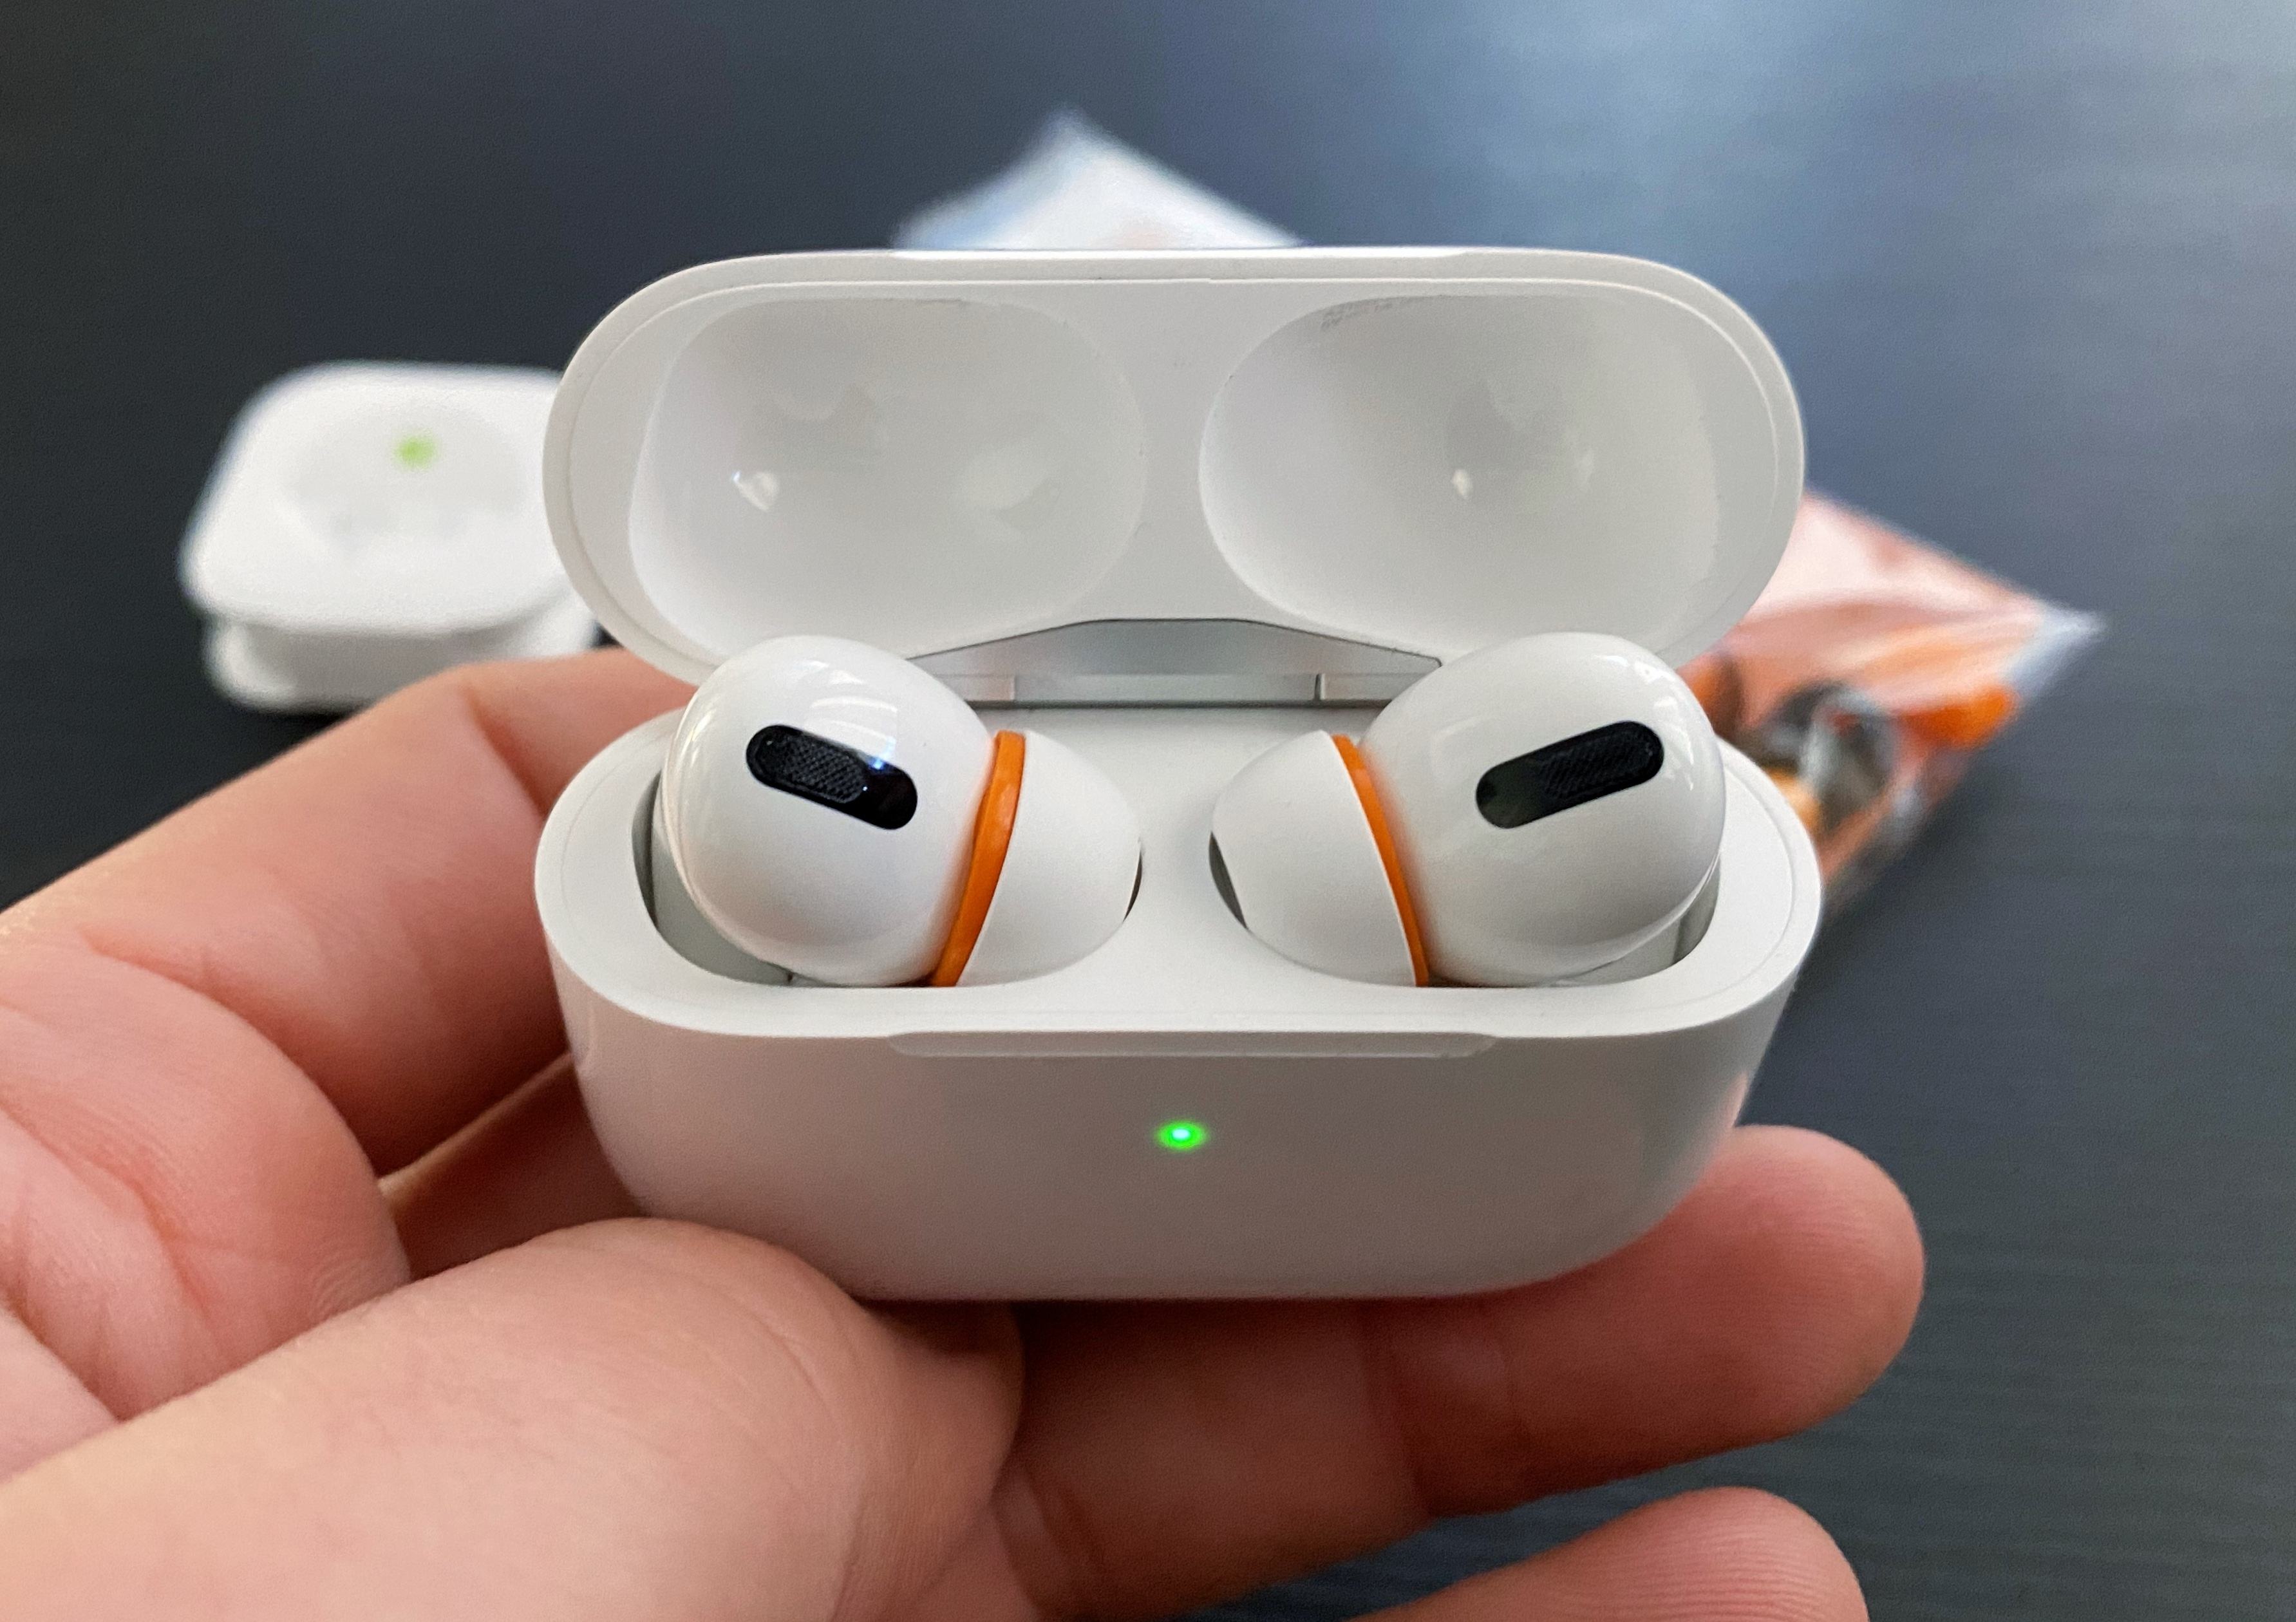
The solution I’ve adopted isn’t ideal since I still haven’t found complete foam replacements made specifically for AirPods Pro, but, at least for me, what I’m using today is better than using Apple’s default silicone tips. As I shared on Twitter a few days ago, I’ve modded the AirPods Pro’s silicone tips with an extra memory foam layer, which helps the tips fit better in my ears, resulting in a warmer sound and overall more comfortable feel. The best part: I didn’t have to cut the memory foam layer myself – I simply took the foam layer from a pair of Symbio W eartips and fitted it inside the AirPods Pro’s tips. The final result looks like this:
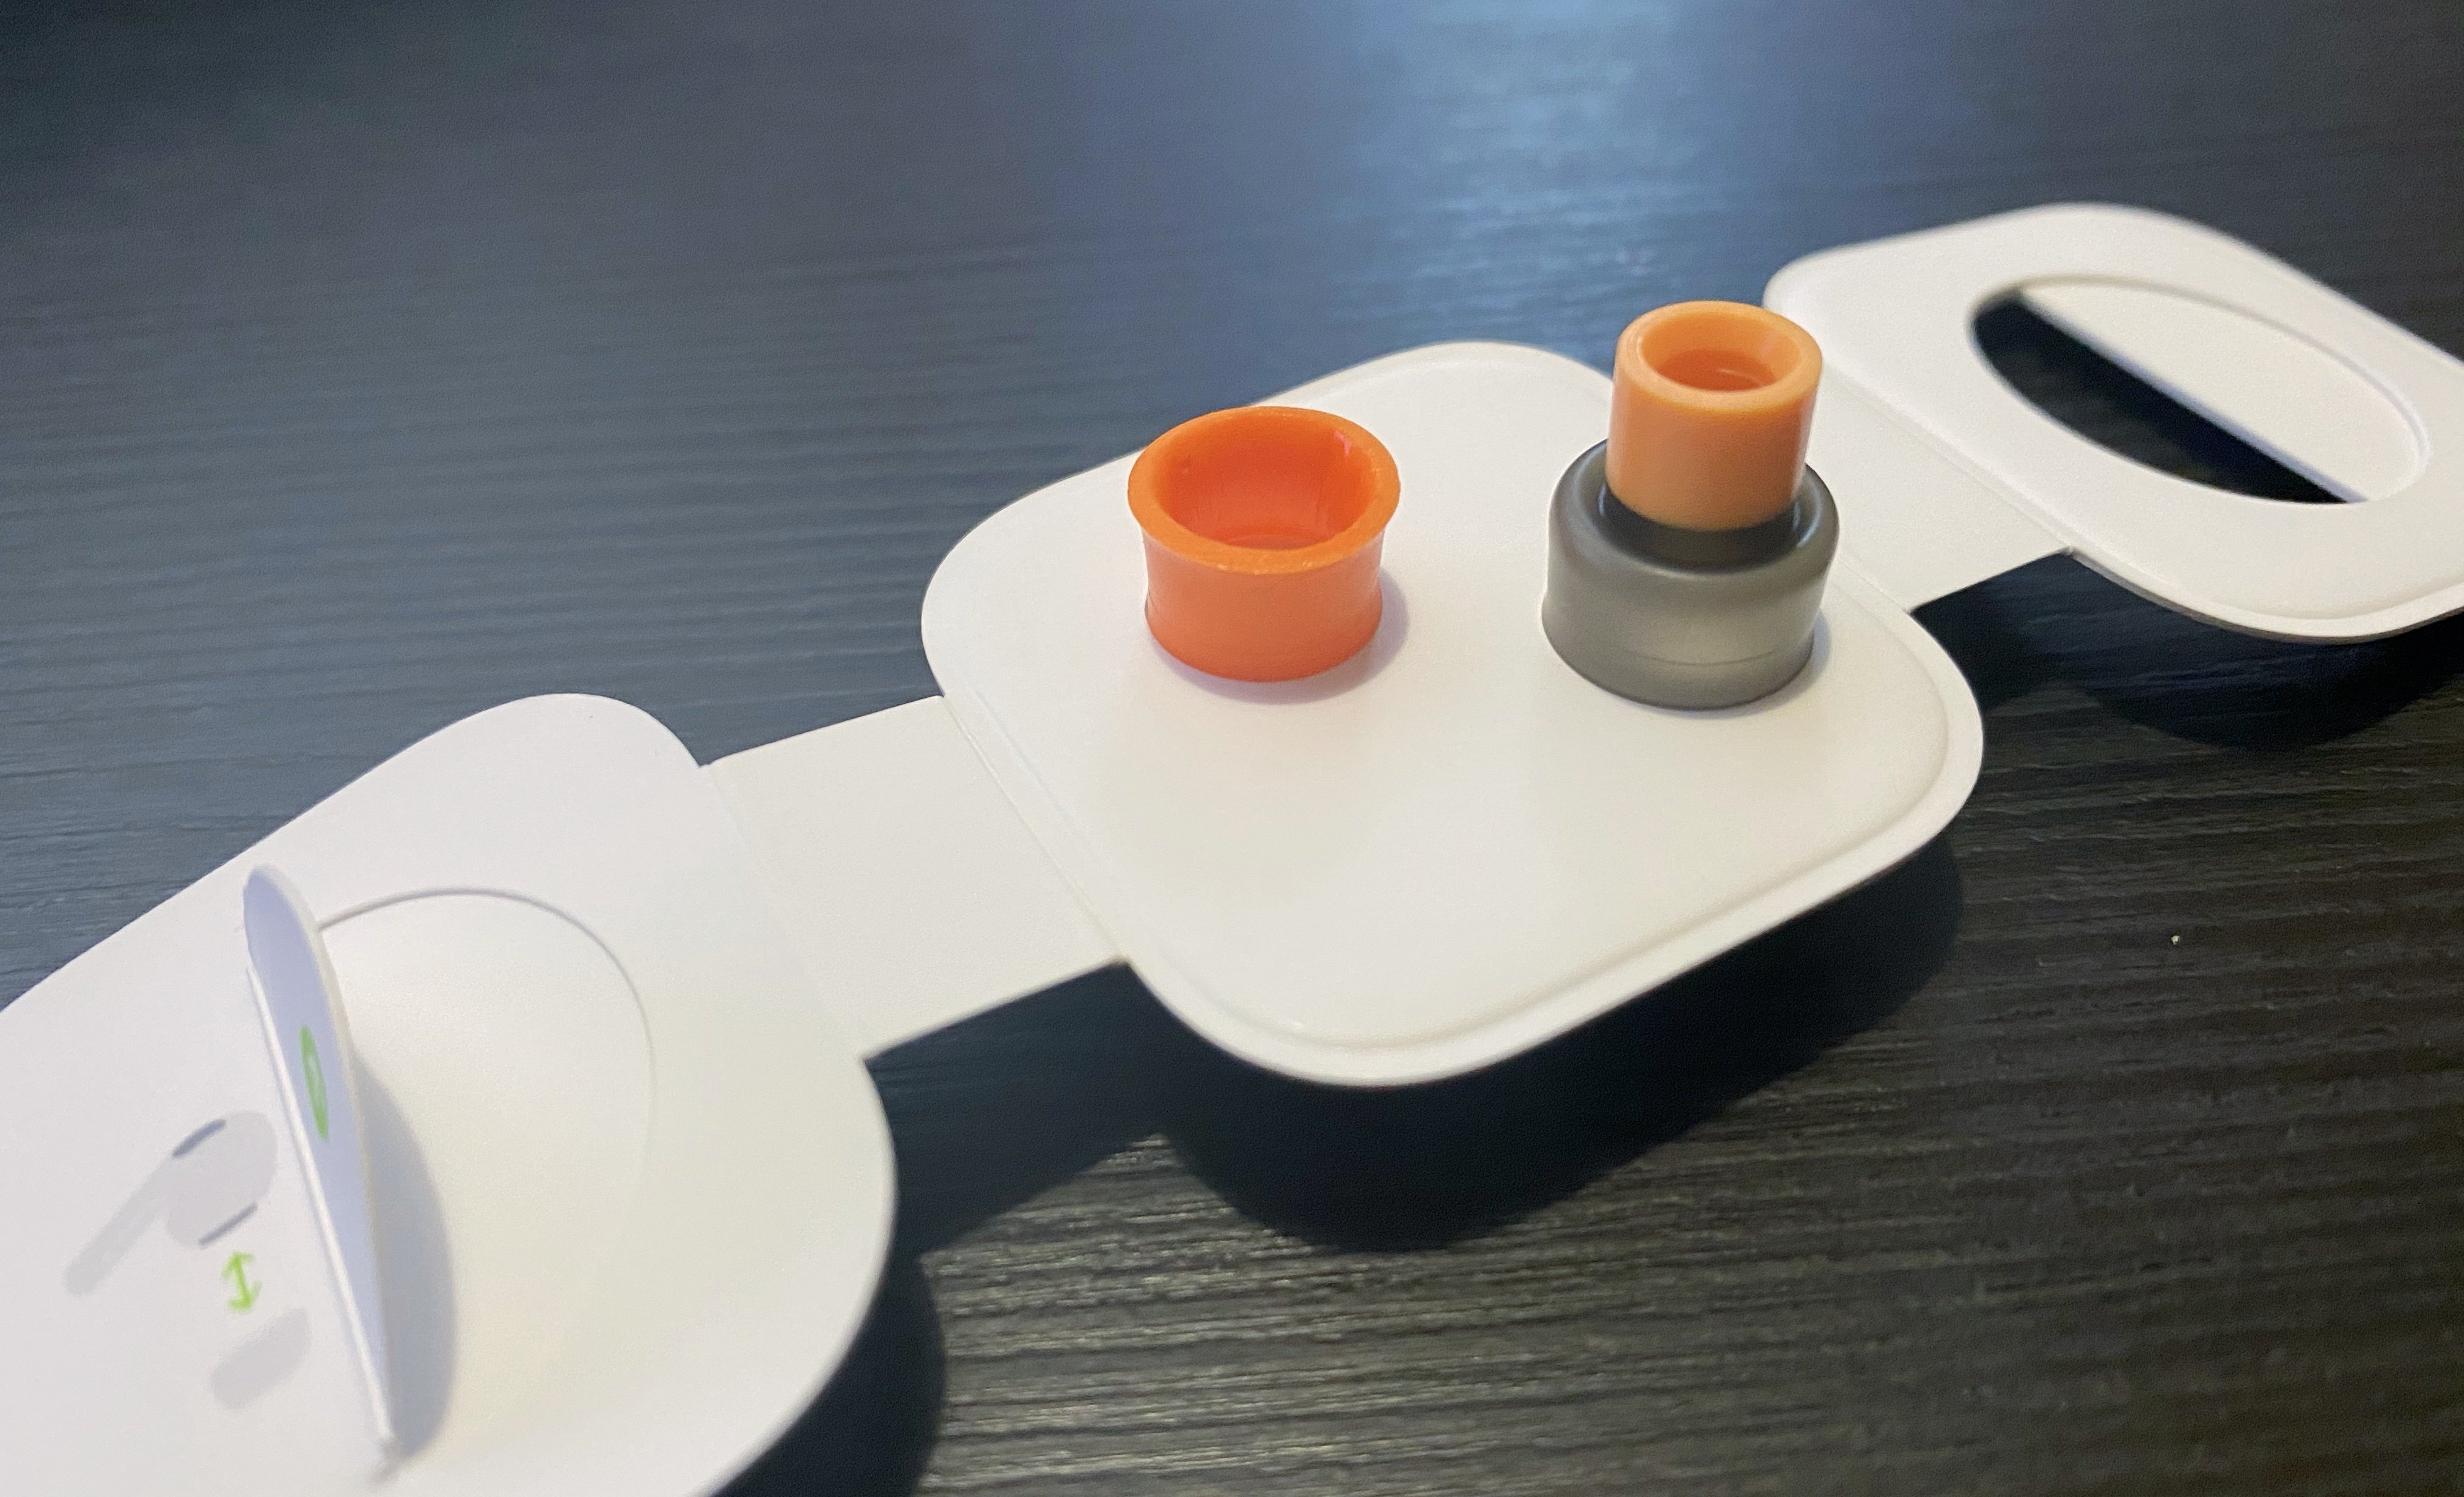
Allow me to offer some context around how I discovered this method and how you can perform this mod yourself with relative ease. I was looking around for discussions related to AirPods Pro and memory foam tips a few weeks back, and I came across this discussion thread on the MacRumors forums where a few users reached the following consensus: until third-party manufacturers come up with a compatible clip that attaches to AirPods Pro and lets you use alternative tips, for now the best DIY mod involves taking a memory foam insert and sliding Apple’s silicone tips inside it so that the foam layer ends up sitting between the central plastic “stem” of the tip and its outer layer. This is what I mean:
Based on the aforementioned MacRumors thread, I purchased a set of Symbio W eartips from Amazon Japan2 (Symbio also has an official website with worldwide shipping, but I haven’t tried it myself). Symbio’s in-ear tips are well suited for this kind of mod for a couple reasons. First, they’re hybrid tips that feature a silicone membrane with an inner memory foam layer; if you pull out the silicone part, you can access the memory foam “ring” contained inside it and remove it so you can use it elsewhere. And second, the Symbio W’s foam layer is thin and short enough that it can fit in the gap between the plastic stem and silicone layer in Apple’s tips, while matching their height in all three sizes as well (just like AirPods Pro, the Symbio W eartips come in small, medium, and large sizes). This means that, unlike other mods, applying the Symbio W’s foam parts to AirPods Pro’s silicone tips will let the AirPods Pro case close just fine.
Now, if you want to replicate this setup yourself, here’s how you can do it in less than a minute for each AirPod. Grab one of the Symbio eartips (if you’re using the medium tips for your AirPods Pro, use the medium Symbio tip too) and pull out the silicone exterior so that the memory foam portion is clearly visible:
Next, gently remove the memory foam ring from the eartip:
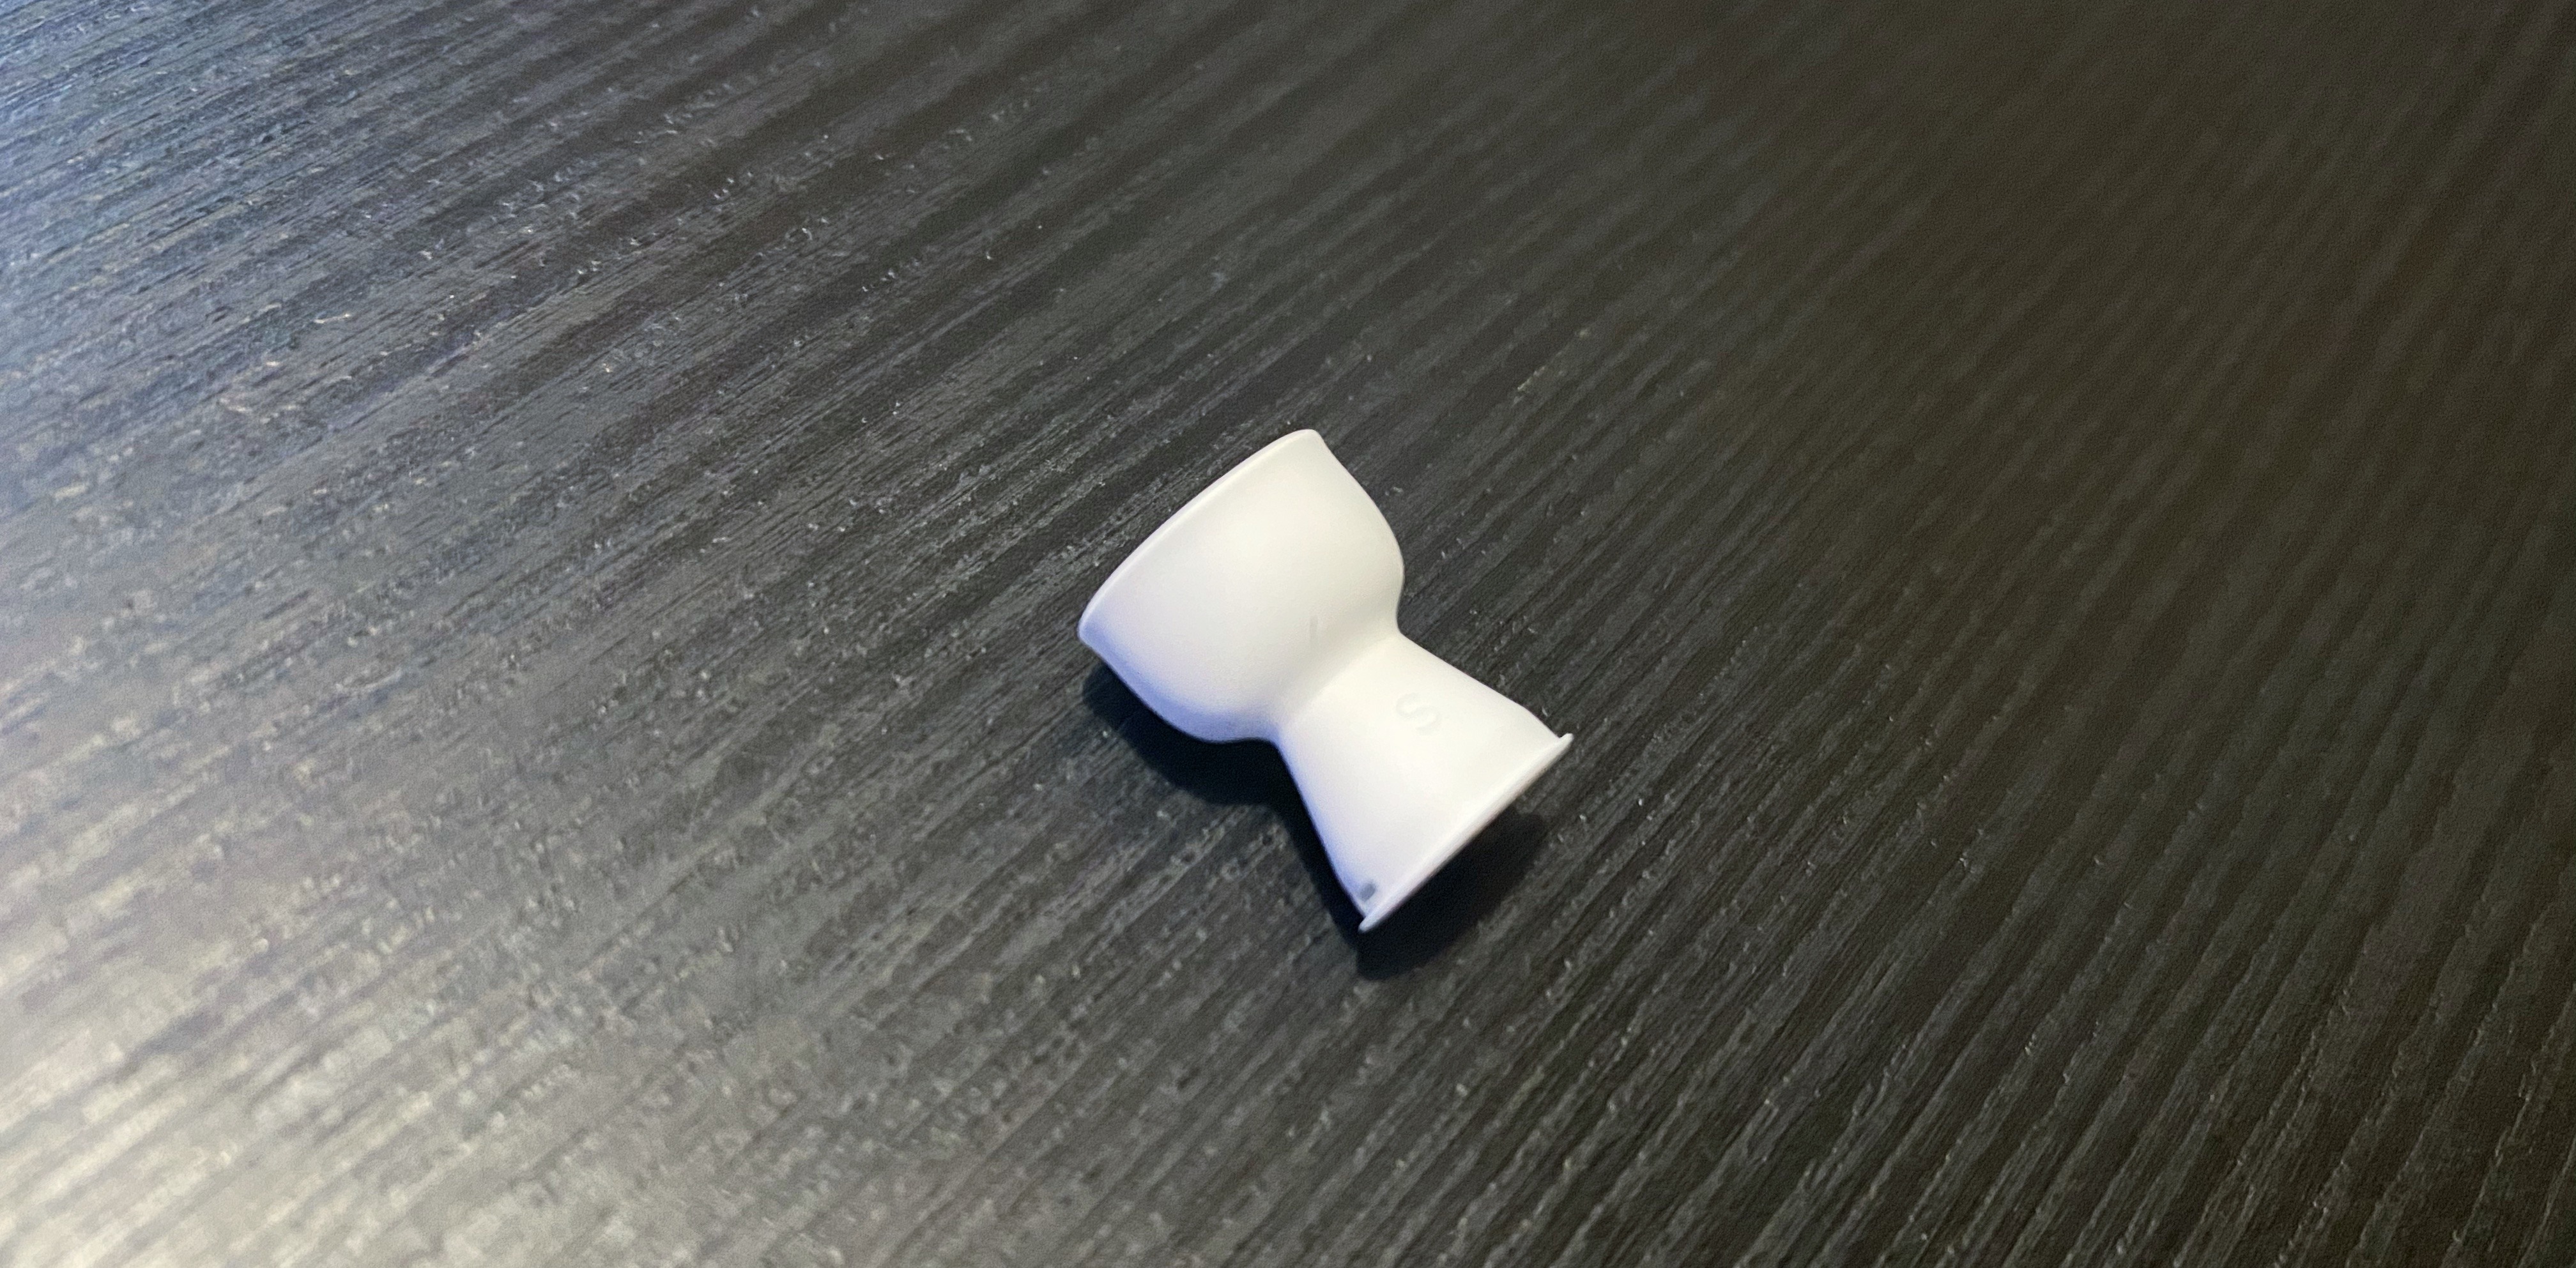
Grab the tip of your AirPods Pro and pull out the soft silicone part – again, don’t apply too much pressure because you don’t want to break it – so that it looks like this:
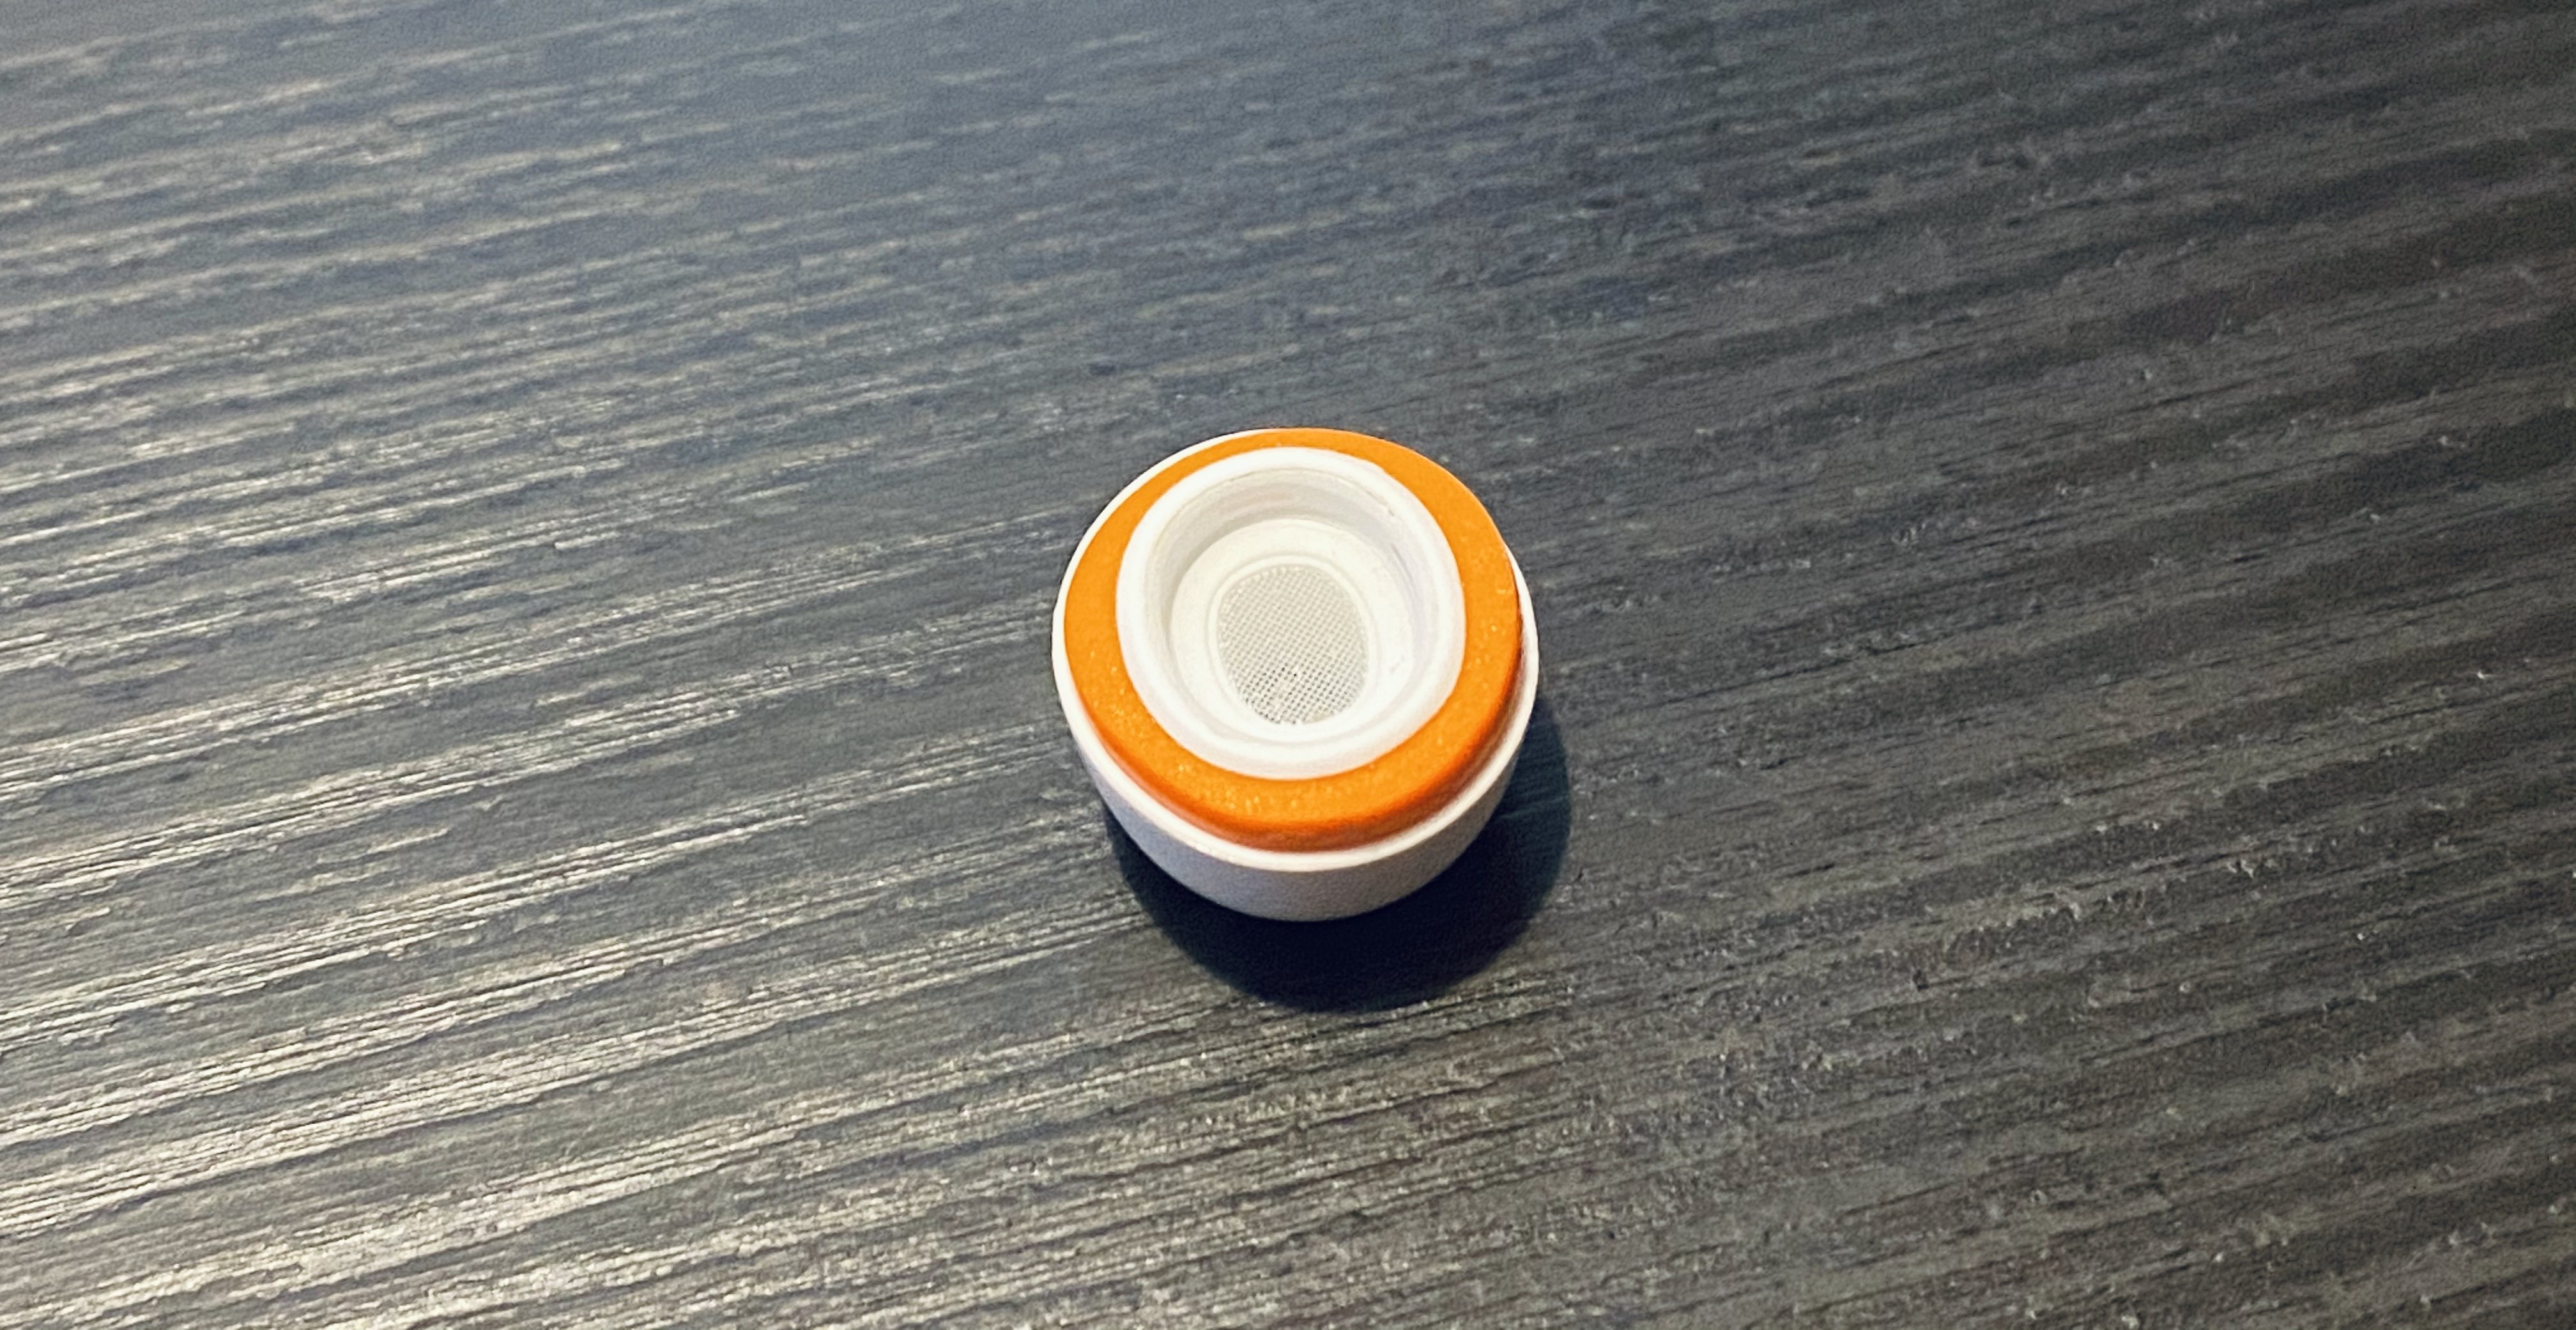
Slide the plastic base of the AirPods’ tip into the foam ring, then carefully adjust it so that it doesn’t cover the vents (which help relieve pressure in your inner ear), as pictured below:
Lastly, pull down the outer silicone layer of the AirPods’ tip so it covers the newly inserted foam part, adjust the foam again so it doesn’t cover the vents, and voila:
Now, obviously this is a DIY modification and it’s by no means an absolutely perfect match for Apple’s design – but it’s a close approximation that has helped me enjoy some of the benefits of memory foam tips despite the fact that I still have to use Apple’s official tips.
I’ve been rocking this setup for the past week, and not only do I find my AirPods Pro more comfortable to wear for prolonged listening sessions because the tips fit better in my ears and don’t wobble as much as before, but sound isolation is also better (as confirmed by Apple’s fit test in Settings). Thanks to the extra foam layer, the modded tips “fill” my ears, creating a better seal and ensuring the AirPods stay in place. As a result of the superior fit, I’ve also noticed a slightly warmer sound with a bit more bass than before, which I believe is a pleasant addition. Best of all, my right AirPod always stays in place now (which wasn’t the case before the mod) and the additional foam layer hasn’t been an issue for the case, which still closes perfectly.
I recognize that after spending $249 on AirPods Pro, I shouldn’t have to invest roughly $18 (plus shipping) on a mod that only sort-of lets me use foam tips with them. Apple should provide users with more choice in terms of the materials used in the default tips: ideally, for $249 the company should offer a selection of silicone and memory foam tips in the box. But I also like my AirPods Pro a lot, and I use them for several hours every day, and I wanted to make them fit my ears better today. I’m pretty happy with this temporary mod; until a better solution comes along3, Symbio’s W eartips have proven to be good companions to Apple’s silicone tips, and I recommend them.
- Train trips, riding the subway in Rome, or writing without hearing surrounding noises. ↩︎
- A tip I picked up from Cabel Sasser years ago: you can register for an Amazon Japan account even if you don’t live in Japan, use the website in English, and take advantage of fast worldwide shipping. I’ve spent more money on Japanese videogame and manga imports than I’m willing to admit. ↩︎
- For real, Comply: please make memory foam replacement tips for AirPods Pro that match the size and plastic attachment of Apple’s default ones. Thank you. ↩︎
Stephen Coyle on the Reduced Bluetooth Latency of AirPods Pro→
Stephen Coyle has followed up on previous tests he conducted on Bluetooth latency of AirPods. This time, he tested the AirPods Pro using the iOS system keyboard, his rhythm game Tapt, and a shotgun microphone, to measure the delay between triggering a sound on an iPad Pro and playback through the Apple’s wireless earphones and other Bluetooth headphones.
As Coyle explains, latency affects certain use cases, such as user-triggered UI sounds like the keyboard, accessibility features like VoiceOver, and game sound effects, more than others. While delayed keyboard clicks may merely be annoying, delayed VoiceOver responses are a serious usability issue for people who depend on the feature.
What Coyle discovered was that the the latency of the AirPods Pro is substantially less than the original model of AirPods. As Coyle puts it:
If it’s possible for the trend line to continue in the same direction, the next generation or two of AirPods will be very exciting. Not being a VoiceOver user, I’m unsure how much AirPods Pro improve its user experience in real terms, but I think this general trend can only be for the good. Similarly, for mobile gaming and general user experience, this trend means that what is, in my opinion, the primary downside of Bluetooth earphones may be gradually disappearing.
I found Coyle’s comment on using AirPods Pro to make and edit music intriguing too:
Their status as the lowest latency Bluetooth earphones notwithstanding, the AirPods Pro make for a deeply unsettling experience when using them as monitors to play piano in Logic Pro; there’s still far too much delay to make for a comfortable experience (and I’m not alone in thinking similar). They are, however, just about usable when editing music or video, and shaving a few dozen more milliseconds off this each generation would fast make them a preferable option over wired earphones.
As someone who edits podcast audio regularly, I’ve never considered using AirPods Pro because I’ve assumed that the latency would be a roadblock. What Coyle’s test show is that it’s time to rethink old assumptions whether it’s the role of AirPods Pro in accessibility features like VoiceOver, audio production, or gaming. As Apple reduces the latency of its wireless earphones, the use cases for them will only expand further, which is exciting.
NoiseBuddy: Control Noise Cancellation and Transparency Modes of AirPods Pro on a Mac
Earlier this week, Guilherme Rambo released a new Mac utility called NoiseBuddy that toggles between the noise cancellation and Transparency modes of AirPods Pro and the Beats Solo Pro headphones when they’re connected to a Mac. The app can place an icon in your Mac’s menu bar or on the Touch Bar and uses the same noise cancellation and Transparency iconography found in Control Center on iOS and iPadOS. The app’s settings allow you to run NoiseBuddy in the menu bar, on the Touch Bar, or in both places. To switch modes, simply click the icon in the menu bar or tap the Touch Bar button.
This isn’t Rambo’s first time working with Bluetooth headphones and the Mac. He also created AirBuddy, which we covered previously. AirBuddy is a Mac utility that displays the charge status of AirPods and Beats headphones that use Apple’s proprietary wireless chips. The app also allows users to connect those headphones to their Macs via Bluetooth with a single click.
NoiseBuddy is the kind of Mac utility that I love. It takes overly fiddly aspect of interacting with macOS and makes it dead simple. The free app is available from Rambo’s GitHub repo, where it can be downloaded as a ZIP archive and then dragged into your Applications folder.
HomePod Gaining Multi-Voice Support and Handoff, AirPods Add Audio Sharing and More
Amid yesterday’s packed WWDC keynote, where iOS 13, iPadOS, the new Mac Pro, and more were announced, Apple also shared a few exciting updates coming this fall for its music-focused accessory products: HomePod and AirPods. The HomePod will soon support multiple users, a new Handoff feature, and radio apps, while AirPods will gain audio sharing and a special Siri feature for messaging.
New AirPods First Impressions: Wireless Magic
I don’t think I need to extol the virtues of AirPods in 2019. Over two years after their debut, Apple’s truly-wireless earbuds, in addition to providing users with a convenient, seamless way to stream music and podcasts to their ears, have become a cultural phenomenon that has spurred some of the greatest memes of Tech Twitter in recent history. Everybody loves AirPods – provided their unique size and design fit their ears – and, most of all, everybody likes to say how much they love their AirPods.
This article is no different, but there’s a small twist in the usual narrative that prompted me to write this story after receiving my second-generation AirPods yesterday.
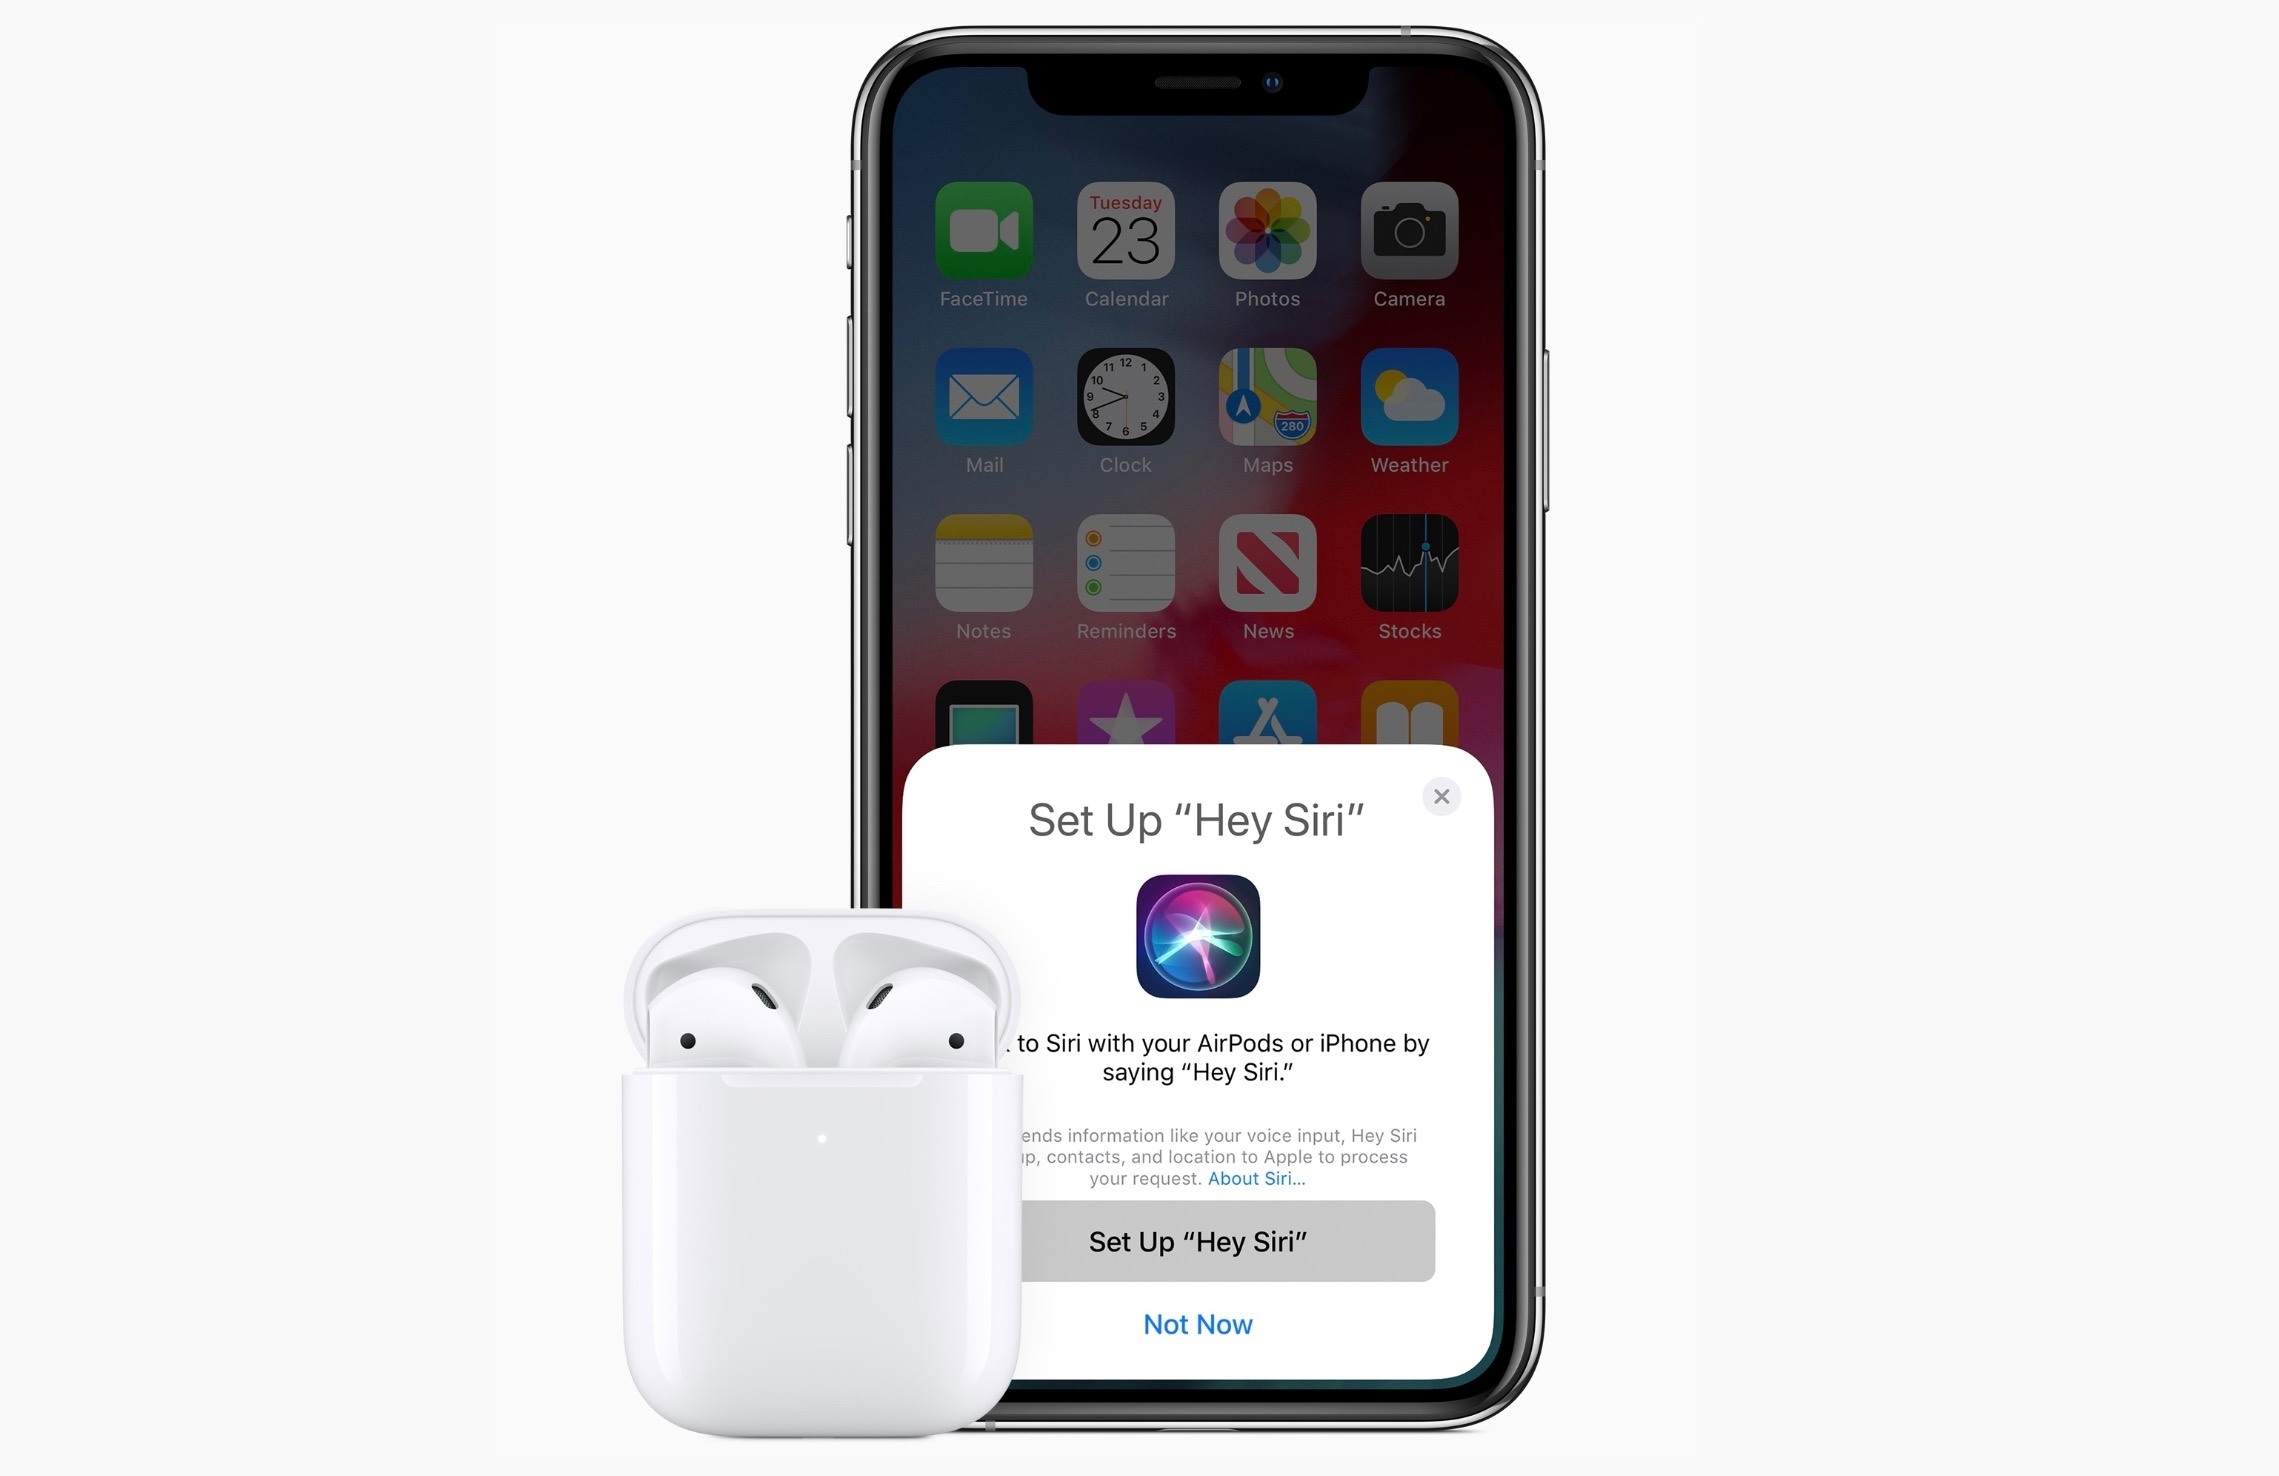
Apple Announces New AirPods with ‘Hey Siri’ Support, New H1 Chip, Wireless Charging Case Option
In a surprise announcement following a string of daily releases this week, Apple today announced a major update to AirPods, the company’s wireless earbuds. As widely speculated over the past several months, the new generation AirPods come with support for hands-free ‘Hey Siri’ activation, feature improved performance over the original AirPods (which launched in late 2016), and support wireless charging (using the Qi standard) via an optional case.
AirBuddy: An AirPods Companion for Your Mac
AirBuddy by Guilherme Rambo is one of the handiest Mac utilities I’ve tried in a while. AirPods connect almost instantly to iOS devices, but the process of pairing them to a Mac is not as simple, often requiring fiddling with your Mac’s Bluetooth settings from the menu bar or System Preferences. AirBuddy solves that problem, making it as trivially easy to connect AirPods to a Mac as it is to do the same with an iPhone.
The app works with a Mac that supports Bluetooth LE and is running macOS Mojave and any headphones that include Apple’s proprietary W1 chip. That means in addition to AirPods, AirBuddy can also control Beats headphones that have a W1 wireless chip. The app runs in the background as a helper process, so you won’t usually see a window or dock icon while it’s running. Nor is there a menu bar icon. Instead, once you’ve adjusted the app’s handful of settings to your liking, the app appears almost immediately when you open your AirPods case near your Mac or turn on your Beats headphones.
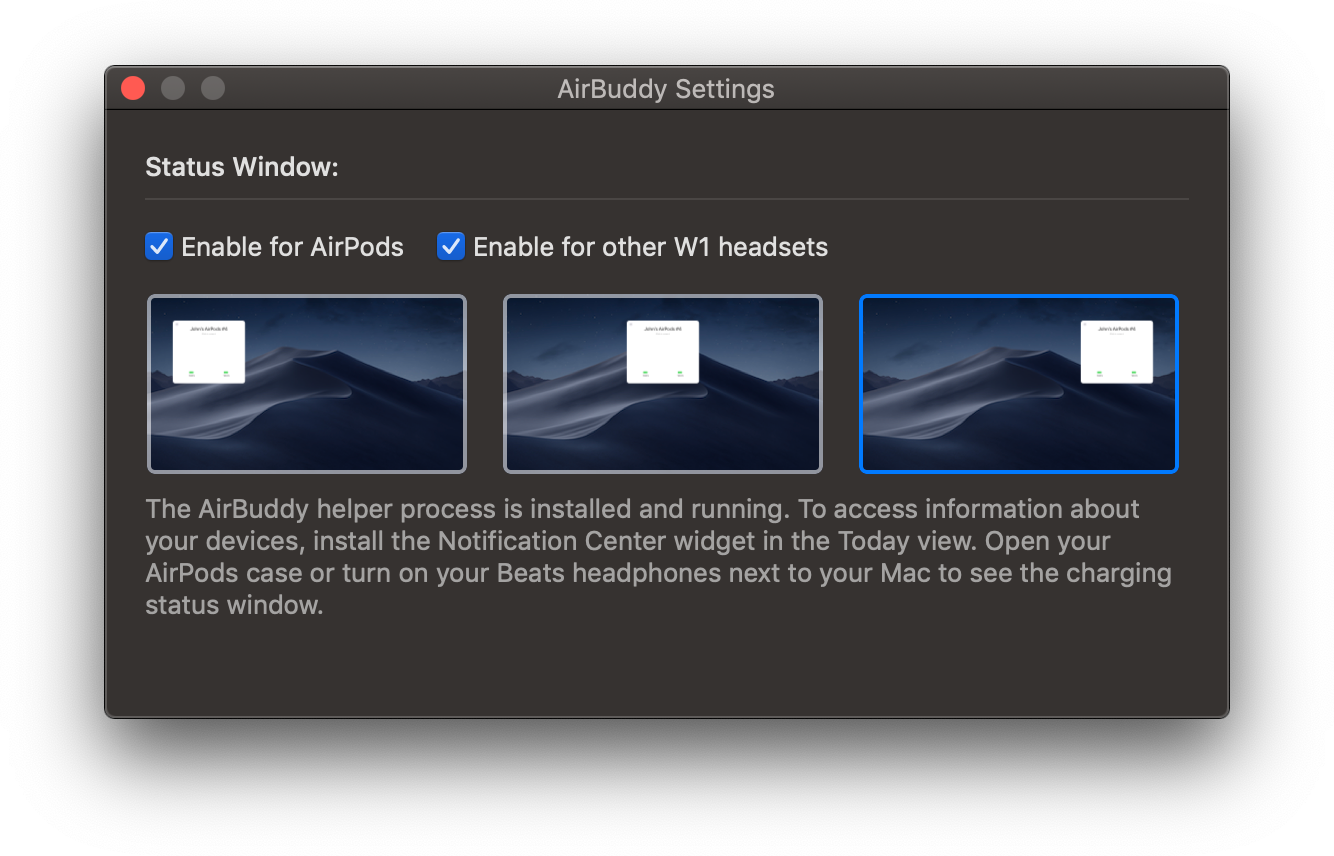
AirBuddy has a few settings that are available by opening the app from the Finder. There are checkboxes for enabling the app to work with AirPods and other W1 headphones and display options for picking where onscreen you want AirBuddy to appear when it detects nearby headphones.
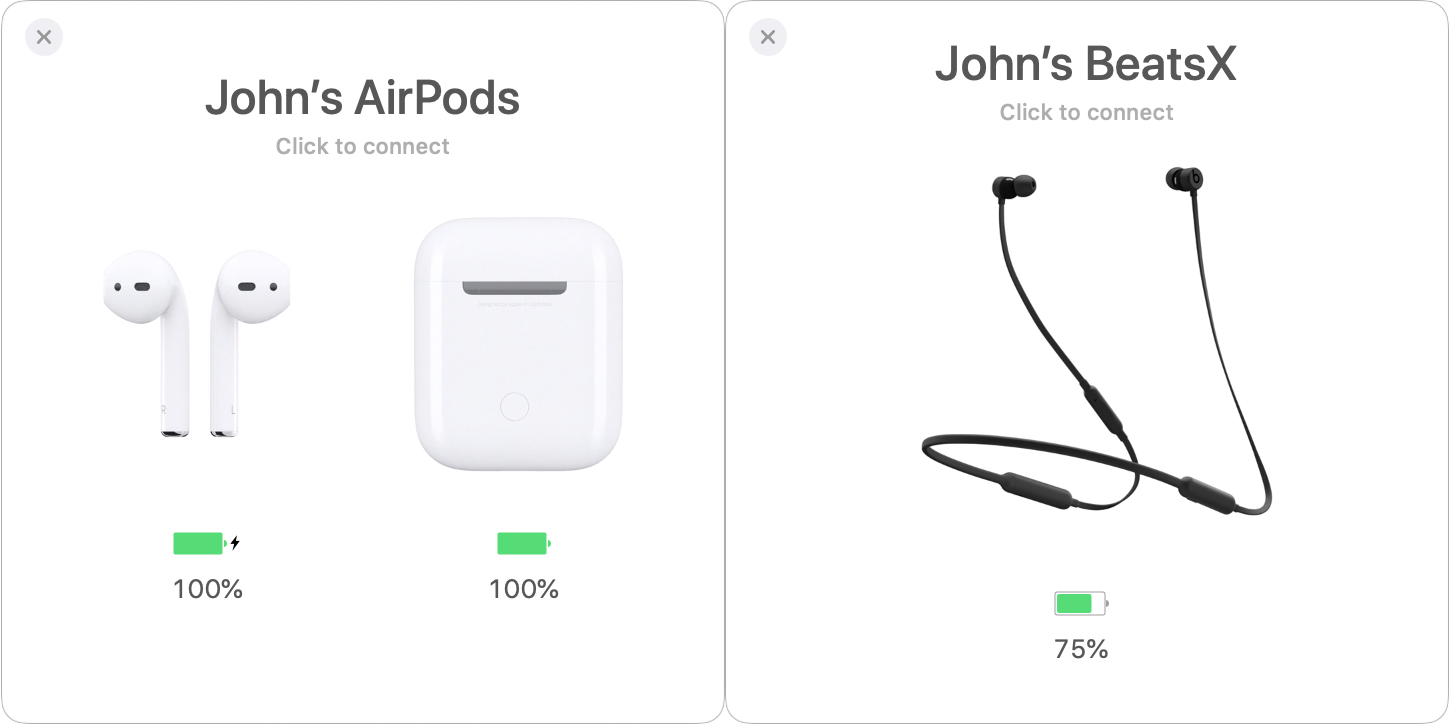
Once you have the app set up, opening your AirPods case near your Mac causes a window to slide down from the top of your screen that looks just like you’d see if you did the same thing in proximity to your iPhone or iPad. For AirPods, you’ll see rotating images of your AirPods and their case with a charge indicator beneath them. The same sort of window appears when you turn on Beats headphones nearby.
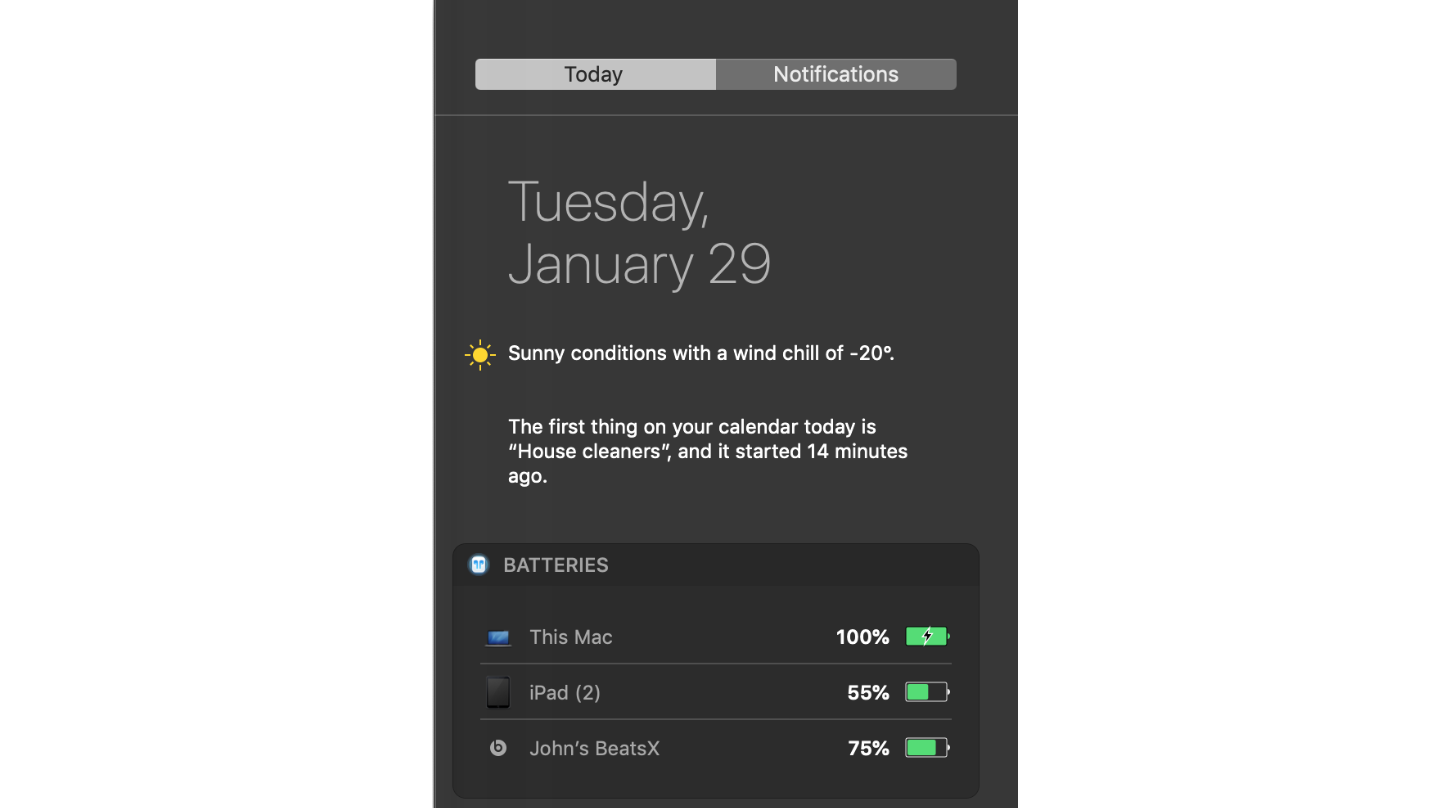
AirBuddy doesn’t just provide the status of your AirPods though. It also allows you to connect them to your Mac with a single click. There is a Mac Today widget that provides battery status for your Mac and any headphones or iOS devices you’ve ever connected to your Mac too. It’s easy enough to check the battery of devices sitting nearby without the help of AirBuddy, but it’s nice that I can also see that the battery of my iPad sitting two floors above me is running low and should be plugged in if I want to read in bed tonight.
In the past, I’ve rarely connected my AirPods to my Mac. Instead, I used headphones with my Mac’s 3.5mm audio jack because AirPods weren’t worth the trouble. In my tests of AirBuddy though, the app works as expected every time eliminating the friction from the connection process. AirBuddy is so simple and works so well that it begs the question of why Apple hasn’t built this sort of functionality into macOS. For whatever reason, Apple hasn’t, which is a shame. Perhaps Apple will add a similar feature to macOS in the future, but unless and until that happens, anyone with AirPods and a Mac should download AirBuddy.
Rambo is selling AirBuddy using a ‘name-your-price’ model with a suggested price of $5.
For AirPods Early Adopters, Apple’s Hit Wireless Earbuds Are Showing Their Age→
I found myself nodding in agreement with this post by Zac Hall about how AirPods purchased in December 2016 are starting to show their age in terms of battery life:
Apple rates AirPods for up to five hours usage at 50% volume, and early testing proved that rating was actually slightly conservative. In practice, brand new AirPods could last almost five and a half hours before their batteries depleted. The carrying case doubles as a charging case, too, providing over 24 hours of battery life without needing to recharge from the wall.
But batteries are consumable, we all know so well now, and that’s proven true for the tiny batteries inside AirPods after two years of daily use. Battery life that once exceeded five hours now struggles to power AirPods through three hours of continuous usage at the same volume. Battery life results can be cut in half if you need to play audio at a louder volume.
In practice, I used to never hear the low battery alert during usage. I rarely listened to audio with AirPods for five straight hours before charging in the carrying case without thought. More recently, I’ve heard the bloop sound much more regularly, frequently followed by AirPods dying before I’m ready to recharge.
I’ve been thinking about this a lot lately (in fact, I proposed it as a topic for this week’s Connected) and I feel like Hall and I have gone through the same process. When my AirPods were new, I could listen to a full episode of Upgrade or Cortex at max volume and still have plenty of battery life left; now I cannot get to the end of an episode (roughly 90 minutes in length) without hearing the low-battery alert. My AirPods can’t hold a charge like they used to and I’m not surprised.
I could buy a fresh pair of AirPods now, but that seems like a waste of money given the (possible?) upcoming release of a new model. I could buy a third-party wireless charging adapter to make charging the case more convenient, but I don’t feel comfortable with an unofficial, bulky add-on case, which wouldn’t fix the battery issue of the AirPods anyway. I love my AirPods – they’re one of my favorite Apple products in recent years alongside the iPad Pro and Apple Watch – but I’m reaching the point where I’m always charging them, and I really want Apple to release whatever they’ve been working on.


