Posts tagged with "photography"

Photo Editor and Organizer Darkroom Adds New Clarity Tool

Photo editing and management app Darkroom has been updated with a new Clarity slider that I’ve been testing on the iPhone and iPad for a couple of weeks now.

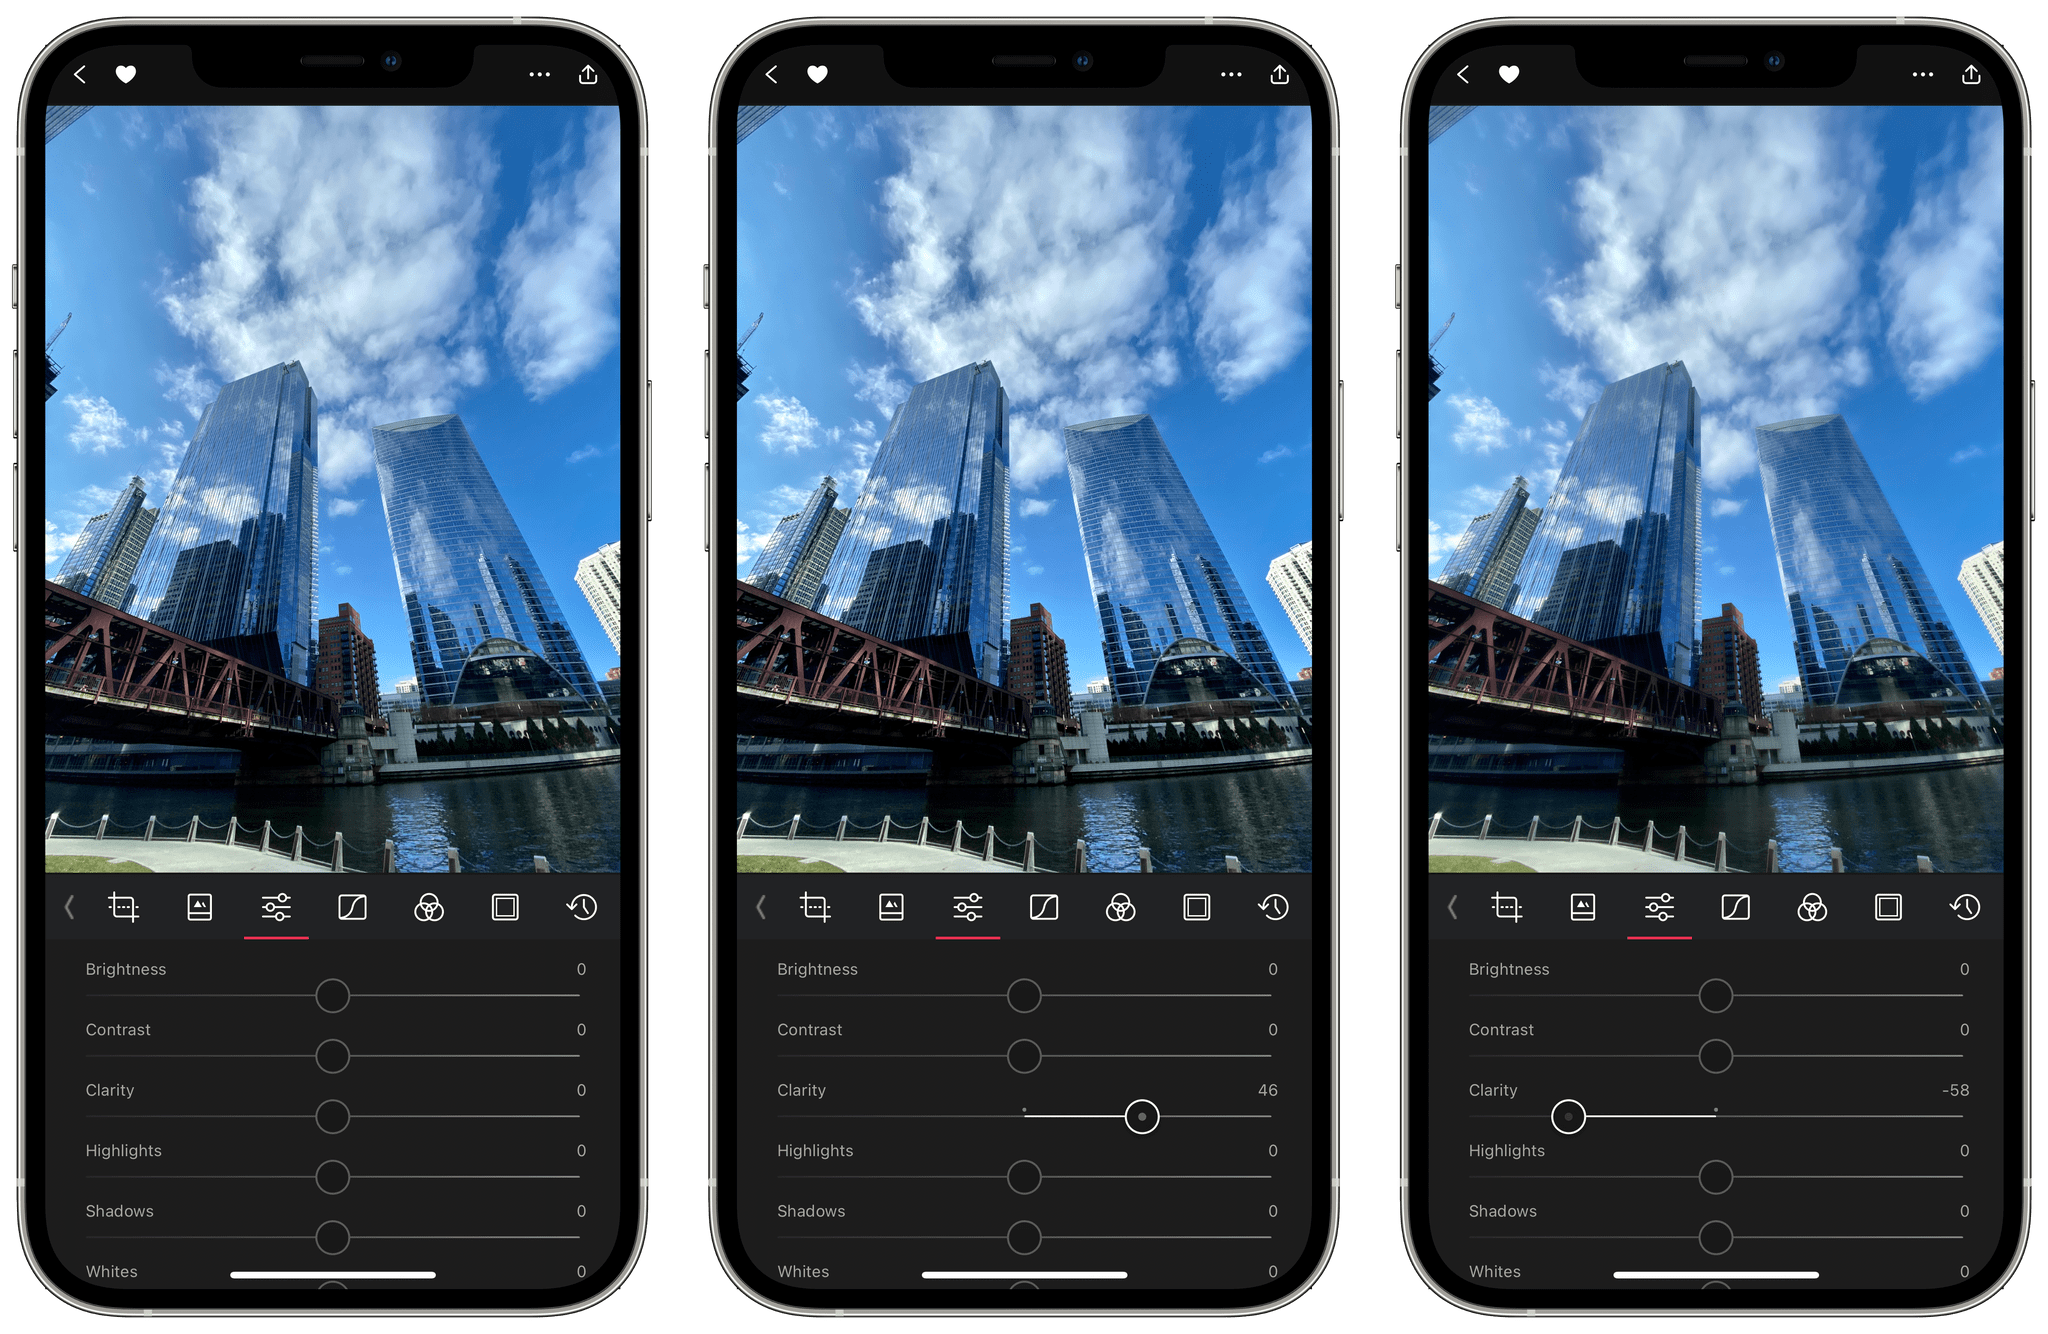
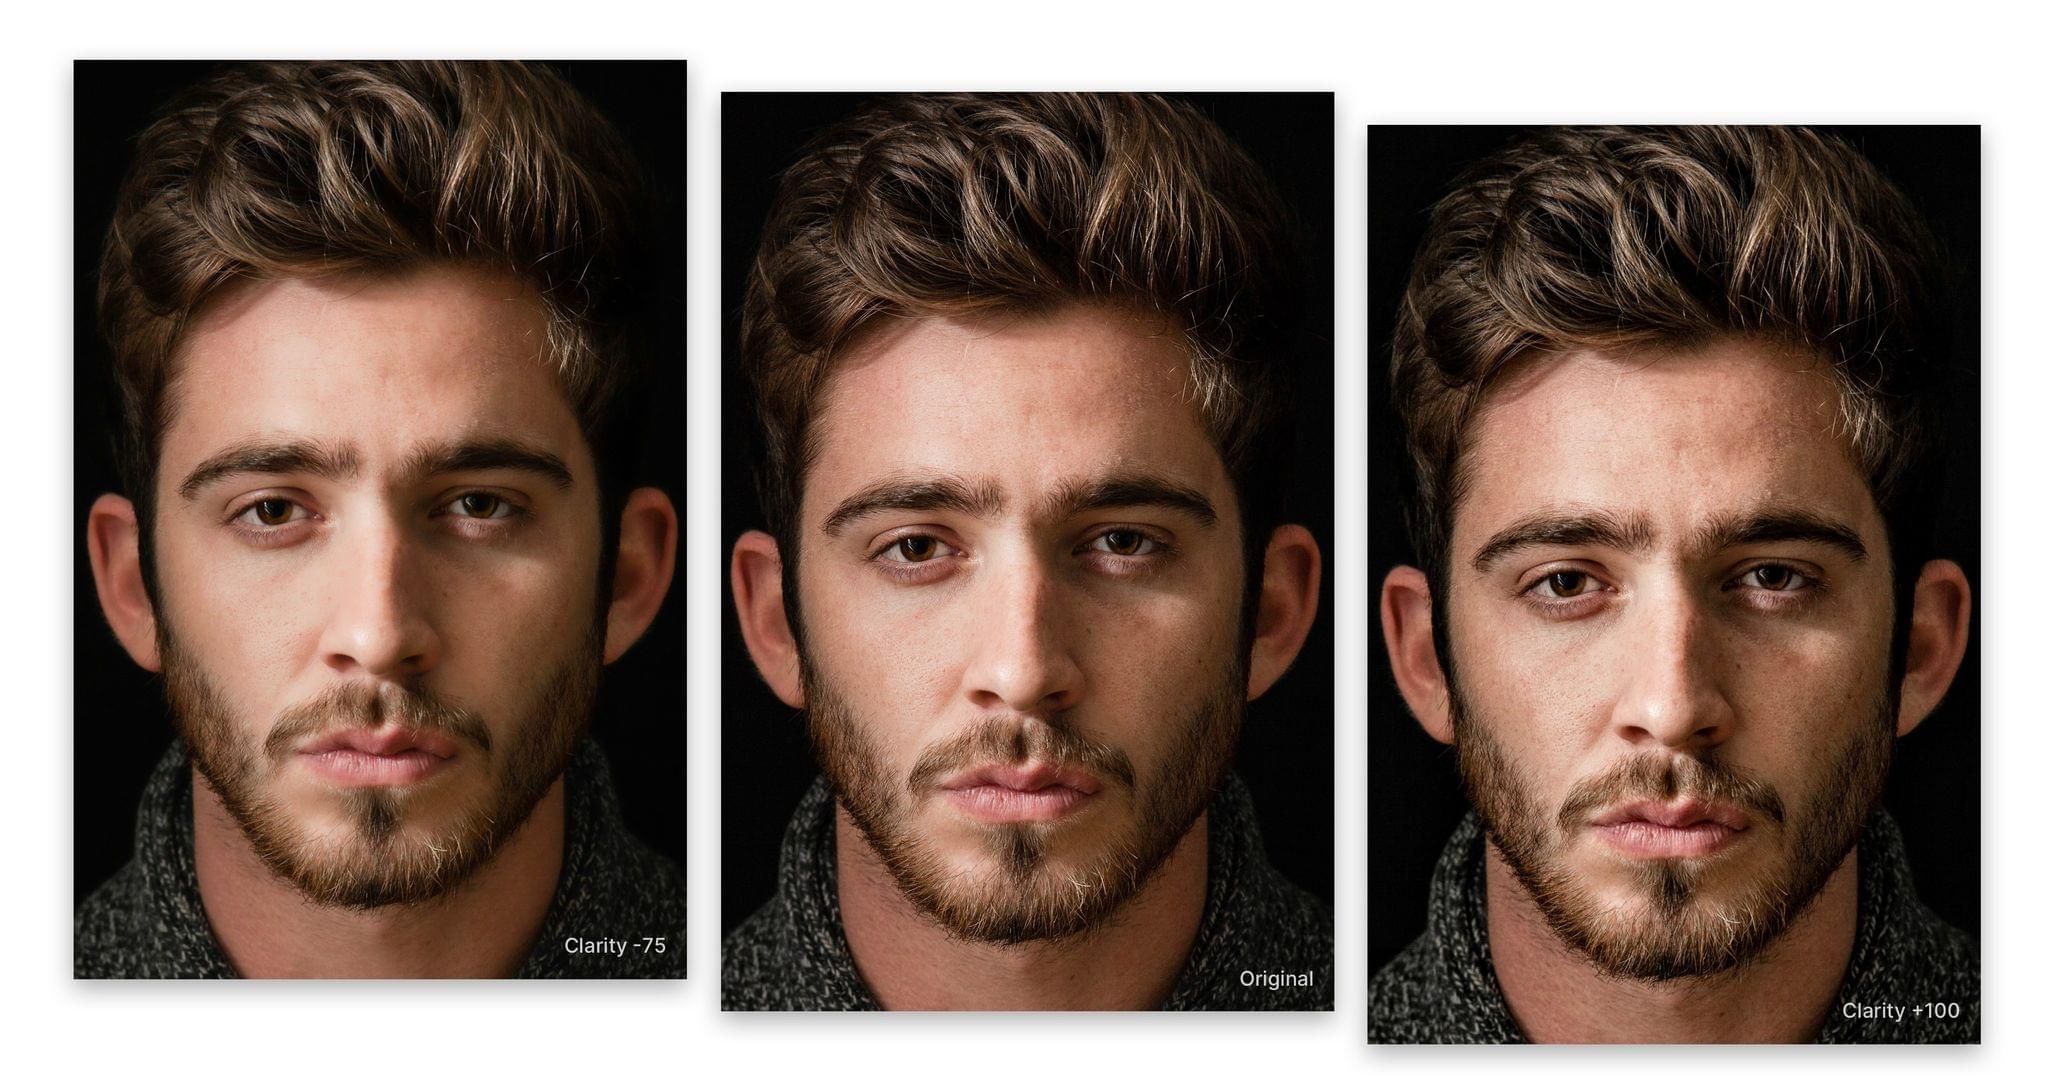
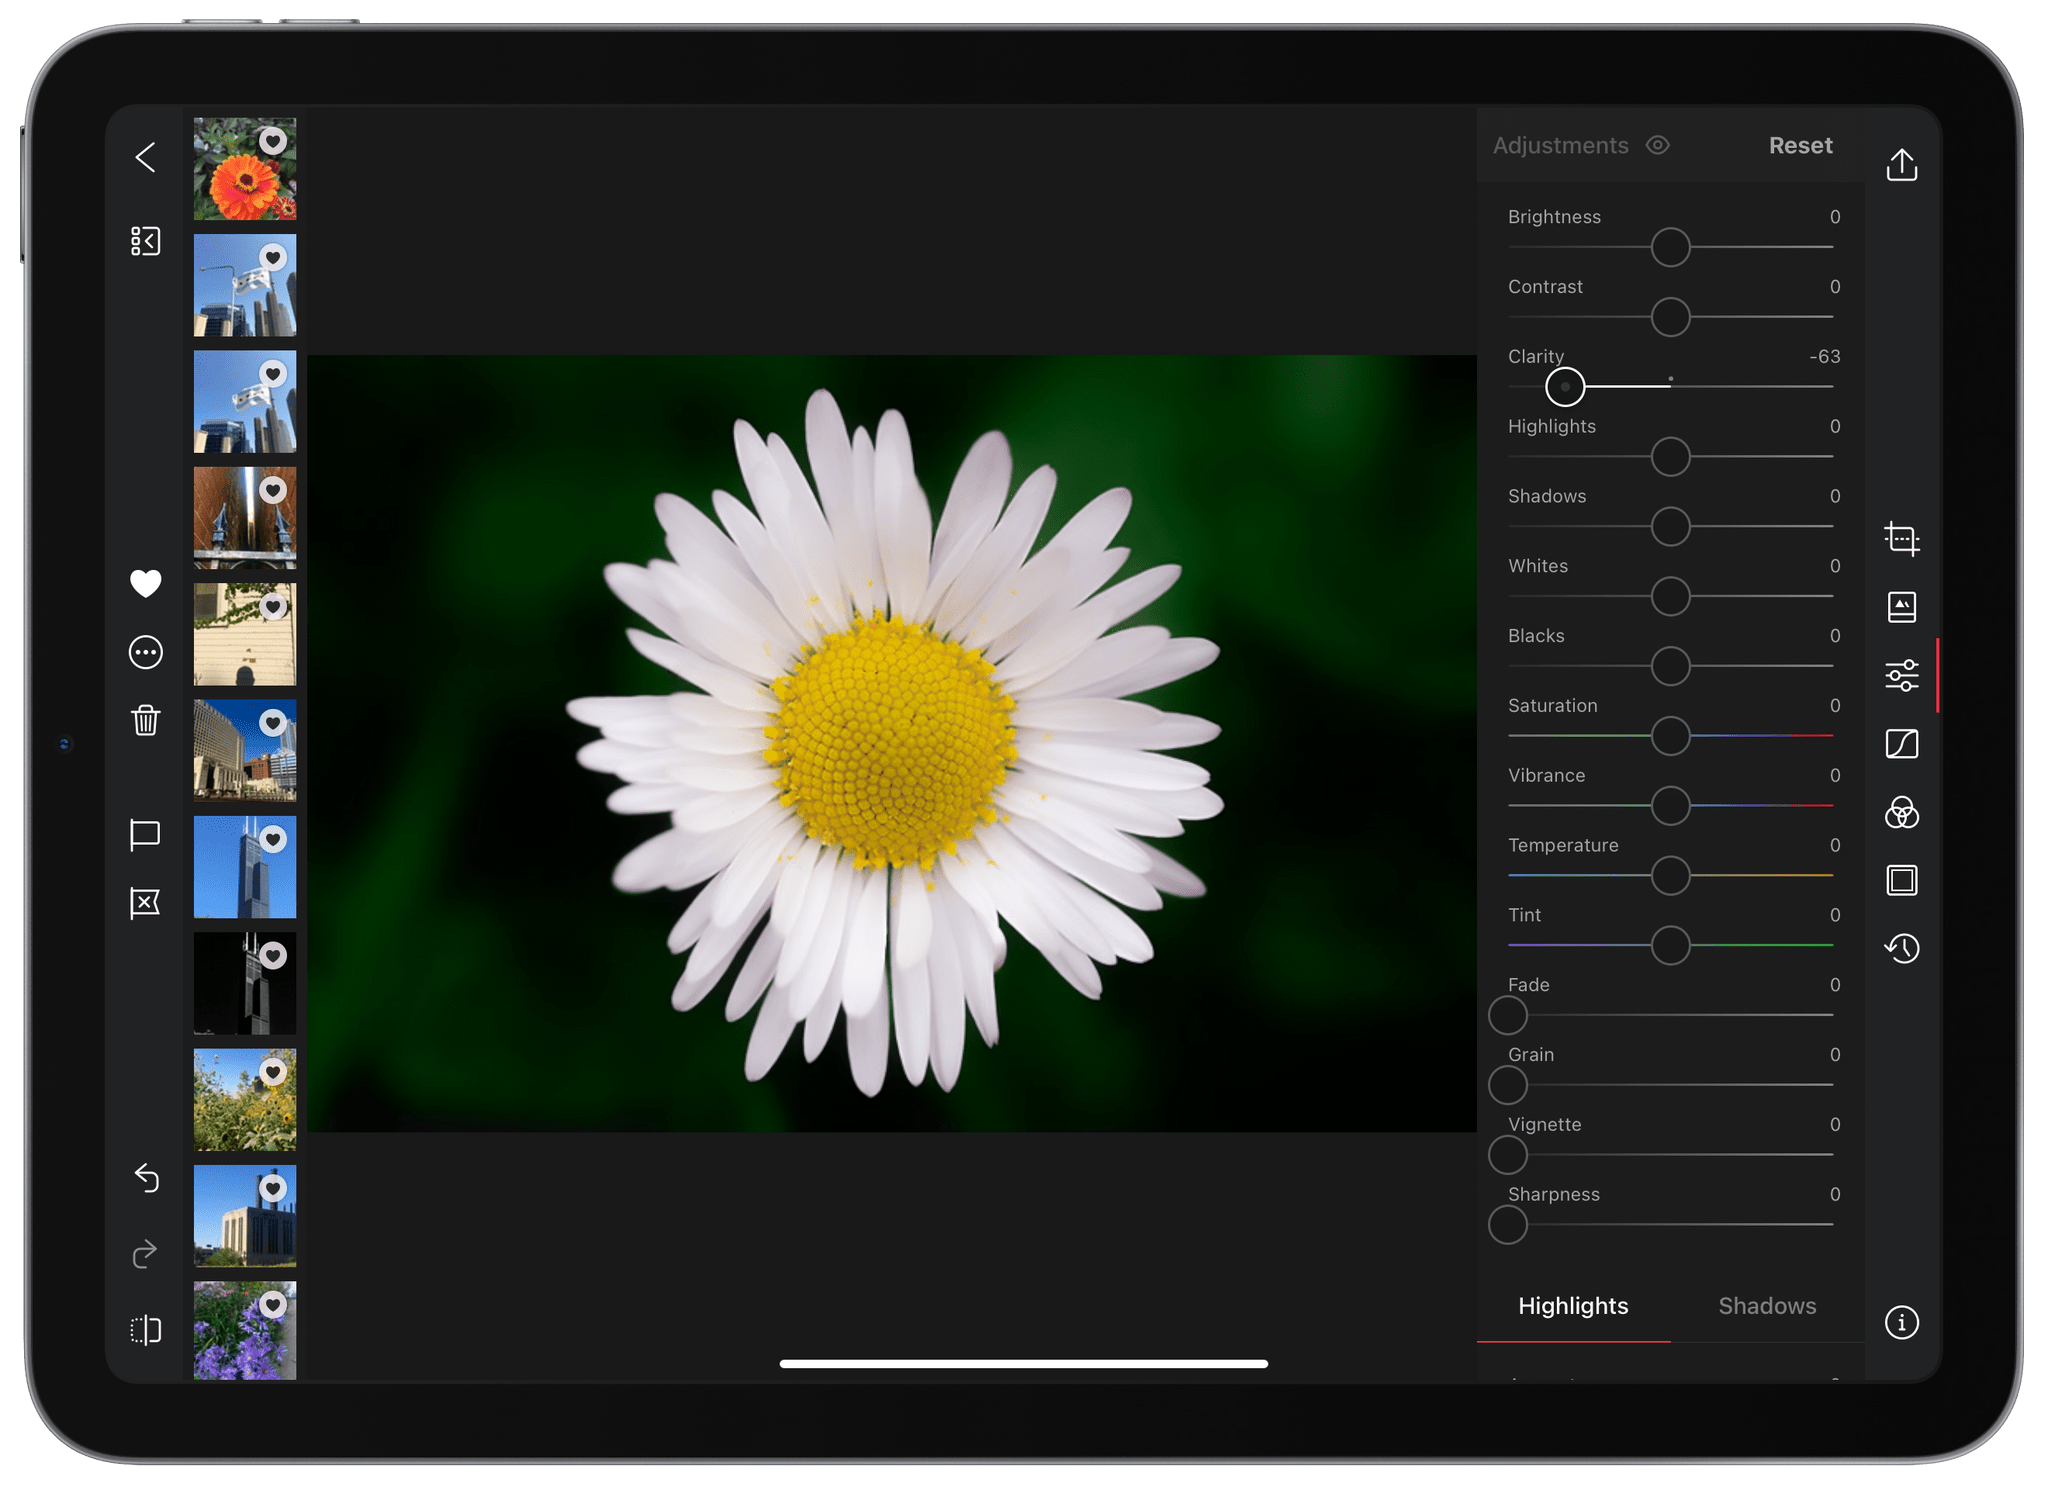
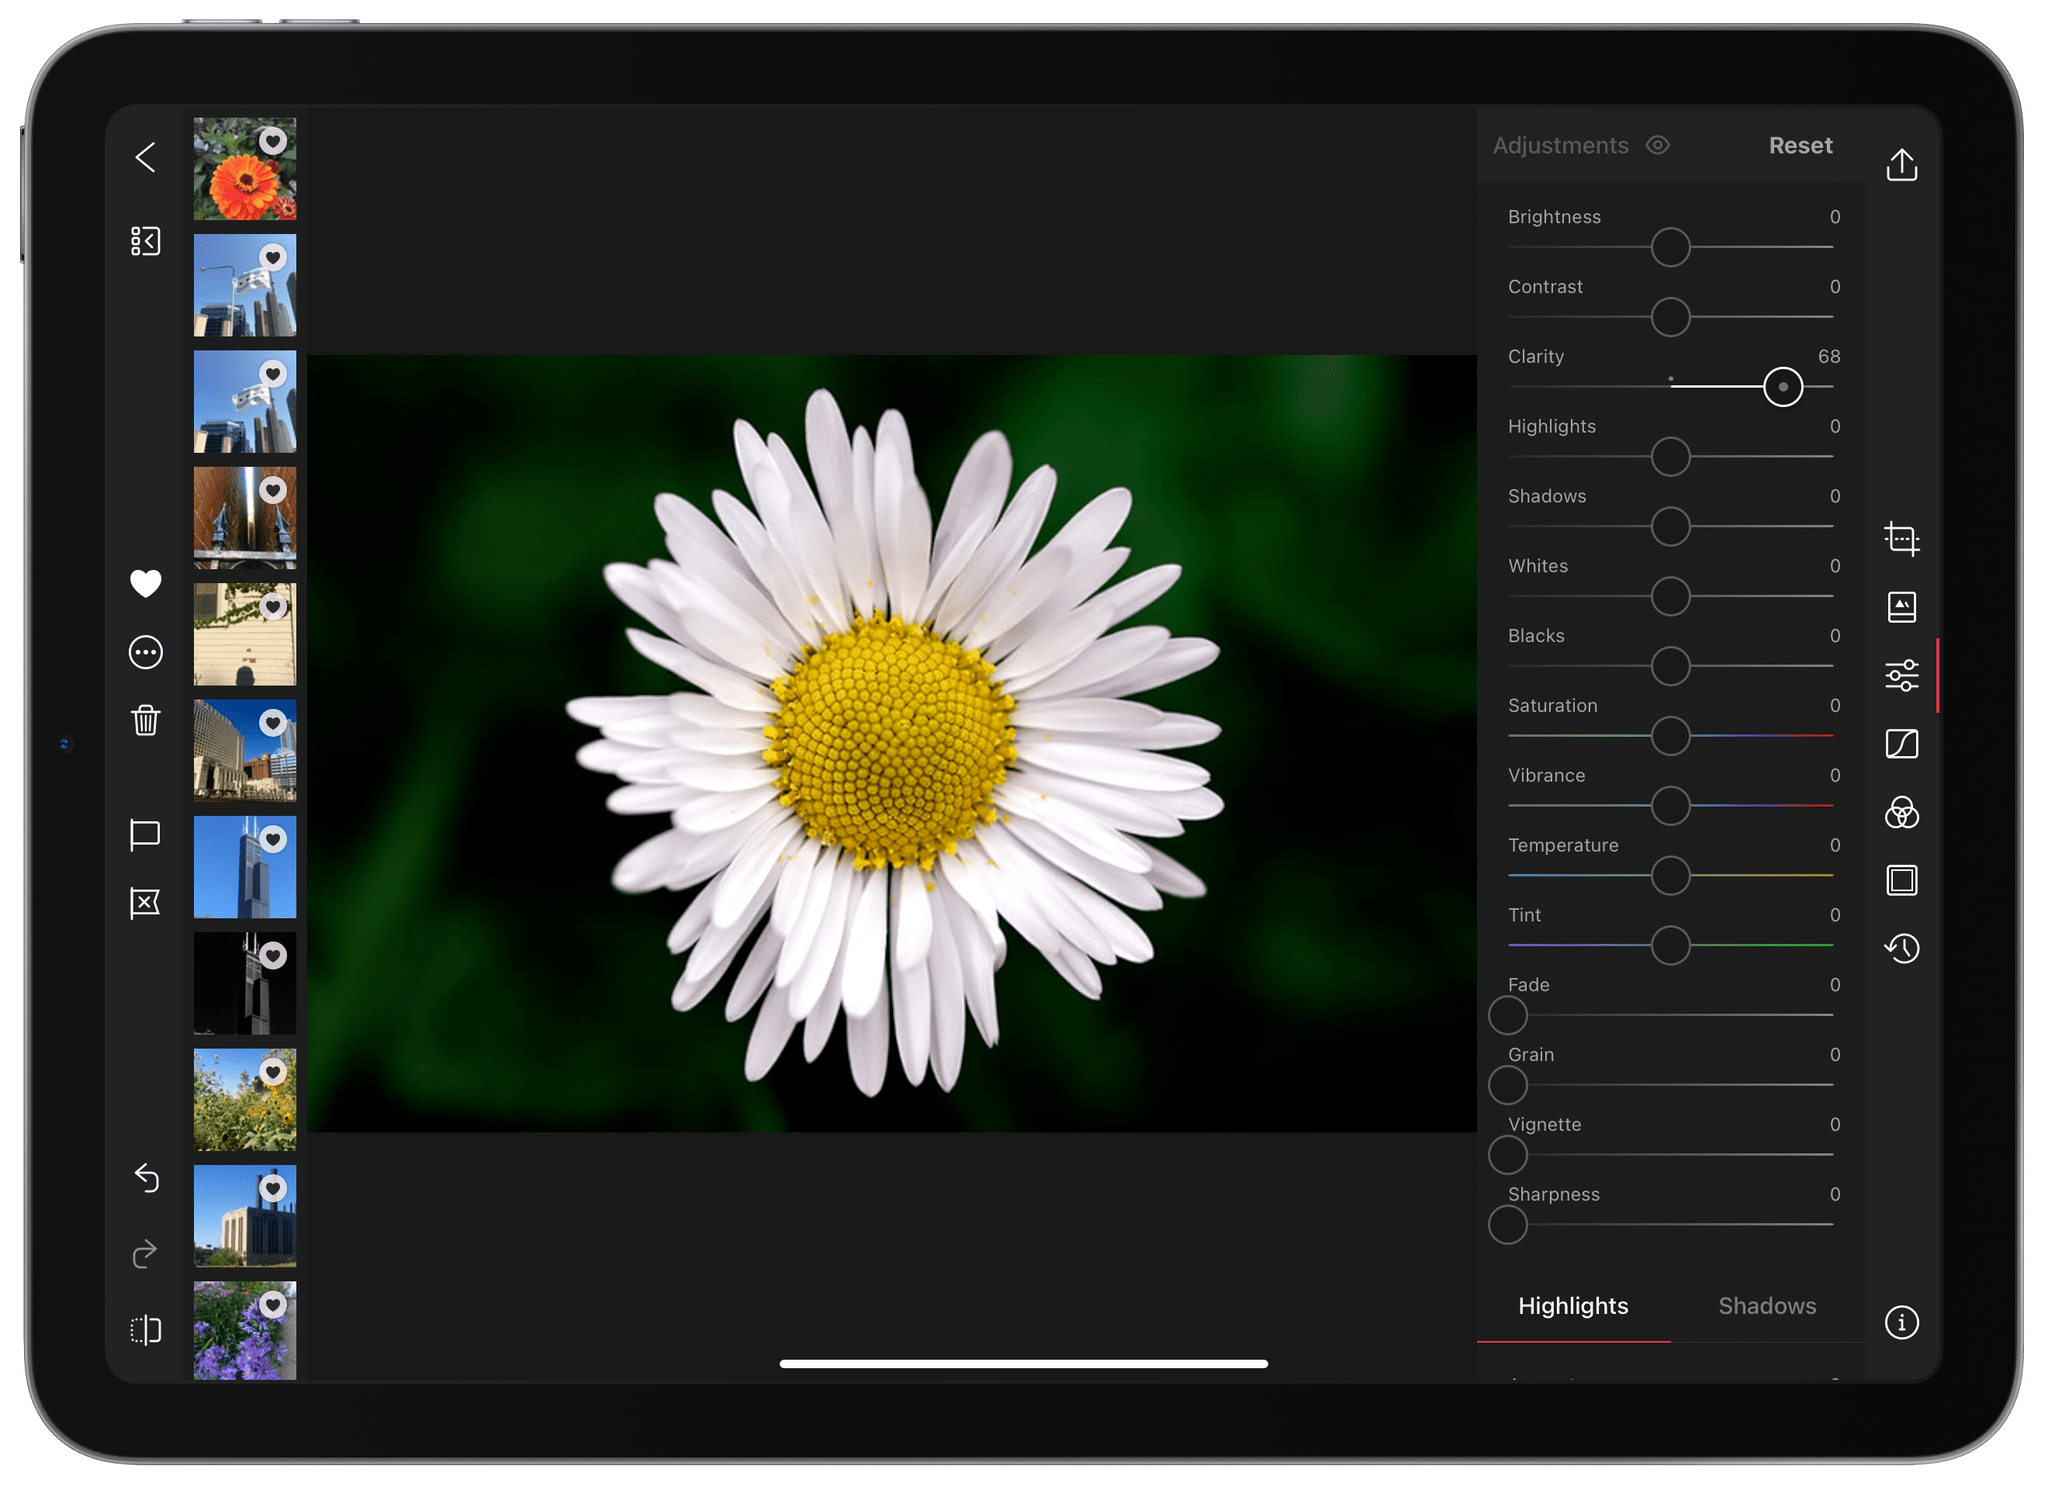
The new slider in the app’s editing panel is deceptively simple. Move the slider to the right to make the details of an image pop or to the left to smooth out the details. If you look carefully, though, you’ll notice that the increase in contrast isn’t uniform across a photo. You can turn the Clarity of a portrait down to smooth a person’s skin, for instance, without affecting their hair or eyes.

Source: Darkroom.

Source: Darkroom.

As Jasper Hauser explains on the Darkroom blog, the Clarity slider is logarithmic, meaning that the effect intensifies more quickly as you approach the endpoints. Picking a point in the middle of the slider’s range produces a subtler effect.

The effect works well with landscapes like the photo of skyscrapers along the Chicago River at the beginning of this story. You can see that increasing Clarity brings out the details in the windows of each building, and turning Clarity down softens areas like the water.

Clarity can achieve a wide range of effects like this shot where it is turned down, smoothing details

Clarity can achieve a wide range of effects like this shot where it is turned down, smoothing details

In contrast, turning up Clarity increases a photo's details dramatically.

In contrast, turning up Clarity increases a photo’s details dramatically.

As Hauser explains, Clarity works by building a detail map of an image and then adjusting the contrast of its regions using an algorithm called a Fast Local Laplacian Filter. There’s a lot of math happening under the hood that Hauser links to if you’re interested in learning more behind what the Darkroom team has managed to incorporate into a simple slider interaction that’s yet another excellent addition to this Apple Design Award-winning app. To learn more about Darkroom’s features, be sure to check out our past coverage and interview on AppStories with Darkroom co-founder Majd Taby.

Darkroom’s latest update is available on the App Store.


Pixelmator Pro Teases ML Crop Feature and Announces a 50% Off Sale

Source Pixelmator.

Source Pixelmator.

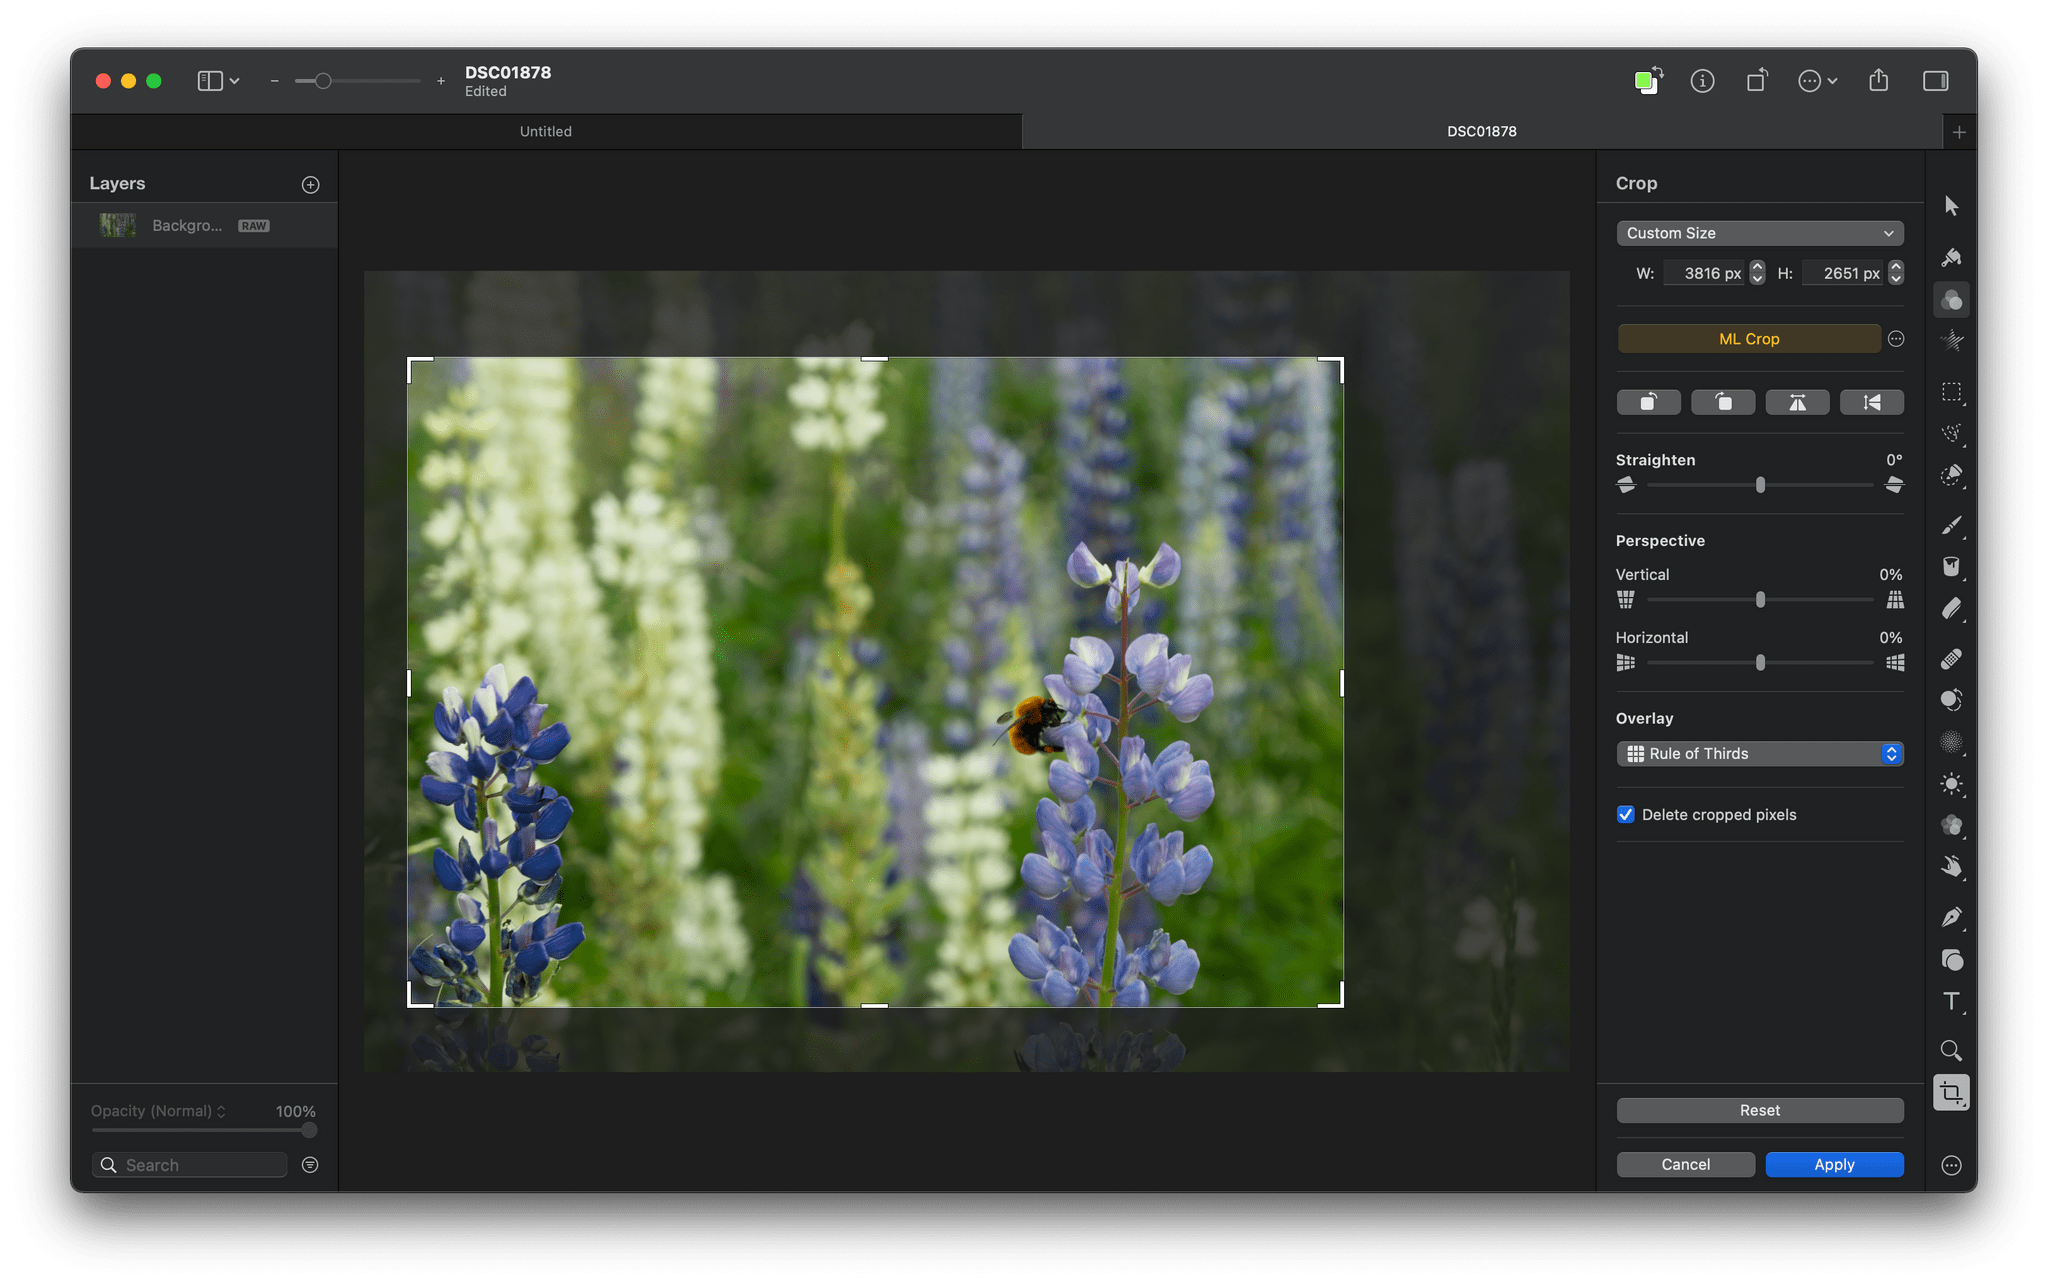
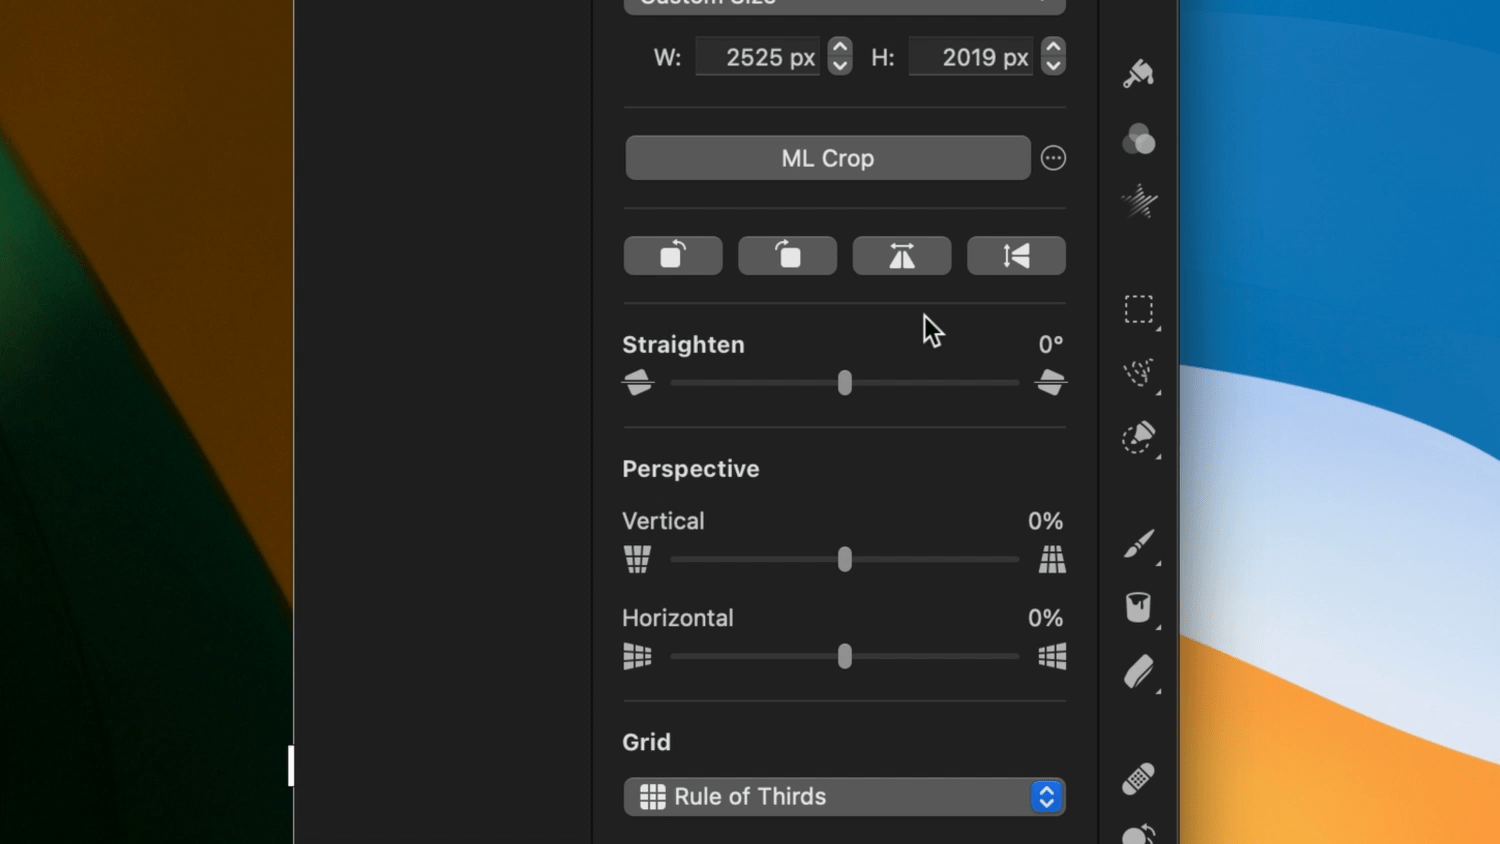
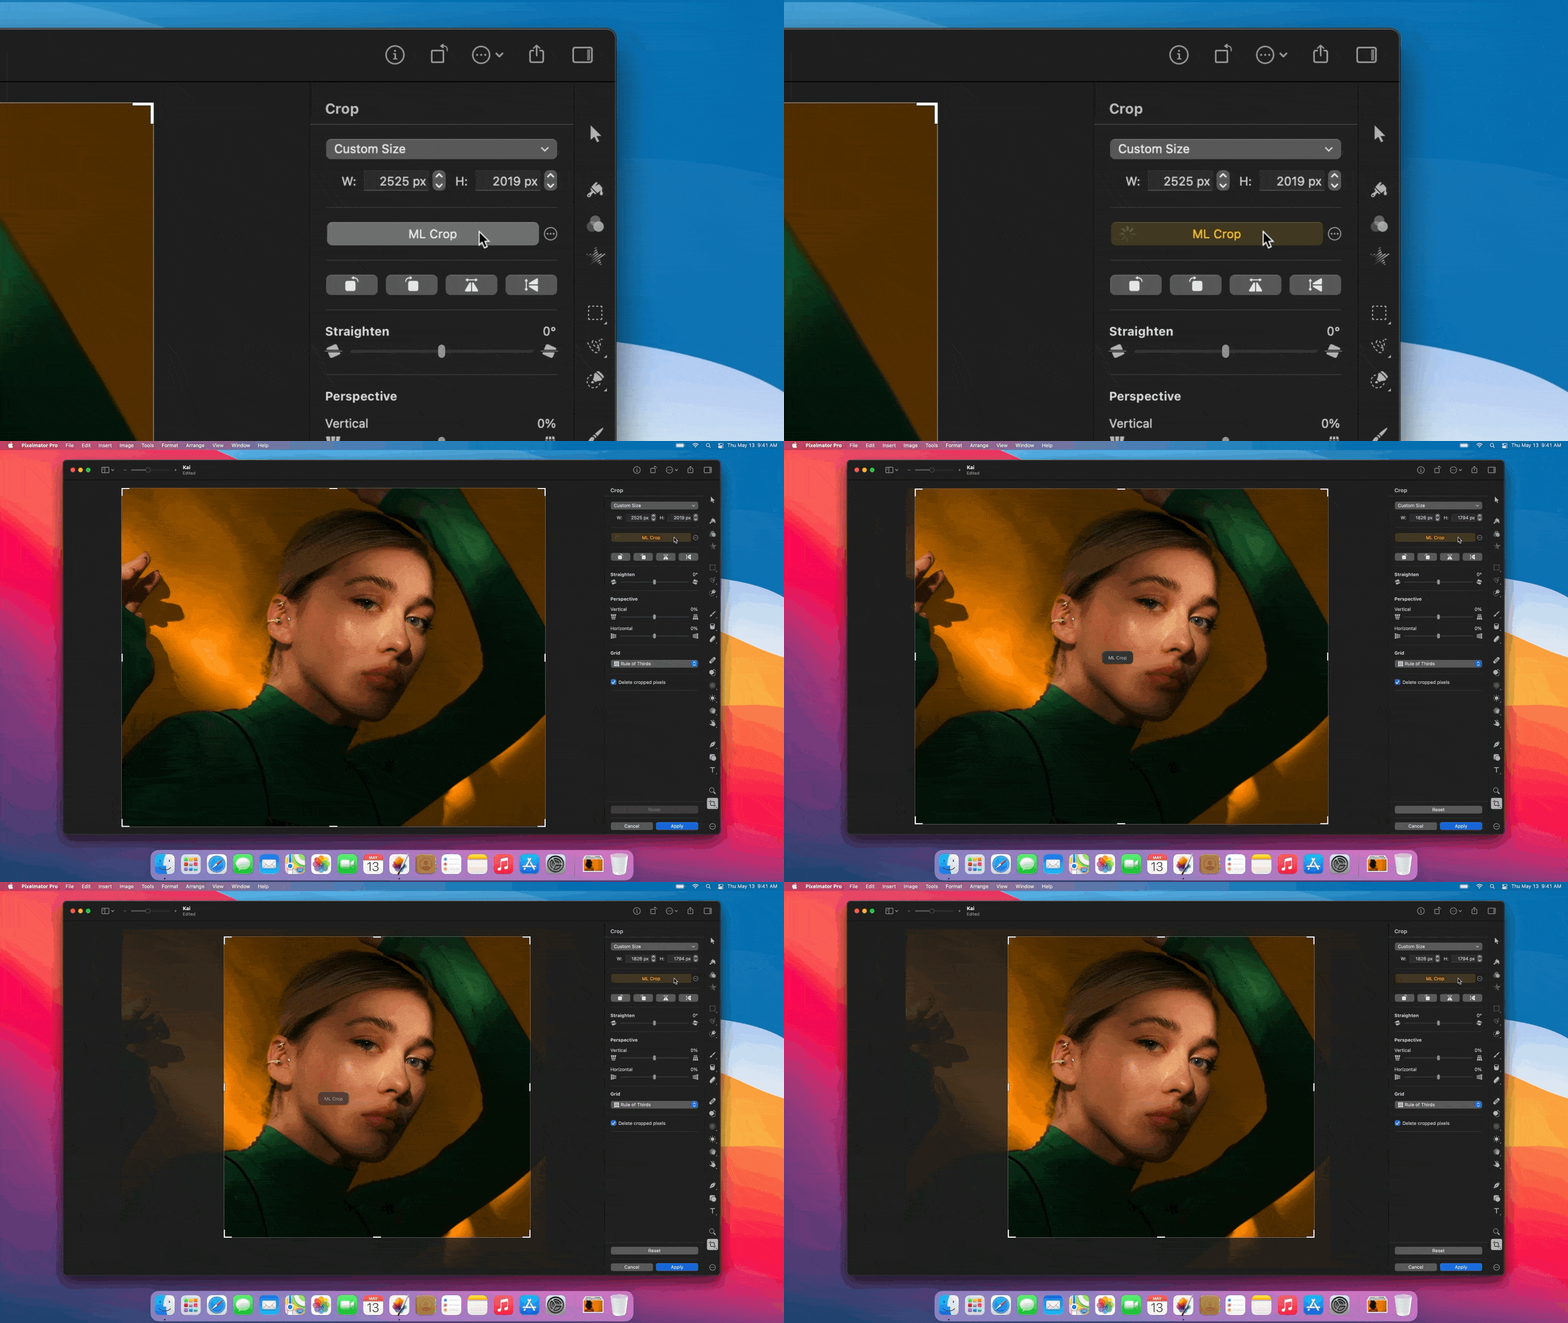
Some of the most impressive additions to Pixelmator Pro in recent updates have been the ones that rely on machine learning. From the auto enhancement feature added in 2018 to last year’s ML Color Match and ML Super Resolution, a wide variety of the app’s tools have harnessed machine learning to help photographers edit their images. Today, the Pixelmator team announced that their extending Pixelmator Pro’s reliance on machine learning to its cropping tool with ML Crop.

Source: Pixelmator.

Source: Pixelmator.

ML Crop uses machine learning to analyze the composition of a photo and suggest how you might like to crop it with the click of a single button. From the video in Pixelmator’s blog post, which is excerpted in the GIF above, the feature looks promising. ML Crop joins features that let you quickly set primary and secondary colors for an image and edit colors in a composition using drag and drop.

In addition to the sneak peek at ML Crop, Pixelmator announced today that the app is currently on sale for 50% off, which makes it a great time to jump in and give Pixelmator Pro if you haven’t yet.


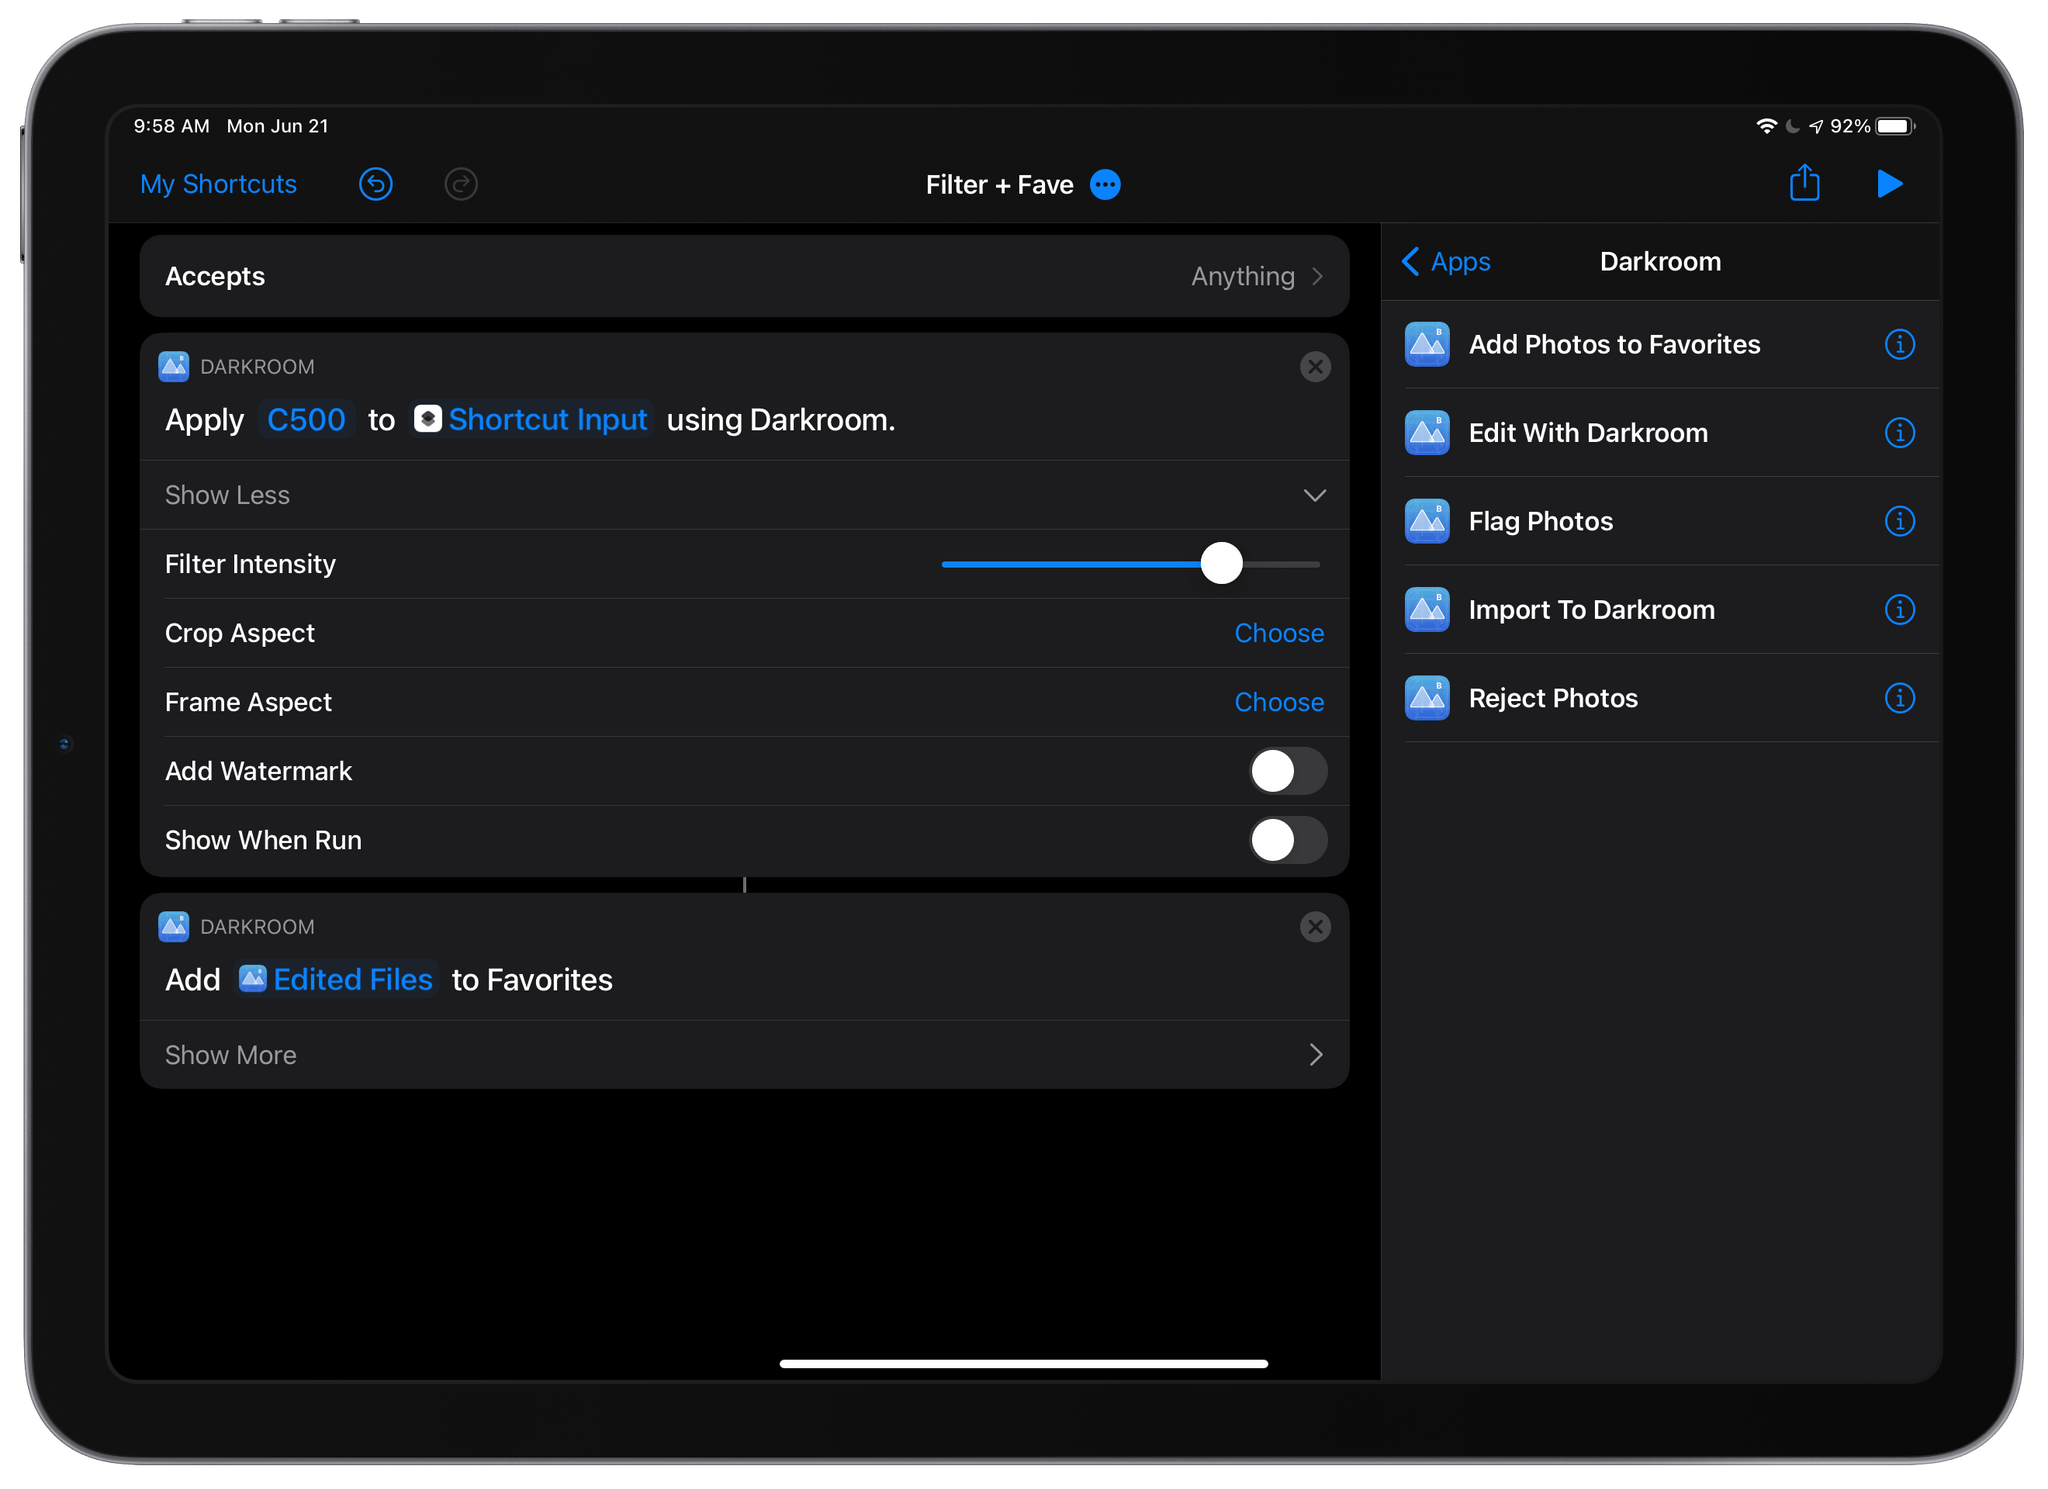
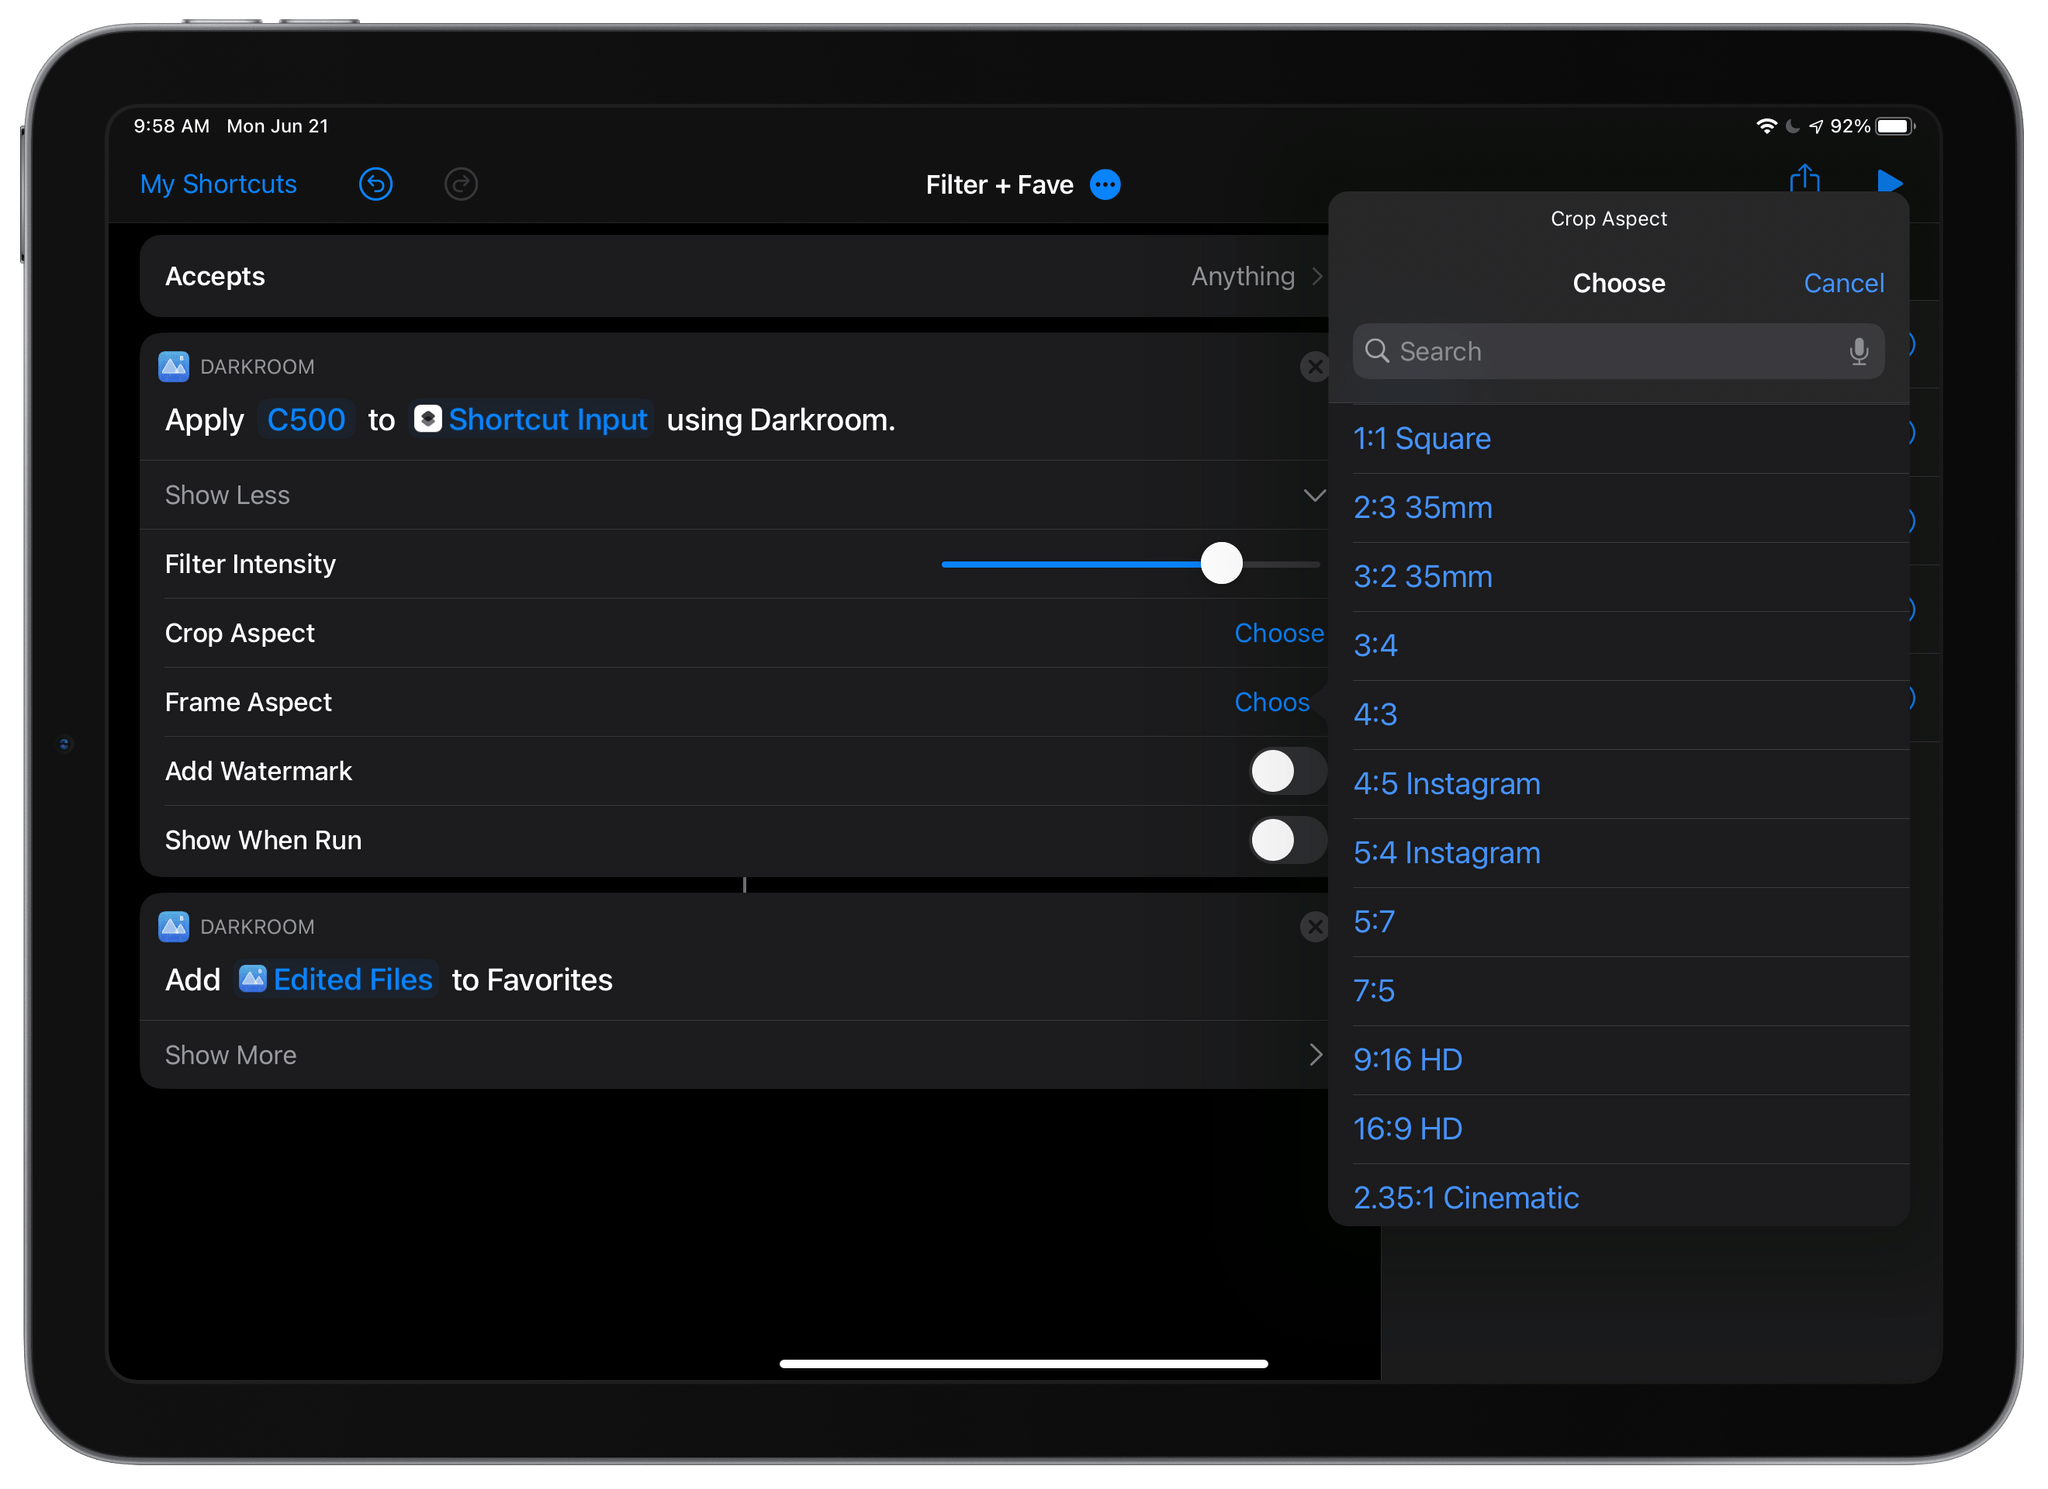
Darkroom 5.2 Improves Photo Management with New Flag and Reject Functionality

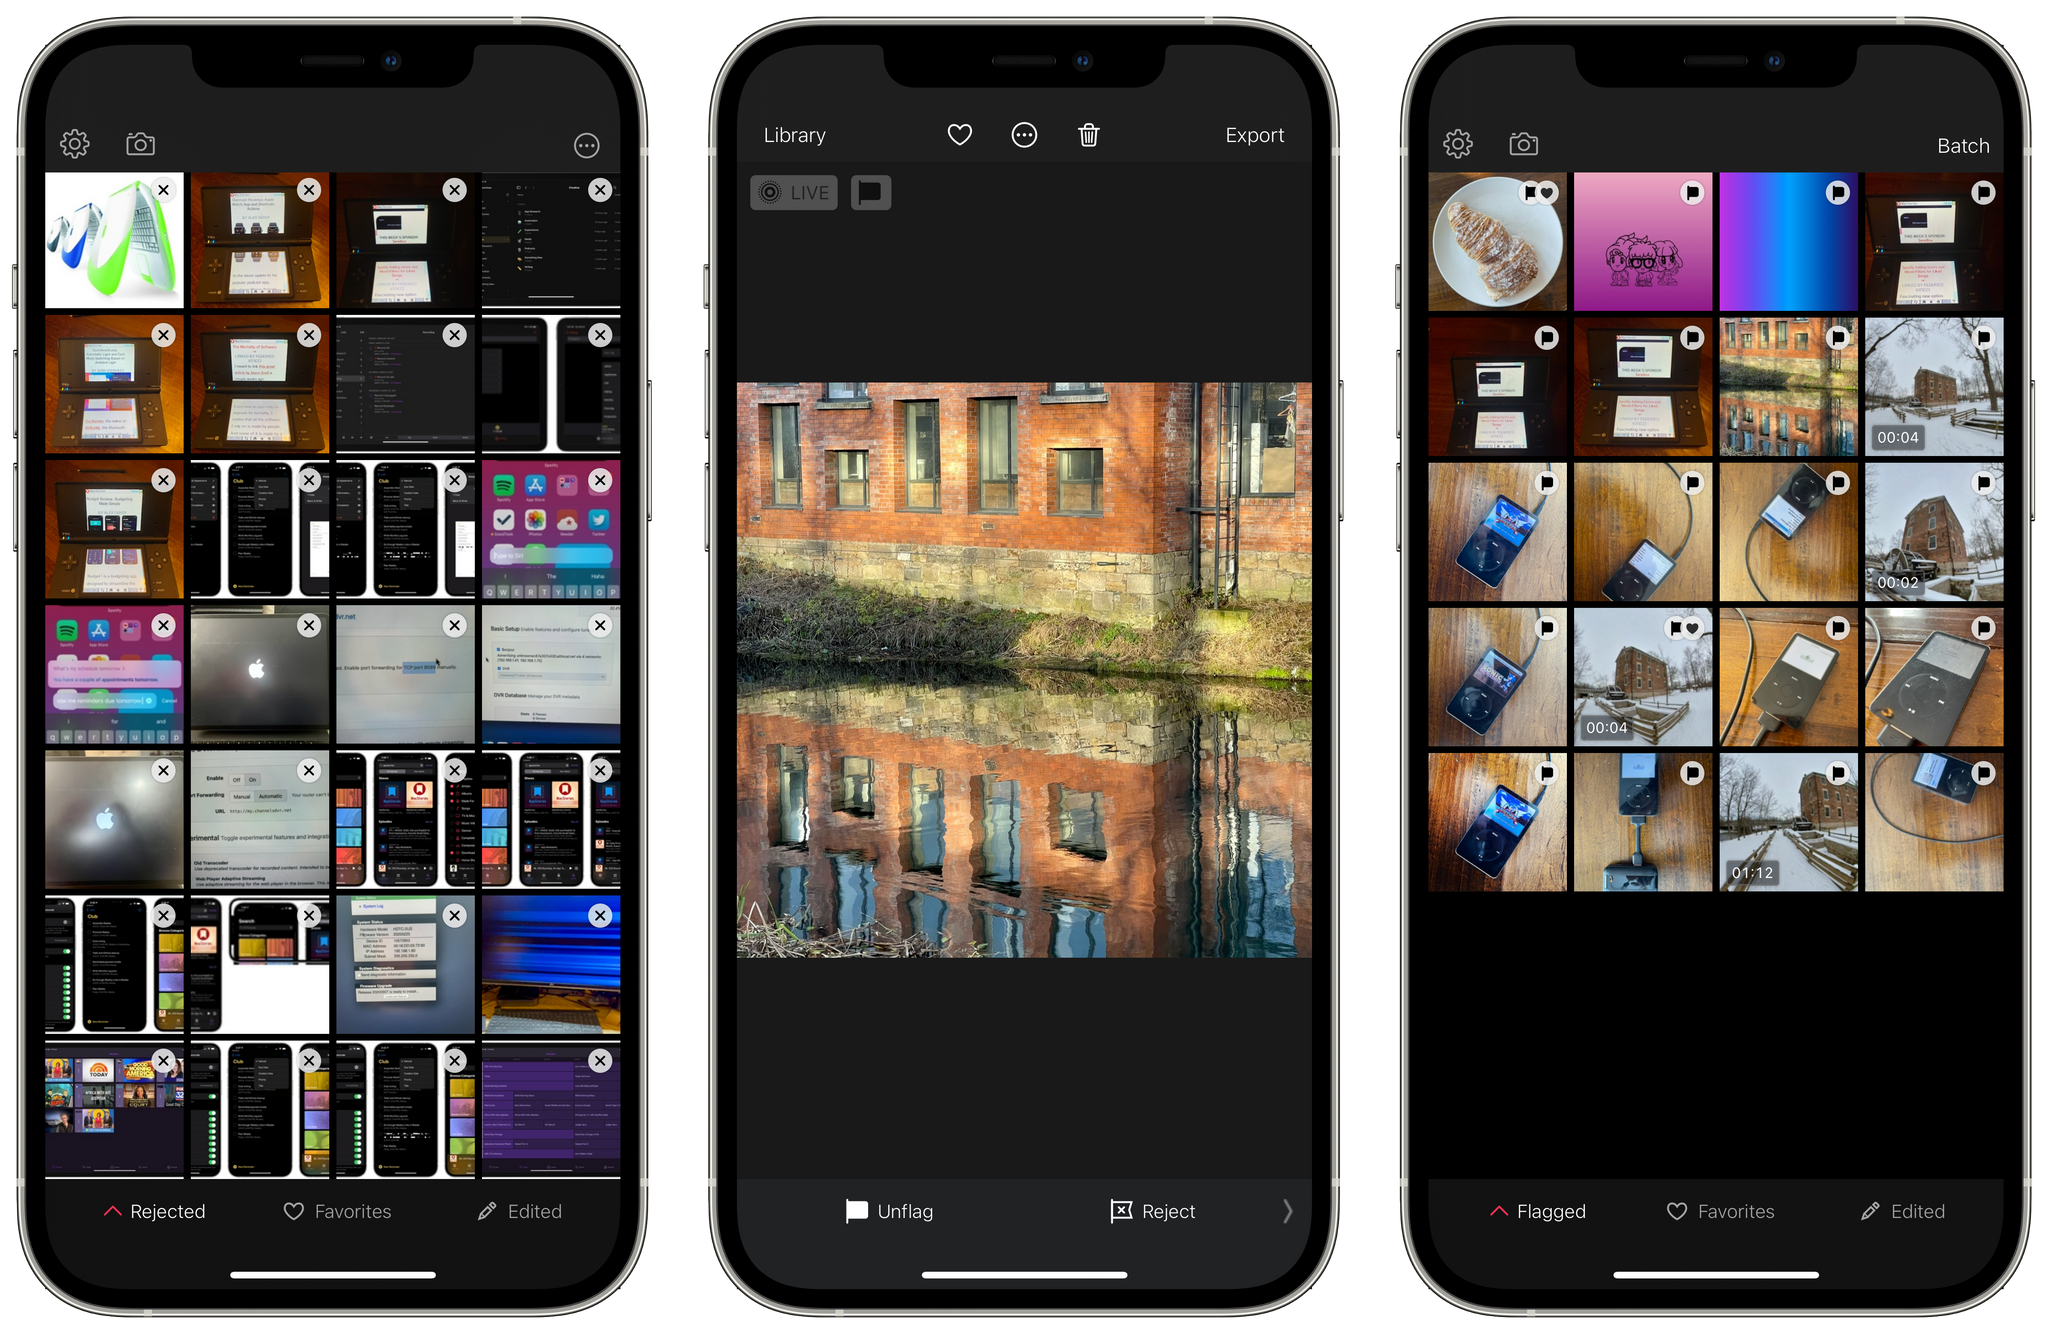
One of the greatest advantages of the iPhone’s camera hardware is that it’s easy to take photos wherever you are. That’s also a bit of a curse because there’s probably no greater friction in managing a photo library than sifting through a large stack of images looking for the ones you want to keep. The convenience quality of the iPhone’s camera means that I take more photos than ever, many of which aren’t shots I want to keep long-term. With today’s release of Darkroom 5.2, the photo editor that we’ve covered on MacStories before takes a significant step forward in making the process of culling the best images from an extensive photo collection easier.

Read more


Hands-On with the Apple Store’s Insta360 ONE X2 Camera Bundle

Source: Insta360.

Source: Insta360.

Starting today, Insta360 is offering an exclusive bundle of the Insta360 ONE X2 camera and an assortment of accessories through Apple’s online store for $479.99.

I’ve been intrigued by Insta360’s action cameras since coming across them during CES in 2020. I bought a DJI Osmo Pocket when it launched at the end of 2018, which sold me on the notion of a tiny, versatile camera that integrates with the iPhone. So, when Insta360 offered to send me the Apple Store bundle to try, I was curious to see what it can do and what a 360-degree perspective would add to the mix. I’ve only had the ONE X2 for a few days during a brutal Chicago cold snap, so my use of the camera has been limited. Still, the excellent app integration has made getting started a breeze, so I wanted to share my first impressions.

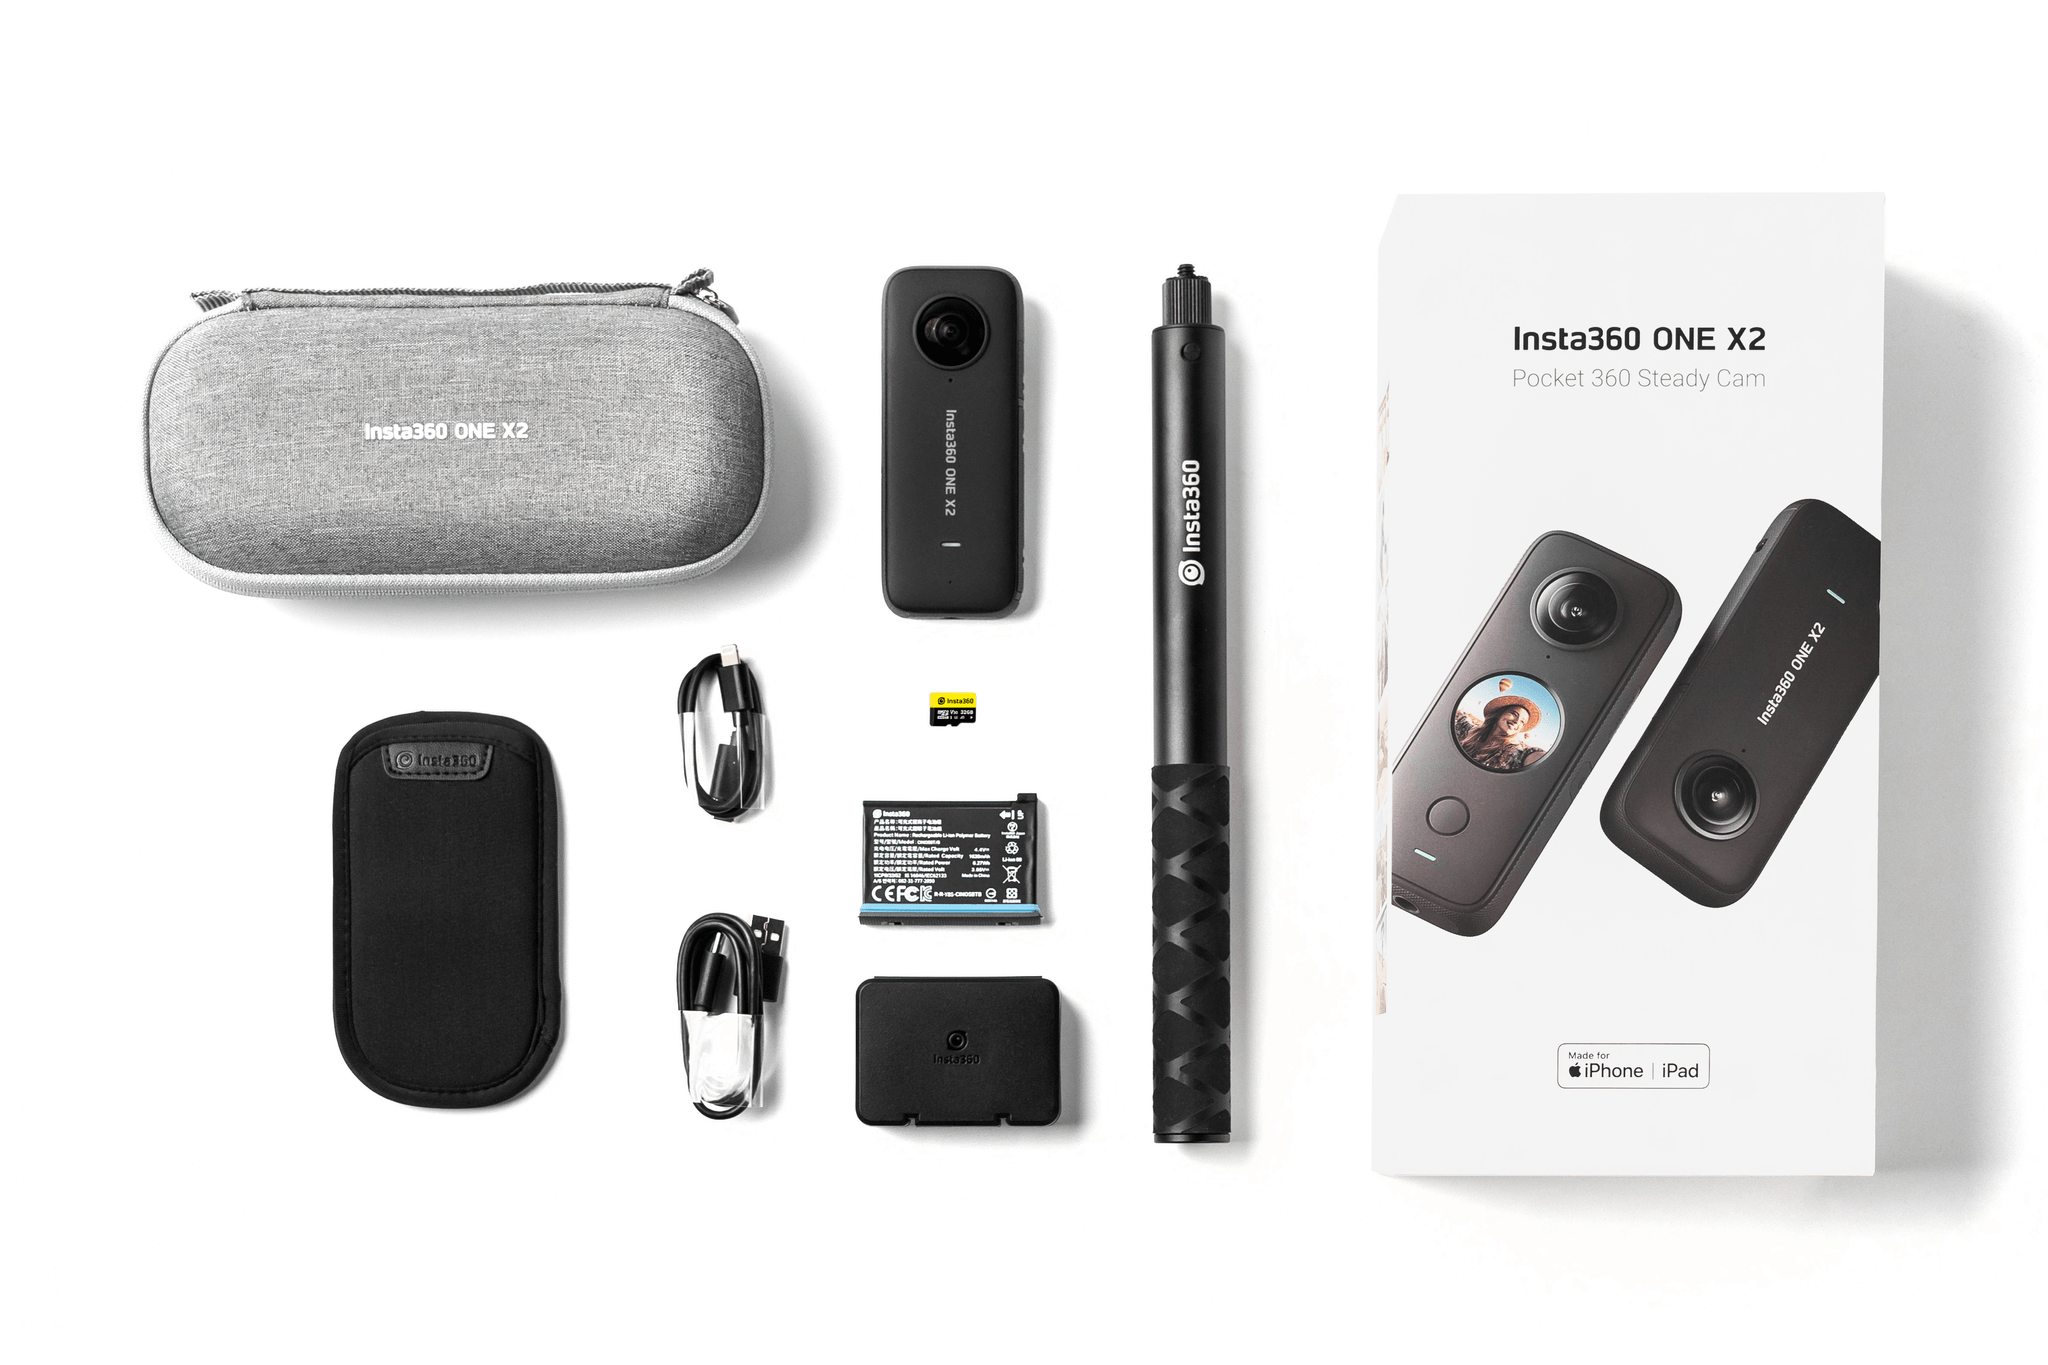
The Insta360 ONE X2 bundle being sold by Apple is a great starter package that includes the ONE X2 camera, an Invisible Selfie Stick, an extra battery and case to carry it, a 32 GB MicroSD card and SD card adapter, two charging cables (USB-A to USB-C and USB-C to Lightning), a carrying case, and a soft pouch. Separately, the camera retails for $429.99, and with the accessories, the entire package would cost around $511 based on the prices listed on Insta360’s website. However, through Apple’s online store, you can purchase the kit for $479.99, saving some money and getting everything you’ll need to get started.

Read more


Apple Spotlights iPhone 12 Photography

Source: Apple

Source: Apple

For the past several years, Apple has shown off some of the best photos taken with the current-generation iPhone. In a press release today, the company highlights 17 beautiful images taken around the globe, as a showcase of what the iPhone 12, 12 mini, 12 Pro, and 12 Pro Max can do. It’s one thing read about the latest iPhone camera technology, which today’s press release recaps. However, it’s something entirely different to see what the latest hardware and software can do in the hands of a skilled photographer.

A few of the many photos highlighted in Apple's press release. Source: Apple.

A few of the many photos highlighted in Apple’s press release. Source: Apple.

In 2019 and 2020, Apple’s January photography announcement was accompanied by a photography contest judged by Apple employees and a team of professional photographers. This year’s press release makes no mention of a contest, which is understandable in light of the global pandemic.

Permalink

Developer Ben Sandofsky on ProRAW and Halide Mark II’s Implementation of the New Format

ProRAW is a big deal for iPhone photography. Joining Austin Mann’s article that I linked earlier today is an even deeper dive by Ben Sandofsky, a member of the Halide Mark II team. Sandofsky does a fantastic job of contextualizing the benefits of ProRAW and explaining how it has been implemented in Halide.

Before getting into the technical details, Sandofsky walks readers through a high-level overview of the limitations of the RAW format, concluding that:

ProRAW elegantly solves all of these problems and more. You can finally reproduce the results of the first-party camera, while retaining most of the editing latitude from traditional RAWs.

What’s more, as Sandofsky explains ProRAW is an extension of the open DNG file format, which should facilitate the implementation of support for ProRAW by third-party app makers:

This may be surprising to some: ProRAW is not a proprietary or closed format. Credit where it is due: Apple deserves kudos for bringing their improvements to the DNG standard. When you shoot with ProRAW, there’s absolutely nothing locking your photos into the Apple ecosystem.

Source: Lux Optics

Source: Lux Optics

Halide Mark II, version 2.1, is available on the App Store now and supports ProRAW in a number of interesting ways:

  • Photographers can take ProRAW-only or ProRAW+JPEG images, whereas Apple’s Camera app always captures both a ProRAW and JPEG image in one shot when the ProRAW option is picked. Capturing a JPEG alongside the ProRAW image is convenient for quick sharing, but having the option to dispense with it helps reduce file size, which is a real issue with ProRAW images that are typically around 25MB.
  • The new ProRAW options are available alongside the app’s existing RAW options by long-pressing the RAW button in Halide’s image capture UI to reveal a context menu, a new feature that makes switching formats faster than repeatedly returning to settings.
  • The same context menu lets users pick between 10-bit and 12-bit color, reducing file sizes where 10-bit color depth is sufficient.
  • Unlike Apple’s Camera app, you can also turn on ProRAW, and it will stay on even if you leave Halide and return to it later, although turning it on and forgetting it’s on will fill your storage fast.

I have only just begun experimenting with Halide’s new ProRAW support, but I like the context menu for quickly changing format and color depth settings a lot. The added flexibility the app provides for which formats are captured and the color depth used are welcome, too, but it will take some time to get a better sense of which to pick in different scenarios.

ProRAW is a fascinating combination of traditional RAW and computational photography that provides hints about where Apple may be headed with its camera sensors. I highly recommend Sandofsky’s article, which is the best explanation I’ve seen of what is happening under the hood with ProRAW and what the format means for beginner and expert photographers alike.

Permalink

Pro Photographer Austin Mann Explains ProRAW

With the release of iOS 14.3, Apple’s ProRAW image format is available in its Camera app and third-party apps like Halide Mark II. Travel photographer Austin Mann, who has been testing ProRAW, published a story explaining why the new format matters, demonstrating the scenarios where it makes the biggest differences, and sharing tips on how and when to use the format.

As Mann explains:

Pro photographers traditionally choose to shoot in RAW because it offers more control. Where there is more data (more color, more range, more everything), there is more latitude to push an image to achieve a vision, and now with ProRAW we have this luxury built right into the native iPhone camera app.

However, ProRAW doesn’t abandon computational photography completely. Instead:

the iPhone camera only leverages the computations that are absolutely necessary for accurate imaging, but gives us complete control over preference parameters like white balance, noise reduction, sharpening, and more.

HEIC image (left) ProRAW image (right). Source: [austinmann.com](http://austinmann.com/trek/iphone-proraw).

HEIC image (left) ProRAW image (right). Source: austinmann.com.

To test ProRAW, Mann took some 30-second Night mode images of the Geminid meteor shower using the iPhone 12 Pro Max. The contrast between what could be achieved by editing a HEIC file versus a ProRAW file in Lightroom is compelling. With the HEIC image, many of the details in the image were lost but with the ProRAW file, Mann was able to preserve the stars in the night sky and the fine details of a rock.

Mann also has side-by-side comparison shots that demonstrate the difference between ProRaw’s 12-bit color and HEIC’s 8-bit color. The differences are more subtle but still noticeable.

Not all photos benefit equally from being shot in ProRAW, and because the files are much bigger than HEIC images, it’s worth understanding when it makes sense to use ProRAW. According to Mann, the format works best for shots with which Apple’s computational photography has the most trouble, such as very low light and high dynamic range scenarios.

Be sure to check out Austin Mann’s entire article for additional examples of ProRAW in action, tips on when and how to use the format, and his interview with Rene Ritchie about ProRAW.

Permalink

Pixelmator Pro 2.0 Released with M1 Mac Support, An Updated Design, and New Effects and Presets

The Pixelmator team has released an extensive update to its image editing app, Pixelmator Pro. Version 2.0 is a Universal Mac app that supports both Intel and M1-based Macs. In addition to the under-the-hood support for Apple’s new SoC architecture, the update has an all-new Big Sur-style design and a host of new features like redesigned effects and presets browsers, the ability to customize the app’s layout, and a new app icon.

Pixelmator Pro’s new design is terrific, right down to its new Big Sur-style app icon. The app already featured a design with minimal chrome that stayed out of the way, focusing attention on the content, which is also a hallmark of Big Sur’s design. As a result, the update will look familiar to existing users but also fits right in with other apps designed for the latest version of macOS.

Changes big and small have been made throughout Pixelmator Pro’s UI. For example, like the Finder and Apple’s other system apps, button outlines are highlighted only when the pointer hovers over the icons in the app’s toolbar. The name of the document you’re working on has been left-justified too. Pixelmator Pro has also added a new zoom control to the toolbar for fast access to zooming in and out of an image using the pointer instead of a trackpad gesture or keyboard shortcut.

Pixelmator Pro's new effects UI.

Pixelmator Pro’s new effects UI.

Although the order of the tools along the right edge of Pixelmator Pro is customizable, the default position of the effects tool has been moved near the top of the window. When active, the effects tool opens a panel that is divided into six default categories of image effects, which can be modified by the user. The design is more compact than before and provides a live thumbnail preview of what the effect will look like if applied, making it easier to find the look you’re after. With the addition of even more effects, the new UI is a much more efficient way to browse through them.

Pixelmator Pro features preset workspaces.

Pixelmator Pro features preset workspaces.

The update also features four preset workspaces in addition to the app’s default configuration, which each move the toolbar and panels to different positions in the app’s window to accommodate photography, design, illustration, and painting workflows. You can also design and save your own setup dragging the app’s two panels and toolbar into positions that suit you.

You can define your own workspaces.

You can define your own workspaces.

Presets have been greatly expanded and enjoy the same sort of compact UI as effects too. The Pixelmator team says it has added over 200 new presets for photography, design, and illustration use cases, which allow users to work more efficiently. The app also has more than 50 new vector shapes in five categories from which to choose.

On the new M1 Macs, Pixelmator Pro benefits from its use of Apple’s Metal frameworks. The M1 Macs are designed to take advantage of Metal, which accelerates tasks in Pixelmator Pro like upscaling images using the app’s ML Super Resolution feature. The Pixelmator team says ML Super Resolution can be accomplished up to 15 times faster on an M1 Mac than was possible before.

I’ve said many times before that Pixelmator Pro is the image editor I use most often for my work at MacStories. The app is powerful but easy to use, dispensing with the steep learning curves of many other pro-level image editors. With version 2.0, the Pixelmator team continues to push the app forward with a design and underlying technologies that are perfectly aligned with where the Mac is heading, which is a reassuring indication that the app will continue to be one of the premier Mac image editors for a long time to come.

Pixelmator Pro 2.0 is available on the Mac App Store to existing users as a free update and new customers for $39.99.


Sebastiaan de With Reviews the iPhone 12 Pro Max Camera

Sebastiaan de With, Co-founder and designer at Lux (the studio behind the Halide Mark II camera app), has written a great review of the iPhone 12 Pro Max camera:

The Pro Max was the wildcard this year. Apple devoted a whole section of their keynote to it, and we got a ton of questions about it on our Twitter. Some reviewers on the internet panned it as an indistinguishable improvement from the iPhone 12 camera, while others called it quite good.

We’ll get into the iPhone 12 camera — we have a lot of thoughts on that. But the iPhone 12 Pro Max tests were quite surprising. So surprising we’ve decided to create this whole separate post about it.

De With clearly explains the impact of the Pro Max’s larger camera sensor, including detailing some scenarios in which the post-processing of Apple’s built-in Camera app can obscure the hardware’s superior results. Some excellent photographs are provided for comparison, and de With makes the point that the highest quality can be pulled from shots taken in RAW.

The whole article has an interesting viewpoint due to it coming from a team of experts on RAW photography. Make sure to give it a read and check out the photos.

Permalink