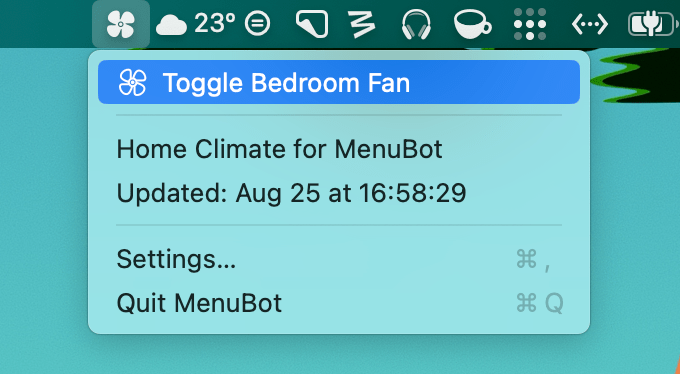
Last year, I wrote about how I was able to display the temperature from my outdoor sensor in my Mac’s menu bar using a combination of Shortcuts, SF Symbols, and small utilities like One Thing and Data Jar. I’ve been using this approach ever since, but this summer, I came across a tool that changed that: MenuBot.
MenuBot is an app for the Mac that lets you build your own indicators and applets for your menu bar directly from the output of a shortcut. The app is more powerful than it may seem at first: you can create entire submenus and even tie URLs and actions to each menu entry. In the end, I was able to use it to completely revamp my outdoor temperature indicator in the menu bar and even enhance it with HomeKit controls.
I’ve been having a ton of fun playing with MenuBot. Let me show you what I’ve done with it.
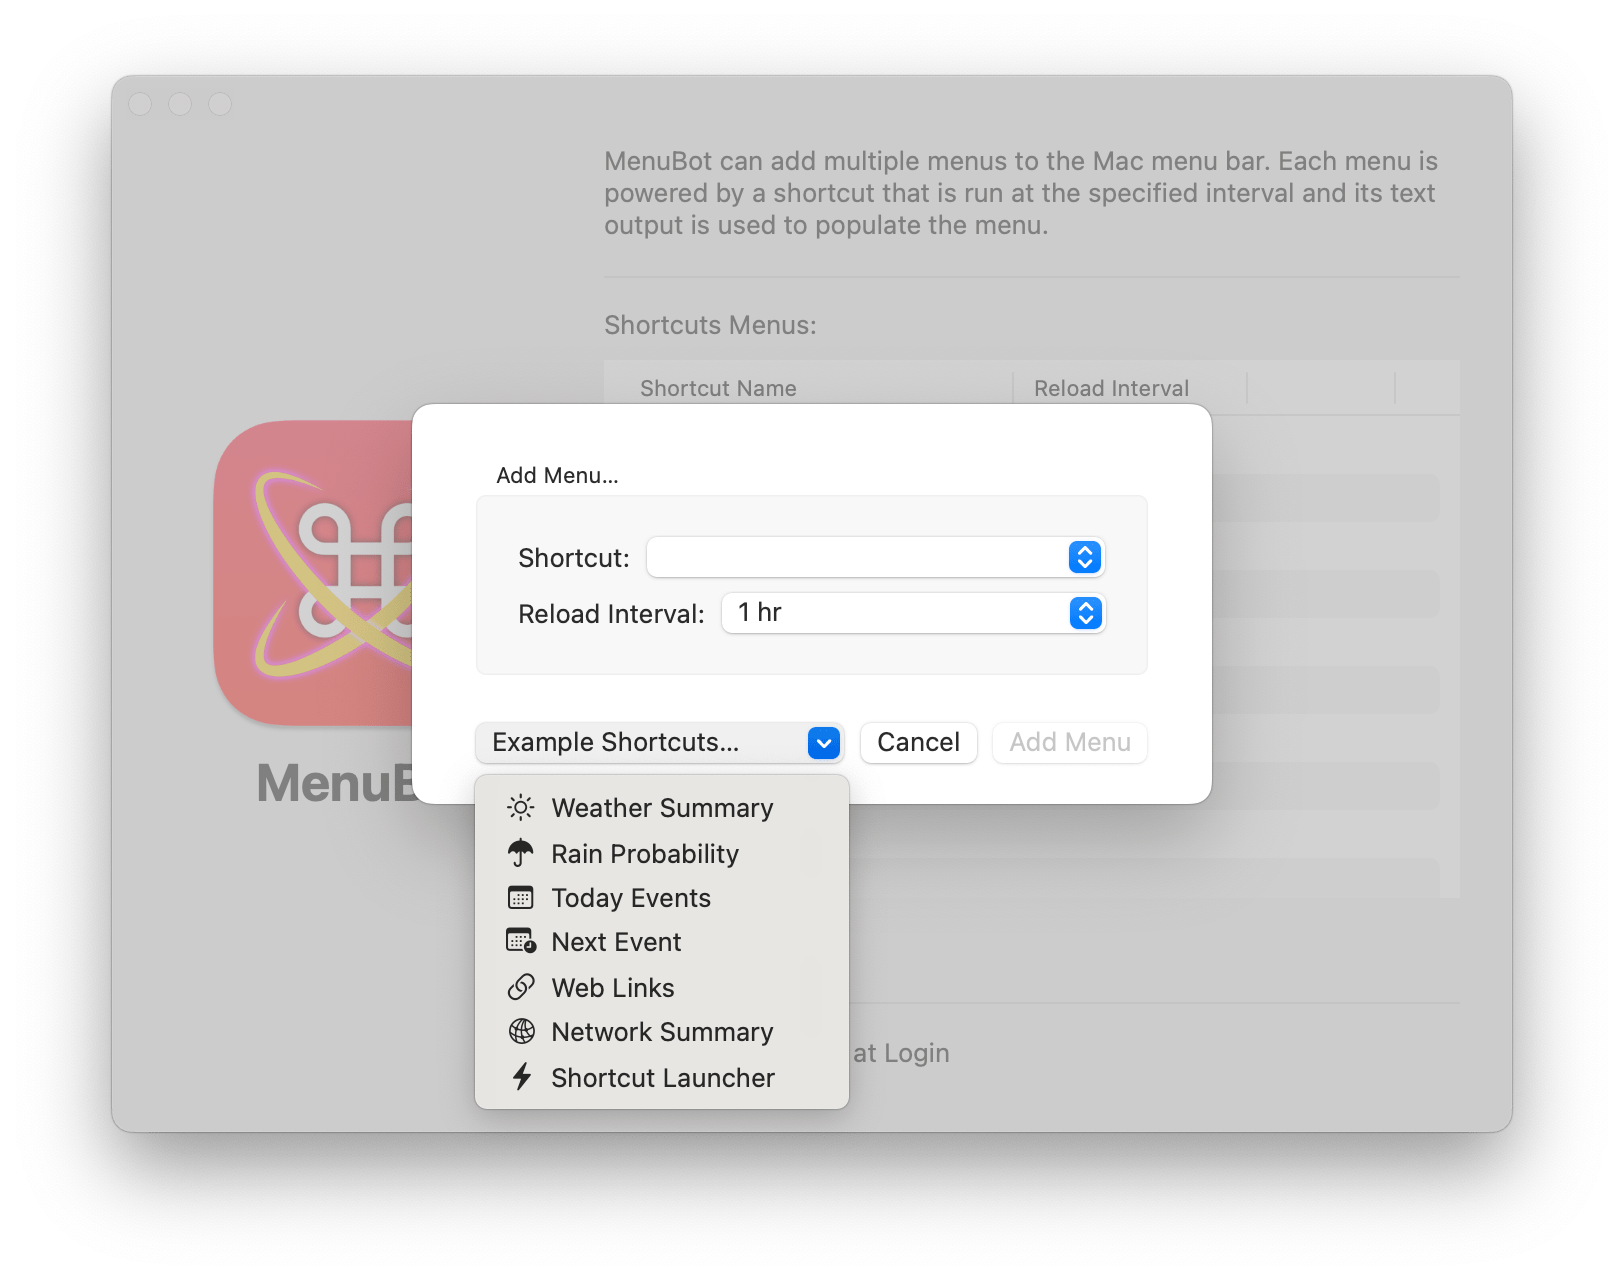
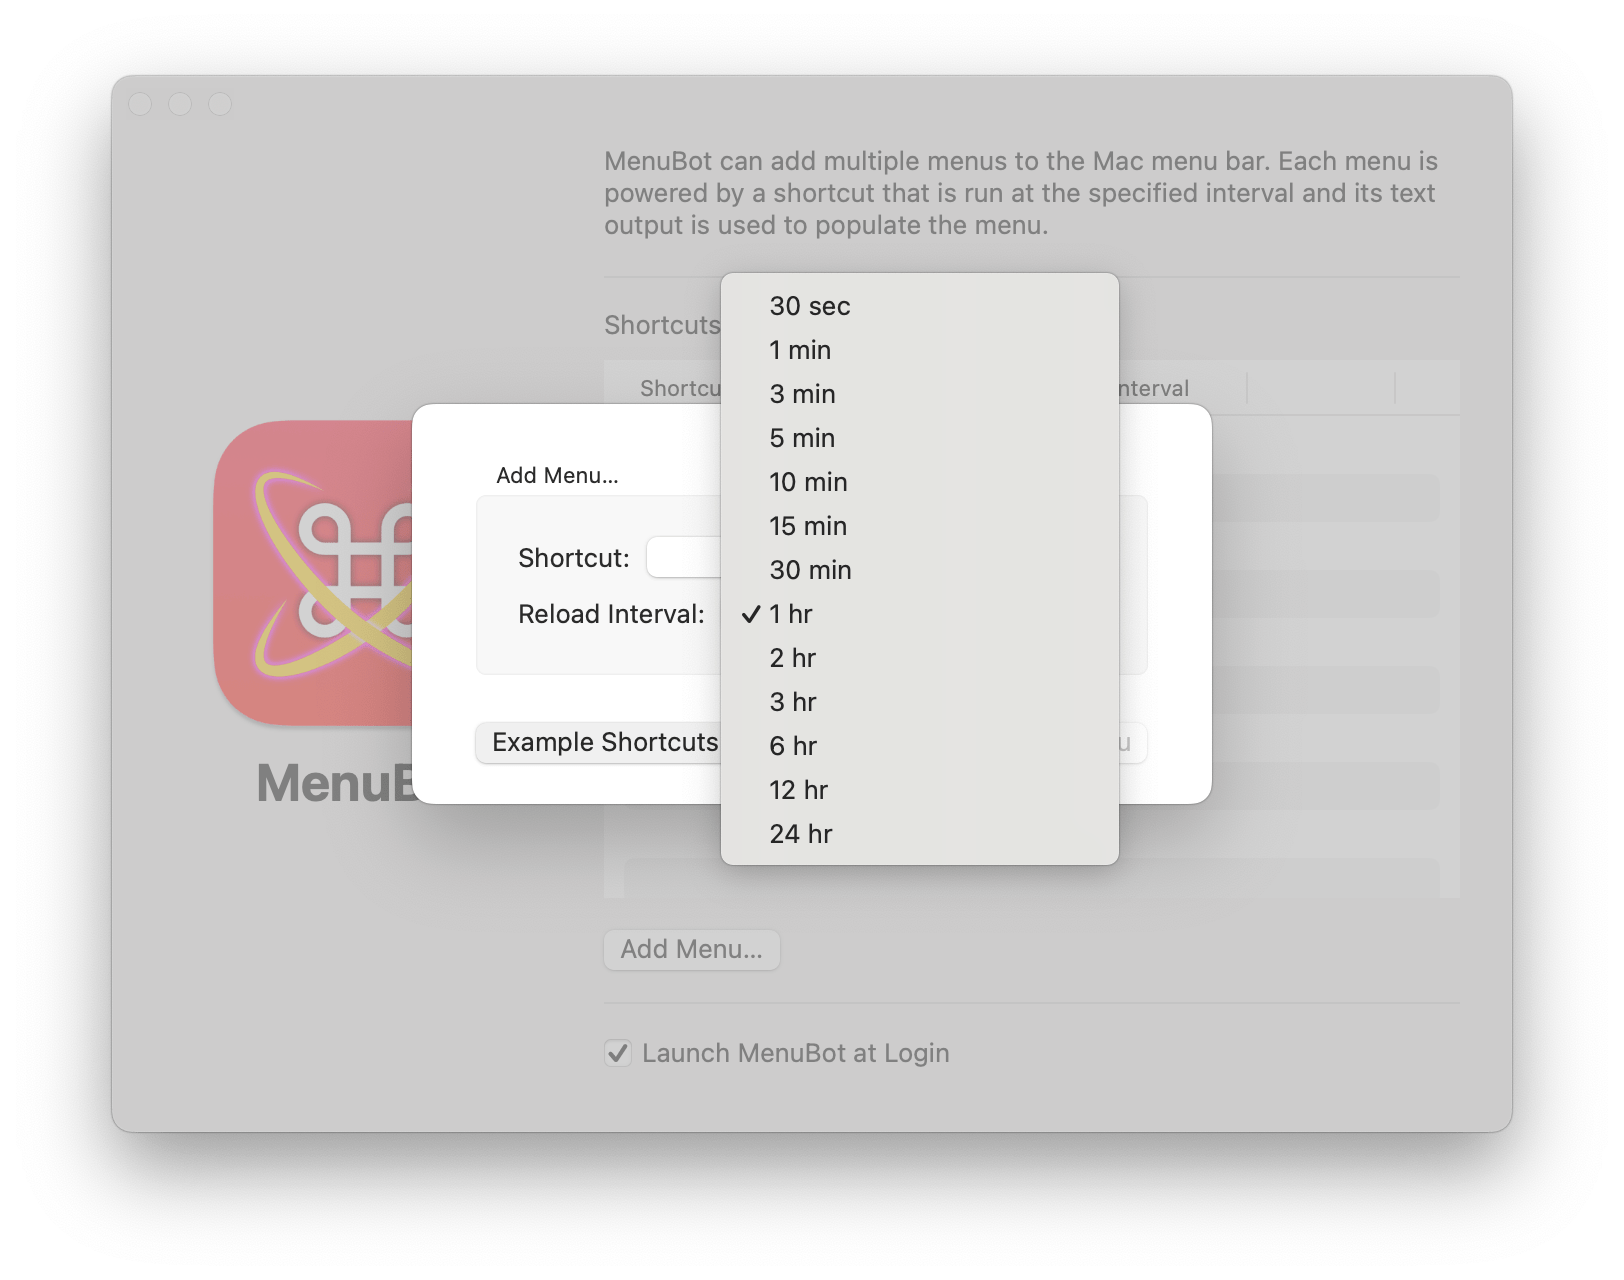
MenuBot is incredibly easy to set up. When you first start the app, all you have to do is pick from one of the provided example shortcuts and set a reload interval to decide how often your custom menu bar applet will refresh. By default, MenuBot comes with seven built-in example shortcuts: Weather Summary, Rain Probability, Today Events, Next Event, Web Links, Network Summary, and Shortcut Launcher. Each is pretty self-explanatory, and if you inspect them, they give you a broad idea of what kind of menu bar applets you can build using MenuBot and Shortcuts.
In addition to being handy, the built-in shortcuts are also great examples for learning the syntax needed to build your own shortcuts for MenuBot. Using that syntax, you can configure what appears directly in the menu bar item as well as what goes inside the menu that opens when you click it.
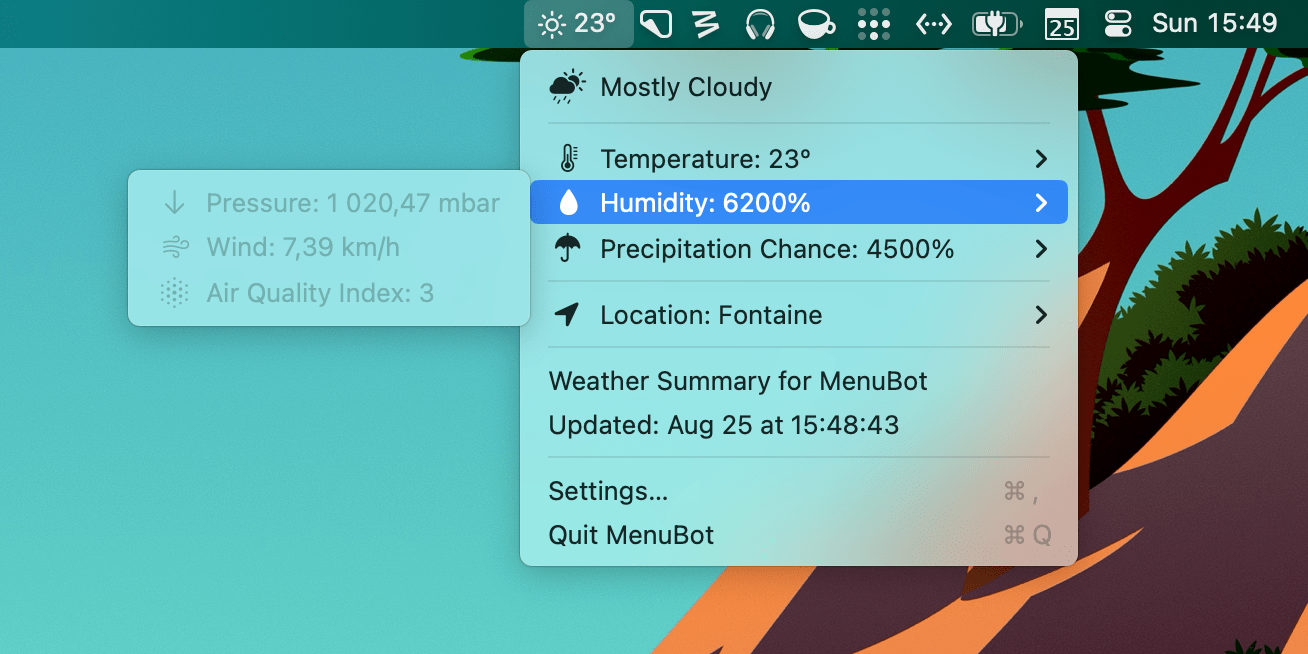
Here’s what the output syntax looks like for MenuBot’s Weather Summary example shortcut:
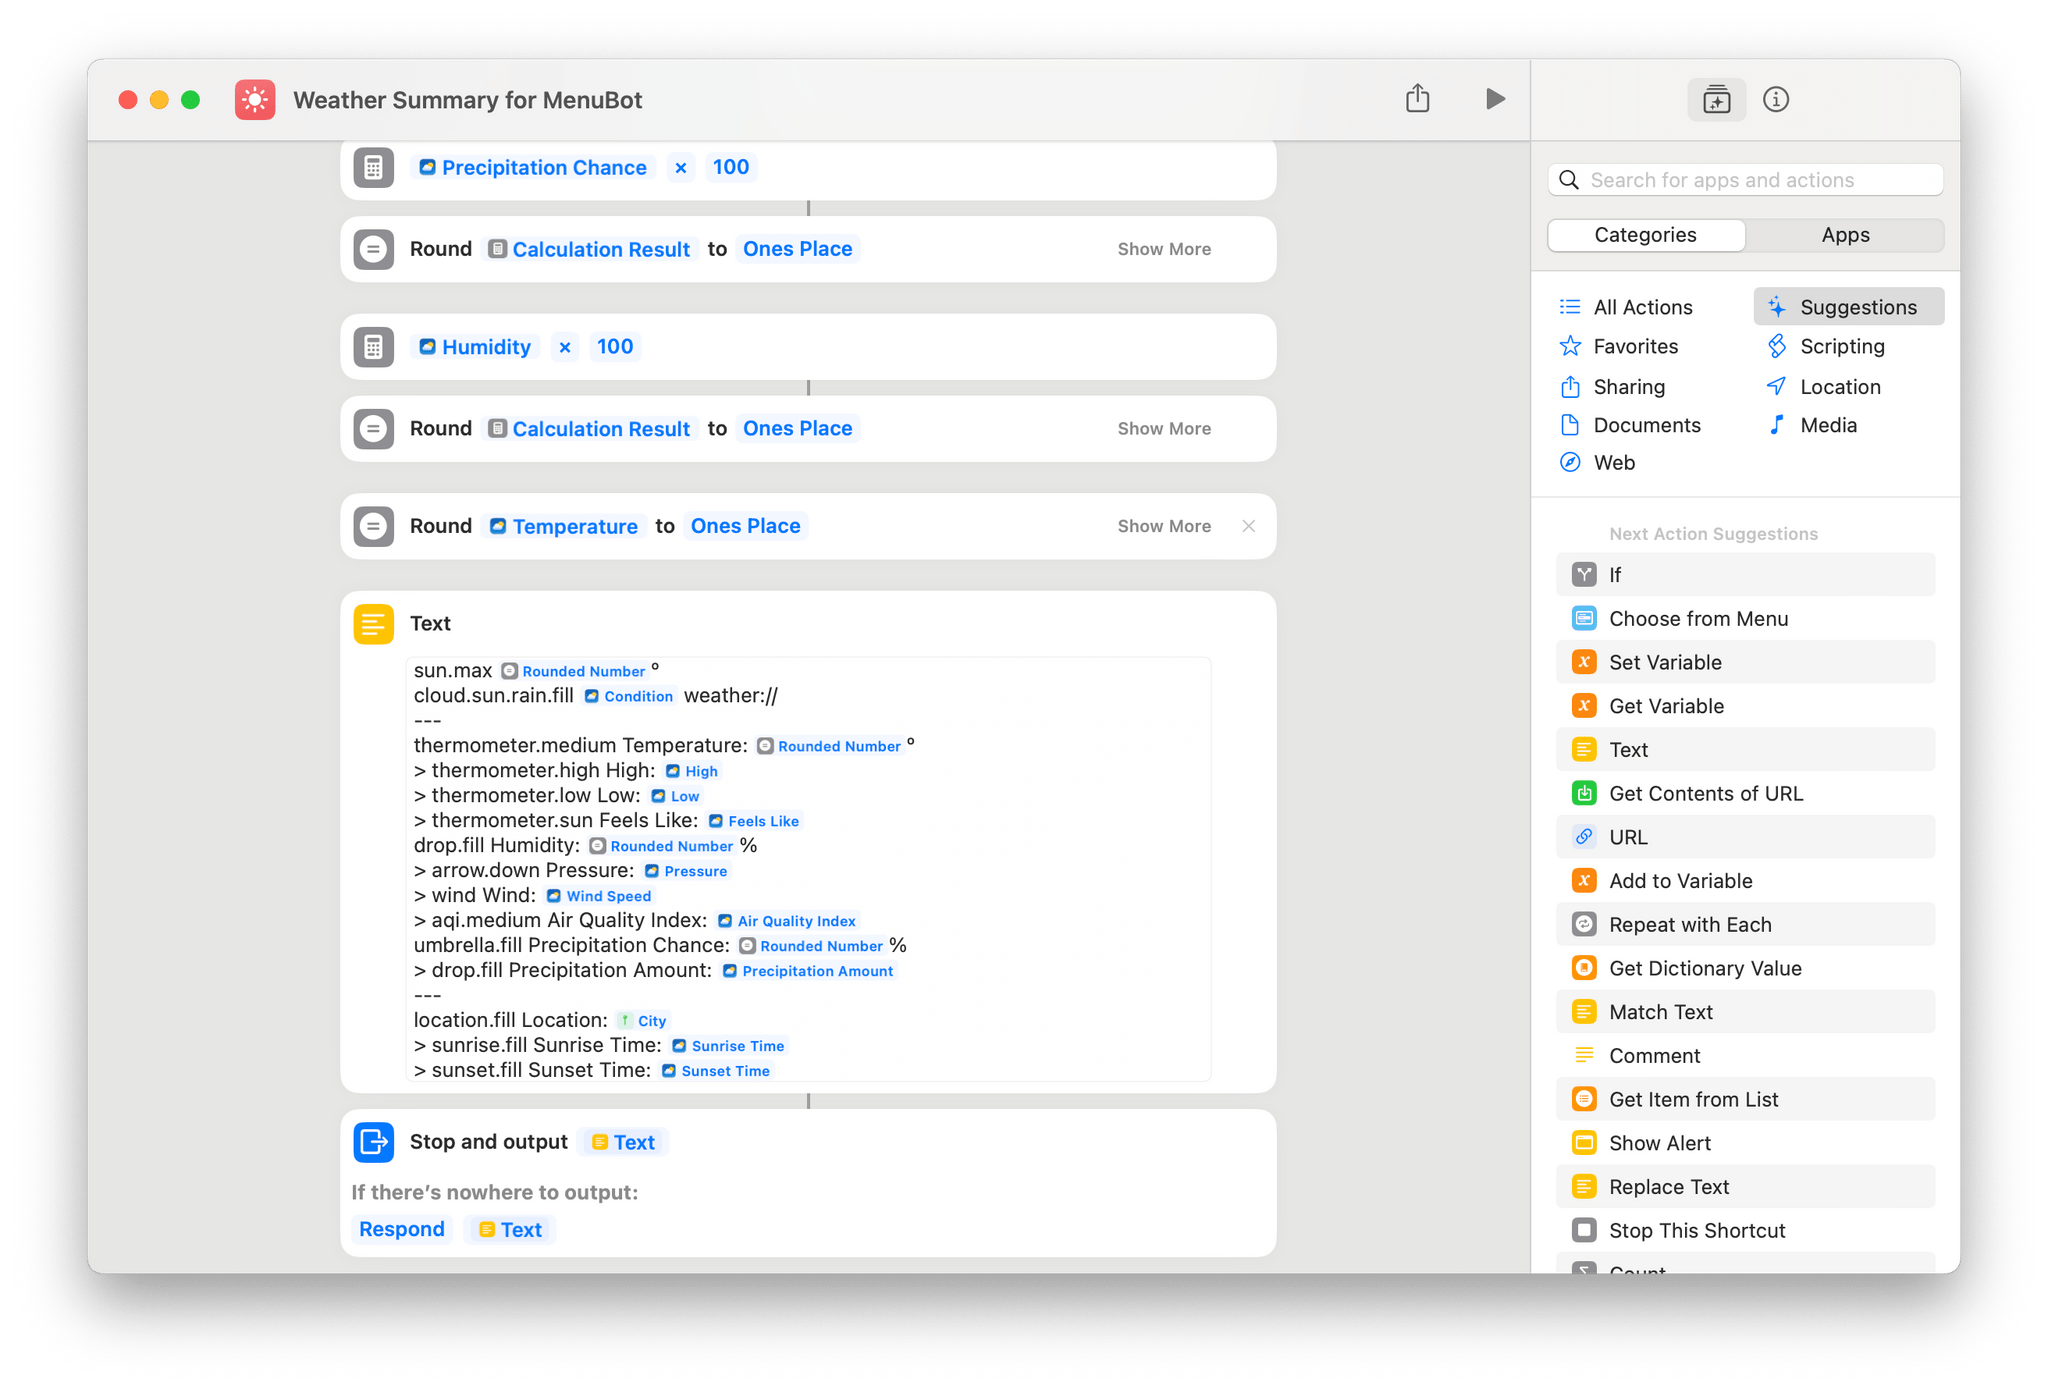
MenuBot’s Weather Summary example shortcut is a good way to learn how to create your own MenuBot shortcut.
To add MenuBot functionality to a new or existing shortcut, insert a Text block containing the formatted data that will be used by the app to build your menu bar applet and set that Text block as the shortcut output. The syntax works as follows:
- The first line of the output is what will appear directly in the menu bar. Every subsequent line will appear in a menu.
- Insert
---on a new line to add a separator to the menu. - Insert
>at the beginning of a line to add a submenu item. - Add a URL at the end of a line to turn the menu item into a link. This works with web URLs as well as app URL schemes.
- For example, add
https://macstories.netat the end of a line to open MacStories when clicking the menu item, orweather://to open Apple’s native Weather app on macOS. - This can also be used to execute other shortcuts using this URL scheme:
shortcuts://run-shortcut?name=[name of your shortcut]
- For example, add
- Optionally, at the beginning of every line, insert the name of an SF Symbol. MenuBot will automatically render SF Symbols in the menu bar and in submenus. For example,
cloud.fillwill be rendered as a filled cloud icon.
With this information in hand, I knew that adapting my old menu bar shortcut would be very easy.
Most of the fundamentals of my shortcut stayed intact. I’m still using the temperature and humidity data from the Eve Weather station positioned outside my bedroom window via HomeKit and assigning SF Symbols based on the current weather condition. I am also still using Data Jar and a math formula to calculate whether the recorded temperature has been trending upward or downward over the past hour and display an indicator accordingly. (Read my previous story to learn more about this setup.)
However, MenuBot’s ability to build entire menus and submenus has allowed me to add more functionality to my shortcut. I specifically had two ideas in mind for my custom menu bar applet:
- Add the ability to compare at a glance the weather data from my outdoor sensor to the forecast coming from Carrot Weather (which handily supports Météo France, France’s national weather service, as a source).
- Add the ability to quickly turn on and off the air conditioning, air purifier, and fans in my home directly from the same menu.
While the former was straightforward and mostly consisted of assembling a menu that gathers weather variables and SF Symbols, the latter posed a small challenge. After setting up a shortcut to toggle my bedroom fan (I named it “VentilateurON”), I added a “Toggle Bedroom Fan” line to my MenuBot shortcut output and ended it with the URL scheme to run the bedroom fan shortcut. It looked like this:
fan Toggle Bedroom Fan shortcuts://run-shortcut?name=VentilateurON
However, this method had one drawback. When run, the shortcuts URL scheme will always open the Shortcuts app on the Mac. As a way to quickly turn on the bedroom fan from the menu bar while working on something, this was too distracting and meant that I had to manually close the Shortcuts app every time.
But once again, this is where BetterTouchTool came in and saved the day. The app has the ability to run shortcuts completely in the background, without having to spawn any windows on your workspace. Even better, BetterTouchTool also provides a fully-featured URL scheme that can be used within MenuBot.
To leverage this, I created a ‘Named Trigger’ (also called “VentilateurON”) in BetterTouchTool that launches the bedroom fan shortcut.
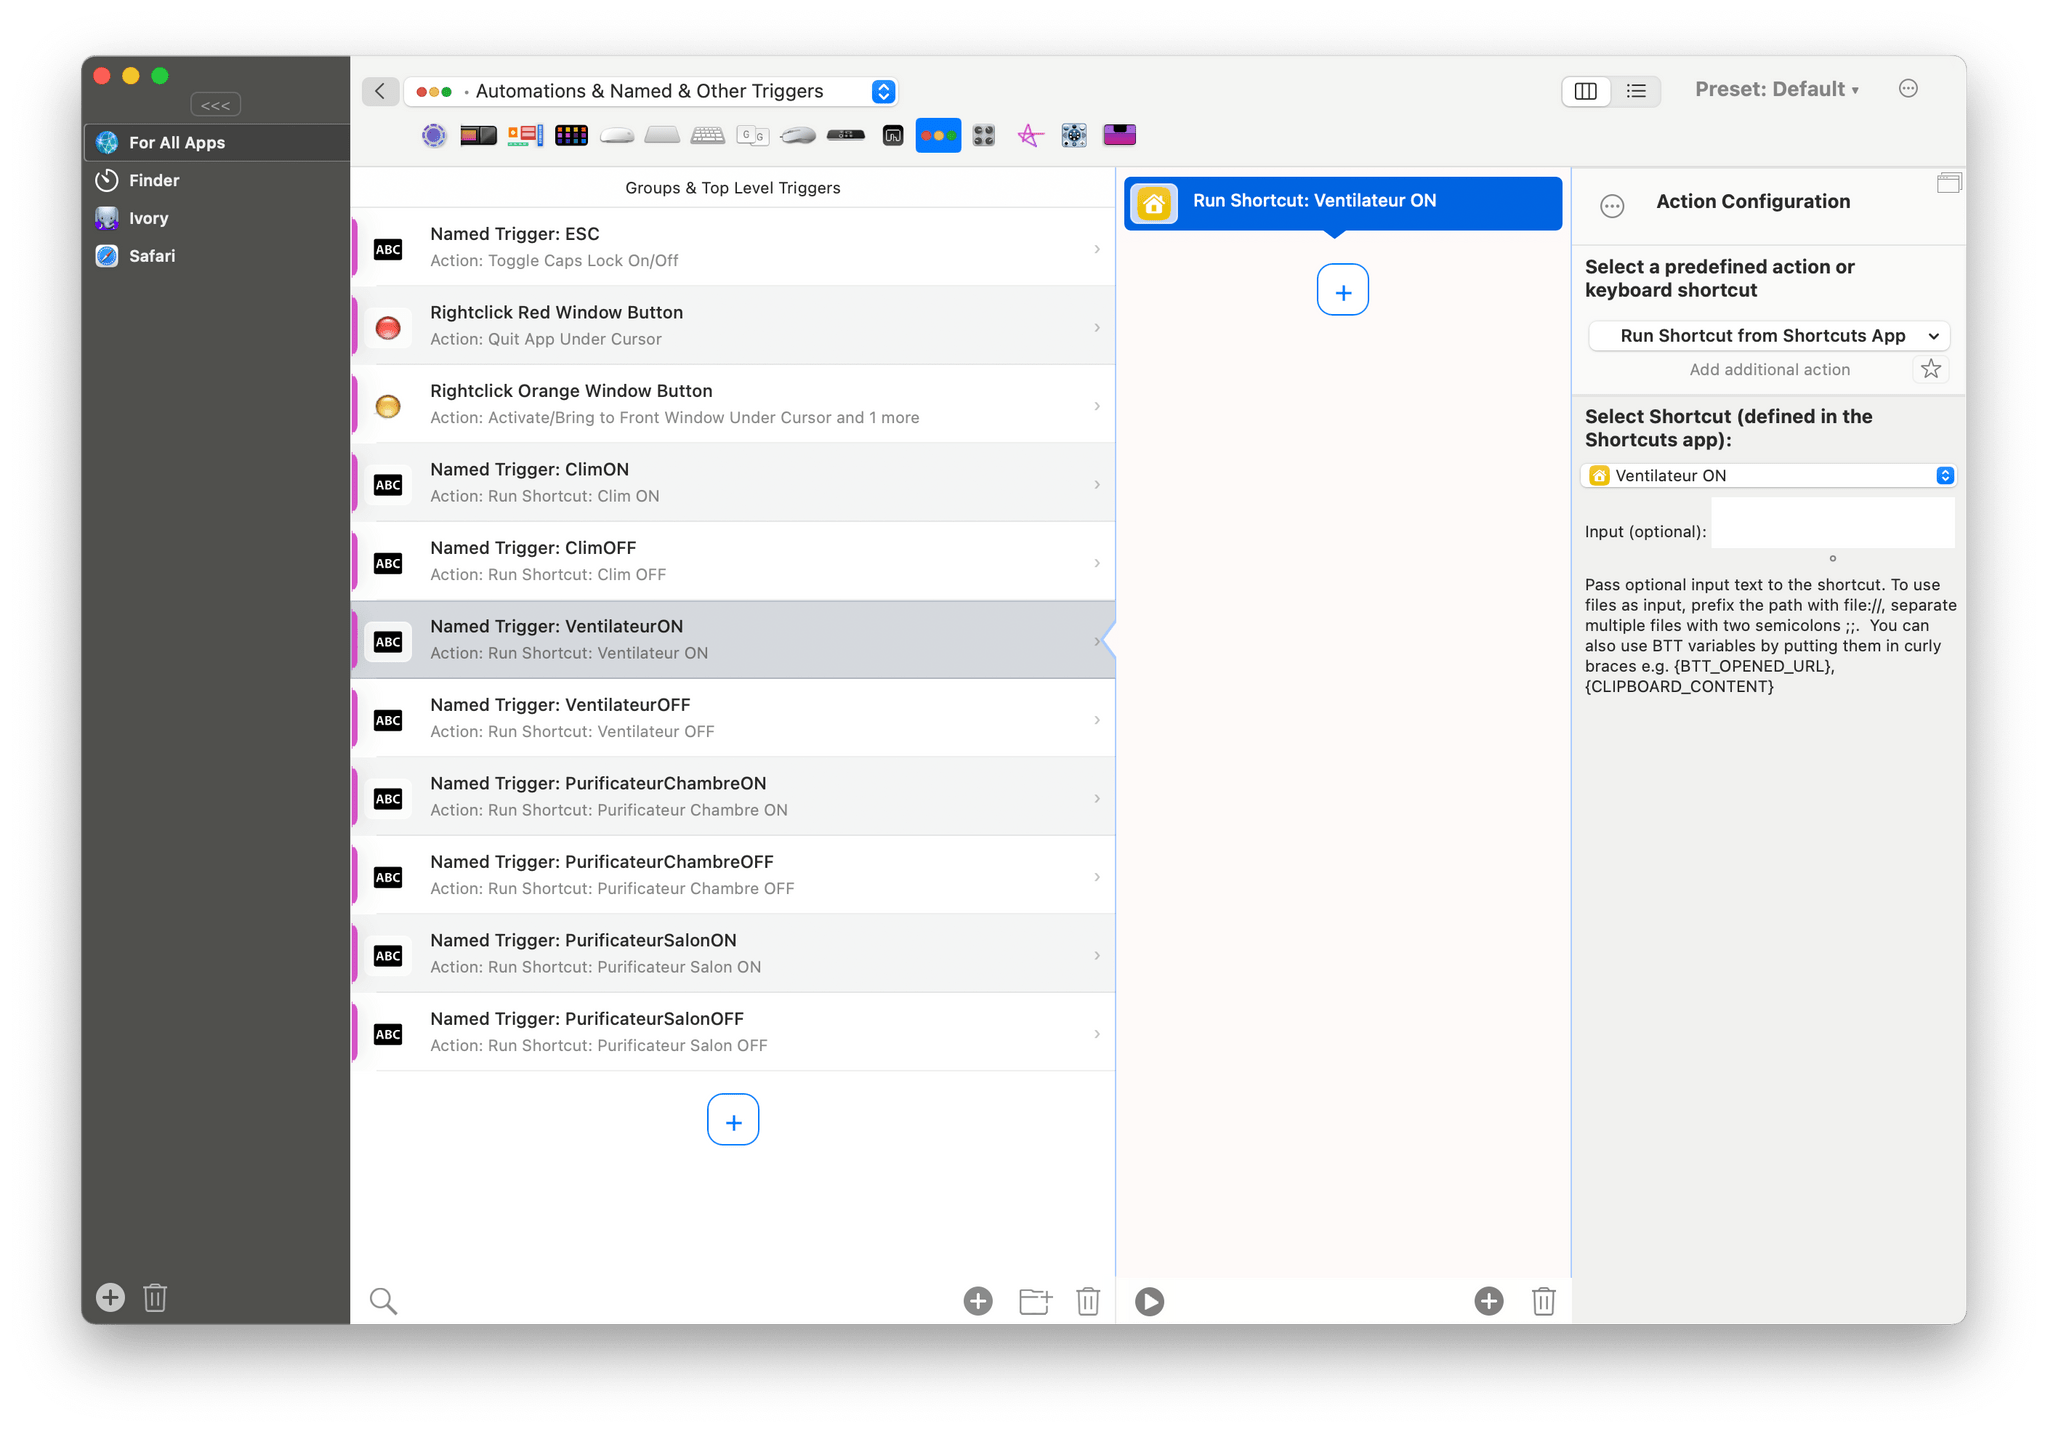
To leverage BetterTouchTool’s URL scheme, I created a Named Trigger (“VentilateurON”) in the app with a single action that launches my bedroom fan shortcut.
Then, back in the MenuBot shortcut output, I modified the line to use BetterTouchTool’s URL scheme instead of Shortcuts’, ending it with the BetterTouchTool Named Trigger:
fan Toggle Bedroom Fan btt://trigger_named/?trigger_name=VentilateurON
Now, clicking Toggle Bedroom Fan in my custom menu bar applet runs the shortcut to turn the bedroom fan on and off completely in the background via BetterTouchTool, without spawning any distracting windows.
I repeated this process for each of the HomeKit climate control appliances in my home, and even went so far as adding ‘If’ conditions to detect and display in the menu whether my fans, air purifiers, and air conditioning units are currently on or off. Not only that, but I also added dynamic indicators to the first line of the shortcut output to display specific SF Symbols in the menu bar when rain is in the forecast or the air quality is poor. To do this, I was able to tap into Air Grenoble, an app with Shortcuts support that was specifically built to monitor the air quality in my home area of Grenoble, France.
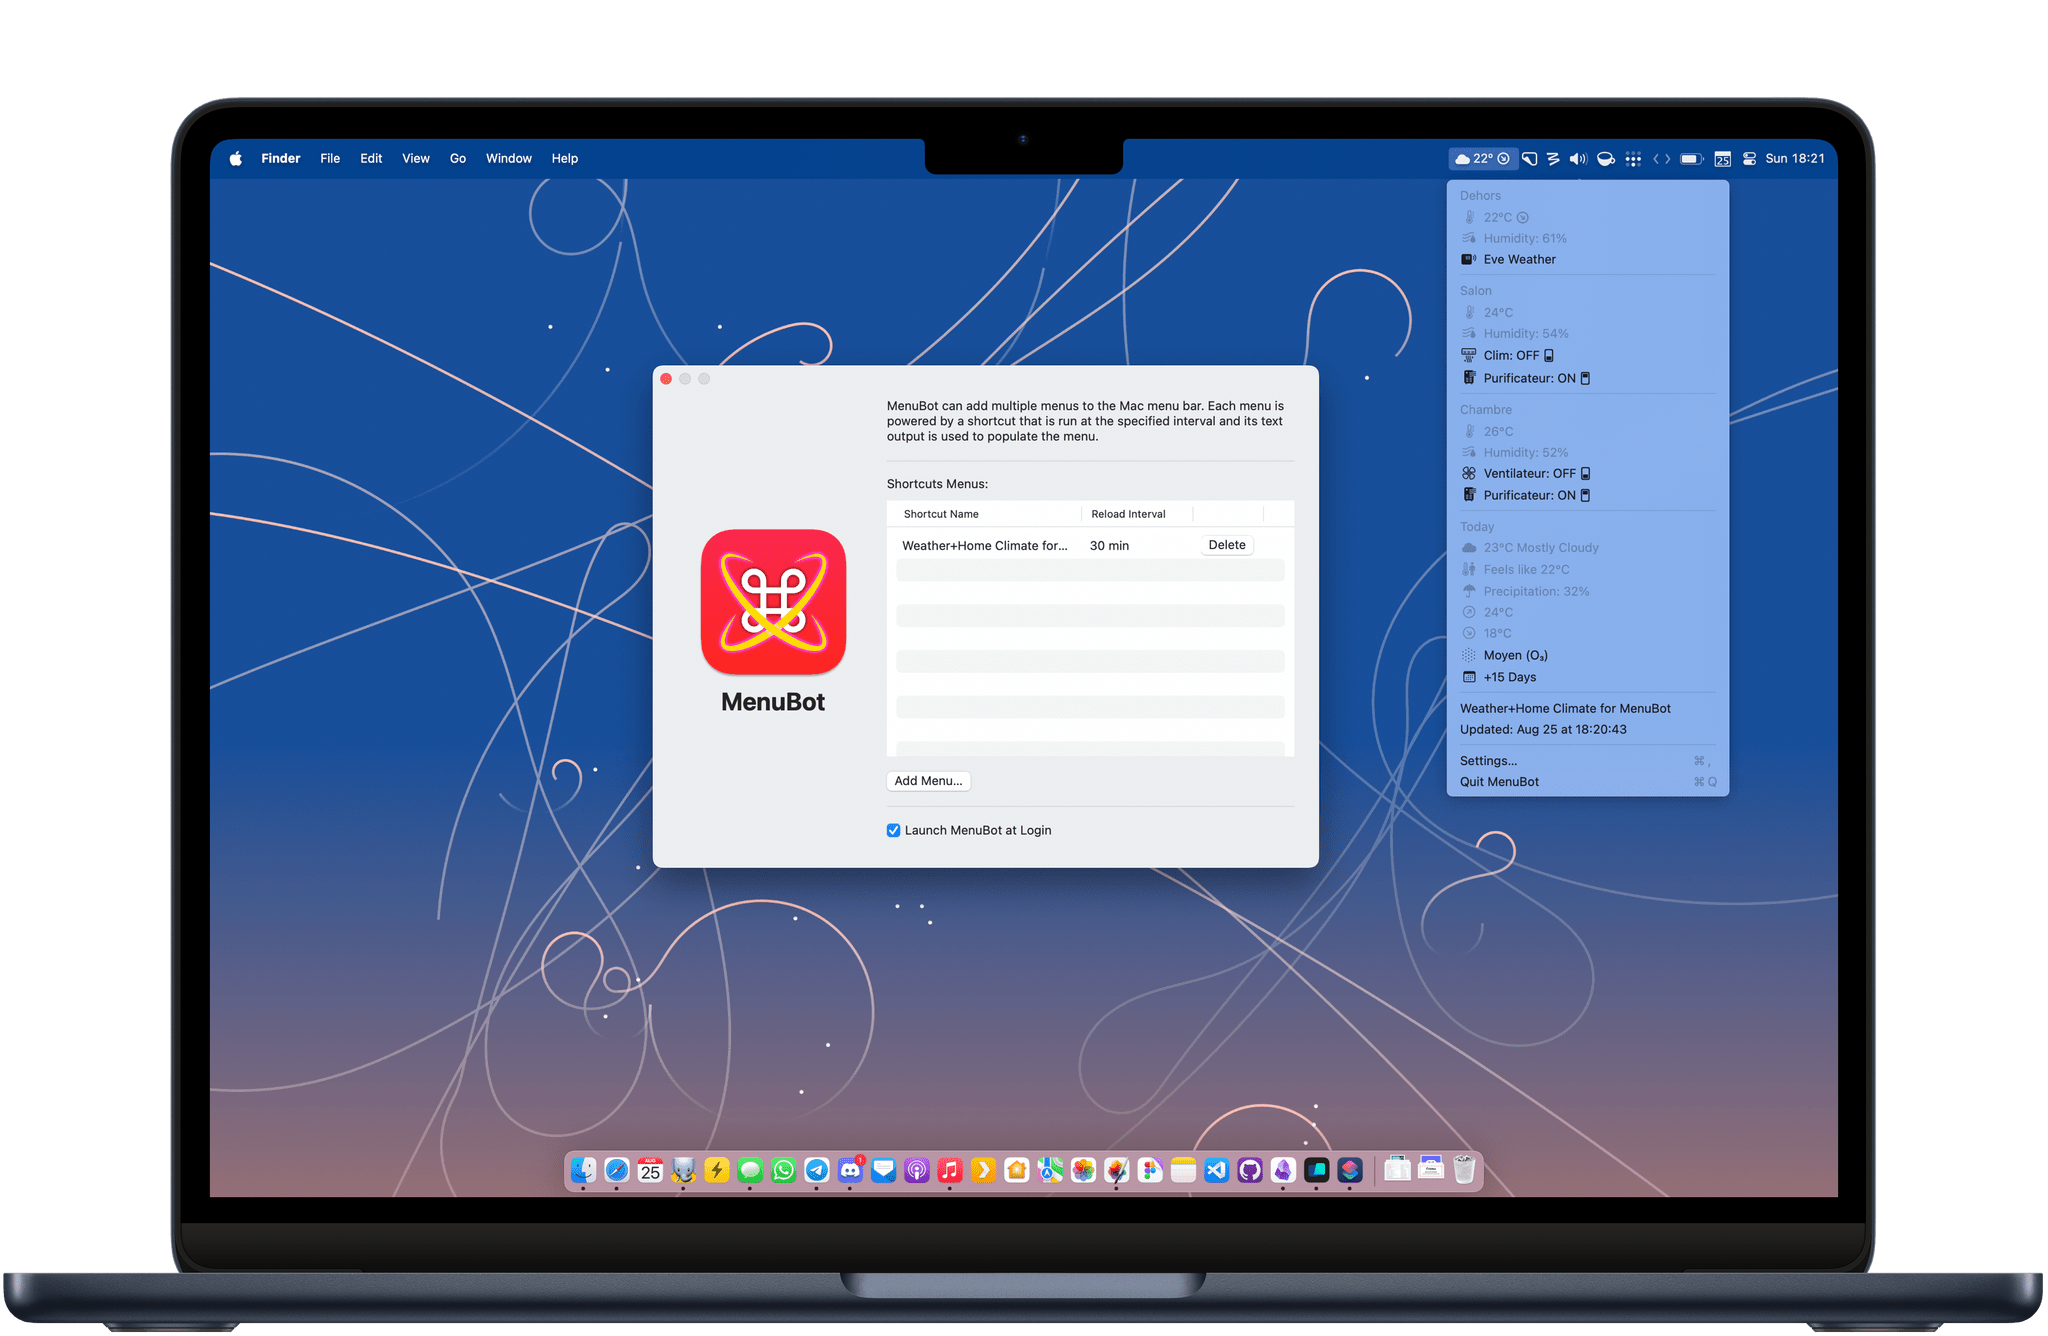
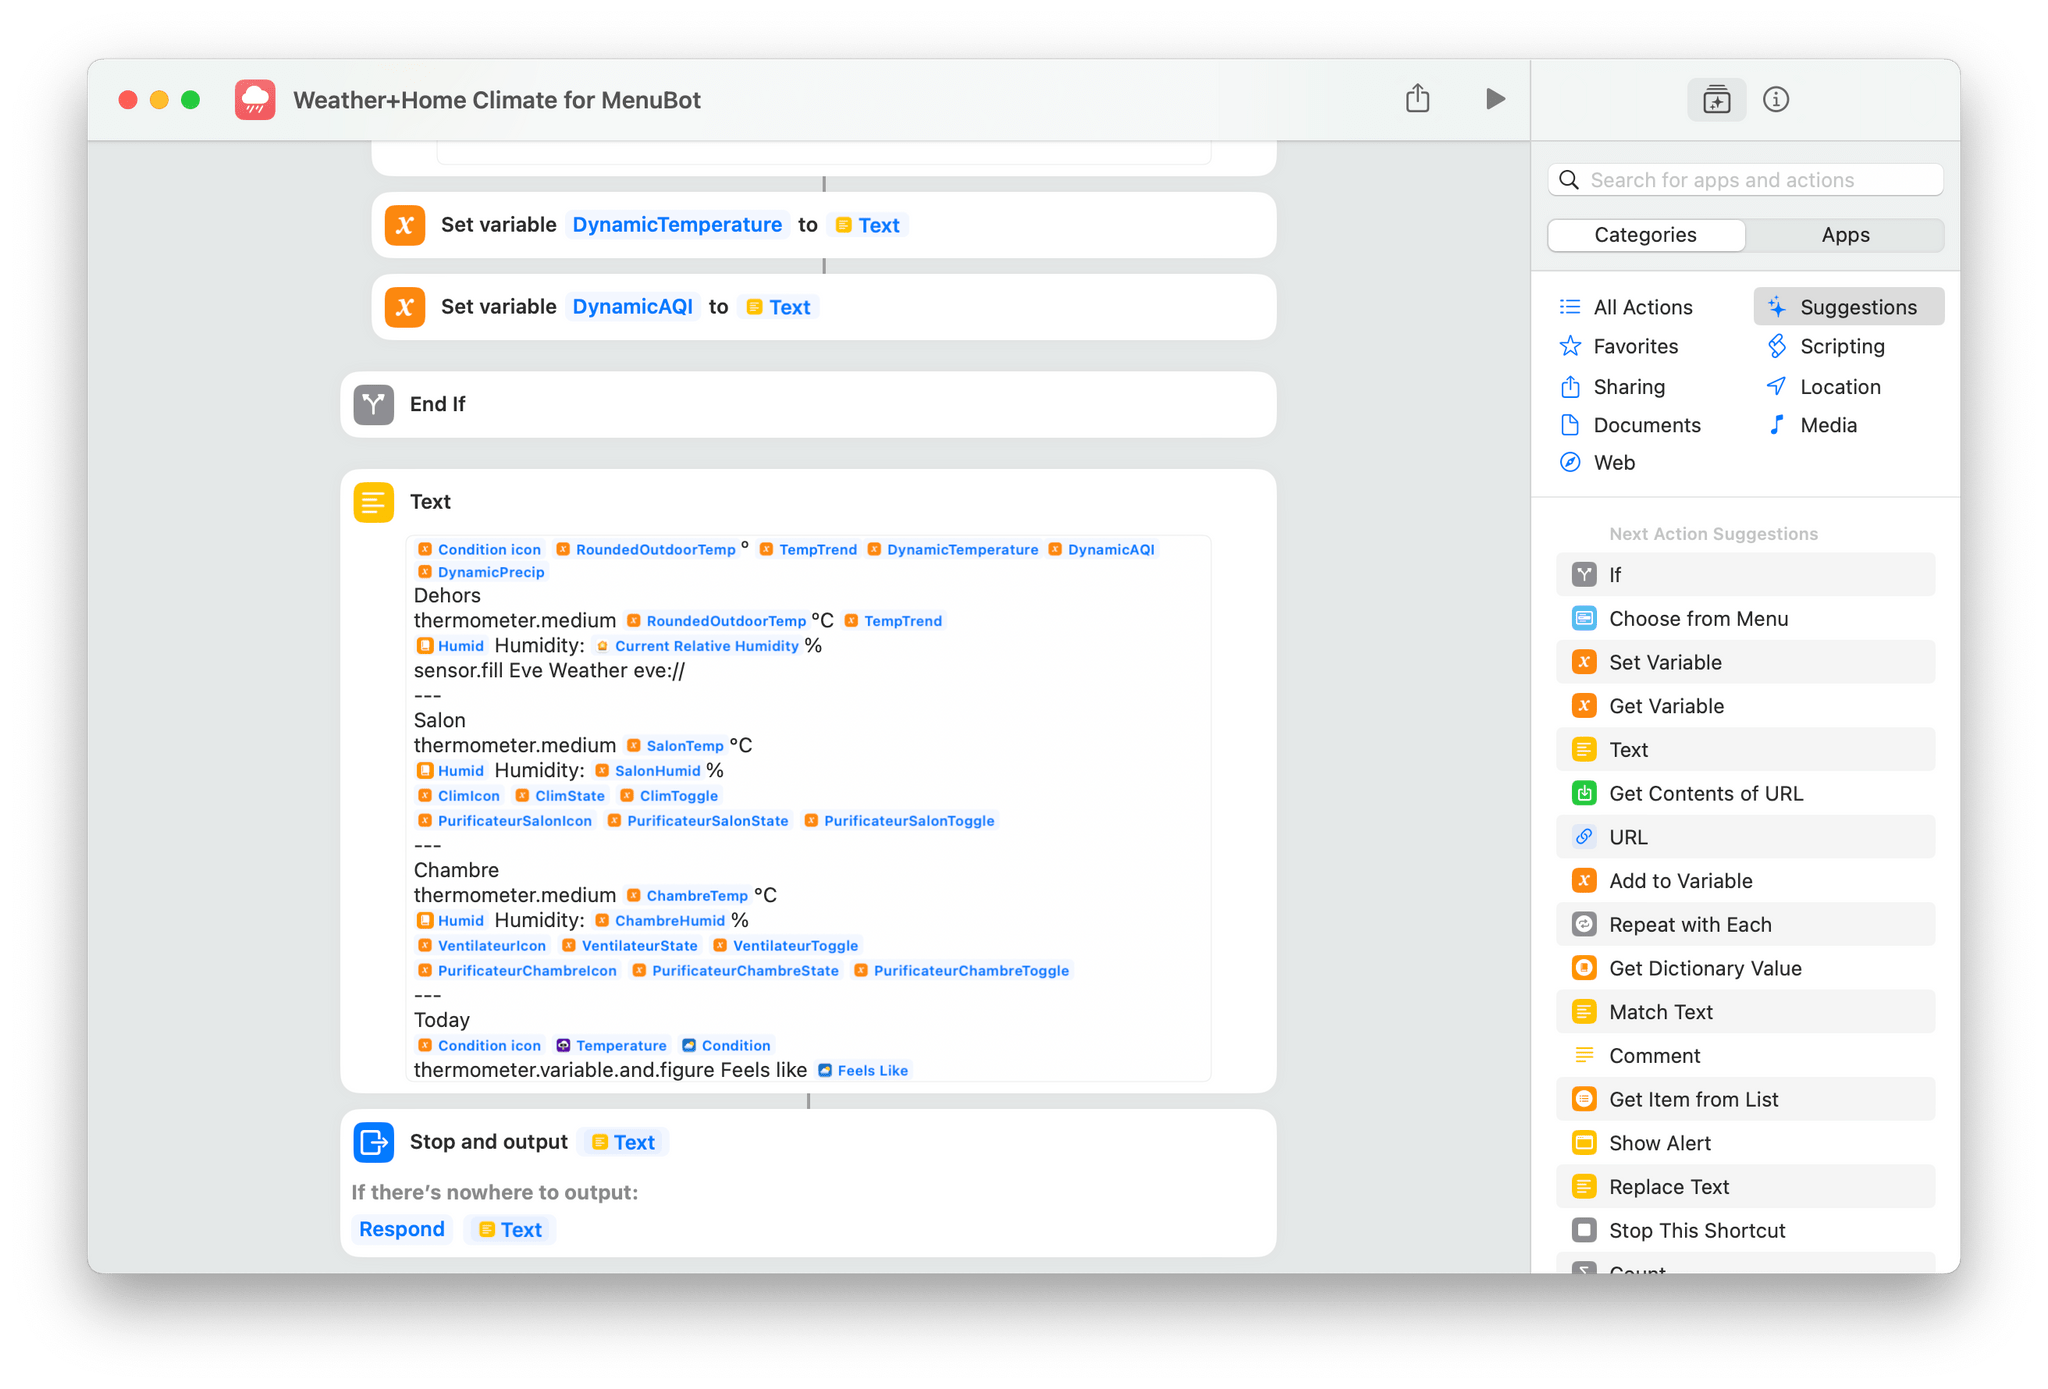
The resulting custom menu bar applet is extremely customized to my needs and home. From top to bottom, it displays temperature and humidity data from my outdoor sensor, living room, and main bedroom, and the fourth and final section compiles a summary of the weather forecast sourced from Carrot Weather. Each room’s section has controls to toggle air purifiers, fans, and air conditioning — each accompanied by an SF Symbol to reflect their current state.
Here’s what it looks like:
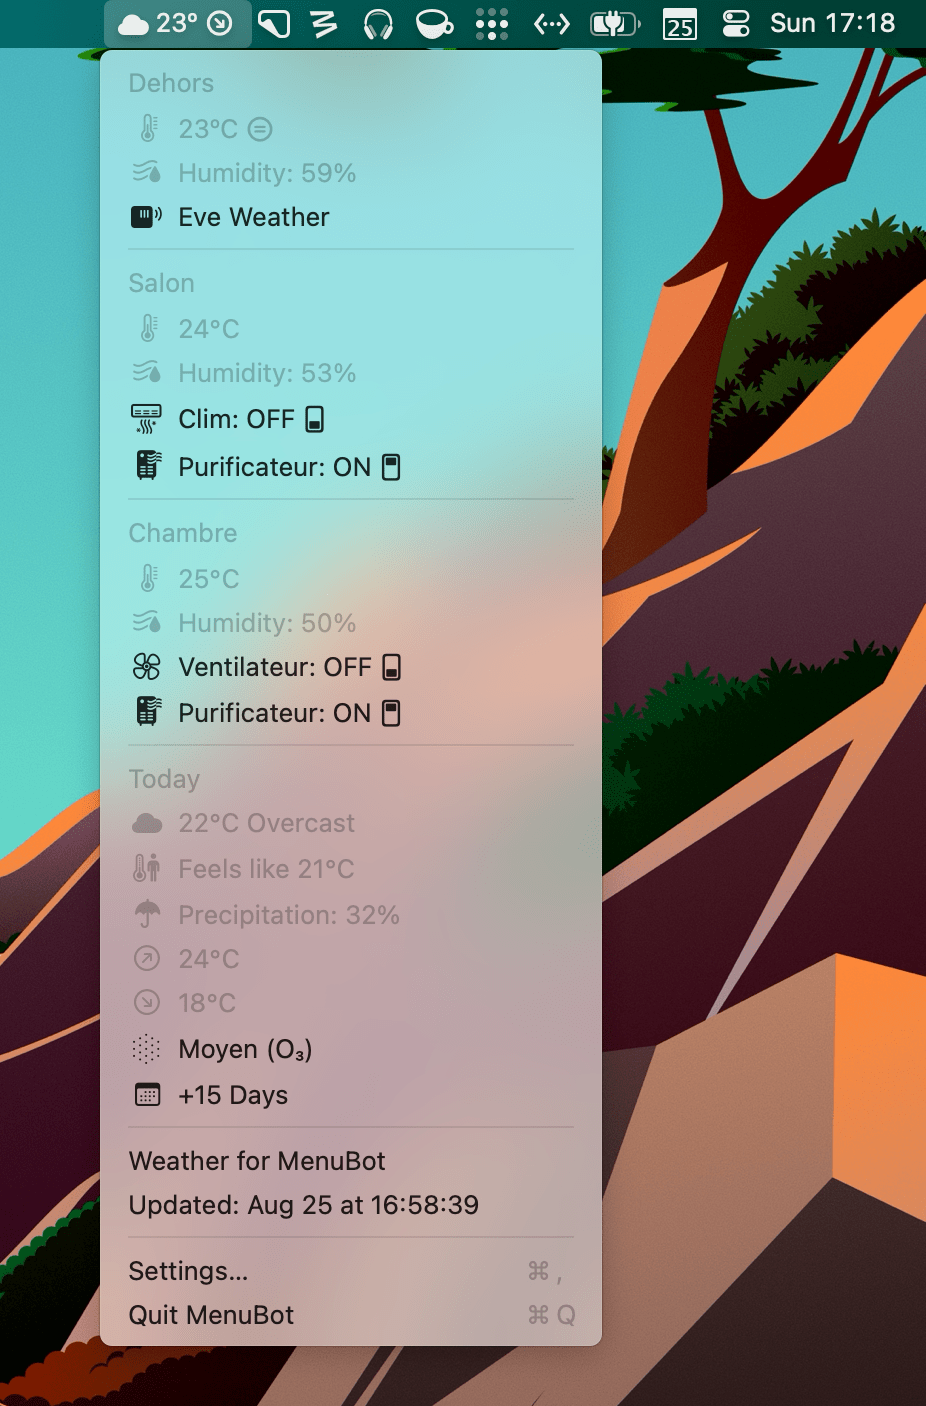
My custom MenuBot shortcut that combines weather data and home climate controls. (Pardon my French.)
I couldn’t be happier with this result. It’s the culmination of so many indie apps and utilities working together to create a hyper-specific Mac menu bar applet. With a single click in the menu bar, I can get a quick look at the forecasted conditions, compare them with the actual reading from my outdoor weather sensor, see how warm or cold each of my main rooms are, and even directly toggle each of my home climate control appliances accordingly. All of this is Shortcuts, HomeKit, Data Jar, Carrot Weather, Air Grenoble, BetterTouchTool, and MenuBot coming together, and that is precisely why it’s so perfect.
I have one wish to leave you with. If you are reading this and feel inspired to use MenuBot in combination with other utilities to create your own custom menu bar applets, please do not hesitate to share them with me on Mastodon or the Club MacStories Discord server. I’m excited to see what you come up with.
As you can tell, my custom shortcut for MenuBot is specifically tailored to my needs, location, and accessories, but if you want to take a look for inspiration, you can download it by clicking here.
MenuBot is available to purchase on the Mac App Store for $3.99.


