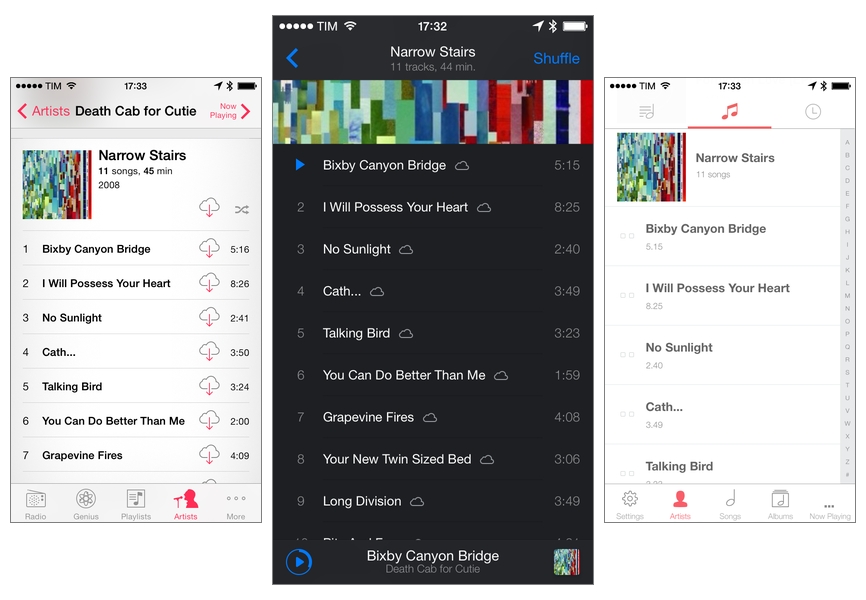
I didn’t think that complaining about iOS status bars on The Prompt would result in Dr. Drang going on a vision quest to produce better screenshots with Python. But I’m glad that I took the time to point out my dislike for messy status bars, because it led the good Doctor to work on some great scripts to automate the entire process with Python, which are compatible with Pythonista for iOS.
I waited to share my workflow for automated screenshot cleaning/generation because I wanted to see where Dr. Drang would end up with his script, Cleanbar. Now that he appears to have settled on a solution that requires standalone image files to act as partial status bar replacements, I think it’s the right time for me to share how I produce iPhone and iPad screenshots for MacStories.
The first step is to set up Cleanbar. I don’t need to repeat what Dr. Drang already explained, but to sum up: grab a black status bar, crop it to get two files similar to Drang’s, then run a script to pack those images as strings. Once set up, you’ll be able to a) use Cleanbar to clean single images picked from the Camera Roll with Pythonista and b) integrate it as cleanbar in other scripts to clean status bars programmatically.
As for my needs:
- I usually need to combine two iPhone screenshots side-by-side in a single image as you can see in most reviews on this site;
- I may or may not need to clean their status bars;
- I don’t have to combine iPad screenshots. I only need to resize them and I may or may not have to clean their status bars;
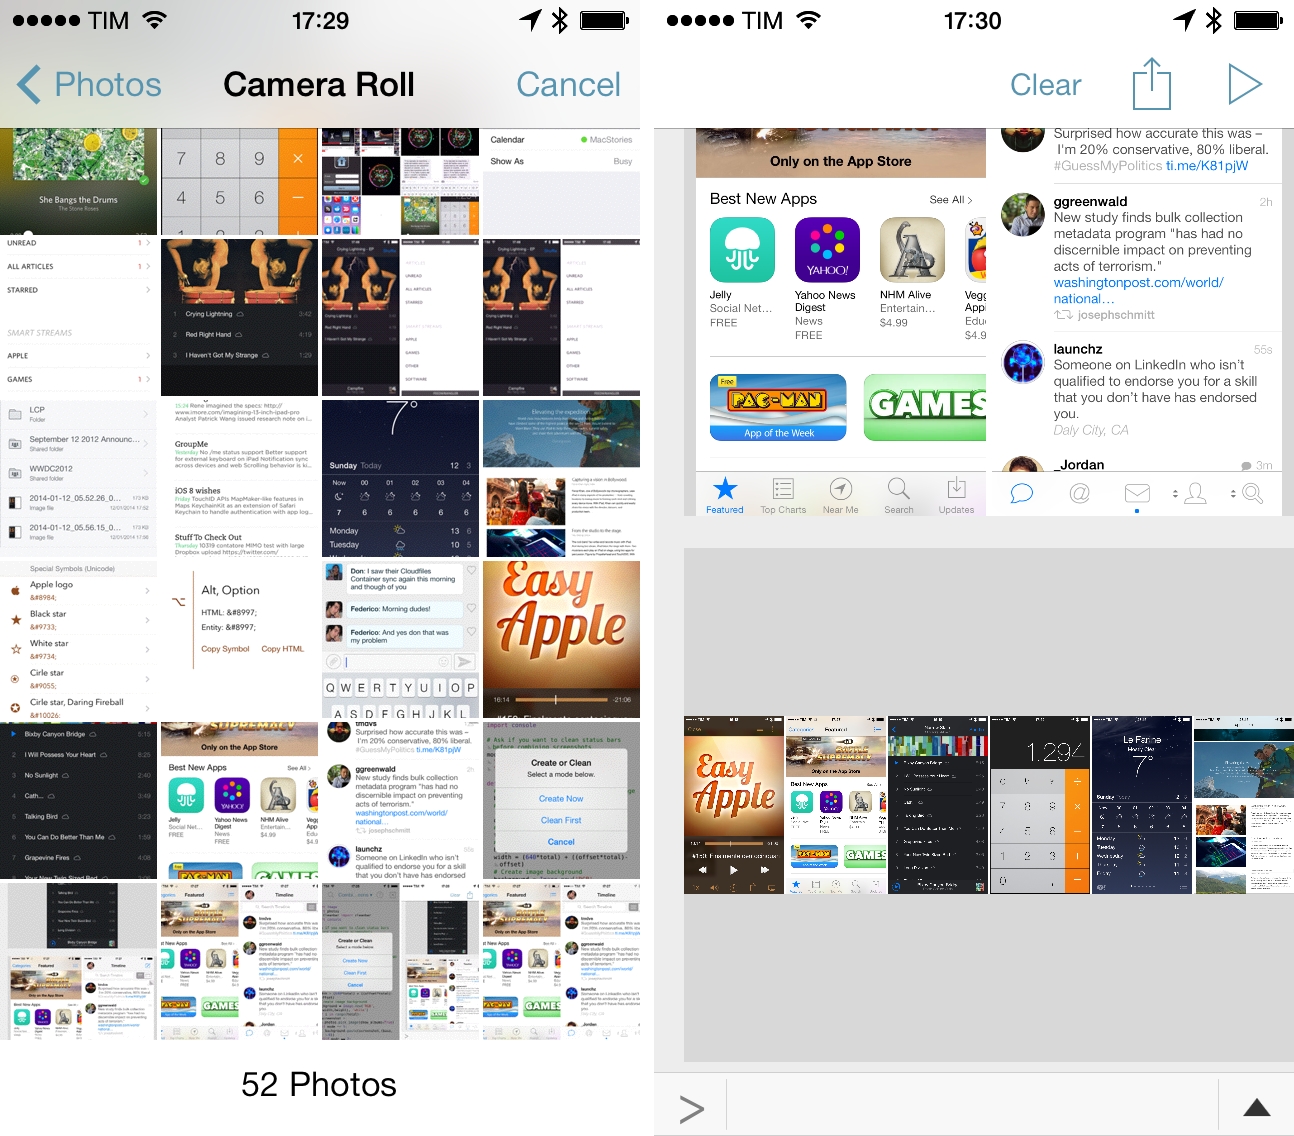
- Occasionally, I want to produce a banner with three screenshots (like this one), which can have original or cleaned status bars;
- Sometimes, I only need to clean one screenshot out of two;
- I always need to upload the final image to a Dropbox folder, which is monitored by Hazel.
And, because I’m not an animal, I wanted to automate all of this. The scripts that you’ll find below are the result of late night tweaking and lots of tests; they probably aren’t the most elegant or “Pythonic” way to handle this kind of image generation, but they work for me and they make me save several minutes every day. I haven’t been generating review screenshots manually in months, and they’re more flexible than my old workflow based on Keyboard Maestro.
CombineScreens
The main script that I use on a daily basis, CombineScreens lets me clean and combine multiple screenshots in a single image. The status bar cleaning is optional, and the script can handle any number of screenshots, although I rarely use it to generate images containing more than two.
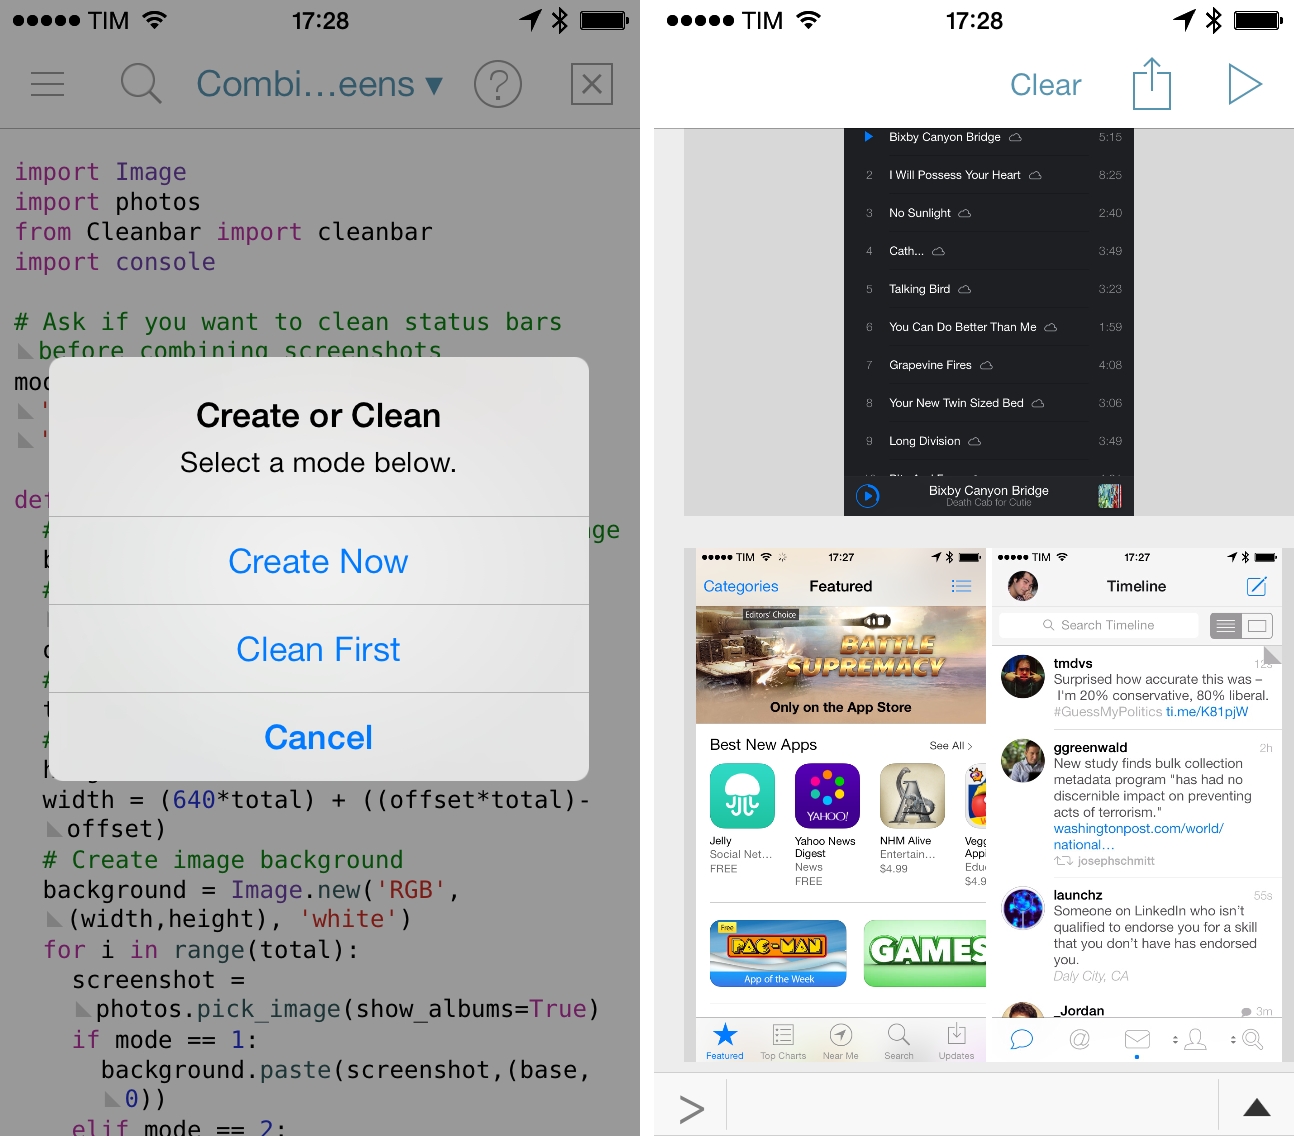
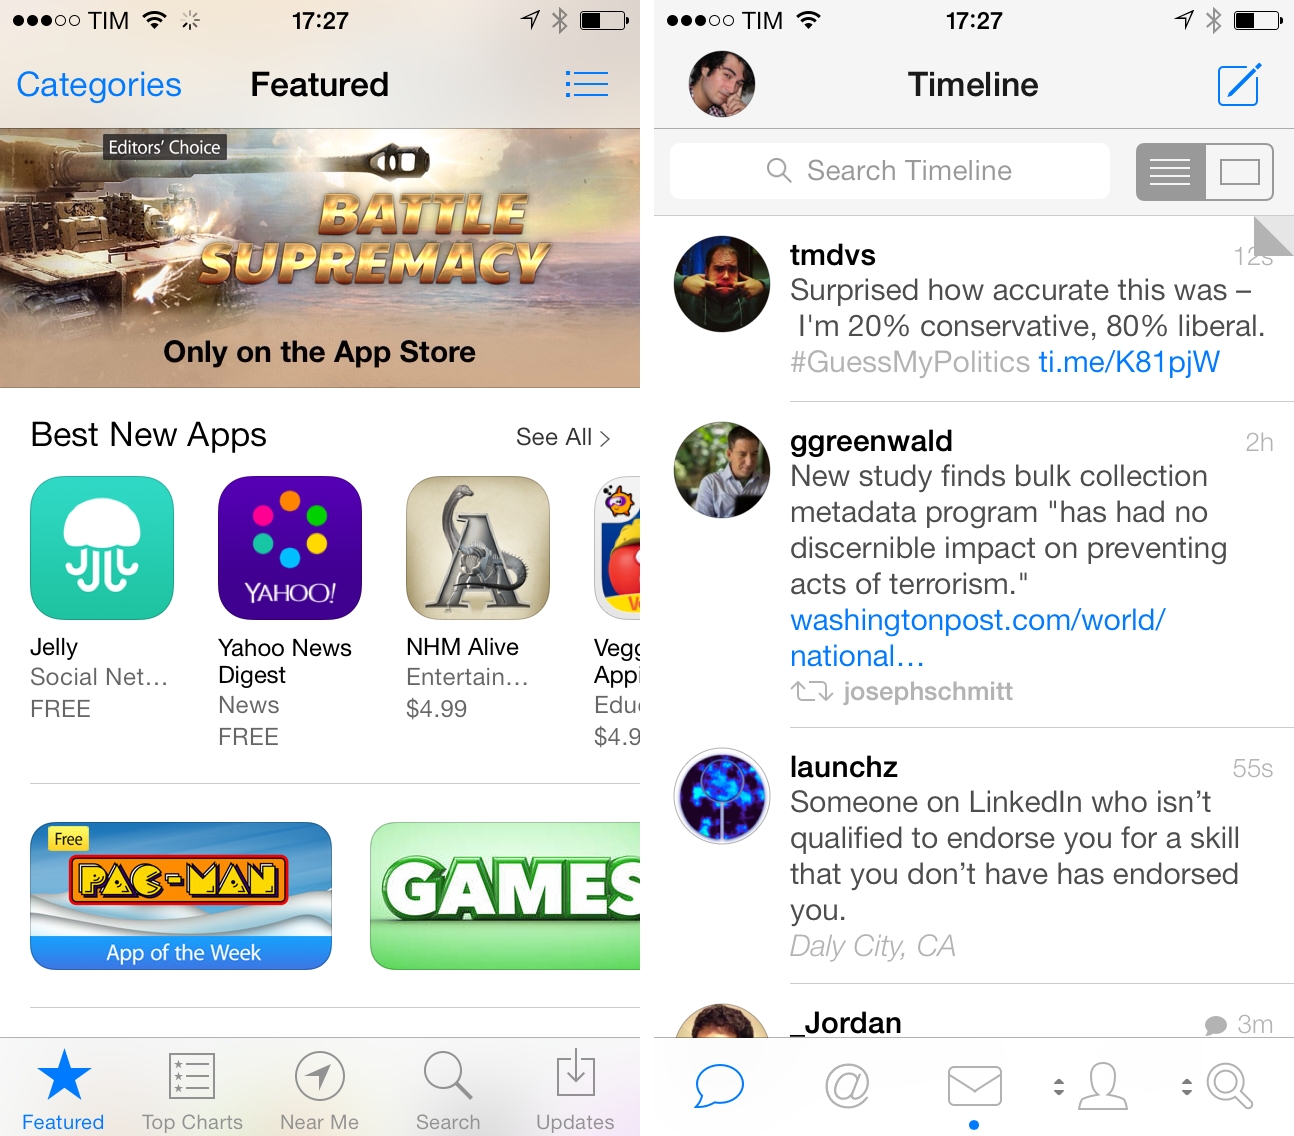
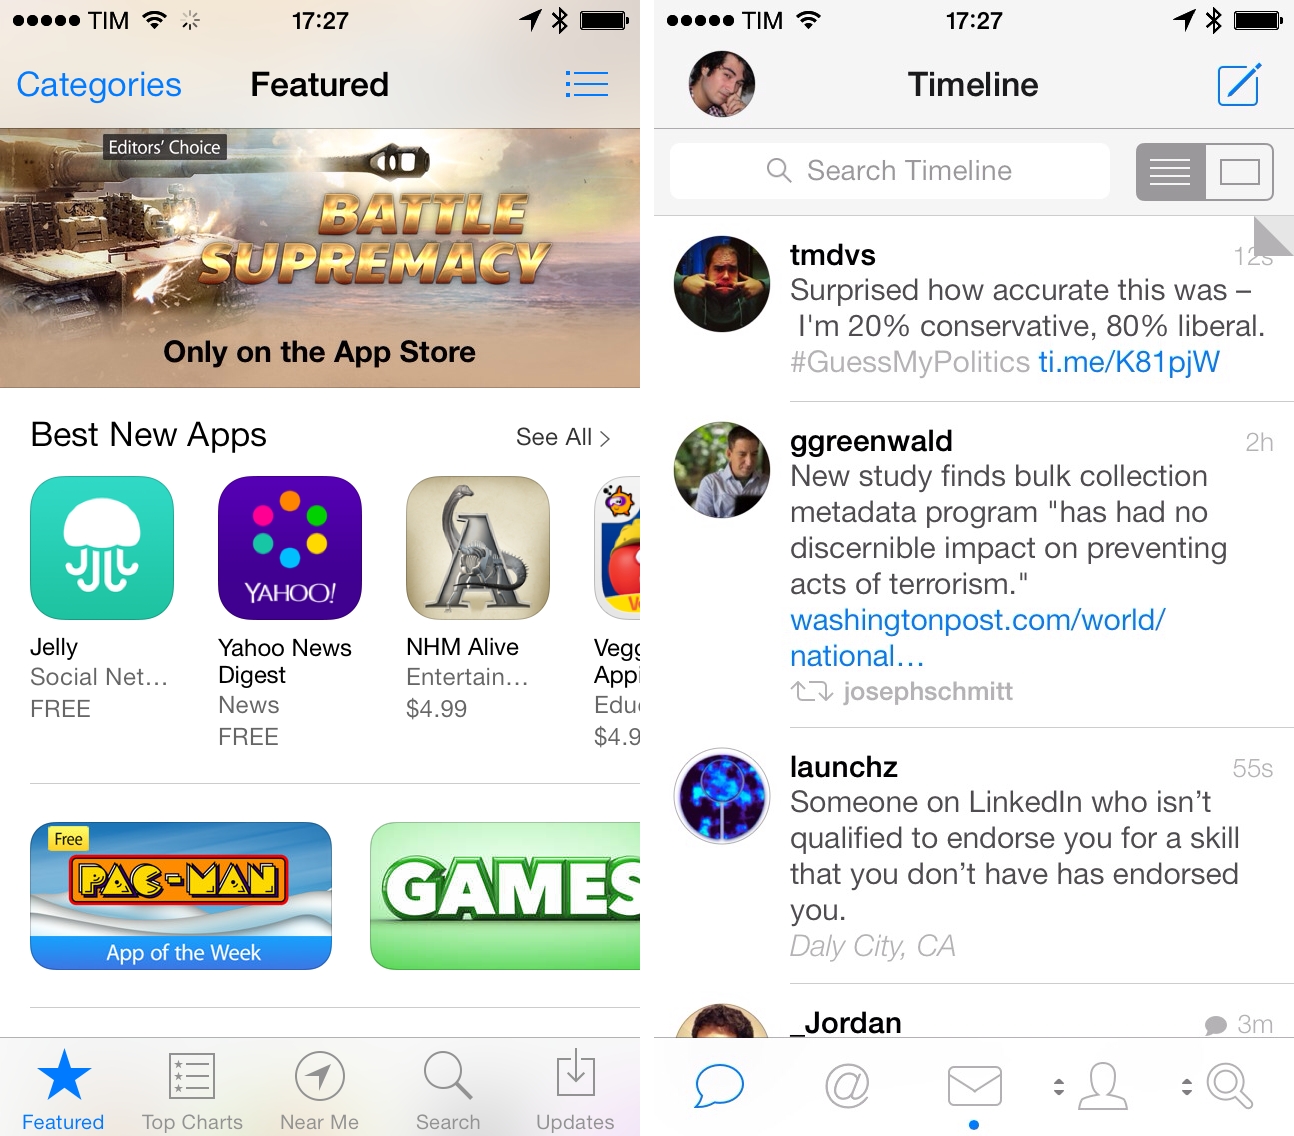
With CombineScreens I can combine two screenshots and get this:
But with status bar cleaning, get this:
Here’s the script:
import Image
import photos
from Cleanbar import cleanbar
import console

# Ask if you want to clean status bars before combining screenshots
mode = console.alert('Create or Clean', 'Select a mode below.', 'Create Now', 'Clean First')

def CombineScreens():
	# Distance from left side of final image
	base = 0
	# Pixels between screenshots in final image
	offset = 14
	# Number of screenshots to combine
	total = 2
	# iPhone 5 resolution
	height= 1136
	width = (640*total) + ((offset*total)-offset)
	# Create image background
	background = Image.new('RGB', (width,height), 'white')
	for i in range(total):
		screenshot = photos.pick_image(show_albums=True)
		if mode == 1:
			background.paste(screenshot,(base,0))
		elif mode == 2:
			cleanbar(screenshot)
			background.paste(screenshot,(base,0))
		base = base + screenshot.size[0] + offset
	background.show()
	# Upload to Dropbox folder
	from WorkPics import WorkPic
	WorkPic(background)

if __name__ == '__main__':
	CombineScreens()
Line 7 asks if you want to clean the status bars of the screenshots or if you want to generate a composite image without cleaning. Line 9 defines the CombineScreens function that can also be called from other scripts and that handles image generation and status bar cleaning.
As MacStories readers know, the final images that I use for reviews have a narrow white separator between screenshots. In the script, this is handled by line 11 and line 13, which define the base distance from the left side of the image for the first screenshot (0 pixels) and the offset for the following screenshots (14 pixels from the preceding screenshot). The value of 14 pixels is completely arbitrary – I picked it because I liked it. You can change it to whatever you want.
Same goes for line 15: it defaults to 2, which is the total number of screenshots I typically need to combine, but it’ll work for any number greater than that. I tried with 3, 6, and even 10 – you’ll end up with a larger image containing lots of screenshots. The script won’t judge.
I debated whether I needed the script to find out the height and width of screenshots passed to it, but I decided that, in my case, I’ll always be throwing iPhone 5 screenshots (1136x640 pixels) at it; therefore, lines 17–18 come with hardcoded integers for height and width – which are also responsible for defining size properties of the final image.
Line 18 multiplies the width of a single screenshot by the number of total screenshots and adds a single offset of 14 pixels (for each screenshots minus the first one) to create a background for the screenshots. If you need to deal with iPhone 4/4s screenshots, you can change the width and height values to what you need. Finally, line 20 creates the image with a white background where screenshots will be pasted upon; if you want a different background color (the one that will be shown between screenshots), change the color name to something else.
Lines 21–29 do the actual screenshot cleaning and combining. On line 21, a loop asks to pick a file for each screenshot (as assigned to the total variable beforehand); if you chose to combine screenshots without cleaning, they will be pasted on the white background. If, on the other hand, you wanted to clean screenshots, Drang’s cleanbar will run on each screenshot and clean its status bar.
The trick to paste multiple screenshots with a 14-pixel separator between them happens on line 28. The base variable needed to be 0 for the first screenshot, but screenshots after that have to be pasted one after the other while keeping a separator. For each screenshot in the loop, the previous base value, the width of the screenshot the loop just processed, and the offset are added to base. This ensures that the first screenshot in the loop will be pasted at the leftmost side of the white background, while the position of others will be incremented by the loop for each screenshot. Line 29 shows the final image in the Console, allowing you to tap & hold it to copy or save it to the Camera Roll as a PNG file.
Lines 31–32 upload the image to a Dropbox folder I configured in the WorkPics script, which is a variation of the DropPics script that I covered when Pythonista 1.4 was released. For context, here’s WorkPics:
from dropboxlogin import get_client
dropbox_client = get_client()
import keychain
import console
import time
import httplib
from io import BytesIO
import datetime
import webbrowser
import urllib
import clipboard

today = datetime.datetime.now()

def WorkPic(img):
	titles = console.input_alert('Image Upload', 'Enter your image name below')
	console.show_activity()
	buffer = BytesIO()
	img.save(buffer, 'JPEG', quality=100)
	buffer.seek(0)
	imgname = today.strftime("%Y-%m-%d-at-%H-%M-%S") + '-' + titles + '.jpeg'
	response = dropbox_client.put_file('/MacStories_Team/Photos/Ticci/upload-unedited/' + imgname, buffer)
	console.hide_activity()
	print 'Image Uploaded'

if __name__ == '__main__':
  import photos
  img = photos.pick_image()
  WorkPic(img)
Note how the file is renamed using a timestamp and how line 19 saves the PNG into a JPEG at full quality. You can change the Dropbox path on line 22 to whatever you need.
I’m happy with how CombineScreens turned out. I like its flexibility, it’s fast, and it allows me to combine multiple screenshots together in just a few seconds without needing a Mac. More importantly, it’s a nice improvement to what I had in November 2012.
Combine 3
I don’t use this script often, but, when I do, the result is pretty sweet. You can see the kind of banner image that Combine 3 creates in posts like this or this.
import Image
import photos
import console
import ImageOps

# Pick screenshots to combine
screenshot1 = photos.pick_image(show_albums=True)
screenshot2 = photos.pick_image(show_albums=True)
screenshot3 = photos.pick_image(show_albums=True)

mode = console.alert('Create or Clean', 'Select a mode below.', 'Create Now', 'Clean First')

if mode == 2:
	from Cleanbar import cleanbar
	cleanbar(screenshot1)
	cleanbar(screenshot2)
	cleanbar(screenshot3)

# Creates final image
console.clear()
print "Creating final image..."
background = Image.new('RGBA', (866,600), (255, 255, 255, 255))
file1 = screenshot1.resize((250,444),Image.ANTIALIAS)
file2 = screenshot2.resize((320,568),Image.ANTIALIAS)
file3 = screenshot3.resize((250,444),Image.ANTIALIAS)

file1 = ImageOps.expand(file1,border=1,fill='gray')
file2 = ImageOps.expand(file2,border=1,fill='gray')
file3 = ImageOps.expand(file3,border=1,fill='gray')

background.paste(file1,(10,77))
background.paste(file2,(272,15))
background.paste(file3,(604,77))

console.hide_activity()
background.show()
print "\n\n Image created"
The script is fairly straightforward. Lines 7–9 get three screenshots from the Camera Roll; lines 13–17 run an optional cleanbar like CombineScreens; lines 22–36 create the final image by resizing screenshots, adding a gray border to them, and pasting them on a white background.
Some points worth noting: the screenshot in the middle is larger than the other two but all of them are resized with Image.ANTIALIAS. The 1-pixel gray border is added through ImageOps and you can change the fill color to anything you want.
Clean iPad
I don’t need to combine iPad screenshots. Hence, my script simply asks how many screenshots I want to resize in a row, and it offers to clean their status bars with cleanbar.
import photos
import Image
import console
from Cleanbar import cleanbar

number = console.input_alert('How many images?')
mode = console.alert('Create or Clean', 'Select a mode below.', 'Create Now', 'Clean First')

for i in range(int(number)):
	screenshot = photos.pick_image(show_albums=True)
	if mode == 1:
		final = screenshot.resize((1024,768),Image.ANTIALIAS)
	elif mode == 2:
		cleanbar(screenshot)
		final = screenshot.resize((1024,768),Image.ANTIALIAS)
	final.show()
	from WorkPics import WorkPic
	WorkPic(final)
The script uses a loop (lines 9–18) to pick screenshots (based on a number entered in line 6), resize them, clean them, and upload them with WorkPics.
Notes
Dr. Drang’s Cleanbar has been a huge help to achieve the status bar cleaning workflow I wanted. It’s not perfect (it picks the color of status bar icons programmatically, so it can’t account for developers who specifically choose one color over another for aesthetic reasons), but it’s the best solution I’ve found to date. Cleanbar works with solid status bars, black and white versions, and it can also fill icons for status bars with translucencies or gradients. The script that I use the most, CombineScreens, handles screenshot selection, status bar cleaning, image generation, and uploading in a function that does everything I need and that can be reused in other scripts.
Like most automation tricks, there’s a lesson to be learned about fiddling. I tweaked my scripts until I was happy with them and I waited for Dr. Drang to find what he thought was the best solution for the job – I invested time in scripts that, now that they’re set up, don’t require me to manage them or fiddle with them anymore. They’ll simply allow me to save time every day and they’ll work both on the iPhone and iPad. Combining screenshots and cleaning status bars are minor annoyances, and I’m glad that I can get rid of them directly on iOS without a computer. Seven years later, this is what you can do on a phone.


