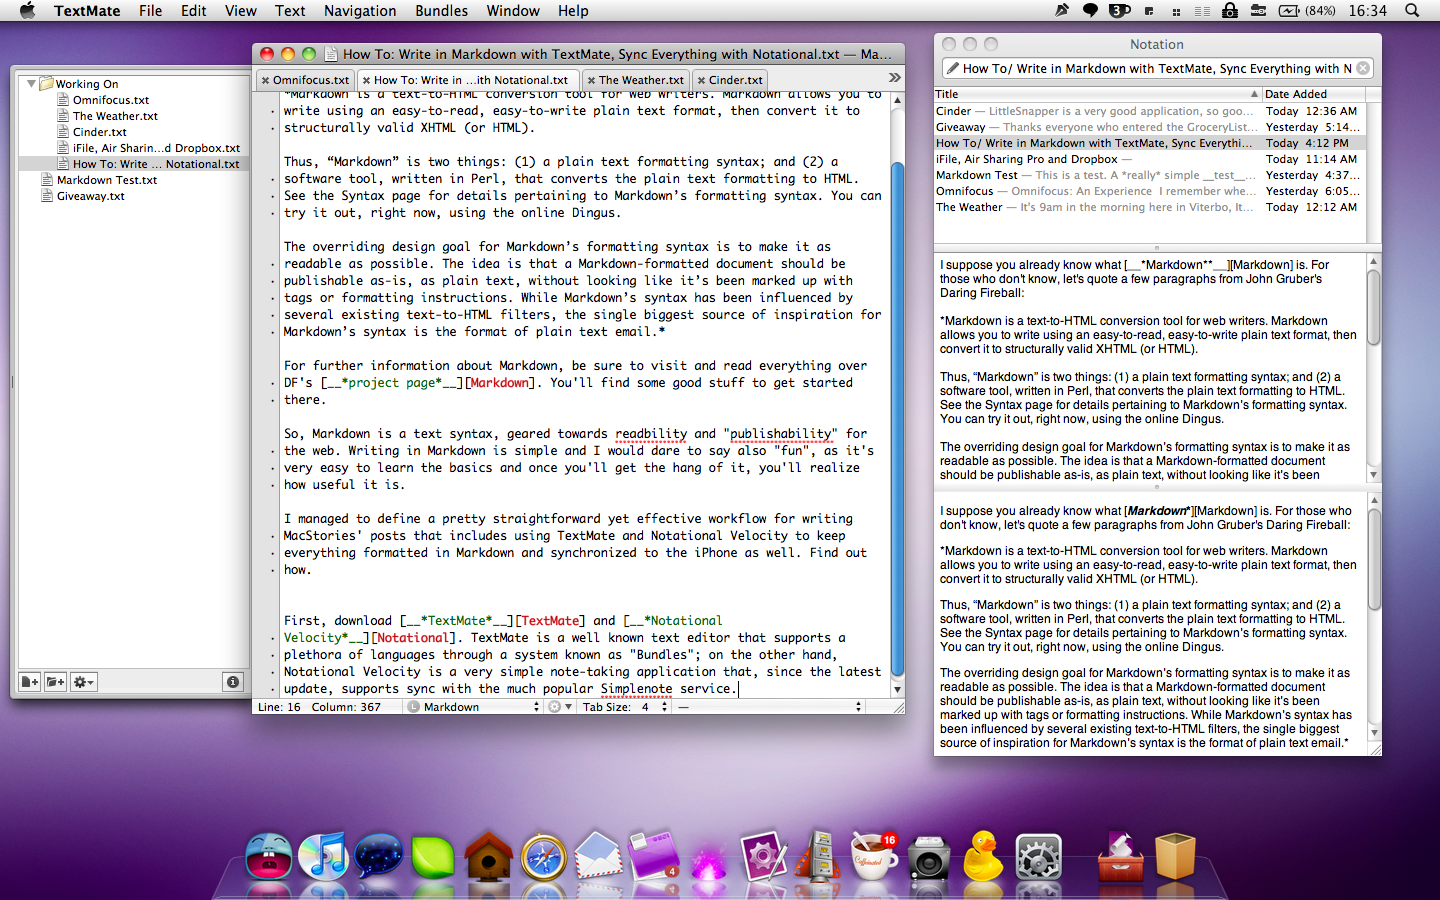
I suppose you already know what Markdown* is. For those who don’t know, let’s quote a few paragraphs from John Gruber’s Daring Fireball:
Markdown is a text-to-HTML conversion tool for web writers. Markdown allows you to write using an easy-to-read, easy-to-write plain text format, then convert it to structurally valid XHTML (or HTML)
Thus, “Markdown” is two things: (1) a plain text formatting syntax; and (2) a software tool, written in Perl, that converts the plain text formatting to HTML. See the Syntax page for details pertaining to Markdown’s formatting syntax. You can try it out, right now, using the online Dingus.
The overriding design goal for Markdown’s formatting syntax is to make it as readable as possible. The idea is that a Markdown-formatted document should be publishable as-is, as plain text, without looking like it’s been marked up with tags or formatting instructions. While Markdown’s syntax has been influenced by several existing text-to-HTML filters, the single biggest source of inspiration for Markdown’s syntax is the format of plain text email.
For further information about Markdown, be sure to visit and read everything over DF’s project page. You’ll find some good stuff to get started there.
So, Markdown is a text syntax, geared towards readbility and “publishability” for the web. Writing in Markdown is simple and I would dare to say also “fun”, as it’s very easy to learn the basics and once you’ll get the hang of it, you’ll realize how useful it is.
I managed to define a pretty straightforward yet effective workflow for writing MacStories’ posts that includes using TextMate and Notational Velocity to keep everything formatted in Markdown and synchronized to the iPhone as well. Find out how.
First, download TextMate and Notational Velocity. TextMate is a well known text editor that supports a plethora of languages through a system known as “Bundles”; on the other hand, Notational Velocity is a very simple note-taking application that, since the latest update, supports sync with the much popular Simplenote service.What’s so great about Notational for Mac is that, by enabling the SN synchronization, you’ll be able to access all your notes from the Simplenote iPhone app, thus enabling a real cross platform workflow. Works very well for me.
Anyway, install both the apps and download the Markdown bundle for TextMate. This TM bundle is very good: accessible from the Bundles menubar menu in TextMate, it brings features like convert, preview,cheat sheet and “generate output and open in browser” (useful to send mails written in Markdown). I’ve created a TextMate project called “Working on”, which contains all the articles I’m writing for MacStories. Files have a .txt extension. Also,both the .tmproj file (the TextMate project) and the actual files are inside a subfolders of /Documents. Just to give them a nice position, easy to remember.
Now, I think I should have told you before that I don’t use a “normal” Notational installation: I’ve downloaded Steven Frank’s Notational fork from GitHub, which adds a third bottom pane to preview notes written in Markdown. Maybe an horizontal pane would have been better, but still. Now, you should let Notational retrieve the notes you write in Textmate and to do so enter the Preferences and choose the folder they’re stored into from the “Read notes from folders menu”. Notational uses a database format to save notes by default, so you’ll also have to click on the Storage tab and choose “Store and read notes on disk as plain text files”. Sure it eats more disk space, but it’s not that big of a deal, being text files.
And that’s it. Now TextMate and Notational are based on the same documents and you can write in TM and leave Notational running to keep a constant sync. Notational will automatically update the files everytime you hit Save in TextMate.
Maybe there’s a better solution than mine - sure there is - but I’m very happy with this workflow. If you’ve got any suggestions, feel free to share in the comments.


