Well, it’s been a minute.
Today, I’m very happy to introduce Apple Frames 4, a major update to my shortcut for framing screenshots taken on Apple devices with official Apple product bezels. Apple Frames 4 is a complete rethinking of the shortcut that is noticeably faster, updated to support all the latest Apple devices, and designed to support even more personalization options. For the first time ever, Apple Frames supports multiple colors for each device, allowing you to mix and match different colored bezels for each framed screenshot; it also supports proportional scaling when merging screenshots from different Apple devices.
But that’s not all. In addition to an updated shortcut, I’m also releasing the Apple Frames CLI, an open source command-line utility that lets developers and tinkerers automate the process of framing screenshots directly from the Mac’s Terminal. And there’s more: the Apple Frames CLI is also designed to work with AI agents, and it comes with a Claude Code/Codex skill that lets coding agents take care of framing dozens or even hundreds of screenshots in just a few seconds, from any folder on your Mac.
Apple Frames 4 is the result of an idea I had months ago that enabled me to remove more than 500 actions from the shortcut, going from over 800 steps down to ~300. I did all that work manually, but it was worth it; the improved shortcut is faster and vastly more reliable than before thanks to a more intelligent logic that adapts to the growing ecosystem of Apple screen sizes and display resolutions.
Apple Frames 4 and the Apple Frames CLI represent a substantial step forward for screenshot automation, and I’ve been using both extensively for the past few weeks.
Let’s dive in.
Apple Frames
Add device frames to screenshots for iPhones (8/SE, 12-13, 15, 16, 17, Air generations in all sizes), iPad Pro (11” and 12.9”/13”, 2018-2025 models), iPad Air, iPad mini, iPad, Apple Watch Series 7/10/11, Apple Watch Ultra 2/3, iMac M4, Studio Display, Studio Display XDR, MacBook Air (2020/M5 13”/M5 15”), MacBook Pro (13”/M5 14”/M5 16”), and MacBook Neo. Apple Frames 4 supports colored device frames for iPhones 16 and 17, iPhone Air, MacBook Pro M5, MacBook Air M5, MacBook Neo, iMac M4, Studio Display, Studio Display XDR, Apple Watch Ultra, and Apple Watch Series 11. The shortcut supports portrait and landscape orientations but does not support Display Zoom; on iPadOS and macOS, the shortcut supports Default and More Space resolutions. The shortcut can be run in the Shortcuts app, as a Home Screen widget, as a Finder Quick Action, or via the share sheet. The shortcut also supports an API for automating input images, frame colors, and framed results.
The New Apple Frames Shortcut
At the core of the new Apple Frames shortcut is the idea that rather than having hundreds of conditional actions inside the shortcut (such as “If screenshot is Apple Watch” or “If screenshot is iPad Pro”), all of those repeated steps are gone, replaced by a JSON file that contains a mapping of Apple device resolutions. The shortcut only checks for a screenshot’s resolution once and finds a match in its ‘Frames’ asset folder in iCloud Drive → Shortcuts to frame each screenshot accordingly. This change alone has made the shortcut much easier for me to tweak, faster to run, and easier to maintain in the future.
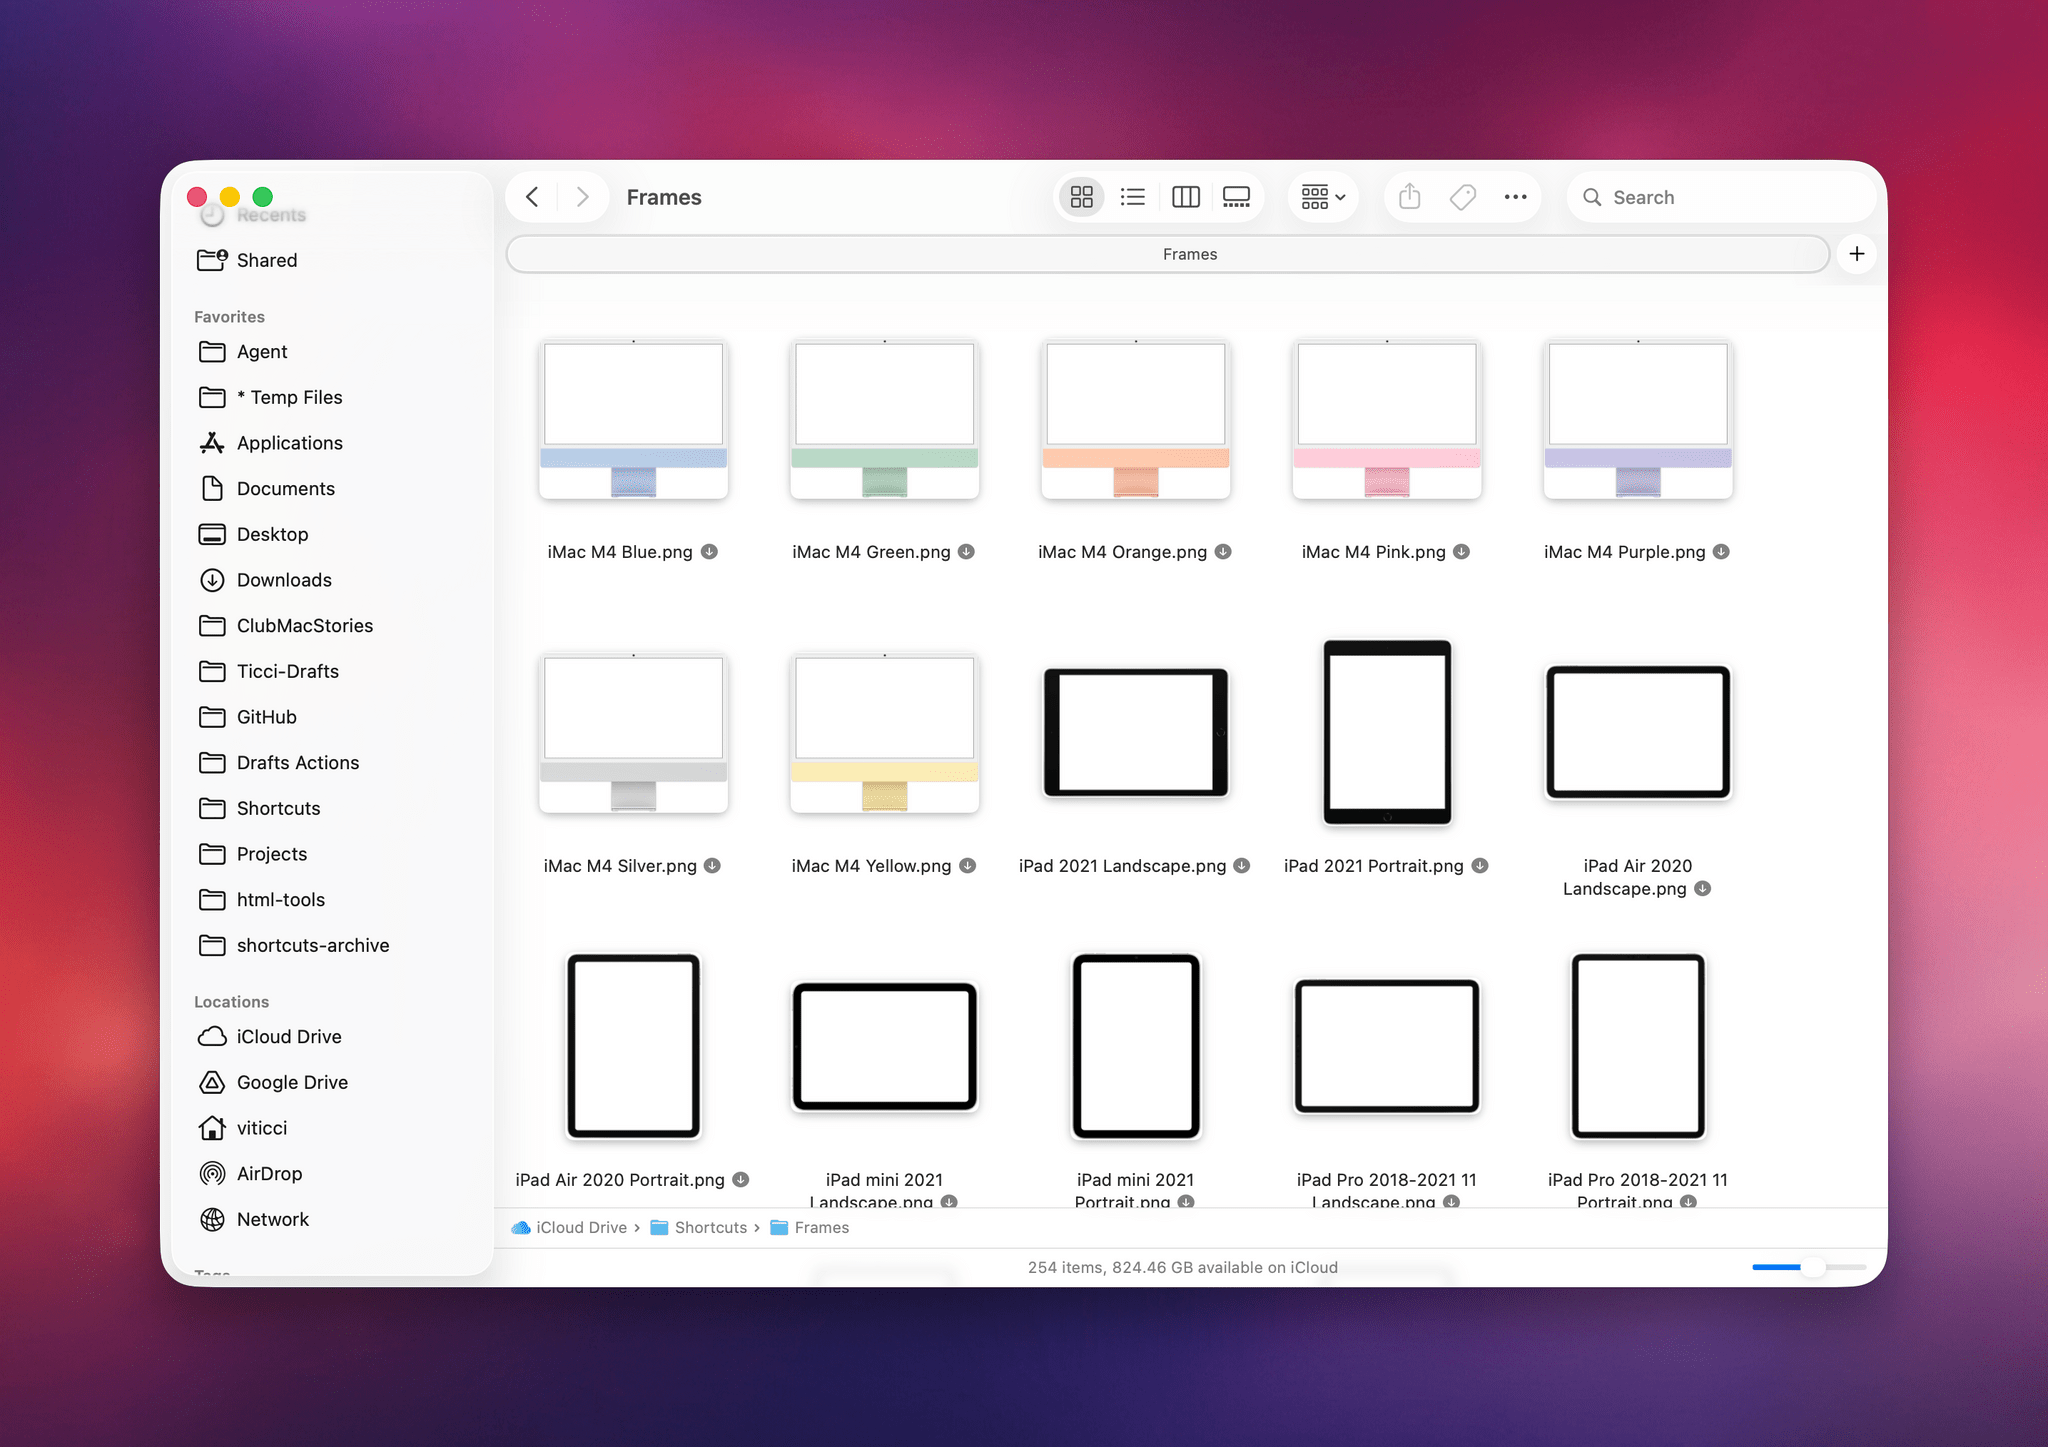
The first time you run Apple Frames – whether you had it installed before or not – you’ll be asked to download frame assets from the MacStories.net CDN. By default, these assets will be saved in iCloud Drive; I highly recommend not touching them. I also recommend making the Shortcuts folder in iCloud Drive always available offline in Files/Finder for optimal performance and framing speed.
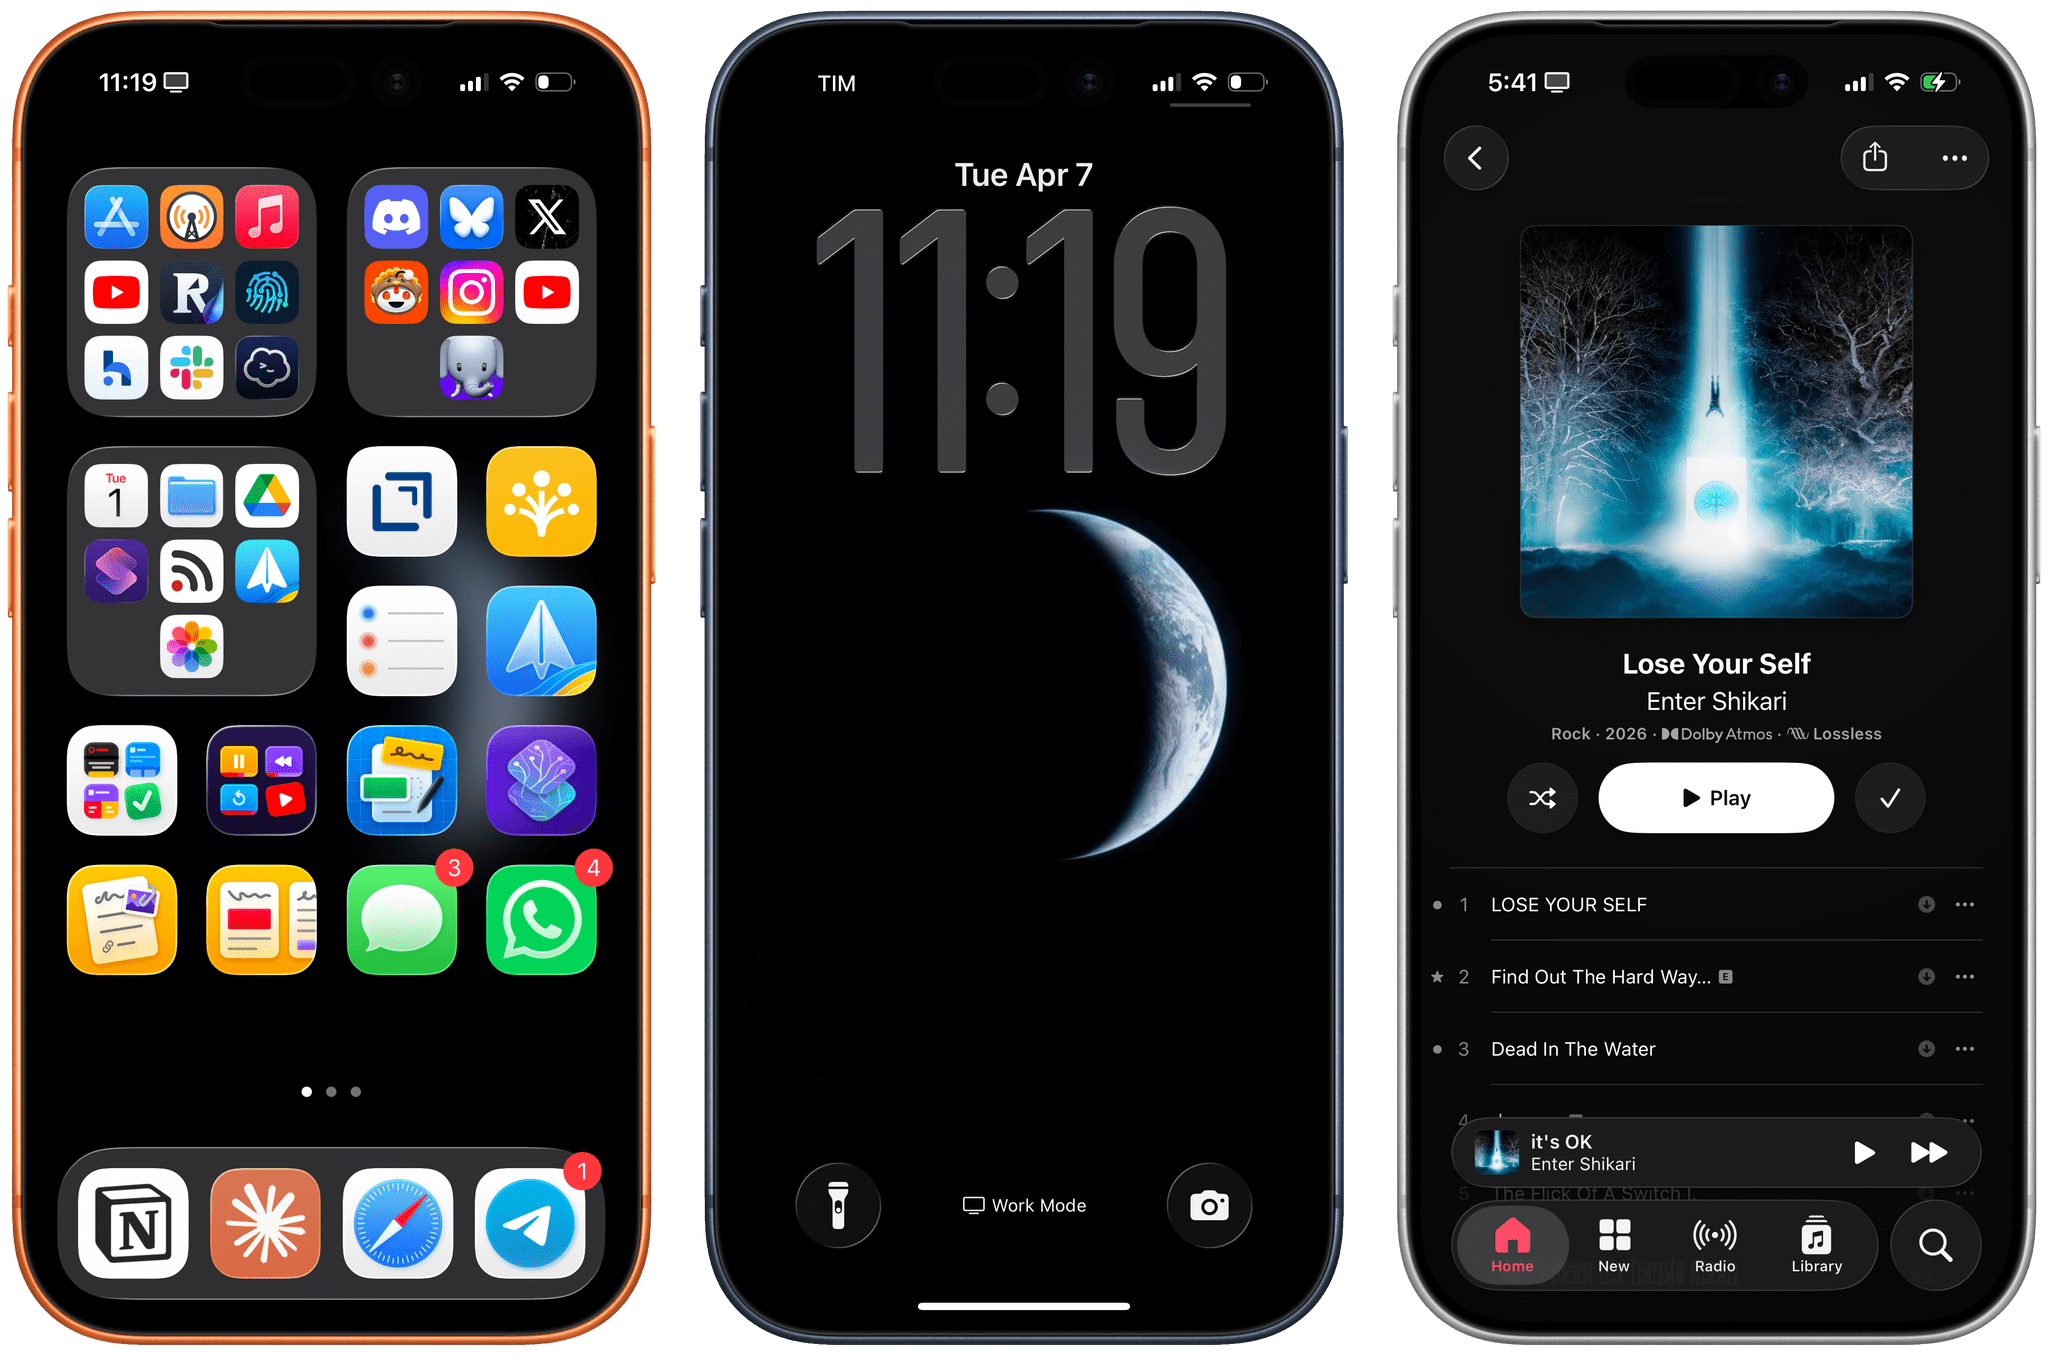
At a basic level, this is all you need to do to start using Apple Frames 4. Install it, run it, and pick one or multiple screenshots, and they’ll be framed. You’ll be presented with the usual action menu at the end, where you can choose what to do with the framed image, such as copying it to the clipboard or sending it somewhere else.
Naturally, Apple Frames 4 supports all the latest Apple devices released since version 3.3 in late 2024:
- iPhone 17 and 17 Pro family
- iPhone Air
- MacBook Air M5
- MacBook Pro M5
- Apple Watch Series 11
- Apple Watch Ultra 3
- MacBook Neo
- Studio Display and Studio Display XDR
I’ve tried to design a good default experience for most people so that if you don’t want to fiddle with anything in Shortcuts, you don’t have to. That said, if you do want to tweak Apple Frames and configure it to your liking…this update is for you.
The first big addition to this version is support for frame colors. Finally, you’re no longer limited to whichever default frame color I chose: Apple Frames 4 supports all the colored bezels officially offered by Apple. If you don’t like the defaults I picked, you can customize the shortcut per-device and per-orientation to use whatever color you like best.
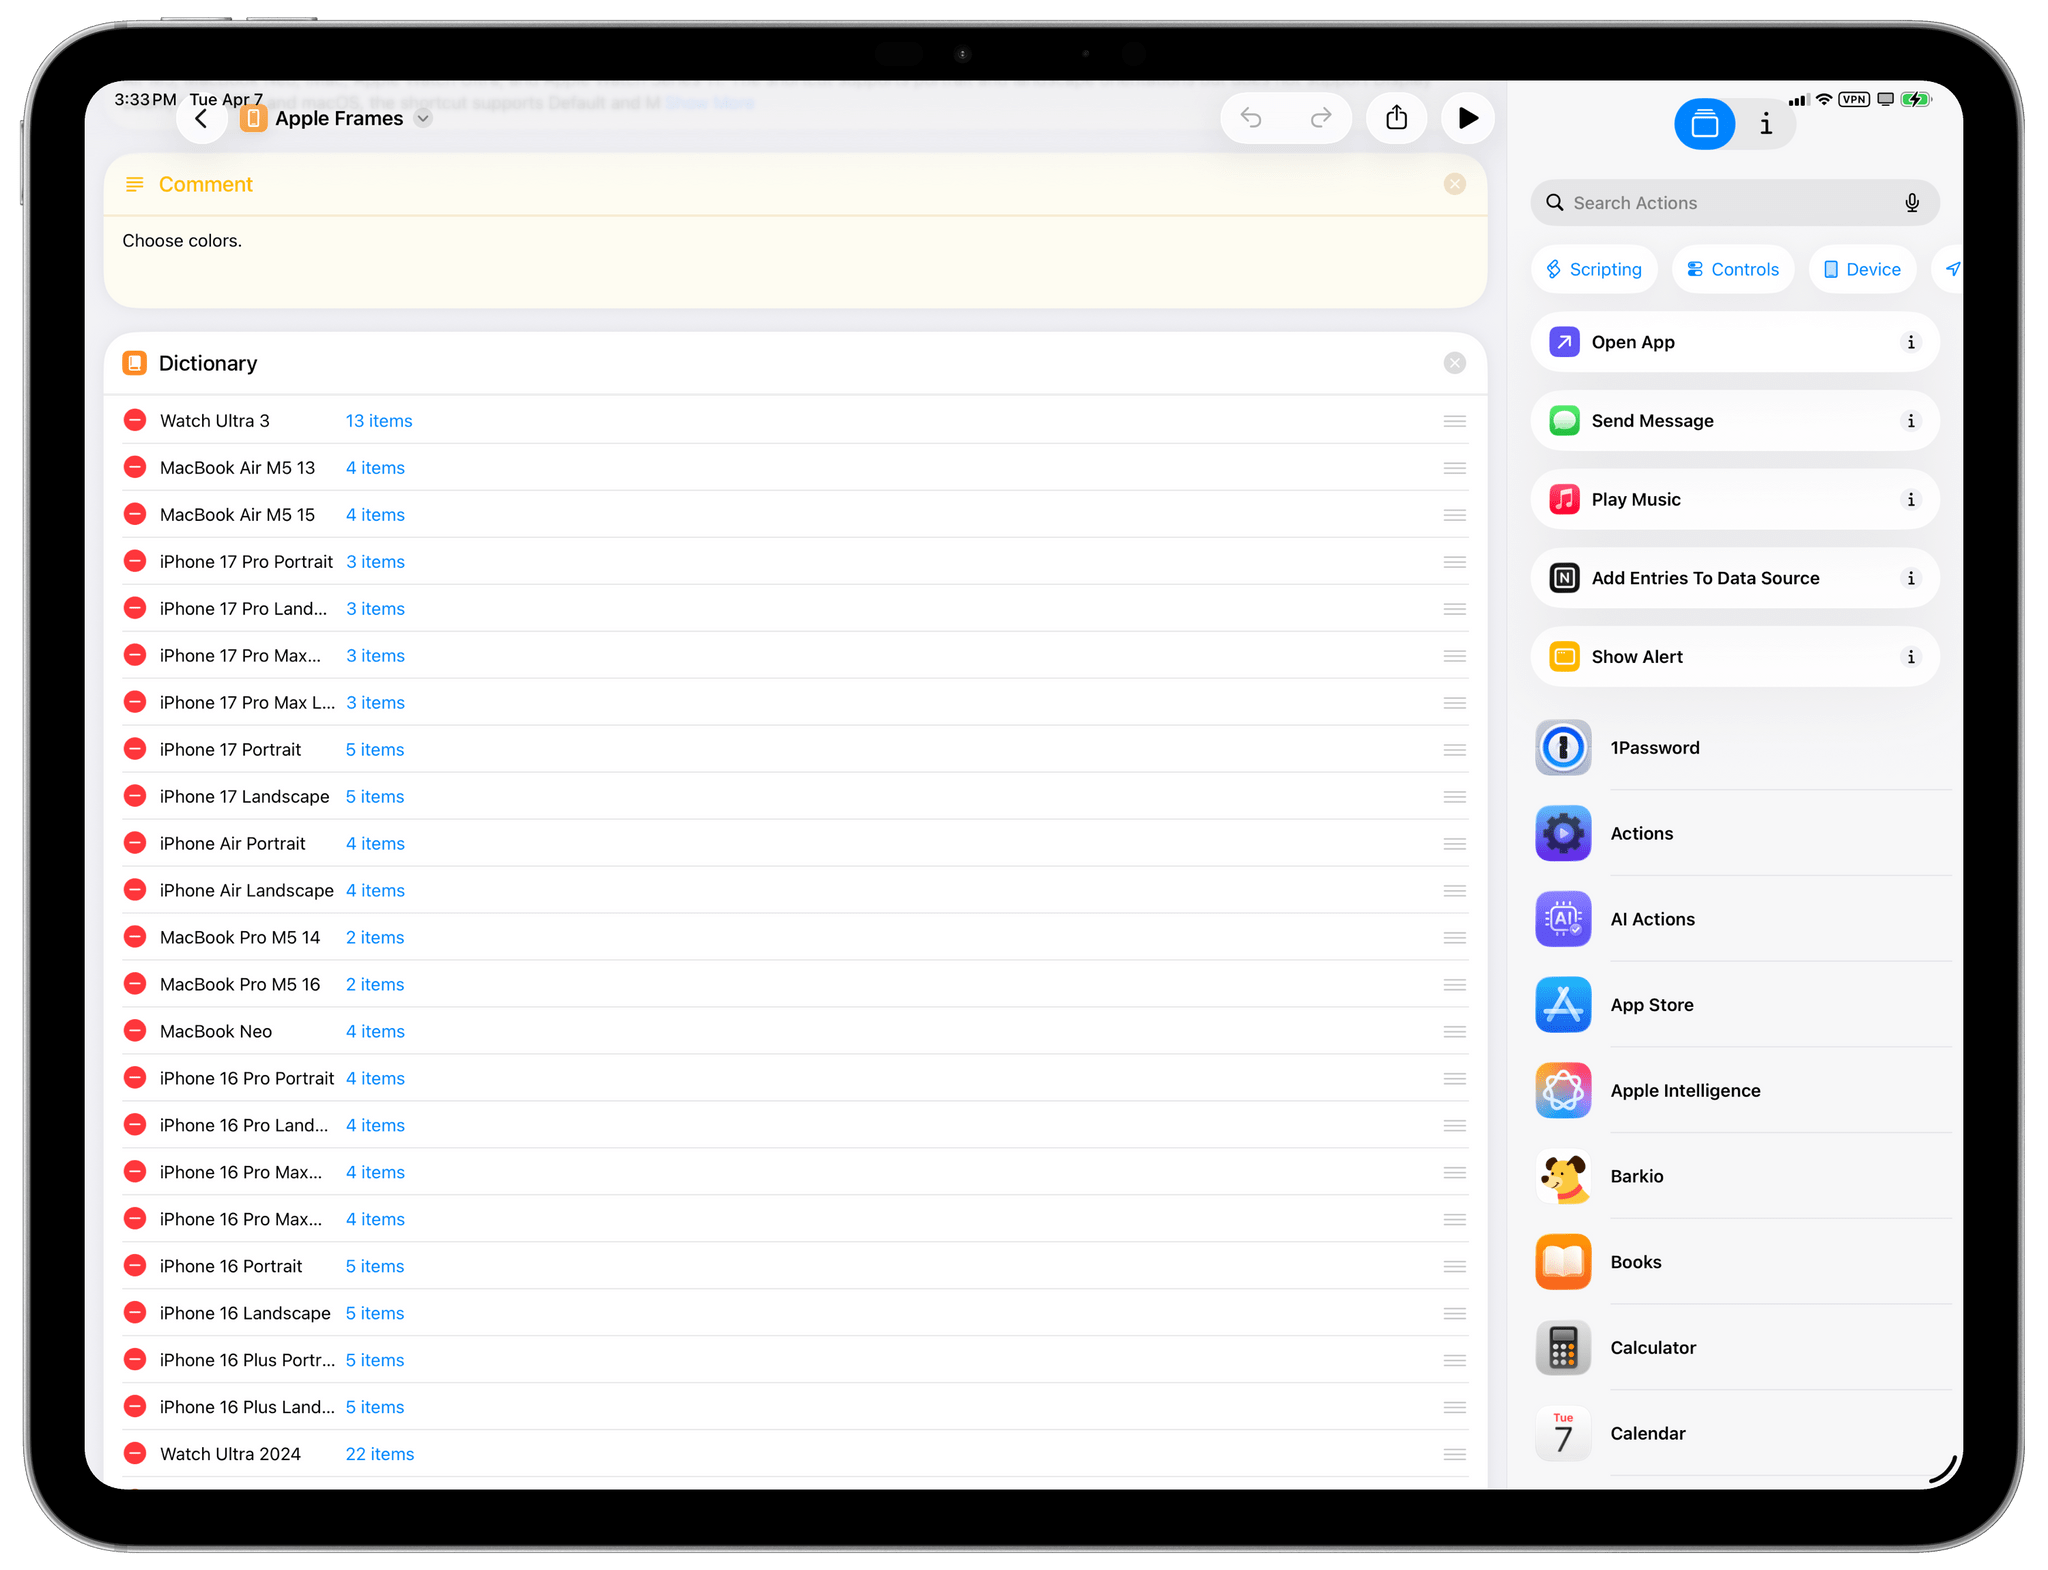
To customize default colors, you simply have to drag and drop your favorite color to the top of this list at the beginning of the shortcut:
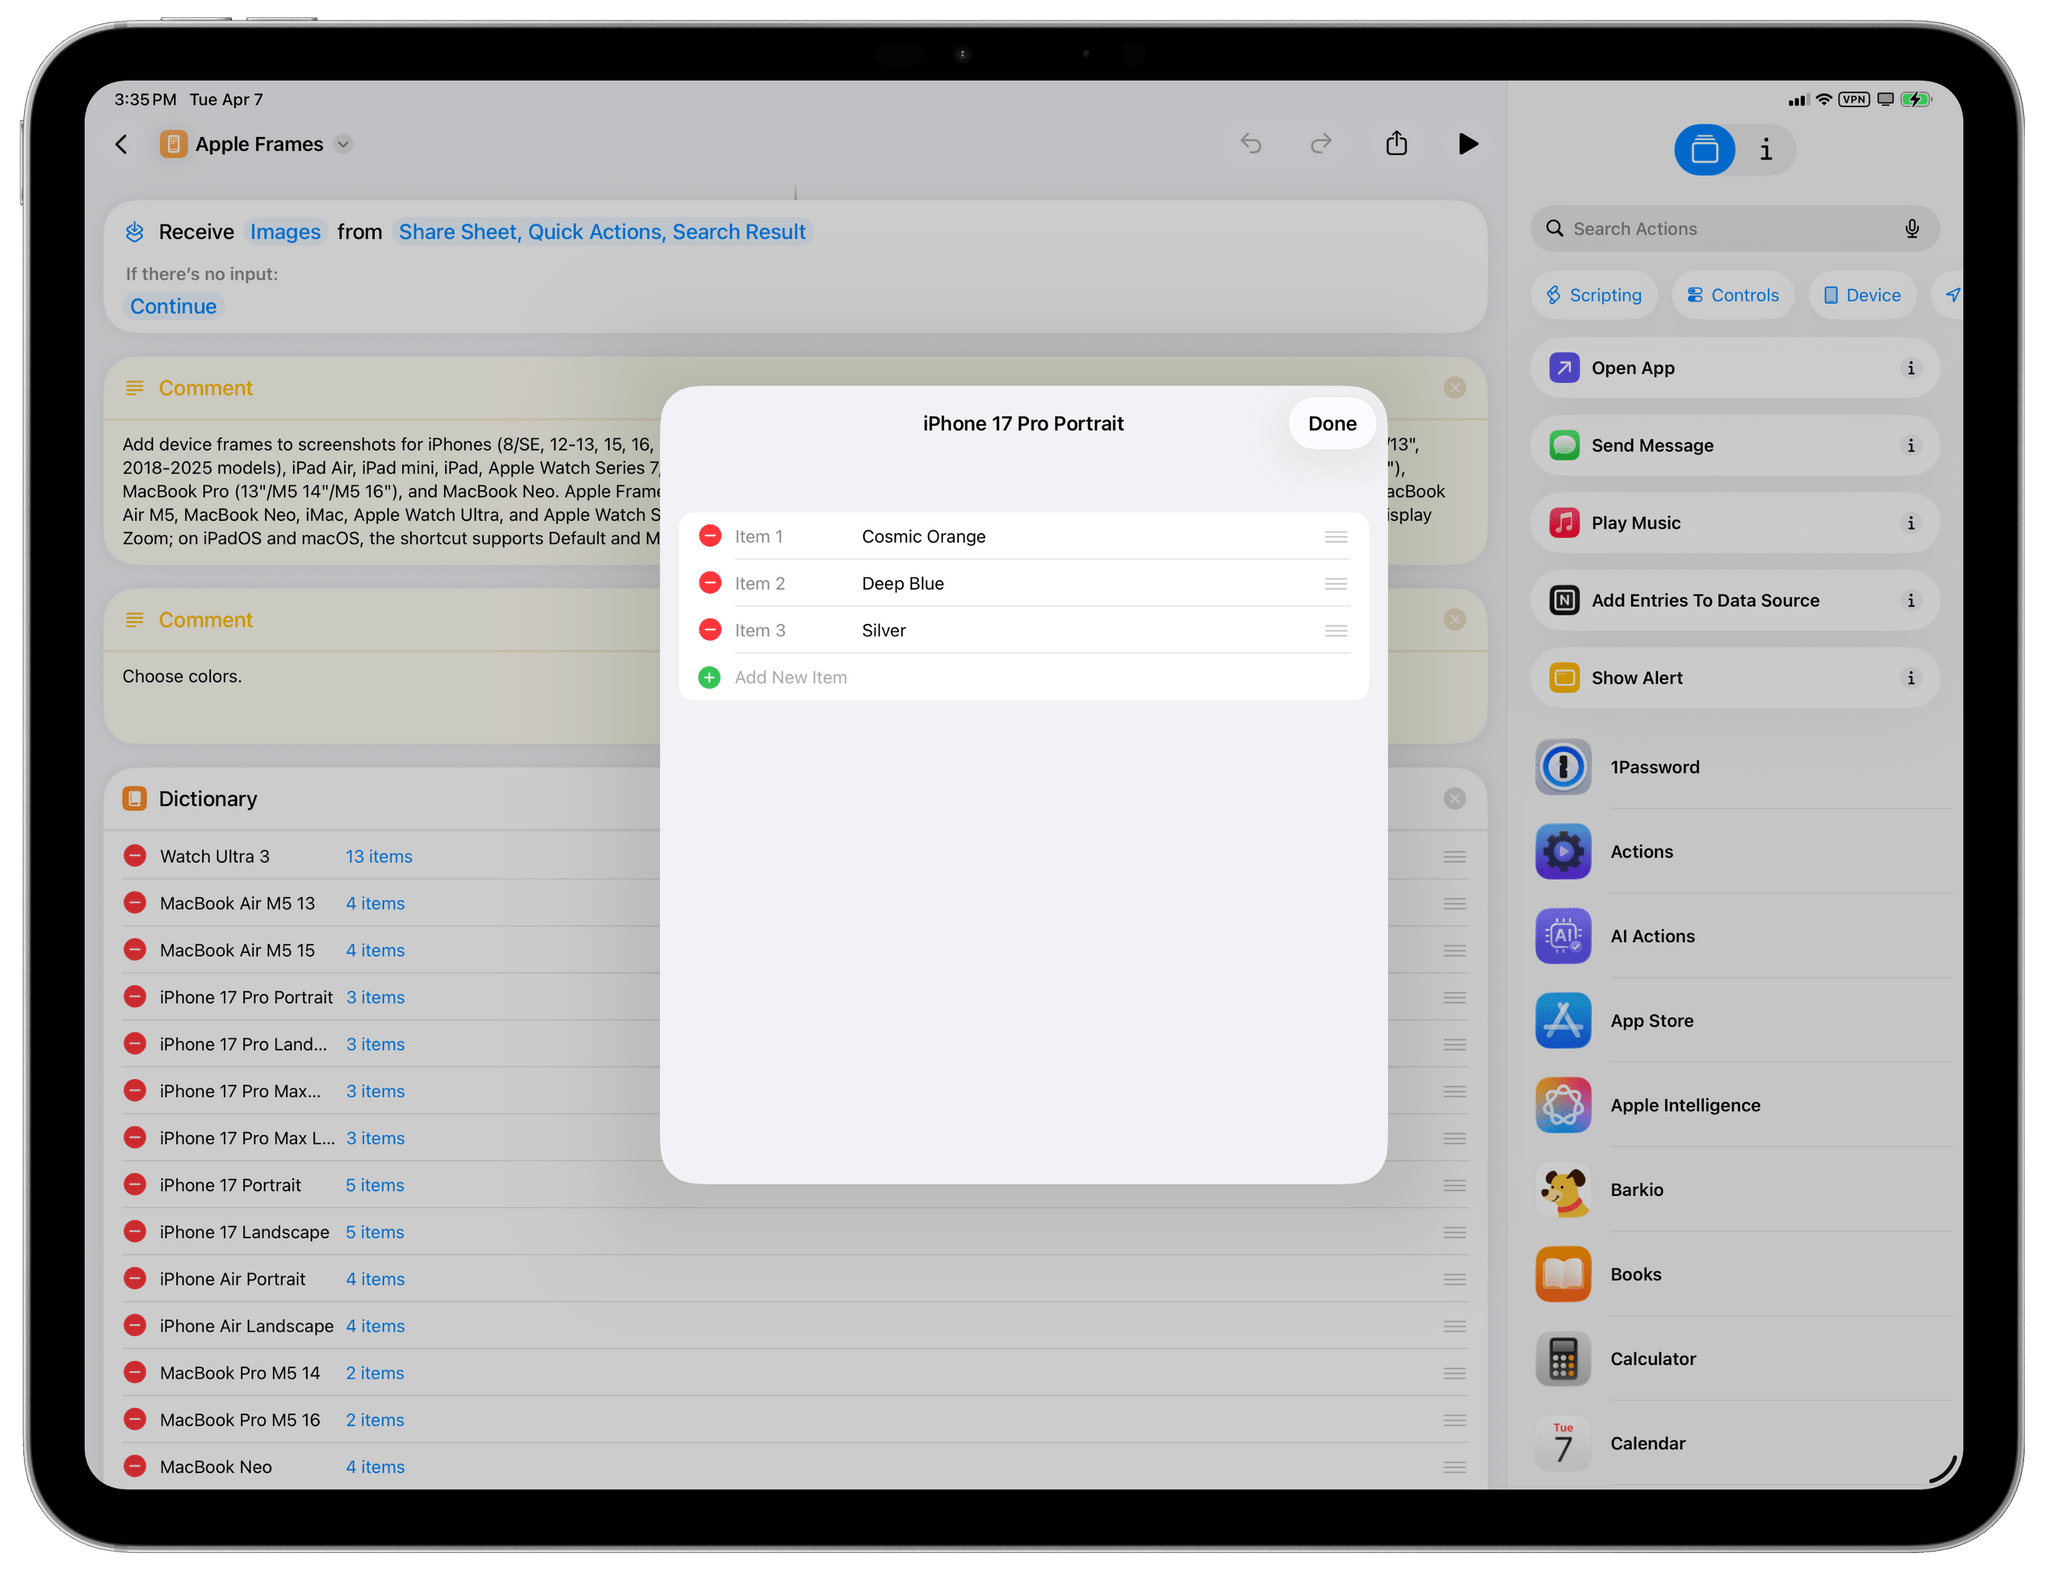
The colors supported for iPhone 17 Pro. The first one in the list will be used as the default color.
Expand the menu item for the device and device orientation you want, pick the default color you want to use, and drag it to be first in the list for that specific device. For instance, if you don’t want to use Cosmic Orange for iPhone 17 Pro Portrait, you can pick Silver and drag it above Cosmic Orange, and it’ll be used as the default color going forward.
I’ve had a lot of fun combining framed screenshots of different colors, which is also something you can automate and randomize. More on this later.
Frame colors aren’t limited to iPhone models: different Apple Watch combinations are also supported now. For Apple Watch Ultra 3, you’ll find support for 13 case + band combinations; Apple Watch Series 11 supports 22 case + band combinations per size.

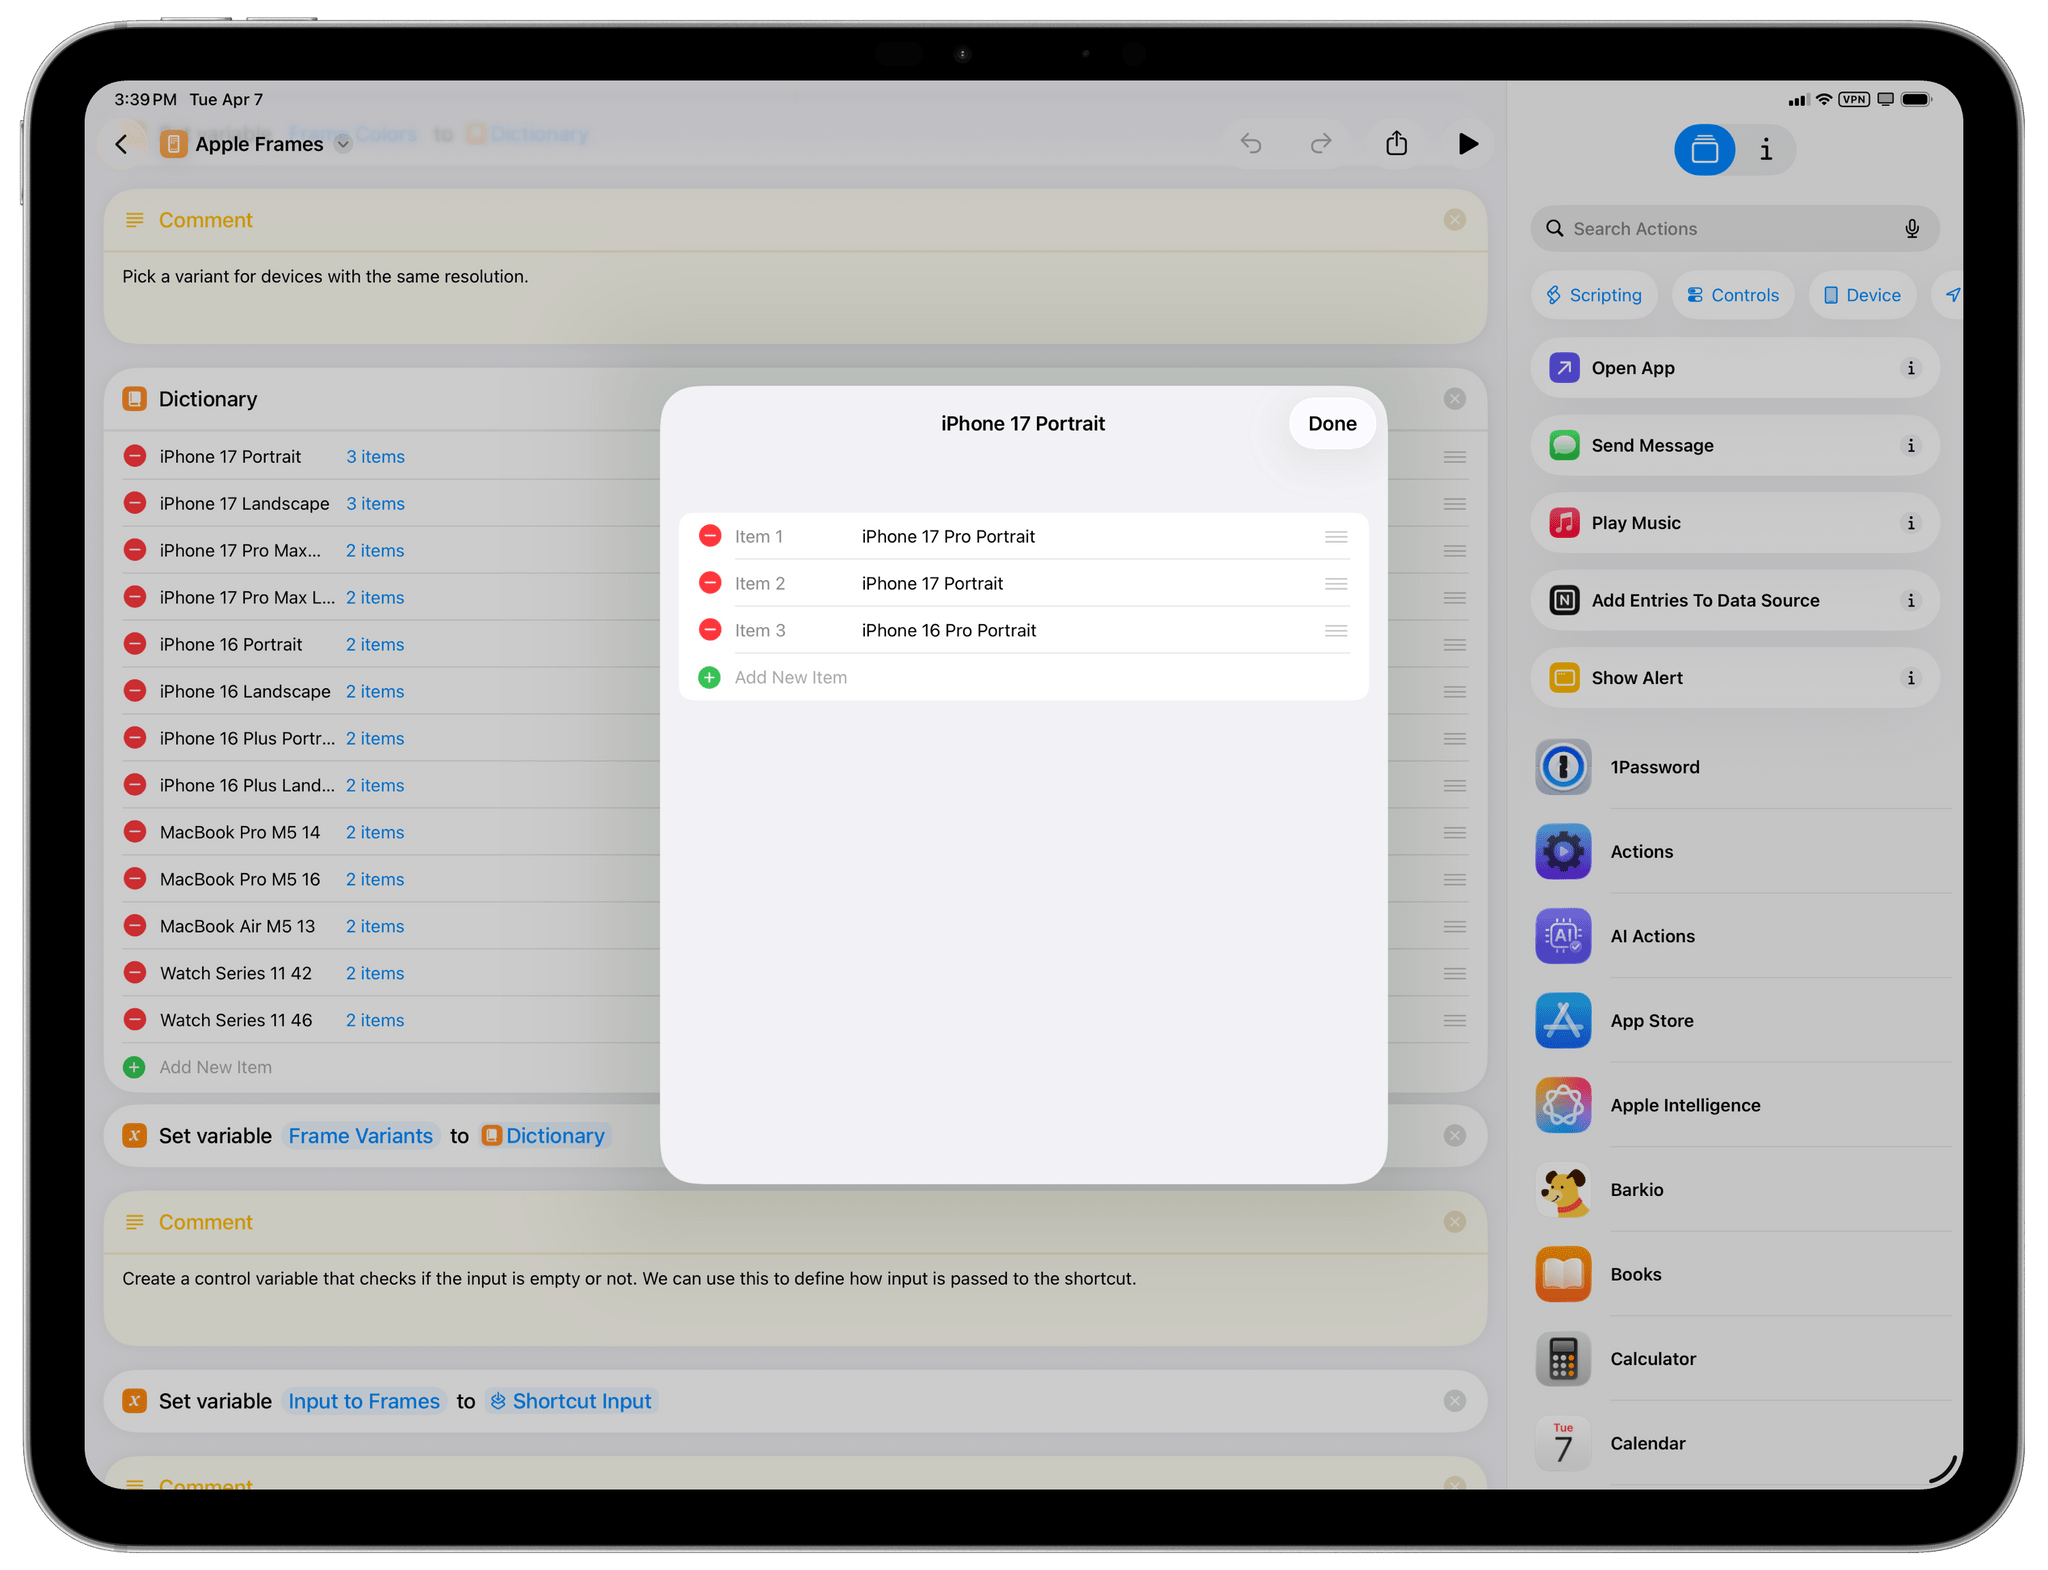
The other addition to Apple Frames 4 is support for device variants. Increasingly over the past few years, Apple has released new devices with display resolutions that may overlap with older ones. For example, the iPhone 16 Pro and 17 Pro share the same resolutions. In the past, I used to design Apple Frames so that only the latest model of a family of devices was supported, but that left some users rightfully unhappy since their older device models were no longer “recognized” by Apple Frames. That is no longer the case. Thanks to device variants, when two device generations share the same screenshot resolution, Apple Frames 4 offers to use the newer device’s frame by default while allowing you to manually pick an older one.
By default, Apple Frames 4 still assumes you want to frame a screenshot with the latest Apple device supported by a particular resolution. However, if you want to customize it, you can do so from the Device Variants list in the shortcut via the same drag and drop method used for colors:
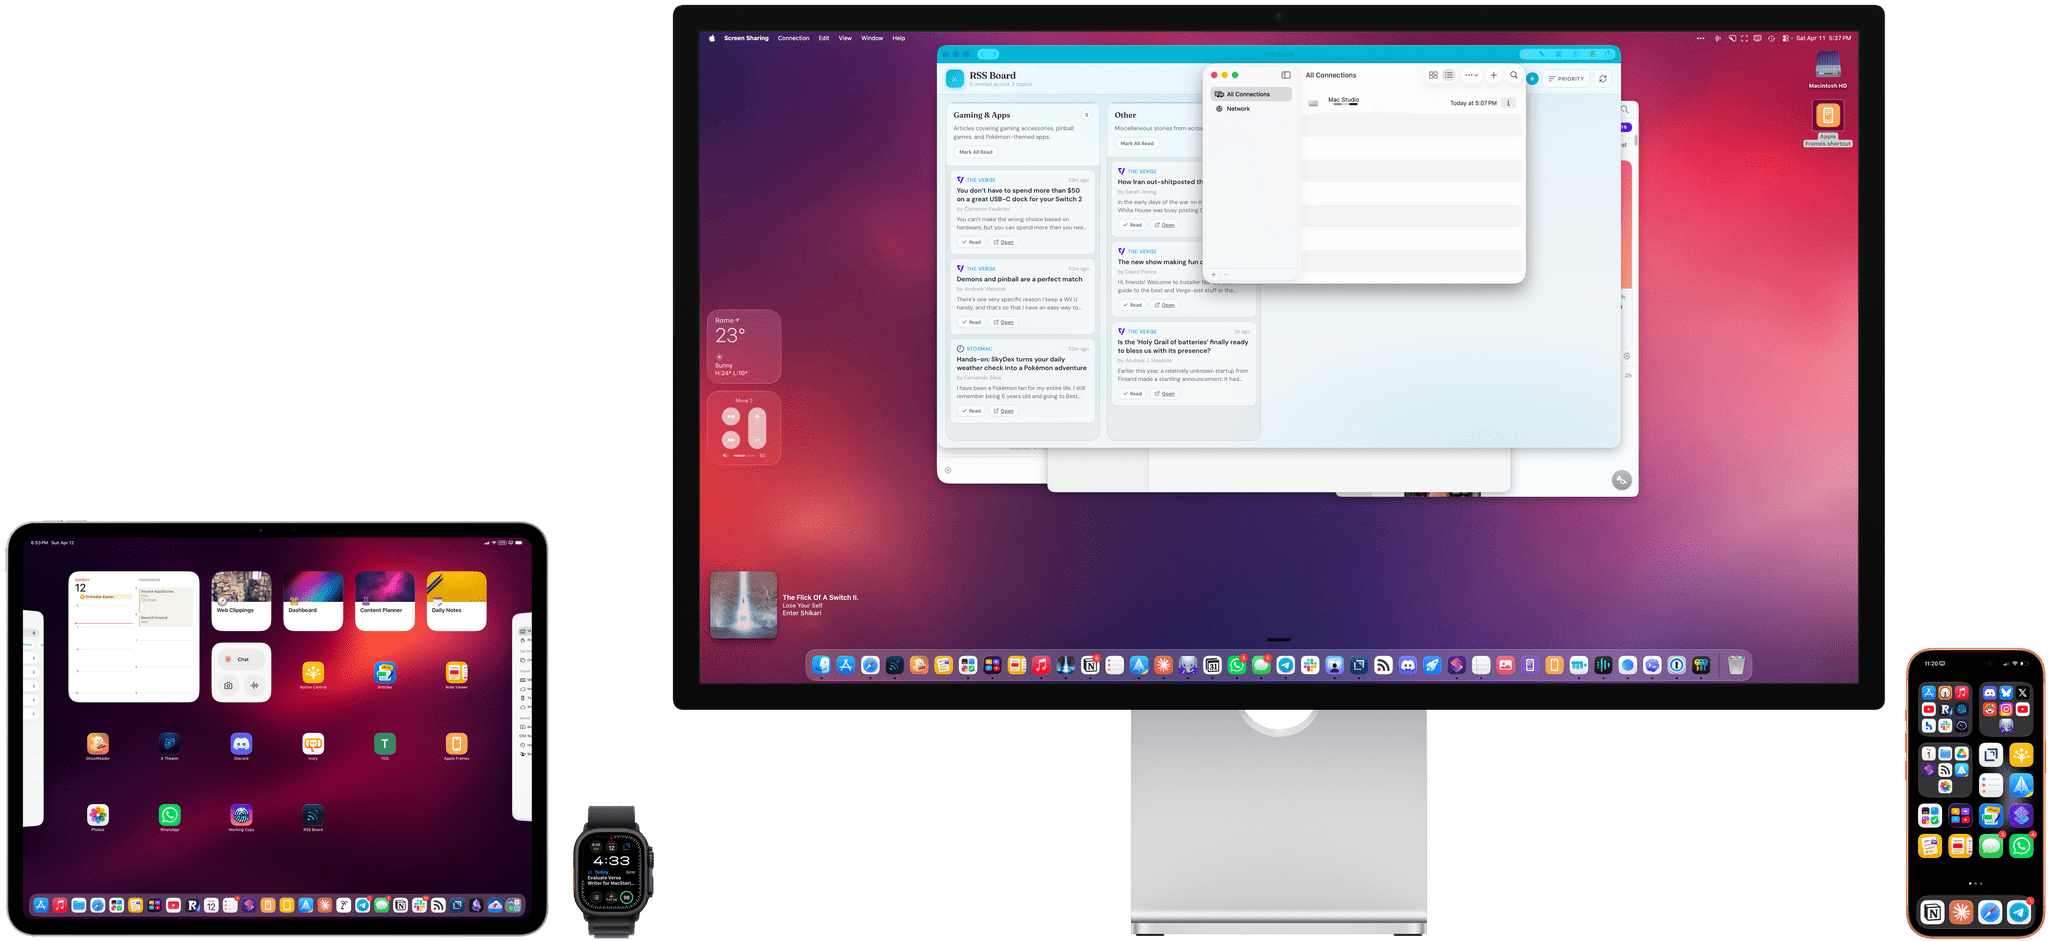
The other substantial addition to Apple Frames 4 is proportional scaling when merging screenshots from different Apple devices. This is something that always bothered me about Apple Frames: when framing screenshots from, say, an iPhone 17 Pro Max and an iPad Pro, the shortcut would merge the images, display them side by side, and…the iPhone would be as tall as the iPad Pro. That’s no longer the case; the new Apple Frames also contains a mapping of all supported devices’ physical proportions, which are respected when merging different screenshots in the same image. It’s a small quality-of-life change that, even so, fundamentally changes how I can composite production images for MacStories. I hope you’ll find it useful, too.
Lastly, in addition to running more quickly, you’ll also notice that Apple Frames 4 will produce smaller image files with no loss in quality. That’s because I optimized the hundreds of frame assets used by the shortcut to get rid of metadata. Your screenshots will still be composited at full resolution with their original color profiles, but the resulting framed images will be smaller than before.
Improvements to the Apple Frames API
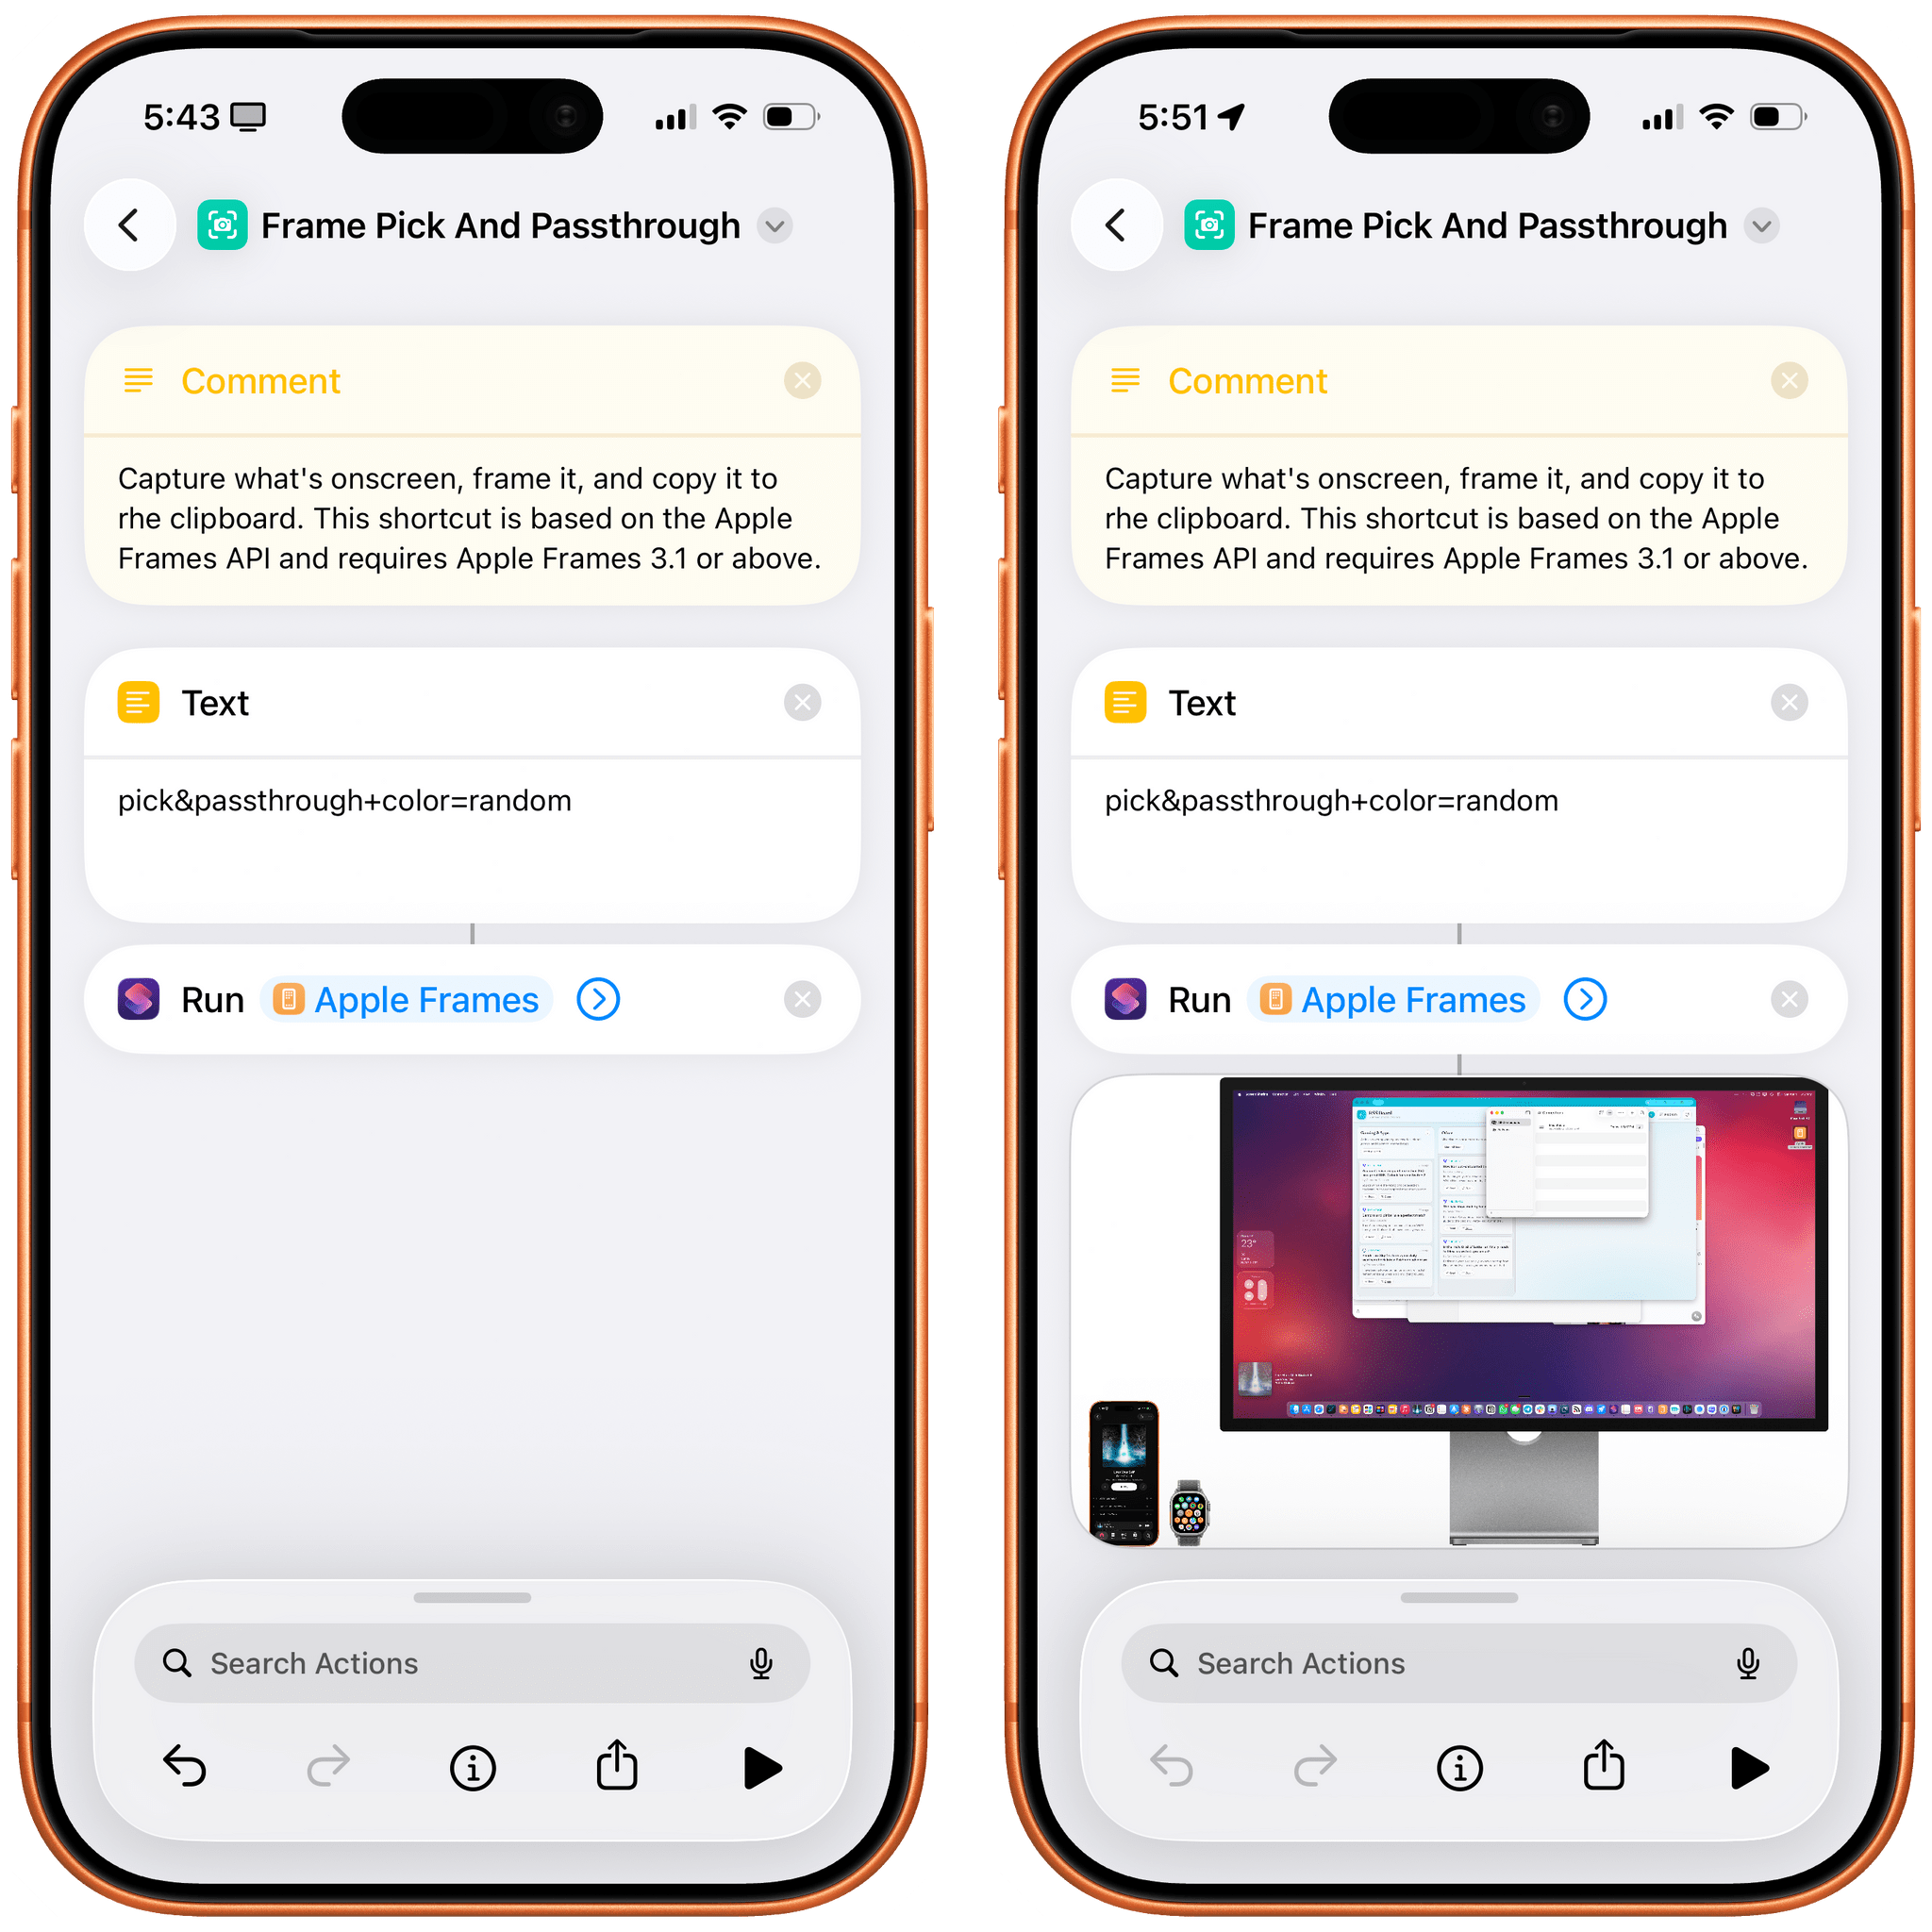
In March 2023 (gosh, I can’t believe it’s been that long), I added support for an API to the Apple Frames shortcut, which I covered extensively here. With the API, you can invoke Apple Frames from other shortcuts to pass input and output commands, allowing you to effectively use Apple Frames as a subroutine of something else. For example, you can leverage the Apple Frames API to “silently” frame a screenshot from the clipboard and pass it back to another shortcut that you’re running. Or you can use the Apple Frames API to capture a screenshot of what you’re looking at on-screen, instantly frame it, and copy it to the clipboard. You get the idea.
In Apple Frames 4, the API has been extended with support for frame colors. Using a new +color input command, you can request either a specific or random color to be applied to the screenshots that you’re framing with the shortcut. The +color input command supports the following values:
+color=Silver(or any other supported color name) to use a specific frame color;+color=randomto let the shortcut pick a random color for the supported frame;+color=2or any other number that matches the order of colors in the dictionary at the beginning of the shortcut. If ‘Cosmic Orange’ is the first color in the list for the iPhone 17 Pro, for instance, its index value will be1.
All other existing Apple Frames API commands remain unchanged (clipboard, latest, number(N), capture, folder, pick, &quickLook, &photos, &quickSave, ©, &airDrop, &upload, &passthrough, +mergeImages=False, +mergeSpacing(N)). To read more about the Apple Frames API and how to use it in Shortcuts, I recommend checking out my story from a few years ago.
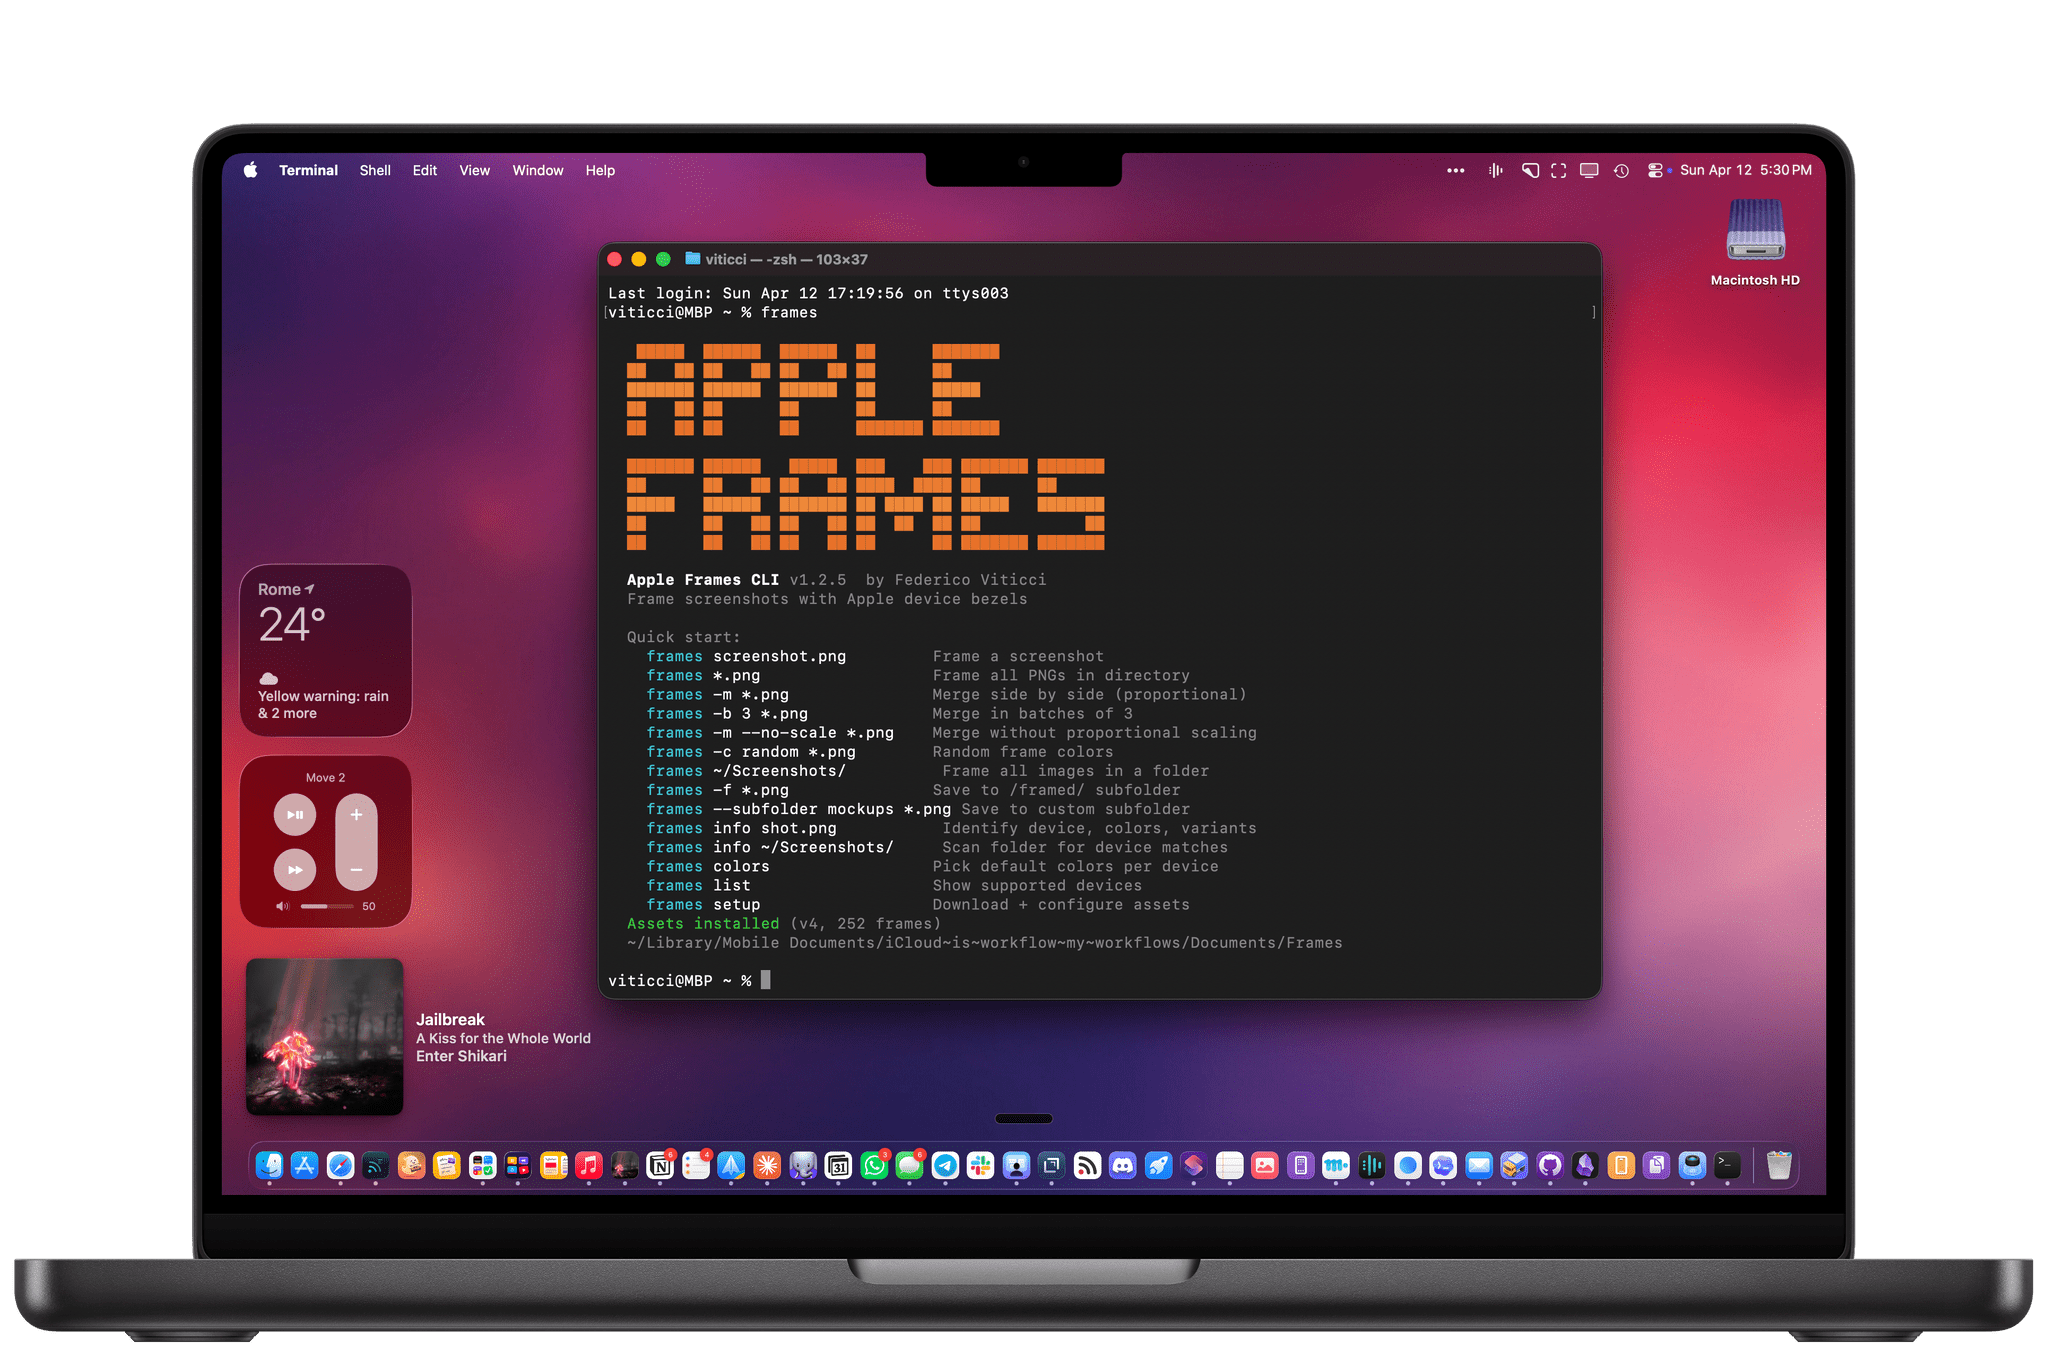
Introducing the Apple Frames CLI
The other big addition to Apple Frames is something I’ve never done before: I’m releasing a command-line interface (CLI) to frame shortcuts from the Terminal with better performance and more options than the Apple Frames shortcut itself.
A big disclaimer is needed upfront: I entirely “created” the CLI with Claude Code and Codex. I’m not a programmer by trade, but as you know, I’ve been building a lot of personal software tools for myself over the past year with coding agents. This is the first time I’ve felt that I had something that was so good, it’d be a shame not to share it with other people. Like the Apple Frames shortcut, the CLI is free for everyone to use, it’s open source, and you can inspect its code here. If you’re ethically opposed to using any piece of software that was written by AI and “overseen” by a human, I understand, and that’s why I’m releasing a huge update to the shortcut too. To each their own tools.
If you’re intrigued by the idea of framing screenshots even faster, let me tell you: I may be biased, but this CLI is very good, and it’ll allow you to frame hundreds of screenshots from any folder on your Mac – with support for all the options from Shortcuts, and then some – in seconds. Alongside the CLI, I’m also releasing a pre-made skill that you can add to your setup to tell your agent how to use the CLI and frame screenshots on your behalf.
The frames CLI is a Python script that replicates and extends the functionality of the Apple Frames shortcut. In fact, it is based on the same NewFrames.json dictionary used by the shortcut (located in iCloud Drive → Shortcuts) as well as the same image assets used by the shortcut. It does not require an Internet connection to download anything else. The CLI uses the standard Pillow framework for image compositing in Python.
Since the CLI is meant to be an optional extension for Apple Frames, I highly recommend downloading the shortcut first and then installing the CLI. If you do this, the CLI will automatically pick up the default install location for Apple Frames assets in iCloud Drive and use them. Otherwise, if you’d rather store the Apple Frames assets somewhere else, you can use a setup command to configure a different install location for Apple Frames’ assets.
At a high level, the Apple Frames CLI is mapped to a frames command that, given some input image files, produces framed equivalents and saves them somewhere in Finder. The CLI, like the main shortcut, supports all the latest Apple devices, multiple device variants, and device colors. Unlike the shortcut, the CLI is fast – like, really fast. Here’s a screen recording showing the CLI recognizing and framing a folder containing 50 screenshots. It is not sped up:
The Apple Frames CLI in action. The video is not sped up.Replay
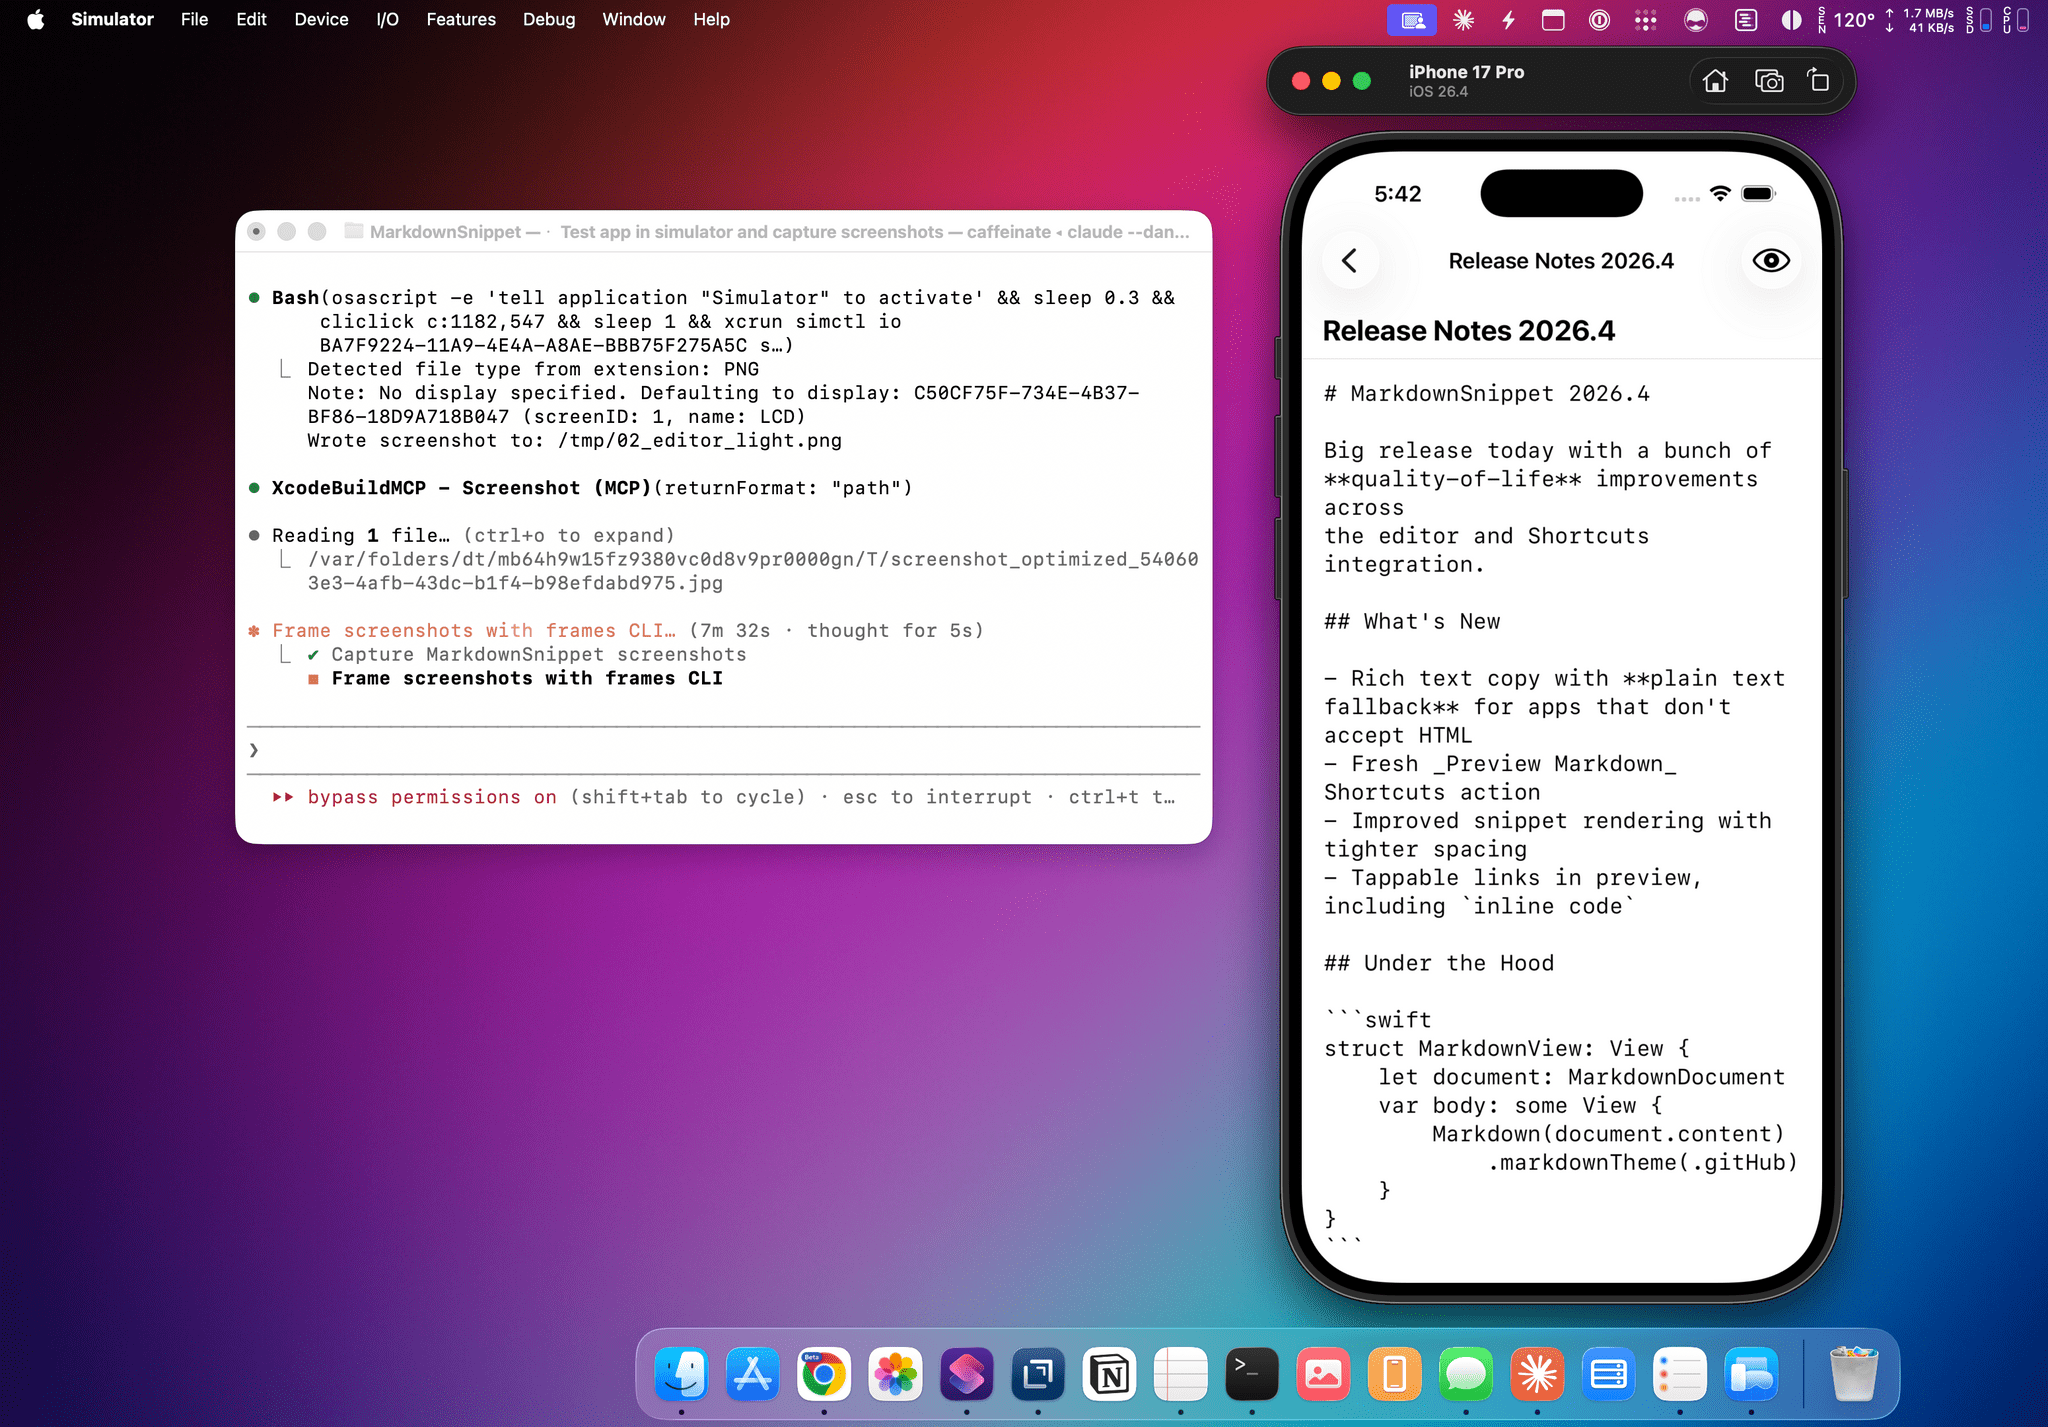
I built the CLI for this very reason: to help developers and marketers who deal with screenshots on a daily basis and save them a bit of extra time every day. Furthermore, by building the CLI with an agent-first mindset and shipping a skill for it, I’ve also ensured that Apple Frames can now be a part of agentic app development workflows. If you’re already using Claude or Codex to build, test, and debug your iPhone and iPad apps, now you can slot in the Apple Frames CLI and related skill to end up with pretty framed screenshots.
In fact, here’s a screenshot of Claude Code using XcodeBuildMCP to open an Xcode app project, test it in a simulator, take screenshots of it, and frame them with frames – all in the same agentic workflow. It just works.
I’m not going to embed the full documentation for the Apple Frames CLI in this blog post. There’s an entire GitHub repo with detailed instructions, plus a skill for agents to use. If you want a complete list of all the commands and options supported by the CLI, simply check out the README. That said, I want to point out a couple of things the CLI enables that are worth your attention.
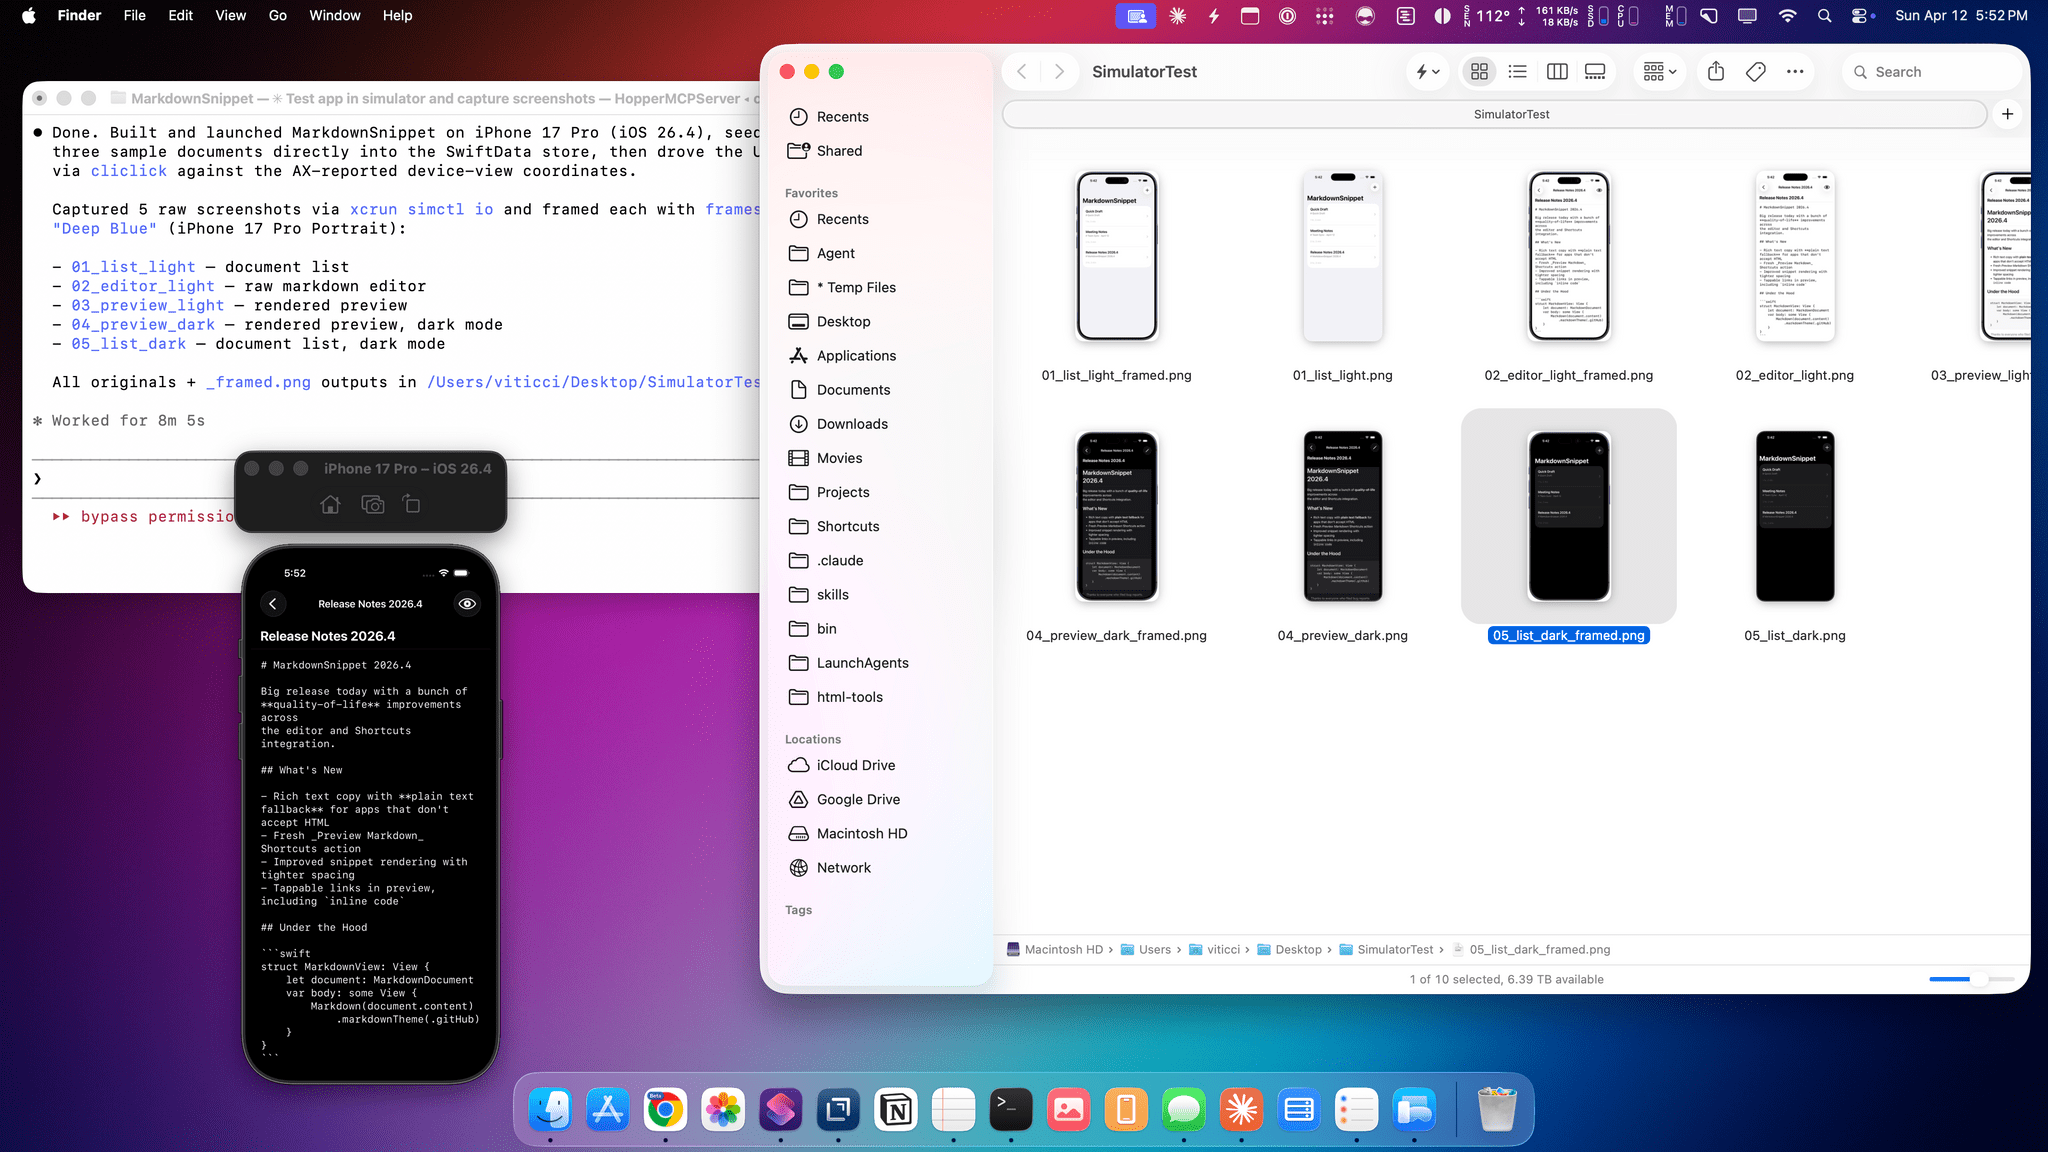
If you’re a developer and deal with hundreds of screenshots for every App Store submission, you’ll be happy to know that the CLI has first-class support for working with images in a folder and saving framed results to subfolders. Like the shortcut, the CLI supports mixed devices in the same input (such as a combination of iPhone and iPad screenshots) and can be configured to either merge all images or frame screenshots individually. Unlike the shortcut, however, the CLI supports a new batch-framing mode that lets you define batches of screenshots that should be framed and merged in the same image. Let’s say, for instance, that you have a folder with 30 images, and you want to produce 10 images featuring 3 iPhones side-by-side, each with a random color, and you want to save those images to a specific sub-folder. With the Frames CLI, just run this command…
frames --batch 3 --color random --subfolder mockups ~/Screenshots/*.png
…and the CLI will create 10 images from a ‘Screenshots’ folder and save them to a ‘mockups’ sub-folder. How about merging 5 iPhones with random colors and wider spacing?
frames --merge --spacing 100 --color random screen1.png screen2.png screen3.png screen4.png screen5.png
And what about batch pairs with before/after comparisons? Here’s how 10 images can become 5 merged pairs:
frames --batch 2 -c "Cosmic Orange" before1.png after1.png before2.png after2.png before3.png after3.png before4.png after4.png before5.png after5.png
Those are just a few examples of the power and flexibility of the CLI. There’s a ton of potential when it comes to combining all of these options with additional automation layers (imagine pairing these commands with BetterTouchTool or Keyboard Maestro) or automated agent pipelines (such as creating hooks to automatically frame screenshots after Claude Code is done testing apps in a simulator). Plus, I made sure to sprinkle some nice touches into the terminal UI itself, like a pretty orange ASCII logo, an info command to get image resolutions and matching devices from images passed as input, and the colors command, which opens an interactive default color picker right inside the Terminal app:

As I mentioned before, I built the CLI to further speed up image generation for folks who deal with hundreds of screenshots and want something faster than Shortcuts. But the launch of an Apple Frames CLI also means something else: you’ll now be able to vibe-code custom apps running on your Mac that can use the CLI under the hood as a dependency. To give you an idea of what’s possible, here’s a simple web app I vibe-coded with Claude that, using the Frames CLI on my Mac server, lets me upload a screenshot and preview what it’d look like with frames of different colors:
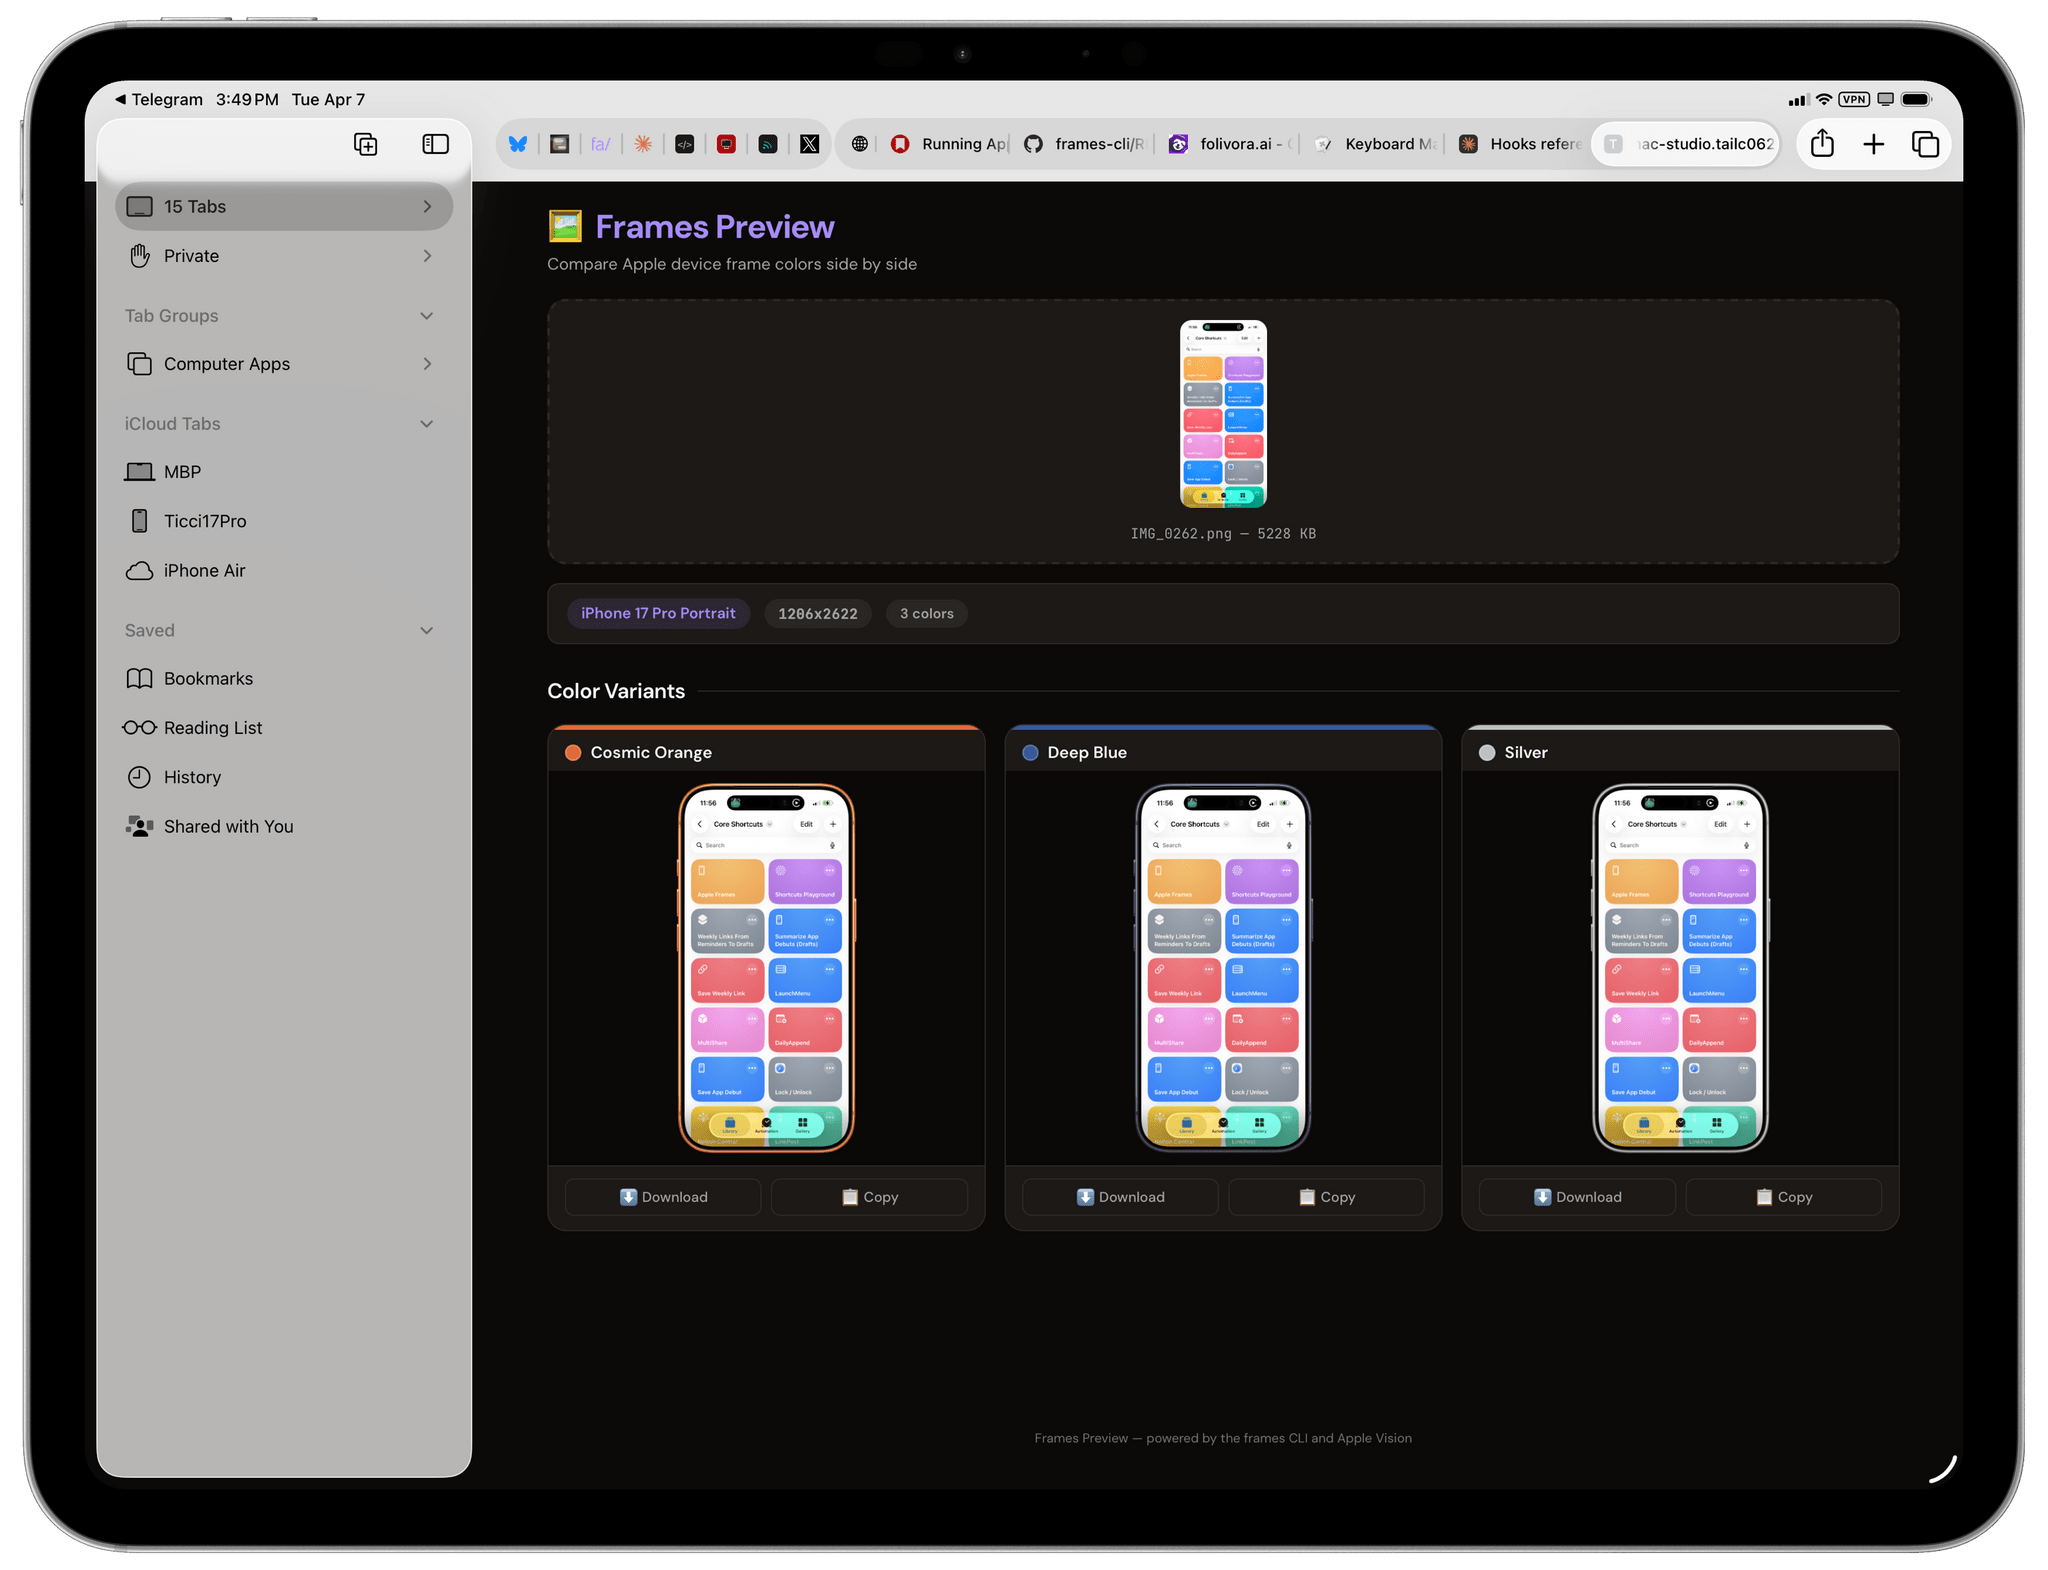
With the Apple Frames CLI and the associated agent skill installed on a Mac, you can build all sorts of things based on the idea of framing screenshots, which is exactly what I wanted to do by modernizing Apple Frames for our current era.
Welcome to Apple Frames 4
I apologize for how long it took me to modernize Apple Frames, but I believe the wait was worth it. Not only do I have a stronger, more maintainable, and more extensible foundation going forward, but I also have the necessary tooling to turn Apple Frames into an ecosystem of utilities that can fit any workflow – from tinkerers and enthusiasts to professional app developers and marketers.
You can download Apple Frames 4 below and find it in the MacStories Shortcuts Archive; the Apple Frames CLI and agent skill are open source and available on my GitHub repo.
Apple Frames
Add device frames to screenshots for iPhones (8/SE, 12-13, 15, 16, 17, Air generations in all sizes), iPad Pro (11” and 12.9”/13”, 2018-2025 models), iPad Air, iPad mini, iPad, Apple Watch Series 7/10/11, Apple Watch Ultra 2/3, iMac M4, Studio Display, Studio Display XDR, MacBook Air (2020/M5 13”/M5 15”), MacBook Pro (13”/M5 14”/M5 16”), and MacBook Neo. Apple Frames 4 supports colored device frames for iPhones 16 and 17, iPhone Air, MacBook Pro M5, MacBook Air M5, MacBook Neo, iMac M4, Studio Display, Studio Display XDR, Apple Watch Ultra, and Apple Watch Series 11. The shortcut supports portrait and landscape orientations but does not support Display Zoom; on iPadOS and macOS, the shortcut supports Default and More Space resolutions. The shortcut can be run in the Shortcuts app, as a Home Screen widget, as a Finder Quick Action, or via the share sheet. The shortcut also supports an API for automating input images, frame colors, and framed results.